
Where to Stay in Budapest, Hungary: Best Areas (2026)

TL;DRThe best neighbourhood for your Budapest stay really depends on what you’re after. First-timers wanting to walk to sights like the Parliament or St Stephen’s Basilica should base themselves in District V (Belváros-Lipótváros), where hotels run from about 25,000 to 60,000 HUF a night. If you’re after peace and quiet with romantic views from the Fisherman’s Bastion, go for hilly District I (Buda), while nightlife fans and ruin-bar hoppers heading to spots like Szimpla Kert belong in District VII (Erzsébetváros). From 1 January 2026, District VI (Terézváros) is bringing in a total ban on short-term lets, and no new apartment licences are being issued anywhere in Budapest — so expect prices to climb. Families with kids will do well around Margaret Island or at the Aquaworld Resort Budapest, which has eleven indoor slides.

Budapest, Hungary works like the perfect magnet that pulls you in and never quite lets go. Hop on a flight from London and a couple of hours later you step out into a metropolis whose wide boulevards and grand architecture put it firmly on par with neighbouring Vienna. And yet the price tags in its hotels and cosy cafés still come as a very pleasant surprise.

Lukáš and I come back to the Hungarian capital again and again, because it offers a fantastic mix of rich history, steaming thermal baths and absolutely brilliant food. Every single time we stroll along the riverbank in the evening and gaze at the floodlit Parliament, we’re struck all over again by just how vast and majestic this city really is.

But the neighbourhood where you finally rest your head will radically shape your entire experience of the trip. Budapest can be incredibly quiet and romantic, yet on the flip side it can also be wild and noisy right through to the small hours. It all comes down to which street you tuck yourself into.

Before you start picking a specific hotel for the weekend, you need to get your bearings on what’s currently happening in the city. The rules of the game are changing dramatically in 2026, and plenty of old travel habits simply no longer apply. So I’ve put together a detailed guide to the very best neighbourhoods.

TL;DR

  • Airbnb ban in the centre: From 2026, the upscale 6th district (Terézváros) enforces a total ban on short-term rentals. On top of that, no new apartment licences are being issued anywhere in Budapest.
  • Best area for first-timers: If it’s your first visit, stay in the flat 5th district (Belváros-Lipótváros), from where you can comfortably walk to all the major sights.
  • Peace and romance: Looking for quiet and stunning views? Choose the historic 1st district (Buda), which sits on a hill and empties out beautifully in the evening.
  • Party and nightlife: For lovers of bars and cheap beer, the 7th district (Erzsébetváros) is the obvious choice, home to the famous ruin bars — just brace yourself for noise until morning.
  • Seniors travel free: All EU citizens over 65 ride Budapest’s public transport completely free — just show your ID card.
  • Tourist tax: Expect your hotel to always add the so-called IFA tax, which comes to 4% of the net room price per night.
  • Famous baths closed: The iconic Gellért Baths are undergoing a huge renovation and will stay shut until at least 2028 — head to Széchenyi or Rudas instead.

6 things you need to know about staying in Budapest, Hungary

Budapest is split into two completely different halves, divided by the broad sweep of the Danube. On one side lies flat, pulsating Pest, full of shops and bars, while on the other rises the hilly, historic Buda. Let’s take a look at the best locations.

1. The 5th district (Belváros-Lipótváros) as the ideal base

This is the absolute heart of Pest and, in our view, the best all-round choice for any traveller. You’ll be staying right next to the stunning Parliament — incidentally one of the most beautiful government buildings in the world, with an incredible 691 rooms. A short walk away you’ve also got St Stephen’s Basilica and the famous Chain Bridge.

The northern part of this neighbourhood (Lipótváros) works more as a business and gastronomy hub, where you’ll find excellent restaurants. We love discovering modern vegetarian bistros here that do great hummus or proper veggie soups. The southern part (Belváros) is packed with very elegant shops and picturesque little cafés where you can enjoy a superb espresso.

The biggest advantage of the 5th district is the fact that you can comfortably walk everywhere. It’s simply the best choice for your first visit, for culture-minded travellers and for couples in love. The atmosphere is wonderfully grand, the streets are clean, and you’ll feel very safe even after dark.

It can be fairly busy during the day, but at night the district is much calmer than the neighbouring areas. As for prices, mid-range hotels here typically run around €75 to €110 per night. If you’re after luxury, you could choose the gorgeous Aria Hotel Budapest, or the modern and brilliantly rated Hotel Vision, which sits just a stone’s throw from the river.

💡 Tip: If you stay in this area, head out early for a morning walk along the Danube. You’ll have the view of Buda Castle bathed in morning sun all to yourself, before the riverbank fills up with crowds of tourists and their cameras.

2. The romantic 1st district (Buda and Castle Hill)

Just cross the river and you’re suddenly in a completely different world. Cobbled lanes, the pastel façades of old townhouses and breathtaking panoramic views from the Fisherman’s Bastion make Buda the most postcard-perfect part of the whole city. Lukáš and I love that moment when we ride up to the top and the city lies spread out at our feet.

Choose this location when you’re after total peace and romance. By day, crowds of day-trippers throng around the main sights, but once the sun sets and the buses leave, the streets empty out like magic. The neighbourhood takes on an almost magical, very slow atmosphere that begs for long evening walks hand in hand.

You do have to reckon with one significant downside, though, because you’re simply on a big hill. Exploring the city therefore means a bit more physical effort, unless you want to keep paying for the funicular or waiting for a bus. You won’t find many open bars or buzzing restaurants up here in the evening either — for a lively night out you always have to head down into Pest.

For accommodation we can warmly recommend the lovely Boutique Hotel Victoria, which offers rooms with a direct view of Parliament on the opposite bank. If you want to experience real tranquillity, book your room well in advance, because capacity in the historic buildings on the hill is fairly limited and disappears fast. We always enjoy visiting the little wine bars here, where they serve excellent local cheeses and olives alongside the wine.

💡 Tip: Castle Hill is ideal if you want to get up early and photograph the Fisherman’s Bastion without the crowds. Around seven in the morning you’ll meet only a few dog walkers and the odd wedding couple posing for photos — otherwise all that beauty is yours alone.

3. The party hub in the 7th district (Erzsébetváros)

This is the absolute epicentre of Budapest’s nightlife and a place that never sleeps. The former Jewish Quarter, where the magnificent Great Synagogue still stands on Dohány Street (it’s the largest in all of Europe), turns into one giant, very wild party after dark. The streets fill with people and music spills out from everywhere.

This is exactly where you’ll find the famous Budapest ruin bars, crowned by the legendary and hugely photogenic Szimpla Kert. If you want to sample craft beers in industrial spaces or join an organised bar crawl, you’re in exactly the right spot. Local guides will happily lead you through the best venues for a fee of around €15 to €20.

I have to honestly warn you, though, that this is definitely not a neighbourhood for families with children, or for anyone who’s even a slightly light sleeper. The street noise doesn’t die down even at four in the morning, and the shouts of partying tourists carry into every window. It’s simply a place for young backpackers and stag and hen dos who want to soak up that proper social atmosphere.

For food, definitely head to the popular Karaván street-food courtyard, where the two of us had an absolutely top-notch vegan lángos and excellent veggie burgers. If you’re after a good base, the party hostel Wombats City Hostel is very popular, or AVAIL Hostel, which sits literally thirty metres from the main action on Kazinczy Street.

💡 Tip: If you stay in this neighbourhood, pack a good pair of earplugs. Even the best-rated hotels here struggle with street noise, especially during warm summer nights when most bars have their terraces open.

4. Local atmosphere in the 9th district (Ferencváros)

If you want to experience Budapest a little more like a local, veer slightly south in your accommodation search. In recent years Ferencváros has transformed from a plain industrial zone into a very pleasant and sought-after residential neighbourhood. It’s a great and often much cheaper alternative to the centre itself.

You’ll also find the famous Great Market Hall (Nagyvásárcsarnok) here, an enormous and architecturally stunning building. The ground floor is hung with strings of local sausages for meat lovers, but we always head upstairs, where they make hot lángos with cheese and garlic or sell fresh sweet pastries. It’s a fantastic experience, and you can pick up excellent ground paprika as a souvenir too.

Besides the market hall, this neighbourhood offers plenty of genuinely great local cafés and a lovely promenade right along the Danube. You won’t be staying right next to Parliament, but the whole area is superbly served by the yellow trams that run here literally every few minutes. You can reach the centre in ten minutes.

Accommodation prices here are noticeably friendlier than in the 5th district. You can find very nice modern apartments as well as smaller family-run hotels where they’ll take great care of you. It’s an ideal choice for travellers who like their peace and quiet but don’t want to stay right out on the fringes.

💡 Tip: Try to find accommodation near tram line number 2. It runs right along the river and offers one of the most scenic rides in all of Europe for the price of an ordinary public transport ticket.

5. Where to stay with children

Travelling with kids, the easiest way to reach Budapest from the UK is by air — there are plenty of direct flights to Budapest from London, Manchester and other airports, with budget carriers like Ryanair, Wizz Air and easyJet flying the route. The flight takes a little over two and a half hours, so it’s an ideal distance even for smaller travellers. Once you land, the city’s airport is well connected to the centre by a direct bus.

When looking for family accommodation, focus primarily on hotels with secure parking in the 5th district, or look a little further from the busy centre. A wonderful choice is the area around the green Margaret Island (Margit-sziget), an enormous oasis of calm in the middle of the river. You’ll find a brilliant mini-zoo, lots of playgrounds and, in summer, a popular outdoor pool.

If you’re going in autumn or during the cold winter, consider staying right inside the Aquaworld Resort Budapest complex at the very north of the city. It boasts an incredible eleven indoor slides and huge pools that will keep the kids entertained all day when it’s raining outside. A regular shuttle bus runs from the resort to the centre.

For families it’s definitely worth getting a multi-day ticket for the dense public transport network. You can buy either a 24-hour or 72-hour pass, which lets you hop freely onto the metro or trams whenever little legs start to ache. Transport here runs absolutely reliably.

💡 Tip: The M4 metro line is the only one in the whole city that’s fully step-free and fitted with modern lifts at every station. If you’re travelling with a pushchair, look for accommodation near the stops on this green line — you’ll save yourself a lot of stress.

lukas a lucka
Lukáš and Lucie recommend
Where to Stay in Budapest
6 accommodations — resorts, hotels and other lodging options

6. The Airbnb ban in 2026 and price traps

This is absolutely crucial information if you were used to automatically opening the Airbnb app when planning a trip and hunting for a private flat. Budapest has decided to crack down hard on the touristification of the centre and the rocketing rents that were pushing locals out to the edges of the city. The Constitutional Court has upheld the strict changes.

From 1 January 2026, the upscale 6th district (Terézváros) enforces a total, uncompromising ban on short-term rentals. We’re talking about the popular area around Andrássy Avenue and the State Opera, where there was a huge concentration of apartments. Roughly 2,700 listings vanished from there overnight, and you legally won’t find any Airbnb here — just around 40 traditional hotels remain.

Don’t try to get around this ban via dodgy online offers. Flat owners face crippling fines of up to 2,000,000 forints and possible sealing of the entire flat, so you could turn up and have nowhere to sleep. What’s more, until the end of 2026 there’s a city-wide freeze on issuing new apartment licences across the whole of Budapest.

This stagnant supply is, of course, pushing the prices of the remaining flats and traditional hotels steeply upward. The situation may change further, as even the historic 1st district is actively considering joining the strict regulation soon. If you insist on a private flat with a kitchenette, you currently need to filter listings in districts 5, 7, 8 or 9, where it still works legally for now.

💡 Tip: Keep a very close eye on the events calendar. During the Formula 1 at the end of July (24–26 July 2026) or the popular Sziget festival in August (11–15 August 2026), the city fills to bursting and accommodation prices shoot up by 30 to 60%.

Practical summary and rough prices

While Budapest is still fairly kind to our wallets, the real prices depend heavily on the tourist season and your chosen type of accommodation. The official Hungarian currency is still the forint (HUF). You can pay with euros in many large hotels and restaurants, but the rate they offer tends to be pretty poor, so it’s always better to just pay by card.

As a rough guide, one euro is around 390 to 400 forints, but always check the rate in your banking app before you travel. As for accommodation itself in 2026, hotels in the very centre will cost you on average 25,000 to 60,000 HUF per night, which works out at roughly €65 to €155 for a double room.

If you’re travelling on a tight budget, you can grab a bed in a shared party hostel from a pleasant €15 per night. When you settle the bill, one extra item will surprise you, and that’s the local tourist tax, or IFA. Budapest charges exactly 4% of the net price of your accommodation per night, automatically added to the final bill. Only guests under 18 or students are exempt.

But we’ve got one absolutely brilliant piece of news for the older generation. This perk is woefully little-known, but all EU citizens over 65 ride Budapest’s public transport completely free. You don’t need to arrange any special pass — if an inspector carries out a random check, you simply show your ID card or a valid passport.

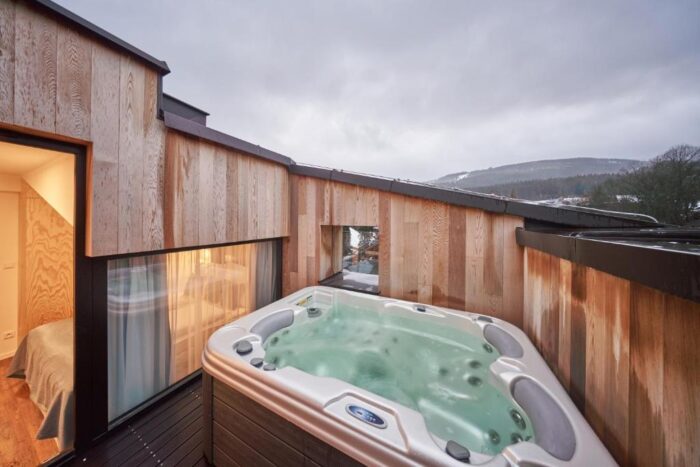
If you’re heading to the city mainly for a wellness break, I must point out one important thing. The iconic and much-photographed Gellért Baths are undergoing a very extensive renovation and will stay completely closed until at least 2028. As an alternative, definitely choose the huge outdoor Széchenyi Baths, or our favourite Rudas Baths, which have a fabulous rooftop hot tub with a stunning panoramic view of the Danube (entry there costs around 6,300 HUF).

Where next

Choosing the right neighbourhood to stay in is, of course, only the first — albeit absolutely essential — step towards a perfect trip. Once you’ve booked your hotel and know where you’ll be resting your head, it’s time for the more fun part of the planning. Budapest is enormous, and if you’re only going for a long weekend you need to plan your time pretty well so you don’t spend half the day just shuttling around on the metro.

We’ve walked this city back and forth and discovered loads of spots you often won’t even find in your standard printed guidebooks. That’s why we’ve put together a genuinely comprehensive list of all our favourite stops. It includes not just the best-known landmarks you simply have to see, but also tucked-away cafés, great viewpoints and practical tips on how to dodge the worst queues.

So be sure to check out our main article 66 things to do in Budapest. You’ll find out which thermal baths we reckon are the very best, where to head for the tastiest vegetarian street food, and which spots are better saved for the evening, when the lighting gives them an utterly unrepeatable atmosphere. With this guide you’ll put together your itinerary in no time.

Frequently asked questions

Where to stay in Budapest for the first time?

If you’re heading to the Hungarian capital for the very first time, the best choice is District V (Belváros-Lipótváros). You’ll be staying in the absolute heart of the city, you can easily reach all the main sights like the Parliament or St. Stephen’s Basilica on foot, and you’ll find a huge number of great restaurants and cafés here.

Does Airbnb still work in Budapest?

The situation changed radically in 2026. In the luxurious District VI (Terézváros), a complete ban on short-term rentals is in effect, so you won’t find legal Airbnb there anymore. In other districts, apartments are still operating, but the city has stopped issuing new licenses across the board, which naturally drives up the prices of all available accommodation.

Is it true that seniors ride public transport for free?

Yes, it’s a huge benefit that’s little known in our country. All European Union citizens over 65 years old have completely free public transport. You don’t need to buy any ticket or get a special card – during inspections on the metro or tram, just show the inspector your valid Czech ID card or passport.

Where to look for accommodation for nightlife?

The undisputed centre of nightlife is District VII (Erzsébetváros), which is the former Jewish Quarter. You’ll find the most famous Budapest ruin bars here, including the legendary Szimpla Kert. It’s an ideal spot for young travellers, but be prepared for the fact that the noise in the streets doesn’t die down even at four in the morning.

Are the Gellért Baths open?

Unfortunately, they are not. The iconic Gellért Baths are undergoing a massive and long-term renovation and will remain closed to the public at least until 2028. As a great alternative, we recommend visiting the Széchenyi Baths in the City Park, or the historic Rudas Baths, which offer a rooftop jacuzzi with a view.

Can I pay in euros at hotels?

Although many larger hotels and restaurants in the center commonly accept euros, it’s not advantageous at all. Merchants charge their own, often very poor exchange rate. The best option is to pay everywhere possible with a regular payment card, or withdraw local forints (HUF) from an ATM.

What does IFA tax mean on a hotel bill?

IFA is an abbreviation for the local tourist tax that hotels and guesthouses must pay to the city. In Budapest, this tax amounts to exactly 4% of the net price of your accommodation per night. The fee is automatically added to your final bill at checkout, and only students and children under 18 are exempt from it.

Is Budapest safe for evening walks?

Yes, the center of Budapest (especially districts V and I) is considered very safe even after dark. The streets are well-lit and full of people. As in any big city though, watch out for pickpockets on crowded trams or at markets, and at night it’s better to avoid deserted side streets on the outskirts of the city.

Tips and Tricks for Your Vacation

Don’t Overpay for Flights

Search for flights on Kayak. It’s our favorite search engine because it scans the websites of all airlines and always finds the cheapest connection.

Book Your Accommodation Smartly

The best experiences we’ve had when looking for accommodation (from Alaska to Morocco) are with Booking.com, where hotels, apartments, and entire houses are usually the cheapest and most widely available.

Don’t Forget Travel Insurance

Good travel insurance will protect you against illness, accidents, theft, or flight cancellations. We’ve had a few hospital visits abroad, so we know how important it is to have proper insurance arranged.

Where we insure ourselves: SafetyWing (best for everyone) and TrueTraveller (for extra-long trips).

Why don’t we recommend any Czech insurance company? Because they have too many restrictions. They set limits on the number of days abroad, travel insurance via a credit card often requires you to pay medical expenses only with that card, and they frequently limit the number of returns to the Czech Republic.

Find the Best Experiences

Get Your Guide is a huge online marketplace where you can book guided walks, trips, skip-the-line tickets, tours, and much more. We always find some extra fun there!
How Much Does a Trip to Alberta & BC Cost in 2026: Budget for Couples, Families and Backpackers

TL;DRA long weekend in Banff for two in 2026 comes to roughly CAD 5,800, a week-long road trip taking in Lake Louise and the Icefields Parkway runs about CAD 9,500, and a two-week family holiday for four tops CAD 19,500. Forum regulars say travellers typically end up spending 50 to 80% more than they budgeted, and a cheaper base than pricey Banff is the town of Canmore, where accommodation runs 25 to 35% less. Reckon on an exchange rate of around 16 to 17.50 CZK per Canadian dollar, tips of 15 to 20%, and a tax difference between Alberta’s 5% and British Columbia’s 12%. From 19 June to 7 September 2026, the Canada Strong Pass gets you free entry to national parks, though the football World Cup in Vancouver in June and July will push hotel prices up by as much as 180%.

Picture turquoise lakes, majestic mountains stretching to the sky and endless forests where bears roam free. The Canadian Rockies are a dream for many travellers, but if you’re thinking about a trip in 2026, I have to warn you right at the start. Planning a trip to Alberta, Canada and neighbouring British Columbia demands brutal honesty about your budget, because your wallet is going to take a beating here 😅. The national parks are bursting at the seams, accommodation prices have shot up to absurd heights, and people on the ground routinely spend tens of percent more than they originally planned.

So I’ve put together three realistic budget scenarios (for couples and families) plus an honest breakdown of everything from flights to tipping, along with tips on how to avoid paying full price for the whole thing. I’ll tell you where to base yourself strategically, how the local taxes work, and why it pays to watch the calendar carefully because of the football World Cup.

TL;DR

If you’re in a hurry and just want the essentials, I’ve listed the key points that will save your wallet from disaster.

  • Build a financial cushion: Prices in Canada keep climbing and tourists spend on average 50 to 80% more than they expected.
  • Three price tiers: A quick long weekend works out to roughly £2,900 for a couple, a week-long road trip around £4,700, and a two-week family holiday can easily top £9,600.
  • The sneaky exchange rate: Although the official mid-market rate hovers around £0.55 per Canadian dollar, for budgeting it’s safer to count on £0.58 to £0.62 because of bank fees and conversions.
  • Tax and tips on top: Prices in shops and restaurants are always listed without tax, and a surcharge jumps on at the till, while restaurants additionally expect a mandatory tip of 15 to 20%.
  • The geographic tax trick: Alberta charges only a 5% tax, while neighbouring British Columbia adds a full 12%, so it pays to buy pricier items before you cross the provincial border.
  • The saviour called Canmore: Staying right in Banff feels like Disneyland prices, but the nearby town of Canmore offers hotels a third cheaper and great infrastructure.
  • Summer 2026 for free: Thanks to the government’s Canada Strong Pass initiative, entry to all national parks is completely free from mid-June to early September.
  • Football fever: Vancouver hosts FIFA World Cup matches in June and July 2026, which sends flight and hotel prices soaring across the entire west coast.

When to visit western Canada

Picking the right dates is absolutely crucial for your budget, because the difference between seasons can easily run into thousands of pounds. The main summer season runs from late June to early September, when the national parks have the best weather and all the mountain lakes have already thawed. July and August are by far the most expensive months, though, when hotel and flight prices hit their absolute peak and the best accommodation vanishes from booking sites at lightning speed.

If you want to save serious money and don’t mind slightly cooler weather, go during the so-called shoulder season in May, June or October. Car rental and hotel room prices drop by tens of percent, and you won’t be jostling through crowds at the viewpoints. You’ll just have to accept that some high-altitude lakes may still be frozen and the famous access road to Moraine Lake doesn’t open until early June.

On top of that, 2026 brings one huge complication in the shape of the football World Cup. Vancouver is hosting seven FIFA World Cup matches between 11 June and 19 July, which will trigger an enormous price explosion across the entire west coast. Hotels in the city centre are reporting a staggering 180% price increase, reaching absurd figures of over CAD 800 a night. Flights will sell out in a flash, so if football isn’t your thing, definitely avoid this period in Vancouver — or book your flights at least eight months ahead.

Instead, you could fly straight into Calgary, which sits just an hour and a half from the gates of Banff National Park. Watch out for early July here too, though, because the city hosts the famous Calgary Stampede, during which accommodation prices triple or quadruple. The ideal compromise for 2026 looks like the turn of August and September, when the football frenzy has died down and the weather in the mountains is still gorgeous.

Where to stay in western Canada

💡 Tip for accommodation and experiences: We like to look for places to stay on Booking.com, which usually has the best cancellation terms. For tickets, tours and activities, it’s worth comparing and booking through GetYourGuide.

Staying right in the heart of the national park sounds incredibly romantic, but in reality it’ll absolutely ruin your wallet. The town of Banff itself has lost the charm of a quiet mountain village for many travellers, and according to plenty of online discussions it feels more like an overcrowded theme park. For the 2026 season, prices for an ordinary three-star hotel in Banff routinely run over CAD 600 a night, and the cheapest rooms disappear from booking sites half a year in advance. On top of that you often have to add so-called resort fees for the pool and another CAD 30 to 55 for overnight parking.

For families and couples who don’t want to spend a fortune just on a bed, there’s a great alternative in the town of Canmore. It sits just twenty minutes’ drive from the national park and offers accommodation 25 to 35% cheaper than the more famous Banff. You’ll find huge supermarkets for cheap grocery shopping, great cafés and, above all, a calmer atmosphere without the claustrophobic crowds. If you’re planning your trip through Booking.com, I’d recommend looking for apartments with a kitchenette, which will massively help cut your food costs. Here are a few specific tips on strategic locations:

  • Canmore (best value for money): Stay at hotels like the Coast Canmore Hotel or The Malcolm Hotel, which offer great comfort for more reasonable money than the resorts in the national park.
  • Banff and Lake Louise (for luxury and comfort): If you want to treat yourself and aren’t watching your budget, the iconic Fairmont Chateau Lake Louise or the Moose Hotel and Suites in Banff will give you an unforgettable experience — but expect prices from CAD 700 upwards.
  • Calgary (before and after your flight): For the night before flying out or after landing, treat yourself to Le Germain Hotel in the centre (it’s a bit of an extravagance, but after a long flight you really deserve that bed).

Solo travellers and backpackers have it much harder, because cheap options in the mountains are genuinely scarce. A bed in a shared room at the Hostelling International (HI) network costs CAD 50 to 100 in season, and even those have to be booked many months ahead. Another option is the state campsites around Lake Louise or Tunnel Mountain, which we’ll cover more in the money-saving section, since they’re the cheapest sleeping option of all.

Where to eat

Eating out in the mountain resorts is a chapter all of its own. A plain sandwich for lunch will set you back CAD 15 to 22, and dinner at a mid-range restaurant typically runs CAD 30 to 45 per person before tax. Tourist traps lurk everywhere, and food near the main attractions carries a hefty high-altitude markup — you’re basically paying for that gorgeous view, not for the quality of the ingredients.

If you don’t want to spend your whole trip cooking but you’re after more reasonable prices, try fast food like the famous sweet BeaverTails or the popular Asian poke bowls, which will fill you up quickly after a long hike. For lovers of plant-based food, I’d recommend trying modern bistros like Coyotes Deli or Crazy Weed in Canmore. You’ll find a fantastic selection of interesting vegetarian and plant-based dishes at fair prices of around CAD 25, so you’ll eat well without wrecking your budget.

7 tips on what to see and do in Alberta and BC (and what it’ll cost)

The budget for the Canadian Rockies isn’t just about one big number — it’s about understanding how the whole system works. I’ve put together a detailed overview of everything that’ll affect your wallet, so you can plan your trip exactly to fit your means.

1. Why it’s actually so expensive and what to prepare for

Simply put, everyone wants to see Banff all at once, and the local infrastructure just isn’t built for it. Banff National Park alone recently welcomed a record 4.5 million visitors in a single year, which logically sent the price of everything into the stratosphere. People on discussion forums commonly admit they spent 50 to 80% more money than they originally budgeted for at the start.

And it’s not just the hotels themselves — it’s the constant stream of small expenses we often don’t know in Europe. You pay for parking at the hotel, fork out eye-watering sums for the cable car, leave a huge tip at the restaurant, and suddenly find your daily budget has vanished before dinner. Many visitors compare today’s Banff price-wise to Disneyland, where you pay a premium markup for absolutely everything, including ordinary parking at the lakes, which can run CAD 36 a day.

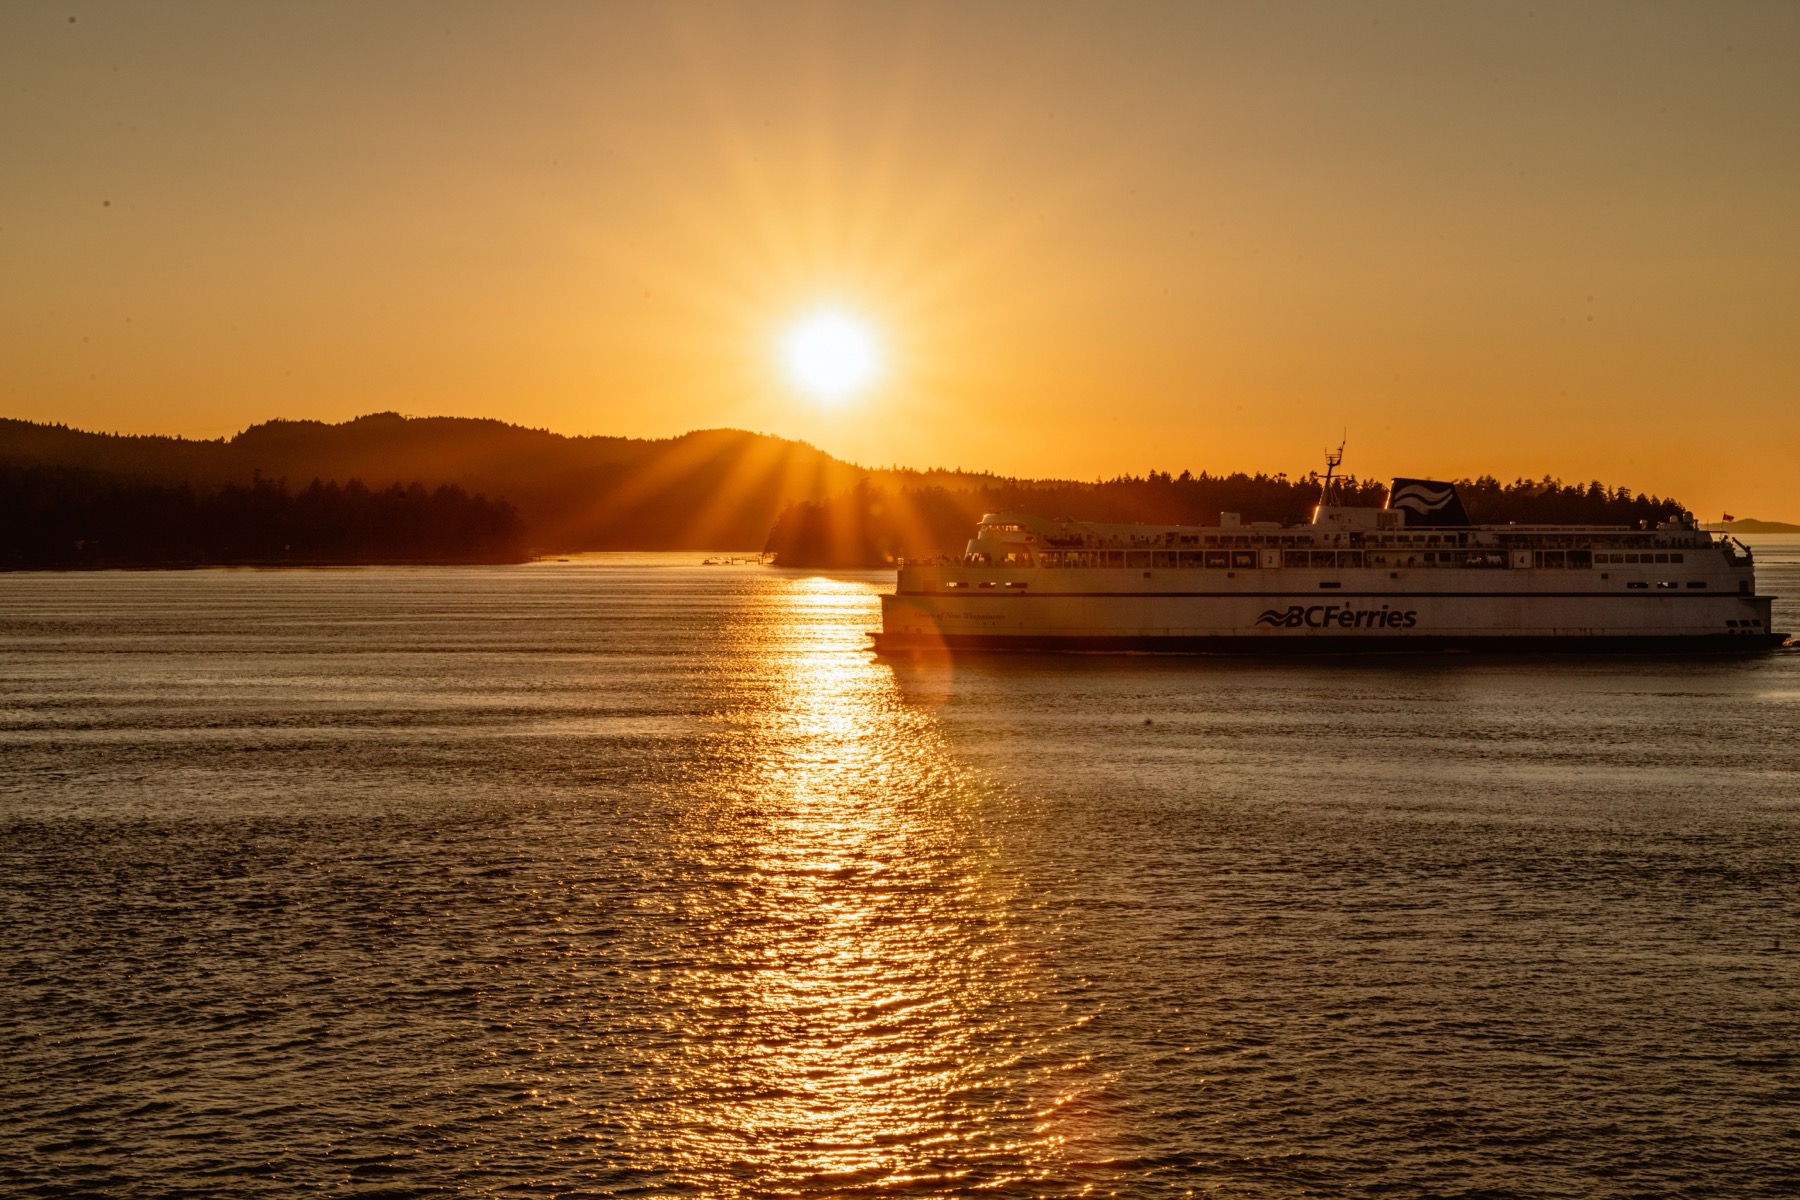
If you’re heading here, you simply have to accept that the words “budget-friendly” and “the Rockies” don’t go together all that well 😅. Another huge item tourists often forget about is the various reservation fees — for example the ferries in British Columbia, which add another CAD 22 to your ticket just to guarantee you a spot. All the figures in this article are based on the hard reality for the 2026 season, so the numbers might catch you off guard a little, but it’s always better to be well prepared than to stand there counting every last dollar on the spot.

2. Three realistic budget scenarios based on trip length

To get a clear picture, I’ve put together three model scenarios that include flights from London, mid-range hotels, a car, food and attractions. The first option is a quick long weekend of three to four days for a couple, which will set you back roughly CAD 5,500 — that’s about £2,900 with a bit of breathing room. It covers accommodation in Banff, a smaller car and basic entry fees.

The golden middle road is a classic week-long road trip for two, taking in Banff, Lake Louise and the Icefields Parkway. Here you should budget around CAD 9,000, or roughly £4,700. That covers a week’s SUV rental, petrol, restaurant meals and the annual Discovery Pass, which is worth buying from your seventh day in the parks.

If you’re planning a two-week family holiday for four people, the budget will exceed £9,600 (roughly CAD 18,700). That sum covers four flights, fourteen days with a large car, the Kananaskis pass and a ride on the Athabasca Glacier (the real big adventure, basically).

💡 Tip: For all your calculations I’d recommend using a conservative rate of around £0.62 per Canadian dollar. Although the official mid-market rate sits lower, this cushion will reliably protect you from bank fees.

lukas a lucka
Lukáš and Lucie recommend
Where to Stay in Alberta and British Columbia
6 accommodations — wellness hotels, hotels and other lodging options
⭐ TOP CHOICE 🏨 Hotel
Coast Canmore Hotel
Recommended hotel in Canmore for those who want great comfort at more reasonable prices than resorts in the national park. Canmore offers accommodation 25 to 35 percent cheaper than Banff and excellent infrastructure including supermarkets.
★★★★ Check prices
Check availability
🏨 Hotel
The Malcolm Hotel
Quality hotel in Canmore with better value for money than resorts in the national park. Canmore is located just twenty minutes from the national park and has a quieter atmosphere than crowded Banff.
★★★★ Check prices
Check availability
⭐ Luxury
Fairmont Chateau Lake Louise
Iconic luxury hotel right at Lake Louise for those who want an unforgettable experience and don’t worry about budget. Offers premium accommodation in the heart of the Rocky Mountains with stunning views.
★★★★ from 700 CAD/night
Check availability
🏨 Hotel
Moose Hotel and Suites
Premium accommodation in downtown Banff for those who want to treat themselves to luxury and comfort. In the 2026 season, prices for a regular three-star hotel in Banff commonly exceed 600 CAD per night.
★★★★ from 600 CAD/night
Check availability
🏨 Hotel
Le Germain Hotel
Modern hotel in downtown Calgary, ideal for a night before departure or after arrival. After a long flight, you really deserve that bed. Calgary is just an hour and a half drive from the gates of Banff National Park.
★★★★ Check prices
Check availability
🏡 Hostel
Hostelling International (HI) hostels
Network of hostels for solo travelers and backpackers in the mountains. A bed in a shared room costs 50 to 100 CAD during season, but even these need to be booked many months in advance.
★★★★ 50-100 CAD/night
Check availability

3. Flights and a car as the biggest upfront investment

Choosing your arrival airport fundamentally shapes not only your itinerary but also the overall cost of the trip. From the UK there are some direct options, but most travellers will face at least one connection via Frankfurt, Amsterdam or a North American hub. Outside peak season you can grab a return flight to Calgary or Vancouver for £400 to £600, but in the summer peak be ready for £700 to £1,100 per person. The golden rule for a road trip is the so-called open-jaw flight, where you arrive in Vancouver and fly home from Calgary, saving yourself nine hours of pointless driving back.

Renting a car is the second huge item, because without one you’ll barely move in the Canadian wilderness. In the summer peak you’ll pay CAD 100 to 180 a day for an SUV rental, and you have to add insurance on top. The biggest financial trap is the fee for returning the car in a different city (the one-way drop fee). If you pick the car up in Vancouver and return it in Calgary, the rental company will charge you another CAD 300 to 500 without batting an eyelid.

At least the petrol price is good news — it’s traditionally the lowest in all of Canada in Alberta, hovering around CAD 1.40 to 1.60 per litre. But as soon as you cross into British Columbia, prices at the pump immediately jump towards the two-dollar mark. So the rule always applies: fill up the tank in Banff or Lake Louise before you cross the provincial border heading west.

4. Taxes and tips, or why the numbers on the bill don’t add up

The tax system is exactly the thing that trips up just about every newcomer at the start. Prices on menus, on shop shelves and on booking sites are always listed without tax. Only at the till does a chunky surcharge jump onto the number, depending on which province you’re in and exactly what you’re buying.

Here comes the key geographic and budget lesson. Alberta is the only province with no provincial tax of its own, so you pay only the five-percent federal GST. British Columbia, however, adds another seven percent PST on top of the five, so the total tax comes to a dizzying 12%. The Yoho and Kootenay national parks already fall under British Columbia, so any pricey camping gear, souvenirs or outdoor clothing is definitely worth buying while you’re still in Banff or Calgary, since you’ll save those seven percent on every item.

You then have to head into restaurants knowing that tipping works here as a hard social obligation. Servers may earn minimum wage, but the card terminal will automatically offer you 15, 18 or 20% when you pay anyway. Leaving less than 15% is taken as a sign of serious dissatisfaction, and staff may take it as a personal insult. Order a CAD 30 lunch and nearly CAD 40 leaves your card — and you stand at the till staring into space for a moment 😅.

5. The exchange rate and hidden bank fees

You basically don’t need cash in Canada these days, because you can pay by card absolutely everywhere without a problem — even at a lonely food truck somewhere at a motorway rest stop deep in the forest. The Canadian dollar officially sits just above £0.55, but for safe holiday planning you need to count on £0.58 to £0.62.

Why such a big difference? Your bank takes a currency conversion fee on every payment, and if you pay at the weekend when the foreign exchange markets are closed, the rates tend to be even worse. A few small coins in your pocket will only come in handy for tipping the hotel porter or buying fresh fruit at local farmers’ markets — otherwise you’ll get by just fine with plastic or your phone.

💡 Tip: For travel overseas I’d recommend getting a Revolut or Wise card. You can transfer pounds onto it and convert them to Canadian dollars at the moment the rate is most favourable. The amount is then locked in your account in the foreign currency, neatly sidestepping all those annoying weekend surcharges and the poor conversions of traditional high-street banks. On a month-long trip you can easily save a few hundred pounds this way, and that counts.

6. Attractions without bleeding your wallet dry

The prices of popular attractions are also at their absolute peak in 2026, because the operators often have a monopoly. Renting a canoe on the famous Lake Louise costs an incredible CAD 170 for just one hour (which is more than a night at an average European hotel).

A ride on the Sulphur Mountain Gondola in Banff costs CAD 74, and the popular trip on the giant glacier bus across the Athabasca Glacier will set an adult back CAD 130. So choose very carefully what you spend your money on — the surrounding nature itself, thankfully, is still free.

7. How to save hundreds of pounds (budget hacks)

The clear saviour for any family budget is cooking your own food. Shopping at the huge supermarkets like Save-On-Foods or Safeway in Canmore will cost you roughly 30% more than back home, but it’s still an absolute fraction of local restaurant prices. Making your own sandwiches and snacks for full-day hikes can easily save a couple CAD 50 a day, and on top of that you get to enjoy your meal in peace by the lake with the best possible view in the world.

The absolute cheapest accommodation option is camping at the state campsites run by Parks Canada, which cost a negligible CAD 26 to 47 a night. There’s one huge catch, though, that forums discuss at length. Bookings open as early as January and the best spots vanish within the first ten minutes. Anyone who hesitates at the computer simply has nowhere to stay in summer and has to settle for hotels that cost many times more.

2026 also brings one absolutely fantastic piece of news for all travellers. Thanks to the government’s Canada Strong Pass programme, entry to all national parks is completely free from 19 June to 7 September. That removes the need to buy pricey day passes or the annual Discovery Pass, saving an ordinary family over CAD 150, which you can invest in better dinners. Outside this exclusive summer window, though, buying the annual pass pays off from the seventh day in the parks.

Where to go next from the Canadian Rockies

If you’re planning a wider itinerary and want to explore Canada in depth, we’ve prepared more detailed guides for you. Find out exactly how the summer Canada Strong Pass 2026 works and what its rules are. To avoid disappointment at the most beautiful lakes, be sure to read our guide to the Moraine Lake and Lake Louise shuttle, because you can no longer get there by private car.

For those who want to combine mountains with the ocean, our Vancouver → Banff road trip itinerary is ideal. If you’re still torn over accommodation, our Canmore vs. Banff comparison will help. And don’t forget to read up on when to visit Banff by the weather and what to pack for the Rockies, so you’re ready for everything nature throws at you. Practical tips to finish: check out SafetyWing travel insurance and get unlimited data with a Holafly eSIM.

Frequently asked questions

Before a first trip to Canada, a whole host of practical questions always crops up. Here’s an overview of the most common ones, which will help you plan your holiday better and avoid unnecessary complications on the ground.

Do I need a visa to travel to Canada?

You don’t need a classic visa, but you must arrange electronic registration eTA in advance. It costs exactly 7 CAD, is valid for five years, and you can sort it out online in just a few minutes. But be very careful of fraudulent websites that look official but will happily charge you up to 80 dollars. Always use only the official government website canada.ca, otherwise you’ll needlessly rip yourself off right before departure.

How is it in the mountains with bears and safety?

The basic rule is to hike in a group, make loud noises, and always carry bear spray (a special pepper spray that you can buy or rent in every mountain town), just don’t forget that you can’t take it on a plane, not even in checked luggage. Grizzly bears and black bears are absolutely common in the national parks and you’ll encounter them even close to roads, so it really doesn’t pay to underestimate prevention.

Is there cell service in the national parks?

Outside the main tourist towns like Banff, Canmore, or Jasper, expect that mobile signal in the mountains is virtually non-existent. Once you hit the Icefields Parkway, you can easily go a hundred kilometers without signal, so download offline maps to your phone while you’re still on hotel Wi-Fi, otherwise you’ll simply get lost and no one will be able to call you.

Is a Czech driver’s license enough to rent a car?

While British Columbia and Alberta theoretically recognize Czech driver’s licenses for a limited period, car rental agencies at the counter strictly require an International Driving Permit. You can get one in the Czech Republic at any extended authority office for €2 on the spot. Definitely don’t underestimate this step, so you don’t end up stuck at the airport without your dream car.

What to do when I can’t make it to the campground in time?

If you miss the January opening of campground reservations, you still have a small chance to snag so-called first-come, first-served sites, which can’t be booked in advance. However, this means arriving at your chosen campground ideally before 8 AM and patiently waiting to see if anyone leaves. It’s a big gamble, but sometimes luck might smile upon you.

Where can I get a Canada Strong Pass?

The pass for summer 2026 isn’t a physical card that you’d have to complicatedly order or pick up somewhere. The gates of the national parks will simply be freely passable in the period from June 19 to September 7, and Parks Canada staff will let you in for free. However, you still have to pay for camping, parking at popular lakes, and all commercial activities, so keep an eye on your budget going forward.

Is the water in Canadian lakes good for swimming?

Most of the most beautiful turquoise lakes, such as Lake Louise, Peyto Lake or Moraine Lake, are fed directly from melting high-mountain glaciers. The water is only a few degrees above zero even in the hottest summer, so swimming is only for the really hardened cold-water enthusiasts and in most cases ends with an extremely quick retreat back to shore 😅.

Tips and Tricks for Your Vacation

Don’t Overpay for Flights

Search for flights on Kayak. It’s our favorite search engine because it scans the websites of all airlines and always finds the cheapest connection.

Book Your Accommodation Smartly

The best experiences we’ve had when looking for accommodation (from Alaska to Morocco) are with Booking.com, where hotels, apartments, and entire houses are usually the cheapest and most widely available.

Don’t Forget Travel Insurance

Good travel insurance will protect you against illness, accidents, theft, or flight cancellations. We’ve had a few hospital visits abroad, so we know how important it is to have proper insurance arranged.

Where we insure ourselves: SafetyWing (best for everyone) and TrueTraveller (for extra-long trips).

Why don’t we recommend any Czech insurance company? Because they have too many restrictions. They set limits on the number of days abroad, travel insurance via a credit card often requires you to pay medical expenses only with that card, and they frequently limit the number of returns to the Czech Republic.

Find the Best Experiences

Get Your Guide is a huge online marketplace where you can book guided walks, trips, skip-the-line tickets, tours, and much more. We always find some extra fun there!
Norway Itinerary for 10 Days: The Classic Road Trip Day by Day

TL;DRThis classic ten-day road trip through southern and western Norway runs from Oslo via Flåm, Bergen, the Hardangerfjord, the Geirangerfjord, the Trollstigen, and the Atlantic Road, finishing up in the Art Nouveau town of Ålesund. Highlights include Oslo’s opera house, the Flåmsbana railway, a cruise along the Nærøyfjord, the Vøringsfossen waterfall and the Storseisundet Bridge. The best time to go is late May to early September, when the mountain roads are open. A hire car with an AutoPASS chip for the tolls is the way to do it, with a budget of around 2,000 to 2,800 NOK a day for two people. You can trim the route to 7 days by skipping the northern stretch, or stretch it to 14 days by adding Stavanger and Preikestolen, or the Lofoten Islands and Tromsø.

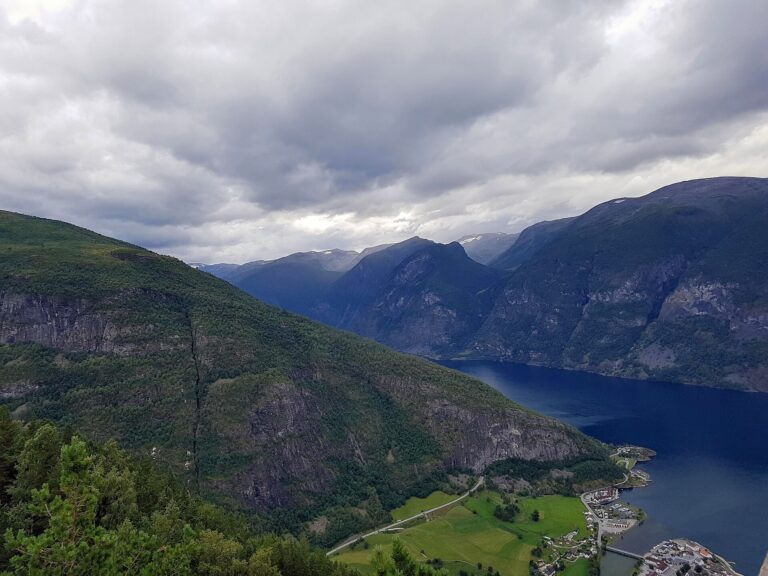
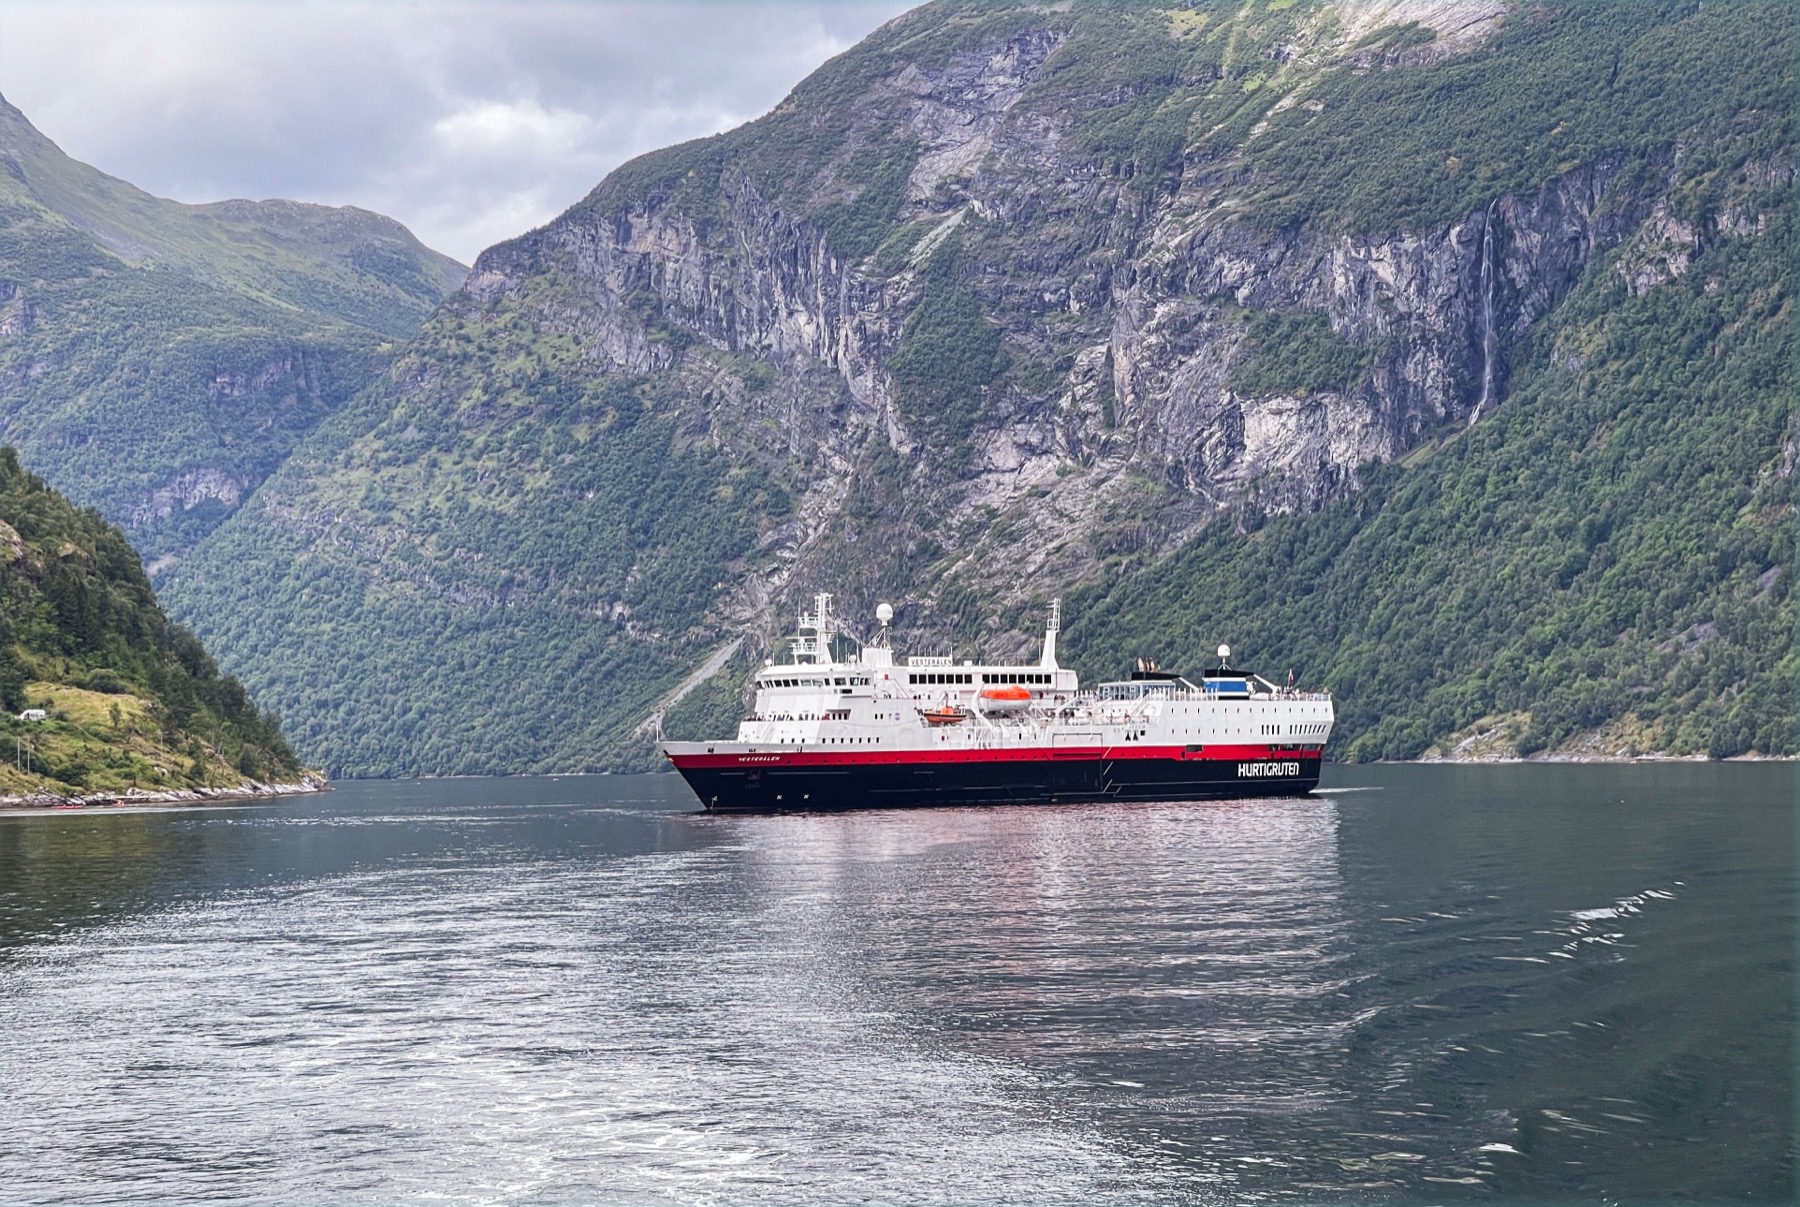
If you’re thinking about heading north to explore Scandinavia, I have to give you an honest warning right from the start. The Norwegian landscape will utterly bewitch you, plant a stubborn bug in your head, and you’ll probably never want to spend your summer holiday anywhere else again. This classic loop through southern and western Norway ranks among the most beautiful road trips in all of Europe, because it combines modern cities with completely wild nature, deep fjords and mountain passes. If you’re looking for the perfect Norway itinerary, you’ve come to the right place.

The land of trolls and waterfalls is enormous, and distances here are deceptive, so a well-planned route is the foundation of any successful trip. In this article we’ll walk through a detailed 10-day itinerary together, taking you from the iconic Opera House in Oslo all the way to the art nouveau streets of the west coast. You’ll also find out roughly how much such a journey costs, how toll payments work, and why it pays not to leave your ferry bookings until the last minute.

TL;DR

  • Length of the route: The ideal amount of time to set aside for this loop is exactly 10 days, which lets you keep a comfortable pace without daily stress behind the wheel.
  • Main stops: Along the way you’ll see Oslo, ride the famous railway down to Flåm, explore historic Bergen, and you won’t miss Geirangerfjord or the legendary Trollstigen mountain road.
  • When to go: The best conditions run from late May to early September, when even the high mountain roads are safely passable.
  • Transport: The greatest freedom comes hands down from a rental car, which lets you stop at every other waterfall (and trust me, there’ll be plenty).
  • Budget: Norway isn’t a cheap destination — expect rough costs of around 2,000 to 2,800 NOK per day for two people (roughly £150–£210) if you opt for mid-range accommodation.
  • Top tip: Accommodation around the most famous fjords sells out months in advance during the summer season, so book your hotels well ahead of time.

When to Take This Trip and How to Adjust the Route

Norwegian weather can be unpredictable even in the middle of July, but as a general rule, summer is by far the best season for a road trip through the fjords and mountains. From late May to early September you can count on the mountain passes — like Trollstigen — being cleared of snow and fully open. On top of that, all the tourist ferries and sightseeing cruises run at full capacity in summer, so you won’t have to worry about missing out on any of those iconic experiences.

If you’re considering a trip in autumn or spring, be prepared for frequent road closures and the fact that many smaller hotels outside the big cities shut their doors. Winter in Norway has its own unmistakable magic, but this particular itinerary isn’t suited to it at all, because you’d spend most of your time detouring around impassable mountain ranges.

What If You Only Have 7 Days?

If you’re pushed for time and can only afford a week’s holiday, you’ll have to trim the route a little and pick up the pace. In that case, I’d recommend skipping the more northerly part with the Atlantic Road and the city of Ålesund. Focus purely on the golden triangle made up of Oslo, the Flåm area with Bergen, and then Hardangerfjord with Geiranger. From Geiranger you can head straight back to Oslo, saving roughly two to three days of driving — even if it means missing out on the famous Trollstigen.

A 14-Day Version for Connoisseurs

Got a full two weeks at your disposal instead? Then a world of fantastic options opens up for extending the itinerary. At the start of the trip you can add the southern tip with the city of Stavanger, the launching point for the famous Preikestolen rock plateau, which towers majestically over the Lysefjord. The second — and perhaps even more tempting — option is to fly north at the end of your trip from Ålesund or Oslo to the Lofoten Islands or Tromsø, where you’ll enjoy the never-setting midnight sun in summer.

Practical Info: Car, Transport and Budget

The basic rule for driving in Norway is to come to terms with the fact that distances here are incredibly deceptive. If your sat-nav shows your destination is two hundred kilometres away, don’t for a second assume you’ll be there in two hours. The roads constantly wind along inlets, climb up steep hills, and very often you’ll face a wait for a ferry — the only way to cross the deep waters of the fjords.

When you rent a car at the airport, you don’t need to stress too much about paying tolls, because most vehicles are automatically fitted with an AutoPASS chip. It records your passes through toll gates, city entry charges and payments for most ferries, and at the end of the trip the rental company simply charges everything to your credit card. Petrol prices in 2026 hover at roughly 21 to 24 NOK per litre (about £1.55–£1.80), so a more fuel-efficient car definitely pays off.

As for the overall budget, Norway is one of the pricier European destinations, but with a bit of planning it’s manageable. If you stay in nice mid-range hotels and eat out occasionally, budget for daily costs of roughly 2,000 to 2,800 NOK for two people (around £150–£210). You can save significantly by shopping at supermarkets like REMA 1000 or Kiwi, where you’ll pick up great ingredients for picnics you can enjoy with a view of majestic mountains.

The Day-by-Day Itinerary

Let’s take a look at the trip plan itself, designed so that you see the very best while not spending your entire holiday just sitting in the car. This schedule assumes you’ll pick up your car right after landing in Oslo, or alternatively collect it the next morning before leaving the city.

Day 1: Modern Architecture and Parks in Oslo

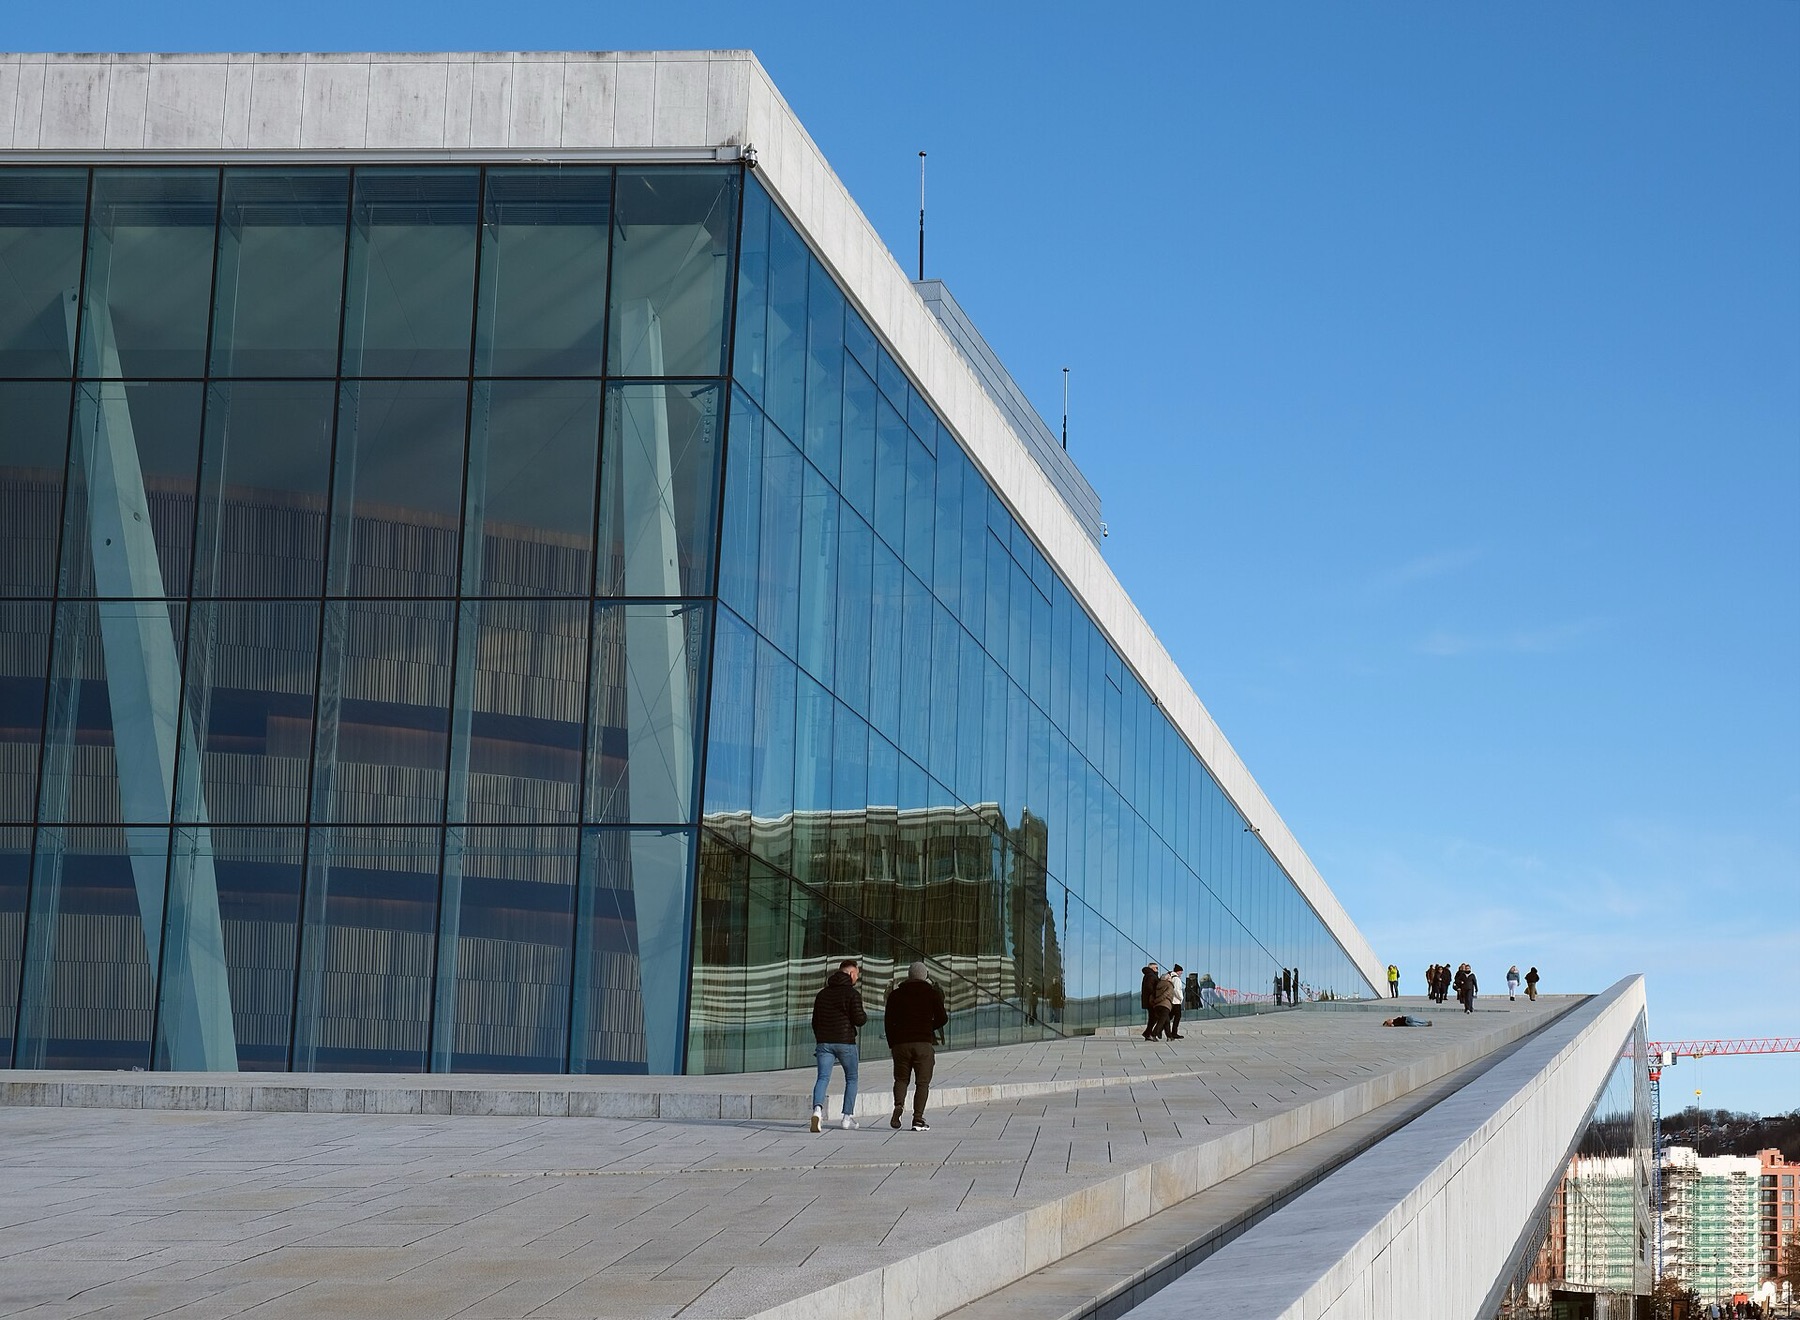
Your Norwegian adventure begins in the capital, which has undergone an incredible architectural transformation in recent years. Straight after landing and checking in, head down to the harbour, where the famous Opera House dominates the landscape — you can freely walk up its sloping roof all the way to the very top. Right next door you’ll find the modern Bjørvika district with the new Munch Museum building, whose shape resembles a bent book.

In the afternoon, move to a quieter part of the city and stroll through the sprawling Vigeland Park, full of fascinating sculptures depicting the cycle of human life. If you’re interested in history, take a boat over to the Bygdøy peninsula, home to several excellent museums, including one about the polar expeditions aboard the ship Fram. In the evening, unwind in one of the cosy cafés in the Grünerløkka district.

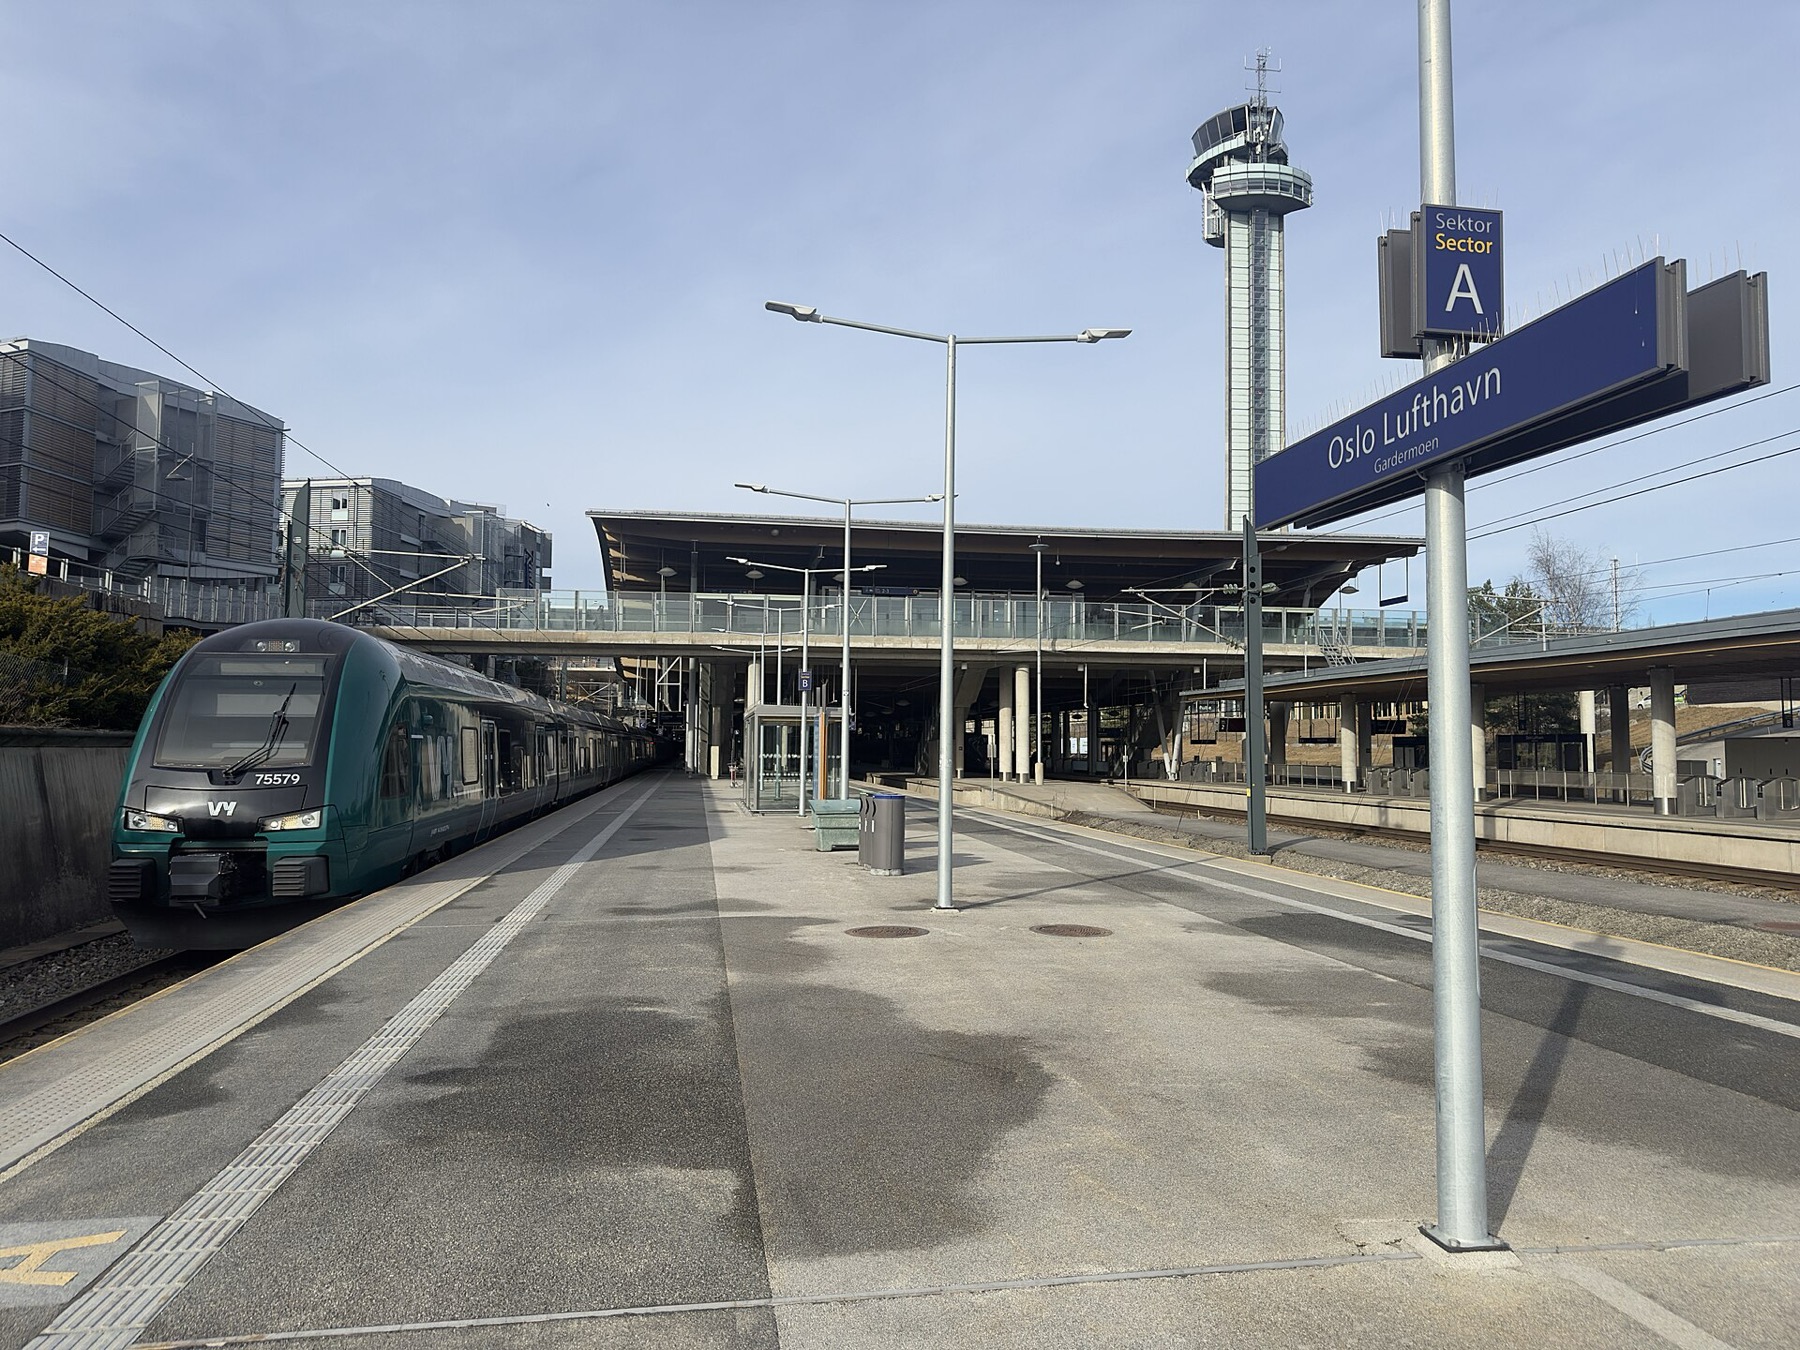
💡 Tip: The fastest way into central Oslo from Gardermoen Airport is the Flytoget express train, which runs every ten minutes, but the regular regional train is noticeably cheaper and only takes a few minutes longer.

Day 2: From Oslo to the Deep Waters of Flåm

On day two your first big westward transfer awaits, and you have a choice between two completely different but equally fascinating options. You can set off by car across the Hardangervidda plateau and through the famous Lærdal Tunnel, which at over 24 kilometres is the longest road tunnel in the world. The drive itself takes roughly five hours of pure driving time, but with the inevitable photo stops, plan for a whole day.

The second, hugely popular option is to set driving aside for a while and take the train. From Oslo you board the famous Bergensbanen line, ride up to the mountain station of Myrdal, and there change onto the iconic historic Flåm Railway (Flåmsbana). It descends steeply into the valley and offers some of the best views in all of Norway, passing right by thundering waterfalls. In the evening you’ll stay in the picturesque village of Flåm, right on the shore of the fjord.

💡 Tip: Tickets for the Flåmsbana train tend to sell out well in advance during the summer months. Just like the sightseeing cruises, you can easily and safely book them ahead of time through GetYourGuide.

Day 3: Nærøyfjord and Views into the Abyss

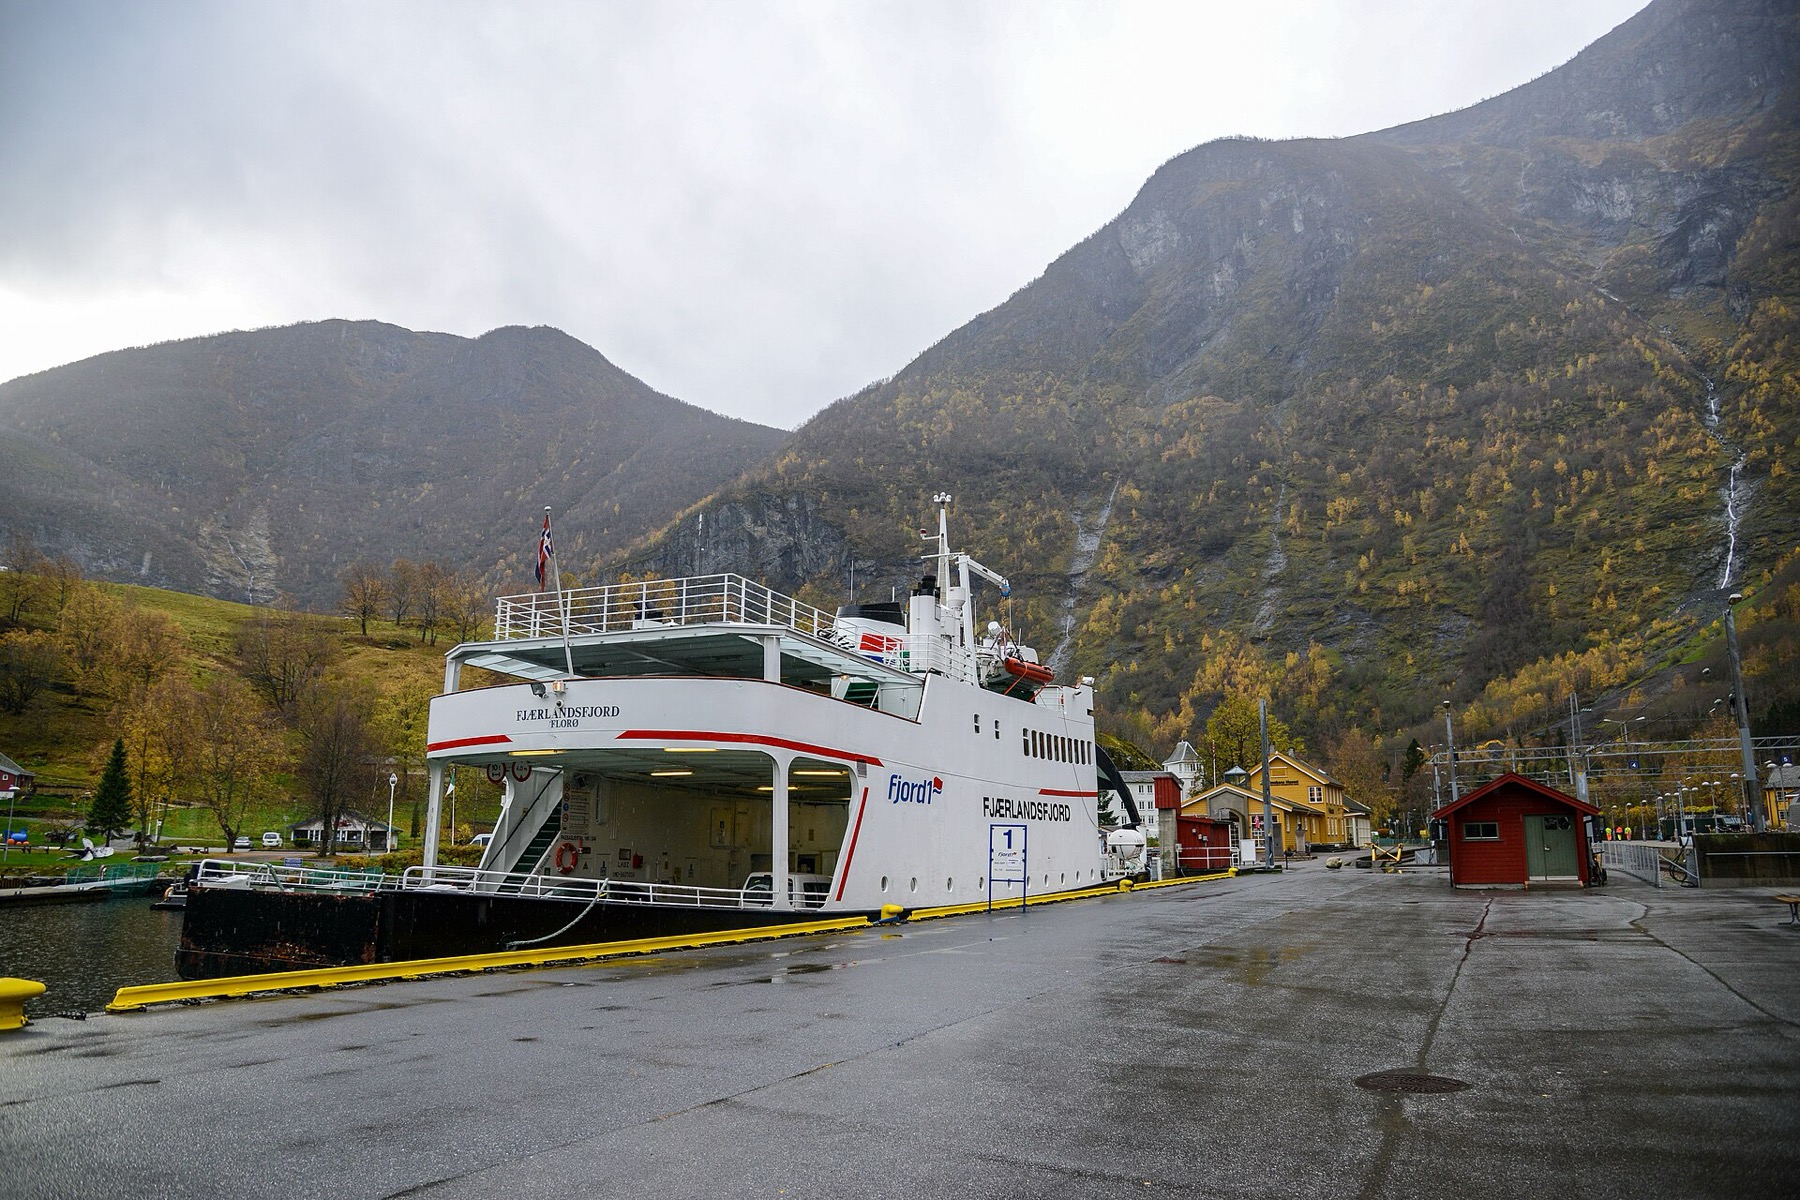
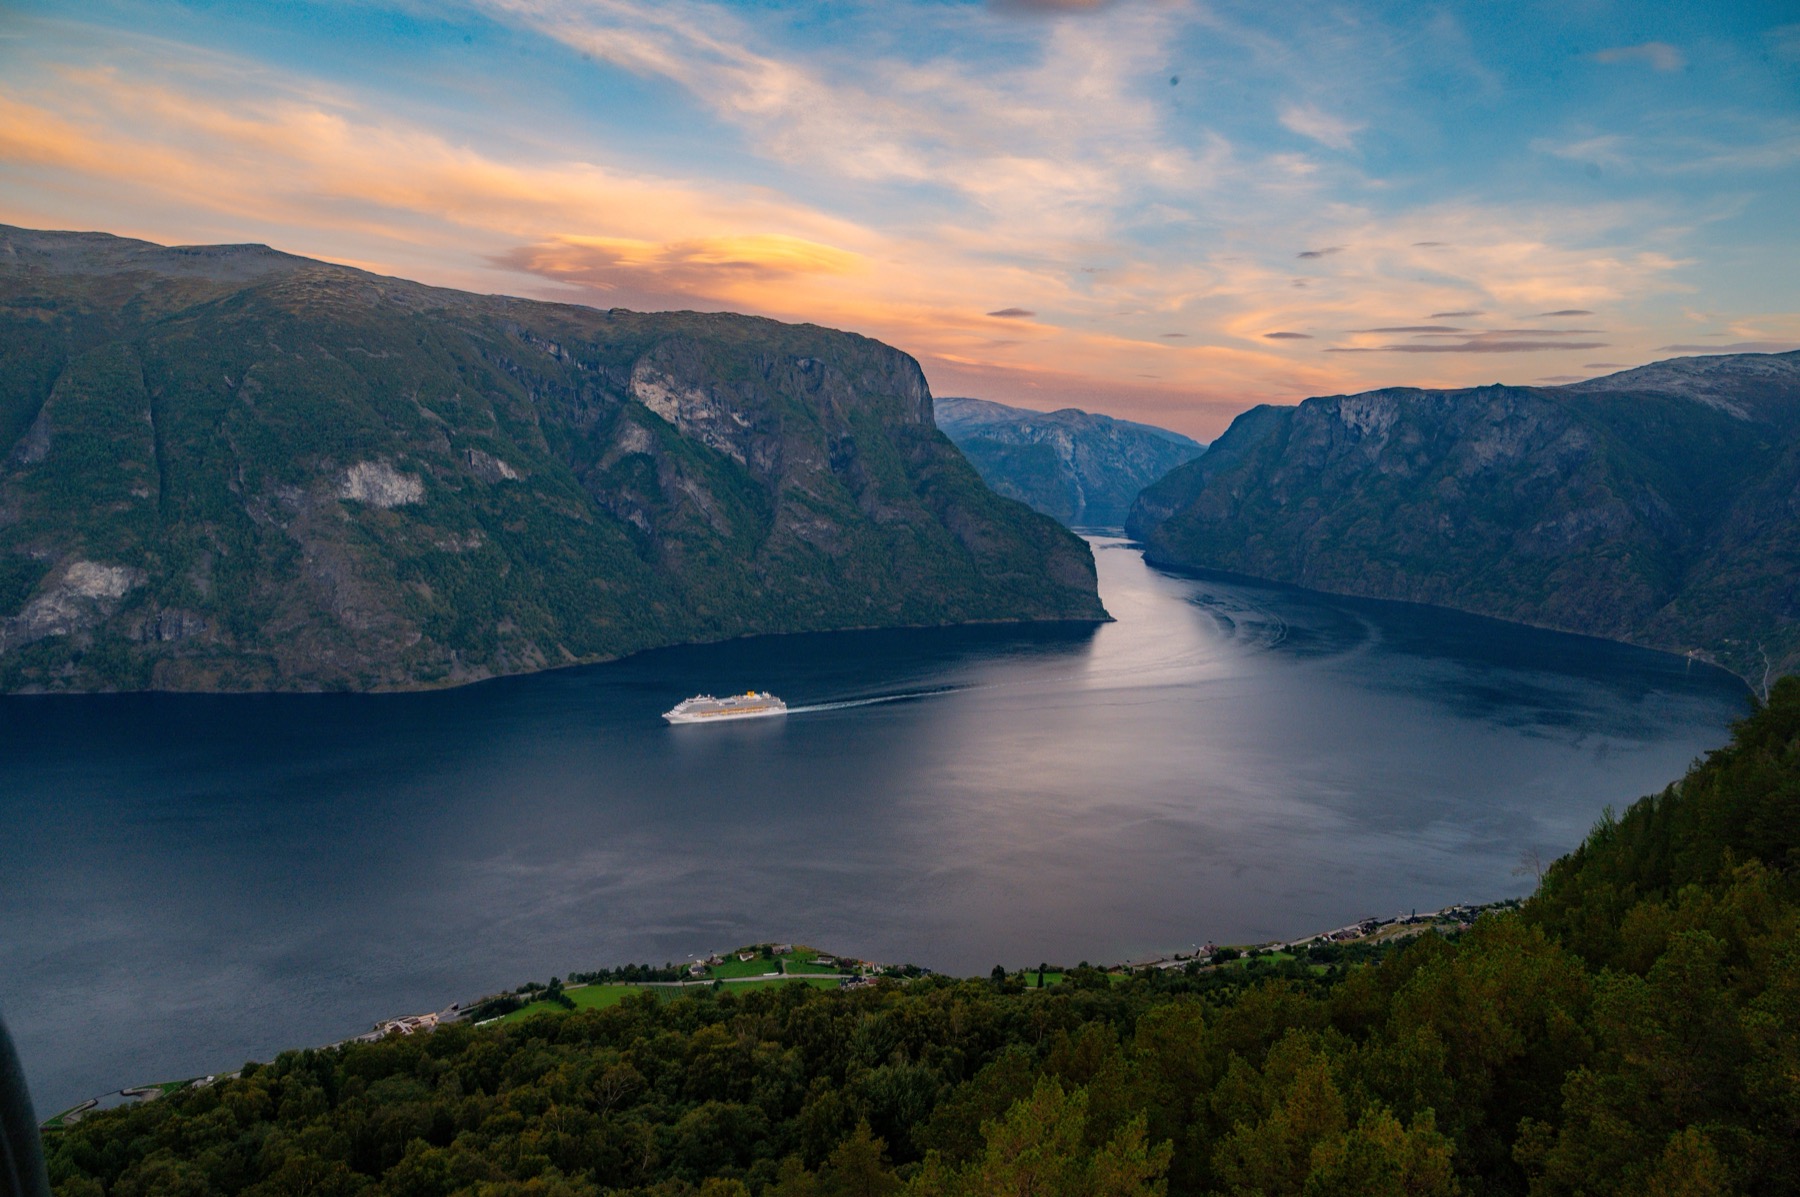
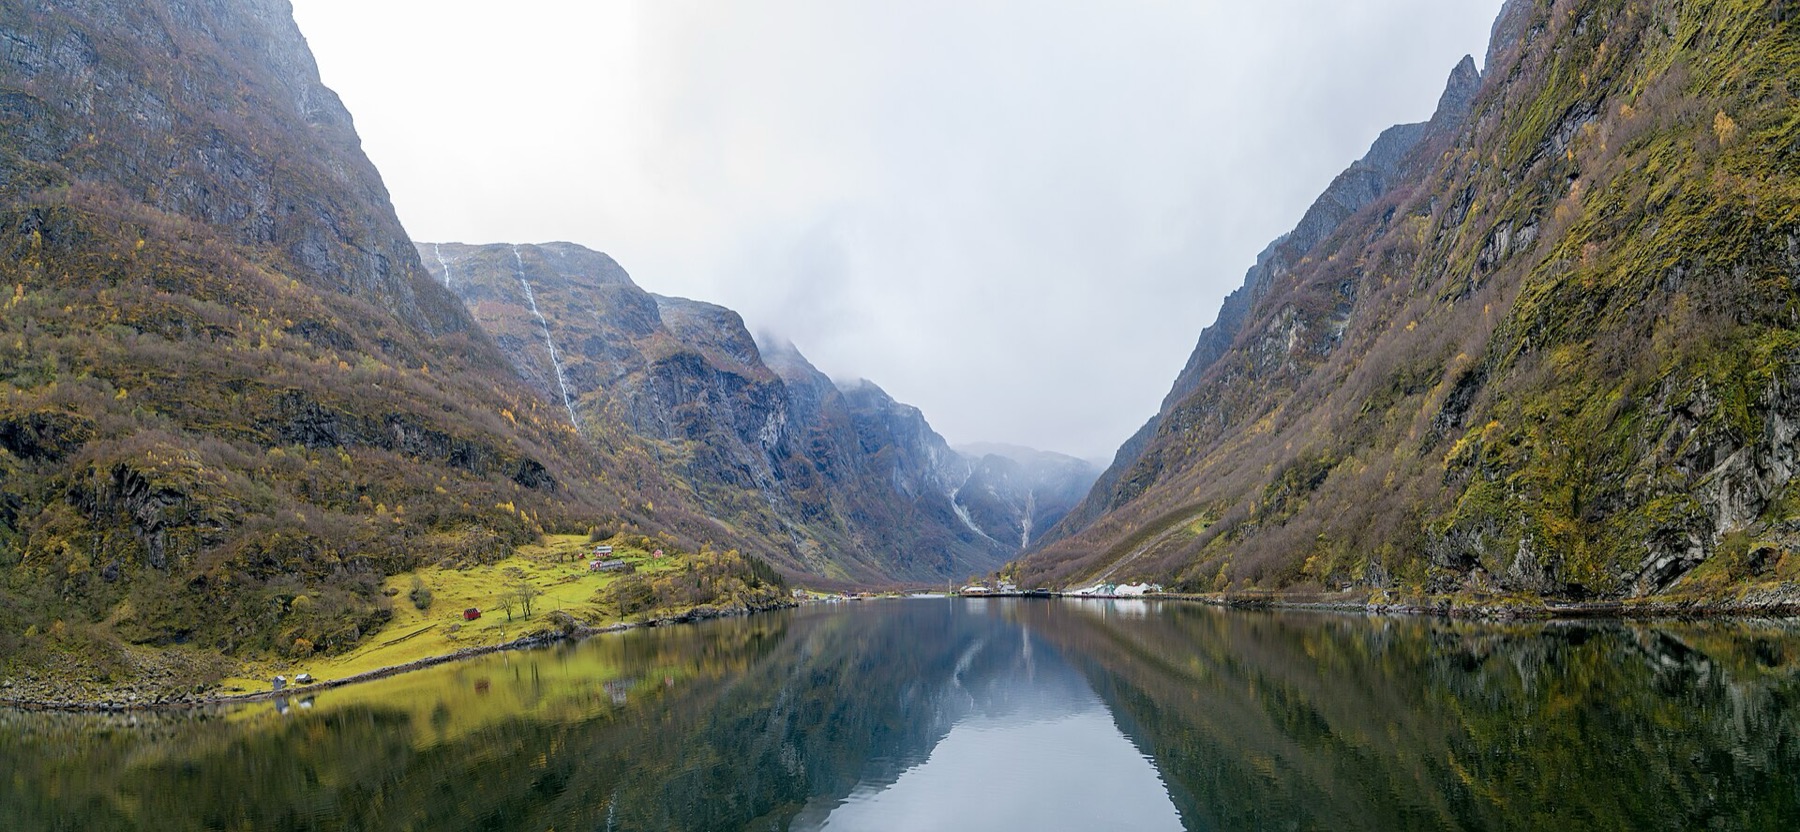
On day three you’ll stay in the area and focus on what makes Norway, well, Norway. In the morning, set off on an unforgettable cruise along the Nærøyfjord, which is on the UNESCO list and in places is so narrow you feel as if you could reach out and touch the cliffs on both shores. The boats depart directly from Flåm and take you to the village of Gudvangen, from where you can easily return by shuttle bus.

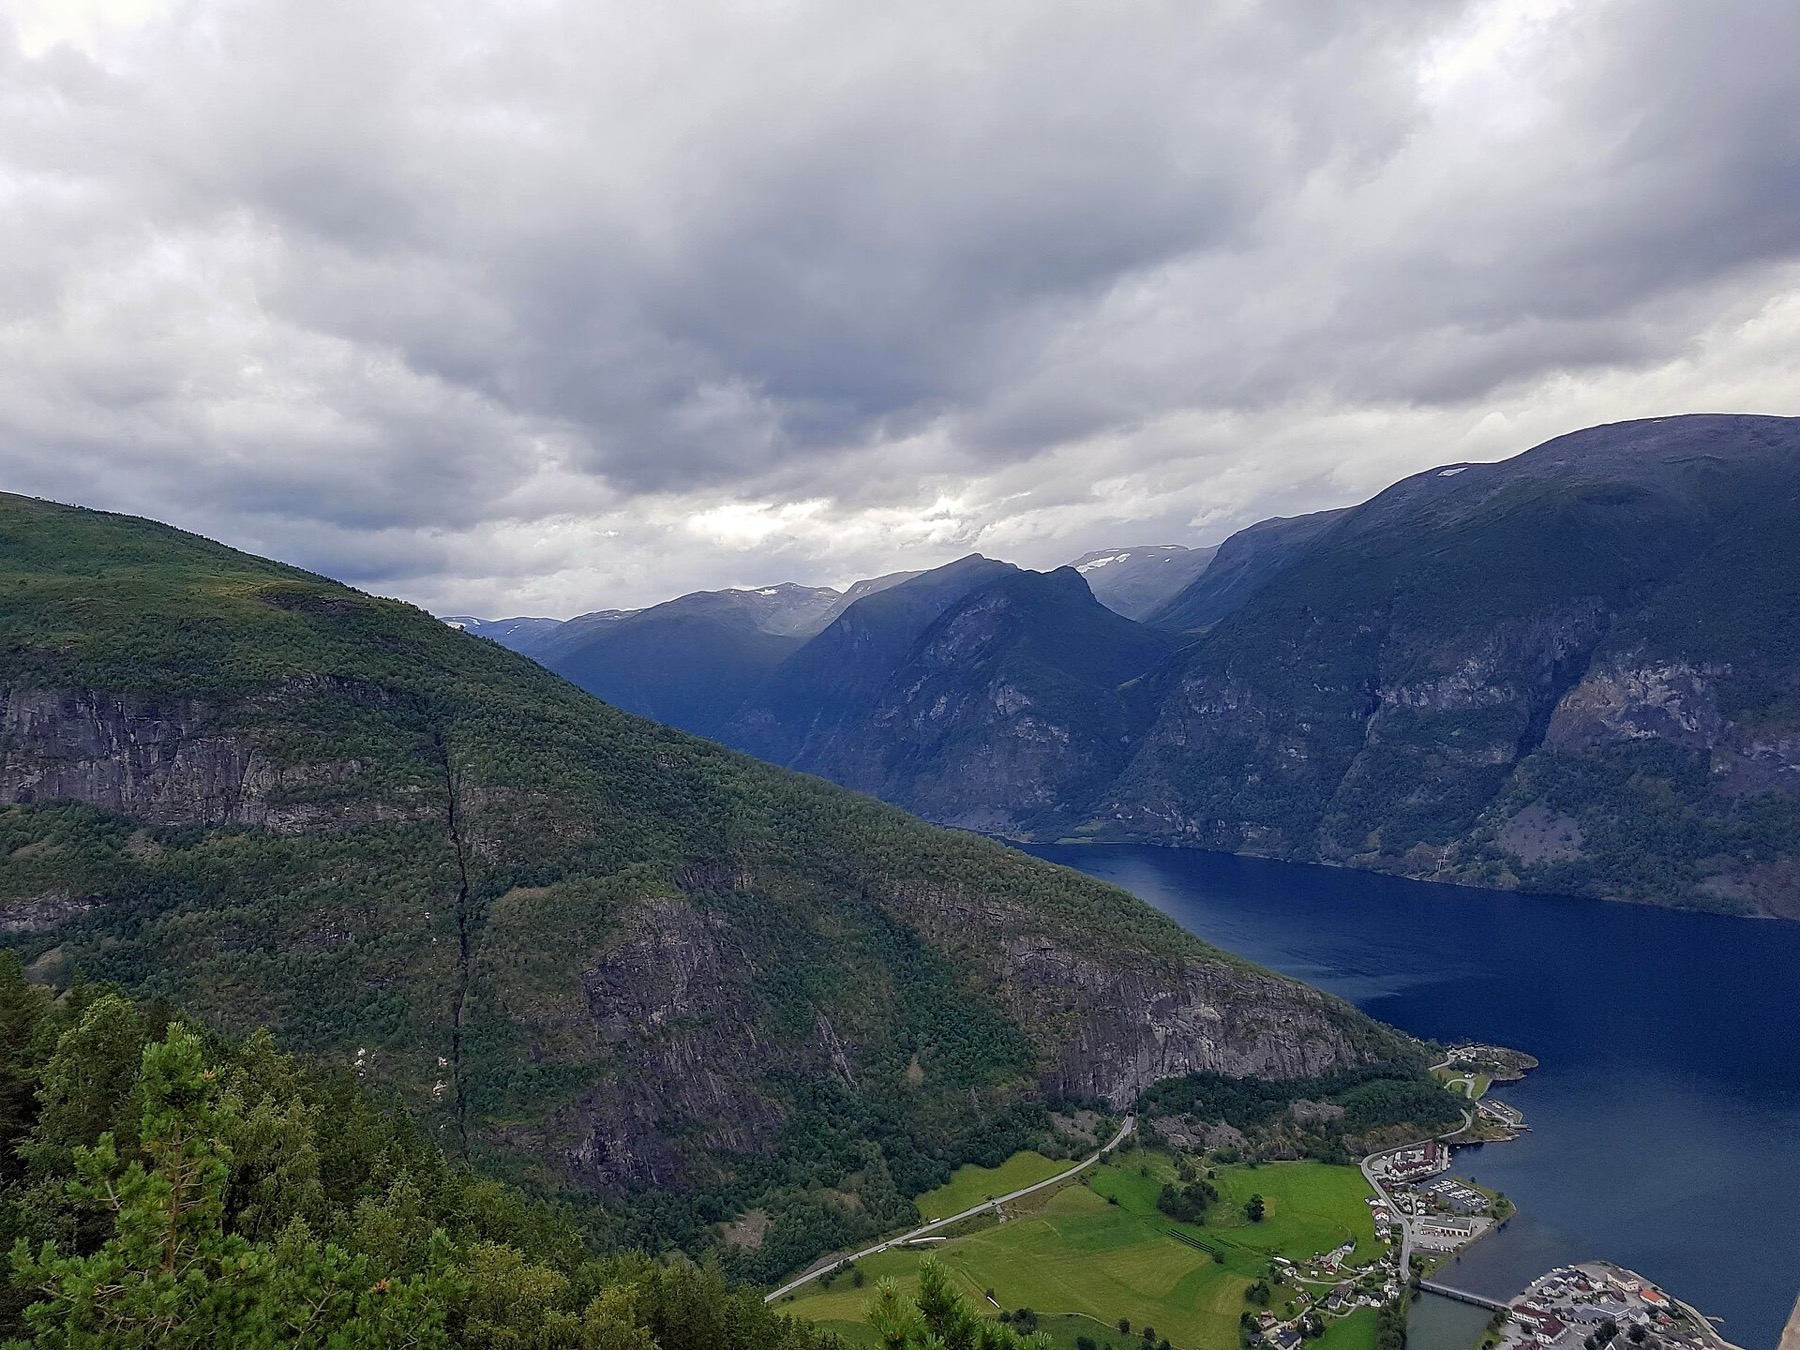
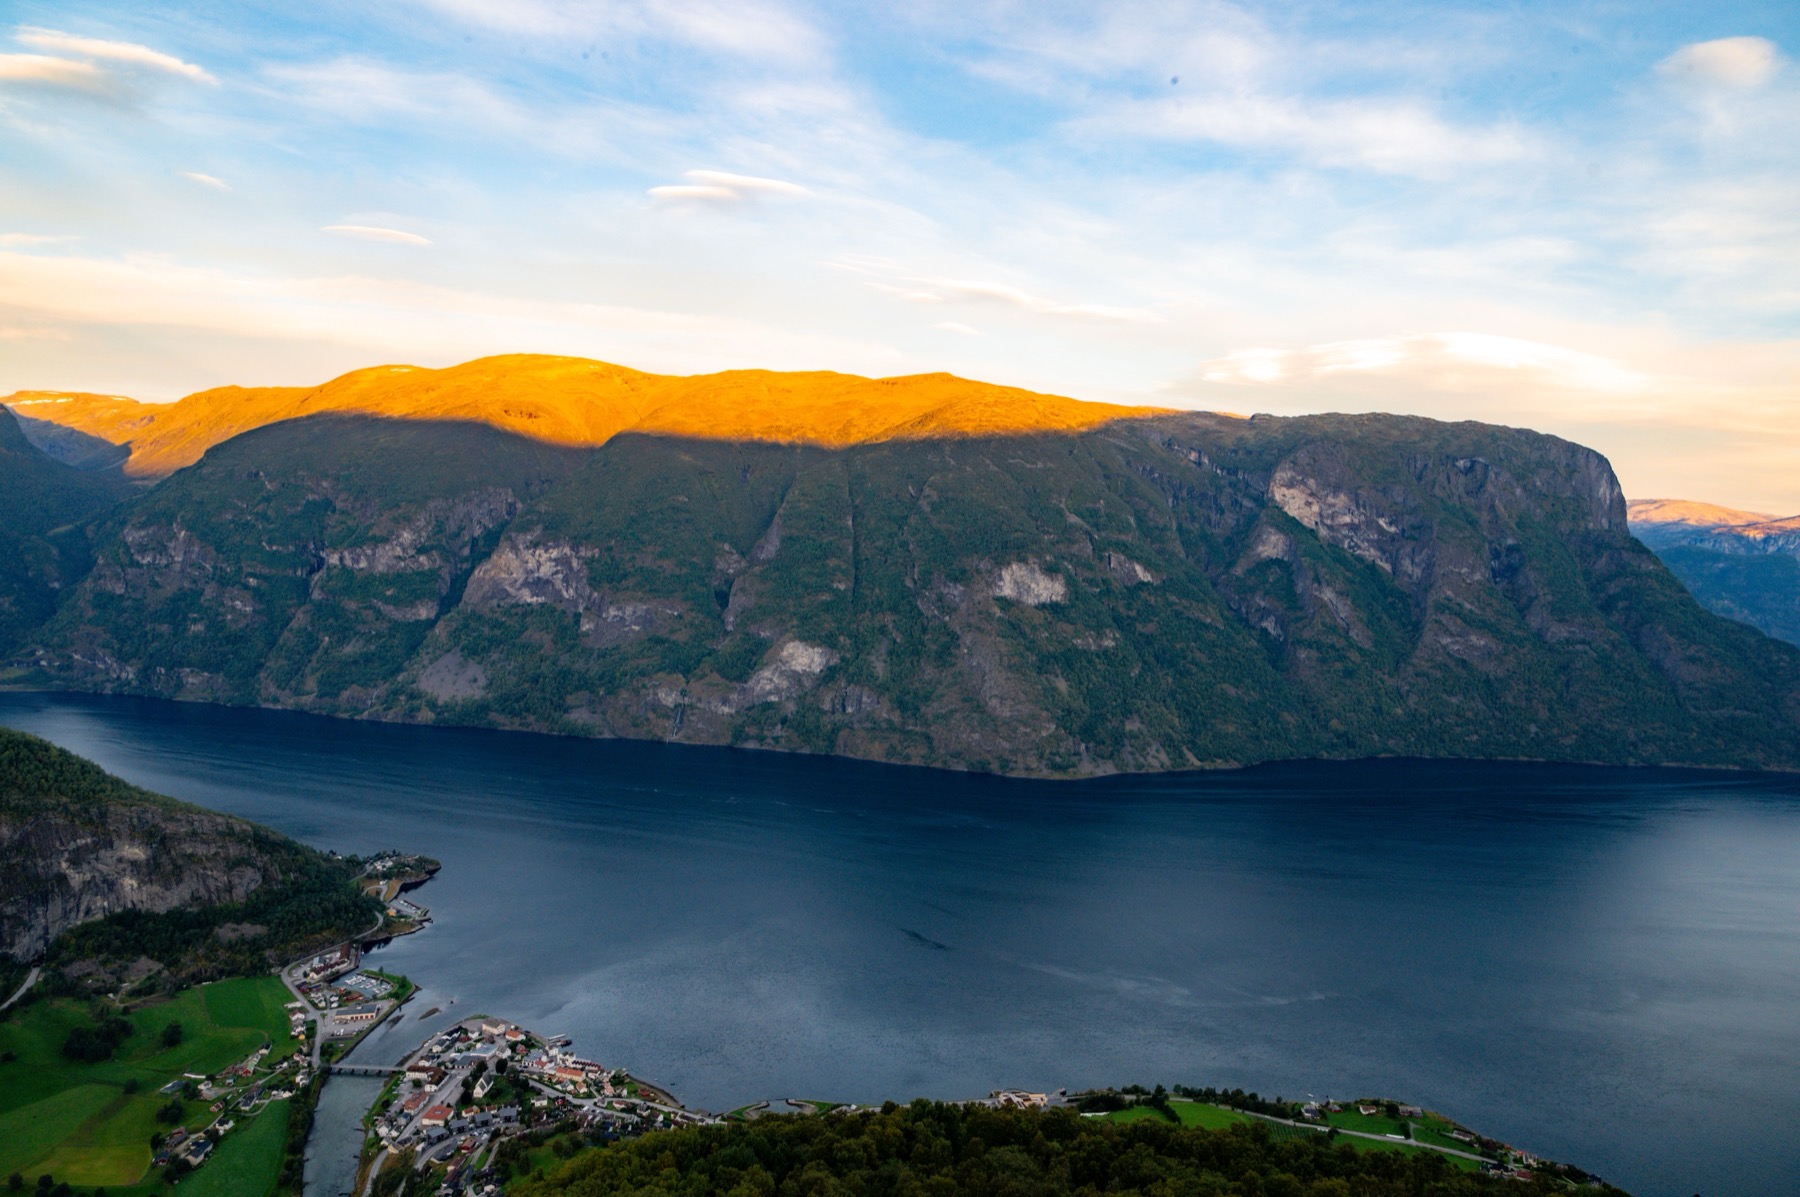
After returning from the cruise, hop in the car and head up a narrow road to the Stegastein viewpoint. This elegant wooden platform juts a full thirty metres out into the void above the Aurlandsfjord and ends in nothing but a sheet of transparent glass, which will reliably get the pulse racing for anyone with a fear of heights. In the afternoon you can fit in a short walk to nearby waterfalls and then rest up at your hotel in the evening.

💡 Tip: To avoid the biggest crowds at the Stegastein viewpoint, go either early in the morning before breakfast or, conversely, in the early evening, once most of the tourists from the cruise ships have already left.

Day 4: Over the Mountains to Rainy Bergen

After breakfast you’ll leave Flåm and head towards the west coast to historic Bergen. The journey takes roughly three hours of pure driving time and runs mostly through the scenic Voss region, known as the centre of Norwegian adrenaline sports. Along the way you’ll pass dozens of smaller lakes and deep forests that practically beg you to make short stops and picnic out in nature.

You’ll probably reach Bergen shortly after noon, which gives you plenty of time for a first taste of the city. Park the car, drop your things at the hotel, and head out for an early-evening stroll around the harbour, where the smell of the sea mingles with the historic atmosphere. Bergen is notorious for its rainy weather, so keep an umbrella or a good waterproof jacket to hand, even when there isn’t a single cloud in the sky.

💡 Tip: There’s an environmental toll for entering central Bergen, which changes depending on the time of day and rush-hour traffic. The AutoPASS system records it automatically — you don’t need to stop anywhere or pay in cash.

Day 5: Bryggen and Bergen’s Streets

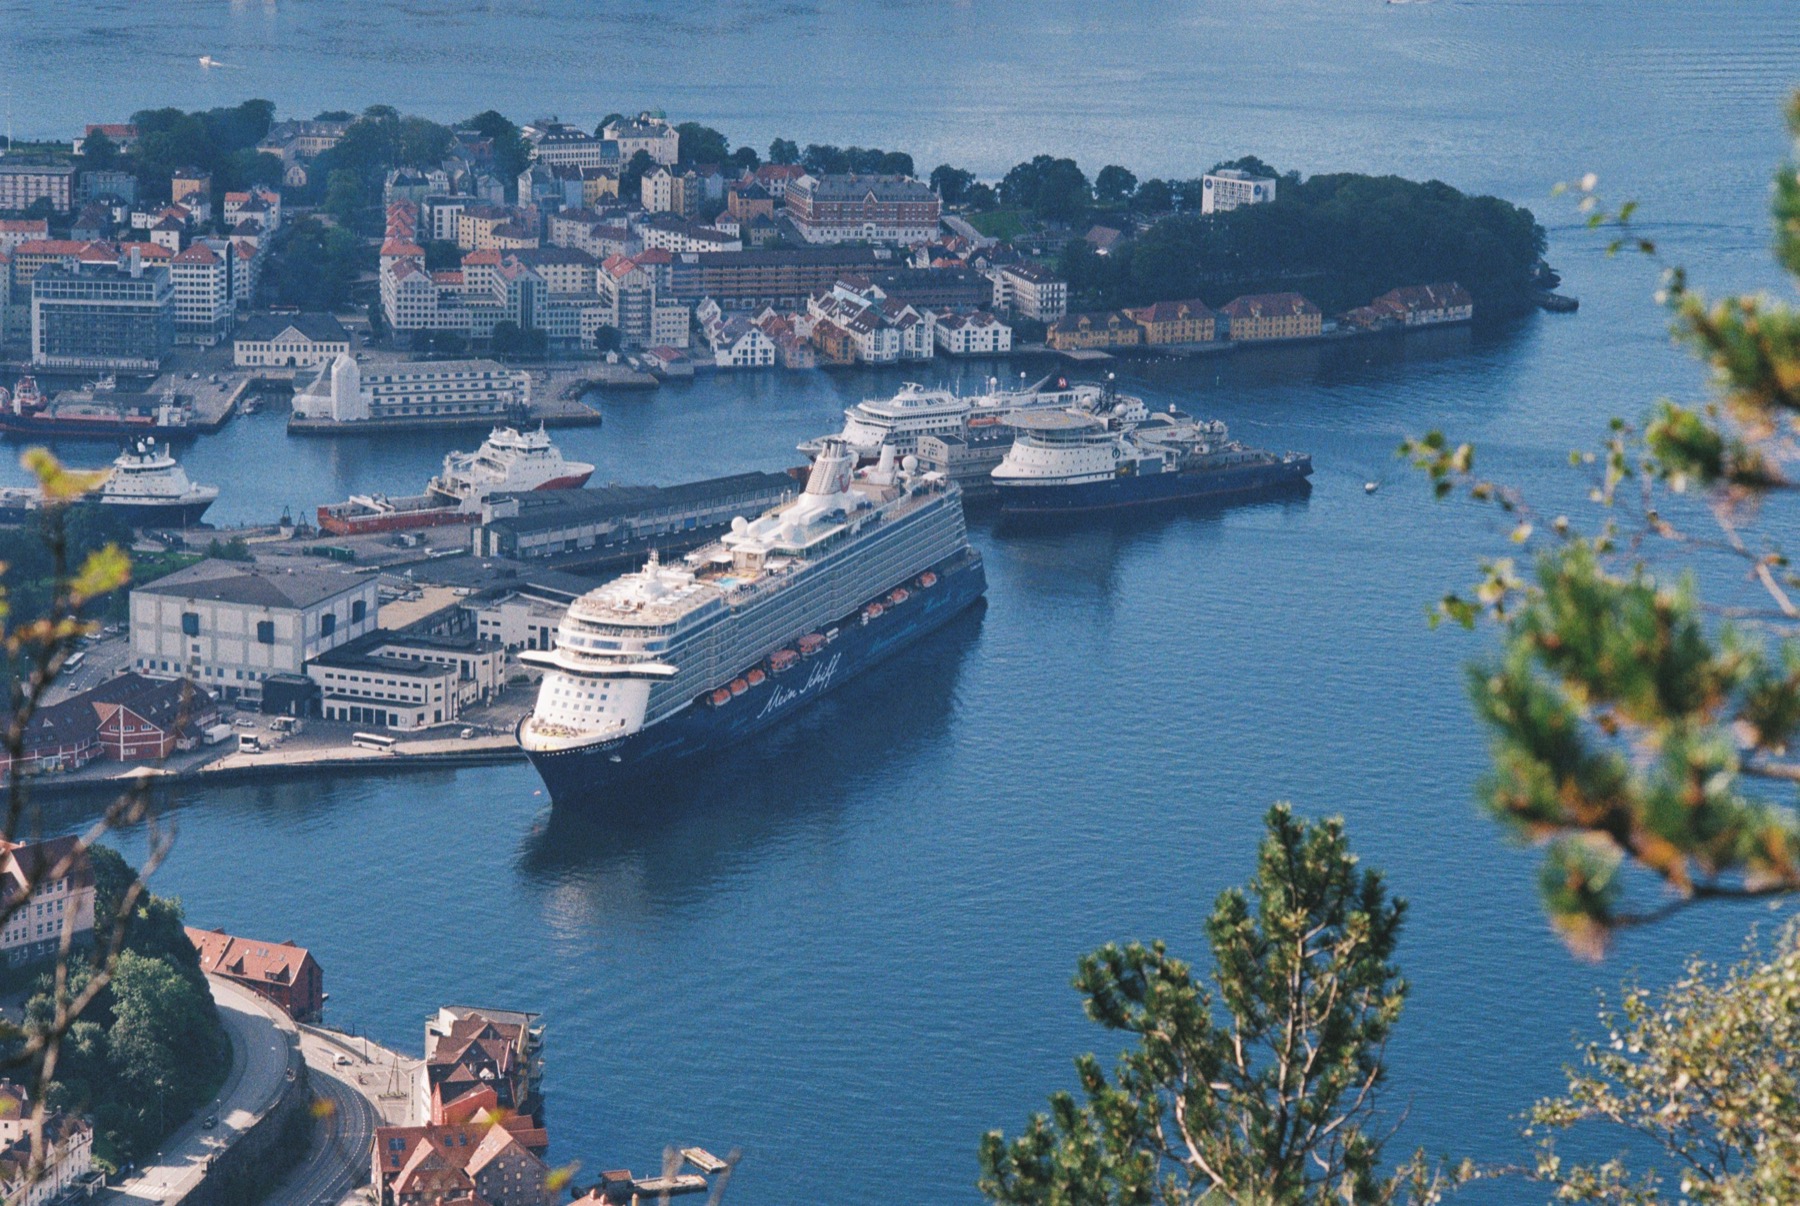
Dedicate the whole of day five to exploring Bergen, nicknamed the gateway to the fjords. Your first steps should lead to the Bryggen district, a row of colourful wooden Hanseatic houses lining the waterfront, whose narrow, slightly crooked lanes hide craft workshops, galleries and cosy cafés. Right across from it you’ll find the famous fish market. The local specialities are, naturally, fish and seafood, but if meat isn’t your thing, you’ll also find great stalls offering fresh artisan bread and excellent local cheeses.

In the afternoon, don’t miss the ride up the Fløibanen funicular to Mount Fløyen, which rises right above the city. From the summit you’ll get a breathtaking panoramic view over the whole of Bergen and the surrounding islands, and if you fancy a bit of exercise, you can head back to the centre on foot along well-marked forest trails.

💡 Tip: If it’s really pouring (which happens often in Bergen), take shelter in the KODE museums, an extensive complex of art galleries set along a picturesque little lake in the city centre.

Day 6: Apple Orchards in Hardanger

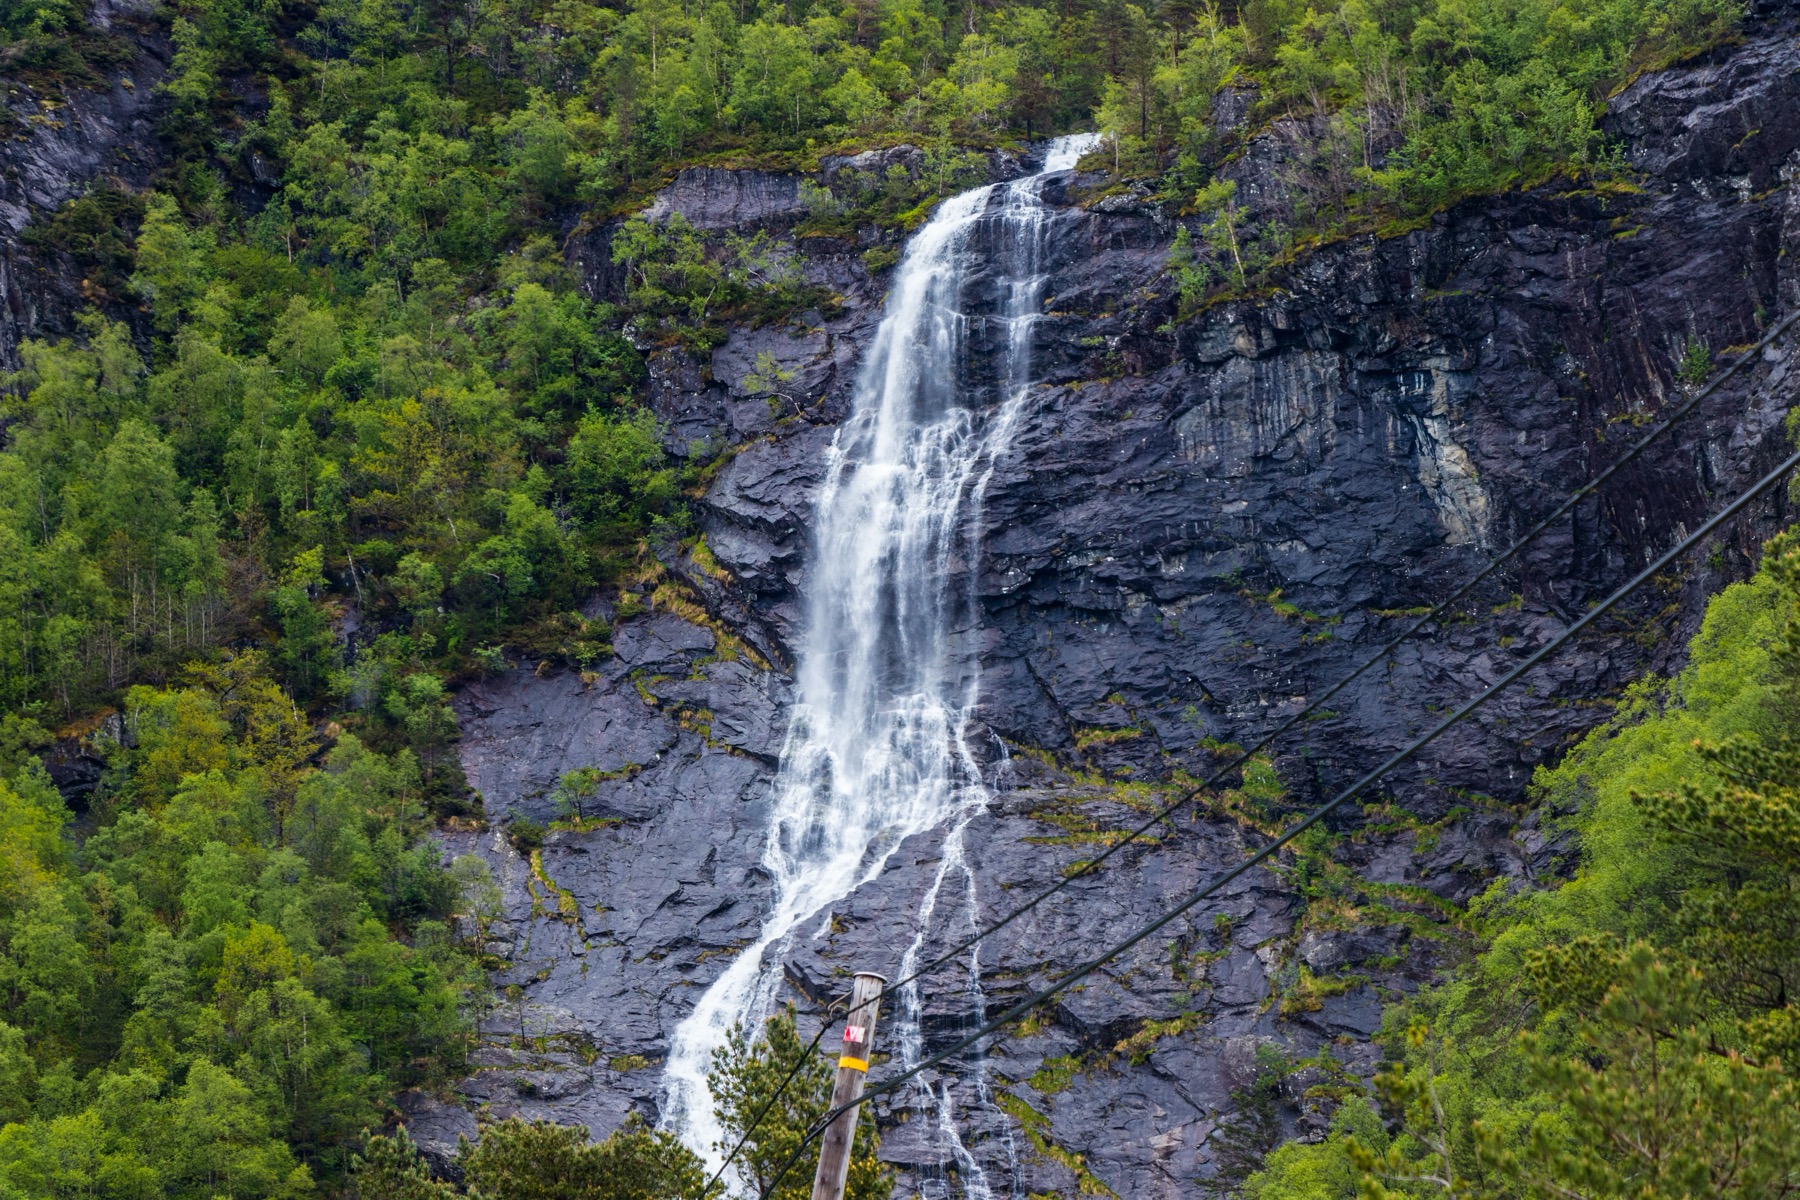
You’ll leave Bergen and head back inland, this time to the Hardangerfjord region, famous for its fruit orchards. Along the way, be sure to stop at Steindalsfossen waterfall, which is unique in that you can walk along a safe little path right behind its falling wall of water without getting wet. It’s a stunning experience and a great spot for photos.

Once you reach the fjord itself, the landscape shifts slightly and turns more rugged. Your main goal for today is the staggering Vøringsfossen waterfall, located near the town of Eidfjord. The water plunges into a deep, narrow canyon from a height of over 180 metres, and a new, very boldly designed footbridge was recently built here, leading you right out over the abyss. You’ll spend the night in one of the villages along the fjord, ideally in Eidfjord or the picturesque Lofthus.

💡 Tip: The Hardanger region grows the best apples in all of Norway. Be sure to stop at one of the small farm stalls by the road and buy some local artisan apple cider (eplemost).

lukas a lucka
Lukáš and Lucie recommend
Where to Stay in Norway
6 accommodations — wellness hotels, hotels and other accommodation options

Day 7: The Long Mountain Crossing to Geiranger

Brace yourself: in terms of driving, day seven will be the most demanding of the entire itinerary. You face a crossing from Hardanger northwards to the legendary Geirangerfjord. This route takes at least five to six hours of pure driving and also involves crossing fjords by ferry, so the total travel time easily stretches into a full day. Don’t let that put you off, though, because the road itself is the destination here, and the scenery changes around every bend.

You’ll drive across vast highland plateaus, where remnants of snow often linger even in the middle of summer, pass lakes with turquoise water fed by glaciers, and travel through countless shorter and longer tunnels. When the view into the deep valley of Geiranger first opens up before you in the early evening, you’ll understand why the whole world admires this place. Check into accommodation right in the town and enjoy a well-earned rest.

💡 Tip: For long crossings, always stock the car the evening before with plenty of food and drink. Refreshment options in remote mountain areas tend to be limited, and petrol stations appear only rarely.

Day 8: Geiranger, the Eagle Road and Magical Trollstigen

Start your morning in Geiranger as early as possible, before the town fills up with tourists from the big cruise ships. Hop in the car and drive the endless hairpin bends up to the Dalsnibba viewpoint, which sits at an altitude of 1,500 metres and offers a breathtaking view down onto the fjord, which from up here looks like nothing more than a small blue ribbon. After heading back down, don’t miss a cruise along the Geirangerfjord itself, during which you’ll see the famous Seven Sisters waterfalls up close.

The afternoon brings another driving thrill. You’ll set off along the steep Eagle Road (Ørnevegen) and travel over the mountains to one of Europe’s most famous roads. The Troll Road (Trollstigen) cuts into a sheer rock face in eleven sharp hairpin bends, and driving it is a genuine adrenaline rush, especially when you meet a coach coming the other way. After successfully descending into the valley, you’ll arrive in the town of Åndalsnes, known as the main hub of Norwegian mountaineering, where you’ll also spend the night.

💡 Tip: At the top of the Troll Road there’s a modern visitor centre with several viewing platforms suspended in the air over the valley. Give yourself plenty of time here for photos.

Day 9: Leaping Over the Waves on the Atlantic Road

After yesterday’s mountain massifs, the landscape changes dramatically on day nine as you head straight to the ocean coast. From Åndalsnes you’ll make your way towards the town of Molde, from where a ferry takes you closer to the famous Atlantic Road (Atlanterhavsveien). This architectural marvel links islets and reefs by means of eight bridges, and driving it feels more like flying low over the water.

The most famous and most photographed spot is the Storseisundet bridge, which thanks to its asymmetrical shape looks, from certain angles, as though it ends in mid-air and the cars are dropping straight into the sea. If you’re lucky enough to catch wilder weather, you’ll see the ocean waves crashing right into the pillars, with the spray occasionally drenching passing cars. In the evening you’ll stay either in the modern town of Molde or in the more historic Kristiansund at the northern end of the road.

💡 Tip: An excellent scenic walking trail with boardwalks runs right by the sea along the Atlantic Road. Park at one of the rest areas and take a stroll on foot — you might even spot seals playing in the waves.

Day 10: Art Nouveau Ålesund and the Flight Home

The final day of your Norwegian road trip belongs to the town of Ålesund, which sits across several small islands and boasts utterly unique architecture. After a devastating fire at the beginning of the 20th century, the entire centre was completely rebuilt in elegant art nouveau style, which is why you’ll find houses adorned with turrets, gargoyles and colourful ornaments that form a perfect contrast with the cold ocean waters all around.

Before you head to the nearby Vigra Airport (or set off on the long drive back south), be sure to climb up to the Aksla viewpoint. There are 418 steps leading up directly from the town park, and the view of the bay, the islands and the mountains in the background is an absolutely perfect way to round off the whole journey.

💡 Tip: Ålesund is also a great place to pick up your last souvenirs. In the local galleries you’ll find beautiful glass and ceramic pieces that will remind you of your Nordic trip for years to come.

Where to Stay Along the Route

💡 Tip for accommodation and experiences: We prefer to look for places to stay on Booking.com, which tends to have the best cancellation terms. It’s then worth comparing and buying tickets, tours and activities through GetYourGuide.

Given that this is the most popular tourist route in the country, I’d recommend leaving nothing to chance and sorting out your accommodation as much as half a year in advance. If you turn up at a fjord in July without a reservation, you could very easily end up sleeping in the car, because every hotel within a fifty-kilometre radius will be hopelessly full. Good old Booking is perfect for reservations, with everything from small guesthouses to large luxury resorts.

Here’s a summary of the best bases along with specific hotel tips worth trying:

  • In Oslo: A great choice is the Thon Hotel Rosenkrantz, located right in the centre just a stone’s throw from parliament, and famous for serving one of the best and most generous breakfasts in the entire city.
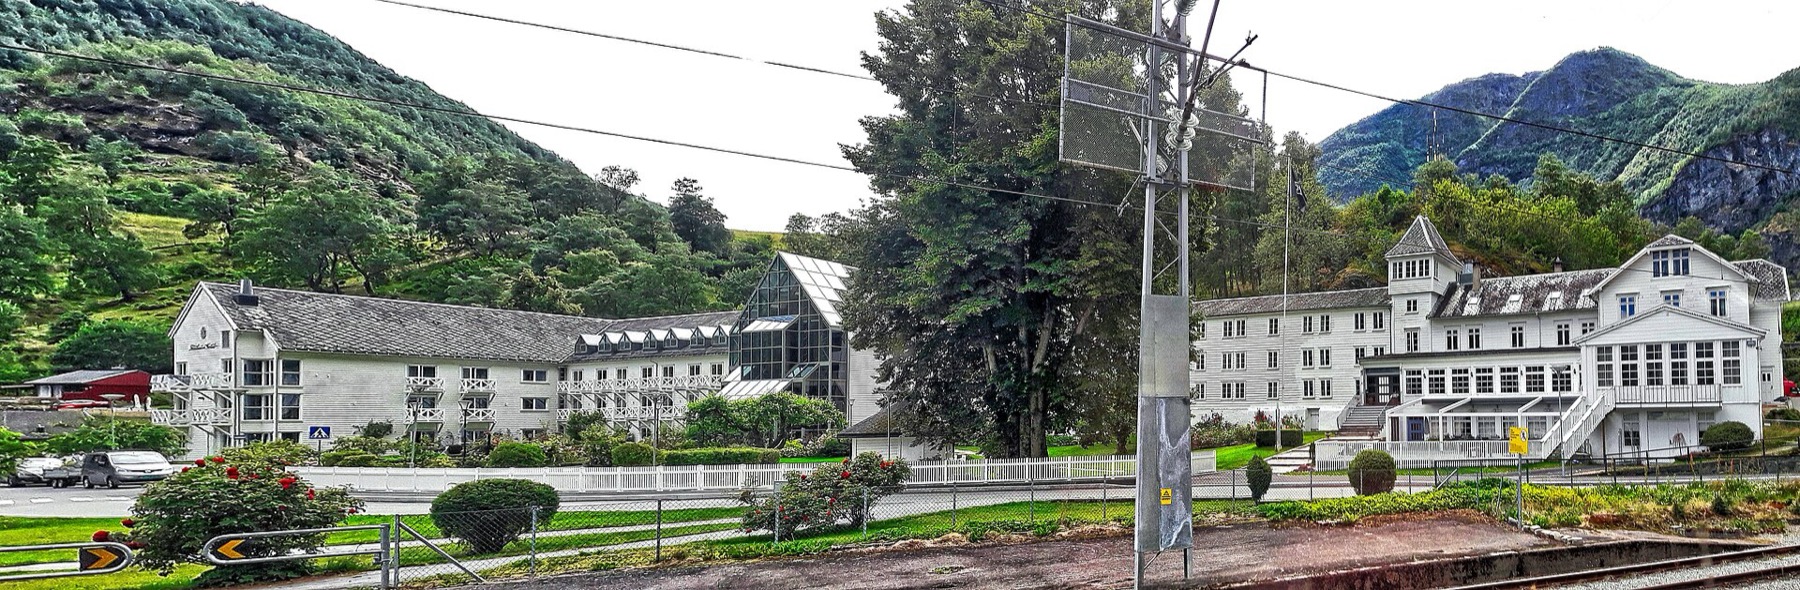
  • In Flåm: If you want a taste of history, stay at the gorgeous Fretheim Hotel, a grand historic building with beautiful gardens that dates back to the dawn of Norwegian tourism in the late 19th century.
  • In Bergen: Go for a strategic location near the harbour — the Thon Hotel Orion is excellent, just a few minutes’ walk from the famous Bryggen Hanseatic houses and the funicular.
  • In Geiranger: For maximum comfort and relaxation in the heart of the mountains, the iconic Hotel Union Geiranger fits the bill, perched on a hill above the village and boasting a fantastic wellness centre with mountain views.
  • In Åndalsnes: A wonderful family atmosphere and modern Nordic design are on offer at Hotel Aak, which caters to active travellers — and after a full day of driving, you’ll find perfect peace and quiet here.

Where to Go Next

If you already have your itinerary roughly figured out and you’re after more detail on specific places, or you need to soak up more practical advice before your trip, take a look at these companion articles:

  • Norway: 50 Things to See — A huge overview of the most interesting places across the whole country, perfect if you’re considering stretching out your route.
  • Norway by Car: Road Trip and Practical Tips — An article focused purely on driving, where I break down tolls, speed limits and how the ferries work in detail.
  • Norwegian Fjords — A Guide — A detailed look at the most beautiful inlets of the west coast and tips on how to enjoy them both from the deck of a boat and from mountain viewpoints.
  • Geirangerfjord — A standalone guide dedicated to the king of all fjords, because this place simply deserves an article of its own.

Frequently Asked Questions

How many days is enough for Norway?

If you want to see the main highlights of the western fjords, 7 days is the absolute minimum. The ideal and most recommended length is 10 days, which allows you to drive the route at a relaxed pace. If you want to add Preikestolen in the south or fly to the north, set aside at least 14 days or more.

Can this itinerary be done without a car?

“`html
Partly yes, but you’ll miss out on a great deal of freedom. You can use the popular “Norway in a Nutshell” package, which combines trains and boats between Oslo, Flåm and Bergen, but getting to more remote places and mountain viewpoints like Trollstigen by public transport is very complicated.
“`

Is it better to go for 7, 10, or 14 days?

The golden middle ground is 10 days, because you’ll cover all the icons of the south and west without a frantic pace. The one-week option is very condensed and you’ll have to cut out interesting places, while 14 days gives you space to discover lesser-known corners or combine the south with the Arctic north.

When to set out on this trip?

“`html
The safest and most beautiful period is roughly from the end of May to the beginning of September. During this time, the snow on mountain roads has usually melted, nature is beautifully green, and all tourist attractions including ferries operate at full capacity.
“`

How much does it all cost roughly?

Calculate that when traveling as a couple in a rental car and sleeping in mid-range hotels, your daily budget will be roughly between €170 and €240. This includes the car, petrol, tolls, accommodation and occasional restaurant visits, with the rest of your meals covered by supermarket shopping.

Where is the best place to start and end the route?

This classic circuit is best to start in Oslo, as it has the most flight connections and you can easily rent a car. You can finish either in Bergen or in Ålesund, from where you’ll fly home with a connection, or you can return to Oslo airport with one last long drive.

Can I handle this road trip even with small children?

Absolutely yes, Norwegians are an incredibly family-friendly nation. However, I recommend loosening the itinerary a bit, avoiding eight-hour car journeys and instead spending at least two nights in each place, so you can give the children time to rest and play in nature.

Tips and Tricks for Your Vacation

Don’t Overpay for Flights

Search for flights on Kayak. It’s our favorite search engine because it scans the websites of all airlines and always finds the cheapest connection.

Book Your Accommodation Smartly

The best experiences we’ve had when looking for accommodation (from Alaska to Morocco) are with Booking.com, where hotels, apartments, and entire houses are usually the cheapest and most widely available.

Don’t Forget Travel Insurance

Good travel insurance will protect you against illness, accidents, theft, or flight cancellations. We’ve had a few hospital visits abroad, so we know how important it is to have proper insurance arranged.

Where we insure ourselves: SafetyWing (best for everyone) and TrueTraveller (for extra-long trips).

Why don’t we recommend any Czech insurance company? Because they have too many restrictions. They set limits on the number of days abroad, travel insurance via a credit card often requires you to pay medical expenses only with that card, and they frequently limit the number of returns to the Czech Republic.

Find the Best Experiences

Get Your Guide is a huge online marketplace where you can book guided walks, trips, skip-the-line tickets, tours, and much more. We always find some extra fun there!
Flåm Railway (Flåmsbana): 7 Things to See and Do on Norway’s Most Beautiful Train Line in 2026

TL;DRSeven things to know before you ride the Flåm Railway: the line itself climbs over 800 metres across just 20 kilometres, there’s a stop at the Kjosfossen waterfall (93 metres) where a Huldra fairy dances for passengers, the village of Flåm has the Flåmsbana Museet and the Ægir brewery worth a look, a side trip up to the Stegastein viewpoint puts you 650 metres above the Aurlandsfjord, the Norway in a Nutshell route takes you through the Nærøyfjord, there’s the Rallarvegen cycling trail, and tickets (a return costs around 600 NOK) are worth sorting out in advance. Set aside at least a full day for the area, ideally with an overnight stop. June to August is the best time to come, but book your tickets online well ahead, as summer sells out fast.

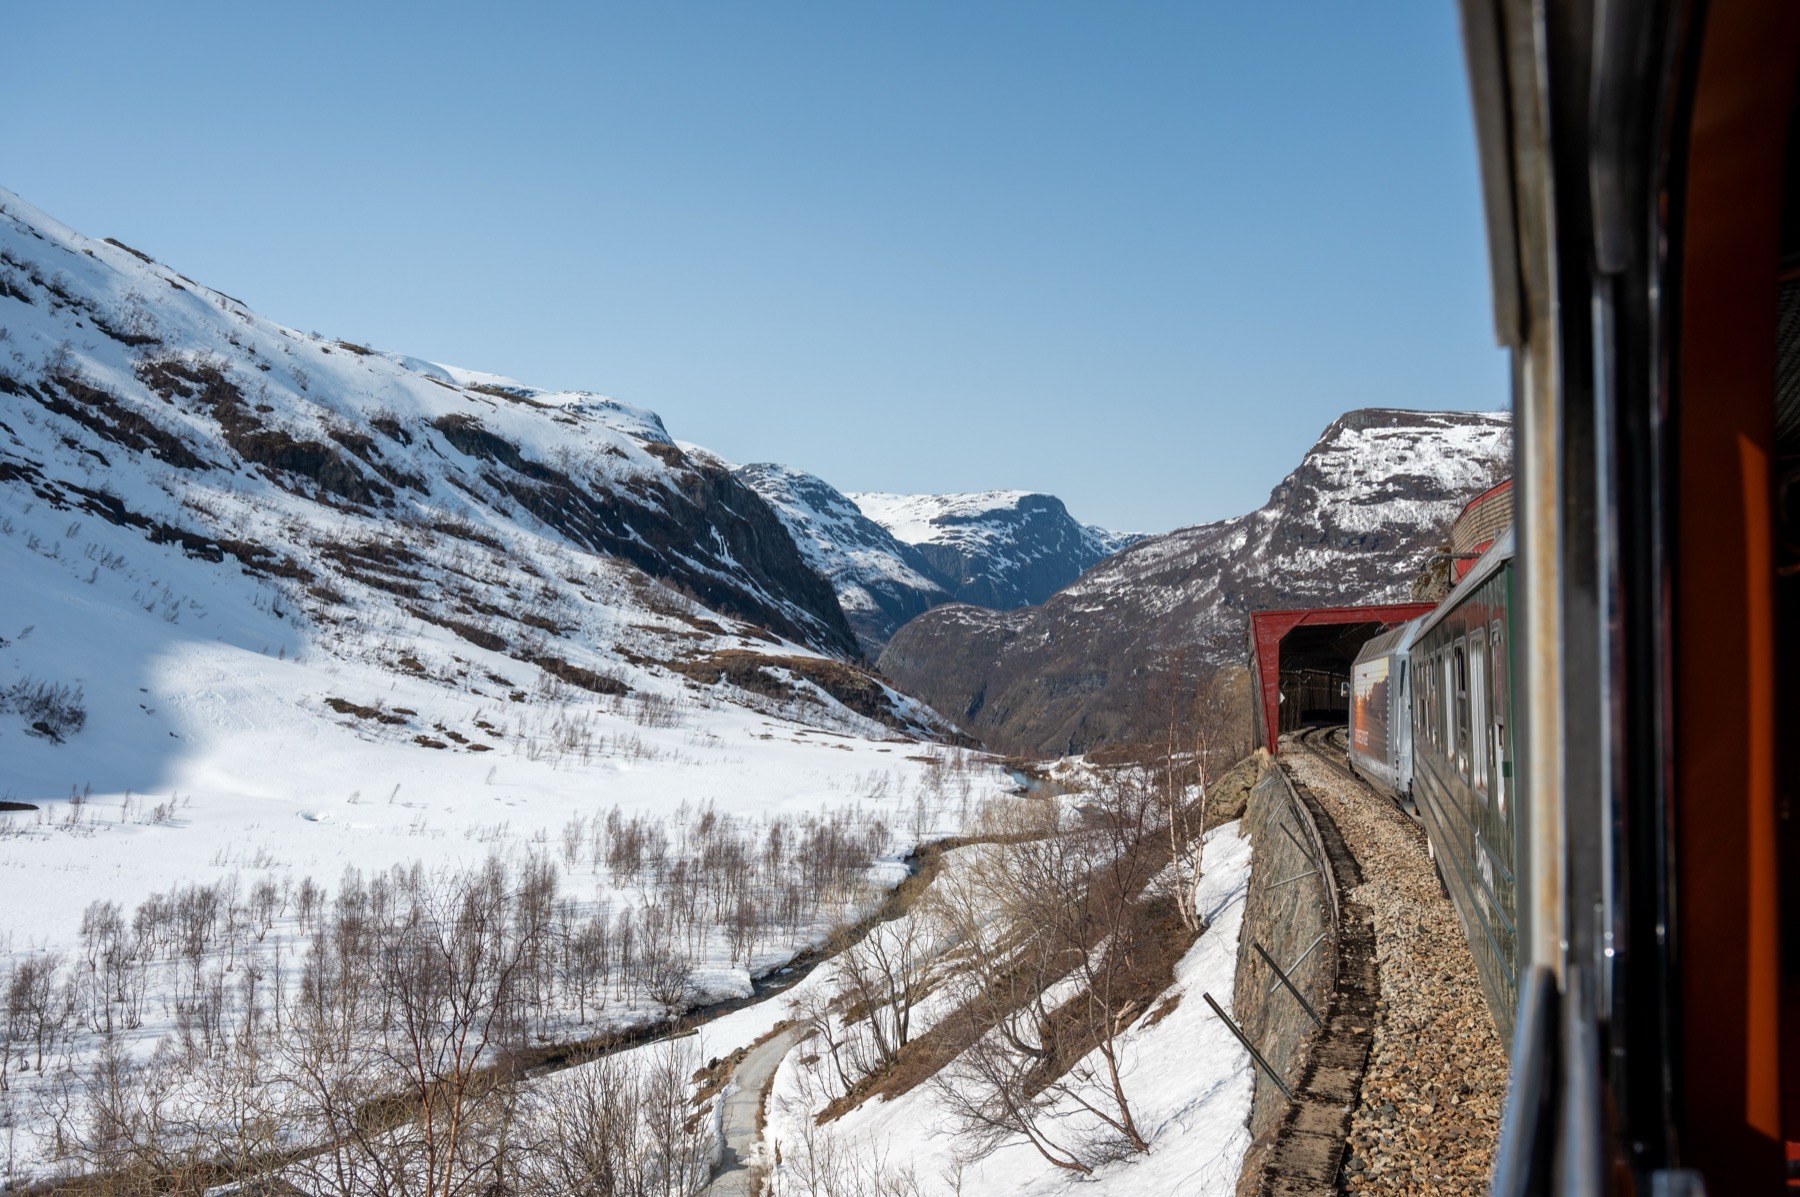
Norway is famous for its deep fjords and rugged Nordic wilderness, but there’s one engineering marvel that lets you take it all in from the comfort of a soft seat. The Flåm Railway (Flåmsbana) in Flåm, Norway rightfully and regularly tops the charts of the most beautiful train journeys on the entire planet.

In just twenty kilometres of travel, you’ll climb (or descend) an enormous elevation change of more than eight hundred metres, all while admiring steep green valleys and thundering waterfalls. The journey from the high-mountain station of Myrdal all the way down to the surface of the majestic Aurlandsfjord is simply something you absolutely shouldn’t miss when visiting Scandinavia.

In this guide, we’ll walk through all the essential information so you can plan your Nordic trip completely stress-free. You’ll learn how to secure your tickets well in advance, why the photo stop at the Kjosfossen waterfall is worth it, and where to stay strategically right in the picturesque little village of Flåm.

TL;DR

  • Length and route: The Flåm Railway runs 20 kilometres and connects the mountain station of Myrdal with the harbour village of Flåm.
  • Extreme gradient: It’s one of the steepest standard-gauge railways in the world, with the track reaching a gradient of up to 5.5 percent.
  • Best views: On the descent from Myrdal, sit on the right-hand side of the train to see the deep valley in all its glory.
  • Waterfall stop: The train makes a special pause at the mighty Kjosfossen waterfall, where the mythical Huldra fairy appears during the season.
  • Booking is a must: Tickets sell out in a flash during the summer months, so buying online well ahead of time is absolutely essential.
  • Part of a bigger trip: The route forms the very heart of the popular Norway in a Nutshell tour.

When to Go and How to Get to Flåm

Planning a trip to the Flåm Railway takes a bit of strategic thinking, especially if you want to dodge the biggest crowds of cruise-ship tourists. The main summer season runs from June to August, when the entire valley is beautifully green and the temperatures are at their most pleasant — but you’ll also have to reckon with fully booked carriages. Spring and autumn offer a noticeably calmer atmosphere, while a winter ride through the snow-covered landscape feels like a genuine Nordic fairytale. If you’re checking the forecast before you go, the Flåm, Norway weather is famously changeable, so pack layers no matter the season.

If you’re travelling by public transport, your starting point will most likely be the high-mountain station of Myrdal. You reach it via the main Bergensbanen railway line, which connects the Norwegian capital Oslo with the coastal city of Bergen. The journey from Oslo takes roughly four and a half hours, while from Bergen you’ll be in Myrdal in about two hours. Coming from the UK, the easiest route is to fly into Bergen — direct flights run from London and several regional airports — and then take the scenic train onward. If you prefer a road trip and have a hire car, you can drive straight into the village of Flåm, passing through the famous Lærdal Tunnel along the way.

Where to Stay: Hotels in Flåm, Norway

💡 Tip for accommodation and experiences: We love searching for places to stay on Booking.com, where the cancellation terms tend to be the best. For tickets, tours and activities, it’s worth comparing and booking through GetYourGuide.

Finding good accommodation right in the village of Flåm can be quite a challenge during peak season, so it pays to sort your booking even six months ahead. Most hotels are located right next to the harbour and the railway station, so you won’t have to drag your suitcases far. Prices here usually range from 1,600 to 2,800 NOK per night (roughly 140 to 245 €), depending on the season and room type.

I’d definitely recommend taking a look at the Fretheim Hotel, a gorgeous historic building brimming with charm that stands just a few steps from both the fjord and the station itself. Another excellent choice is the Flåmsbrygga Hotel, which sits right by the harbour pier and is home to a beloved local brewery, so you won’t have far to go for an evening drink. You can easily book both of these through Booking, where you can also keep an eye out for free cancellation.

7 Things to See and Do Around the Flåm Railway

The Flåm Railway isn’t just about sitting in a carriage and being carried down to the fjord. The whole Flåmsdalen valley works as a complete experience destination, offering an incredible range of activities for lovers of nature, history and good food alike. To make the most of your time in this area, I’ve put together a detailed list of places and experiences.

You’ll find everything here, from hikes and bike rides to cruises across the deepest fjords in the country. Set aside at least one full day for this area, ideally with an overnight stay, so you can savour the early-evening calm once the big tour groups have headed back to their cruise ships.

1. Riding the Steepest Railway

The Flåmsbana journey itself is an astonishing feat of engineering that took a full twenty years to build and demanded an enormous amount of effort. Over its twenty kilometres, the train tackles a gradient of up to 5.5 percent, making it one of the steepest standard-gauge railways in the world. Along the way you’ll pass through no fewer than twenty tunnels, eighteen of which were carved into the hard Norwegian rock entirely by hand, without any heavy machinery.

The scenery outside the window changes by the minute, as the rugged high-mountain plateaus around Myrdal gradually give way to lush green pastures in the valley. The train deliberately travels very slowly, so passengers can soak in all those dramatic views of deep ravines and farms scattered across the mountainsides. The carriages are also fitted with large panoramic windows and a nostalgic wooden interior that gives the whole experience just the right historic atmosphere.

💡 Tip: If you’re travelling from Myrdal down to Flåm, try to grab a seat on the right-hand side of the train. It’s from this side that you’ll get the very best views deep into the Flåmsdalen valley itself.

2. Kjosfossen Waterfall and the Huldra Fairy

About halfway through the journey, the train starts to slow down, eventually coming to a complete stop on a specially built wooden platform in the middle of the wilderness. This is where the mighty Kjosfossen waterfall is located, its waters plunging from an impressive height of 93 metres and creating such a powerful spray that you probably won’t stay entirely dry. The stop lasts about five minutes — just enough time to step out and take a few lovely photos.

But this natural spectacle has one more big draw, rooted in old Norse myths and legends. During the summer season, the mysterious Huldra fairy appears at the waterfall — a mythical creature in a long red dress who, according to legend, lured men into the deep forests with her song. Accompanied by dramatic Norwegian folk music echoing through the valley, she performs a short, magical dance right on the rocks beside the thundering water.

Interestingly, the role of this mythical being is usually played by talented students from a Norwegian ballet school. The whole little performance feels almost impossibly mystical in the middle of the wilderness, and for many travellers the moment at Kjosfossen is the most powerful experience of the entire train journey.

3. The Village of Flåm

Your train journey ends right at the water’s edge in the picturesque little village of Flåm, which may have only around 350 permanent residents but bursts at the seams during the season. Right next to the station you’ll find the free Flåmsbana Museet, where you can dive into the fascinating history of building this unique railway and admire the old locomotives. It’s a great way to understand just how incredibly demanding it was to construct a working line in such extreme mountain terrain.

When hunger strikes after your journey, don’t miss the famous local Ægir brewery, whose building looks from the outside like a traditional Viking stave church. Inside, you’ll be greeted by a wonderful atmosphere with a huge fireplace in the centre of the room, where you can order a tasting board of their craft beers. Beyond the excellent drinks, the brewery serves a varied range of local dishes, and vegetarians are well catered for too, thanks to some great meat-free specialities inspired by Nordic cuisine.

Flåm also serves as the main launch point for exploring the surrounding nature by water. A whole fleet of cruise boats and fast craft is moored in the harbour, but if you prefer a more active kind of relaxation, you can hire a sea kayak here and explore the fjord’s quiet corners entirely on your own.

lukas a lucka
Lukáš and Lucie recommend
Where to stay in Flåm
3 accommodations — hotels and other lodging options
lukas a lucka
Lukáš and Lucie recommend
Where to Stay in Flåm
3 places to stay — hotels and other accommodation options

4. The Aurlandsfjord and the Stegastein Viewpoint

The village of Flåm lies at the very end of the Aurlandsfjord, one of the most beautiful arms of the vast Sognefjord, which cuts deep into the Norwegian mainland. The sight of the deep blue water hemmed in by steep green hills is absolutely breathtaking and well worth heading out on an organised cruise for. Modern, fully electric boats set off regularly from the local harbour, gliding across the water almost silently so as not to disturb the surrounding wilderness.

If you want to take in all that beauty from a bird’s-eye view, you’ll need to make your way to the famous Stegastein viewing platform. This stunning wooden structure rises 650 metres directly above the surface of the fjord, and thanks to its clear glass edge, you’ll feel as though you’re floating freely in mid-air. It’s reached via a narrow, winding road known as the Snow Road, which might make your head spin a little — but the view is one hundred percent worth it.

Special sightseeing buses run regularly from Flåm to the viewpoint, so you can get there easily even without your own car. The trip takes about an hour and a half including time for photos, so it fits perfectly as an extra afternoon activity once you’ve come down from the mountains by train.

5. The Norway in a Nutshell Tour

If you want to see the best of the Norwegian fjords in a short space of time and don’t have a car, this is your best possible option. The Flåm Railway forms the very heart of the popular Norway in a Nutshell package, which brilliantly links together the country’s most beautiful train and boat routes. There’s no complicated planning required — the whole system is designed so that all the connections fit together perfectly and stress-free.

A typical one-day tour starts early in the morning in Oslo or Bergen with a ride along the main Bergensbanen line to Myrdal station. From there you descend the famous Flåmsbana down to the fjord, where you smoothly transfer to a cruise boat that takes you not only through the Aurlandsfjord but also the breathtaking, UNESCO-listed Nærøyfjord. In places this fjord is just 250 metres wide, with steep cliffs towering more than a kilometre above it.

After the cruise to the village of Gudvangen, the journey continues by bus along steep hairpin bends to the town of Voss, and from there by train back to civilisation. This trip is more demanding in terms of both time and money, but it gives you a truly complete picture of just how diverse and monumental Norwegian nature really is.

6. The Rallarvegen Cycling Route

For travellers who love combining stunning views with a bit of physical effort, the area around the railway is an absolute paradise. The historic Rallarvegen road originally served the workers who built the railway line at the end of the nineteenth century, and today it ranks as one of the most popular and beautiful cycling routes in all of Norway. You can simply bring your bike with you on the train, ride up to Myrdal station, and then enjoy the twenty-kilometre descent back down.

The route is largely gravel and steep in places, so good brakes and a bit of cycling caution are definitely in order here. On the way down you’ll pass roaring rivers, sheer drops and picturesque mountain farms that the average tourist will never get this close to from a train window. You can stop wherever you fancy and soak up that incredible sense of mountain freedom to the full.

If you don’t have your own gear, there’s no need to worry at all. You can comfortably hire bikes right in Flåm or at other stations along the route, and once you’ve finished your trip you simply return them at your destination, which makes the whole logistics enormously simpler.

7. Tickets, Prices and Booking

Travelling around Norway isn’t exactly a cheap affair, and a ride on this historic train is no exception. A return ticket will set you back around 600 NOK, which works out at roughly 52 €, with the one-way option only marginally cheaper. Even so, it’s such a powerful experience that this investment in memories is well worth it — you won’t regret a penny.

The basic rule for the summer months is not to leave buying your tickets until the last minute. Trains are often sold out weeks in advance, because much of the capacity is snapped up by travel agencies and the huge cruise ships moored in the fjord. If you want to be absolutely certain of getting on the train at your chosen time, buy your tickets online well ahead.

💡 Tip: A great solution is to book your tickets through trusted platforms like GetYourGuide, where you can reserve them from the comfort of home with the benefit of free cancellation. This gives you flexibility in case your travel plans or the weather change dramatically at the last minute.

Where to Go Next from Flåm

Once you’ve explored the Flåmsdalen valley and ridden the train, it would be a shame not to linger in the fjord region a little longer. Norway offers an endless number of beautiful places just waiting to be discovered. If you want to keep exploring the surrounding waterways, I’d recommend reading our article focused on the Sognefjord and Nærøyfjord, where you’ll find plenty of practical information about boat trips.

From Flåm you can also easily get back onto the main railway line and head off for some urban culture on the west coast. Norway’s second-largest city has a wonderful historic atmosphere, which you can read more about in our guide Bergen: what to see. For more comprehensive holiday planning, don’t miss the extensive article Norway: 50 things to see or our big Guide to the Norwegian Fjords, where you’ll find plenty more travel inspiration.

Frequently Asked Questions

Planning a trip to this mountain railway comes with a whole host of practical details. Below I’ve gathered answers to the most common questions that travellers usually have before visiting this area, so you have all the important information neatly in one place.

How much does a ticket for the Flåm Railway cost?

A return ticket on the route from Flåm to Myrdal and back will cost you approximately 600 NOK, which is roughly 60 EUR. If you’re buying just a one-way ticket, the price is somewhat lower. Children usually qualify for significant discounts, which are worth taking advantage of when travelling as a family.

How long does the ride take?

The train journey itself in one direction takes approximately one hour of pure time. During this time, you’ll cover a twenty-kilometer distance and overcome an elevation gain of over eight hundred meters. The train travels very slowly so that passengers have plenty of space for taking photos and admiring the views.

Where to buy tickets?

The best option is to purchase tickets well in advance online through official websites or portals like GetYourGuide. During the peak summer season, connections are usually hopelessly sold out, and relying on buying tickets directly at the station is a huge risk that could ruin your plans.

What is Norway in a Nutshell?

This is a very popular tourist package that combines a train journey from Oslo or Bergen, a ride on the Flåm Railway, and a beautiful boat cruise on the Nærøyfjord. It’s an absolutely ideal choice for anyone who doesn’t have a rental car and wants to see the best of the Norwegian fjords in just one day.

When is the best time to visit?

Most tourists head here during the summer months, when nature is lush green and the weather is most stable. However, if you want to avoid the biggest crowds, feel free to go in autumn, when the trees turn golden, or in winter, when the entire landscape is blanketed in snow and takes on an incredibly romantic charm.

Is the Flåm Railway Worth It?

Definitely yes. Despite the higher ticket price and occasional tourist crowds, this is one of the most beautiful and steepest railway lines in the world. Just the view from the window of the deep valleys and the special stop at the thundering Kjosfossen waterfall are things you won’t forget anytime soon.

How to get to Myrdal and Flåm?

You can reach the mountain station of Myrdal by the main train line Bergensbanen, which connects Oslo and Bergen. From Myrdal, you simply transfer to the Flåmsbana, which takes you down to the fjord. If you’re travelling by rental car, you can comfortably drive directly to the village of Flåm through the system of road tunnels.

Tips and Tricks for Your Vacation

Don’t Overpay for Flights

Search for flights on Kayak. It’s our favorite search engine because it scans the websites of all airlines and always finds the cheapest connection.

Book Your Accommodation Smartly

The best experiences we’ve had when looking for accommodation (from Alaska to Morocco) are with Booking.com, where hotels, apartments, and entire houses are usually the cheapest and most widely available.

Don’t Forget Travel Insurance

Good travel insurance will protect you against illness, accidents, theft, or flight cancellations. We’ve had a few hospital visits abroad, so we know how important it is to have proper insurance arranged.

Where we insure ourselves: SafetyWing (best for everyone) and TrueTraveller (for extra-long trips).

Why don’t we recommend any Czech insurance company? Because they have too many restrictions. They set limits on the number of days abroad, travel insurance via a credit card often requires you to pay medical expenses only with that card, and they frequently limit the number of returns to the Czech Republic.

Find the Best Experiences

Get Your Guide is a huge online marketplace where you can book guided walks, trips, skip-the-line tickets, tours, and much more. We always find some extra fun there!
Breeze eSIM Review 2026: Is This Travel eSIM Worth It?

TL;DRBreeze eSIM suits travellers after the cheapest unlimited data plans who don’t need calls or texts – it covers more than 190 countries, including the US, Japan, Turkey and all of Europe, with unlimited packages running roughly £40–£85 for 30 days depending on destination. Setup is simple via QR code, with no app required, and it holds a 4.3 out of 5 rating on Trustpilot (over 2,600 reviews). The catch is that unlimited data slows down once you’ve burned through 1GB a day, plus there’s no mobile app and customer support is patchy. Compared with rivals like Airalo or Saily, Breeze usually comes in £15–£25 cheaper on unlimited plans, but with less polish. If you want a premium experience with better support, go for Saily or Airalo instead.

Looking for a reliable travel eSIM that keeps you connected abroad without those eye-watering roaming charges? Breeze eSIM covers more than 190 countries worldwide, with straightforward setup and competitive pricing. In this review we’ll take a close look at whether Breeze eSIM is the right choice for your next trip.

TL;DR

✅ Main advantages:

  • The cheapest unlimited plans on the market (~£40–£55/30 days)
  • Works in more than 190 countries
  • Easy installation via QR code
  • Rated 4.3/5 on Trustpilot

❌ Main drawbacks:

  • Data only (no calls or SMS)
  • Unlimited data is throttled after 1GB per day
  • No mobile app
  • Weaker customer support

What is Breeze eSIM and how does it work?

Breeze is a British eSIM provider focused on data plans for travellers. Unlike a traditional plastic SIM card, an eSIM works as a digital profile stored directly in your phone or tablet.

How does it work in practice?

Instead of swapping a physical SIM card in your phone, you buy a data package for your chosen destination on the Breeze website, receive a QR code and scan it into your device. As soon as you land in your destination country, the eSIM automatically connects to a local network and you have instant internet access.

Your original SIM card stays active for calls and texts, while the Breeze eSIM handles your data connection – as long as your phone supports dual SIM technology.

TIP: Read our eSIM-card review

Breeze eSIM: pros and cons at a glance

Curious about the pros and cons of Breeze eSIM? Then read on.

✅ Advantages

  • Wide coverage: Works in more than 190 countries, including popular destinations like the USA, Japan, Turkey and the whole of Europe.
  • No app needed: Unlike its competitors, it doesn’t require you to install a separate app.
  • Early activation: You can install the eSIM up to 6 months before departure.
  • Wide range of plans: From 1GB to unlimited data, valid for 1–30 days.
  • Competitive prices: Especially with unlimited plans, Breeze is one of the cheapest options out there.
  • High rating: 4.3 stars on Trustpilot (as of December 2025).

❌ Disadvantages

  • Limits on unlimited data: Once you use 1GB in a day, your speed is throttled.
  • Data only: You can’t make calls or send regular SMS (you’ll need to use WhatsApp, Messenger, etc.).
  • No app: You can only manage your plans through the web interface.
  • Unreliable customer support: The chatbot often doesn’t work well, and the phone line is frequently busy.
  • Weaker signal outside cities: In remote areas the connection can be unstable.

Breeze eSIM pricing

Breeze offers flexible data plans valid for 1 to 30 days. The cheapest packages start at around £3 for 1GB over 7 days, while the longest 30-day plans with unlimited data range from roughly £40 to £80 depending on the destination.

Example prices for selected destinations

CountryPlan typeDataValidityPrice
FranceCheapest1 GB7 days~£3
FranceUnlimitedUnlimited30 days~£40
MexicoCheapest1 GB7 days~£3.50
MexicoUnlimitedUnlimited30 days~£83
USACheapest1 GB7 days~£2.50
USAUnlimitedUnlimited30 days~£55
JapanCheapest1 GB7 days~£3
JapanUnlimitedUnlimited15 days~£33
TurkeyCheapest1 GB7 days~£3
TurkeyUnlimitedUnlimited30 days~£50

Prices are indicative and were accurate as of December 2025.

Breeze eSIM vs. the competition (Airalo, Saily)

So how does Breeze stack up against its two biggest rivals?

ProviderDestinationsPlan validityCheapest plan
Breeze190+1–30 days~£3 (1 GB, 7 days)
Airalo200+3–30 days~£3.50 (1 GB, 3 days)
Saily200+7–30 days~£1.70 (1 GB, 7 days – Bulgaria)

Where does Breeze shine? Above all with unlimited data plans. A 30-day unlimited plan from Breeze is often £13–£27 cheaper than one from Airalo, Saily or Holafly.

Where does it fall short? Saily has slightly cheaper basic plans and offers a mobile app for easier management. Airalo, meanwhile, covers more destinations.

How to install Breeze eSIM

Installing the Breeze eSIM is a touch more fiddly than with app-based competitors, but it’s still perfectly manageable.

Here’s the process for the most common devices:

Installing on iPhone (iOS)

  1. Open SettingsMobile Data (or Cellular).
  2. Tap Add eSIM.
  3. Choose Enter Details Manually.
  4. Enter the SMDP+ address and activation code from Breeze.
  5. Tap Continue and wait up to 10 minutes for activation.
  6. Once it’s done, tap Done.
  7. In your mobile data settings, set your default line to Primary.
  8. Go back to Mobile Data, select the Breeze eSIM and turn on data roaming.

Installing on Android

  1. Open SettingsNetwork & internet (or Connections).
  2. Tap the + icon next to Mobile network or SIM cards.
  3. Scan the QR code from Breeze.
  4. Enable the eSIM line under Mobile network/SIM cards.
  5. Turn on Mobile data and Data roaming.
  6. If needed, set up the APN according to the instructions in your email from Breeze.

You might also like: Our Maya Mobile eSIM review

Tips for a smooth activation

  • Install it in advance: The Breeze eSIM can be installed up to 6 months ahead – ideally activate it at home over Wi-Fi.
  • Turn on roaming after you land: As soon as you switch off aeroplane mode, enable data roaming (you won’t pay roaming fees – the eSIM simply needs roaming turned on to connect).
  • A stable connection is key: Only activate the eSIM when you have a fast, stable Wi-Fi connection.
  • Keep your original SIM: Your home SIM can stay in the phone, so you remain reachable for calls and texts.

Read also: Our Holafly review

Performance and user reviews

According to reviews on Trustpilot (4.3/5 stars, over 2,600 ratings), Breeze has mostly happy customers:

The most common praise:

  • Easy setup via QR code,
  • quick connection right after landing,
  • excellent value for money,
  • handy alerts when data is running low,
  • reliable connection in cities and tourist areas.

Common complaints:

  • Unstable connection in remote areas,
  • issues with automatic activation for some users,
  • speed throttling on unlimited plans after 1GB per day,
  • weaker customer support.

Performance in practice

  • In big cities: Reliable 4G and 5G connectivity in urban areas with good signal.
  • In the countryside: Quality can vary here – it depends on the local mobile operators’ infrastructure, not on Breeze itself. The eSIM simply uses the available local networks.
  • Unlimited plans: Breeze clearly states that once you use 1GB of data in a day, your speed is capped.

Customer support

Breeze offers more ways to get in touch than most of its rivals:

  • chatbot on the website,
  • email: complaints@breezesim.com,
  • phone: +443303202064,
  • contact form on the website,
  • postal address (London).

In practice? Email or the web form are your most reliable bets. The chatbot mainly responds to preset answers and tends to fall apart with anything specific. The phone line is often engaged.

Breeze eSIM alternatives

For a quick overview, we’ve lined Breeze eSIM up against its most common competitors. This is a rough comparison – prices change depending on destination and current deals.

ServiceCoverageData typePrice from (approx.)HotspotEnglish support
Breeze eSIM190+ countriesData packagessee pricing aboveDepends on plan✅ Yes
Airalo200+ countriesData packages~€3.50/GBYes✅ Yes
Holafly160+ countriesMostly unlimited dataHigher (unlimited)Limited✅ Yes
Saily (NordVPN)200+ countriesData packages~$3.99/GBYes✅ Yes (app)
lk-sim.com (ours)200+ countriesData packagesfrom €3Yes✅ Yes
Rough comparison of eSIM providers. Always check current prices in the relevant app.

Weighing up several options? Let’s take a look at the competition.

When to choose Airalo?

If you want the widest choice of destinations (200+ countries) and prefer to manage everything through a mobile app. It’s a little pricier, but it offers more convenience.

When to choose Saily?

Saily is the most balanced choice – it has a mobile app, transparent unlimited data (with no daily throttling on the Ultra plan), 24/7 customer support and bonus features like ad blocking. If you’re after a premium experience, Saily is the best pick.

Final verdict: is Breeze eSIM worth it?

So, is Breeze eSIM worth it for you?

Who is Breeze a good fit for?

  • travellers looking for the cheapest unlimited data,
  • those who spend most of their time in cities,
  • more experienced users who are comfortable with manual setup,
  • people who don’t need to make calls (WhatsApp and the like are enough).

Who is it probably not for?

  • travellers heading to remote areas with poorer coverage,
  • those who prefer everything in a single app,
  • users who need 24/7 customer support,
  • people who want truly unlimited data with no throttling.

Overall verdict: Breeze eSIM offers great value for money, especially for everyday travel needs. If you’re after an affordable data connection and don’t mind the lack of a mobile app, Breeze is a solid choice. For a premium experience with better support and an app, though, Saily or Airalo are well worth considering.

Prices, coverage and terms for eSIM services change often. The details in this article are indicative and were verified in June 2026 – before you buy, always check the current offer directly in the provider’s app.

Frequently asked questions

Is Breeze eSIM safe?

“`html
Yes, eSIM technology is generally very secure. Unlike a physical SIM card, it can’t be lost, stolen, or physically damaged, and it has built-in security features.
“`

Can I make phone calls with Breeze eSIM?

No, Breeze offers only data connection. For calls you can use VoIP apps like WhatsApp, Viber, Messenger or Skype.

What if I run out of data?

“`html
Breeze will send you a notification when you’ve used 50% and 80% of your data. You can then easily top up with another package or credit through the web interface (ideally over Wi-Fi).
“`

Can I reuse the Breeze eSIM?

Yes, you can top up your eSIM and use it repeatedly for up to 12 months from your last use.

Does Breeze eSIM work on smartwatches?

Currently no. Breeze eSIM only supports smartphones, tablets, laptops and other devices with mobile connectivity.

How to check your data balance?

Log in to your Breeze account and click on Details for the respective eSIM.

Tips and Tricks for Your Vacation

Don’t Overpay for Flights

Search for flights on Kayak. It’s our favorite search engine because it scans the websites of all airlines and always finds the cheapest connection.

Book Your Accommodation Smartly

The best experiences we’ve had when looking for accommodation (from Alaska to Morocco) are with Booking.com, where hotels, apartments, and entire houses are usually the cheapest and most widely available.

Don’t Forget Travel Insurance

Good travel insurance will protect you against illness, accidents, theft, or flight cancellations. We’ve had a few hospital visits abroad, so we know how important it is to have proper insurance arranged.

Where we insure ourselves: SafetyWing (best for everyone) and TrueTraveller (for extra-long trips).

Why don’t we recommend any Czech insurance company? Because they have too many restrictions. They set limits on the number of days abroad, travel insurance via a credit card often requires you to pay medical expenses only with that card, and they frequently limit the number of returns to the Czech Republic.

Find the Best Experiences

Get Your Guide is a huge online marketplace where you can book guided walks, trips, skip-the-line tickets, tours, and much more. We always find some extra fun there!
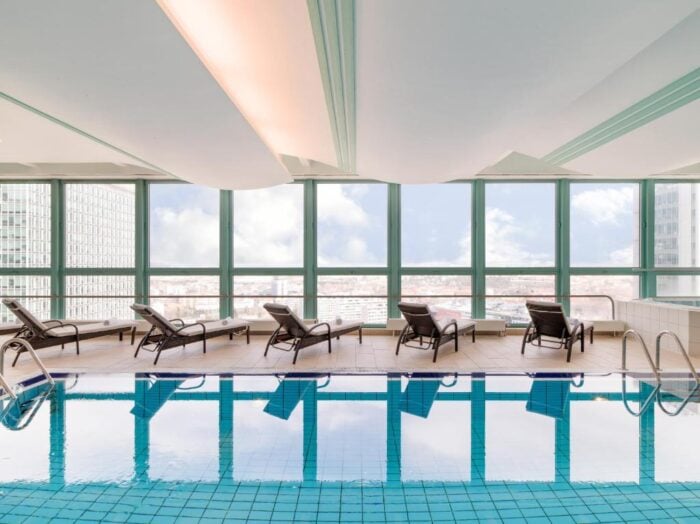
Northern Lights: Where and When to See Them (12 Best Places)

TL;DRYour best bet for catching the northern lights runs from late September to mid-April, right under the auroral oval — think Norway’s Tromsø and the Lofoten Islands, Sweden’s Abisko, Fairbanks in Alaska or Yellowknife in Canada, where even a low KP index of 1–3 will do. The piece rounds up 12 top spots in total, including Iceland, Finnish Lapland, Greenland, the Faroe Islands, northern Scotland, Estonia and Canada’s Yukon. What matters most is proper darkness, timing it around magnetic midnight (roughly 22:00–2:00), and clear skies — a faint display on a clear night beats a strong storm hidden behind cloud. Thanks to the solar maximum from autumn 2024, 2025–2026 promises the best conditions in over a decade.

Standing in the bitter cold deep in the Alaskan wilderness, watching green light start to dance above you for the first time, is one of those moments you’ll never forget for the rest of your life. I still remember the absolute silence, the snow crunching under my feet, and the feeling of sheer wonder when the whole sky suddenly lit up. Chasing the northern lights is, quite simply, a natural spectacle that grabs you and won’t let go.

If you dream of hunting the aurora, I have to warn you up front, because honestly it’s not just about glancing out of your hotel window. It’s often a test of your patience, freezing in snowdrifts, and endlessly watching cloud-cover forecasts — but trust me, the huge reward is absolutely worth it. I’ve put together a detailed list of the places where you have the very best chance of seeing this celestial beauty.

So let’s get to it. I’ll show you twelve places where hunting the northern lights has the greatest chance of success, explain how this whole cosmic miracle actually works, and give you tips on how to photograph the aurora so you walk away with a memory for life.

TL;DR

You’ll see the northern lights most reliably from late September to mid-April in areas lying directly under the auroral oval, such as Tromsø in Norway, Abisko in Sweden, or Fairbanks in Alaska. The keys are complete darkness, the time around magnetic midnight, and above all a clear sky — because remember one golden rule: even the faintest aurora under a clear sky beats a massive solar storm hidden behind thick clouds.

Summary

  • Best season: You can see the northern lights roughly from late September to mid-April, with ideal conditions usually around the spring and autumn equinoxes.
  • The hunters’ golden rule: Low activity (KP 1) under a clear sky will always beat a massive geomagnetic storm (KP 8) if it happens to be overcast.
  • Clearest skies in Europe: Abisko in Sweden benefits from a unique microclimate known as the “Blue Hole,” thanks to which the clouds disappear here even on days when it’s snowing everywhere else.
  • Best accessibility: Tromsø in Norway sits right in the heart of the auroral oval and has great direct flights, even if you’ll often need to chase the clouds away here.
  • An exceptional 2026: The Sun has reached its maximum in the current eleven-year cycle, which means the coming months and years offer the best conditions in over a decade.
  • Shooting on a phone: Modern smartphones now capture the aurora with no problem, but an absolute must is a tripod and the longest possible night-mode exposure.
  • The tricky summer: Even though the aurora physically appears in the sky in July too, thanks to a phenomenon called the polar day you simply won’t see it against the bright sky.

12 Best Places to See the Northern Lights in the World

I’ve ranked them roughly by how certain and at the same time how accessible the northern lights are. For each place you’ll find why it’s good, when to go, and what KP index you usually need.

1. Tromsø (Norway)

Tromsø in Norway lies roughly 350 kilometres north of the Arctic Circle and sits right in the heart of the auroral oval, which makes it probably the most popular base in Europe. The big advantage of this location is that, to witness the gorgeous show, a KP index of 1 or 2 is plenty. The city itself is fairly brightly lit, though, so seasoned hunters recommend driving a little further out into the dark.

Travellers really rate the nearby island of Kvaløya and especially the Sommarøy area, where you’ll find some of the darkest skies for miles around. The reflections of the green light on the surface of the dark fjords are beautiful here and give photos amazing depth. If there’s an impenetrable blanket of cloud directly over the city, it often pays to drive west, where the sky clears up surprisingly fast.

The best time to visit is from late September to early April, with plenty of photographers preferring February and March, when the spring equinox naturally boosts solar activity. Tromsø is very easy to reach thanks to direct flights from Oslo and other European cities — and from the UK you can usually fly via Oslo with SAS or Norwegian — making it the most accessible Arctic destination for ordinary travellers.

💡 Tip: Be genuinely flexible and don’t rely solely on organised tours. Renting a car gives you enormous freedom to chase the bad weather away to exactly where a clear window is forecast.

2. Lofoten Islands (Norway)

The Lofoten archipelago lies exactly under the auroral oval and offers probably the most dramatic natural backdrops you could wish for. Picture steep, snow-covered mountains plunging straight into the sea and iconic red fishermen’s cabins, with the green sky rippling overhead. Just like in Tromsø, here too minimal activity around KP 1 is enough for a successful hunt.

There’s one fairly big catch, though, and that’s the highly unpredictable Norwegian weather. Lofoten is one of the cloudiest spots in the region, so the clouds here can be really persistent and ruin even the best geomagnetic forecast. A typical trip here often means three nights of heavy snowfall and an endless wait for one single clear hour, for which you’ll find yourself driving at night from Flakstad beach all the way to the Eggum lighthouse.

Your best shot at success is during March, when the winter storms slowly start to settle, but the season runs from late August right through to April. You can get here either on a domestic flight to the small airports of Svolvær or Leknes, or by the scenic route by car and ferry from the mainland, which is an unforgettable experience in itself.

💡 Tip: If you’re heading here primarily for the northern lights, book at least five nights so you have enough buffer in case of bad weather. You’ll find more inspiration in our article about the northern lights in Lofoten and our tips on what to see in Lofoten.

3. Iceland

The whole of Iceland sits ideally under the auroral oval, so from a purely geographical standpoint your chances are excellent right across the island. Compared with brightly lit Reykjavík, where you need fairly strong activity around KP 3 to 4 for visibility, much lower values are enough in the dark countryside. The huge advantage of Iceland is the chance to combine aurora hunting with a classic road trip along the famous Ring Road.

A car gives you the single most important weapon in an aurora hunter’s arsenal — the ability to outrun the clouds. When it’s overcast in the south, you can move north or east. A hugely popular spot among photographers is Þingvellir National Park, where there’s minimal light pollution and, on windless nights, the green show reflects perfectly on the calm surface of the vast lake Þingvallavatn.

You’ll enjoy the longest and darkest nights here from October to February, but the equinoxes in late September and March tend to be statistically a bit more active. The journey here is also very easy: plenty of direct flights serve Keflavík airport from all over Europe, including several daily flights from London, and the car rental companies work flawlessly.

💡 Tip: Keep a close eye on the local cloud-cover forecast on the Vedur.is portal, which is far more accurate for the island than global apps. Before you go, be sure to read our article with tips on the northern lights in Iceland and our complete guide to Iceland.

4. Fairbanks and Alaska (USA)

Lukáš and I spent some time in Alaska, and I have to say that watching the sky right here has an utterly unique magic to it. Fairbanks lies inland directly under the auroral oval and, thanks to its distance from the ocean, enjoys a beautifully dry continental climate. In practice that means far more clear nights than in the cloudy coastal regions of Europe, even if it comes at the price of truly brutal cold.

The local university states that the aurora is visible here on over 200 nights a year, and if you’ve got clear skies and darkness, your chances climb incredibly high. From our own experience we can hugely recommend the area around Murphy Dome, where we stood in absolute silence, gazing upward in fascination. A completely different but utterly luxurious experience is then offered by Chena Hot Springs, where at minus twenty you can sit in hot thermal water and watch green streaks right overhead 😅.

The best season here runs from December to March, even though the official season begins as early as August. If you’re after a truly exceptional experience, try staying in the glass igloos at Borealis Basecamp, where you can wait for the spectacle warm and snug from your bed.

💡 Tip: Be prepared for the cold to get genuinely extreme, draining the batteries in both your camera and your phone fast, so tuck them into the inner pockets of your jacket, close to your body. You can read more about our experiences in our pieces on the northern lights in Alaska and tips for Fairbanks.

5. Finnish Lapland and the Glass Igloos

While Rovaniemi sits right on the Arctic Circle, the very best viewing conditions are found a bit further north, around Saariselkä or Ivalo. Finnish Lapland in particular became world-famous for its glass-igloo phenomenon, which offers the most luxurious possible way to wait for the celestial show. In peak season they say you can see the aurora roughly every other clear night, as long as cloud cover doesn’t spoil your plans.

The most iconic resort is undoubtedly Kakslauttanen, where you can rent a combination of a traditional log cabin with a fireplace and sauna, attached to a glass heated dome with a bed. It’s gorgeous, but I have to warn you to keep your expectations realistic. An igloo is simply an expensive bucket-list luxury, but it’s by no means a guarantee that you’ll see the aurora. If it snows heavily all night, you’ll just be staring at snowflakes.

The best time to travel here is from late August to April, ideally around the autumn or spring equinox. You usually fly here with a connection in Helsinki straight to the smaller airports in Rovaniemi or Ivalo, where you can easily pick up a car.

💡 Tip: If you decide to splash out on a pricier igloo resort, treat it mainly as an overall winter experience with sauna sessions and cosy relaxation — the northern lights will then just be the most beautiful cherry on top. Check out our tips for the northern lights in Lapland and Rovaniemi.

6. Abisko (Sweden)

The little town of Abisko in Swedish Lapland boasts one of the greatest natural trump cards in all of Scandinavia. The local mountains on the border with Norway create a strong rain shadow that acts as a perfect shield against cloud coming in off the ocean. The result is a unique microclimate known as the “Blue Hole,” thanks to which the sky here tends to be clear even when snowstorms are raging all around.

Thanks to this blue hole, Abisko has statistically the clearest skies of all the Nordic destinations. It’s said that staying three or more nights gives you a huge chance of success. A massive draw is the local Aurora Sky Station, which sits at an altitude of 900 metres on top of Mount Nuolja. You get up here on a roughly twenty-minute chairlift ride straight through the pitch dark, which is apparently a fantastic experience in itself.

The main season here runs from December to March, when the chairlift operates regularly. The journey here usually goes via the airport in Kiruna, from where it’s just over an hour to Abisko by car or train.

💡 Tip: The night chairlift ride to the top of Nuolja is romantic, but it gets absolutely freezing up there, with temperatures commonly around minus twenty, so definitely don’t turn down the warm thermal suits they lend out here.

7. Yellowknife (Canada)

The capital of Canada’s Northwest Territories proudly calls itself the aurora capital of North America, and it has very good reasons to. Yellowknife lies directly under the auroral oval and benefits from a completely flat subarctic landscape with no high mountains, so you get a totally unobstructed horizon. The dry continental air here also means that during the brutal frosts below minus 30 degrees, clouds simply don’t form.

Thanks to this climate, the displays here are among the very brightest and most colourful on the entire continent. The operators of the famous local Aurora Village, where you can wait for the lights in traditional heated teepees set up on a frozen lake, claim up to a 95% success rate over a three-day stay. Take that statistic with a pinch of salt, but there really are over two hundred clear nights here a year.

The best time to head here is from mid-November to early April. Air connections usually run via Calgary or Edmonton in Canada, straight to the small airport in Yellowknife.

💡 Tip: Don’t get lulled into a false sense of comfort sitting in a heated teepee. As soon as the aurora starts, you’ll dash out onto the frozen lake into temperatures that commonly drop towards minus forty, so top-notch gear is essential.

8. Greenland

Greenland is a destination for true connoisseurs and travellers looking for something more than the usual northern Europe. The area around the town of Kangerlussuaq, for example, is renowned for a reported incredible 300 clear nights a year. The vast Greenland ice sheet creates a permanent high-pressure zone here that reliably pushes the cloud cover away.

An even more magical experience is offered by the famous Ilulissat with its UNESCO-listed icefjord. Just imagine the beauty when the giant floating icebergs light up in green and purple, reflecting the aurora from the sky. Even in the capital, Nuuk, which has minimal light pollution, you can routinely watch the aurora right from the streets — something utterly unique in the world.

The ideal time to visit is from November to mid-March. Air access to Greenland is constantly changing, though, due to the construction of new international airports, so be sure to check current connections via Copenhagen carefully in advance.

💡 Tip: Trips here are among the most expensive in the world, so Greenland makes more sense when you want to see monumental glaciers and Arctic nature, with the northern lights more of a giant added bonus.

9. Faroe Islands

The Faroe Islands lie at 62 degrees north, which places them right on the southern edge of the auroral zone. The islands themselves offer absolutely breathtaking scenery, and since there’s almost no light pollution at all beyond a few larger villages, the conditions for dark skies are perfect. To see the aurora here you need somewhat stronger activity, around KP 3 and above.

Honestly, though, I have to say the main problem with the Faroe Islands is the extremely changeable and rainy weather. The chance that the clouds will part and the wind will drop during the long winter nights is fairly low. The official guides sum it up very tersely: the northern lights only come out when the sky is clear. And in winter, that’s a rarity here.

If you want to risk it, go between November and February, when the nights are longest. You can reach Vágar airport from Copenhagen, and you then get around the islands easily by car thanks to a system of undersea tunnels.

💡 Tip: On a clear winter night you’ll sometimes capture a faint green aurora through the camera aimed at the northern horizon, rather than experiencing a wild colour show directly overhead.

lukas a lucka
Lukáš and Lucie recommend
Where to Stay for Northern Lights
5 accommodations — wellness hotels, campings and other lodging options

10. Northern Scotland

It probably wouldn’t occur to many people to look for the northern lights in the UK, but the far north of Scotland — and especially the Shetland or Orkney islands — has excellent credentials for it. They do lie south of the main oval, so for a proper show you need stronger activity, from KP 4 to KP 5, but the vast dark landscape with no artificial light plays right into the hunters’ hands. If you’re wondering whether the northern lights are visible in the UK tonight, the far north of Scotland is by far your best bet.

Locals use the lovely Shetland name “Mirrie Dancers” for this phenomenon, which translates as the shimmering dancers. The aurora-hunting community here is huge — the local Shetland Aurora Hunter Facebook group, for example, works as a great live activity feed. The vast majority of displays here are just green, but during really strong storms the sky can even turn a rare shade of red.

The best time for a Scottish hunt is from late September to March, ideally between 9 pm and 2 am. You can get here easily on flights from major UK airports to Inverness, or directly to Shetland.

💡 Tip: If you head out hunting here, find a spot with the lowest, most open northern horizon possible, because the aurora here very often plays out low above the horizon and rarely directly at the zenith. Check out our article on a holiday in Scotland too.

11. Estonia and the Baltics

Estonia lies furthest north of all the Baltic states and occasionally pops up on aurora hunters’ radar as an interesting and very accessible alternative. Geographically it sits south of the main auroral belt, but during stronger geomagnetic storms from KP 5 and up, the sky here can light up beautifully. The current solar maximum is especially favourable for these more southerly observations.

Estonian media regularly report on these sightings, but I have to stress that seeing the aurora in the Baltics is more about one-off events than reliable certainty. If you head here between September and March and happen to catch a massive solar flare, all you need to do is drive a little north of Tallinn to the dark coast and you have a great chance of a beautiful experience.

💡 Tip: Travelling to Estonia purely for the northern lights doesn’t statistically pay off, but if you’re already on holiday here and your app warns of a big storm, definitely head out to the sea at night.

12. Yukon (Canada)

The Canadian territory of Yukon, with its capital Whitehorse, is a fantastic alternative for those who want to experience the Canadian wilderness but are put off by the extreme remoteness of the more northerly regions. Whitehorse lies slightly beyond the edge of the main oval, so you need average activity around KP 3 to 4 here, but the big advantage is the excellent accessibility and infrastructure.

Unlike the tiny Nordic settlements, Whitehorse is a proper town with great hotels, restaurants, and car rental offices. The Yukon’s continental climate also delivers a large number of clear, frosty nights. During the current solar maximum, the frequency of visible auroras here can comfortably exceed a hundred nights per season, which is an absolutely amazing figure.

The season here runs from mid-August to the end of April, with the most stable frosty weather usually from January to March. You can reach the local airport very easily from Vancouver or Calgary.

💡 Tip: If you’d rather not freeze in your car at night, local operators offer plenty of comfortable cabins outside town, where you can wait for the aurora with a hot cup of tea by the stove.

Comparison Table at a Glance

PlaceCountryBest seasonKP needed
TromsøNorwayLate September – early AprilKP 1+
LofotenNorwayLate August – mid-AprilKP 1+
IcelandIcelandSeptember – AprilKP 2–4
FairbanksUSA (Alaska)August – AprilKP 1–2
Rovaniemi/IvaloFinlandLate August – AprilKP 2–3
AbiskoSwedenDecember – MarchKP 1–2
YellowknifeCanadaMid-November – early AprilKP 2–3
KangerlussuaqGreenlandSeptember – early AprilKP 1–2
Faroe IslandsKingdom of DenmarkNovember – FebruaryKP 3+
Northern ScotlandUnited KingdomLate September – MarchKP 4–5+
Baltics (Estonia)EstoniaSeptember – MarchKP 5+
Whitehorse (Yukon)CanadaMid-August – end of AprilKP 3–4

What the Northern Lights Are and How They Form

To keep it from getting too scientific, it all starts with the solar wind. The Sun continuously sends a stream of charged particles — mostly electrons and protons — out into space. When this wind speeds up and its magnetic field twists the right way, it merges with Earth’s protective magnetic field. These particles then ride along the magnetic field lines as if down a giant funnel towards both poles, where they slam into the atmosphere at high speed.

The coloured light itself appears the moment these fast electrons collide with oxygen and nitrogen molecules in the upper layer of the atmosphere and give them energy. When these atoms then return to their original resting state, they release the excess energy in the form of a photon — that is, coloured light.

The colour of the aurora depends on which gas the particles hit and at what altitude it happens:

  • Green: By far the most common colour, created by oxygen at an altitude of roughly 100 to 240 kilometres. On top of that, our human eye is most sensitive of all to green.
  • Red: A very rare sight, also caused by oxygen, but at enormous altitudes above 200 to 300 kilometres. It only forms in thin air, because this excited state lasts a long time and in the denser air lower down it would lose its energy before it could glow.
  • Purple and pink: These gorgeous colours are created by nitrogen much lower down, usually around 100 kilometres above the ground. They often form the beautiful purple lower fringe of the green curtains during very strong storms.

What’s more, this phenomenon doesn’t just happen in the north. Exactly the same physics works in the southern hemisphere, where the phenomenon is called the aurora australis. It appears at precisely the same time as the northern lights — it’s just much harder to observe, because the south magnetic pole lies mostly over empty ocean.

When You’ll See the Northern Lights

The best months for viewing in the northern hemisphere are from late September to mid-April. You might be wondering why it doesn’t work in summer, when it’s warm. Physically the aurora is of course there, but thanks to a phenomenon called the polar day, or midnight sun, at these high latitudes it simply never gets dark. And against a bright sky you logically won’t see the aurora. A handy northern lights forecast app — most of them pull data from NOAA — will tell you when activity is likely to peak.

Your best chance is around so-called magnetic midnight, which tends to be roughly between 10 pm and 2 am local time. The statistically best period then always comes around the autumn and spring equinoxes, because Earth’s position relative to the solar wind naturally amplifies geomagnetic activity.

The key indicator for hunters is the KP index, a scale from zero to nine that measures the strength of a geomagnetic storm. While in the far north in Tromsø KP 1 or 2 is plenty, the requirements rise steeply as you head south. In Scotland you already need roughly KP 5, and for visibility from central Europe you’d need a massive storm of KP 8 to 9.

The current period is also absolutely exceptional. In autumn 2024 the Sun reached its maximum within the eleven-year cycle. That heightened activity doesn’t drop off immediately, though, so 2025 and 2026 are still incredibly strong and offer the best aurora-viewing conditions in over a decade.

How to Photograph the Northern Lights (Phone and Camera)

In complete darkness, the human eye loses its ability to see colours and switches to black-and-white vision, so live you’ll see a fainter aurora more as a greyish or slightly greenish cloud. A camera lens, however, can take in light over a much longer period, which is why photos are always more colourful than reality.

How to Shoot on a Phone

Modern smartphones handle this brilliantly nowadays thanks to night mode, which stacks several frames together in low light. The absolute essential, though, is to keep the phone perfectly still. You need to put it on a small tripod, or prop it firmly against a backpack or rock.

Switch on night mode and manually drag the timer to the maximum, which on iPhones is usually 3 to 10 seconds. Always turn on the 2-second self-timer, because just tapping the screen with your finger would blur the shot. Try also locking the focus on the sky with your finger on the display and lowering the exposure slightly, so the green colour doesn’t blow out into a white blob.

How to Shoot on a DSLR or Mirrorless

Here you need full manual mode (M). Open the aperture all the way, ideally to f/2.8 or even lower. Set the exposure time to roughly 5 to 15 seconds depending on how fast the aurora is moving. If it’s dancing very quickly, you’ll need to shorten it to 3 seconds, otherwise you’ll just get a blurry smudge on the photo.

The upper exposure limit should never exceed 20 to 25 seconds. The reason is the rotation of the Earth, which would stretch the background stars into ugly streaks. Set the ISO somewhere between 800 and 3200, always shoot in RAW format for better editing, and most importantly focus manually to infinity, because autofocus simply doesn’t work in the dark. Watch out for your batteries — the cold literally devours them, so always carry spares in a pocket close to your body.

Where to Next

If aurora hunting has got you hooked and you’re wondering exactly where to book your flights, take a look at our detailed guides to the individual regions. For Norway we’ve written up tips for Tromsø and a dedicated guide to the northern lights in Lofoten.

If you’re more drawn to untamed wilderness across the ocean, don’t miss our piece on the northern lights in Alaska. And for lovers of toasty saunas, we’ve got an article focused on the northern lights in Lapland.

Frequently Asked Questions

Here are the answers to what people most often want to know about hunting the northern lights.

Is a full moon a problem for viewing the northern lights?

“`html
The full moon isn’t exactly an obstacle, because it’s very difficult for moonlight to overpower a strong aurora. It is true though that a dark sky around the new moon gives photos and the eye much better contrast, so you’ll see more subtle structures and colors. But you definitely don’t need to cancel your trip because of a full moon.
“`

Do I need a guide, or can I manage on my own?

You can definitely manage it on your own with a rental car, the key is being able to escape the clouds and light pollution. Organised tours have tremendous value mainly in that guides monitor the weather in real time, know secret dark spots and you don’t have to stress about driving at night on icy roads.

Are there tours with aurora guarantee?

Some operators in Scandinavia offer a guarantee, but that usually just means they’ll give you a free repeat trip the next day if you don’t see the lights. There’s no money back and it only applies during your stay. Numbers like 99% success rate should be taken more as clever marketing from the operators.

Why is the aurora more colorful in photos than in real life?

In very dark environments, the human eye switches to rod cells, which don’t distinguish colors, so we often see the aurora in rather gray-white or faintly greenish tones. However, a camera can gather much more light thanks to long exposure and high ISO, which is why it captures vivid green even during very faint displays.

How many nights per year can you see the aurora in top locations?

It’s often stated that Canadian Yellowknife has up to 240 clear auroral nights, Alaskan Fairbanks over 200, and Norwegian Tromsø over a hundred. These impressive numbers mostly come from tourist materials, so take them with a slight grain of salt, but the fact remains that the chances are huge in these locations.

What KP index is actually needed?

In the high Arctic, such as Tromsø or Fairbanks, KP 1 to 2 is absolutely sufficient. Northern Scotland already requires around KP 4 to 5. For viewing from Central Europe and Czechia, you need a massive storm with a strength of KP 8 to 9. Generally speaking, the higher the KP, the further south the oval moves.

Can you see the northern lights in the Czech Republic?

Yes, but it’s extremely rare, as you need an extreme storm with a strength of KP 8 to 9. The last time this happened on a widespread scale was in May 2024 during the massive Gannon storm (G5), and then again in October of the same year. Such events typically occur only a few times during an entire eleven-year solar cycle, so it’s definitely not a yearly certainty.

How cold is it and what to wear?

In Lapland or Canada, temperatures during the season regularly drop between minus 5 and minus 30 degrees. The key is layering, where you put fleece over merino and a thick windproof jacket on top. When photographing, you’re just standing quietly in one place and not generating body heat, so warm mittens and insulated boots are an absolute necessity.

Can I photograph the aurora with just a regular phone?

“`html
Yes, modern flagship phones on a tripod in night or Pro mode with long exposure around 3 to 10 seconds will capture a really nice shot. However, a quality DSLR with a large sensor will always win in sharpness of details and the ability to freeze fast colorful curtains.
“`

What colors will I see in the sky?

You’ll most commonly see green, which is created by oxygen at medium altitudes. During very strong geomagnetic storms, you can also spot red high up in the thin air and beautiful violet or pink, caused by nitrogen in the lower layers of the atmosphere.

Tips and Tricks for Your Vacation

Don’t Overpay for Flights

Search for flights on Kayak. It’s our favorite search engine because it scans the websites of all airlines and always finds the cheapest connection.

Book Your Accommodation Smartly

The best experiences we’ve had when looking for accommodation (from Alaska to Morocco) are with Booking.com, where hotels, apartments, and entire houses are usually the cheapest and most widely available.

Don’t Forget Travel Insurance

Good travel insurance will protect you against illness, accidents, theft, or flight cancellations. We’ve had a few hospital visits abroad, so we know how important it is to have proper insurance arranged.

Where we insure ourselves: SafetyWing (best for everyone) and TrueTraveller (for extra-long trips).

Why don’t we recommend any Czech insurance company? Because they have too many restrictions. They set limits on the number of days abroad, travel insurance via a credit card often requires you to pay medical expenses only with that card, and they frequently limit the number of returns to the Czech Republic.

Find the Best Experiences

Get Your Guide is a huge online marketplace where you can book guided walks, trips, skip-the-line tickets, tours, and much more. We always find some extra fun there!
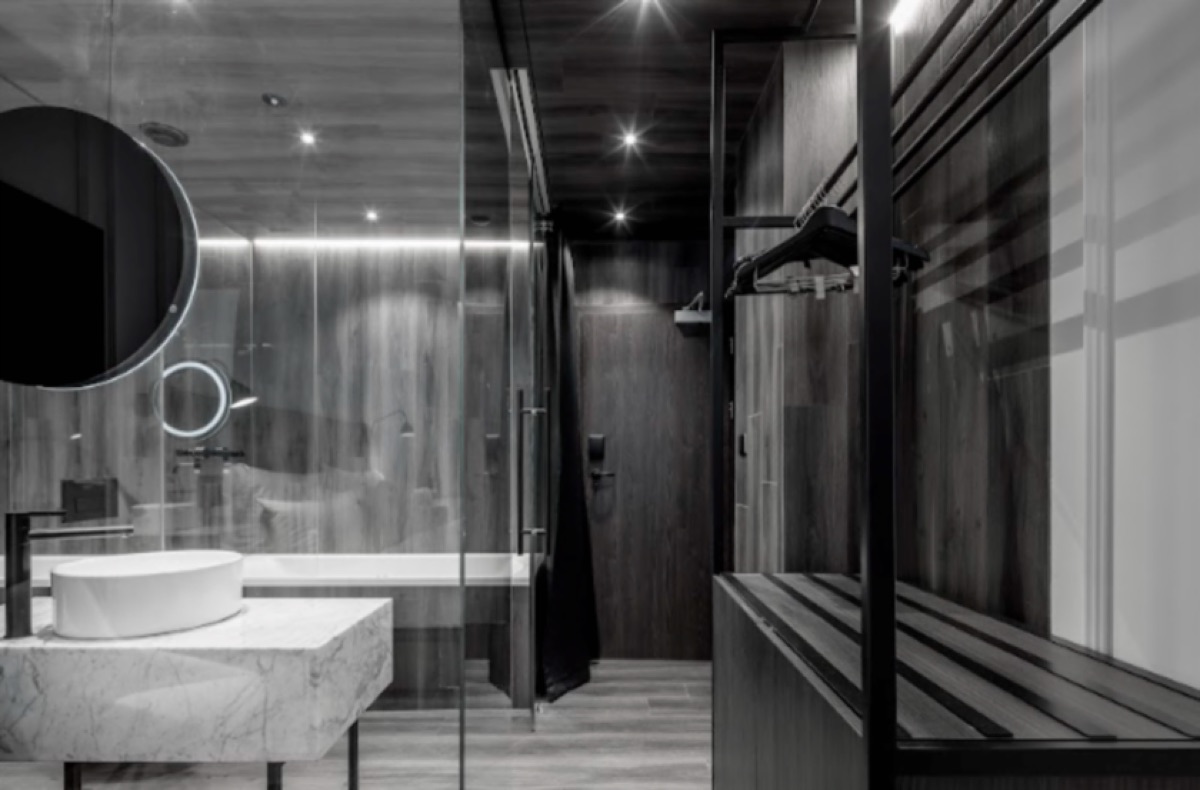
Mexico Travel from the UK: Flights, the ESTA Trap on US Layovers & Insurance 2026

TL;DRThere’s no direct flight to Mexico, so you’re routing via Europe (Madrid, Paris, Amsterdam) or through US hubs like Atlanta, Miami or Dallas – and that’s where the ESTA trap kicks in. Even a layover counts as entering the US, and without approved registration ($21, roughly 480 CZK) or a visa, you won’t be allowed to board. Flights run $16,000–$22,000 CZK, and it’s worth booking 2 to 4 months ahead – avoid the March Spring Break season, which is the worst time to fly. Visa-wise, Mexico doesn’t require one for tourists – a passport valid for 6 months gets you a stay of up to 180 days. Decent travel insurance is essential too, since your EHIC card is worthless here and private clinics charge American-style prices.

You know that feeling when it’s freezing outside, an icy wind is howling, and you’re sitting at your computer with a cup of tea dreaming of pristine white beaches, Mayan pyramids and an endless supply of fresh guacamole? Trust me, when it comes to Mexico travel, this is exactly the destination that will make every one of those dreams come true. And although a journey halfway across the world might seem like a massive logistical challenge, with the right plan you’ll pull it off without breaking a sweat.

If you’ve already spent your nights googling flights to Mexico and wondering how to organise the whole thing, you’re in the right place. We’ve put together the ultimate practical guide that will walk you through the entire process — from buying your flights through the pitfalls of US airports all the way to withdrawing cash from local ATMs without getting fleeced by ridiculous fees.

In this guide you’ll find everything you need to handle the trip to Mexico completely stress-free. We’ll look at the sneaky trap called ESTA, explain why the insurance that comes free with your credit card probably won’t be enough, and share insider transport tips that will save you a heap of money and nerves.

TL;DR

  • Flights: There’s no direct flight from the UK. You can fly via Europe (no visa headaches) or via the USA (often cheaper, but it comes with American bureaucracy).
  • The ESTA trap: If you fly via the USA (even for just an hour on a layover), you absolutely need an approved ESTA registration.
  • Entering the country: Luckily, Mexico doesn’t require a tourist visa from UK travellers. All you need is a passport valid for another 6 months and you’ll get a stay of up to 180 days. The tourist card (FMM) is now mostly fully digital.
  • Money: You pay in Mexican pesos (MXN). The exchange rate hovers around 0.045 € per peso. Always decline the unfavourable DCC conversion at ATMs and keep some cash on you for markets and small purchases.
  • Insurance: An absolute must. Private clinics in Mexico charge American prices, and a basic UK travel card won’t get you far there.
  • Internet: The most reliable and convenient option is to get an eSIM before you fly, so you’re online the moment you land.
  • Transport: ADO buses are incredibly luxurious and reliable. For shorter distances, the brilliant shared vans called colectivos do the job perfectly.

How to get to Mexico from the UK (layovers, what it costs and when to book)

Planning your trip starts with the most important thing of all: the flights. There are some direct flights from London to Cancún and Mexico City (with the likes of British Airways and TUI), but they tend to be pricey and seasonal, so most travellers end up with at least one — and more often two — layovers. It’s nothing to be scared of, though. You just need to choose your route carefully so your dream holiday doesn’t turn into a bureaucratic purgatory before it even begins.

The basic decision you’ll face is choosing between a layover in Europe and one in the United States. A route purely through European airports (most commonly via Madrid with Iberia, via Paris with Air France, or via Amsterdam with KLM) is by far the most hassle-free. You don’t have to deal with any transit visas — you simply walk from one plane to another. These flights do tend to be a bit pricier, though. Flights with a layover at big American hubs like Atlanta, Miami or Dallas, on the other hand, are often very attractively priced, but they come with the need to sort out American paperwork, which we’ll cover in detail in the next chapter. If you’re hunting for flights to Mexico, definitely compare both options and weigh up whether saving a couple of hundred pounds is worth the extra stress.

Flight prices from London typically range between £650 and £900 depending on the season. If you head off in high season (which runs from November to April, when the weather in Mexico is at its best), prices logically climb. The absolute worst time to book is around American Spring Break in March, when prices shoot into the stratosphere and resorts are bursting at the seams. On the flip side, if you book your flights well in advance (ideally 2 to 4 months ahead), you can snag some lovely deals.

💡 Tip: As tempting as it is to hunt for flights through various comparison sites and dodgy agencies, always end up booking directly on the official website of the airline. If your flight gets cancelled or delayed, dealing with the airline directly is a thousand times easier than trying to get through to a third-party reseller’s customer line.

⚠️ The ESTA trap: watch out for US layovers (even transit needs authorisation)

And now we come to the point where more than a few holidays come crashing down every year. Travelling to Mexico via American airports is hugely popular, but it hides an enormous trap. Loads of travellers assume that if they’re only transiting through the USA — never leaving the transit zone and flying on a few hours later — the American authorities won’t care one bit. That’s a massive misconception that could cost you your entire holiday.

The United States simply doesn’t have the classic airport transit concept the way we understand it in Europe. Even if you’re just walking through the airport to your next gate, as far as the US authorities are concerned you are officially entering US territory. That means you must have either a valid US visa or an approved ESTA electronic registration. You need to sort this out online well in advance on the official government ESTA website. It costs 21 dollars (around £17) and in the box for a US address you simply write the word “transit”. Be very careful to fill in the registration only on this official government site, because the internet is full of scam websites that will happily charge you triple for the same form.

Another huge complication arises if you’ve previously visited certain countries the USA considers high-risk. If your passport has a stamp from Iran, Iraq, Syria, Sudan, Yemen or Cuba after January 2021, the system will automatically reject or cancel your ESTA. In that case you’ll have to apply for a regular B2 tourist visa at the US embassy in London, which means an in-person interview and a wait of several months. So if you’re flying via the USA, “ESTA before a Mexico layover” is a phrase you need to drill into your memory.

💡 Tip: When you transit through the USA, you always have to collect your checked luggage, take it through customs, and then hand it straight back onto the belt for your connecting flights. This process can take a while, so always allow at least 3 — ideally more like 4 hours — for a layover in America.

Visa and entry into Mexico (FMM and the tourist card)

After all that American faff, here’s some good news at last. Mexico doesn’t require a visa from UK tourists. If you’re heading there for tourism, all you need is a valid passport. It must be valid for at least 6 months beyond your planned return home.

As European tourists we’re entitled to a stay of up to 180 days, which is an absolutely luxurious amount of time to explore the whole country. In the past you used to fill in a little slip of paper on the plane called the Forma Migratoria Múltiple (FMM), whose second half you had to carefully keep for the entire stay and hand over on departure. Losing that slip meant a hefty fine and unnecessary stress at the airport.

Today Mexico has switched to a fully digital system at most international airports (including Cancún, Mexico City and the new airport in Tulum with the code TQO). You walk up to the immigration officer, they scan your passport, stamp it, and you’re done. Even so, it sometimes happens that for some reason an officer doesn’t give you the full 180 days, but only a limited number of days based on your return ticket.

💡 Tip: As soon as you get your stamped passport back in your hand, check the number the officer has written in pen. That’s the number of days you can legally stay in the country. If you see fewer days than you need for your trip, speak up immediately — it’s very tricky to sort out later.

Travel insurance (why a basic card won’t save you)

Travel insurance is one thing it absolutely doesn’t pay to skimp on, and that goes double for Latin America. Forget about your EHIC/GHIC card bailing you out — it’s worthless beyond Europe. Relying solely on the insurance that comes free with your everyday bank card is also a huge risk, because the medical expense limits on these basic products tend to be hopelessly low.

Healthcare in Mexico is split into public and private. Public hospitals are cheap, but often overcrowded and you won’t always find English-speaking staff. As a tourist you’ll most likely head to a private clinic, where the care is absolutely top-notch but the prices are comparable to those in the United States. A simple consultation with a doctor over an upset stomach can set you back hundreds of dollars, and any serious injury can climb into the tens of thousands of pounds.

If you’re planning an active holiday, definitely check exactly what your insurance covers. Diving in the magical underground caves (cenotes), surfing on the Pacific coast or longer treks in the mountains often fall into the extreme sports category and you’ll need to pay extra for them. There’s a whole range of insurers on the market — popular options for longer and more adventurous trips include True Traveller and AXA with their premium packages.

💡 Tip: If you’re only hit by the usual traveller’s woes like mild stomach trouble or a cold, you don’t need to call an ambulance straight away. All across Mexico there are pharmacy chains (such as Farmacia del Ahorro or Farmacia Similares) that have a small doctor’s surgery right next to the shop. A consultation there costs literally a few pesos, and the doctor will prescribe and sell you the medicine you need on the spot.

Money: pesos, tricky cards and why ATMs want to rip you off

Money in Mexico is a chapter all of its own, and it’s worth being prepared for it so you don’t needlessly throw away hundreds on fees. The official currency is the Mexican peso (MXN). For easy mental maths, you can lock in roughly that 1 peso is about £0.04. So as a rough guide, just multiply Mexican prices by around four to get the pence figure and you’re sorted. Occasionally (mainly in touristy areas) you’ll come across prices in US dollars, but paying in them is usually a bad deal because of the poor exchange rate the vendor offers.

Cards are accepted perfectly normally in better restaurants, supermarkets and hotels. But you always need to carry enough cash. The authentic street stalls with the best cheesy quesadillas, local markets, little cafés, colectivo rides and motorway tolls are strictly cash-only zones.

The biggest tourist trap is waiting at ATMs and it’s called DCC (Dynamic Currency Conversion). When you put your UK card (say Revolut or Wise) into a Mexican ATM, the screen will triumphantly offer to convert the money straight into your home currency so you “know exactly how much you’re paying”. Never do it. That guaranteed rate hides a sneaky markup of 8 to 9%. Always decline this offer (you often have to tap “Decline Conversion” or “Without Conversion”) and let the ATM debit the amount in Mexican pesos. Your bank will convert it at a far better mid-market rate.

Another important rule is to only withdraw money from ATMs physically located inside the branches of big banks (such as Santander, HSBC, BBVA, Banorte). Never withdraw from random machines on the street or in bars — gangs with skimming devices often operate there. The banks themselves charge a withdrawal fee ranging from 36 pesos (Santander) up to 81 pesos (HSBC). The maximum limit per withdrawal is usually around 5,000 to 10,000 pesos.

And what about your budget? It depends on your travel style. A frugal backpacker can get by on around £35 to £55 a day (hostel accommodation, street food). A comfortable mid-range standard with nice hotels and dinners out in restaurants comes to roughly £70 to £110 per person per day. If you’re after luxury and resorts, set aside at least £180 a day. As for tipping, in restaurants it’s normal to leave 10 to 15%, for housekeeping you leave around 25 to 50 pesos a day, and at the petrol station you give the attendant about 10 pesos for cleaning your windscreen and filling up.

💡 Tip: When you’re paying in big supermarkets, you’ll notice older people packing your shopping into bags at the checkout. They don’t get any wage from the shop and live solely off what customers give them. It’s good manners to leave them a coin worth 10 to 20 pesos.

eSIM and internet (how to be online the moment you land)

Going without internet these days is pretty much unthinkable for most of us. Not just for sharing photos, but mainly for navigation, looking up restaurant reviews or ordering a ride. If you used your UK plan, you’d pay a fortune for a few megabytes. Classic roaming outside the EU is simply financial suicide.

Luckily, things are much simpler these days thanks to eSIMs. If you have a newer phone that supports this technology, nothing could be easier than downloading an app like Holafly or Yesim before you fly and buying a data package for Mexico (it often uses the best local network, Telcel). A 5 GB data package costs around 13 dollars and activates automatically the moment your plane touches down on the runway.

If you have an older phone, your only option is to get a physical SIM card. You can buy one on literally every corner at the ubiquitous Oxxo convenience stores. Just ask for a “chip Telcel” and top it up with a data package (the so-called paquete amigo).

💡 Tip: Before you even board the plane in Europe, go into your phone settings and switch off data roaming on your UK SIM card. That way you’ll stop your phone from accidentally connecting to the Mexican network for a few seconds before you’ve had a chance to switch on your local eSIM.

Getting around Mexico (ADO buses, vans and the car-rental catch)

Getting around Mexico is surprisingly easy, varied and — most importantly — safe, as long as you follow a few basic rules. The country is huge, so it pays to combine several modes of transport.

ADO buses For travelling between bigger towns (for example from Cancún to Playa del Carmen or Tulum), the long-distance buses run by ADO are an absolute number one. If you’re used to your average National Express coach, your jaw will hit the floor here. They’re incredibly spacious, clean, with huge seats, air conditioning (which is often as cold as Siberia, so bring a jumper!) and they run bang on time. A ticket from Playa del Carmen to Cancún costs about 10 dollars, and I’d recommend buying it in advance through their app.

Colectivos (shared vans) For shorter distances and exploring the smaller cenotes along the highway, colectivos are absolutely genius. They’re white vans that shuttle along the main routes. They don’t have fixed stops — you simply stand by the road, wave them down, and if they have space, they’ll pick you up. A ride costs a few dozen pesos (e.g. 45 MXN) and you pay the driver when you get off. When you want to get off, just shout “Baja!” out loud. It’s a bit punk, but an incredibly authentic experience.

Domestic flights If you’re covering vast distances (e.g. from the Yucatán to Mexico City), use local low-cost carriers like Volaris or VivaAerobus. The flights are cheap, but watch out big time for hidden baggage fees. It often pays to just buy the slightly pricier fare that already includes a cabin bag. One word of warning: Mexico City recently opened a new airport called AIFA (code NLU), which is really far from the city centre, so when booking, double-check which of the two airports you’re flying into.

Renting a car and the insurance trap If you want complete freedom, renting a car is a great choice, especially in the safe Yucatán. The roads are in good condition; you just have to get used to the ubiquitous speed bumps called “topes”. These are often not marked in any way, and if you hit one at speed you’ll rip your undercarriage off. The golden rule is: never, and I mean never, drive at night.

The biggest problem when renting a car, though, is the insurance. Booking portals will lure you in with rentals for a ridiculous 5 dollars a day. The catch is that in Mexico third-party liability insurance (TPL/PLI) is required by law, and no credit-card insurance covers it. So when you turn up at the counter, the rental company will force you to buy this insurance and the rental price suddenly triples (they’ll happily add another 20 to 30 dollars a day). Factor it in upfront so you’re not caught out.

💡 Tip: In tourist hubs like Cancún and Tulum, a fierce war is raging between traditional taxi drivers and Uber drivers. In Tulum, Uber doesn’t work at all, and at Mexico City airport the National Guard has banned it from picking up passengers right at the terminal as of March 2026. So always play it safe and book your airport transfers to the hotel in advance through official companies.

Where to next

If you’ve got the logistics down to a fine art, it’s time to start planning the fun bit — the trip itself! We’ve prepared more articles to help you out:

  • What to see in Mexico — the most beautiful beaches, mysterious Mayan ruins and hidden cenotes that would be a huge shame to miss.
  • When to go to Mexico — a detailed weather guide that’ll tell you which months to avoid because of the rains and when the seaweed (sargassum) on the beaches is at its worst.
  • Is Mexico safe? — an honest look at the security situation. Which states to give a wide berth and why the Yucatán is considered the safest area.
Experiences & tickets
traveler-rated · GetYourGuide
Chacchoben Mayan Ruins from Costa Maya
★★★★★ 4.5 · 502 reviews
from €51
I want this experience →
🔗 These are affiliate links — they don't change your price and help us create content. · All experiences →

Frequently asked questions

What currency is used in Mexico and can I use dollars?

“`html
The official currency is the Mexican peso (MXN), which you can use to pay everywhere. While US dollars are sometimes accepted in tourist areas, the exchange rate the vendor will offer you will be very unfavorable, so it’s better to avoid them and pay in pesos.
“`

Do I need a visa to visit Mexico?

If you’re traveling for tourism purposes and you’re a citizen of the Czech Republic, Mexico doesn’t require a visa. All you need is a passport valid for at least 6 months, and you’ll get a permit to stay for up to 180 days at the border.

Do you need to get any special vaccinations for Mexico?

No vaccination is officially required. However, doctors strongly recommend that all travelers have valid vaccinations against hepatitis A and typhoid fever, as hygiene at street food stalls is not always one hundred percent reliable.

Can I drink tap water in Mexico?

In no case, tap water in Mexico is not drinkable even for locals and is only used for washing. Always buy bottled water (agua purificada), and if you’re having a drink with ice, look for ice with a hole in the middle, which means it’s from a factory and made from safe water.

What electrical outlets are used in Mexico?

You’ll find the same outlets and voltage in Mexico as in the United States (type A and B with two flat pins). You absolutely must pack a travel adapter, otherwise you won’t even be able to charge your phone.

Do I have to leave a tip in Mexico?

“`html
Yes, the tipping culture is very strong here, service staff have miserable wages and rely on it. In restaurants, it’s common to leave 10 to 15% of the bill, for hotel housekeeping around 25 to 50 pesos per day.
“`

Why did the system reject my ESTA registration for a layover in the US?

The most common reason for ESTA denial among Czech tourists is a previous visit to Cuba (after January 2021) or other high-risk countries such as Iran or Syria. In such cases, you can’t transit through the USA on ESTA and you’ll need to go through the complicated process of applying for a US B2 visa.

Tips and Tricks for Your Vacation

Don’t Overpay for Flights

Search for flights on Kayak. It’s our favorite search engine because it scans the websites of all airlines and always finds the cheapest connection.

Book Your Accommodation Smartly

The best experiences we’ve had when looking for accommodation (from Alaska to Morocco) are with Booking.com, where hotels, apartments, and entire houses are usually the cheapest and most widely available.

Don’t Forget Travel Insurance

Good travel insurance will protect you against illness, accidents, theft, or flight cancellations. We’ve had a few hospital visits abroad, so we know how important it is to have proper insurance arranged.

Where we insure ourselves: SafetyWing (best for everyone) and TrueTraveller (for extra-long trips).

Why don’t we recommend any Czech insurance company? Because they have too many restrictions. They set limits on the number of days abroad, travel insurance via a credit card often requires you to pay medical expenses only with that card, and they frequently limit the number of returns to the Czech Republic.

Find the Best Experiences

Get Your Guide is a huge online marketplace where you can book guided walks, trips, skip-the-line tickets, tours, and much more. We always find some extra fun there!
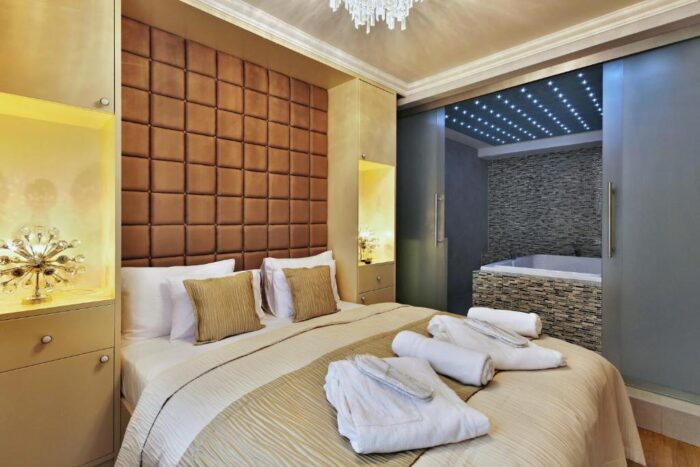
Day Trips from Budapest, Hungary: 7 Best Ideas (2026)

TL;DRHere are 7 of the best day trips from Budapest for 2026. Szentendre is just 40 minutes away on the HÉV suburban railway, with its art galleries and pastel-coloured lanes. Visegrád has a citadel perched above the bend in the Danube, while Esztergom, an hour and a half by train, is home to Hungary’s largest basilica. Eger, two hours from Keleti station, mixes a Turkish minaret with Egri Bikavér wine. There’s also Gödöllő Palace, linked to Empress Sisi, and Lake Balaton (an hour and a half by train, with the resort towns of Siófok and Balatonfüred). Fancy going further afield? Bratislava is two hours away, and Vienna two and a half. The best months for sightseeing are April, May, September and October, when temperatures sit around 20 degrees — summer, by contrast, often tips past 35. Train tickets range from a few hundred forints for the HÉV to Szentendre up to 15 to 20 euros for a return fare to Balaton or Eger.

Budapest is absolutely magical, but if you’re spending more than just a long weekend here, that big-city energy can start to feel like a bit much. Lukáš and I love the city, we happily soak in the thermal baths and stroll along the Danube, but after three days we’re always itching to escape somewhere quieter. That’s exactly when the best day trips from Budapest, Hungary come into play.

Hungary has one huge advantage: the HÉV suburban trains and the regular railway both work brilliantly. Just an hour on the train and suddenly you find yourself in charming little Baroque towns, beneath the ruins of ancient castles, or even on the shore of an enormous lake the locals call nothing less than the Hungarian sea.

In this article I’ll show you the most beautiful destinations you can easily do as a day trip from Budapest. We’ve picked spots where you can escape the crowds, taste superb wine, or simply wander through winding lanes steeped in history.

TL;DR

  • Most popular escape from the city: Szentendre is a picturesque artists’ town full of galleries, reachable in 40 minutes by suburban train.
  • Best nature views: Visegrád with its mighty citadel offers the most beautiful view of the iconic Danube Bend.
  • For history lovers: Esztergom is home to the largest basilica in all of Hungary and the cradle of the Hungarian state.
  • For great wine: The town of Eger tempts you with Baroque streets, a Turkish minaret and the famous red wine known as Bull’s Blood.
  • Following Empress Sisi: Gödöllő Palace is a lavish Baroque residence where you’ll feel like you’re in the Austro-Hungarian court.
  • Summer relaxation by the water: Lake Balaton is closer than you think, and in an hour and a half you can be lying on the beach.
  • A hop across the border: If you keep a fast pace, both Bratislava and Vienna are comfortably reachable by direct trains.

When to take day trips around Budapest, Hungary

Hungary has a climate fairly similar to ours, but the summers here are noticeably hotter and drier. If you’re planning sightseeing trips, the best time is definitely spring and autumn. During April and May everything bursts into bloom, temperatures hover around a very pleasant 20 °C (68 °F), and the lanes of Szentendre or Eger aren’t yet bursting at the seams.

September and October are absolutely ideal for wine trips. Autumn days in the valley near Eger have an incredibly romantic atmosphere, the sun isn’t scorching anymore and grape harvests are happening everywhere. We swear by autumn travel, because you can sit calmly in a courtyard, enjoy a glass of wine and not have to hide from the exhausting heat.

Summer in Hungary can be truly relentless. During July and August, the weather in Budapest, Hungary regularly climbs above 35 °C (95 °F), which turns the hike up to the citadel in Visegrád into quite the athletic feat. If you’re coming in summer, I’d definitely recommend planning a trip to Balaton where you can cool off, or heading out to the sights early in the morning before the real heat kicks in.

Winter has its own special charm, especially if you love Christmas markets. But I have to warn you about the cold wind off the Danube, which can chill you to the bone. In the winter months the sightseeing cruises don’t run, and some castles or outdoor exhibits may have reduced opening hours, so it’s best to check everything in advance on the official websites.

Where to stay in Budapest, Hungary for easy day trips

If you know you’ll want to head out of the city, it’s absolutely crucial to choose accommodation in a strategic location near a train station. There’s nothing worse than losing an hour in the morning just fighting through rush hour from the edge of town to the main railway station. Budapest is huge, and you’ll definitely appreciate the time you save.

Personally, I recommend looking for hotels near major transport hubs like Nyugati or Keleti stations. An excellent choice is the Hotel Nemzeti Budapest, part of the MGallery collection, just a short walk from Keleti station. It’s a gorgeous historic hotel with perfect service, and direct trains to Eger leave right from there.

If you’re planning trips north to the Danube Bend or to Bratislava, take a look at the Radisson Blu Béke Hotel. It sits just a few minutes’ walk from Nyugati station. The rooms are spotlessly clean, the breakfast is generous, and best of all you’ll know you can stroll comfortably to your morning train towards Visegrád or Esztergom with a coffee in hand.

For trips to artistic Szentendre, the Buda side of the river is best. The lovely Boutique Hotel Victoria offers stunning views of Parliament, and crucially it lies just steps from Batthyány tér station. That’s exactly where the HÉV suburban train departs from, taking you straight to the town. We always book our accommodation well in advance through Booking.com, because the best-located hotels get snapped up fast in season.

7 best day trips from Budapest, Hungary

Let’s take a look together at the specific places worth your attention. We’ve picked a mix of historic towns, natural beauty and spots tied to great food and wine, so you can choose exactly what excites you most.

1. Szentendre: A Baroque artistic idyll

This little town is probably the single most popular day-trip destination around Budapest, and we completely understand why. It lies just 40 minutes north of the city, but the moment you step off the train you’re greeted by an atmosphere that feels more like the sun-drenched Mediterranean than typical Central Europe.

Szentendre is famous for its strong artistic community and bursts with colour. You’ll find winding cobbled lanes and pastel-coloured houses tucked away with countless little galleries, local craft shops and ancient churches. It’s all framed by a beautiful long promenade along the Danube, perfect for a slow afternoon.

Our favourite thing to do here is settle into one of the little cafés, grab a traditional Hungarian lángos and just watch the boats on the river. The easiest way to get here is on the HÉV suburban train, line H5, which departs from Batthyány tér station right across from Parliament. The ticket costs just a couple of euros and the trains run very frequently.

💡 Tip: If you come in the summer months, book tickets for a river sightseeing cruise. The trip down the Danube straight from central Budapest to the harbour in Szentendre is an unbelievably romantic experience, which you can arrange in advance through GetYourGuide.

2. Visegrád and its majestic citadel

If you love nature and epic views, the Danube Bend will absolutely thrill you. It’s an area where the mighty river cuts through the mountains and forms a dramatic curve that, seen from above, looks like an enormous letter U. Right in the heart of this natural wonder lies picturesque Visegrád.

Its main landmark is the mighty 13th-century stone citadel, towering high on a wooded hill above the river. The climb up follows a forest trail and will give you quite a workout, especially in the summer heat, but the effort is worth it. Your reward is the best imaginable views of the winding Danube and the surrounding green hills.

Getting here is a touch more adventurous, since Visegrád has no direct train connection from Budapest. At Nyugati station you board a train to the town of Nagymaros, a journey of just under an hour. From there you hop on a ferry that runs every hour and carries you straight across the river to Visegrád.

💡 Tip: For the hike up to the citadel, definitely wear sturdy trainers — sandals would be no fun at all. Up by the castle there are often knights’ tournaments and historical re-enactments that delight adults and children alike.

3. Esztergom: The cradle of the Hungarian state

If you continue upstream from Visegrád, you’ll reach Esztergom. This town is the most sacred place in all of Hungary and boasts an incredibly rich history. From a distance you’ll be captivated by the sight of the giant Neoclassical basilica, rising majestically on a cliff right above the Danube.

It’s the largest church in the country, and its massive dome dominates the wider surroundings. I’d definitely recommend paying to climb up to the viewpoint in the dome, even though the way up the narrow spiral stairs takes a bit of fitness. The view over the river and the opposite Slovak banks is utterly breathtaking and worth every drop of sweat.

Around 25 trains a day run here from Budapest’s Nyugati station, and the journey takes roughly an hour and a half. Just like the other towns on the Danube Bend, in peak season you can also arrive romantically by sightseeing cruise, which is an experience in itself.

💡 Tip: Take a short walk across the Mária Valéria Bridge, which connects Hungarian Esztergom with Slovak Štúrovo. It’s from the Slovak bank that you’ll get the most beautiful photos of the whole basilica reflected on the surface of the Danube.

4. Eger: Turkish monuments and Bull’s Blood

Eger lies northeast of Budapest and it’s an absolute paradise for anyone who loves the good life. It’s a showcase Baroque town full of history, famous for its heroic defence against the Turks. To this day you’ll find a beautifully preserved medieval castle, plus fascinating remnants of Ottoman rule, such as an original Turkish minaret.

But the main reason most people come is the legendary red wine Egri Bikavér, better known as Bull’s Blood. For tastings you have to head to the Valley of the Beautiful Women (Szépasszony-völgy), which lies just a short distance from the historic centre. Here you’ll find dozens of cosy wine cellars carved straight into the rock.

Lukáš and I had a lovely afternoon here, wandering from one winemaker to the next, pairing excellent wine with great local cheeses, nuts and traditional savoury pogácsa scones. The local speciality may be meaty goulash, but as vegetarians we got along perfectly well with the rich offering of meat-free treats, cheese boards and vegetable spreads.

💡 Tip: Trains to Eger leave from Keleti station and the journey takes about two hours. Given the temptation of the wine cellars, a lot of people opt to stay overnight so they can enjoy the tasting to the full and not worry about the late journey back.

lukas a lucka
Lukáš and Lucie recommend
Where to Stay in Budapest
4 accommodations — hotels and other lodging options

5. Gödöllő: In the footsteps of Empress Sisi

Just beyond the eastern edge of the capital lies the charming little town of Gödöllő. Its greatest jewel is the enormous Royal Palace, which takes your breath away with its sheer size and Baroque splendour. This grand residence served as a summer seat of the Habsburgs and was especially beloved by Empress Elisabeth of Bavaria, known to everyone as Sisi.

A walk through the palace’s richly decorated interiors and sprawling English gardens lets you peek into the luxurious life of Austro-Hungarian high society. Everything here is beautifully restored, and as you wander the chambers it’s easy to imagine the grand balls and celebrations once held here.

Getting here is incredibly easy and quick. At Örs vezér tere station, the terminus of the red M2 metro line, you simply switch to the HÉV suburban train, line H8. It whisks you straight to Gödöllő in no time, so half a day is more than enough for this whole royal outing.

💡 Tip: Exact admission prices and opening hours for 2026 may change seasonally, so it’s best to verify them on the palace’s official website before you go. To avoid the queues at the ticket office, I recommend buying tickets online in advance through GetYourGuide.

6. Lake Balaton: The Hungarian sea in a flash

Balaton is the largest lake in Central Europe, and for Hungarians it plays the same role the seaside does for us. You might be surprised just how close it actually is from Budapest. Direct trains from Déli station get you here in about an hour and a half, so you can leap straight from the busy streets of the capital onto a beach lounger in no time.

The lake has two completely different faces, so you can choose based on your mood. On the southern shore lies the lively resort of Siófok, the centre of entertainment, shallow beaches and boisterous summer parties. A ticket here costs roughly €6 to €8.50 and it’s the ideal choice if you’re after beach bars and a buzz.

On the northern shore, by contrast, you’ll find the gorgeous Tihany peninsula and the elegant town of Balatonfüred. A much calmer atmosphere reigns here, fragrant lavender is grown and the local cellars pour excellent white wine. The journey to Balatonfüred takes a full two hours and a ticket comes to around €7 to €11.50.

💡 Tip: If you’re going for a quick day trip on a hot summer’s day, take the very first morning connection. Travel guides agree that Balaton is the most accessible large lake for day trips, but by afternoon the best spots on the beach are hopelessly taken.

7. Bratislava and Vienna: An international hop

If you’re spending a whole week in Budapest and you like a fast travel pace, there’s the option of ticking off another European capital or two. Both cities sit on exactly the same fast railway line, which makes an international trip tempting.

The Slovak capital Bratislava is just two very comfortable hours by train from Budapest. Its historic centre is beautifully compact, full of colourful lanes and great cafés. You can stroll through Bratislava in a single day completely stress-free, and in our opinion it’s the easiest way to pop out of Hungary for a day.

Austria’s Vienna is about two and a half hours away by train. While a day trip is technically doable, I have to warn you it’ll be a proper sprint. Vienna is enormous and packed with sights, so if you go for it, accept that you’ll realistically only manage the most basic loop around the Hofburg and a quick moment for a coffee with a slice of Sachertorte.

💡 Tip: Always buy tickets for international trains in advance through the official Hungarian MÁV or Austrian ÖBB app. At the station right before departure the prices tend to be needlessly high, and in season you might not even get a seat.

Where to go next from Budapest

If you haven’t yet explored the whole Hungarian capital, you definitely shouldn’t rush off beyond the city limits. Budapest has so much to offer that even after a week you’ll still have things to discover, from ruin bars in the Jewish Quarter to the luxurious thermal baths scattered along both banks of the river.

It took us several visits to walk all those hidden corners, taste the best vegetarian lángos in the city and find our favourite cafés. If you’re looking for inspiration right in the city centre, we’ve put together an extensive article, 66 things to see in Budapest, with a complete itinerary and our favourite spots.

And if you’ve already crisscrossed Hungary from end to end, maybe it’s time to plan your next European adventure. Plenty of budget airlines fly cheaply from Budapest airport to Italy or Spain, so you can easily extend your trip and head off somewhere further south in search of the sea and sunshine.

Frequently asked questions

How do the HÉV suburban trains work?

HÉV trains are like overground metro lines that connect the centre of Budapest with the nearby surroundings. You can buy tickets normally at the vending machines of the Budapest transport company (BKK). Be careful, if you have an all-day public transport ticket, it’s only valid within the city limits and you must pay the remaining part of the journey with the driver or at a vending machine.

Where do you buy tickets for boats to Szentendre and Visegrád?

Tickets for the regular ferry lines operated by MAHART can be purchased directly at the Vigadó tér pier in the city center, or conveniently online on their website. During the summer season, the boats tend to be very full, so we definitely recommend booking a few days in advance.

Is a trip to Eger suitable for people who don’t drink wine?

Absolutely yes! Eger is a beautiful historic town with an imposing castle and stunning Baroque architecture. Even if you skip the wine cellars, you’ll have a lovely day strolling through the monuments, visiting the Turkish minaret, and sampling local cheeses in the cafés around the square.

How much does a typical train trip from Budapest cost?

Traveling by train in Hungary is very cheap. A return ticket to more distant places like Balaton or Eger will cost you roughly 15 to 20 €. Shorter routes on the HÉV suburban train, for example to Szentendre or Gödöllő, cost only around 3 €.

Which trip is best for families with children?

Children usually enjoy most a trip to Lake Balaton, where they can swim on the shallow beaches in Siófok. Another great choice is Visegrád Castle, where knight performances take place, or a boat trip to Szentendre, which is a great experience in itself for little travelers.

Can you do Visegrád and Esztergom in one day?

Technically it’s possible, but be prepared for a very intense all-day rush from early morning until evening. Traveling between these two cities takes time and both places require quite a bit of walking (the climb up to the citadel and to the basilica dome), so we recommend choosing just one and enjoying it at a leisurely pace.

Where can I find timetables for international and long-distance trains?

“`html
You’ll find the best and most reliable information in the official mobile app of Hungarian State Railways MÁV. The app is in English, easy to navigate, and you can buy tickets directly through it with a small discount, so you’ll avoid queues at the station.
“`

Tips and Tricks for Your Vacation

Don’t Overpay for Flights

Search for flights on Kayak. It’s our favorite search engine because it scans the websites of all airlines and always finds the cheapest connection.

Book Your Accommodation Smartly

The best experiences we’ve had when looking for accommodation (from Alaska to Morocco) are with Booking.com, where hotels, apartments, and entire houses are usually the cheapest and most widely available.

Don’t Forget Travel Insurance

Good travel insurance will protect you against illness, accidents, theft, or flight cancellations. We’ve had a few hospital visits abroad, so we know how important it is to have proper insurance arranged.

Where we insure ourselves: SafetyWing (best for everyone) and TrueTraveller (for extra-long trips).

Why don’t we recommend any Czech insurance company? Because they have too many restrictions. They set limits on the number of days abroad, travel insurance via a credit card often requires you to pay medical expenses only with that card, and they frequently limit the number of returns to the Czech Republic.

Find the Best Experiences

Get Your Guide is a huge online marketplace where you can book guided walks, trips, skip-the-line tickets, tours, and much more. We always find some extra fun there!
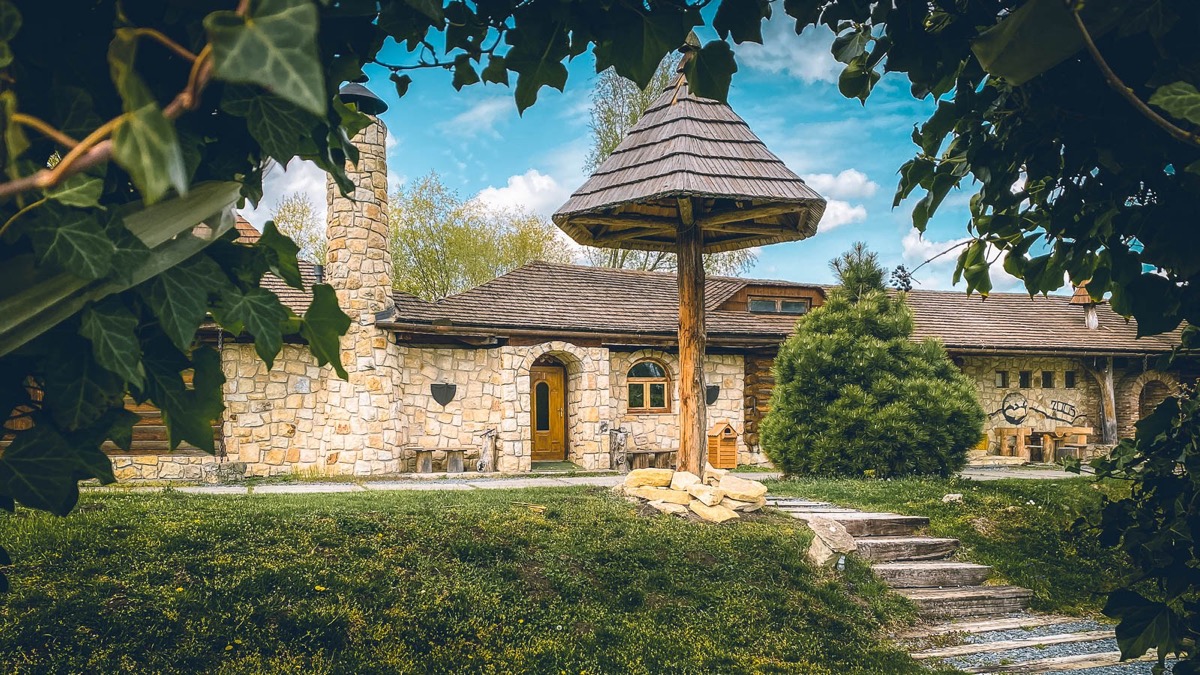
Verdon Gorge, France: 12 Tips + How to Visit in 2026

TL;DRThe Gorges du Verdon, Europe’s largest canyon in southeastern France, is best visited in spring (May, June) or autumn (September, early October), ideally over three to four days so you can fit in a hike and an adrenaline activity. Key stops include Lac de Sainte-Croix, the Pont de Galetas bridge with its boat rentals (you can paddle up to two kilometres into the gorge), the villages of Moustiers-Sainte-Marie, Aiguines and La Palud-sur-Verdon, and two scenic drives — the northern Route des Crêtes and the southern Corniche Sublime, each taking half a day. There are 12 specific tips here, including the famous Sentier Blanc-Martel trail (around fourteen kilometres, six to seven hours’ walking), and the advice is to book canyoning, rafting or bungee jumping off the Pont de l’Artuby (a 182-metre drop) at least two months ahead.

Picture yourself driving across sun-baked Provençal hills scented with wild thyme and pine. Then, out of nowhere, the ground falls away and reveals a gigantic gash with an emerald river running through it. The Verdon Gorge in France simply has zero regard for any fear of heights you might be carrying.

In this article you’ll find 12 tips on how to enjoy the largest canyon in Europe to the fullest, minus the tourist madness. You’ll learn where to base yourself strategically and how to grab a boat for a paddle in good time. Be prepared, too, that the local roads will occasionally test the very limits of your driving skills.

TL;DR

  • Get up early: In high summer you need to be at the water or the viewpoints ideally around eight in the morning, otherwise you won’t find a parking spot at all.
  • Water colour: Lake Sainte-Croix and the Verdon river have a turquoise-emerald colour thanks to dissolved minerals and fluorine in the limestone.
  • Two routes: You can circle the canyon along the northern rim (Route des Crêtes) or the southern rim (Corniche Sublime). Each takes roughly half a day of actual driving time.
  • Boats and kayaks: Rentals are at the Pont de Galetas bridge, and you can paddle into the gorge for a maximum of two kilometres before buoys protecting the reserve stop you.
  • Book in advance: If you want to try canyoning or via ferratas, book your slots through portals like GetYourGuide at least two months ahead.
  • Bases: The prettiest village to stay in is Moustiers-Sainte-Marie, but Aiguines or La Palud-sur-Verdon can be more strategic and quieter.

When to Visit the Verdon Gorge

The Verdon Gorge is one of the most sought-after natural spots in all of France, which means it really demands a solid planning strategy. If you come in July or August, brace yourself for scorching heat and roads jammed to bursting. Forget the naive idea of rolling up to the lake at high noon, parking calmly and going for a swim. In the summer months the car parks at the main attractions are hopelessly full before nine in the morning, and anyone who arrives later just circles in despair and eventually leaves empty-handed.

The best windows for a visit open up in spring and again in autumn. If you can, plan your trip for May or June, when nature is beautifully fresh and the Verdon river carries far more water thanks to melting snow in the nearby Alps. That’s the ideal time for fans of rafting and white water. Another great option is September and early October, when the crowds with their caravans have vanished back home. The water in Lake Sainte-Croix is still gloriously warm from summer in September, so you can swim in comfort while dodging the stress of hunting for a free table at a restaurant.

As for how long to stay, set aside ideally three to four days for the area so you don’t have to rush anywhere. In a single day you’ll only manage a quick lap of the canyon by car and a few snaps from the viewpoints, but you won’t soak up the real atmosphere. Two days let you add a boat trip and a visit to one village. Only with three or four days in your itinerary can you tackle a full-day hike, try an adrenaline sport, and spend the evening relaxing over a glass of Provençal wine watching the sunset.

Hotels Near the Verdon Gorge in France

💡 Tip for accommodation and experiences: We love searching for places to stay on Booking.com, which usually has the best cancellation terms. Tickets, tours and activities are then worth comparing and booking through GetYourGuide.

Accommodation logistics are absolutely crucial here, because public transport around the canyon is essentially non-existent and you have to get everywhere by your own or a rented car. For your base, ideally pick one of the villages near Lake Sainte-Croix, from where the water and the start of the scenic roads are just a short hop. Always search for accommodation and book well in advance through popular portals like Booking, because capacity in the small villages is very limited and another price rise is expected for 2026.

The biggest visual gem is the village of Moustiers-Sainte-Marie, literally wedged into a cleft in the rock and ranked among the most beautiful villages in France. It’s a gorgeous spot full of narrow lanes and little ceramics shops, but bear in mind that evenings here can get fairly lively and accommodation prices are the highest in the area. Take a look, for example, at the Hôtel Le Relais, which offers an authentic atmosphere and a great location right in the heart of the action. Expect to pay roughly €150 to €200 per night for a double room in season.

If you prefer more peace and quiet plus stunning views, stay in the village of Aiguines, which sits high above the lake and serves up absolutely fantastic scenery at sunset. Here you’ll find, for instance, the Hôtel Grand Canyon du Verdon, an excellent springboard for exploring the southern rim. For lovers of climbing and rawer nature, the perfect choice is the village of La Palud-sur-Verdon, where the famous Route des Crêtes scenic road begins and the whole local outdoor community gathers.

12 Things to See and Do in the Verdon Gorge

Now that you know when to go and where to rest your head, let’s take a detailed look at what awaits you in this breathtaking area. The following tips will guide you from the most iconic spots to hidden viewpoints that will leave you literally gasping. Be ready for the fact that the Verdon Gorge engages all your senses, and occasionally a bit of physical fitness too.

1. Pont de Galetas and Paddling into the Heart of the Canyon

This is the absolute centrepiece of the whole experience and a place you simply can’t skip. The Pont de Galetas bridge connects the shores of the lake exactly where the Verdon river escapes the tight grip of sheer cliffs and flows into the wide body of water. This is where those most famous photos are taken, of little boats drifting under the bridge into the shadow of the enormous limestone walls. The scene is so visually overwhelming that for a moment you’ll feel like you’re in a national park in North America rather than the south of France.

The most popular activity is renting a kayak, canoe or pedalo and heading upstream straight into the gorge. You’ll find rental spots on the small pebble beaches right below the bridge, and the price per hour hovers around €20 to €25 per boat. It sounds idyllic, and silently gliding over the emerald water really is, but there’s one big catch. You’re only allowed to paddle about two kilometres into the canyon before buoys protecting the strict nature reserve from human intrusion stop you in no uncertain terms.

Combustion engines are thankfully strictly banned here, which protects not just the cleanliness of the water but, above all, the absolutely fantastic acoustics of the whole space. The trouble is that the echo carries every human voice, so at midday it sounds more like a busy marketplace. If you want to enjoy the silence, the water dripping from the rocks and the occasional birdsong, you simply have to get up early and sacrifice a little sleep.

💡 Tip: Set your alarm so you’re standing at the rentals by 8:30 in the morning. You’ll be sure of a parking spot, the surface will be shrouded in mystical morning mist, and you’ll paddle into the gorge among the very first, before it turns into a motorway of colourful plastic boats.

2. Swimming in the Emerald Lac de Sainte-Croix

Although Lake Sainte-Croix looks completely natural and fits perfectly into the surrounding landscape, it’s actually a giant reservoir dating from 1973. To build it, the original village of Les Salles-sur-Verdon had to be entirely flooded; its new version now sits safely on the shore. The water in the lake is incredibly clean and reaches pleasant temperatures of around 24 degrees in summer, making it an absolute lifesaver against the heat after a full day out.

The colour of the water is a chapter all its own, shifting from deep blue through turquoise to an opaque emerald. This unique shade is caused by dissolved minerals and tiny particles of limestone and fluorine that the Verdon washes down from the rocks. When you step into the water, you’ll notice it leaves a very fine, almost imperceptible mineral film on your skin. All around the lake you’ll find plenty of beaches large and small, from grassy ones to pure pebble, so everyone can find their favourite stretch of shore.

If you’re after somewhat quieter swimming spots, steer clear of the main beach by the Galetas bridge and drive a little further towards the village of Bauduen. Here you’ll find smaller coves lined with pines that offer merciful shade in the afternoon heat. Don’t forget to pack water shoes, because the bottom tends to be stony and walking barefoot over scorching pebbles is not exactly a pleasant experience.

💡 Tip: Most beaches around the lake have no refreshment stalls or showers. Buy a fresh baguette, cheese and vegetables at the bakery first thing in the morning and have yourself a classic French picnic by the water.

3. Driving the Northern Rim: Route des Crêtes (D23)

Seeing the canyon from river level is gorgeous, but only from the edge of the precipice do you fully grasp its gigantic scale. The northern rim is traced by the famous Route des Crêtes scenic road, a roughly twenty-three-kilometre loop that both starts and ends in the village of La Palud-sur-Verdon. This is definitely not a road for the faint-hearted or for drivers prone to dizziness. The ribbon of asphalt often winds just a few inches from a deep abyss, and the low stone walls along the way feel more symbolic and decorative than like a genuine safety barrier.

Along the whole route you’ll find fourteen official viewpoints, the so-called belvedères, each offering a slightly different angle into the seven-hundred-metre depths. It’s worth stopping at every single one, because the landscape constantly changes and reveals new rock towers and meanders of the river far below. You’ll feel tiny here, and the majesty of the limestone walls will completely floor you.

The logistics of this route come with one very strict rule you mustn’t break. A large part of the loop is one-way and you have to drive it clockwise only. If you happen to overshoot an interesting viewpoint, you can’t turn the car around and go back to it. The road is extremely narrow and in summer it’s full of unwieldy caravans and motorhomes whose drivers occasionally forget to breathe out of sheer terror over the abyss.

💡 Tip: Set aside at least two to three hours to drive this short stretch. Stopping, taking photos and carefully edging past oncoming cyclists eats up far more time than a glance at the map would suggest.

4. Point Sublime Viewpoint and Vulture Watching

Of those fourteen viewpoints along the Route des Crêtes, one is utterly exceptional and lives up to its name. Point Sublime is an iconic spot where you stand on a rocky outcrop and hell itself opens up beneath you, in the form of the narrowest and deepest point of the entire canyon. This is where you’ll feel most acutely the power of the water that managed to gnaw its way through the massive rock and create this geological miracle.

Beyond the view itself, people also come here for another fascinating natural spectacle. The canyon is home to a huge colony of griffon vultures, which were artificially reintroduced to the area in the past and now thrive here enormously. These giant birds with wingspans of nearly three metres use the warm thermal currents rising from the floor of the heated gorge and circle on them elegantly.

The intriguing part is that from Point Sublime you often don’t look at them from below, as is usual, but literally gaze down onto their backs, because they fly far below the level of your viewpoint. It’s an utterly mesmerising experience to watch these scavengers in their natural habitat, smoothly spiralling up towards the blue sky without a single beat of their wings.

💡 Tip: Don’t forget to pack binoculars or a camera with a decent telephoto lens. The vultures may be large, but the canyon is so vast that they easily get lost in it, and a bit of zoom lets you observe the details of their plumage.

5. The Southern Rim: Corniche Sublime (D71)

While the northern route is all about raw verticality and vertigo, the southern shore of the lake is served by the Corniche Sublime road, which reveals the canyon from a much wider, more complete perspective. This route is noticeably longer, a little smoother to drive, and offers views of the entire limestone massif from a distance, so you can more easily imagine its overall enormity. The D71 climbs up from the village of Aiguines and gradually rises into the hills, opening up views not only into the abyss but also onto the shimmering surface of Lake Sainte-Croix in the distance.

Here too you’ll find a whole series of stunning stops, and among the most popular is the Balcons de la Mescla viewpoint. At this spot the smaller gorge of the Artuby river joins the main canyon and creates a beautiful crossroads of waterways far below you. It’s an ideal place for panoramic photos, because in the afternoon the sun creates an amazing play of shadows on the surrounding rocks.

Unlike the northern route, you’ll meet somewhat fewer buses here, because some sections are too narrow for them, but even so you have to stay constantly alert behind the wheel. The rocks often overhang the road as low ledges, creating nasty blind spots where you simply can’t see into the bend. If your windows are open, listen out for honking from oncoming local drivers.

💡 Tip: Drive the Corniche Sublime in the late afternoon, when the sun is no longer so harsh. The surrounding limestone cliffs turn unbelievable shades of gold and orange, and the light is absolutely perfect for photography.

6. Pont de l’Artuby and a Test of Courage

While driving the southern Corniche Sublime route you’ll come across a technical and architectural curiosity that’s guaranteed to quicken your pulse, even if you just walk across on foot. It’s the Pont de l’Artuby, whose elegant concrete arch spans high above the side canyon of the river of the same name. The bridge was built in the 1930s and is a beautiful display of engineering skill in its own right, but the main draw lies in its height.

At an incredible 182 metres, it’s one of the absolute highest spots for bungee jumping in all of Europe. On weekends during the summer season, fans of extreme adrenaline gather here and dive headfirst into the terrifying void beneath the bridge. Even if you don’t take part in this madness yourself, just watching the jumpers and peering over the railing will reliably turn your stomach and leave your knees knocking.

You can stop at a small car park right at the bridge entrance, from where you can then walk across and back on foot. The bridge also offers a lovely view into the narrow gorge, which is full of greenery and feels far wilder than the main Verdon stream. It’s a popular stop for motorcyclists, so weekends here can get pretty lively and noisy.

💡 Tip: If you fancy bungee jumping, expect a price of around €140 per jump in 2026. Jumps only run on selected days, though, and booking in advance through specialised websites is an absolute must, otherwise you won’t stand a chance.

lukas a lucka
Lukáš and Lucie recommend
Where to stay at Verdon Gorge
3 accommodations — hotels and other lodging options

7. The Golden Star Above Moustiers-Sainte-Marie

A visit to the Verdon Gorge wouldn’t be complete without exploring Moustiers-Sainte-Marie, a village that regularly ranks at the very top of lists of the most beautiful towns in France. Its setting is utterly dramatic, as the houses of yellowish stone are practically crammed into a narrow rocky crevice through which a babbling mountain stream flows. From a distance it looks as if the village might slide down the slope into the valley at any moment.

What will catch your eye most at first glance, though, is the golden star hanging high above the village on an enormous iron chain strung between two rocky peaks. The origin of this star is wrapped in many legends, the most famous of which claims it was hung here by the knight Blacas after his return from the Crusades as thanks for surviving Saracen captivity. The star has been replaced several times over the centuries and today measures a respectable 125 centimetres.

The village itself is a maze of steep cobbled lanes, staircases and little squares that breathe genuine Provençal atmosphere. Moustiers is famous for its production of traditional faïence, a fine glazed ceramic decorated with typical blue and yellow patterns. Pop into the local boutiques even if you don’t plan to buy anything, because the hand-painted plates and vases are small works of art.

💡 Tip: Don’t be put off by the effort and climb the 262 stone steps up to the chapel of Notre-Dame de Beauvoir, which towers high above the village. The view from the terrace in front of the chapel over the rooftops and the lavender fields in the distance is one hundred percent worth the sweat.

8. The Village of Aiguines and the Best Sunset

If you’re looking for the spot with the best view of the whole of Lake Sainte-Croix, you need to head to the village of Aiguines. While Moustiers lies hemmed in by cliffs, Aiguines is enthroned on a high hill above the water and serves as a kind of gateway to the southern Corniche Sublime route. It’s a far quieter place than the more famous Moustiers and exudes a more relaxed, rural atmosphere that even the tourist crowds haven’t spoiled.

The village is dominated by a beautiful Renaissance château (Château d’Aiguines) with its characteristic little turrets covered in colourful glazed tiles. Unfortunately, the château is in private hands and not open to the public, but its exterior makes a fantastic backdrop for your photos. Right next to the château is the small church of Saint-Jean, which offers the very widest panoramic view of the surroundings.

Aiguines is also a centre of traditional craft, specifically wood-turning and the production of boules for the game of pétanque, which were originally made from boxwood studded with nails. Today you can read about this intriguing history and view the exhibits in the local museum (Musée des Tourneurs sur Bois). It’s a great activity for an hour or so if you want to hide from the worst of the midday heat.

💡 Tip: Book a table on the outdoor terrace of one of the restaurants on the main square exactly for sunset time. Watching the sun sink below the horizon and turn the lake below red while you tuck into a delicious vegetarian pizza or a cheese platter is priceless.

9. La Palud-sur-Verdon: Paradise for Climbers and the Outdoors

This unassuming village, sitting at an altitude of over 900 metres, is the absolute heart of the northern part of the canyon and serves as the unofficial capital of all climbers and outdoor enthusiasts. If you’re after a place buzzing with a sporty vibe, where you’ll meet people draped in carabiners and ropes, you’re in the right spot. La Palud lacks the picturesque polish of Moustiers; it’s more of a functional base with a few bakeries, bars and specialist gear shops.

The famous one-way Route des Crêtes starts from this village, so cars and motorbikes ready for the scenic loop pile up here in the morning. It’s also the starting point for plenty of shorter walking trails that run across the surrounding hills and offer great views of the limestone walls without having to fight your way through crowds. The local cafés are full of debates about who climbed which route and what tomorrow’s weather will be like.

In the village you’ll also come across a small but very pretty 18th-century château (Château de La Palud), which today houses the national park’s information centre (Maison des Gorges du Verdon). Be sure to stop in. You’ll find excellent maps, information about trail closures and an exhibition dedicated to the local fauna, flora and geology, which will help you better understand how this natural wonder actually came to be.

💡 Tip: If you’re missing any hiking gear, whether sturdy boots, a backpack or just a decent water bottle, the local outdoor shops are incredibly well stocked and the staff will give you very knowledgeable advice on choosing a suitable route.

10. Adrenaline on the Water: Canyoning and Rafting

The Verdon Gorge isn’t just about gazing out from the car; it’s a huge playground for lovers of active recreation. Canyoning is extremely popular here, where, dressed in a wetsuit and kitted out with a helmet, you walk, swim and abseil through narrow side gorges that the average tourist will never see. It’s an intense physical experience in which you leap into deep pools of icy water and slide down natural stone chutes carved by the river.

Another major attraction is rafting and the so-called aqua-randa (water trekking). While the raft suits the spring months when the flow is at its strongest, aqua-randa is run in summer when there’s less water. You let the current carry you in a life jacket and take in the steep cliffs from the lowest possible perspective. All these activities must take place under the supervision of certified local guides, because the river can be treacherous and dangerous whirlpools form in many places.

The crucial thing to be aware of is the extreme demand. You can’t decide on adrenaline activities from one day to the next in high season. Booking through portals like GetYourGuide or directly with local agencies needs to be sorted well in advance, often two to three months before you leave. Instructors have their calendars full from spring onwards, and you won’t find a single free slot once you’re there.

💡 Tip: If you’re travelling with family, ask the agencies about canyoning routes labelled “découverte” (discovery). These are specially adapted so that even children from around eight years old can manage them, they don’t involve extremely high jumps, and the water in the side tributaries is a little warmer.

11. Lavender Fields on the Plateau de Valensole

Although it’s not strictly inside the canyon, the Valensole plateau lies so close that a visit is an absolute must. As you head northwest from Lake Sainte-Croix, the landscape suddenly opens up and the roads begin to be lined with endless purple fields. The Plateau de Valensole is the largest and most famous lavender-growing area in all of Provence, and in summer it turns into heaven for the eyes and the nose.

The flowering period is fairly short and depends very much on the current weather, but as a rule, you’ll see the best colours from mid-June to mid-July. After that the harvest begins and the fields quickly vanish under tractor wheels. Walking among the neat rows of blooming lavender, listening to the hum of thousands of bees and breathing in that intense, calming scent is an experience you’ll remember forever. Many fields are complemented by patches of bright yellow sunflowers, creating an absolutely perfect colour contrast for photos.

Don’t forget to stop at one of the local farms or distilleries scattered along the road. You can buy essential oils, lavender soaps or taste lavender honey. The farmers are used to tourists and often offer short free tours, showing you how distillation is done today and how it was done a hundred years ago.

💡 Tip: The fields right by the main roads (for example the D8) tend to be besieged by coaches full of tourists. Turn off onto smaller side lanes and you’re guaranteed to find completely empty lavender fields where you’ll have all that purple splendour entirely to yourself.

12. Hiking and the Famous Blanc-Martel Trail

If you want to get to know the canyon really deeply and don’t mind sweat and blisters, you have to set off on a hike. The area has dozens of kilometres of marked trails, but the absolute king of all treks is the Sentier Blanc-Martel. This roughly fourteen-kilometre route runs right along the canyon floor, close beside the wild river, and offers views you’ll simply never see from the car or from the viewpoints above. The trail starts at the Chalet de la Maline and ends at the Point Sublime viewpoint.

The trail got its name from two explorers (Édouard Alfred Martel and Isidore Blanc) who were the first to traverse the canyon completely in the early 20th century. The walk takes you roughly six to seven hours of actual time and is definitely no Sunday stroll in the park. You’ll climb steel ladders, scramble through boulder fields and pass through dark tunnels left behind by an unfinished hydraulic project from the last century. One of the tunnels (Tunnel du Baou) is nearly 700 metres long and pitch black inside.

The trickiest part of the whole hike, though, is the logistics, because the route isn’t a loop. You can’t leave the car at the start and walk back to it. Thankfully, a special shuttle bus (navette) runs in the summer season, connecting La Palud with the start and end of the trail. You do have to book your seat on the bus in advance online, though, because capacity is limited and taxis in this wilderness practically don’t exist.

💡 Tip: For the tunnels at the end of the route you absolutely need a quality headlamp or torch; a phone light really isn’t enough, and there’s often water and mud on the ground. And don’t forget to bring at least three litres of water per person, because down in the canyon the air doesn’t stir and the heat is stifling.

Where to Go Next from the Verdon Gorge

Once you’ve explored all the viewpoints and tested the temperature of Lake Sainte-Croix, the question of where to head next naturally comes up. The south of France is incredibly varied, and the Verdon Gorge sits strategically right on the border of several completely different worlds.

If you want to keep exploring historic villages, the scent of herbs and good wine, head west deeper into Provence. You can visit papal Avignon, the ochre quarries in Roussillon, or wander the lanes of Aix-en-Provence. Provence is calmer and will relax you beautifully after the adrenaline of the Verdon.

A completely different experience awaits if you head southwest into the Rhône river delta. The Camargue is Europe’s Wild West – a total flatland without a single hill, ruled by the mistral wind and shallow salt water. While the Verdon overwhelms you with verticality, the Camargue soothes the mind with horizontal infinity. Here you’ll see thousands of wild pink flamingos, herds of wild white horses wading through marshes, and the brave gardians (local cowboys) who tend the black bulls. Stop by the salt pans at Aigues-Mortes, where the water turns blood red thanks to algae.

And if you find yourself craving the bustle of a big city, luxury and sea waves, just drive a little under two hours southeast and you’ll be welcomed by the dazzling French Riviera. Nice, Cannes or Monaco offer the perfect contrast to the rugged mountain landscape – wide promenades, luxury boutiques and the pebble or sandy beaches of the Mediterranean.

Frequently Asked Questions

How to best get to Verdon Gorge from the Czech Republic?

The fastest option is to fly to the south of France. Direct flights operate from Prague to Nice or Marseille (often at very reasonable prices). From both airports you’ll need to rent a car, and the journey to Lake Sainte-Croix takes just over two hours. A car is an absolute necessity here – without one, you won’t be able to reach the viewpoints and more remote villages.

Is the Verdon Canyon suitable for families with children?

Yes, but with reservations. Swimming in Lake Sainte-Croix and pedal boat rides are great for kids. Scenic drives with small children can be challenging due to frequent stops and heat. Demanding hiking treks to the canyon floor (like the Blanc-Martel trail) are not recommended at all for small children due to the difficult terrain and lack of escape routes.

What is the water temperature in Lake Sainte-Croix?

“`html
The water in the lake is surprisingly pleasant. In July and August, temperatures commonly range around 23 to 25 degrees Celsius, which is ideal refreshment in the Provençal heat. However, the Verdon River itself deeper in the canyon is much colder, usually around 14 to 16 degrees.
“`

Can I bring my own dog on a rental boat?

The majority of rental places near Pont de Galetas bridge allow dogs on canoes and pedal boats, but it always depends on the specific operator. The dog should be calm and accustomed to water. Keep in mind, however, that in summer it’s extremely hot on the water and the sun beats down strongly, so it may not be entirely comfortable for the animal.

Do I need a jeep or SUV to drive the Route des Crêtes?

No, the Route des Crêtes road (D23) is fully paved and with a bit of caution you can drive it in any regular car. The problem isn’t the road surface quality, but the road width and occasional steep inclines. Larger motorhomes often have serious trouble making it around the bends.

Where can I park my camper van for the night near Verdon Gorge?

Wild camping is strictly prohibited throughout the entire Verdon Regional Nature Park and fines are very high. You must use official campsites, of which there are quite a few around the lake and in La Palud-sur-Verdon, or designated motorhome parking areas (so-called aires de camping-car). In summer, advance booking is necessary.

Are there mosquitoes in the area?

Around Lake Sainte-Croix and in the canyon itself, mosquitoes aren’t too much of a problem because the water is cooler and often flowing. However, the situation changes dramatically if you head further south to the marshy Camargue region – there, mosquitoes are an absolute plague during the summer months and a good repellent is essential.

Tips and Tricks for Your Vacation

Don’t Overpay for Flights

Search for flights on Kayak. It’s our favorite search engine because it scans the websites of all airlines and always finds the cheapest connection.

Book Your Accommodation Smartly

The best experiences we’ve had when looking for accommodation (from Alaska to Morocco) are with Booking.com, where hotels, apartments, and entire houses are usually the cheapest and most widely available.

Don’t Forget Travel Insurance

Good travel insurance will protect you against illness, accidents, theft, or flight cancellations. We’ve had a few hospital visits abroad, so we know how important it is to have proper insurance arranged.

Where we insure ourselves: SafetyWing (best for everyone) and TrueTraveller (for extra-long trips).

Why don’t we recommend any Czech insurance company? Because they have too many restrictions. They set limits on the number of days abroad, travel insurance via a credit card often requires you to pay medical expenses only with that card, and they frequently limit the number of returns to the Czech Republic.

Find the Best Experiences

Get Your Guide is a huge online marketplace where you can book guided walks, trips, skip-the-line tickets, tours, and much more. We always find some extra fun there!
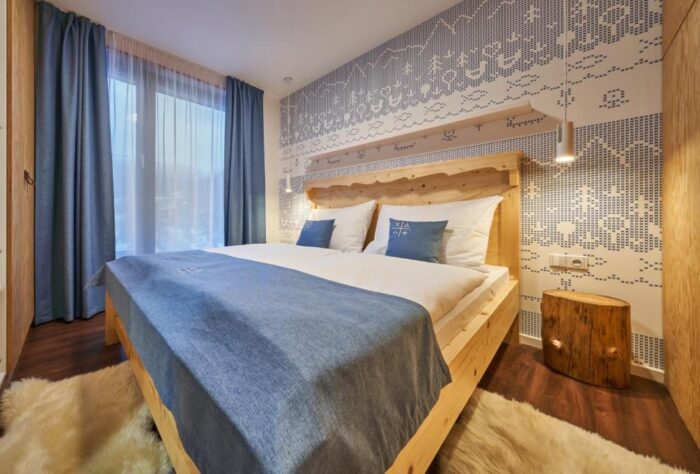
Money in Turkey: Lira, Prices, Payments & SIM in 2026

TL;DRThe Turkish lira (TRY) keeps sliding thanks to inflation running above 30%, so bring euros or dollars rather than any leftover currency from home. Prices run on two tracks: everyday life is cheap, but major sights charge in euros – Hagia Sophia is €25, Topkapı Palace €55, Ephesus €40, and a hot-air balloon flight over Cappadocia €250-450. At cash machines, always decline the DCC conversion and choose “Pay in TRY”, or you’ll lose 5-8% on the exchange – and steer clear of Euronet machines, which charge an 8% fee. Tipping in restaurants is 5-10% in cash, left on the table. Turkey isn’t in the EU, so roaming is pricey – it’s worth setting up an eSIM (Airalo, Holafly) before you fly out. British passport holders don’t need a visa for stays up to 90 days, but your passport must be valid for at least 6 months after you get back.

Turkey may sit partly in Europe, and in the resorts it certainly feels that way, but financially and bureaucratically you are outside the European Union. That changes the rules of the game: different roaming, different payments, an invalid European health insurance card, and ATMs that try to skim a few percent off you. Getting the turkey currency right is the difference between a relaxed holiday and a nasty surprise on your bill.

How the practical side works will decide your whole trip – you’ll either enjoy it stress-free, or you’ll be blindsided by a phone bill, ATM fees and unfavourable exchange rates. The good news is that with a little preparation, Turkey is very cheap for a traveller with euros in their pocket.

In this guide you’ll find everything about money in Turkey: how the lira and the dual pricing work, how to pay, which ATM traps to watch out for, how much to tip, how to sort out data with an eSIM, and what different types of holiday really cost.

TL;DR

  • The lira (TRY) is falling ⚠️: inflation over 30%, exchange rates change before your eyes. Don’t exchange money at home, bring euros.
  • Dual prices: everyday life is cheap (street food, transport), monuments are expensive and fixed in euros (Hagia Sophia €25, Ephesus €40).
  • How to pay: in cities and resorts by card (in lira!), cash for bazaars, street food and tips.
  • ATMs ⚠️: always choose “Pay in TRY” (decline DCC); watch out for 8% fees – avoid Euronet, look for PTT/ING/VakıfBank.
  • Tipping: 5–10% in restaurants, always in cash; €2–3 for porters, 10–20% for the bath attendant.
  • Data ⚠️: Turkey isn’t in the EU – get an eSIM (Airalo/Holafly) before you leave home, otherwise roaming is pricey.
  • Passport: valid for at least 6 months after your return; UK travellers can stay visa-free for 90 days.

The lira, inflation and the two faces of Turkish prices

The official currency is the Turkish lira (TRY), which has been in free fall in recent years – inflation is stuck above 30% and the exchange rate shifts almost literally before your eyes (roughly £100 ≈ 5,400 TRY). As a result, Turkey operates in a two-speed pricing reality.

Everyday local life is extremely cheap – the weak lira works in your favour with street food, tea, ferry tickets and local restaurants. The state-run tourist business, however, works differently: the government has hiked prices and pegs admission fees to the euro. Hagia Sophia costs €25, Topkapı Palace around €55, ancient Ephesus €40, and a hot-air balloon flight over Cappadocia €250–450 in season. Paradoxically, a huge dinner will cost you a few pounds, but a day touring Istanbul’s monuments works out pricier than Paris.

💡 Tip: Don’t bother exchanging money at home – you’ll struggle to find lira and the rate will be terrible. Bring euros or dollars, change a portion into lira for small purchases, and pay the rest by card. In resorts, traders and market stalls will accept euros, but at an unfavourable “tourist” rate.

Card vs. cash

Cards are now accepted almost everywhere in big cities and tourist zones – more than half of all transactions in Turkey are cashless, so you can tap your way through cafés, shops and museums. ⚠️ At state-run ticket desks (such as Ephesus) they often won’t take euros in cash at all – they require a card or lira.

That said, do keep some cash in lira – you’ll need it at bazaars, street food stalls, markets, when topping up a transport card, and above all for tipping.

Tricky ATMs and the trap called DCC

Withdrawing from an ATM is the most convenient way to get cash, but it hides the biggest financial trap – DCC (Dynamic Currency Conversion). As soon as you insert your card, the screen offers a “favourable” conversion into your home currency. ⚠️ Always, without exception, press “Decline” or “Pay in TRY” – otherwise the machine uses a rip-off rate and you’ll lose 5–8%.

To make matters worse, many Turkish banks have introduced a fixed 8% fee for foreign-card withdrawals. Steer well clear of the blue-and-yellow Euronet machines with the worst fees, and look for PTT (post office), ING or VakıfBank ATMs, where conditions tend to be more bearable (though the rules keep changing). If you’re exchanging cash, use a licensed exchange office (döviz) in the centre – avoid airport counters and hotel receptions.

Tipping: the culture of bakşiş

“Do I have to tip? Isn’t it a shakedown?” No. Tipping is a deeply ingrained norm in Turkey and is expected across the service industry. In restaurants and cafés the standard is 5–10%, in upmarket venues 10–15%. ⚠️ One crucial detail: you usually can’t add the tip to a card payment – you need to leave it on the table in cash.

Keep small change ready elsewhere too: a “coffee” tip of at least 100 TRY for transfer drivers, €2–3 for luggage porters, a few euros for the housekeeper in your room, and rounding up is enough for taxis. And after a traditional hammam bath, hand the attendant 10–20% directly.

Data and SIM: a trap for your wallet and your phone

“Roam like at home” does not apply in Turkey – with UK providers it falls into an expensive zone. ⚠️ If you don’t switch off data before landing, downloading just a few emails can send your bill soaring.

The simplest solution is an eSIM installed before you leave home (Holafly, Yesim, Airalo) – activate it after landing and you’re online instantly. If your phone doesn’t support eSIM, buy a physical tourist SIM (Turkcell, Vodafone, Türk Telekom) at the airport. ⚠️ Beware of a Turkish quirk – IMEI registration: after 120 days on a physical Turkish SIM, a foreign phone gets blocked until you pay a hefty tax. For a normal holiday this isn’t an issue, but an eSIM neatly sidesteps the trap. More details in our guide on what to pack for a holiday in Turkey.

Visas and passport validity

Good news: UK travellers don’t need a visa for Turkey and can stay up to 90 days within any 180-day period. The e-visas you’ll occasionally read about apply to other nationalities.

⚠️ The catch is the passport: officially Turkey requires validity of 60 days beyond your stay, but airlines often won’t let you board unless the document is valid for at least 150 days from entry. The safest bet is a passport valid for at least 6 months after your return.

How much a holiday in Turkey costs

Turkey can be dirt cheap or eye-wateringly expensive depending on your travel style. Add a 2% accommodation tax to everything.

  • Backpacking: hostels/guesthouses, street food, getting around by dolmuş, and free camping on the Lycian Way. You can get by in Cappadocia on around £25 per person per day (skip the balloon and watch the giants take off from a free viewpoint instead).
  • Couple’s weekend in Istanbul: a direct flight, a boutique hotel and the best of the monuments – just the “big five” sights come to nearly €190 per person. A three-day weekend for two, flights included, easily swallows £550–900.
  • Family all-inclusive: in peak season, 7 nights in a 5* ultra-AI resort typically costs £750–950 per person, dropping to £380–450 with early-bird deals or in the shoulder season. More in our article on all-inclusive in Turkey.

What to sort out before you fly

TaskDetailWhy it matters
Check your passportvalid at least 6 months after returnairlines may refuse boarding otherwise
Buy travel insuranceprivate cover with a high limityour EHIC/GHIC doesn’t work in Turkey
Sort out dataeSIM (Holafly), or switch data offTurkey isn’t in EU roaming
Prepare your moneyeuros/dollars in cash + a cardyou can’t exchange pounds easily, ATMs have DCC and 8% fees
Pack a scarfwomen: a light scarf for shoulders/hairfaster entry into mosques

💡 Tip for accommodation and experiences: We like to look for places to stay on Booking.com, which tends to have the best cancellation terms. For tickets, tours and activities, it pays to compare and book through GetYourGuide.

Where to next

Main hub: holiday in Turkey, practical prep: what to pack for a holiday in Turkey, safety and scams: is Turkey safe?, plus inspiration in when to visit Turkey and all-inclusive in Turkey.

Frequently asked questions

What currency to take to Turkey and how to pay?

Take euros or dollars (Czech crowns are difficult to exchange in Turkey and at unfavorable rates) and exchange part of them for lira at a licensed exchange office in town. In large cities and resorts, pay by card in lira (TRY), keep cash for bazaars, street food and tips. For both payments and withdrawals, always decline conversion to euros (DCC).

What is DCC and why refuse it?

DCC (Dynamic Currency Conversion) is an offer by ATMs or payment terminals to convert the amount into your home currency “for convenience”. However, the exchange rate is terrible and you’ll lose 5–8%. Always choose “Pay in TRY” (pay in lira) and let your bank handle the conversion. Also watch out for 8% fees at some ATMs – avoid Euronet.

Does European roaming and EHIC work in Turkey?

“`html
No. Turkey is not in the EU, so “Roam like at home” doesn’t apply and roaming is expensive – sort out data with an eSIM card before you leave home. Similarly, the European Health Insurance Card (EHIC) is not valid in Turkey; commercial travel insurance with a high limit is essential.
“`

How much do you tip in Turkey?

In restaurants and cafés 5–10% (in luxury establishments 10–15%), always in cash on the table (you usually can’t add it to the card). Transfer drivers at least 100 TRY, porters 2–3 €, housekeeping a few euros, hammam attendant 10–20%.

How long does a passport need to be valid for Turkey?

Officially 60 days beyond your stay, but in practice airlines often won’t let you board without at least 150 days validity. The safest option is to have a passport valid for at least 6 months after your planned return. Czechs don’t need a visa for tourism up to 90 days, but you cannot enter the country with just an ID card.

Tips and Tricks for Your Vacation

Don’t Overpay for Flights

Search for flights on Kayak. It’s our favorite search engine because it scans the websites of all airlines and always finds the cheapest connection.

Book Your Accommodation Smartly

The best experiences we’ve had when looking for accommodation (from Alaska to Morocco) are with Booking.com, where hotels, apartments, and entire houses are usually the cheapest and most widely available.

Don’t Forget Travel Insurance

Good travel insurance will protect you against illness, accidents, theft, or flight cancellations. We’ve had a few hospital visits abroad, so we know how important it is to have proper insurance arranged.

Where we insure ourselves: SafetyWing (best for everyone) and TrueTraveller (for extra-long trips).

Why don’t we recommend any Czech insurance company? Because they have too many restrictions. They set limits on the number of days abroad, travel insurance via a credit card often requires you to pay medical expenses only with that card, and they frequently limit the number of returns to the Czech Republic.

Find the Best Experiences

Get Your Guide is a huge online marketplace where you can book guided walks, trips, skip-the-line tickets, tours, and much more. We always find some extra fun there!