TL;DRYou apply for your ESTA online, only through the official site esta.cbp.dhs.gov, and it costs exactly $40.27 ($4 processing fee plus $36.27 authorisation fee). You’ll need your biometric passport details to fill it in, and from 2026 you’ll also have to upload a selfie to match against your passport photo. It’s worth applying at least 72 hours before you fly, though approval usually comes through within minutes. An ESTA is valid for 2 years from approval (or until your passport expires) and lets you enter the US visa-free for up to 90 days for tourism or a short business trip — the same rules apply whether you’re headed to New York, Los Angeles or Miami. Having an approved ESTA doesn’t guarantee entry, though: that’s down to the CBP officer at passport control when you land.
Planning a trip to the United States and dreading the thought of complicated paperwork? A correctly completed ESTA USA application is the essential first step for your journey across the Atlantic. The process takes just a few minutes, but it demands total accuracy. Typos or the use of dodgy websites could cost you money — and even your flight.
In this guide you’ll get a clear, practical walkthrough. You’ll learn the exact costs, the current requirements for 2026, and what the immigration control process looks like once you land at a US airport. You can handle everything yourself from home in a fraction of the time.
The article covers the whole US entry process: from submitting the application, through payment, to meeting a CBP officer at the airport. It doesn’t matter whether you’re flying to New York, Los Angeles or Miami. The procedure and conditions are identical for every US destination.
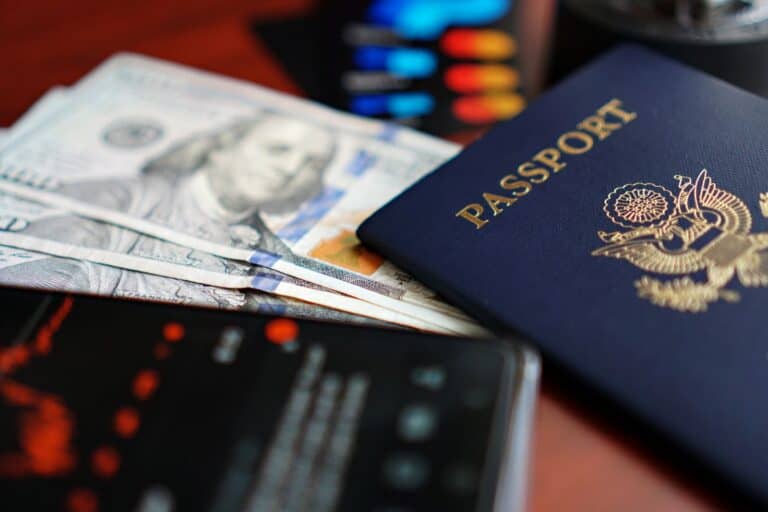
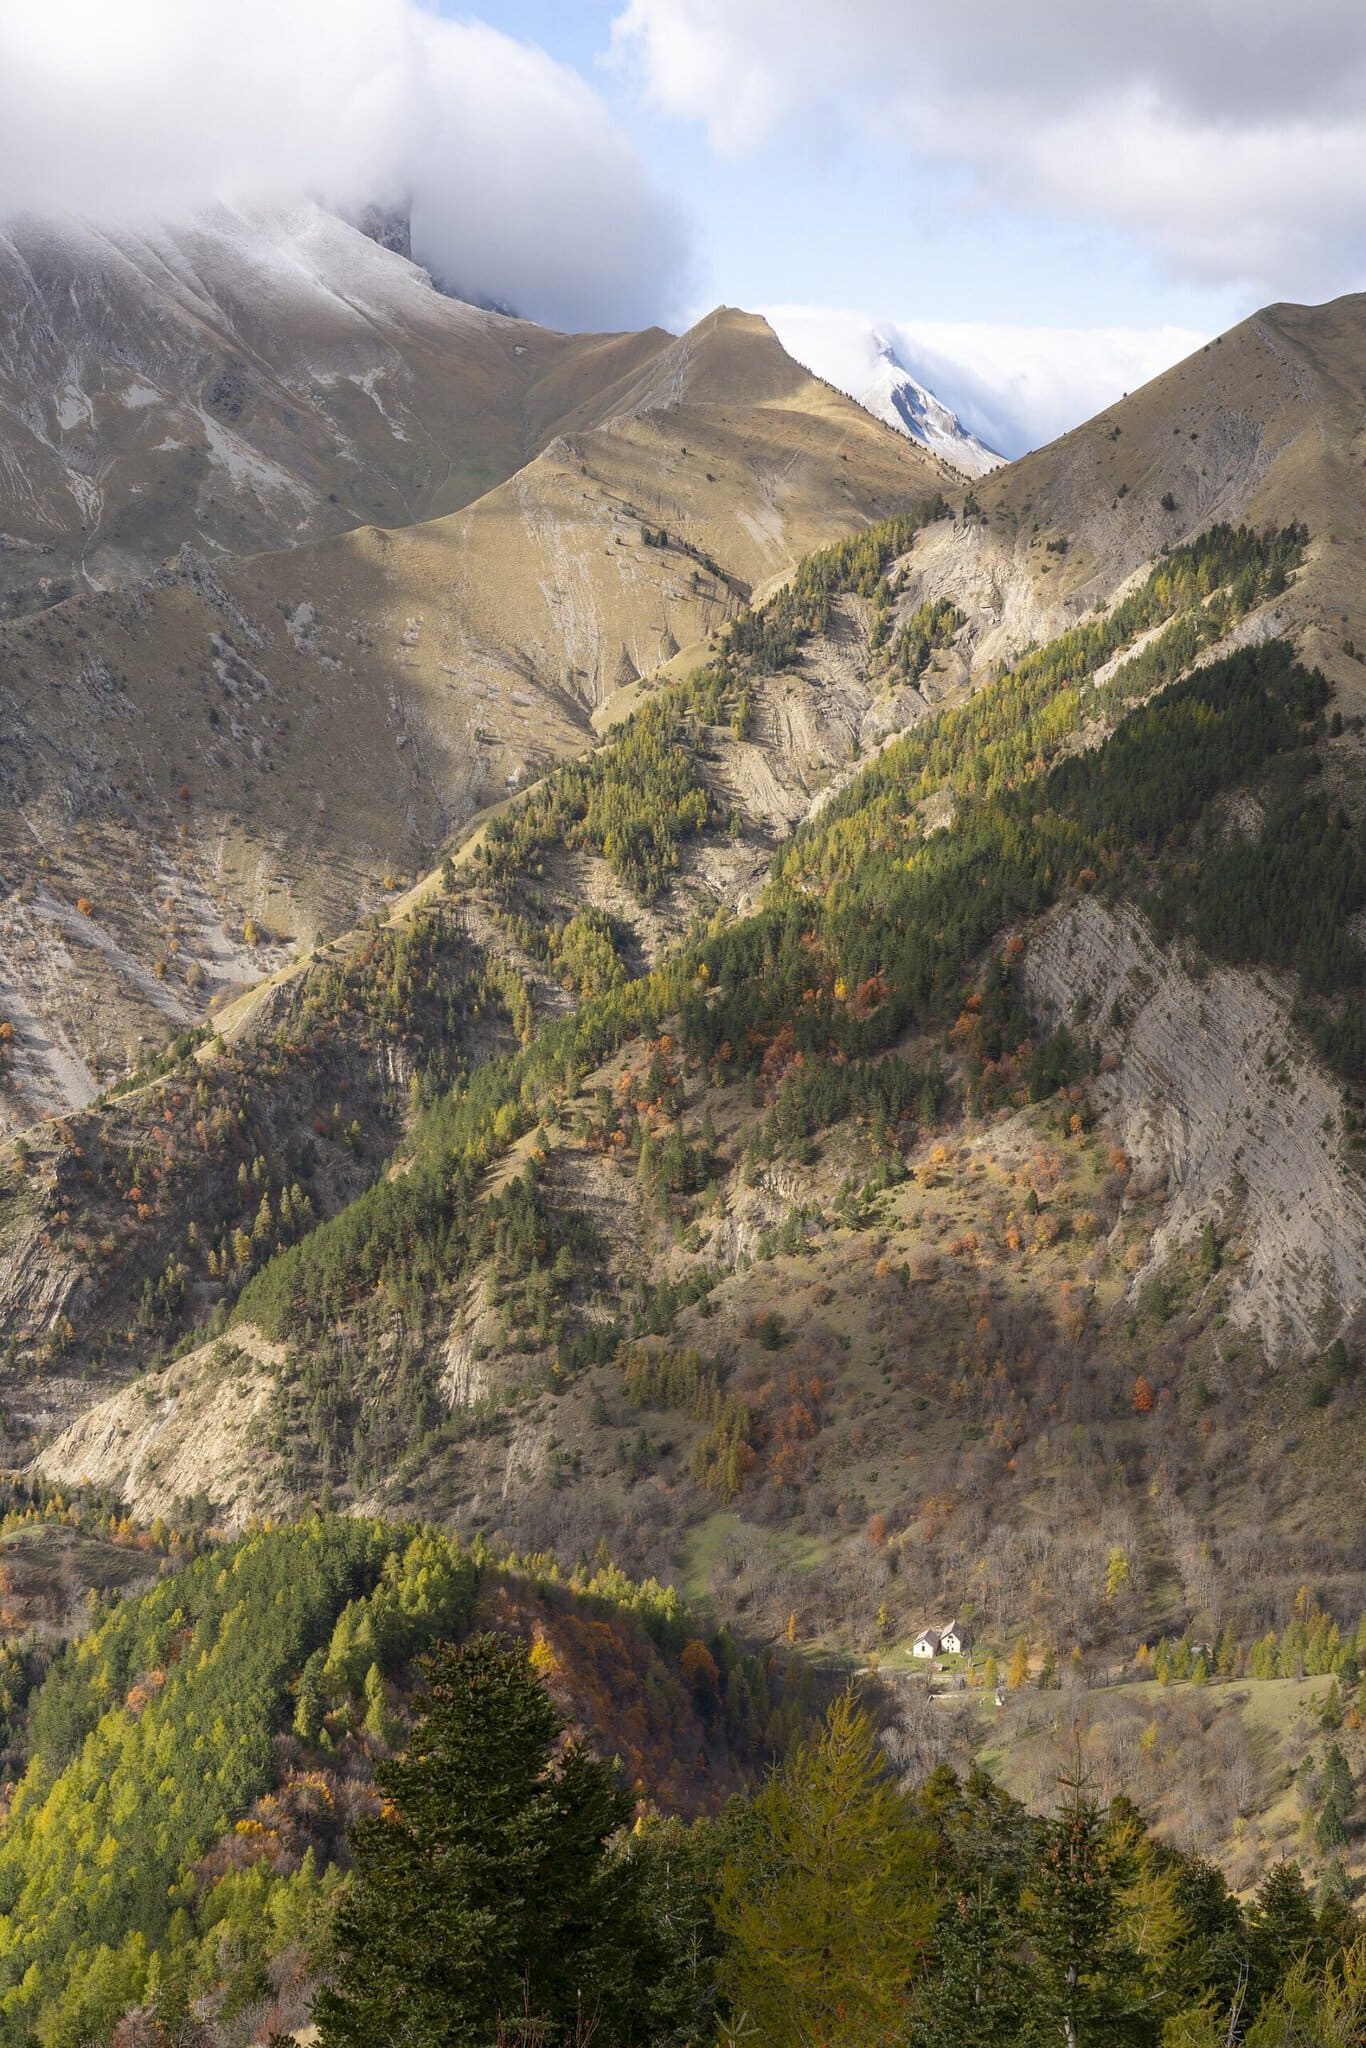
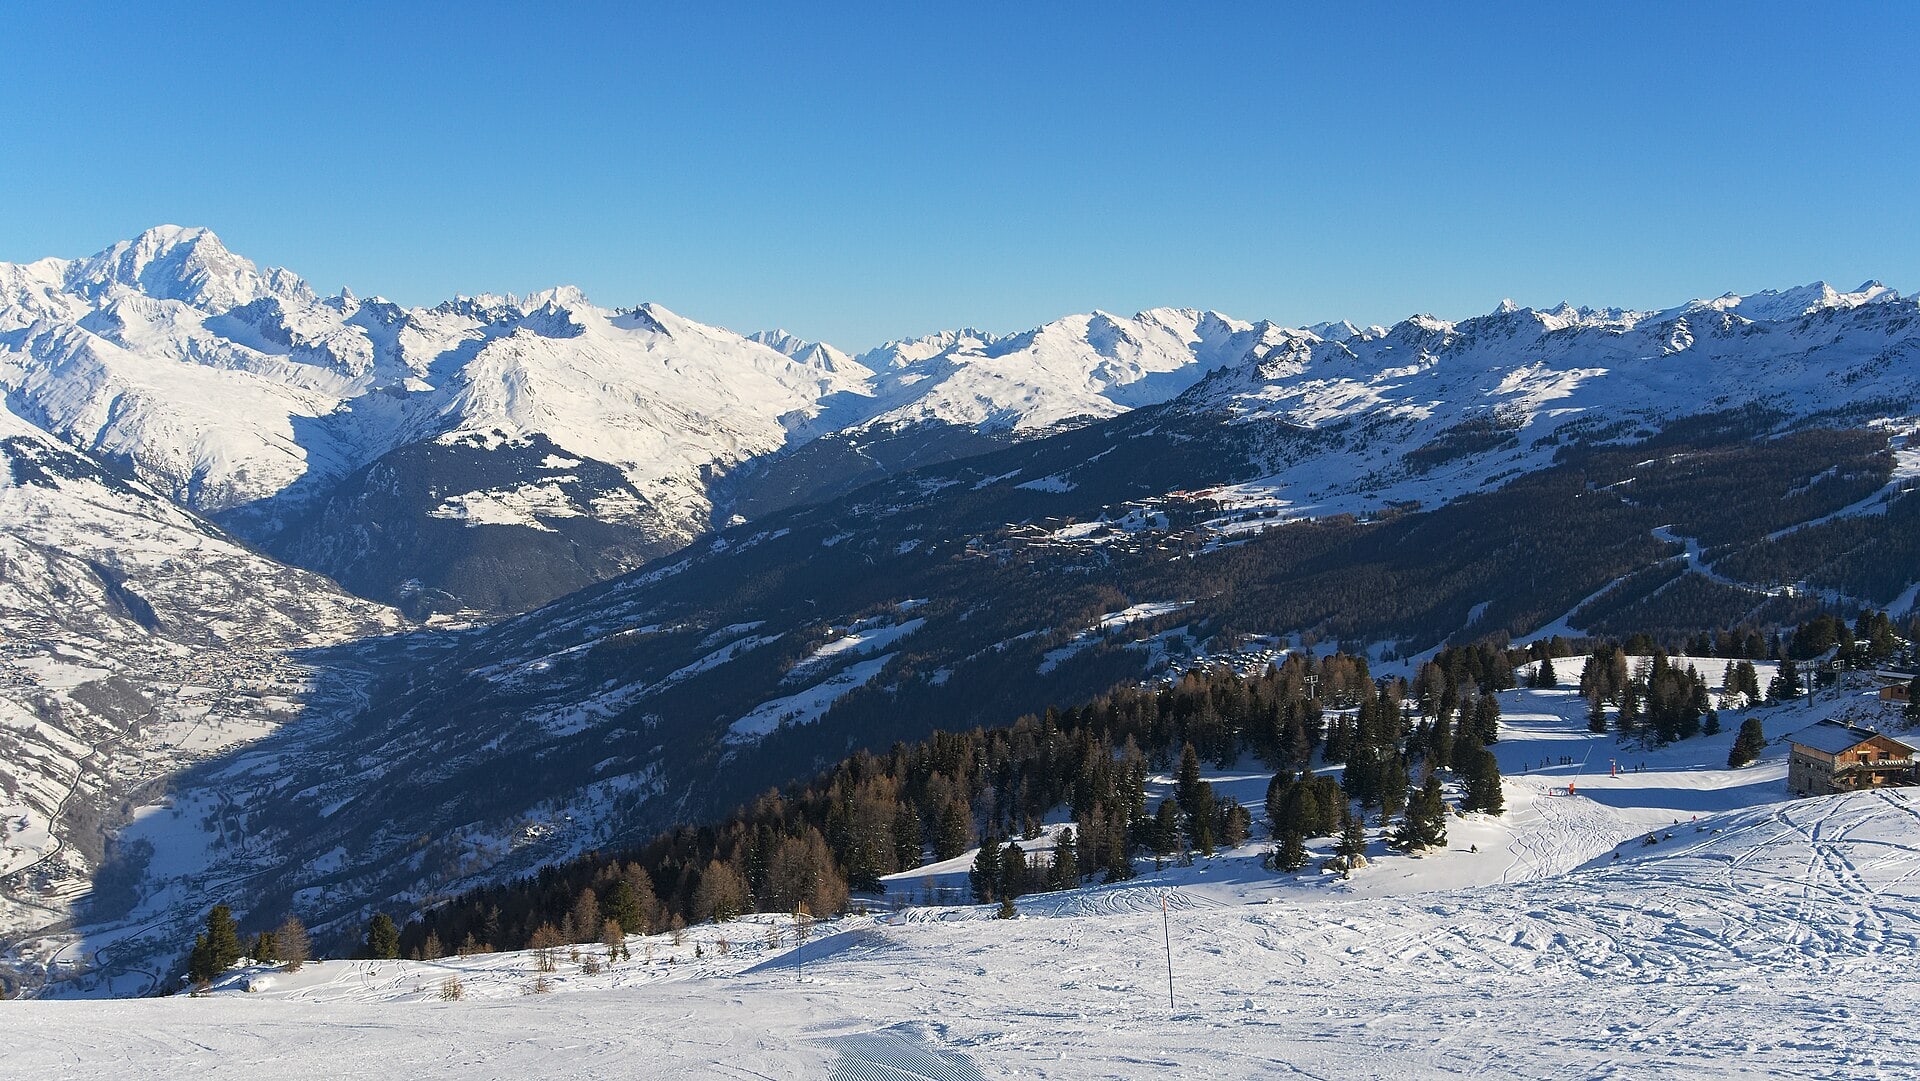
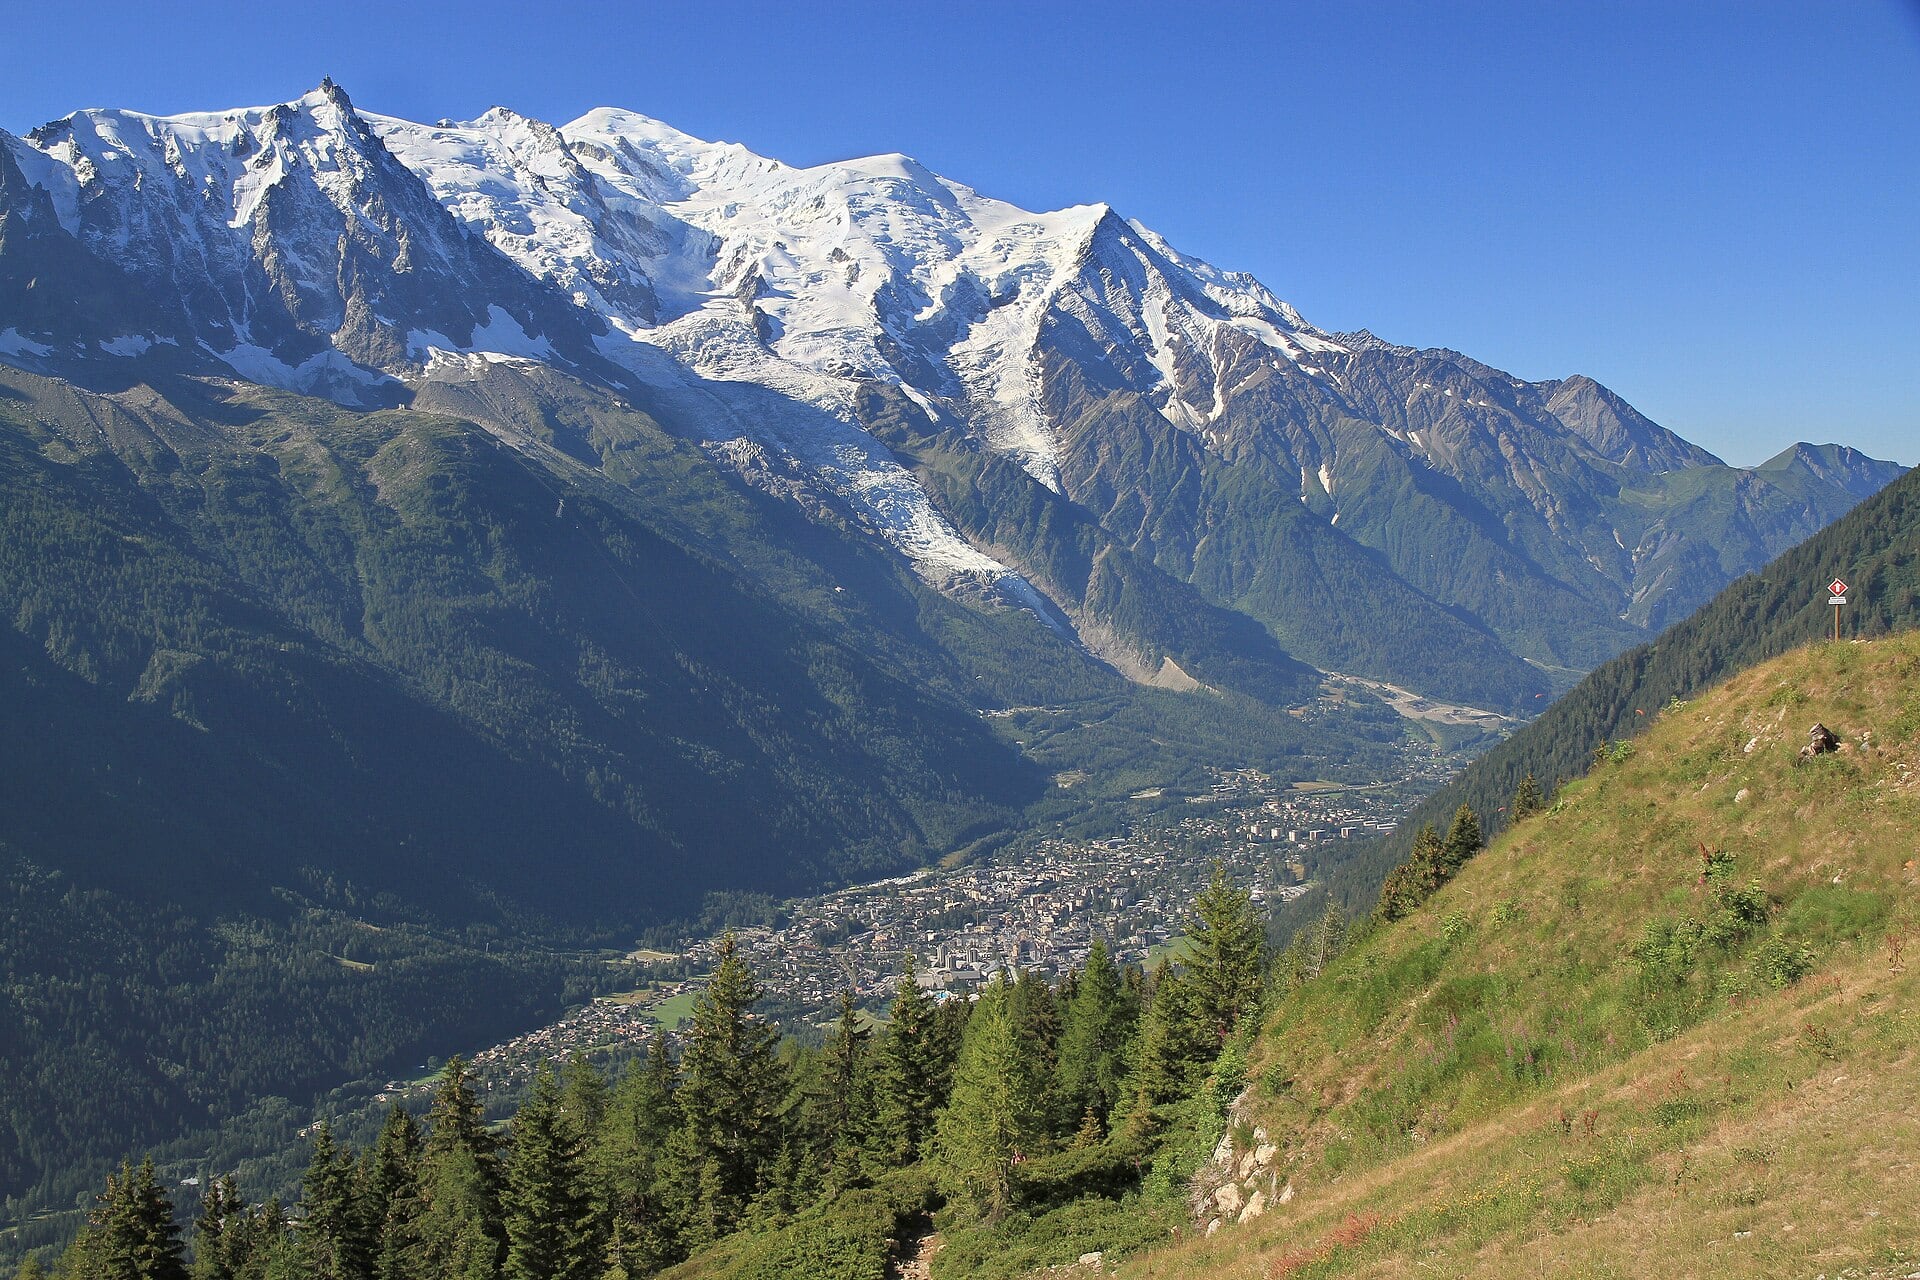
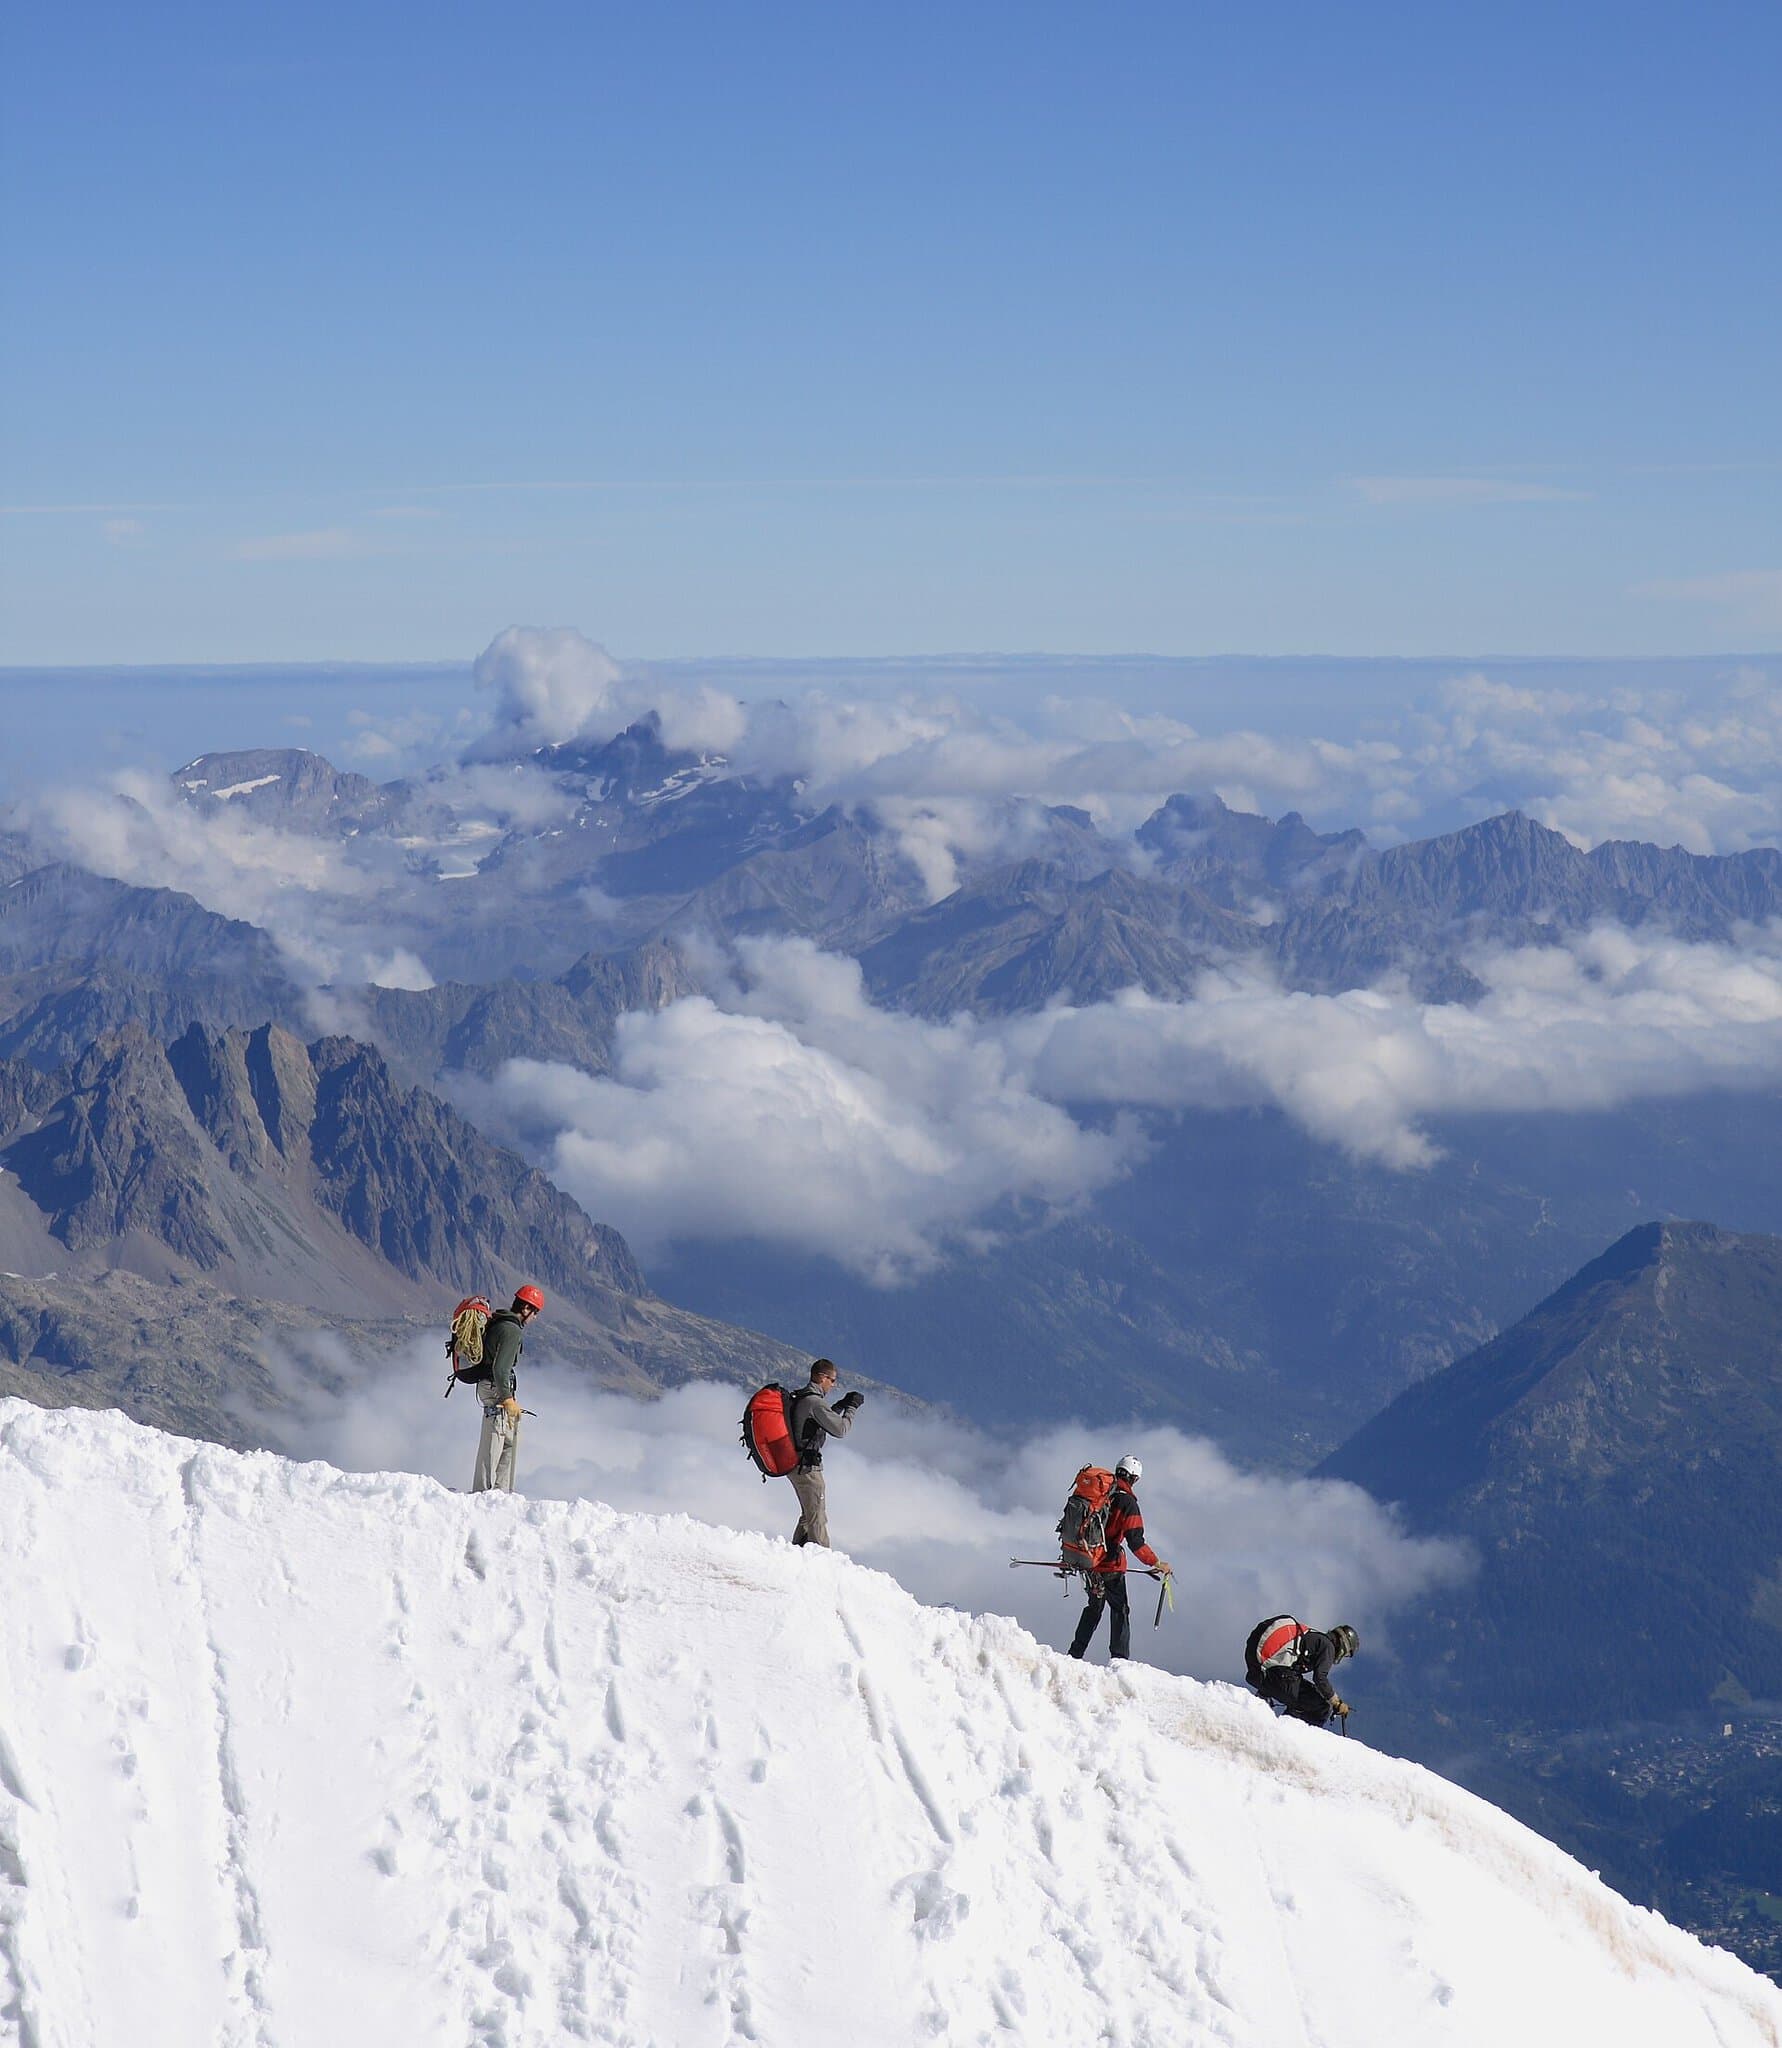
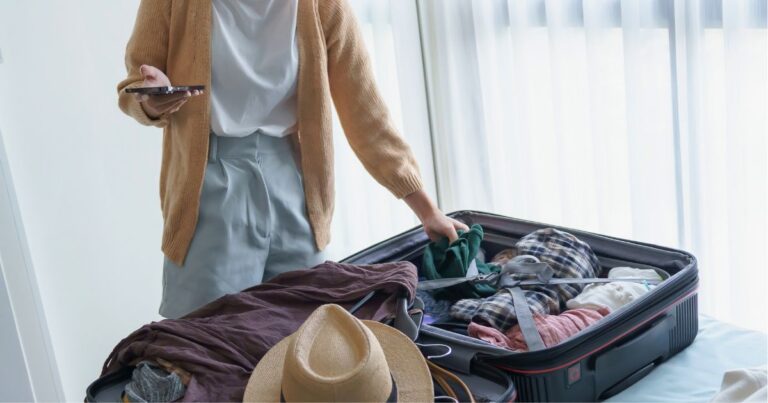
A trip to the USA starts with sorting out your ESTA (photo: Pexels)
TL;DR
What it is: ESTA is an electronic registration for visa-free entry to the USA for a maximum of 90 days.
Price: Exactly $40.27 (paid online by card).
Validity: 2 years from approval (or until your passport expires).
Where to apply: Only on the official government site esta.cbp.dhs.gov.
New requirement for 2026: You must upload a selfie to compare with your passport photo.
When to apply: At least 72 hours before your planned departure.
Important warning: An approved ESTA does not guarantee entry to the USA — the officer at the airport has the final say.
ESTA stands for Electronic System for Travel Authorization. It’s an electronic registration created for countries included in the Visa Waiver Program. The United Kingdom is part of this programme. Thanks to that, UK citizens don’t need a traditional paper visa for ordinary trips.
This system allows you visa-free entry to the USA for tourism or a short business trip. A single stay must not exceed 90 days. Planning to study, do manual work or stay longer? In that case ESTA won’t cut it, and you’ll need to arrange a standard US visa at the embassy.
ESTA also doesn’t cover any kind of work permit. If you’ll be earning any income in the USA, you need a specific type of visa. Tourist activities (visiting landmarks, attending unpaid conferences, private visits to relatives), on the other hand, are fully in line with ESTA conditions.
How to Apply for an ESTA for the USA Step by Step
Filling in the form is a straightforward process. Get all your documents ready on the desk beforehand. That way you’ll avoid the needless stress of the website’s time limit running out. Work carefully and double-check every letter you enter.
Where to Apply (Official ESTA Application Site Only)
There’s only one correct place to submit your application. Open the official government siteesta.cbp.dhs.gov. The internet is full of scam pages posing as official agencies. These sites charge $80 to $100 just to forward your details.
You get nothing extra from them. The approval speed and success rate are identical. So always check that the address in your browser ends with the .gov domain, which marks US government institutions. Private sites don’t have this domain — and can’t.
What You’ll Need
The essential item is a valid biometric passport. You’ll recognise it by the small rectangle-with-a-circle symbol on the front cover. It must be a machine-readable document. Also have a payment card with online transactions enabled and a working email address ready.
A new requirement for 2026 introduces the obligation to upload a selfie with your application. The system automatically compares this facial photo with the image in your uploaded passport. Also prepare the address of your first accommodation in the USA and a rough travel itinerary. The form requires this information.
Filling It In and Paying
The form guides you through several sections. Fill in all details without accents, exactly as they appear in the machine-readable zone at the bottom of your passport. You’ll answer questions about your employment, health and criminal history. Answer truthfully and concisely.
At the end of the process the system prompts you to pay. Enter your card details and confirm the amount. Without a successful payment, your application won’t be sent for processing. After paying, you’ll see your Application Number on the screen. Save it or print it out.
Approval and Checking Your ESTA Status
Most travellers receive a decision within a few minutes. However, the authorities have an official window of 72 hours to assess it. For this reason, submit your application at least three days before departure. Don’t leave this step for the airport terminal.
You won’t get any confirmation email about approval. You have to check the status yourself on the official site in the “Check ESTA Status” section using your application number and passport number. If you see “Authorization Approved”, you’re all set and can start packing.
A status of “Authorization Pending” means they’re processing your application; just wait. “Travel Not Authorized” is a rejection. In that case you must apply for a standard visa at the US embassy. Any previously rejected ESTA applications must also be declared on every future application.
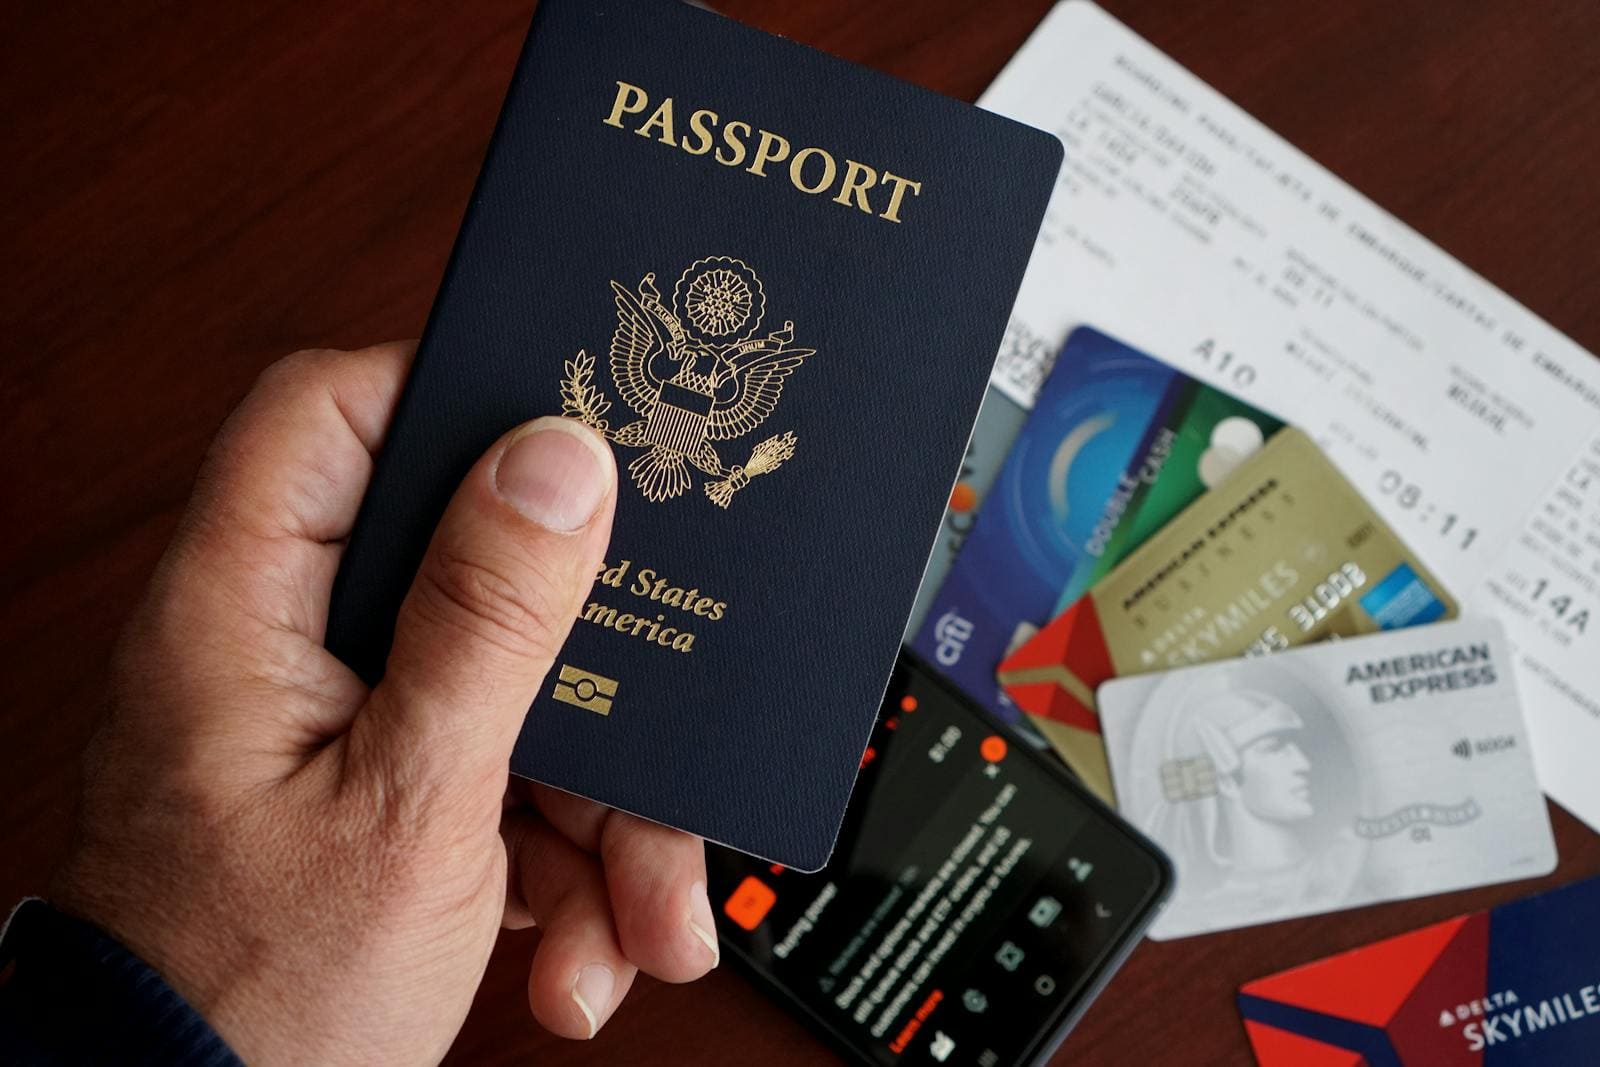
For an ESTA you need a valid biometric passport (photo: Pexels)
ESTA USA Price and How Long It Lasts
A new price list has been in effect since late 2025. Processing costs exactly $40.27. This amount is made up of two items. The first part is a processing fee of $4. The second is the authorisation fee itself, at $36.27.
The price increase replaced the previous rate of $21. If a website asks you for $80 or more, you’re on a scam intermediary portal. Leave that page and go to the government site. There are also growing queries about the so-called “Visa Integrity Fee” of $250. This hefty fee applies only to standard visa applicants — it does not apply to ESTA travellers.
An approved registration is valid for exactly 2 years from the date of issue. There’s one exception. If your passport expires in less than two years, the authorisation ends together with the passport. If you get a new passport, you must submit a new ESTA application. The old one stops being valid. Within the validity period you can travel to the United States repeatedly with no further fees.
After Arrival: Immigration Control (CBP)
Landing on American soil marks the start of another process. An approved ESTA serves only as permission to board the plane heading to the USA. It doesn’t guarantee automatic entry to the country. The final word always belongs to the immigration officer (CBP) at the airport.
If you’re flying to New York, you’ll go through this check right at JFK, Newark or LaGuardia. You’ll join the queue for foreign nationals and wait to be called to the desk. The officer will ask you a series of basic questions. They’ll want to know the purpose of your trip, the length of your stay and where you’re staying.
Next comes taking your fingerprints on a digital scanner and photographing your face. The whole process at the desk usually takes just a few minutes. Have your return ticket ready, printed or downloaded. The officer also often asks for the exact address of your hotel or apartment.
Answer calmly, briefly and honestly. Officers process dozens of travellers an hour and appreciate clear, direct answers. Being overly chatty or nervous for no reason only drags the check out. Having your documents ready in hand (passport, ticket, accommodation address) is the easiest way to speed the whole thing up.
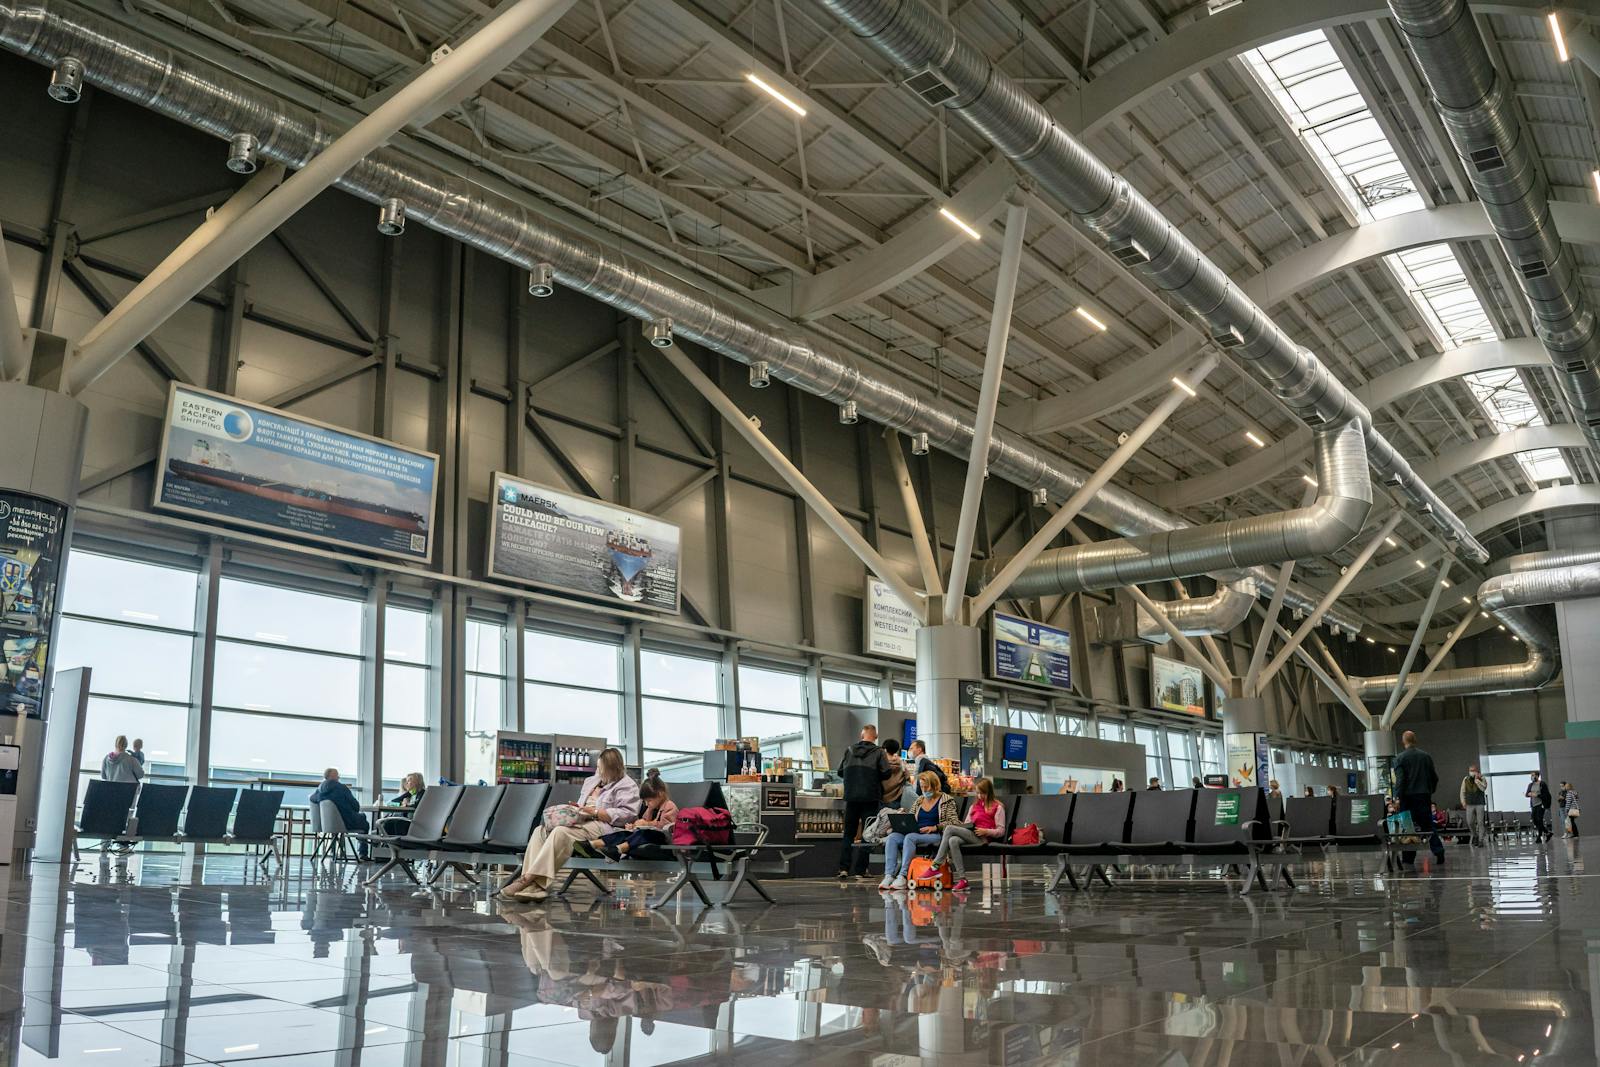
After landing, CBP immigration control awaits you (photo: Pexels)
Practical Tips and Common Mistakes
Preparing for a trip to the USA calls for attention to detail. A small slip at your computer can complicate boarding the plane. Here you’ll find concrete advice for a smooth process.
💡 Tip: Check your name and passport number at least three times. A typo in your name or mistaking the letter O for a zero in your passport number means an invalid registration. The airline won’t let you board with an error like that.
💡 Tip: Apply separately for every member of the family. The requirement applies including babies and small children. Every child must have their own biometric passport and their own approved registration for $40.27.
💡 Tip: Apply well in advance. The ideal time is right after buying your flights. The registration isn’t tied to a specific flight or airline. You can have it sorted months before departure, giving yourself peace of mind for the rest of your planning.
💡 Tip: The selfie you upload with your application must meet specific conditions. It needs to be a direct look into the camera, a neutral expression with no smile, good background contrast and adequate lighting on your face. An unsuitable photo will delay processing.
💡 Tip: Once you get a new passport, your existing ESTA automatically becomes void. So before travelling, always verify your registration status at esta.cbp.dhs.gov and check which passport it’s linked to.
Traveller Tips and Experiences
The experiences of thousands of travellers reveal clear behaviour patterns that lead to a successful entry to the USA. Here are the most common practical tips from the field.
Travellers most often advise ignoring the first search results and typing the government site’s address directly into your browser. That way you avoid falling for intermediaries charging triple the price.
Seasoned flyers recommend sorting your registration right after paying for your flight. That gives you a big time buffer in case the approval process takes longer.
At immigration control, it pays to speak briefly and clearly. Don’t volunteer answers to things the officer hasn’t asked about.
Have the printed hotel address and return flight confirmation on hand. Officers like to see these documents in person.
Double-check your passport expiry date before submitting your application. Many people only discover during the form that their passport is about to expire.
When filling in the form, open exclusively the official ESTA site. This page offers a secure environment, guarantees the fixed $40.27 fee and protects your personal data from third parties.
Where to Next
Got your approval and tickets in your inbox? Start planning your actual itinerary. New York offers endless options, and a good plan will save you dozens of hours and sore feet. Pick from our detailed guides:
“`html
ESTA (Electronic System for Travel Authorization) is an electronic registration that allows Czech citizens to enter the USA without a visa for a maximum of 90 days. Approval is done online through esta.cbp.dhs.gov.
“`
How much does ESTA cost in 2026?
ESTA costs 40.27 USD (4 USD processing fee + 36.27 USD authorization fee). Since the end of 2025, the price is higher than before (previously 21 USD). Payment is made by card directly at esta.cbp.dhs.gov.
How long is ESTA valid for?
ESTA is valid for 2 years from approval, or until passport expiration, whichever comes first. When you get a new passport, you must submit a new application. During the validity period, you can travel to the USA multiple times without any additional fee.
How long does ESTA approval take?
“`html
Approval usually comes within a few minutes, but officially it can take up to 72 hours. Apply at least 72 hours before departure, not at the airport at the last minute.
“`
Does ESTA guarantee entry to the USA?
No. ESTA is an authorization to board the plane, not a guarantee of entry. The final decision is always made by the CBP immigration officer upon arrival at a US airport.
Do children need ESTA too?
Yes, ESTA is processed for each traveler separately, including infants and small children. Each child needs their own valid biometric passport and their own approved registration.
Tips and Tricks for Your Vacation
Don’t Overpay for Flights
Search for flights on Kayak. It’s our favorite search engine because it scans the websites of all airlines and always finds the cheapest connection.
Book Your Accommodation Smartly
The best experiences we’ve had when looking for accommodation (from Alaska to Morocco) are with Booking.com, where hotels, apartments, and entire houses are usually the cheapest and most widely available.
Don’t Forget Travel Insurance
Good travel insurance will protect you against illness, accidents, theft, or flight cancellations. We’ve had a few hospital visits abroad, so we know how important it is to have proper insurance arranged.
Where we insure ourselves: SafetyWing (best for everyone) and TrueTraveller (for extra-long trips).
Why don’t we recommend any Czech insurance company? Because they have too many restrictions. They set limits on the number of days abroad, travel insurance via a credit card often requires you to pay medical expenses only with that card, and they frequently limit the number of returns to the Czech Republic.
Find the Best Experiences
Get Your Guide is a huge online marketplace where you can book guided walks, trips, skip-the-line tickets, tours, and much more. We always find some extra fun there!
TL;DRGetting around New York in 2026 runs on the contactless OMNY system, which finally replaced the old paper MetroCard on 1 January 2026 – just tap your regular bank card or phone with Apple Pay or Google Pay at the turnstile. A single subway ride costs $3, with a weekly cap of $35 (after 12 rides, the rest of the week is free), and the subway runs round the clock, 24 hours a day. From JFK, the quickest route is the AirTrain combined with the LIRR train to Penn Station or Grand Central – the journey takes 35 to 45 minutes and comes in under $17, whereas the yellow cab has a flat fare of $70 but with tolls and tip you’ll realistically pay over $100. Heading out from Newark, keep in mind the AirTrain shuts down on weekdays between 5am and 3pm, while from LaGuardia the free Q70 bus gets you to Jackson Heights station.
You’re standing at the edge of the platform and hear the familiar rumble of an approaching train in the distance. Finding your way around a huge, unfamiliar metropolis can trip up even seasoned travellers. But New York transportation actually works far more logically than it seems at first glance. Thankfully, these days you no longer need to decode complicated fare zones or hunt in confusion for ticket machines.
The city’s iconic subway is the main bloodstream of the entire city. It’ll reliably get you almost anywhere. This detailed guide will walk you through all the latest news and changes for 2026. You’ll find the exact ticket prices for every mode of transport. And you’ll learn how to travel from the airport to your hotel without needless stress or getting lost.
We’ll go step by step through paying with a contactless card at the turnstiles. We’ll look at the tricky airport taxis as well as the fantastic sightseeing ferries. You’ll also discover the new rules for driving cars into central Manhattan. Your comfortable journey starts right now. 😊
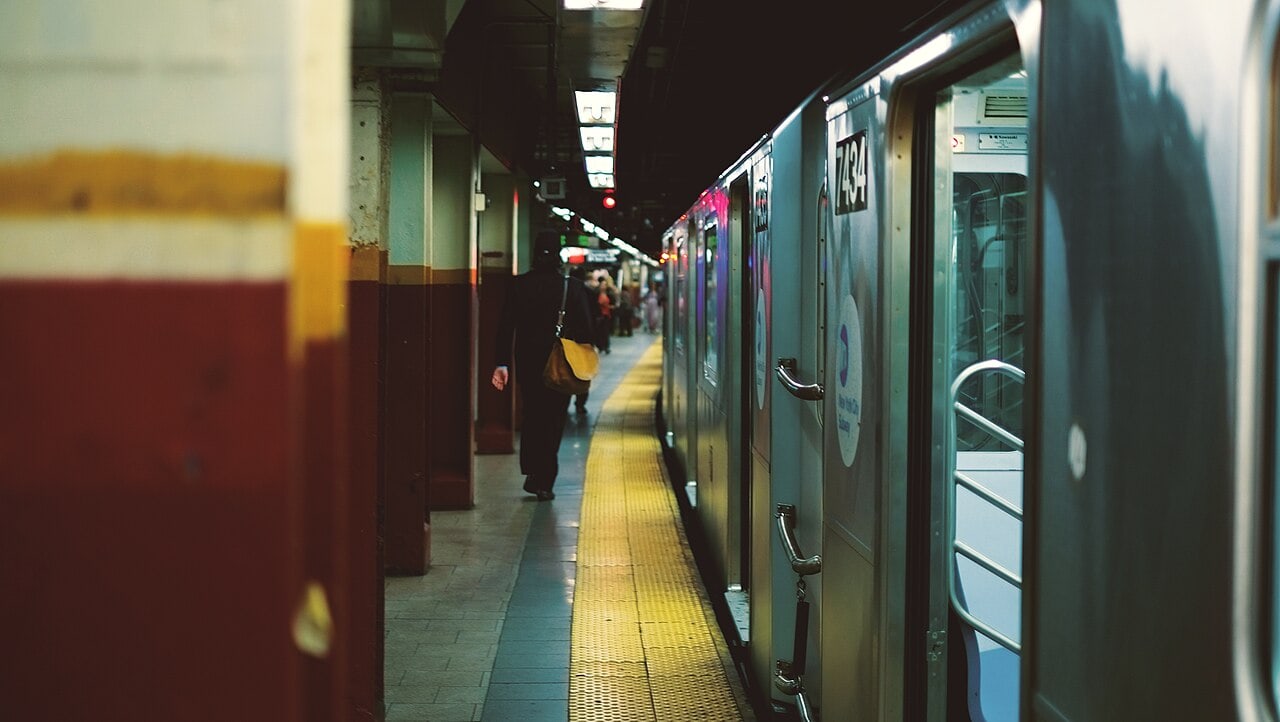
The New York subway runs 24/7 (photo: Martin David, Unsplash)
TL;DR
As of 1 January 2026, the paper MetroCard is gone for good and you pay exclusively contactless through the OMNY system.
A single standard ride costs exactly $3.
The weekly cap stops your spending at $35 (after 12 rides you travel the rest of the week for free).
From JFK airport, the fastest way to the centre is the LIRR train (35 to 45 minutes for under $17).
A yellow cab from JFK has a flat rate of $70, but with tolls and tip you’ll realistically pay over $100.
The New York subway runs non-stop, 24 hours a day, 7 days a week.
Newark airport (EWR) has announced a weekday morning shutdown of the AirTrain for 2026.
The underground railway is the fastest way to move between neighbourhoods. It runs without a single overnight pause. During the day, trains come every few minutes. At night the wait stretches a little, but you’ll always reach your destination. You’ll find stations on practically every corner, and you’ll recognise them by the distinctive green or red lamps at the entrance to the underground.
Paying with the OMNY System
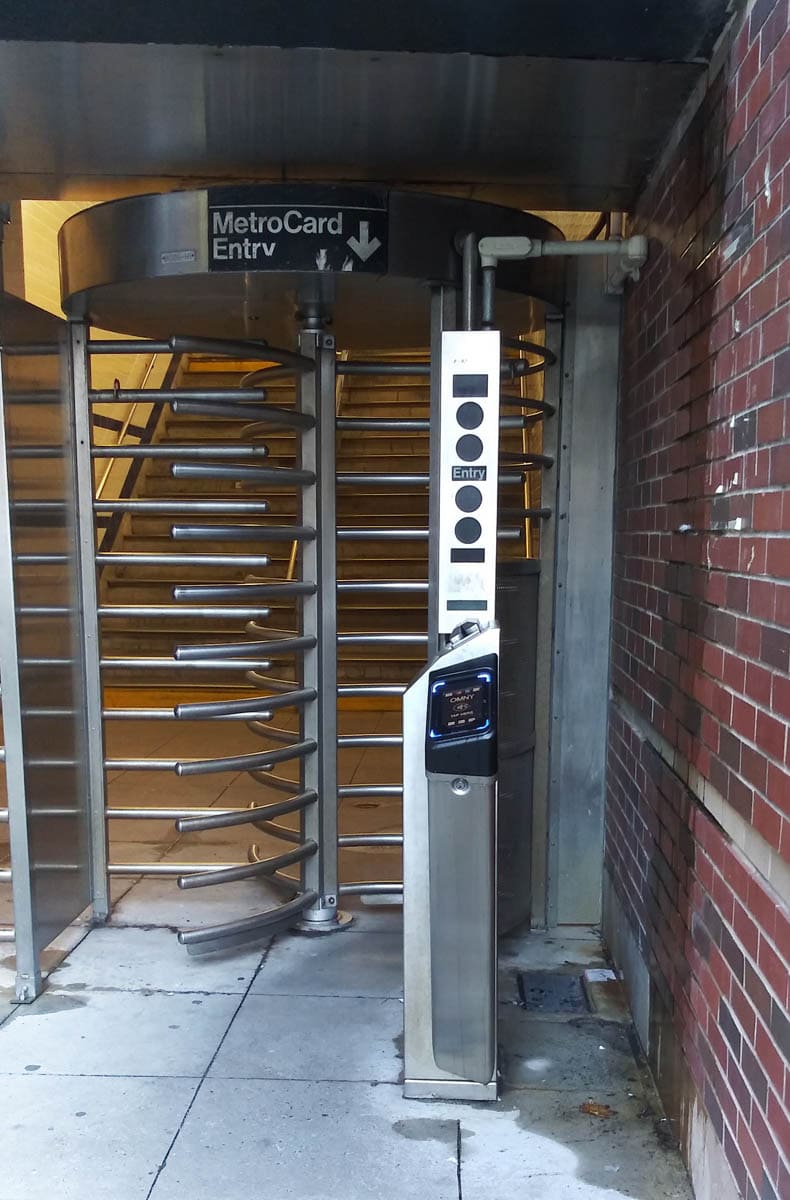
The OMNY system (One Metro New York) has completely rewritten the rules of travel. The old yellow paper MetroCards were retired for good on the first of January 2026. The turnstiles no longer allow you to swipe magnetic cards. All New York transportation now relies on contactless technology. All you need is an ordinary bank card issued by your UK bank.
You can just as easily use a phone with Apple Pay or Google Pay. Walk up to the turnstile and simply tap your device on the reader. The screen instantly turns green and you can walk through onto the platform. You don’t need any special app. You don’t have to register anywhere in advance. Everything works smoothly the moment you land.
💡 Tip: Keep your phone charged. If your battery dies, you won’t be able to pay at the turnstile. Just to be safe, carry a physical bank card with you as a backup. You’ll find more about the contactless system at omny.info.
How Much the Subway Costs and How the Weekly Cap Works
A single subway ride costs $3.00. That fare also covers a transfer to a local bus, as long as you catch it within two hours of your first tap. The transfer happens automatically. When you board the bus, tap the same card again and the system won’t charge you a penny more.
The biggest advantage of OMNY is the so-called weekly fare cap. The limit is set at $35 over 7 consecutive days. The maths is simple. You pay for the first 12 rides. Once you hit that amount, every additional ride that week is automatically free. You could then ride a hundred times and not a single cent will leave your account.
There’s one important rule you have to follow, though. Tap with exactly the same device at the turnstiles all week. If you start paying with a physical card, you have to stick with it. If you use Apple Pay on your phone, don’t use Apple Pay on your watch. The system treats the watch and the phone as two separate devices, and the weekly cap would be counted for each one separately.
Finding Your Way on the Subway: Uptown, Downtown, Express
Basic orientation in Manhattan comes down to understanding two directions. A sign reading Uptown means the train is heading north towards the Bronx. Downtown points south towards the Statue of Liberty and Brooklyn. Always check the sign above the stairs before you enter a station. Some smaller stations have separate entrances for each direction, and you can’t switch sides once you’re underground.
Another quirk is that trains are split into local and express. Local trains dutifully stop at every station along the route. Express trains sail past the smaller stations without mercy and only stop at the main hubs. On the map you’ll spot an express stop by a white dot. A black dot marks a station where only local trains stop.
On the platform, always watch the light-up boards. They show the letter or number of the line and its final stop. The colour of a line on the map is only a rough guide. Two lines of the same colour can branch off into completely different neighbourhoods at a certain point. So always follow the specific letter on the front of the incoming train.
A turnstile with an OMNY reader (photo: GK tramrunner RU, Wikimedia Commons, CC BY-SA 4.0)
From the Airport to the Centre: JFK, Newark and LaGuardia
The trip from the airport to your hotel is often the first test of your travel skills. New York is served by three major international airports. Each lies in a different part of the metropolis and each offers slightly different transport options. I’ve put together a clear table of the best connections for you.
Airport
Best connection
Price
Time
JFK
AirTrain + LIRR train
under $17
35–45 min
JFK
AirTrain + subway A/E
approx. $11.75
60–90 min
Newark (EWR)
AirTrain + NJ Transit
$15.75–17.25
30–40 min
LaGuardia (LGA)
Bus Q70 + subway
$3
45–60 min
JFK (Queens): Fastest by Train
John F. Kennedy Airport welcomes most European flights. An automated shuttle train called the AirTrain departs right from the terminals. A ride costs $8.75 and drops you at two important transfer stations. It’s entirely up to you which route into Manhattan you take from there.
The first option is the classic New York subway. At Jamaica station you can transfer to the E, J or Z lines. At Howard Beach you can pick up the A line. This route will cost you around $11.75. Bear in mind, though, that the trip into the centre takes an hour to an hour and a half. Subway cars also have no special space for large luggage.
A far better option is the LIRR (Long Island Rail Road) commuter train. You transfer to it at Jamaica station. It’ll whisk you to the enormous Penn Station or Grand Central in just 35 to 45 minutes. A ticket costs from $2.75 to $7.75 depending on the time of day. At weekends you can buy a bargain CityTicket for $5. All in, you’ll stay under $17 and save yourself a lot of precious time.
Newark (EWR): Watch Out for the 2026 Shutdown
Newark Airport sits in the neighbouring state of New Jersey. The journey into Manhattan from here is often shorter than from JFK. The standard route goes like this. You board the airport AirTrain for $8.75. At Newark Liberty Airport Station you transfer to an NJ Transit train. That takes you to Manhattan’s Penn Station. The whole trip costs $15.75 to $17.25 and takes 30 to 40 minutes.
2026 has brought a major complication for travelling from Newark, however. Since 15 January 2026, there’s been an extensive shutdown of the AirTrain airport shuttle. The shutdown applies on weekdays from 5:00 to 15:00. During those hours you have to use a replacement bus service, which annoyingly drags out the whole process. At weekends and in the afternoons the AirTrain runs normally.
💡 Tip: Before you fly out, check the current train timetables and information on the replacement bus service on the operator’s official website, njtransit.com.
LaGuardia (LGA): Free Bus
LaGuardia Airport is used mostly for domestic flights. If you’re flying in from another American city, chances are you’ll land right here. This airport has no train connection at all. Even so, it’s the cheapest of all three airports to reach the centre from.
The special Q70 bus route (LaGuardia Link) stops right outside the terminal. The ride is free for all passengers. The bus takes you to Jackson Heights station in Queens. From there you simply tap your bank card, pay $3 for the subway and carry on straight into Manhattan. The journey takes 45 to 60 minutes.
A yellow cab from JFK has a flat rate, but with fees it works out pricier (photo: Ermell, Wikimedia Commons, CC BY-SA 4.0)
The subway is the backbone of getting around, but sometimes you’ll need other modes of transport too. New York offers a colourful range of options. Some will spare your aching feet, others serve up fantastic views of the city skyline. You’ll quickly discover, though, that driving on the surface has its pitfalls.
Yellow cabs are one of the city’s symbols. If you take a taxi from JFK airport to Manhattan, the driver will offer you a so-called flat rate of $70. That fixed price sounds very tempting at first. But tourists often forget about the various surcharges. On top of the base fare come airport fees, state taxes, tolls for bridges or tunnels, and of course the customary tip. Realistically, you’ll pay over $100 for the trip from JFK.
Apps like Uber and Lyft work reliably in the city. Cars turn up within a few minutes of ordering. But prices change dynamically depending on current demand and traffic conditions. During rush hour or heavy rain, fares can shoot up to astronomical levels. On top of that, driving often takes forever thanks to the ever-present gridlock.
💡 Tip: 2026 saw the Congestion Pricing system (a charge for driving into the centre) fully kick in. This zone covers all of Manhattan south of 60th Street. A private car pays $9 to enter during the day and $2.25 at night. These charges also feed into the cost of alternative transport. A $0.75 surcharge is added to every yellow-cab ride in this zone. For apps like Uber and Lyft the surcharge is even higher, at $1.50 per ride. You’ll find the details at congestionreliefzone.mta.info.
If you prefer to get some fresh air, try the Citi Bike shared bikes. You’ll find the blue docking stations all over the city. You can rent a classic pedal bike or a faster e-bike. To unlock a bike you need the official app. The system works brilliantly for short hops along the river or a ride across Central Park. You’ll find fare info at citibikenyc.com.
The NYC Ferry boats offer great value for money and a memorable experience. A single ride costs $4.50. From the deck you’ll get wonderful views of the skyscrapers, the Brooklyn Bridge and the Statue of Liberty. Note that OMNY does not work on the boats. You have to buy your ticket in advance in the official NYC Ferry app and activate it before boarding.
Also worth a mention is the Roosevelt Island Tram cable car. The red cabins carry you high above the East River from Manhattan to Roosevelt Island. From the tram you’ll get a close-up view of the Queensboro Bridge and the busy streets below. A single ride costs the same $3 as a regular subway trip, and you pay for it simply by tapping your card at an OMNY turnstile.
Tips and Traveller Experiences
When planning your trip, it pays to learn from other people’s mistakes. I’ve gathered the most important tips from those who’ve already explored the city successfully. They’ll save you a lot of stress and money.
The most common piece of advice is crystal clear. Don’t buy any special travel cards in advance. Just arrive and tap your contactless card or phone at the turnstile. The OMNY system works flawlessly for tourists.
From JFK airport, travellers strongly recommend the LIRR train over a taxi. You’ll save loads of time, avoid throwing money away and neatly dodge the endless queues on the motorway.
Be very wary of yellow cabs from JFK. Travellers warn that the promised $70 flat rate is just the bare bones. With tolls and the mandatory tip, the final total realistically climbs past $100.
Before your trip, download Google Maps or Citymapper with live departures onto your phone. The New York subway has frequent closures, especially at weekends, and the app will steer you onto an alternative route in good time.
For the very latest information on closures and transport changes, I always recommend visiting the official MTA website. You’ll find live maps there as well as alerts about planned weekend track repairs.
Where to Stay (Near the Subway)
When choosing a hotel in New York, one golden rule applies. Your accommodation should be no more than a 10-minute walk from the nearest subway station. After a full day of walking the city, you’ll appreciate every step saved. Look for stations where several different lines stop. That gives you more flexibility when planning day trips and helps you avoid awkward transfers.
On the map below you can easily find accommodation right next to subway stations. Take a look at hotels in the well-connected Midtown or compare all accommodation in New York by distance to the subway and price.
Where to Go Next in New York
You’ve got getting around down to a fine art. Now you can dive into planning the actual programme. I’ve prepared more detailed articles to help you put together the best possible itinerary.
“`html
From 2026 onwards, payment is exclusively contactless using the OMNY system. Paper MetroCard tickets are no longer valid. At the turnstile, simply tap your regular payment card, mobile phone with Apple Pay, or watch with Google Pay. The turnstile will turn green and you can pass through.
“`
How much does a subway ride cost in New York?
One ride costs 3.00 USD. This price includes a free transfer to a local bus within two hours of the first tap. There’s also a weekly cap of 35 USD. If you pay for 12 rides with the same device within 7 days, you ride free for the rest of the week.
How to get from JFK Airport to downtown?
The fastest and most convenient route is a combination of the AirTrain airport shuttle (8.75 USD) and the LIRR commuter train from Jamaica station to Penn Station or Grand Central (2.75 to 7.75 USD). The entire journey costs under 17 USD and takes 35 to 45 minutes. This way you’ll avoid unpredictable traffic jams.
Does the subway run at night in New York?
Yes, the New York subway operates 24 hours a day, 7 days a week. During nighttime hours, the intervals between trains are simply extended and some express lines switch to local service (stopping at all stations).
Is it worth taking a taxi or Uber in New York?
For regular trips around the city, driving doesn’t really pay off due to frequent traffic jams and high prices. Moreover, south of 60th Street in Manhattan, there’s a congestion pricing fee that increases the cost of every taxi ride by 0.75 USD and Uber by 1.50 USD. It’s faster and cheaper to travel underground.
What is OMNY?
OMNY (One Metro New York) is a modern contactless payment system for fares in New York’s public transportation. It replaced the old yellow MetroCard. It allows passengers to pay for their ride by simply tapping their own bank card or smartphone directly at the turnstile.
Tips and Tricks for Your Vacation
Don’t Overpay for Flights
Search for flights on Kayak. It’s our favorite search engine because it scans the websites of all airlines and always finds the cheapest connection.
Book Your Accommodation Smartly
The best experiences we’ve had when looking for accommodation (from Alaska to Morocco) are with Booking.com, where hotels, apartments, and entire houses are usually the cheapest and most widely available.
Don’t Forget Travel Insurance
Good travel insurance will protect you against illness, accidents, theft, or flight cancellations. We’ve had a few hospital visits abroad, so we know how important it is to have proper insurance arranged.
Where we insure ourselves: SafetyWing (best for everyone) and TrueTraveller (for extra-long trips).
Why don’t we recommend any Czech insurance company? Because they have too many restrictions. They set limits on the number of days abroad, travel insurance via a credit card often requires you to pay medical expenses only with that card, and they frequently limit the number of returns to the Czech Republic.
Find the Best Experiences
Get Your Guide is a huge online marketplace where you can book guided walks, trips, skip-the-line tickets, tours, and much more. We always find some extra fun there!
TL;DRThe most beautiful cenotes on the Yucatán are Suytún, Ik Kil, Dos Ojos, Gran Cenote, Oxman, Zací, Hubiku, Samula and X’Keken, with entry running 60 to 350 MXN and cash being pretty much the only option almost everywhere. Colonial Valladolid makes the best base, with Oxman, Suytún and Zací all within a 30-minute drive. Every cenote enforces a strict ban on sunscreen (even the biodegradable kind) and makes you shower before getting in the water; a life jacket is usually compulsory too, no matter how well you swim. The weather’s best from December to April, with February being the sweet spot, and it’s worth turning up right at opening between 8am and 9am to beat the crowds bussed in from Cancún.
Picture the heat. The sun beats down on you, the air doesn’t stir, and after a full day of exploring Maya ruins you feel like you might just melt. Then suddenly you descend a set of stone steps below ground and a completely different world opens up before you. Crystal-clear, refreshing water framed by vines, stalactites, and the silence of the jungle. The Yucatán cenotes are exactly the kind of natural wonder that leaves you gasping and wondering whether you’re dreaming.
Whether you’re chasing the most beautiful, photogenic cenotes with perfect light, or craving hidden caves with no signal and no crowds, this peninsula hides thousands of them. In this guide you’ll find 12 tips for the absolute best cenotes, we’ll look at where to base yourself strategically, what strict swimming rules apply, and what to watch out for. Let’s dive into the Yucatán underworld!
Photo: Mauricio Borja / Pexels
TL;DR
What they actually are: Sinkhole karst caves filled with fresh or brackish water. For the ancient Maya they were a sacred gateway to the underworld (Xibalba) and their main source of drinking water.
Best base: The colonial town of Valladolid. It sits at an ideal driving distance from the prettiest spots (Oxman, Suytún, Zací).
Sunscreen ban: Every cenote strictly bans sunscreen (even the biodegradable kind). A shower before entering the water is mandatory.
Life vests: In the state of Yucatán a life vest is compulsory in most cases, even if you’re an excellent swimmer.
Cash is king: Entry fees (roughly 60 to 350 MXN, about €3–17) are paid almost exclusively in cash, in Mexican pesos.
When to go: The best weather runs from December to April, with February being the ideal month.
The Yucatán has essentially two seasons, and picking the right dates will make a big difference to your experience. If you’re after azure skies and pleasant temperatures around 28°C, plan your trip between December and April. February is usually the loveliest month, with minimal rainfall and cave water offering the best possible refreshment. From May to October it’s the rainy season — hot, humid and sticky — but you’ll save on accommodation and meet fewer people.
If you plan to visit the most famous cenotes, one golden rule applies: get up early. The magical atmosphere disappears the moment the first air-conditioned coaches arrive from Cancún. Most sites open between 8 and 9 a.m. The early bird gets the crystal-clear surface all to themselves.
💡 Tip: Read our detailed article on when to visit Mexico, where we break down weather and safety in detail.
Where to Stay (and How to Avoid the Traps)
Choosing the right base is absolutely crucial for exploring the caves. The peninsula is huge, and spending hours in the car will quickly wear you out. The best strategy is to split your trip into several stops and stay in two or three different towns along the way.
The clear number one for cenote lovers is Valladolid. This charming colonial town (officially listed among Mexico’s so-called Pueblos Mágicos) will win you over with colourful façades and a laid-back atmosphere. But the main advantage is the location. Within a thirty-minute drive of the centre you’ll find several stunning caves. Consider staying in the gorgeous boutique Casa Tia Micha or the comfortable, affordable Hotel Zací. That way you’ll get a huge head start on the crowds who commute in from the coast.
Valladolid is the ideal base for both Chichén Itzá and the surrounding cenotes, and compared with the coast you get far more for the same money here — a colonial house with a pool instead of an anonymous resort. It pays to stay a few minutes from the main square so you have evening life and morning coffee within easy reach.
💑 For couples and quiet:Zentik Project Boutique Hotel & Spa is an adults-only oasis with a pool in an artificial salt cave and colourful art-deco rooms — travellers love it precisely for the privacy and calm (from around €115 per night).
👨👩👧 For families:Hotel Posada San Juan occupies a 19th-century house with two pools and a large tree-filled garden just off the centre, so the kids have somewhere to burn off energy (from around €165 per night).
💰 Best value for money:Le Muuch Hotel Boutique offers stylish design rooms, two pools, and a breakfast guests rave about, just minutes from the square (from around €120 per night).
✨ For history lovers:Hotel Real Hispano sits in a former monastery with a courtyard pool, and you’re just half a block from the main square (from around €105 per night).
Booking tip: for all these hotels, choose a rate with free cancellation — plans change and you don’t want to pay for somewhere you never make it to. And don’t leave it to the last minute: the top-rated addresses sell out months in advance in high season, and prices then jump by tens of percent.
The second great base is Mérida. It’s earned the title of the safest city in Mexico and the second safest in all of North America. From here it’s easy to make trips to lesser-known, rustic cenotes around the villages of Homún and Cuzamá. Worth a mention is El Palacito Secreto, which looks like a genuine fairy-tale palace, but you’ll also find plenty of cheaper guesthouses here.
Mérida is the cultural heart of the Yucatán, and the best address is the Paseo de Montejo avenue or within walking distance of the cathedral. Staying in a colonial villa with a patio costs a fraction of a similar experience on the Caribbean coast.
💑 For couples:Casa Lecanda Boutique Hotel is an intimate adults-only boutique with cobbled patios and a pool right by Paseo de Montejo — exactly the kind of calm couples are after (from around €275 per night).
👨👩👧 For families:Hotel Hacienda Mérida VIP has three pools and cots for children, yet it’s just a 10-minute walk from the cathedral (from around €110 per night).
💰 Best value for money:The Diplomat Boutique Hotel is among the best-rated boutiques in the centre — guests highlight the owners’ personal touch and breakfast on request (from around €200 per night).
✨ For the experience:Rosas & Xocolate Boutique Hotel and Spa is a design flagship across two colonial villas on Paseo de Montejo, with a rooftop terrace and a chocolate spa (from around €225 per night).
Booking tip: for all these hotels, choose a rate with free cancellation — plans change and you don’t want to pay for somewhere you never make it to. And don’t leave it to the last minute: the top-rated addresses sell out months in advance in high season, and prices then jump by tens of percent.
The third option used to be the popular Tulum, but here I have to add a big, honest warning. Tulum has been going through a huge crisis in recent years. Prices have shot up to astronomical heights, transport is collapsing, and the beaches are often plagued by massive seaweed deposits (sargassum). If you’re mainly drawn by Gran Cenote and Dos Ojos, which lie just outside Tulum, consider staying instead in the quieter town of Bacalar, or look for accommodation via Booking.com in less affected areas further from the Tulum beach zone.
💡 Tip: If you want to save yourself the hassle of searching, Booking.com is completely reliable in Mexico and offers the widest choice, from cheap hostels to luxury haciendas. Always check reviews focused on street noise and working air conditioning, though.
What to See and Do: The 12 Most Beautiful Yucatán Cenotes + Rules
Before we get to the list itself, we need to clear up the rules of the game. Visiting these fragile ecosystems has its specifics, and local communities watch over them very carefully.
Since 2021, the state of Quintana Roo has strictly banned chemical sunscreens in cenotes, and in practice even so-called reef-safe or biodegradable versions aren’t welcome. They too leave an oily film on the surface that suffocates the local flora and fauna. That’s why everyone has to shower thoroughly before entering. If you try to get around the rule, you risk a fine of around 200 pesos or simply won’t be let into the water (this is confirmed by reports from Mexico Travel & Leisure magazine).
Let’s take a look together at the most breathtaking caves the Yucatán has to offer.
1. Cenote Suytún: A Cave for Photo Hunters
Photo: Mauricio Borja / Pexels
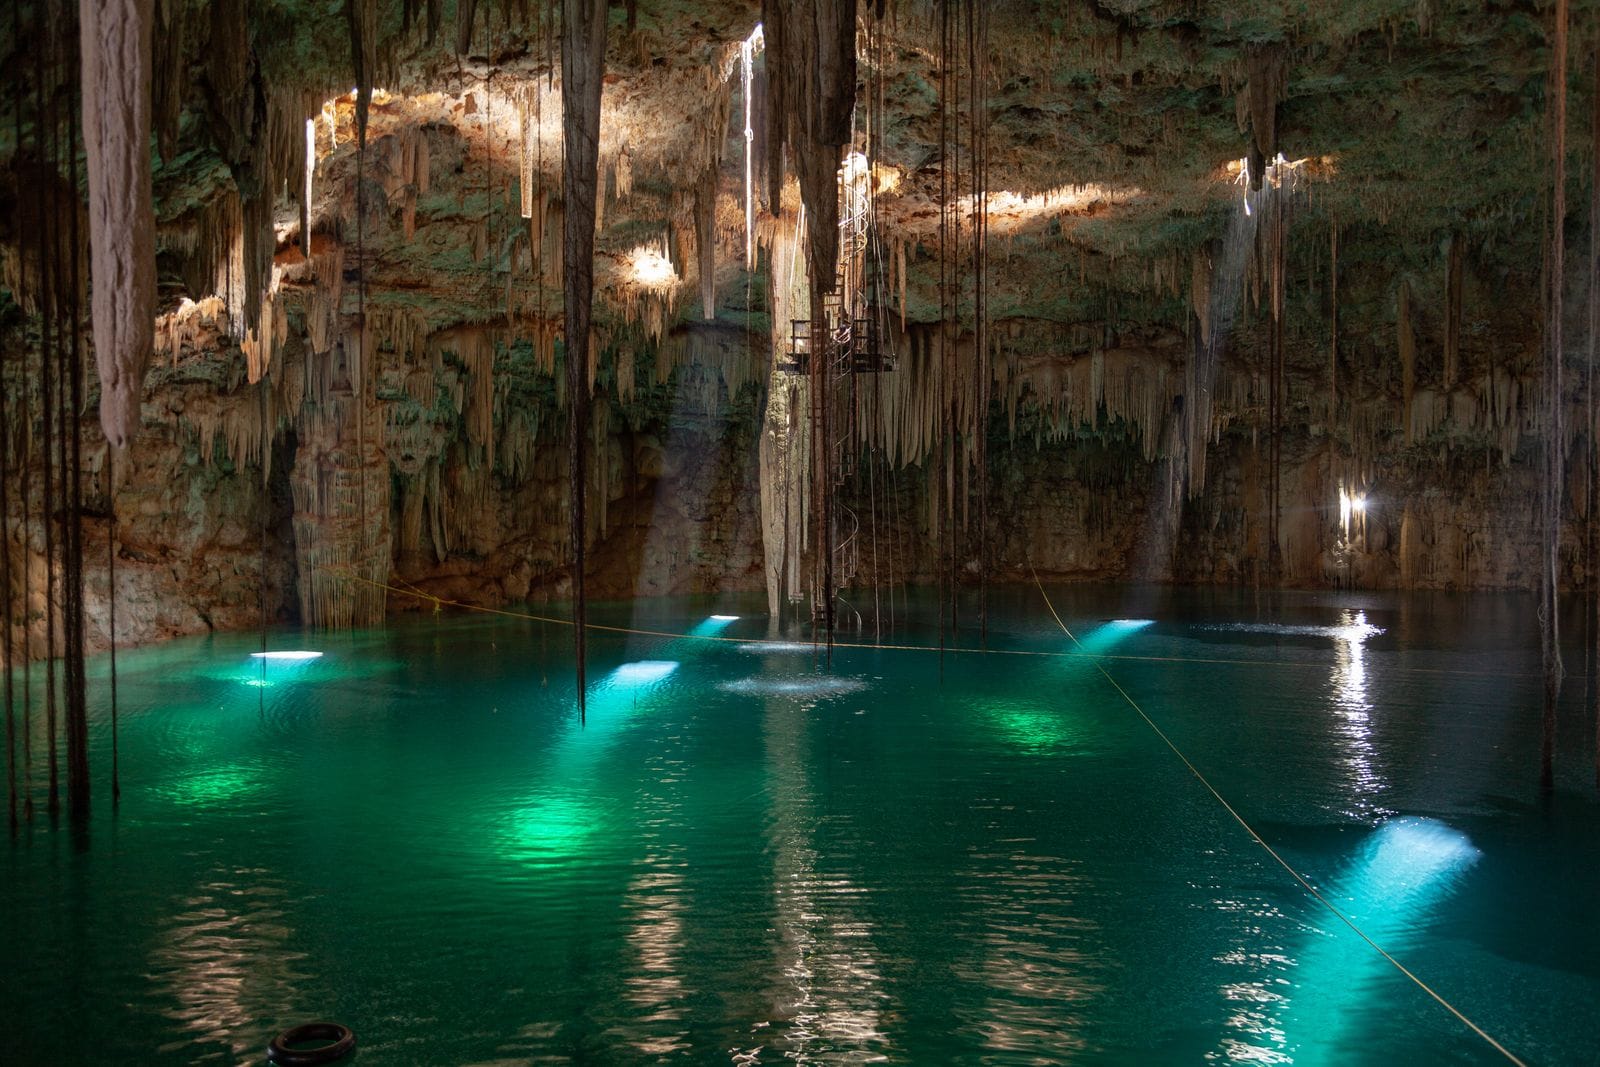
If you’ve ever seen a photo of a Mexican cenote on Instagram, chances are it was Suytún. This enclosed underground cave hides a stone pier that leads to the middle of the water’s surface. When you’re lucky and arrive at the right time, a magical sunbeam falls through a small opening in the roof straight onto the end of the pier. Entry costs around 250 MXN (about €12) and the visit is often limited to one hour.
There’s a catch, though. Suytún looks like a quiet, spiritual place in photos, but the reality tends to be the opposite. Inside it’s usually packed — whole coaches arrive and a queue of people forms at the stone pier waiting for their photo. Travellers from the Uprooted Traveler blog recommend arriving right at opening time at 9 a.m., when you’ll only run into a handful of people.
The strongest beam of light, however, falls between 12 and 2 p.m., which is also the busiest time. If you want to see the light without going mad from the crowds, the compromise is to come on a weekday and avoid weekends (as reviews on TripAdvisor also advise). Swimming is allowed here (with a mandatory vest), but the water is fairly shallow and people mostly come for the visual experience.
2. Cenote Ik Kil: Majestic Beauty Full of Vines
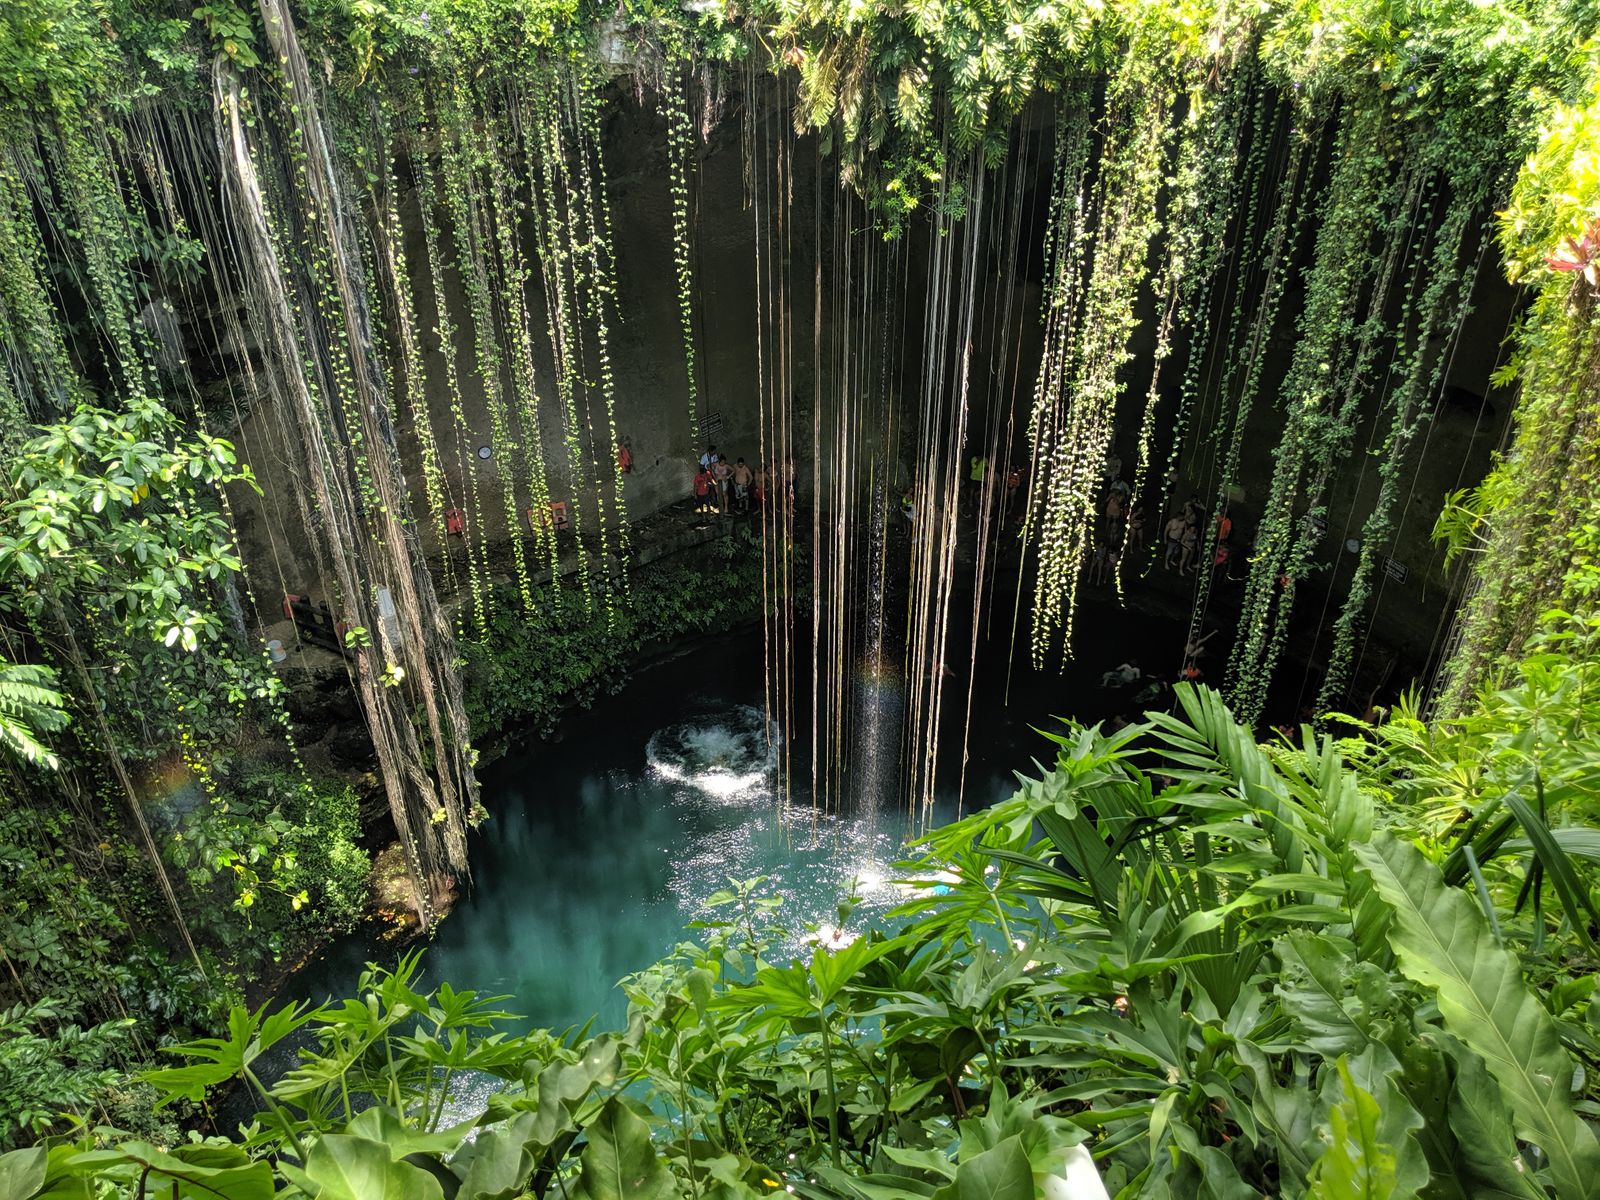
Cenote Ik Kil is an absolute classic and probably the most famous cenote of all. It’s an open sinkhole into which long green vines and small waterfalls tumble from a height of several dozen metres. The view from the bottom up to the sky is utterly breathtaking. The water reaches a respectable depth of around 50 metres, so a life vest is strictly compulsory for everyone without exception. Entry costs 200 MXN (about €10).
This beauty pays a price in the form of enormous popularity. Ik Kil lies just minutes’ drive from the famous pyramid of Chichén Itzá. Based on experiences from the Travel With Bender blog, the place tends to be quieter early in the morning, because most tourists start the day at the pyramids and only reach the water after noon. If you arrive in the afternoon, be prepared to dodge dozens of other swimmers in orange vests.
3. Cenote Dos Ojos: A Paradise for Divers
Photo: Francisco Davids / Pexels
The name Dos Ojos translates as “Two Eyes.” This complex lies north of Tulum and consists of two connected sinkholes that, from a bird’s-eye view, really do resemble eyes. The water here is incredibly clear, which makes the place an absolute paradise for snorkelling and cave diving. The light filtering through the water creates magical turquoise reflections. Entry is a little higher — set aside 350 MXN (around €17).
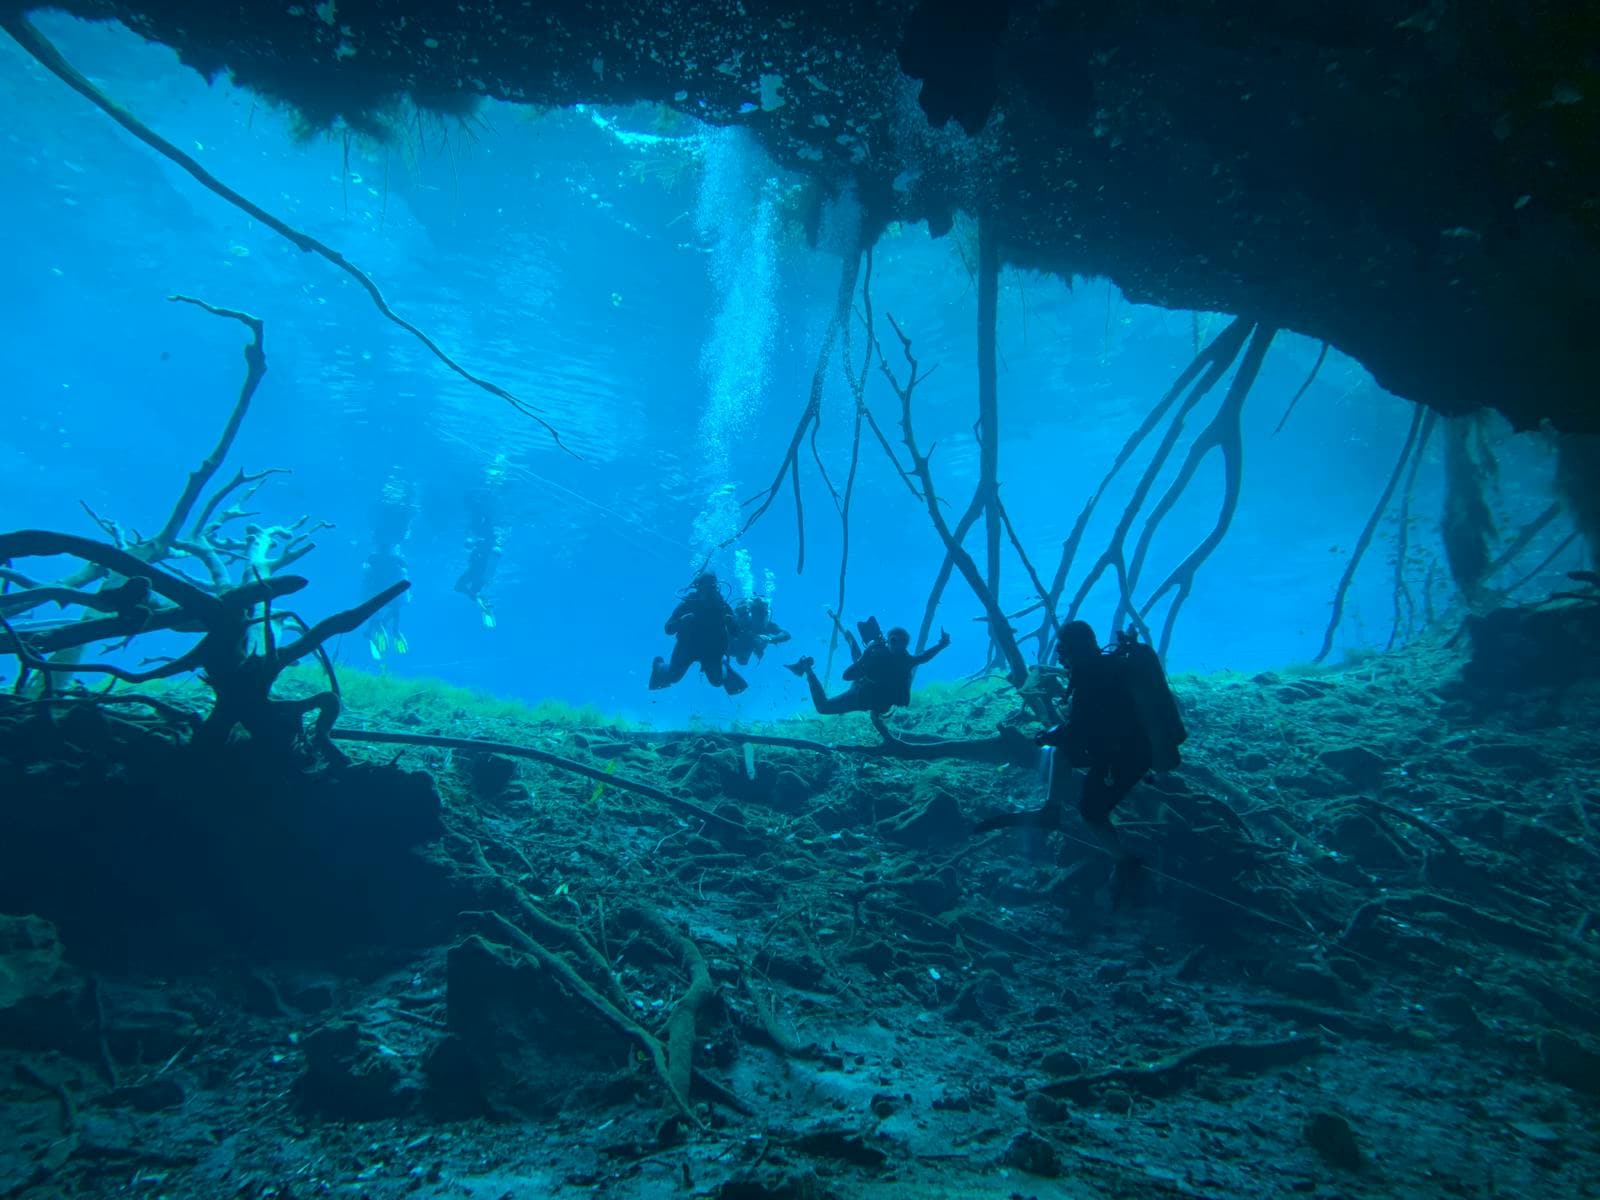
If you scuba dive and are certified, Dos Ojos offers one of the best cave dives in the world. The underground Sac Actun tunnel system stretches an incredible 340 kilometres, with a maximum depth of up to 118 metres. For ordinary swimmers, though, there are safe, shallower zones set aside. Be sure to bring your own snorkel mask so you can admire the fascinating limestone formations below the surface.
4. Gran Cenote: Turtles and Crystal-Clear Water
Gran Cenote is one of the prettiest, but also one of the busiest and most expensive spots on the peninsula. It lies just outside Tulum and lures visitors with crystal-clear water where you can regularly swim alongside small freshwater turtles and fish. The cave is part open, part enclosed; stalactites hide beneath the wooden walkways and the odd bat flits overhead. A ticket now costs over 300 MXN (about €15).
The rules here are very strict. Besides the absolute sunscreen ban, in many parts of the complex you’re not allowed to shoot with professional DSLRs, and the operators keep a close eye on everything. According to the Seth Dive Mexico blog, the crowds are thickest at midday and on weekends. Luckily they thin out over the afternoon, and in the last hour before the 5 p.m. closing time there are usually hardly any people at all. That’s your best shot at a peaceful experience.
5. Cenote Oxman: A Leap into a Jungle Pool
While Ik Kil is bursting at the seams, Cenote Oxman near Valladolid offers a very similar visual experience but in a far more relaxed atmosphere. It’s a deep sinkhole with tree roots dangling right down to the water. The main draw here is a huge rope swing you can leap from into the refreshing water with a scream. Entry starts at a very pleasant 70 pesos (about €3.50).
Oxman sits within the beautiful grounds of the historic Hacienda San Lorenzo, where you’ll also find a restaurant and an outdoor pool. The place used to be a secret tip, but these days coaches returning from Chichén Itzá regularly pull up in the late afternoon. That’s why Mexico Travel & Leisure magazine recommends arriving first thing in the morning or early afternoon, before the organised tours pile in.
This one is a real one-off. While for most cenotes you have to drive or ride a scooter deep into the jungle, Zací lies right in the historic centre of Valladolid. It’s a huge, semi-open cave surrounded by lush vegetation. The water has a rich green to deep blue colour, and walkways and diving platforms at various heights have been built along the edges.
It’s a great spot for a quick afternoon refresher. Entry is ridiculously cheap, around 60 MXN (about €3), and if you have lunch at the restaurant of the same name above the cave, access to the water is often thrown in for free. The atmosphere here is very local — on weekends whole Mexican families come to swim and there’s a noisy, cheerful mood.
7. The Cenotes of Homún: A Rustic Adventure
Photo: Amar Preciado / Pexels
If you’re tired of concrete walkways and crowds with phones on selfie sticks, head to the village of Homún. It lies about 58 kilometres south of Mérida and hides more than twenty different, often very rustic cenotes. Entry to each cave costs between 30 and 250 pesos. The most popular is the Santa Bárbara complex, where for roughly 250 MXN you get access to three caves plus bike hire and a life vest.
Travelling between the caves is an experience in itself here. Locals commonly use so-called moto-taxis (modified three-wheelers with a driver). One visitor, however, warns in TripAdvisor reviews that after 2 p.m. it was already very hard to find a driver, so it’s better to arrange a circuit in advance or arrive in your own car. It’s touristy, but in the good, authentic sense of the word.
8. The Cenotes of Cuzamá: A Horse-Drawn Cart Ride
Photo: Mauricio Revuelta / Pexels
The neighbouring village of Cuzamá offers a similar experience to Homún, but with one unique historical twist. To travel between the cenotes, people use so-called “trucks” — small wooden carts pulled by horses along old railway tracks that once served to transport sisal agave. The ride through the jungle over the rickety rails is enormous fun.
On a single circuit you’ll usually visit three different caves. Some are open, others hidden deep underground and accessible only by steep wooden ladders. The atmosphere here is reminiscent of the Indiana Jones films. Be sure to bring plenty of small change for tipping the driver, and expect the whole trip to take up to half a day.
9. Cenote Hubiku: Light Underground
Photo: Amar Preciado / Pexels
Just outside Valladolid you’ll come across Hubiku. It’s an underground cave with a huge dome, through the centre of which daylight pours in and illuminates the turquoise surface. It’s a gorgeous natural phenomenon that feels incredibly mystical. The water here is quite cold, an estimated 20°C or so, which feels wonderful in the Mexican heat.
The grounds around Hubiku are very well equipped — you’ll find a restaurant, souvenir shops, and even a tequila museum. Thanks to the good infrastructure, larger groups of tourists sometimes drop by, but the sheer size of the cave means people spread out easily and you never feel cramped.
10. Cenote Samula: An Underground Temple with Roots
Photo: Francisco Davids / Pexels
Samula (also spelled Samulah) is located in the village of Dzitnup near Valladolid. This enclosed cave looks like a natural cathedral. Long, thick roots from an enormous Alamo tree penetrate through the ceiling, hanging through the air right down to the water’s surface. It’s visually one of the most striking sights in the entire Yucatán.
Little bats flit around the water and now and then you’ll hear water dripping from the stalactites. A ticket costs around 80 pesos and is often sold in combination with the neighbouring X’Keken cave. Inside there’s a fairly dim, mysterious atmosphere, broken only occasionally by the shrieks of delighted swimmers.
11. Cenote X’Keken (Dzitnup): Among the Stalactites
Right next to Samula lies X’Keken, so it pays to visit both places at once. While Samula amazes with its roots, X’Keken is literally studded with huge limestone stalactites hanging from the ceiling, in many places joining up with the floor. The cave is very tight and enclosed, lit only by artificial lights and a single small opening in the roof.
The water is crystal-clear and full of tiny, harmless fish that will gently nibble at your feet if you stand still for a while (the kind of natural pedicure you’d pay a fortune for anywhere else). Access is down slightly slippery stone steps, so a bit of caution is definitely in order.
12. Cenote X’Canché: Adrenaline by the Maya Ruins
Photo: Darren Lawrence / Pexels
If you plan to visit the stunning Maya ruins of Ek Balam (where, incidentally, you can climb the breathtaking 43-metre-high Acropolis until 2026), X’Canché is literally round the corner. From the entrance to the archaeological site it’s about a 20-minute walk, or you can hire a bike and ride through the jungle.
This place is made for adrenaline lovers. The open sinkhole is surrounded by sheer walls, and besides the usual swim you can try a zipline right over the water or rappel down the walls. Entry is a little higher because of the attractions, but you’ll be rewarded with far fewer people than at the famous icons nearby.
💡 Tip: Plan your day so you explore the Maya monuments at Ek Balam in the morning and hide from the midday heat in X’Canché. It’s a perfect combination of history and relaxation.
What to Taste (Not Just for Sweet Tooths)
Mexico is a culinary paradise, and Yucatecan cuisine is a special chapter all of its own. Locals swear by traditional cochinita pibil (slow-roasted meat marinated in citrus juice and achiote, then cooked underground wrapped in banana leaves), but if you’re a vegetarian like me, don’t despair at all. The Yucatán is full of fantastic meat-free options!
Be sure to try Sopa de Lima, a refreshing lime soup that you can often ask for in a vegetarian version without chicken stock. For breakfast the absolute king is Chilaquiles (corn tortillas smothered in green or red sauce, topped with cheese and beans). During the day you’ll be saved by quesadillas filled with Oaxaca cheese and mushrooms, honest guacamole with nachos, or traditional panuchos — small fried tortillas filled with black beans and topped with pickled red onion, to which you simply mustn’t order a meat filling. Food in the Yucatán is colourful, bold, and incredibly cheap.
Practical Tips for the Trip
To make sure your trip to the underworld goes stress-free, it’s worth keeping a few purely practical things in mind. Here’s a selection of the most important ones:
Money and cash: Entry usually ranges from €5 to €30 per person, and almost everywhere you pay exclusively in cash. It’s absolutely essential to carry enough small pesos for entry, locker rental, and a bit of food at the stalls. This is also covered by the safety guide on Cenotes Guide.
Life vests: Even if you’re a world-champion swimmer, a life vest is often compulsory in the tourist cenotes of the Yucatán. The bottom often drops from shallows straight down to 10 to 60 metres, which is terribly hard to judge in clear water. Don’t argue with the staff — it’s simply the rule.
Transport and buses: For travelling between towns (Cancún, Valladolid, Mérida, Tulum) the comfortable buses of the ADO company work perfectly. Longer routes will cost you €25 to €40. For shorter hops from town centres to the sights, so-called colectivos (shared vans) are super cheap and will stop for a wave of the hand.
Safety: I often hear worries about safety in Mexico. But the Yucatán Peninsula (and especially the state of Yucatán, with its capital Mérida) is perfectly safe, comparable to many European resorts. Of course, keep an eye on your things and don’t leave your backpack unattended, but you definitely needn’t be afraid to walk around town in the evening.
💡 Tip: If you plan to hire a car, don’t forget the compulsory Mexican liability insurance (TPL). The standard cover from credit cards often doesn’t apply here, and without local liability the rental company simply won’t hand over the car. We always use a comparison site to check these conditions in advance.
Where to Go Next
The Yucatán Peninsula offers far more than just underground caves. Once you emerge from the water, don’t miss exploring the region’s fascinating Maya history.
We’ve put together a detailed guide to the iconic Chichén Itzá, where you’ll learn why you shouldn’t go on a Sunday. From there you can continue to the beautiful Valladolid, which will probably become your base. Another great stop is vibrant Mérida, full of culture and lovely little cafés. And if you’re interested in the wider context and want to see everything the region has to offer, take a look at our overview article on the whole Yucatán.
You can buy cenote tickets and combined tours on GetYourGuide.
Frequently Asked Questions
How much does admission to cenotes in Yucatan cost?
Prices vary greatly depending on the popularity of the location. The cheapest and less well-known spots (e.g. around Homún) start at 30–60 MXN (around €1.40–2.80). Famous places like Suytún or Gran Cenote will cost you 250 to 350 MXN (€10–14). You always need to have cash in Mexican pesos.
Can I use biodegradable sunscreen?
“`html
No, currently there is a strict ban on using any creams, including biodegradable (reef-safe) ones. Even these leave a film on the water surface. Instead, you must shower before entering the water and protect yourself from the sun with UV-protective clothing.
“`
Is the water in the cenotes cold?
The water is quite refreshing, with temperatures averaging between 24 and 25 degrees Celsius. In the hot and humid Mexican climate, when outside temperatures climb above 30 degrees, it’s incredibly pleasant and invigorating.
Do I need a rental car for visiting?
The car offers the greatest freedom, especially if you want to catch opening hours and avoid crowds. However, if you don’t have a car, most well-known sites are accessible via shared vans (colectivos) or ADO buses from city centers like Valladolid or Tulum.
Is a life jacket mandatory in the cenotes?
Yes, wearing an orange life jacket is required almost everywhere in the state of Yucatán, regardless of your swimming abilities. The water can be surprisingly deep (even over 50 meters) and local authorities take safety very seriously.
Which place is best to stay for visiting the cenotes?
The ideal home base is the colonial town of Valladolid. It lies at a perfect driving distance from the most famous and beautiful cenotes (Suytún, Oxman, Zací) and offers great infrastructure, safety, and an authentic Mexican atmosphere.
When is the best time of day to visit?
Definitely first thing in the morning, as soon as they open (usually between 8:00 and 9:00), or alternatively late afternoon an hour before closing (around 16:00). This way you’ll avoid the crowds of tourists from air-conditioned buses, who typically arrive here around noon after visiting the pyramids.
Tips and Tricks for Your Vacation
Don’t Overpay for Flights
Search for flights on Kayak. It’s our favorite search engine because it scans the websites of all airlines and always finds the cheapest connection.
Book Your Accommodation Smartly
The best experiences we’ve had when looking for accommodation (from Alaska to Morocco) are with Booking.com, where hotels, apartments, and entire houses are usually the cheapest and most widely available.
Don’t Forget Travel Insurance
Good travel insurance will protect you against illness, accidents, theft, or flight cancellations. We’ve had a few hospital visits abroad, so we know how important it is to have proper insurance arranged.
Where we insure ourselves: SafetyWing (best for everyone) and TrueTraveller (for extra-long trips).
Why don’t we recommend any Czech insurance company? Because they have too many restrictions. They set limits on the number of days abroad, travel insurance via a credit card often requires you to pay medical expenses only with that card, and they frequently limit the number of returns to the Czech Republic.
Find the Best Experiences
Get Your Guide is a huge online marketplace where you can book guided walks, trips, skip-the-line tickets, tours, and much more. We always find some extra fun there!
TL;DRThe best ski resorts in the French Alps for 2026 come down to twelve picks, topped by Les Trois Vallées — the world’s largest ski area, with 600km of connected pistes — and Val Thorens, Europe’s highest resort at 2,300m, running its 2025/2026 season from 6 December to 17 April.
Other highlights include glitzy Courchevel, the more romantic Méribel, freeride paradise Espace Killy (Tignes and Val d’Isère, 300km of pistes), and Chamonix-Mont-Blanc with its cable car up to the Aiguille du Midi (3,842m, return ticket €81–€83; the terrace closes from 25 May 2026 for 4–5 weeks). A six-day lift pass for Les Trois Vallées costs €368. March is the sweet spot for skiing, while September is best for summer trekking — the Tour du Mont Blanc runs 170km, and you’ll need to book huts a year ahead.
The French Alps are far more than a pretty backdrop for winter fun — they’re a wild, uncompromising world of their own that pulls you in with sheer, rugged beauty. Here you stand at the doorstep of the highest mountains in Western Europe, where you can perch on a rocky spire at almost four thousand metres in the morning and spend the afternoon watching the region’s disappearing glaciers spill down into the valleys. If you’re planning a trip to the French Alps ski resorts, you’ve come to the right place.
This is a land of extremes, and the French approach their mountains with a kind of engineering audacity all their own. Where others might build a small wooden hut, the French construct a gigantic network of cable cars linking entire valleys together. The result is the biggest ski playground on the planet, legendary long-distance treks, and roads where cycling history is written every single summer. I’ve put together 12 tips on what to see and do in the French Alps so you can enjoy this majestic destination to the fullest. You’ll learn where to base yourself strategically, how much lift passes cost for 2026, and what to watch out for when planning your trip.
TL;DR
The largest ski area on the planet: The Les Trois Vallées region offers an incredible 600 kilometres of interconnected slopes on a single ski pass.
Europe’s highest resort: In Val Thorens the snow lies from November to May, and it’s a huge hit for spring skiing.
A mecca of mountaineering: Chamonix isn’t a typical ski resort but a buzzing base camp for climbers right beneath Mont Blanc.
A trip into the stratosphere: The Aiguille du Midi cable car takes you up to 3,842 metres, but in May and June 2026 the main terrace will be under renovation.
Summer extreme: If you love cycling, mark July 2026 in your calendar, when the Tour de France peloton will tackle the legendary 21 hairpin bends of Alpe d’Huez not once but twice.
A royal trek: The Tour du Mont Blanc measures 170 kilometres, and you’ll need to sort out mountain hut reservations a year in advance.
The Alps don’t forgive planning mistakes, so picking the right dates is absolutely key. The ski season kicks off in December, but the very best snow conditions and longer, sunnier days come in March. On the other hand, give February a wide berth, because the whole of France takes staggered school holidays and the resorts are literally bursting at the seams. For lovers of spring snow, April is ideal — the higher resorts still have great conditions but accommodation prices have already dropped noticeably.
If you’re heading here in summer for high-mountain hiking, the window is fairly narrow. Most mountain huts don’t open until mid-June and close at the end of September. In June there can still be plenty of dangerous snow on the high passes, while August is overcrowded and full of heat-driven afternoon storms. The very best month for summer hiking is September, with stable weather, crisp autumn light, and far fewer walkers on the trails.
Getting to the French Alps from the UK is refreshingly straightforward. The fastest option is to fly into Geneva in Switzerland, with plenty of budget flights from London and other major UK airports on carriers like easyJet, British Airways, and Swiss. From Geneva Airport, reliable shuttle buses run constantly to resorts like Chamonix and the Tarentaise valley. If you prefer to drive and bring your own kit, the Eurotunnel gets you to Calais, from where it’s a long haul south of around eight to nine hours. Budget for pricey French motorway tolls, which are charged per section and add up to tens of euros. Watch out when driving through the big valley cities like Lyon or Grenoble, too, as France has strict low-emission zones. You’ll need a Crit’Air sticker (around €5), or you risk a hefty €68 fine.
Where to Stay in the French Alps
💡 Accommodation and experiences tip: We love searching for places to stay on Booking.com, where the cancellation policies tend to be the best. For tickets, tours and activities, it pays to compare and book through GetYourGuide.
The French approach to mountain architecture from the 1960s and 70s is often decidedly brutal. Don’t come looking for romantic little wooden chalets tucked away in the forest like next door in Austria. The French built purely for function under the so-called plan neige, aiming to house as many people as close to the slopes as possible. The ski-in ski-out concept applies quite literally here, so you usually clip into your skis right by the lift of a huge concrete complex and glide straight onto the piste. When hunting for a place to stay, it’s worth browsing the listings on Booking.com, where you’ll find everything from modest apartments to luxury mountain hotels.
For skiing in the enormous Three Valleys area, Les Menuires is a great compromise — from here you can quickly reach every corner, and prices are noticeably lower than in neighbouring, glitzy Courchevel. If you want guaranteed powder and don’t mind thinner air, go for the highest resort, Val Thorens. For exploring the area around Mont Blanc you don’t have to stay right in overpriced Chamonix at all — you’ll find far more peace and more reasonable prices in the villages of Les Houches or Argentière. These smaller villages are also brilliantly connected to the main centre by a free train if you hold a guest’s tourist card.
For specific recommendations, take a look at the highly rated Hotel Le Chablis in Les Houches, which offers cosy rooms, fantastic breakfasts, and sits just a stone’s throw from the main cable car. If you’re after absolute luxury right on the slopes in Val Thorens, book a room at Hotel Pashmina Le Refuge, with its gorgeous spa and breathtaking views of the snowy peaks. Over in the Chamonix valley, the stylish design-led Héliopic Hotel & Spa is very popular, strategically located right by the base station of the Aiguille du Midi cable car. After a demanding day, you can tuck into a superb cheese fondue — a reliable crowd-pleaser and a treat for any vegetarian — either at your hotel or in nearby restaurants.
12 Best Things to See and Do in the French Alps
Let’s dive into the very best these French mountains have to offer. Expect incredible ski terrain, bird’s-eye views, and colossal glaciers that are sadly slowly vanishing before our eyes.
Photo: Krzysztof Golik / Wikimedia Commons, CC BY-SA 4.0
1. Val Thorens, Europe’s Highest Resort
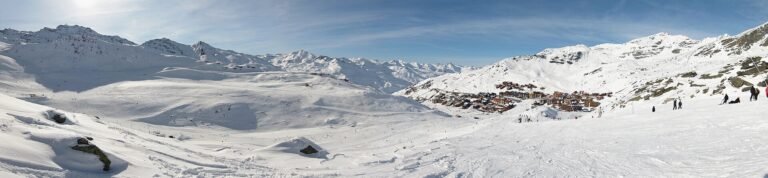
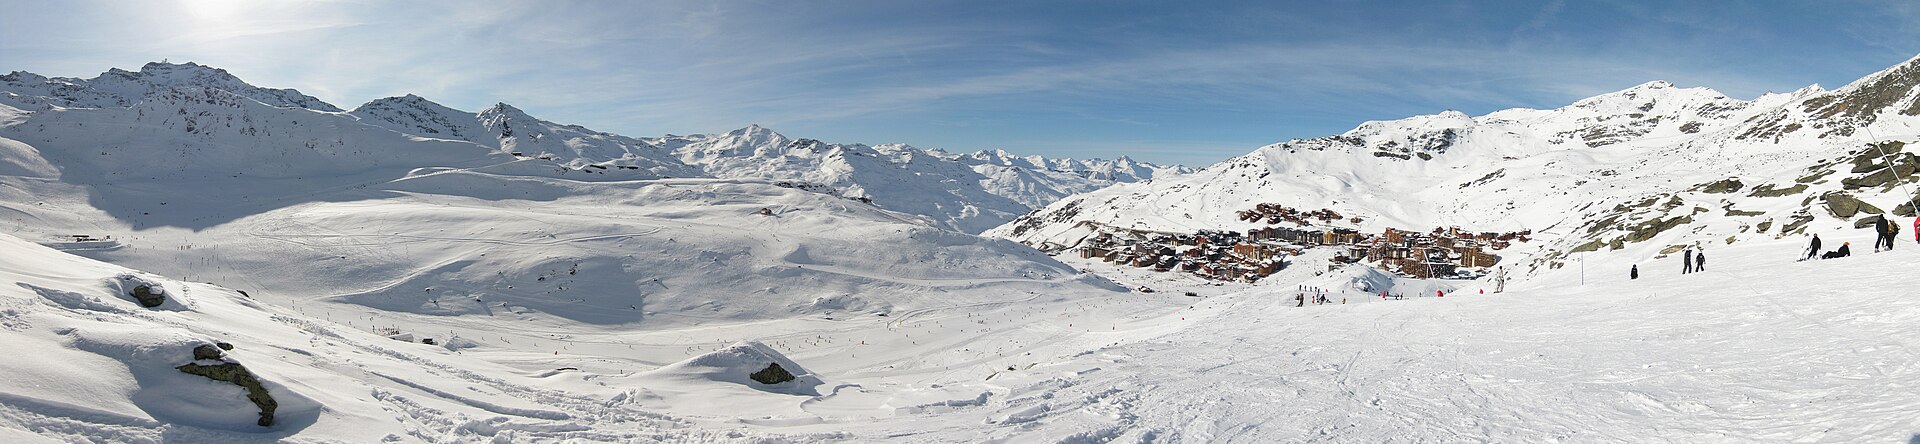
The French have never shied away from extreme projects, and Val Thorens is the best proof of that. It’s the highest ski resort in all of Europe, with the village itself sitting at a respectable 2,300 metres. That gives you a rock-solid guarantee of great snow from late November right into May — in the 2025/2026 season the lifts run from 6 December until 17 April. The crowning glory of the local area is the Cime de Caron peak at 3,195 metres, which opens up a breathtaking 360-degree panorama across more than a thousand Alpine summits.
Val Thorens has a genuinely cult status among skiers, and every winter you’ll bump into thousands of them here. The final thirty kilometres of rugged switchbacks can really put your car’s clutch through its paces, but the payoff is unquestionably worth it. The ski terrain is enormous and the sporting value of the local pistes will satisfy even the most demanding riders, whether you prefer freshly groomed corduroy in the morning or deep powder.
💡 Tip: If you want to save money and dodge the crowds, come at the shoulder of the season, in December or April. You can also buy a cheaper lift pass covering just the local Val Thorens and Orelle valley, though for the full experience I’d recommend paying extra for the entire connected Three Valleys area.
Photo: Willtron / Wikimedia Commons, CC BY-SA 3.0
2. Les Trois Vallées: Ski the Biggest Area in the World
Together, the Three Valleys form an absolute skiing super-league that struggles to find any rival in Europe. They offer an astonishing 600 kilometres of connected pistes, officially making this the largest ski area in the world. You could ski here all week from dawn till dusk and never take the same run twice. The lift system is so cleverly designed and fast that hopping between the individual mountains flows completely smoothly, so you spend the maximum amount of time on the snow instead of standing in endless queues.
Of course, the French charge handsomely for this endless luxury, and lift passes will carve a hefty chunk out of your budget. In the 2025/2026 season, a six-day pass for the whole connected area costs €368, while a single day ticket is €73.60. The season here starts in early December and the lifts finally shut down in mid-April, so you’ve got plenty of time to plan your winter holiday and hunt down the best snow conditions.
💡 Tip: When crossing between valleys, always keep a careful eye on your return time. If you miss the last connecting cable car over the ridge, you’ll face a wildly expensive taxi ride the long way round through the lower valley, which can set you back well over a hundred euros.
Photo: Florian Pépellin / Wikimedia Commons, CC BY-SA 4.0
3. Courchevel: A Glimpse of Absolute Luxury
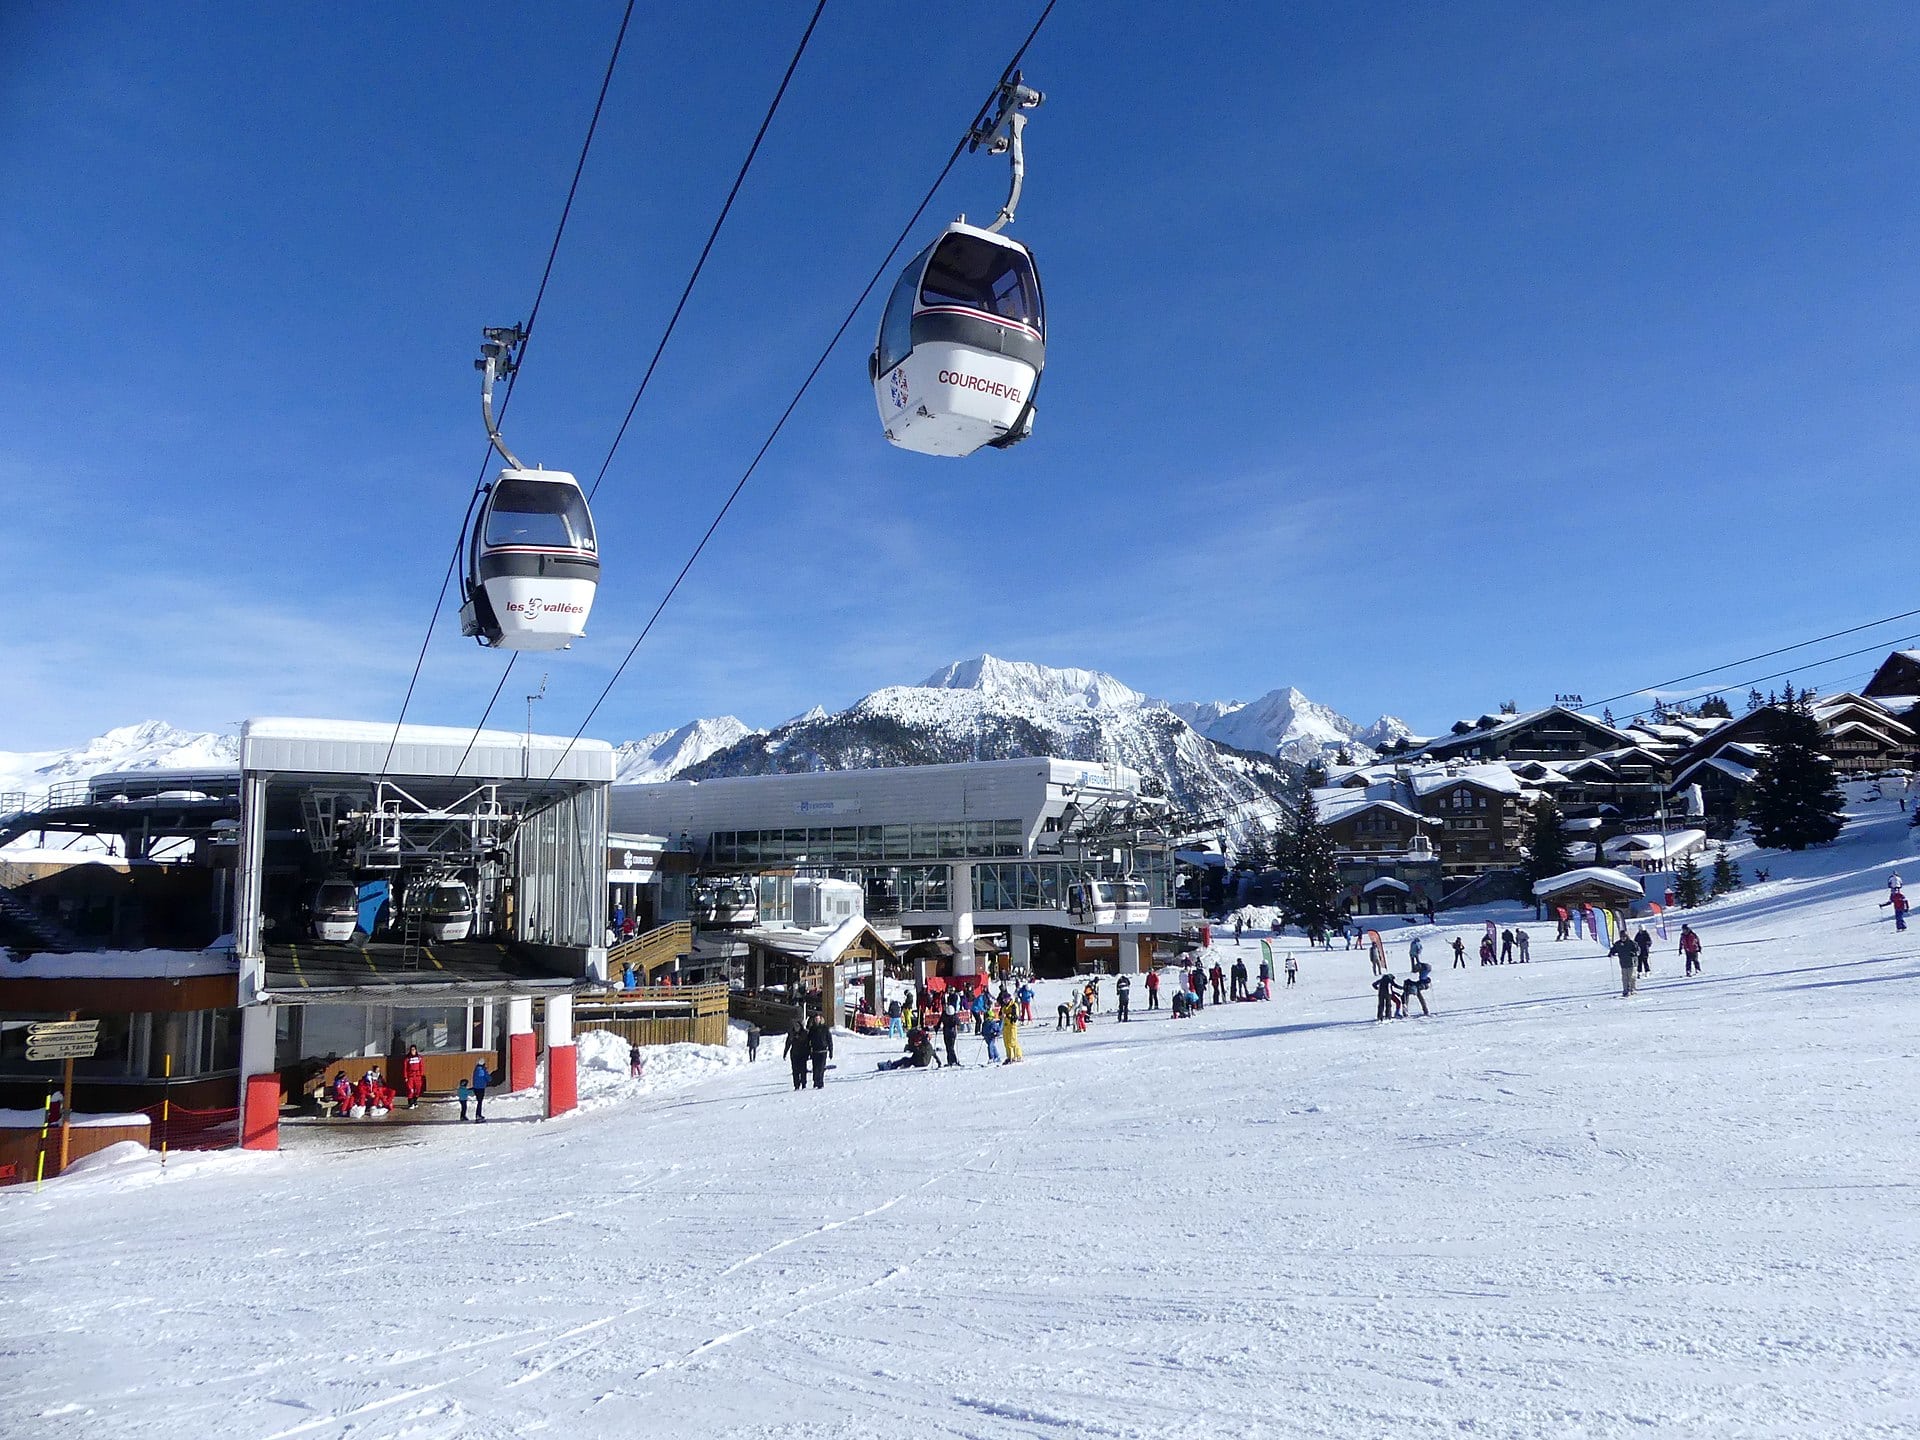
At the very edge of the Three Valleys lies Courchevel, an exclusive playground reserved for billionaires, global celebrities, and the seriously wealthy. The resort is split into several altitude levels, and the highest of them, iconic Courchevel 1850, is a parade of the most luxurious chalets and five-star hotels in the world. You’ll find pricey boutiques of global fashion houses set right in the snow and opulent restaurants crowned with several Michelin stars, where a reservation can take months to land.
Even if you probably won’t be staying here, do come over for at least one day of skiing as part of your extended lift pass. It’s well worth it, because the local pistes are perfectly groomed and often completely empty. The wealthy clientele here spend far more time at afternoon champagne parties than carving morning turns on the corduroy. When you stop for coffee, though, brace yourself for a proper price shock — even a plain espresso can easily cost you ten euros.
💡 Tip: Be sure to head down the gorgeous red Combe de la Saulire run, which starts at the peak of the same name. It offers a beautiful, incredibly flowing sporty descent with a vertical drop of nearly a thousand metres all the way down into the valley.
Photo: DimiTalen / Wikimedia Commons, CC0
4. Méribel: Wooden Romance in the Heart of the Mountains
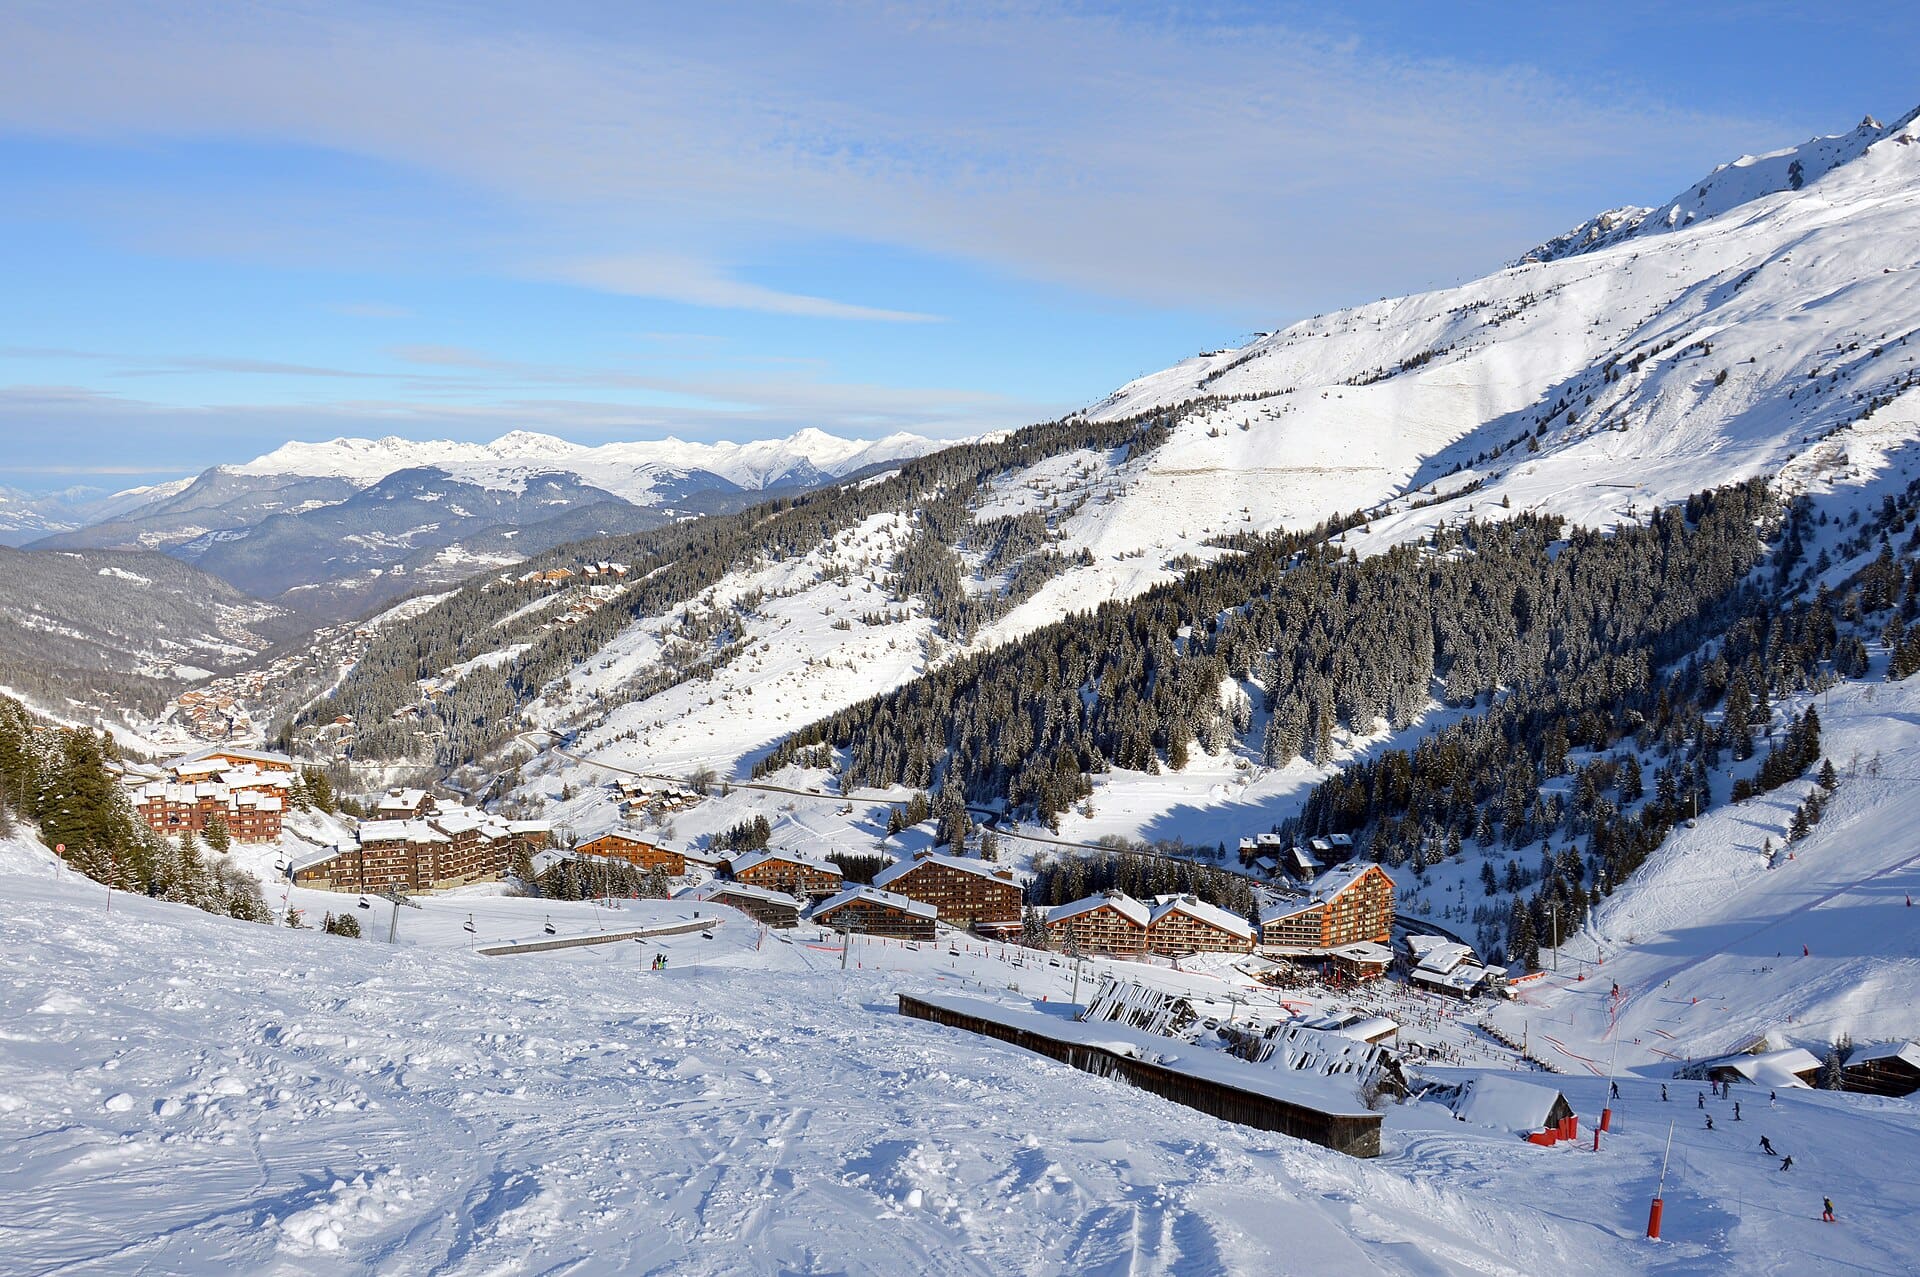
Right in the middle of the gigantic Three Valleys complex sits Méribel, the perfect antidote to the concrete tower blocks of other French resorts. Development here was subject to very strict rules, so every building has to respect the traditional Alpine style and must be clad in wood and local stone. As a result, the resort has kept a wonderfully romantic and warm atmosphere that you often miss elsewhere in France — you’ll feel more like you’re in Austria or Switzerland next door.
Beyond its lovely, tasteful architecture, Méribel’s huge advantage is its utterly unbeatable strategic position on the ski map. It sits smack in the centre of the whole web of pistes, so each morning you’re free to decide whether to explore luxurious Courchevel on one side or the sporty, higher Val Thorens on the other. From a logistical point of view, it’s simply the best launchpad for exploring the entire region.
💡 Tip: If you love long, varied runs, catch the very first morning cable car up to the Mont Vallon summit at 2,952 metres. From here descends one of the most beautiful red pistes in the whole area, surrounded by utterly wild high-mountain scenery with no other infrastructure in sight.
Photo: Didier Descouens / Wikimedia Commons, CC BY-SA 4.0
5. Tignes and Val d’Isère: The Espace Killy Freeride Paradise
If the Three Valleys feel a bit too mainstream and polished for you, just hop one valley over to the breathtaking Espace Killy, named after the legendary French downhill racer. It links the resorts of Tignes and Val d’Isère and offers a total of 300 kilometres of first-class pistes. The terrain here, though, is noticeably sportier, much steeper, and the freeride possibilities are practically endless. It’s a renowned spot for genuinely honest, physically demanding skiing and perfect powder.
Tignes is also one of the few places in France where you can happily ski even during the summer holidays. Thanks to the Grande Motte glacier, the winter season here runs until 3 May, and the lifts then fire up again in June and July for summer training camps. Skiing in a T-shirt on packed snow in July and then swimming in a crystal-clear mountain lake down in the valley in the afternoon is a wonderfully bizarre — and absolutely fantastic — experience you’ll fall in love with.
💡 Tip: After a demanding day on the Espace Killy slopes, treat yourself to a well-earned evening in the local restaurants. I warmly recommend trying traditional cheese fondue or fragrant raclette — a perfect vegetarian delight that’s guaranteed to warm you up after a freezing day and top up your lost energy.
Photo: Nathalie / Wikimedia Commons, CC BY 2.0
6. Alpe d’Huez and Its Legendary 21 Cycling Hairpins
Alpe d’Huez is a fantastic winter resort that boasts the longest black run in Europe, known as La Sarenne, stretching an incredible 16 kilometres. Honestly, though, this name resonates far more powerfully in the sporting world thanks to its sun-baked summer tarmac. The road climbing from the valley town of Bourg d’Oisans up to the resort measures just under 14 kilometres, with a punishing average gradient of over eight per cent.
The most important thing of all, though, is the exactly 21 numbered hairpin bends that make up one of the most iconic climbs on the planet. Every summer day you’ll find hundreds of amateur cyclists sweating buckets as they try to beat themselves and grind all the way to the top. Each bend even bears the name of one of the historic Tour de France stage winners. The seventh bend, nicknamed “Dutch Corner”, is especially famous — during the race, orange-clad fans swarm here and create absolute mayhem.
💡 Tip: The year 2026 will be utterly extreme in this respect, as the Tour de France peloton will arrive here not once but twice. If you want to see the finish of stages 19 and 20 live on 24 and 25 July 2026, you’ll need to arrive with a huge head start, because the road is closed off completely on race day.
Photo: Pline / Wikimedia Commons, CC BY-SA 4.0
Lukáš and Lucie recommend
Where to stay in the French Alps
4 accommodations — wellness hotels, hotels and other accommodation options
In many ways, Les Deux Alpes is a total one-off that defies the usual laws of mountain physics. It has a completely inverted topography compared to most other ski areas in Europe. You’ll find the steepest and most demanding black runs right down at the bottom, just above the village, whereas the higher up you ride the cable car, the flatter and gentler the terrain becomes. That’s because the top of the whole area is formed by the huge, gentle Mantel glacier, home to the very easiest blue motorways for beginners.
This sprawling glacier, sitting at a respectable 3,600 metres, is also a huge draw for lovers of freestyle skiing and keen snowboarders. Every summer, one of the biggest and best-rated snowparks in Europe is built here, drawing pros from all over the world to practise demanding jumps into giant airbags and ride perfectly milled halfpipes under the summer sun.
💡 Tip: When descending from the glacier back to the valley in the afternoon, always be extremely careful. Because of the inverted topography, at the very end of the day you have to tackle very steep and often nastily icy sections, where hundreds of tired skiers heading for their hotels are squeezed into narrow bottlenecks.
Photo: Andreas Eichler / Wikimedia Commons, CC BY-SA 4.0
8. La Plagne and Les Arcs, Joined in the Giant Paradiski
At the turn of the millennium, the two enormous and hugely popular resorts of La Plagne and Les Arcs decided to join forces, creating a gigantic area called Paradiski that offers skiers a full 425 kilometres of superb runs. To link them, the French had to build a genuine engineering miracle. The Vanoise Express cable car is a huge double-decker cabin carrying an impressive 200 people at once and spanning the deep, steep valley without a single support pillar — an experience in itself.
While La Plagne is by nature gentler and geared towards relaxed family skiing on very wide blue motorways, Les Arcs offers far sportier and steeper terrain cleverly hidden among the trees. Both resorts once again champion the beloved ski-in ski-out philosophy without compromise, so you’ll find plenty of huge apartment complexes that may not win any beauty awards but are incredibly practical for a winter holiday.
💡 Tip: If you visit Les Arcs, don’t miss the legendary Aiguille Rouge run, which plunges uncompromisingly from over three thousand metres all the way down to the charming little village of Villaroger. This endless descent has a vertical drop of over two kilometres and will reliably set your thighs on fire.
Photo: Ximonic, Simo Räsänen / Wikimedia Commons, CC BY-SA 3.0
9. Chamonix-Mont-Blanc, the Buzzing Mecca of Alpinism
Chamonix in the French Alps is definitely not your quiet little mountain town of cosy family apartments — it’s a genuine high-mountain mecca. This buzzing base camp of European alpinism has an absolutely unreal atmosphere, where the streets throng with a curious mix of Japanese tourists clutching giant cameras, bronzed climbers festooned with carabiners, and hardened freeriders who’ve been impatiently waiting since dawn for the first deep powder.
The town lies tightly wedged into a deep valley, and directly above it the Mont Blanc massif rises like an impenetrable, majestic white wall. Whenever you tilt your head to the heavens, you see jagged glaciers crawling like endless frozen rivers down the steep slopes towards the town. Chamonix has a much rougher, sportier vibe overall than the polished Austrian resorts, and in the local bars in the evenings the talk turns to avalanche danger and current crevasse conditions rather than luxury fashion.
💡 Tip: If you want to take home something truly unforgettable from the mountains, look into tandem paragliding flights. You can easily book these breathtaking scenic paragliding flights over the Chamonix valley in advance through platforms like GetYourGuide, and it’s an absolutely fantastic once-in-a-lifetime experience.
Photo: Benh LIEU SONG / Wikimedia Commons, CC BY-SA 3.0
10. Aiguille du Midi: A Ticket to the Stratosphere
If you only have time for a single big attraction in Chamonix, it has to be this incredible cable car, no question. The Aiguille du Midi, with its summit at 3,842 metres, is a jagged rocky spire on top of which balances a complex maze of terraces and viewpoints that look at first glance like some secret base from a Bond film. The journey up is a powerful physical experience in itself, because the cable car conquers a huge vertical rise without a single support pillar, and as it swings out over the edge of the rock above a kilometre-deep abyss, the whole cabin holds its breath.
At the top you’re hit with a rough slap of very thin air, with roughly 40 per cent less oxygen than at sea level. Your reward, though, is an absolute, unbeatable view of the Mont Blanc massif and the chance to try the “Step into the Void”, a glass box suspended right over the drop. A return ticket costs €81 in the winter and spring season, rising to €83 from June, and booking a specific time slot is absolutely essential.
💡 Tip: I have a very important warning for you for 2026. From 25 May, the main viewing terrace closes completely for four to five weeks for a complex renovation. The complex will be partially accessible, but that most iconic view will sadly be significantly limited.
Photo: SNappa2006 (https://www.flickr.com/people/snappa2006/) / Wikimedia Commons, CC BY 2.0
11. Mer de Glace and the Sad Story of a Vanishing Glacier
The second cornerstone of Chamonix tourism is the fascinating Mer de Glace, which aptly translates as “Sea of Ice”. You won’t reach it by an ordinary cable car, though, but on the historic Tramway de Montenvers rack railway, which has been steadily climbing through the dense pine forests from Chamonix up to just under two thousand metres since 1908. The ride in the iconic red vintage carriages is wonderfully romantic and offers lovely views over the green valley the whole way up.
At the site itself, though, a rather harsh and tangible lesson in ongoing climate change awaits, because this once mighty glacier is retreating at a truly frightening pace. It once reached right up to the train station; today you have to descend deep into the valley to touch it. Since 2024, thankfully, a brand-new modern gondola has been running, replacing the old cable car and dramatically shortening the journey to the retreating ice and the artificially carved ice cave you can peek inside.
💡 Tip: Buy a combined ticket for both the rack railway and the new gondola straight away — it works out far better value, unless of course you’re travelling with the handy Mont Blanc Natural Resort pass. Exploring the interior of the ice cave with its amazing blue light is an experience you definitely shouldn’t miss during your visit.
Photo: Dmitry A. Mottl / Wikimedia Commons, CC BY-SA 4.0
12. Tour du Mont Blanc, the Ultimate King of Long-Distance Treks
Turn your back on the cable cars, lace up a solid pair of hiking boots, and head into the mountains on foot. The Tour du Mont Blanc is quite literally the holy grail of every long-distance hiker, a 170-kilometre loop that cuts in turn through France, Italy, and Switzerland. Over the usual seven to ten days of walking, this route serves up around 10,600 metres of cumulative ascent — the equivalent of climbing from sea level all the way to the summit of Mount Everest and then some. The trail leads you across gorgeous Alpine meadows and offers views of the white mountain from every angle.
The real stumbling block, however, isn’t the brutal physical climbing but the fairly complex logistics. The trek is a victim of its own enormous success, and the capacity of the mountain huts, or refuges, is strictly limited. Wild camping is banned along the route under threat of hefty fines, so you’re entirely reliant on official accommodation, where one night with the compulsory half board will set you back around €80 to €90 per person.
💡 Tip: Note this well: bookings at the mountain huts open every year on 15 October for the whole of the following summer. If you want to do this trek in August, you’ll need to be sitting at your computer the previous autumn, frantically clicking on the official portal, because the best spots vanish instantly.
Where to Go Next from the French Alps
If the Alpine peaks have captivated you and you want to keep exploring this region, you have several great options. Stop by the town of Annecy, nicknamed the French Venice thanks to its enchanting canals, and home to one of the cleanest lakes in all of Europe.
If you want to delve even deeper into the mysteries of European alpinism and learn more about the history of conquering the highest mountain on the old continent, be sure to read our detailed guide to Chamonix and Mont Blanc, where you’ll find plenty more practical tips for this particular corner of France.
Frequently Asked Questions
How much does a ski pass cost in the French Alps?
In large interconnected areas, ski passes are quite expensive. For example, a six-day pass for the entire Three Valleys area (Les Trois Vallées) will cost you around 368 euros in the 2025/2026 season. However, you can save significantly if you buy a ski pass only for the local valley where you’re staying.
What’s the best route by car from Czechia?
The fastest and most comfortable route to the northern Savoyard resorts leads from Prague through German Nuremberg, Swiss Geneva and French Annecy. Pure driving time is between 10 to 12 hours. However, prepare money for the Swiss motorway vignette and relatively expensive French tolls.
When is the best snow for skiing?
The absolute best skiing conditions are found in French resorts during March, when there’s already plenty of snow from the whole winter, but the days are longer and the sun shines more often. January is also very good, while February tends to be incredibly crowded due to the ongoing French spring holidays.
When do reservations open for the summer Tour du Mont Blanc trek?
This is absolutely crucial information, because mountain hut (rifugio) reservations open as early as October 15th of the previous year. If you want to set off on a trek during the summer months, you need to book your accommodation on the official portal nearly three-quarters of a year in advance. Capacity on the popular route is strictly limited, and the very best spots usually disappear at lightning speed within the first few days.
Do I need an eco-sticker for my car in the French mountains?
You don’t usually need the Crit’Air eco-sticker to drive directly to high-altitude ski resorts, but be extremely careful when passing through large cities in the valleys, such as Grenoble or Lyon. These low-emission zones are still in effect in 2026, and entering without the sticker, which costs just over €5 and must be purchased online in advance, can result in a hefty fine of €68.
Will the Aiguille du Midi viewpoint be open all year in 2026?
Unfortunately no, and please pay really close attention to this when planning your holiday. From May 25, 2026, the main observation terrace at the very top will be completely closed for four to five weeks due to extensive and demanding reconstruction. The cable car will still run and part of the entire complex will be accessible, but the very best view will be temporarily significantly limited.
When will the 2026 Tour de France go through the Alps?
If you’re passionate cycling fans, mark the third week of July 2026 in your calendar. The entire race will arrive in the Alps for stage 15, which takes place on July 19th. Subsequently, the peloton will tackle the legendary climb up Alpe d’Huez twice in a row during stages 19 and 20, specifically on July 24th and 25th.
Can you ski in France in the summer too?
Yes, summer skiing is fortunately still possible on the large glaciers in the Tignes resorts, where you’ll find the expansive Grande Motte glacier, and also in Les Deux Alpes. The lifts here usually start running again after a short spring break around the end of June and beginning of July. However, due to high temperatures, skiing typically only takes place in the morning, before the snow gets too soft in the intense summer sun.
Tips and Tricks for Your Vacation
Don’t Overpay for Flights
Search for flights on Kayak. It’s our favorite search engine because it scans the websites of all airlines and always finds the cheapest connection.
Book Your Accommodation Smartly
The best experiences we’ve had when looking for accommodation (from Alaska to Morocco) are with Booking.com, where hotels, apartments, and entire houses are usually the cheapest and most widely available.
Don’t Forget Travel Insurance
Good travel insurance will protect you against illness, accidents, theft, or flight cancellations. We’ve had a few hospital visits abroad, so we know how important it is to have proper insurance arranged.
Where we insure ourselves: SafetyWing (best for everyone) and TrueTraveller (for extra-long trips).
Why don’t we recommend any Czech insurance company? Because they have too many restrictions. They set limits on the number of days abroad, travel insurance via a credit card often requires you to pay medical expenses only with that card, and they frequently limit the number of returns to the Czech Republic.
Find the Best Experiences
Get Your Guide is a huge online marketplace where you can book guided walks, trips, skip-the-line tickets, tours, and much more. We always find some extra fun there!
TL;DRThe Atlantic Road (Atlanterhavsveien) and Trollstigen are two scenic drives in the Møre og Romsdal region of western Norway, and together they make a road trip of roughly two to three days. The Atlantic Road runs 8.3 kilometres between Kristiansund and Molde, linking eight bridges including the famous Storseisundet Bridge, and it’s open year-round and free to drive. Trollstigen, near Åndalsnes, has 11 hairpin bends and gradients of around nine per cent, but it only opens seasonally, roughly mid-May to the end of October, with the odd closure due to landslides. Molde, Ålesund and Åndalsnes all make good bases, and from there you can carry on along the Golden Route via Ørnevegen to the Geirangerfjord.
Norway is a vast country full of natural extremes, where the simple act of driving becomes an utterly unique experience. When it comes to scenic Norway roads, the Møre og Romsdal region on the west coast is hard to beat — it boasts two architecturally unique roads that regularly top the world rankings of the most beautiful viewpoint routes.
On one side you’ll find the Atlantic Road (Atlanterhavsveien), which gracefully leaps across tiny islets and reefs right above the surface of an unpredictable ocean. A little further inland, the famous Trollstigen — or the Troll’s Path — cuts into steep mountain cliffs, testing the nerves of even the most experienced drivers with its hairpin bends.
If you’re thinking of heading north and you love the freedom of travelling by car, skipping these two engineering marvels would be a serious mistake. In this guide I’ll show you how best to plan this iconic Norwegian road trip, where to find a strategically located base, and what to watch out for when driving through the mountain passes.
TL;DR
The Atlantic Road (Atlanterhavsveien): An 8.3-kilometre stretch between the towns of Kristiansund and Molde that links small coastal islets via eight bridges.
Storseisundet Bridge: The most famous, photogenic spot on the Atlantic Road, which from a certain angle looks like a launch ramp into the sky.
Trollstigen (the Troll’s Path): An extremely steep mountain road near the town of Åndalsnes with 11 sharp hairpin bends and breathtaking viewpoints.
Trollveggen: The tallest vertical rock face in Europe, found close to the foot of the Troll’s Path in the Romsdalen valley.
The Golden Route: A popular connection from Trollstigen via a ferry and the Eagle Road (Ørnevegen) all the way to the famous Geirangerfjord.
Opening times: While the Atlantic Road is open year-round, Trollstigen opens only for the summer season and frequently suffers unexpected closures.
Bases for exploring: The best places to look for accommodation are the towns of Molde, Ålesund, or the mountain resort of Åndalsnes itself.
Planning a trip to Norway always revolves around the unpredictable weather, and when it comes to mountain roads that goes double. The Atlantic Road may be open all year, but its atmosphere changes dramatically depending on the season and the current conditions.
Many travellers agree that the most dramatic experience comes during the autumn storms, when enormous waves crash straight into the bridge piers and water occasionally splashes right up onto the cars. In summer, by contrast, the sea here tends to be calm and turquoise, creating ideal conditions for spotting seals and a relaxed bit of fishing from the coastal walkways.
Completely different rules apply to the Trollstigen mountain road, which operates strictly seasonally. It usually opens around mid-May and closes again uncompromisingly with the first snows in October. On top of that, in recent years the Troll’s Path has faced frequent closures due to dangerous landslides, so it’s absolutely essential to check the latest traffic information right before you set off.
Photo: Nils R / Pexels
Where to Stay Near the Atlantic Road and Trollstigen
💡 Tip for accommodation and experiences: We love searching for places to stay on Booking.com, which usually has the best cancellation terms. For tickets, tours and activities, it’s worth comparing and booking through GetYourGuide.
Choosing the right base is absolutely crucial for this road trip if you want to avoid wasting hours in transit. The most strategic locations are the towns of Molde and Åndalsnes, from which you can easily reach both the ocean and the steep mountains.
If you’re looking for accommodation right in the thick of it beneath the mountains, the renowned Hotel Aak in the town of Åndalsnes is a fantastic choice. It’s a historic mountain hotel with a wonderful atmosphere and views of the surrounding peaks, where a night in a double room will set you back around 2,000 NOK (about €175).
For lovers of modern design and fjord views, there’s Scandic Seilet in the town of Molde. This sail-shaped hotel stands right on the fjord’s edge and makes an ideal starting point for a trip to the Atlantic Road, with a night costing roughly 1,800 NOK (around €158).
Travellers on a tighter budget, or those who prefer being close to nature, often go for Trollstigen Camping, which sits close to the foot of the famous hairpins. Renting a cosy wooden cabin here costs around 1,400 NOK (roughly €123) a night, and naturally it’s best to book well in advance via Booking.com.
The Atlantic Road: Island Hopping by Car
The Atlantic Road (Atlanterhavsveien in Norwegian) is regarded as a masterpiece of modern Norwegian engineering. This relatively short but incredibly intense stretch of road connects the towns of Molde and Kristiansund, crossing the open sea via a series of bridges and causeways.
Driving through this area feels more like sailing on a boat than driving a car. Let’s take a closer look at exactly what this national tourist route has to offer and where it’s definitely worth hitting the brakes.
Photo: Florian Süß / Pexels
1. The Atlantic Road in All Its Glory
The Atlanterhavsveien itself measures just 8.3 kilometres, yet even on such a short stretch Norwegian engineers managed to build an astonishing eight bridges. The road winds across the Hustadvika archipelago, notorious as one of the most dangerous stretches of sea along the entire Norwegian coast.
On calm summer days it’s a very relaxing drive with gorgeous views into the blue distance. But once an autumn low-pressure system rolls in, the road reveals its true face and the journey turns into an adrenaline-fuelled experience, where you have to battle strong gusts of wind and sea spray.
This engineering marvel was completed in 1989 and has since picked up a string of architectural awards. What’s more, the road is completely free with no tolls to pay — a rather pleasant exception in Norway, where toll roads are common.
Photo: Barnabas Davoti / Pexels
2. The Storseisundet Bridge, the "Bridge to the Sky"
The largest and undoubtedly most photographed feature of the whole route is the cantilever Storseisundet Bridge. It measures 260 metres and its main arch rises an impressive 23 metres above sea level so that ships can pass safely beneath it even at high tide.
Thanks to its asymmetric shape, it creates a perfect optical illusion from certain angles. As you approach from the south-west, it looks as though the road suddenly ends in mid-air and the cars plunge straight into the ocean — which earned it the nickname the “bridge to the sky”.
💡 Tip: To get the best photos of this bridge, stop at the dedicated car park just before it. You’ll find safe walking paths there from which to capture the perfect angle of the curve.
Photo: Tim Diercks / Pexels
3. Stops and Viewpoints on the Islet of Eldhusøya
So that visitors can truly soak up the rugged nature up close, the Norwegians built a modern architectural complex on the islet of Eldhusøya. Its main feature is an elevated viewing walkway made of steel grating, which safely loops around the entire island.
From this walkway, fantastic views open up over the open ocean, and in good weather you can supposedly even spot whales or seals in the distance. The complex also includes an elegant glass café that, from the outside, looks more like a work of art blending into the surrounding rocks.
Many of the bridges on the Atlantic Road are also specially adapted for sport anglers. The secured side walkways allow you to safely cast your line straight into the powerful sea currents, where large shoals of cod are said to gather.
Trollstigen and the Golden Route: a Mountain Adventure
As you move from the flat coast deeper inland towards the town of Åndalsnes, the landscape begins to rise dramatically. Suddenly you’re surrounded by steep granite massifs enclosing deep, dark valleys.
This is where the legendary Trollstigen lies — a road that, since opening in the 1930s, has held the status of one of the country’s greatest engineering achievements. Driving carefully through these places leaves a deep impression on absolutely everyone.
The Troll’s Path is the very embodiment of a driving challenge. This narrow road cuts into a sheer rock face and climbs more than 850 metres via eleven extremely sharp hairpin bends, with an average gradient reaching a respectable nine percent.
In places the road is so narrow that two larger vehicles can barely pass one another, which is why there’s a strict ban on vehicles longer than 13.1 metres. Each bend even has its own name, usually after the foreman of the construction crew that carved that section into the rock by hand back in the 1930s.
Driving here demands total concentration, as the crash barriers in many spots consist only of low stone walls. The reward for all that stress behind the wheel, however, is utterly incredible views into the valley, which keep getting better with every bend.
Photo: Stefan Krause, Germany / Wikimedia Commons, CC BY-SA 3.0
5. The Stigfossen Waterfall and Viewing Platforms
As you climb the hairpins, the roaring Stigfossen waterfall will keep you company. This mighty mass of water plunges from a height of an impressive 320 metres and flows through old stone bridges just beneath the road in several places, so in the spring months it often splashes icy water onto the cars.
Once you’ve negotiated every bend up to the summit, you’ll reach the sprawling Trollstigen visitor centre. From here a short, easy concrete path leads to a set of modern steel viewing platforms that hang high above the abyss.
The view from the furthest platform, which juts straight out into the void, is supposedly only for the brave. From this bird’s-eye perspective you can see the full zigzag of all eleven bends deep below you, carved into the rugged Nordic landscape.
6. The Romsdalen Valley and the Vertical Trollveggen Wall
Even before you start the climb up the Troll’s Path, it’s worth taking a short detour through the Romsdalen valley. This is home to the famous Trollveggen, or the Troll Wall, which is the tallest vertical rock face in all of Europe.
From base to jagged summits this rock massif measures roughly 1,100 metres, and in places it even overhangs menacingly. No wonder it has become a global mecca for the most experienced climbers and, in the past, attracted lovers of extreme base jumping too.
Due to the enormous risk and several tragic accidents, however, jumping from the Troll Wall is now strictly forbidden. You can still admire this natural giant safely from the modern Trollveggen Besøkssenter visitor centre, which sits right beneath the wall and offers an excellent café with huge panoramic windows.
7. The Golden Route: Geiranger–Trollstigen and Ørnevegen
Many travellers fold the drive over the Troll’s Path into a longer itinerary nicknamed the Golden Route. This stretch of roughly one hundred kilometres links Trollstigen with the famous Geirangerfjord, a UNESCO World Heritage Site.
After cresting the summit of Trollstigen, the road continues across a mountain plateau dotted with lakes and snowfields all the way to the town of Valldal, where you need to take a short ferry across the fjord on the Linge–Eidsdal route. The route then climbs towards another iconic road known as the Eagle Road (Ørnevegen).
Ørnevegen offers hairpins every bit as steep as Trollstigen, with the difference that from its top you get one of the most famous views of the deep-blue Geirangerfjord and the Seven Sisters waterfall. This whole route is said to be the absolute best that Norway roads have to offer.
Photo: Peter Holmboe / Pexels
8. Closures, Safety and When the Roads Are Open
While the Atlantic Road troubles drivers with strong winds at most, on Trollstigen nature poses a far more real threat. The mountain pass usually lies under a thick layer of snow from late October until mid-May, when the road is completely closed off by a barrier.
In recent years, though, a far more serious problem has emerged in the form of falling rocks and large landslides. Due to melting snow and unstable ground, the Norwegian authorities have already had to close the Troll’s Path for extended periods several times, even in the middle of the main summer season.
💡 Tip: Before every trip into these mountains it’s absolutely essential to check current road conditions on the official Norwegian roads website (Statens vegvesen). If the road were closed, you’d have to take a very long detour through a neighbouring valley.
Photo: Monika Balciuniene / Pexels
How to Plan a Western Norway Road Trip
The ideal road trip linking the Atlantic Road and Trollstigen takes roughly two full days at a relaxed pace. If you decide to add the Golden Route all the way to Geiranger, plan for three days instead, so you have plenty of time for photos and soaking up the scenery.
The beautiful Art Nouveau town of Ålesund is the most common starting point, followed by the Molde and Kristiansund areas. The route from the Atlantic Road south to the mountains requires crossing the Romsdalsfjord, which means taking the regular ferry between the ports of Sølsnes and Åfarnes.
Time passes very differently on Norway’s roads than in the rest of Europe. Speed limits are very strict (often just 60 or 80 km/h) and mountain roads don’t allow for fast driving, so budget about a third more time for each section than your sat nav suggests. For getting here from the UK, the easiest route is to fly direct from London or Manchester to Ålesund (or via Oslo with SAS/Norwegian) and pick up a hire car at the airport.
💡 Tip: If you don’t fancy driving your own car on roads this extreme, definitely check out GetYourGuide. Local agencies there regularly offer safe, organised coach tours that depart straight from Ålesund or Molde.
Where to Go Next from the Møre og Romsdal Region
Norway’s west coast is laced with jaw-dropping places, and these two roads are just a small taster. If you’re looking for inspiration on where to point the steering wheel after conquering the Troll’s Path, I’ve put together links to a few more useful articles:
“`html
The mountain road is open seasonally only, usually from mid-May to the end of October. However, the dates vary depending on snowfall, and in recent years there have been frequent summer closures due to dangerous landslides. You must always check the current status.
“`
Is the Atlantic Road open year-round?
Yes, this coastal route remains open all year round and there is no toll charged on it. Many travellers agree that it offers the most dramatic spectacle during harsh autumn storms, when huge ocean waves crash over it.
How long does this road trip take?
If you want to connect the coast with the mountains and continue all the way to Geiranger, ideally set aside two full days for the journey. The actual drive won’t take that much time, but constant photo stops and waiting for ferries will significantly extend your schedule.
Can you drive on these roads with a caravan?
“`html
The Atlantic Road is completely problem-free for caravans and has plenty of rest areas. On the other hand, Trollstigen’s sharp hairpin bends require enormous driving experience and there is a strict ban for all vehicles longer than 13.1 meters.
“`
Where is the best place to have a base?
For visiting the Atlantic Road, the towns of Kristiansund or Molde are the best choice. If you’re planning to tackle the mountain passes, you’ll find the ideal base in the small town of Åndalsnes, which lies right at the foot of the mountains in the Romsdalen valley.
What exactly is the Golden Route?
This is a popular tourist route that starts at the foot of Trollstigen, continues across a mountain plateau to the Linge–Eidsdal ferry, and then climbs via the Eagle Road (Ørnevegen) up to Geirangerfjord. This section is among the most beautiful in the country.
Is the Storseisundet Bridge worth photographing?
Definitely yes, it’s the most photographed spot in the entire area, often nicknamed the bridge to heaven. If you stop at the adjacent designated parking lot, you’ll find safe walkways from where you can capture that famous angle where the road seemingly ends in mid-air.
Tips and Tricks for Your Vacation
Don’t Overpay for Flights
Search for flights on Kayak. It’s our favorite search engine because it scans the websites of all airlines and always finds the cheapest connection.
Book Your Accommodation Smartly
The best experiences we’ve had when looking for accommodation (from Alaska to Morocco) are with Booking.com, where hotels, apartments, and entire houses are usually the cheapest and most widely available.
Don’t Forget Travel Insurance
Good travel insurance will protect you against illness, accidents, theft, or flight cancellations. We’ve had a few hospital visits abroad, so we know how important it is to have proper insurance arranged.
Where we insure ourselves: SafetyWing (best for everyone) and TrueTraveller (for extra-long trips).
Why don’t we recommend any Czech insurance company? Because they have too many restrictions. They set limits on the number of days abroad, travel insurance via a credit card often requires you to pay medical expenses only with that card, and they frequently limit the number of returns to the Czech Republic.
Find the Best Experiences
Get Your Guide is a huge online marketplace where you can book guided walks, trips, skip-the-line tickets, tours, and much more. We always find some extra fun there!
TL;DReSIM Global YO makes most sense for flexible travellers hopping between several countries, who don’t need hotspot sharing or a Czech-language app. It covers data plans in more than 200 countries, ranging from 0.5 GB to 20 GB (up to 50 GB in select countries), priced at roughly €2.50 to €3.50 per GB — similar to Airalo. The YOYO$ loyalty scheme can cut the price by up to 50%, plans run from 1 to 30 days, and activation is fully digital, done in minutes by scanning a QR code. The downsides are no hotspot support and an interface only in English and Spanish, which brings the overall rating to 4 out of 5 stars.
You land at the airport, switch on your phone, and discover that roaming has swallowed more money in a single day than your entire hotel bill. Sound familiar? That’s exactly why more and more travellers are switching to an eSIM for travel – a digital SIM card you buy from your sofa at home and activate within minutes anywhere in the world.
One provider that’s been getting a lot of attention lately is Global YO. It’s a relatively young brand, but it comes with an ambitious offering: data in more than 200 countries, a tidy app, a loyalty programme, and even the ability to make international calls. On paper it looks brilliant – but how does it hold up in practice?
We set out to put the Global YO eSIM through its paces. In this review you’ll find everything you need to know before you buy – from prices and coverage to activation and the things to watch out for.
TL;DR
Global YO offers an eSIM for travel in more than 200 countries with instant digital activation.
Prices are around average, but discounts and the YOYO$ loyalty programme can cut them by up to 50%.
Both the app and website are clear and easy to use, but they’re only available in English.
Unique feature: international calling via YO SHOUT. Hotspot (data sharing) is not supported – keep that in mind before you buy.
Customer support is reliable, even at weekends.
Recommended for: flexible travellers who don’t need hotspot sharing.
Global YO is a modern eSIM provider that lets you get online practically anywhere in the world – no physical SIM card, no queuing in a shop, no waiting for delivery. Everything happens digitally: you choose a package, pay, scan a QR code, and you’re online. For most users the whole process takes just a few minutes.
Unlike traditional operators, there are no complicated contracts and no need to track down a new SIM card for every trip. Just pick a package for your destination and off you go.
Coverage: How far does the Global YO eSIM reach?
One of Global YO’s biggest strengths is the breadth of its coverage. Data packages are available for more than 200 countries, and you can choose not only single-country plans but also regional options – whether you’re travelling around Europe, Asia or the Americas.
The special packages such as “Surfer Explorer” and “Digital Nomad” are worth a look too, as they cover a combination of destinations. That’s something you won’t find with most competitors. And for those who never stop moving around the globe, there are global plans covering 52, 100 or 118 countries.
The signal works reliably in big cities and tourist areas. In more remote spots, connection quality can fluctuate. But that’s true of most eSIM providers and depends on the partner operators in each region.
Data packages and prices
The Global YO eSIM offers packages typically from 0.5 GB to 20 GB, and up to 50 GB for selected countries. There are now also unlimited plans, although these are currently capped at 7 days.
As for prices, Global YO sits around the market average – you’ll pay roughly €2.50 to €3.50 per 1 GB of data, which is comparable to Airalo or eSIM4Travel. The upside is the frequent discounts and the YOYO$ loyalty programme, which can bring the price down by as much as 50%. That makes Global YO a genuinely appealing choice, especially for regular travellers.
Package validity ranges from 1 to 30 days. Heads up: the 3 to 5 GB packages are only available with 15-day validity, not the 30 days you might expect from the competition.
Payment options: you can pay by card (Visa, Mastercard), via PayPal or with Apple Pay. It’s all quick and secure – no need to go anywhere or wait around.
Activation: How quickly will you be online?
Once you’ve paid, you’ll receive a QR code by email or directly in the app. Scan it in your phone’s settings and the eSIM is activated – the whole thing takes a few minutes at most. If you don’t have a second device to hand for scanning, the app also lets you enter the codes manually.
The setup is designed so that absolutely anyone can manage it, even without any technical know-how. A wizard walks you through the entire process.
A review of the Global YO eSIM
App and website: Clear and easy, though English only
Both the website and the mobile app are clean and intuitive. Managing your data packages, tracking usage and topping up are all just a couple of taps away. The app even throws in extras like radio and films – and if you don’t need them, no worries, they don’t get in the way.
The downside? The website and app are only available in English and Spanish. More advanced users might find it annoying that technical details (such as hotspot support or connection speed) are only available on the website, not directly in the app.
Calling with YO SHOUT
Global YO is one of the few eSIM providers to also offer international calling. The YO SHOUT service works over VoIP – so you need to be connected to the internet (Wi-Fi is fine). Calls happen straight in the app; you don’t get a local number, but you can call anyone in the world.
Handily, your calling credit stays valid for up to 365 days after your data package expires. When you buy credit, you’ll see the exact number of minutes you get to a given country upfront. It’s a paid extra, but for anyone who needs to make calls abroad it can be really practical.
The YOYO$ loyalty programme
The Global YO eSIM has a well-thought-out loyalty scheme. You collect YOYO$ points for registering, completing your profile, referring friends, time spent in the app or taking part in competitions. For every 100 YOYO$ you get $1 off your purchase. The maximum discount on a single plan usually ranges from 10% to 50%. It’s a nice bonus that can save regular travellers a decent amount of money.
Customer support
On the website you’ll find an extensive FAQ section and a chatbot that can answer most common queries. For more specific issues or complaints, the most reliable option is to email support@globalyo.com directly – support responds quickly, usually even at weekends.
One thing that may put some users off: the Global YO eSIM does not support data sharing via hotspot. If you need to connect a laptop or tablet to the internet through your phone, this service won’t let you. Details about this limitation are only found in the technical specifications on the website, and they’re not always easy to track down.
Global YO eSIM: Pros and cons at a glance
Wondering what the pros and cons of the Global YO eSIM are? Let’s take a look.
Pros:
Coverage in more than 200 countries, including less touristy destinations.
Instant digital activation with no waiting for a physical SIM.
Clear, user-friendly app and website.
Loyalty programme and frequent discounts.
International calling via YO SHOUT.
No monthly subscription – you only pay for what you use.
Cons:
Website and app only in English (and Spanish).
No data sharing via hotspot.
The 3–5 GB packages are valid for just 15 days (not 30).
Unlimited data is only available for 7 days.
Signal quality can fluctuate in remote areas.
Global YO eSIM
Verdict: Who is the Global YO eSIM ideal for?
To give you a quick overview, we’ve lined the Global YO eSIM up against its most common rivals. This is a rough comparison – prices change depending on the destination and current promotions, so treat it as a guide only.
A rough comparison of eSIM providers. Always check current prices in the relevant app.
Global YO is a solid choice for travellers looking for flexible mobile data without complicated contracts or paperwork. You’ll appreciate this service in particular if you’re travelling to several countries at once, like clean, well-designed apps and want to be able to make calls abroad.
The loyalty programme and regular discounts make it an interesting alternative to established names like Airalo or Holafly, especially if you plan to use an eSIM again and again. But if you need to share data via hotspot, you’d be better off looking elsewhere.
Overall rating: ⭐⭐⭐⭐ (4/5) – A good option for most travellers, though a few little things still leave room for improvement.
Prices, coverage and terms with eSIM services change frequently. The details in this article are approximate and were verified in June 2026 – always check the current offer directly in the provider’s app before you buy.
Frequently Asked Questions (FAQ)
Is Global YO eSIM compatible with my phone?
“`html
Global YO works on all devices with eSIM support – that is, on most modern iPhones (from XS and up), Samsung phones, Google Pixel, and others. Check your model’s compatibility on the provider’s website before purchase.
“`
How quickly will I have my eSIM activated?
“`html
Pretty much instantly. After payment, the QR code arrives via email or appears in the app, and the activation itself takes just a few minutes.
“`
Can I top up my eSIM if I run out of data?
Yes, top-up is possible directly in the Global YO app anytime and anywhere.
Does Global YO eSIM work as a hotspot for sharing data?
No. Sharing data via hotspot is not supported by Global YO. If you need this feature, consider a different provider.
What is YO SHOUT and how does calling work?
YO SHOUT is an add-on service enabling international calls over the internet (VoIP). You call directly from the app, don’t need a local number and can call anyone in the world. Call credit is valid for 365 days.
How does the YOYO$ loyalty program work?
“`html
For various activities in the app (registration, referrals, time spent in the app, etc.) you collect YOYO$ points. For every 100 points you get a 1 USD discount on purchasing another package, usually up to 10–50% of the price.
“`
What are the payment options?
You can pay by debit or credit card (Visa, Mastercard), via PayPal or Apple Pay.
Is Global YO suitable for longer travel?
“`html
For travel up to 30 days yes, packages have a maximum validity of 30 days. If you’re planning a longer trip, you’ll need to renew the package. Global plans are available for 52, 100, or 118 countries at once.
“`
Tips and Tricks for Your Vacation
Don’t Overpay for Flights
Search for flights on Kayak. It’s our favorite search engine because it scans the websites of all airlines and always finds the cheapest connection.
Book Your Accommodation Smartly
The best experiences we’ve had when looking for accommodation (from Alaska to Morocco) are with Booking.com, where hotels, apartments, and entire houses are usually the cheapest and most widely available.
Don’t Forget Travel Insurance
Good travel insurance will protect you against illness, accidents, theft, or flight cancellations. We’ve had a few hospital visits abroad, so we know how important it is to have proper insurance arranged.
Where we insure ourselves: SafetyWing (best for everyone) and TrueTraveller (for extra-long trips).
Why don’t we recommend any Czech insurance company? Because they have too many restrictions. They set limits on the number of days abroad, travel insurance via a credit card often requires you to pay medical expenses only with that card, and they frequently limit the number of returns to the Czech Republic.
Find the Best Experiences
Get Your Guide is a huge online marketplace where you can book guided walks, trips, skip-the-line tickets, tours, and much more. We always find some extra fun there!
TL;DRTiming your trip around specific species makes all the difference for wildlife-watching in Mexico. Grey whales and humpbacks gather off the Baja California peninsula (Ojo de Liebre, San Ignacio and Magdalena Bay lagoons) from December to April, peaking in February and March. Whale sharks show up in the Caribbean near Holbox, Isla Mujeres and Cancún from 15 May to 17 September, costing around $190, while over on the Pacific side near La Paz they swim from November to March. Sea turtles nest from May to November, though snorkelling with them at Akumal beach means going with a certified guide and wearing a life vest. If you want to pack in as many species as possible in one go — monarch butterflies in Michoacán and flamingos at Celestún included — January is the month to go.
You know that feeling when your jaw drops in amazement, your breath catches, and you just stare in disbelief at what nature has come up with? That’s exactly how you’ll feel when you encounter Mexico wildlife up close. This vast country offers far more than perfect white-sand beaches, Mayan pyramids and the best vegetarian tacos on the planet — it’s an absolute paradise for animal lovers. Whether you dream of a giant whale gliding beneath your boat in a lagoon, want to snorkel alongside a majestic whale shark, or long to witness millions of orange butterflies, you’re in the right place.
This guide will walk you through the best wildlife in Mexico so you know exactly where — and crucially, when — to go. Nature doesn’t wait, and if you arrive in the wrong month, you might leave disappointed. We’ll look at where you can best spot adorable sea turtles, where to head for flocks of pink flamingos, and why it matters to choose certified guides who respect the animals. In short, I’ll show you how to make your travel dreams come true and bring home memories no one can ever take away.
In this article you’ll find a complete wildlife-watching calendar, detailed tips for individual regions from Baja California to the Yucatán, an overview of current prices and plenty of practical advice to make your adventure absolutely perfect.
Photo: Andre Estevez / Pexels
TL;DR
Best month for wildlife: If you want to see as much as possible, go in January. You can combine whale watching in the west, monarch butterflies in central Mexico and flamingos on the Yucatán.
Grey whales and humpbacks: The main season on the Baja California peninsula runs from December to April, with the absolute peak — and the best chance of seeing calves — in February and March.
Whale shark: In the Caribbean (Holbox, Isla Mujeres, Cancún) you’ll see them from mid-May to mid-September. In the Pacific (La Paz), it’s November to March.
Sea turtles: They nest from May to November; in the Akumal area a guide and life jacket are mandatory for snorkelling with them.
Monarch butterflies: They overwinter in the state of Michoacán from November to March, with millions coating the trees at high altitudes.
Flamingos: Celestún is ideal from November to March, while Río Lagartos hosts nesting from March to June.
Conservation: Never touch the animals, keep your distance, and never enter cenotes or coral-rich seas wearing sunscreen.
Wildlife Calendar: What You’ll See in Mexico and When
When planning a wildlife trip, timing is absolutely crucial, because most of the most fascinating creatures only migrate to Mexico. If you book flights for October hoping to see grey whales or whale sharks in the Caribbean, you’ll sadly just be staring at an empty sea. To help you get your bearings, here’s a clear table of the biggest highlights and their seasons.
Ideal calm seas for snorkelling with whale sharks.
July
Whale shark (Caribbean), Sea turtles
Peak season for the giant fish and for turtles nesting on the beaches.
August
Whale shark (Caribbean), Turtles
The last strong month for whale sharks on the east coast.
September
Crocodiles (Banco Chinchorro), Turtles
The whale-shark season on the Yucatán ends around 17 September.
October
Sea turtles (hatching)
The biggest hatching of tiny turtles racing toward the sea begins.
November
Whale shark (La Paz), Monarchs
Whale sharks arrive in La Paz; the first butterflies settle in the mountains.
December
Whales (Baja), Flamingos (Celestún)
The main whale-watching season on the west coast kicks off.
💡 Tip: If your holiday dates are flexible and you want to see the widest variety of nature, plan your trip around the turn of January and February. The weather is pleasant everywhere and the animals are present in full numbers.
Grey Whales and Humpbacks: When to Visit the Baja California Peninsula
Photo: Pexels
The Baja California peninsula is often called the world’s aquarium, and trust me, it earns that title down to the last letter. Every year, after travelling thousands of kilometres from the cold waters of Alaska, thousands of whales arrive here to mate and give birth in the warm, calm lagoons. Watching these giants with your own eyes is an experience that will give you goosebumps long after you get home.
The stars of the west coast are grey whales and humpbacks. The season runs roughly from December to April, but if you want to be sure of seeing mothers with their tiny calves, come in February or March. The very best spots are the Ojo de Liebre and San Ignacio lagoons, which mean heading a little further north up the peninsula. It’s here that the whales are what’s known as “friendly” — they often approach the small boats themselves, with mothers literally nudging their calves up to the surface to get a look at the tourists. It’s a magical show.
If you don’t want to travel that far north, Magdalena Bay is a great alternative. Tours set off from the small town of Puerto San Carlos, about three and a half hours’ drive from La Paz or roughly five and a half hours from the popular resort of Cabo San Lucas. Local fishermen take you out in small boats called pangas right into the bay, where whales will be breaching and blowing geysers all around you. Always make sure your captain follows the rules and doesn’t chase the animals — respecting their space is the absolute priority.
💡 Tip: Mornings out on the ocean in Baja California can be surprisingly cold, even at the height of the season. Be sure to pack a waterproof windbreaker, a warm hoodie and maybe a beanie, because once the boat picks up speed the wind can really cut through you.
Whale Shark in Mexico: Swim with the World’s Biggest Fish
Photo: Pexels
Picture yourself floating in crystal-clear blue water when suddenly, out of the shadows, an enormous creature covered in white spots emerges — looking like something straight out of prehistory. The whale shark is the largest fish on our planet, and swimming with one is a huge draw that brings tens of thousands of excited travellers to Mexico. But don’t worry: despite having the word “shark” in its name, it feeds only on plankton and tiny fish, so you’re of absolutely no interest to it and you’re in no danger.
It does, however, depend on which Mexican coast you’re heading to, as the seasons differ dramatically. If you’re going to the east coast and the Caribbean (areas like Cancún, Isla Mujeres or the little island of Holbox), the season is strictly government-regulated from 15 May to 17 September. You’ll find the highest concentrations — and therefore the best chance of success — in the middle of summer, from June to August. Tours are organised early in the morning and very strict rules apply to absolutely everyone.
A maximum of ten tourists are allowed on each boat, only two people enter the water with a guide at a time, and you must keep a distance of at least two metres. Touching the animal is strictly forbidden, and you may not use any sunscreen — not even the biodegradable kind — because the chemicals would harm the fish. The price for this tour is around 190 USD (about €175), which already includes the government fee for entering the reserve, roughly 125 USD. If, on the other hand, you’re heading west to the Pacific around the city of La Paz, whale sharks arrive there in winter, from November to March.
💡 Tip: For snorkelling in the Caribbean you can choose from certified agencies. You can verify the official rules and the list of permitted operators for the Holbox area on sites like Holbox Travel. If you suffer from seasickness, take a tablet first thing in the morning — the open-water swells can be treacherous.
Sea Turtles: Where to Watch Nesting and Hatching in the Pacific and Caribbean
Photo: Pexels
While whales and sharks amaze with their sheer size, sea turtles win everyone over with their charm and the incredible calm with which they glide beneath the surface. Mexico is hugely fortunate that every year thousands of females from several turtle species come ashore on its beaches to lay their eggs. The whole nesting process takes place roughly from May to November, and the subsequent hatching of the tiny turtles and their race for life toward the sea is one of the most moving experiences imaginable.
Probably the best-known spot for snorkelling with turtles is Akumal beach on the Riviera Maya. You used to be able to just turn up and jump straight into the water, but because the tourist pressure became unbearable for the animals, the government introduced strict and much-needed restrictions. Today you may only enter the turtle zone with a certified local guide, you’re required to wear a life jacket (so you’re forced to swim on the surface and can’t dive down to the turtles), and you must keep a safe distance. The turtles graze on seagrass on the seabed and need space to come up for air.
Besides the Caribbean, you’ll also find turtles on the Pacific coast, for example in the state of Oaxaca (famous beaches such as Mazunte) or Puerto Vallarta. During the autumn months, organised releases of baby turtles take place here, run by rescue stations. This is how they protect the nests from poachers and predators and give the hatchlings a far greater chance of survival.
💡 Tip: If you see a turtle on the beach laying eggs, never shine a torch or your phone’s flash at it. Light disorients them and they may return to the sea without laying their eggs.
Monarch Butterflies: A Natural Wonder in the State of Michoacán
Photo: Pexels
Not all of Mexico’s fascinating wildlife hides beneath the ocean’s surface. High in the mountains of the state of Michoacán, amid pine and oyamel forests, one of the world’s most mysterious animal spectacles unfolds. Every year, millions of orange-and-black monarch butterflies fly here from Canada and the northern US, covering an incredible 4,000 kilometres to wait out the harsh northern winter.
The season runs from November to March, but if you want to see it at its most beautiful, plan your visit for January or February. At that time the trees are literally draped in clusters of butterflies so dense that the branches bend under their weight. Then, when the sun comes out and the forest warms up, millions of butterflies take to the air all at once. There are so many that you can hear the rustle of their wings and the sky turns orange.
Among the most visited and best-equipped reserves are El Rosario and Sierra Chincua. The path to them runs up steep mountain trails, so be ready for a bit of cardio at altitudes over 3,000 metres above sea level. The reserves themselves are very well organised, and by visiting you support the local communities that protect the forests from illegal logging.
💡 Tip: A trip to the butterflies means setting off early in the morning into proper mountains. Temperatures here can drop to freezing, so layered clothing and comfortable hiking shoes are an absolute must — even if everywhere else in Mexico you’ve been wandering around in shorts.
Flamingos, Crocodiles and Other Animals in the Yucatán and Chiapas
Photo: Alejandro Juárez / Pexels
While the Yucatán peninsula is famous for its Mayan ruins and magical cenotes, it also harbours a huge amount of wildlife. If you love birds and colour, you have to see the flocks of flamingos. You’ll find these elegant pink birds mainly in two places. The first is the Ría Celestún reserve on the western coast of the peninsula, best visited from November to March. The second is Río Lagartos in the far north, where as many as 40,000 individuals gather. They nest here from March to June, but you can actually see them year-round. Along the way you’ll surely hear about the pink lakes of Las Coloradas — but beware, these are used for salt extraction and swimming in them is strictly forbidden.
If you fancy a bit more adrenaline, Mexico will show you prehistoric giants in the form of crocodiles. One of the best places to watch them safely is the Sumidero Canyon National Park in the state of Chiapas. During a boat trip through the canyon, with its stunning walls up to 1,000 metres high, you’ll come across dozens of crocodiles lazily basking on the banks of the Grijalva River. More than two hundred of them live here. Tours usually start in the charming little town of Chiapa de Corzo, and you’ll find current information on park entry on the official Mexico tourism website.
Experienced divers can head to the vast Banco Chinchorro atoll (departing from the village of Mahahual), where from June to September you can meet American crocodiles underwater. This expedition is reserved for true enthusiasts only, and the trips may be organised by a single certified centre, the XTC Dive Center. Also worth a mention is the Sian Ka’an Biosphere Reserve (a UNESCO site spanning 1.3 million acres south of Tulum), where with a bit of luck you’ll spot wild dolphins, sea turtles or rare manatees.
💡 Tip: If you’re heading to the pink lakes of Las Coloradas near Río Lagartos, bear in mind that the water’s colour depends heavily on the sun and the time of day. They’re at their most vivid around midday, but if it’s overcast they can look more brown.
The Ethics of Wildlife Watching: How to Be a Responsible Traveller
Photo: Zak Cole / Pexels
Mexico’s nature is gorgeous, but it’s also incredibly fragile. Every year, millions of tourists arrive in the country, and this onslaught unfortunately takes its toll on the coral reefs, the rainforests and the animals themselves. Being a responsible traveller doesn’t mean you have to stay at home — it means behaving with the utmost respect for the environment you’re stepping into. Here are a few basic rules you should always keep in mind.
The most fundamental and important rule is: don’t touch. Whether it’s a starfish on the beach, a sea turtle or animals in the jungle. Human touch transfers bacteria to them, can damage their protective mucus and, in animals like turtles, causes enormous stress. You must also never pull a starfish out of the water, not even for a couple of seconds for a photo, because they suffocate very quickly.
The second big topic is protecting the water. Sunscreens — even those labelled “biodegradable” or “reef safe” — contain substances that bleach and kill corals. For snorkelling with whale sharks, sunscreens are banned entirely. The same goes for a strict ban on using any creams or repellents before entering cenotes. These underground freshwater systems are interconnected and the chemicals linger in them. The popular Gran Cenote near Tulum, for example, bans all creams entirely, and you have to shower thoroughly before getting in the water. Entry fees to these natural wonders are also rising — at Dos Ojos, for instance, you’ll now pay around 350 pesos (about €18).
💡 Tip: For wildlife trips and diving in the sea, I recommend getting a quality long-sleeved swim top with a UV filter (a so-called rashguard). You then don’t have to worry about sunscreen on your back and shoulders at all, protecting yourself from sunburn and the seabed from pollution. For diving off the island of Cozumel (the famous Palancar reef), also note that as of 2025 there’s a national park entry fee of 218 pesos per day.
Where to Next
If Mexico has captured your imagination and you want to carry on planning your dream trip, take a look at our other articles, where we’ve put together a whole heap of inspiration for you.
Find out how to put together the perfect itinerary and what to see in Mexico on a two-week trip.
Not sure which month to book your flights? We’ve written a detailed guide on when to go to Mexico based on weather and prices.
🔗 These are affiliate links — they don't change your price and help us create content. · All experiences →
Frequently Asked Questions
When is the best time for whale watching in Mexico?
Your best chance of encountering gray whales and humpbacks on the Baja California peninsula is from late December to early April. If you also want to see the calves, the absolute peak of the season is February and March in the lagoons of San Ignacio or Magdalena Bay.
Where can I swim with a whale shark and how much does it cost?
On the Caribbean side (Holbox, Isla Mujeres), the season runs from May 15 to September 17, with the trip costing around 190 USD (roughly 175 EUR), which already includes a fairly high government fee. On the Pacific side near the city of La Paz, you’ll see them in winter from November to March.
Can I wear my sunscreen while snorkeling with turtles or whale sharks?
Definitely not. The use of sunscreen, even those labeled as biodegradable, is strictly prohibited when swimming with whale sharks. The same rules apply to most cenotes and protected coves; a much better solution is a UV-protective shirt that guards against the sun.
How do I get to the monarch butterflies and how does it work there?
The most famous reserves like El Rosario or Sierra Chincua are located in the mountains of Michoacán state not far from Mexico City. The journey to them requires a hike at high altitude above 3,000 meters, so it’s necessary to have sturdy boots and warm clothing, because mornings there can be very chilly.
Where can I find the largest flocks of pink flamingos?
On the Yucatán Peninsula, there are two main places to see them. From November to March, the Celestún reserve on the western coast is ideal, while from March to June, flamingos nest in the north in the Río Lagartos area, where there can be tens of thousands of them.
Is it safe to go on a trip to see crocodiles in Sumidero Canyon?
Yes, it’s completely safe because you’ll only travel on organized motorboats with local guides. The crocodiles usually bask on the banks of the Grijalva River and the boats maintain a safe and respectful distance from them, so you can photograph them in peace.
Why do I have to wear a life jacket when swimming with turtles in Akumal?
The vest lifts you up and physically prevents you from diving deeper to the seabed. Turtles graze on the grass there and need a safe corridor to the surface so they can breathe; the vest ensures that tourists won’t restrict or disturb them.
Tips and Tricks for Your Vacation
Don’t Overpay for Flights
Search for flights on Kayak. It’s our favorite search engine because it scans the websites of all airlines and always finds the cheapest connection.
Book Your Accommodation Smartly
The best experiences we’ve had when looking for accommodation (from Alaska to Morocco) are with Booking.com, where hotels, apartments, and entire houses are usually the cheapest and most widely available.
Don’t Forget Travel Insurance
Good travel insurance will protect you against illness, accidents, theft, or flight cancellations. We’ve had a few hospital visits abroad, so we know how important it is to have proper insurance arranged.
Where we insure ourselves: SafetyWing (best for everyone) and TrueTraveller (for extra-long trips).
Why don’t we recommend any Czech insurance company? Because they have too many restrictions. They set limits on the number of days abroad, travel insurance via a credit card often requires you to pay medical expenses only with that card, and they frequently limit the number of returns to the Czech Republic.
Find the Best Experiences
Get Your Guide is a huge online marketplace where you can book guided walks, trips, skip-the-line tickets, tours, and much more. We always find some extra fun there!
TL;DRThe best neighbourhood for your Budapest stay really depends on what you’re after. First-timers wanting to walk to sights like the Parliament or St Stephen’s Basilica should base themselves in District V (Belváros-Lipótváros), where hotels run from about 25,000 to 60,000 HUF a night. If you’re after peace and quiet with romantic views from the Fisherman’s Bastion, go for hilly District I (Buda), while nightlife fans and ruin-bar hoppers heading to spots like Szimpla Kert belong in District VII (Erzsébetváros). From 1 January 2026, District VI (Terézváros) is bringing in a total ban on short-term lets, and no new apartment licences are being issued anywhere in Budapest — so expect prices to climb. Families with kids will do well around Margaret Island or at the Aquaworld Resort Budapest, which has eleven indoor slides.
Budapest, Hungary works like the perfect magnet that pulls you in and never quite lets go. Hop on a flight from London and a couple of hours later you step out into a metropolis whose wide boulevards and grand architecture put it firmly on par with neighbouring Vienna. And yet the price tags in its hotels and cosy cafés still come as a very pleasant surprise.
Lukáš and I come back to the Hungarian capital again and again, because it offers a fantastic mix of rich history, steaming thermal baths and absolutely brilliant food. Every single time we stroll along the riverbank in the evening and gaze at the floodlit Parliament, we’re struck all over again by just how vast and majestic this city really is.
But the neighbourhood where you finally rest your head will radically shape your entire experience of the trip. Budapest can be incredibly quiet and romantic, yet on the flip side it can also be wild and noisy right through to the small hours. It all comes down to which street you tuck yourself into.
Before you start picking a specific hotel for the weekend, you need to get your bearings on what’s currently happening in the city. The rules of the game are changing dramatically in 2026, and plenty of old travel habits simply no longer apply. So I’ve put together a detailed guide to the very best neighbourhoods.
TL;DR
Airbnb ban in the centre: From 2026, the upscale 6th district (Terézváros) enforces a total ban on short-term rentals. On top of that, no new apartment licences are being issued anywhere in Budapest.
Best area for first-timers: If it’s your first visit, stay in the flat 5th district (Belváros-Lipótváros), from where you can comfortably walk to all the major sights.
Peace and romance: Looking for quiet and stunning views? Choose the historic 1st district (Buda), which sits on a hill and empties out beautifully in the evening.
Party and nightlife: For lovers of bars and cheap beer, the 7th district (Erzsébetváros) is the obvious choice, home to the famous ruin bars — just brace yourself for noise until morning.
Seniors travel free: All EU citizens over 65 ride Budapest’s public transport completely free — just show your ID card.
Tourist tax: Expect your hotel to always add the so-called IFA tax, which comes to 4% of the net room price per night.
Famous baths closed: The iconic Gellért Baths are undergoing a huge renovation and will stay shut until at least 2028 — head to Széchenyi or Rudas instead.
6 things you need to know about staying in Budapest, Hungary
Budapest is split into two completely different halves, divided by the broad sweep of the Danube. On one side lies flat, pulsating Pest, full of shops and bars, while on the other rises the hilly, historic Buda. Let’s take a look at the best locations.
1. The 5th district (Belváros-Lipótváros) as the ideal base
Photo: Elijah Cobb / Pexels
This is the absolute heart of Pest and, in our view, the best all-round choice for any traveller. You’ll be staying right next to the stunning Parliament — incidentally one of the most beautiful government buildings in the world, with an incredible 691 rooms. A short walk away you’ve also got St Stephen’s Basilica and the famous Chain Bridge.
The northern part of this neighbourhood (Lipótváros) works more as a business and gastronomy hub, where you’ll find excellent restaurants. We love discovering modern vegetarian bistros here that do great hummus or proper veggie soups. The southern part (Belváros) is packed with very elegant shops and picturesque little cafés where you can enjoy a superb espresso.
The biggest advantage of the 5th district is the fact that you can comfortably walk everywhere. It’s simply the best choice for your first visit, for culture-minded travellers and for couples in love. The atmosphere is wonderfully grand, the streets are clean, and you’ll feel very safe even after dark.
It can be fairly busy during the day, but at night the district is much calmer than the neighbouring areas. As for prices, mid-range hotels here typically run around €75 to €110 per night. If you’re after luxury, you could choose the gorgeous Aria Hotel Budapest, or the modern and brilliantly rated Hotel Vision, which sits just a stone’s throw from the river.
💡 Tip: If you stay in this area, head out early for a morning walk along the Danube. You’ll have the view of Buda Castle bathed in morning sun all to yourself, before the riverbank fills up with crowds of tourists and their cameras.
2. The romantic 1st district (Buda and Castle Hill)
Photo: Czapp Árpád / Pexels
Just cross the river and you’re suddenly in a completely different world. Cobbled lanes, the pastel façades of old townhouses and breathtaking panoramic views from the Fisherman’s Bastion make Buda the most postcard-perfect part of the whole city. Lukáš and I love that moment when we ride up to the top and the city lies spread out at our feet.
Choose this location when you’re after total peace and romance. By day, crowds of day-trippers throng around the main sights, but once the sun sets and the buses leave, the streets empty out like magic. The neighbourhood takes on an almost magical, very slow atmosphere that begs for long evening walks hand in hand.
You do have to reckon with one significant downside, though, because you’re simply on a big hill. Exploring the city therefore means a bit more physical effort, unless you want to keep paying for the funicular or waiting for a bus. You won’t find many open bars or buzzing restaurants up here in the evening either — for a lively night out you always have to head down into Pest.
For accommodation we can warmly recommend the lovely Boutique Hotel Victoria, which offers rooms with a direct view of Parliament on the opposite bank. If you want to experience real tranquillity, book your room well in advance, because capacity in the historic buildings on the hill is fairly limited and disappears fast. We always enjoy visiting the little wine bars here, where they serve excellent local cheeses and olives alongside the wine.
💡 Tip: Castle Hill is ideal if you want to get up early and photograph the Fisherman’s Bastion without the crowds. Around seven in the morning you’ll meet only a few dog walkers and the odd wedding couple posing for photos — otherwise all that beauty is yours alone.
3. The party hub in the 7th district (Erzsébetváros)
Photo: KITSUN YUEN / Pexels
This is the absolute epicentre of Budapest’s nightlife and a place that never sleeps. The former Jewish Quarter, where the magnificent Great Synagogue still stands on Dohány Street (it’s the largest in all of Europe), turns into one giant, very wild party after dark. The streets fill with people and music spills out from everywhere.
This is exactly where you’ll find the famous Budapest ruin bars, crowned by the legendary and hugely photogenic Szimpla Kert. If you want to sample craft beers in industrial spaces or join an organised bar crawl, you’re in exactly the right spot. Local guides will happily lead you through the best venues for a fee of around €15 to €20.
I have to honestly warn you, though, that this is definitely not a neighbourhood for families with children, or for anyone who’s even a slightly light sleeper. The street noise doesn’t die down even at four in the morning, and the shouts of partying tourists carry into every window. It’s simply a place for young backpackers and stag and hen dos who want to soak up that proper social atmosphere.
For food, definitely head to the popular Karaván street-food courtyard, where the two of us had an absolutely top-notch vegan lángos and excellent veggie burgers. If you’re after a good base, the party hostel Wombats City Hostel is very popular, or AVAIL Hostel, which sits literally thirty metres from the main action on Kazinczy Street.
💡 Tip: If you stay in this neighbourhood, pack a good pair of earplugs. Even the best-rated hotels here struggle with street noise, especially during warm summer nights when most bars have their terraces open.
4. Local atmosphere in the 9th district (Ferencváros)
Photo: Efrem Efre / Pexels
If you want to experience Budapest a little more like a local, veer slightly south in your accommodation search. In recent years Ferencváros has transformed from a plain industrial zone into a very pleasant and sought-after residential neighbourhood. It’s a great and often much cheaper alternative to the centre itself.
You’ll also find the famous Great Market Hall (Nagyvásárcsarnok) here, an enormous and architecturally stunning building. The ground floor is hung with strings of local sausages for meat lovers, but we always head upstairs, where they make hot lángos with cheese and garlic or sell fresh sweet pastries. It’s a fantastic experience, and you can pick up excellent ground paprika as a souvenir too.
Besides the market hall, this neighbourhood offers plenty of genuinely great local cafés and a lovely promenade right along the Danube. You won’t be staying right next to Parliament, but the whole area is superbly served by the yellow trams that run here literally every few minutes. You can reach the centre in ten minutes.
Accommodation prices here are noticeably friendlier than in the 5th district. You can find very nice modern apartments as well as smaller family-run hotels where they’ll take great care of you. It’s an ideal choice for travellers who like their peace and quiet but don’t want to stay right out on the fringes.
💡 Tip: Try to find accommodation near tram line number 2. It runs right along the river and offers one of the most scenic rides in all of Europe for the price of an ordinary public transport ticket.
5. Where to stay with children
Travelling with kids, the easiest way to reach Budapest from the UK is by air — there are plenty of direct flights to Budapest from London, Manchester and other airports, with budget carriers like Ryanair, Wizz Air and easyJet flying the route. The flight takes a little over two and a half hours, so it’s an ideal distance even for smaller travellers. Once you land, the city’s airport is well connected to the centre by a direct bus.
When looking for family accommodation, focus primarily on hotels with secure parking in the 5th district, or look a little further from the busy centre. A wonderful choice is the area around the green Margaret Island (Margit-sziget), an enormous oasis of calm in the middle of the river. You’ll find a brilliant mini-zoo, lots of playgrounds and, in summer, a popular outdoor pool.
If you’re going in autumn or during the cold winter, consider staying right inside the Aquaworld Resort Budapest complex at the very north of the city. It boasts an incredible eleven indoor slides and huge pools that will keep the kids entertained all day when it’s raining outside. A regular shuttle bus runs from the resort to the centre.
For families it’s definitely worth getting a multi-day ticket for the dense public transport network. You can buy either a 24-hour or 72-hour pass, which lets you hop freely onto the metro or trams whenever little legs start to ache. Transport here runs absolutely reliably.
💡 Tip: The M4 metro line is the only one in the whole city that’s fully step-free and fitted with modern lifts at every station. If you’re travelling with a pushchair, look for accommodation near the stops on this green line — you’ll save yourself a lot of stress.
This is absolutely crucial information if you were used to automatically opening the Airbnb app when planning a trip and hunting for a private flat. Budapest has decided to crack down hard on the touristification of the centre and the rocketing rents that were pushing locals out to the edges of the city. The Constitutional Court has upheld the strict changes.
From 1 January 2026, the upscale 6th district (Terézváros) enforces a total, uncompromising ban on short-term rentals. We’re talking about the popular area around Andrássy Avenue and the State Opera, where there was a huge concentration of apartments. Roughly 2,700 listings vanished from there overnight, and you legally won’t find any Airbnb here — just around 40 traditional hotels remain.
Don’t try to get around this ban via dodgy online offers. Flat owners face crippling fines of up to 2,000,000 forints and possible sealing of the entire flat, so you could turn up and have nowhere to sleep. What’s more, until the end of 2026 there’s a city-wide freeze on issuing new apartment licences across the whole of Budapest.
This stagnant supply is, of course, pushing the prices of the remaining flats and traditional hotels steeply upward. The situation may change further, as even the historic 1st district is actively considering joining the strict regulation soon. If you insist on a private flat with a kitchenette, you currently need to filter listings in districts 5, 7, 8 or 9, where it still works legally for now.
💡 Tip: Keep a very close eye on the events calendar. During the Formula 1 at the end of July (24–26 July 2026) or the popular Sziget festival in August (11–15 August 2026), the city fills to bursting and accommodation prices shoot up by 30 to 60%.
Practical summary and rough prices
While Budapest is still fairly kind to our wallets, the real prices depend heavily on the tourist season and your chosen type of accommodation. The official Hungarian currency is still the forint (HUF). You can pay with euros in many large hotels and restaurants, but the rate they offer tends to be pretty poor, so it’s always better to just pay by card.
As a rough guide, one euro is around 390 to 400 forints, but always check the rate in your banking app before you travel. As for accommodation itself in 2026, hotels in the very centre will cost you on average 25,000 to 60,000 HUF per night, which works out at roughly €65 to €155 for a double room.
If you’re travelling on a tight budget, you can grab a bed in a shared party hostel from a pleasant €15 per night. When you settle the bill, one extra item will surprise you, and that’s the local tourist tax, or IFA. Budapest charges exactly 4% of the net price of your accommodation per night, automatically added to the final bill. Only guests under 18 or students are exempt.
But we’ve got one absolutely brilliant piece of news for the older generation. This perk is woefully little-known, but all EU citizens over 65 ride Budapest’s public transport completely free. You don’t need to arrange any special pass — if an inspector carries out a random check, you simply show your ID card or a valid passport.
If you’re heading to the city mainly for a wellness break, I must point out one important thing. The iconic and much-photographed Gellért Baths are undergoing a very extensive renovation and will stay completely closed until at least 2028. As an alternative, definitely choose the huge outdoor Széchenyi Baths, or our favourite Rudas Baths, which have a fabulous rooftop hot tub with a stunning panoramic view of the Danube (entry there costs around 6,300 HUF).
Where next
Choosing the right neighbourhood to stay in is, of course, only the first — albeit absolutely essential — step towards a perfect trip. Once you’ve booked your hotel and know where you’ll be resting your head, it’s time for the more fun part of the planning. Budapest is enormous, and if you’re only going for a long weekend you need to plan your time pretty well so you don’t spend half the day just shuttling around on the metro.
We’ve walked this city back and forth and discovered loads of spots you often won’t even find in your standard printed guidebooks. That’s why we’ve put together a genuinely comprehensive list of all our favourite stops. It includes not just the best-known landmarks you simply have to see, but also tucked-away cafés, great viewpoints and practical tips on how to dodge the worst queues.
So be sure to check out our main article 66 things to do in Budapest. You’ll find out which thermal baths we reckon are the very best, where to head for the tastiest vegetarian street food, and which spots are better saved for the evening, when the lighting gives them an utterly unrepeatable atmosphere. With this guide you’ll put together your itinerary in no time.
Frequently asked questions
Where to stay in Budapest for the first time?
If you’re heading to the Hungarian capital for the very first time, the best choice is District V (Belváros-Lipótváros). You’ll be staying in the absolute heart of the city, you can easily reach all the main sights like the Parliament or St. Stephen’s Basilica on foot, and you’ll find a huge number of great restaurants and cafés here.
Does Airbnb still work in Budapest?
The situation changed radically in 2026. In the luxurious District VI (Terézváros), a complete ban on short-term rentals is in effect, so you won’t find legal Airbnb there anymore. In other districts, apartments are still operating, but the city has stopped issuing new licenses across the board, which naturally drives up the prices of all available accommodation.
Is it true that seniors ride public transport for free?
Yes, it’s a huge benefit that’s little known in our country. All European Union citizens over 65 years old have completely free public transport. You don’t need to buy any ticket or get a special card – during inspections on the metro or tram, just show the inspector your valid Czech ID card or passport.
Where to look for accommodation for nightlife?
The undisputed centre of nightlife is District VII (Erzsébetváros), which is the former Jewish Quarter. You’ll find the most famous Budapest ruin bars here, including the legendary Szimpla Kert. It’s an ideal spot for young travellers, but be prepared for the fact that the noise in the streets doesn’t die down even at four in the morning.
Are the Gellért Baths open?
Unfortunately, they are not. The iconic Gellért Baths are undergoing a massive and long-term renovation and will remain closed to the public at least until 2028. As a great alternative, we recommend visiting the Széchenyi Baths in the City Park, or the historic Rudas Baths, which offer a rooftop jacuzzi with a view.
Can I pay in euros at hotels?
Although many larger hotels and restaurants in the center commonly accept euros, it’s not advantageous at all. Merchants charge their own, often very poor exchange rate. The best option is to pay everywhere possible with a regular payment card, or withdraw local forints (HUF) from an ATM.
What does IFA tax mean on a hotel bill?
IFA is an abbreviation for the local tourist tax that hotels and guesthouses must pay to the city. In Budapest, this tax amounts to exactly 4% of the net price of your accommodation per night. The fee is automatically added to your final bill at checkout, and only students and children under 18 are exempt from it.
Is Budapest safe for evening walks?
Yes, the center of Budapest (especially districts V and I) is considered very safe even after dark. The streets are well-lit and full of people. As in any big city though, watch out for pickpockets on crowded trams or at markets, and at night it’s better to avoid deserted side streets on the outskirts of the city.
Tips and Tricks for Your Vacation
Don’t Overpay for Flights
Search for flights on Kayak. It’s our favorite search engine because it scans the websites of all airlines and always finds the cheapest connection.
Book Your Accommodation Smartly
The best experiences we’ve had when looking for accommodation (from Alaska to Morocco) are with Booking.com, where hotels, apartments, and entire houses are usually the cheapest and most widely available.
Don’t Forget Travel Insurance
Good travel insurance will protect you against illness, accidents, theft, or flight cancellations. We’ve had a few hospital visits abroad, so we know how important it is to have proper insurance arranged.
Where we insure ourselves: SafetyWing (best for everyone) and TrueTraveller (for extra-long trips).
Why don’t we recommend any Czech insurance company? Because they have too many restrictions. They set limits on the number of days abroad, travel insurance via a credit card often requires you to pay medical expenses only with that card, and they frequently limit the number of returns to the Czech Republic.
Find the Best Experiences
Get Your Guide is a huge online marketplace where you can book guided walks, trips, skip-the-line tickets, tours, and much more. We always find some extra fun there!
TL;DRA long weekend in Banff for two in 2026 comes to roughly CAD 5,800, a week-long road trip taking in Lake Louise and the Icefields Parkway runs about CAD 9,500, and a two-week family holiday for four tops CAD 19,500. Forum regulars say travellers typically end up spending 50 to 80% more than they budgeted, and a cheaper base than pricey Banff is the town of Canmore, where accommodation runs 25 to 35% less. Reckon on an exchange rate of around 16 to 17.50 CZK per Canadian dollar, tips of 15 to 20%, and a tax difference between Alberta’s 5% and British Columbia’s 12%. From 19 June to 7 September 2026, the Canada Strong Pass gets you free entry to national parks, though the football World Cup in Vancouver in June and July will push hotel prices up by as much as 180%.
Picture turquoise lakes, majestic mountains stretching to the sky and endless forests where bears roam free. The Canadian Rockies are a dream for many travellers, but if you’re thinking about a trip in 2026, I have to warn you right at the start. Planning a trip to Alberta, Canada and neighbouring British Columbia demands brutal honesty about your budget, because your wallet is going to take a beating here 😅. The national parks are bursting at the seams, accommodation prices have shot up to absurd heights, and people on the ground routinely spend tens of percent more than they originally planned.
So I’ve put together three realistic budget scenarios (for couples and families) plus an honest breakdown of everything from flights to tipping, along with tips on how to avoid paying full price for the whole thing. I’ll tell you where to base yourself strategically, how the local taxes work, and why it pays to watch the calendar carefully because of the football World Cup.
Photo: Pierre5018 / Wikimedia Commons, CC BY-SA 4.0
TL;DR
If you’re in a hurry and just want the essentials, I’ve listed the key points that will save your wallet from disaster.
Build a financial cushion: Prices in Canada keep climbing and tourists spend on average 50 to 80% more than they expected.
Three price tiers: A quick long weekend works out to roughly £2,900 for a couple, a week-long road trip around £4,700, and a two-week family holiday can easily top £9,600.
The sneaky exchange rate: Although the official mid-market rate hovers around £0.55 per Canadian dollar, for budgeting it’s safer to count on £0.58 to £0.62 because of bank fees and conversions.
Tax and tips on top: Prices in shops and restaurants are always listed without tax, and a surcharge jumps on at the till, while restaurants additionally expect a mandatory tip of 15 to 20%.
The geographic tax trick: Alberta charges only a 5% tax, while neighbouring British Columbia adds a full 12%, so it pays to buy pricier items before you cross the provincial border.
The saviour called Canmore: Staying right in Banff feels like Disneyland prices, but the nearby town of Canmore offers hotels a third cheaper and great infrastructure.
Summer 2026 for free: Thanks to the government’s Canada Strong Pass initiative, entry to all national parks is completely free from mid-June to early September.
Football fever: Vancouver hosts FIFA World Cup matches in June and July 2026, which sends flight and hotel prices soaring across the entire west coast.
Photo: Chensiyuan / Wikimedia Commons, CC BY-SA 4.0
Picking the right dates is absolutely crucial for your budget, because the difference between seasons can easily run into thousands of pounds. The main summer season runs from late June to early September, when the national parks have the best weather and all the mountain lakes have already thawed. July and August are by far the most expensive months, though, when hotel and flight prices hit their absolute peak and the best accommodation vanishes from booking sites at lightning speed.
If you want to save serious money and don’t mind slightly cooler weather, go during the so-called shoulder season in May, June or October. Car rental and hotel room prices drop by tens of percent, and you won’t be jostling through crowds at the viewpoints. You’ll just have to accept that some high-altitude lakes may still be frozen and the famous access road to Moraine Lake doesn’t open until early June.
On top of that, 2026 brings one huge complication in the shape of the football World Cup. Vancouver is hosting seven FIFA World Cup matches between 11 June and 19 July, which will trigger an enormous price explosion across the entire west coast. Hotels in the city centre are reporting a staggering 180% price increase, reaching absurd figures of over CAD 800 a night. Flights will sell out in a flash, so if football isn’t your thing, definitely avoid this period in Vancouver — or book your flights at least eight months ahead.
Instead, you could fly straight into Calgary, which sits just an hour and a half from the gates of Banff National Park. Watch out for early July here too, though, because the city hosts the famous Calgary Stampede, during which accommodation prices triple or quadruple. The ideal compromise for 2026 looks like the turn of August and September, when the football frenzy has died down and the weather in the mountains is still gorgeous.
Photo: Dietmar Rabich / Wikimedia Commons, CC BY-SA 4.0
Where to stay in western Canada
💡 Tip for accommodation and experiences: We like to look for places to stay on Booking.com, which usually has the best cancellation terms. For tickets, tours and activities, it’s worth comparing and booking through GetYourGuide.
Staying right in the heart of the national park sounds incredibly romantic, but in reality it’ll absolutely ruin your wallet. The town of Banff itself has lost the charm of a quiet mountain village for many travellers, and according to plenty of online discussions it feels more like an overcrowded theme park. For the 2026 season, prices for an ordinary three-star hotel in Banff routinely run over CAD 600 a night, and the cheapest rooms disappear from booking sites half a year in advance. On top of that you often have to add so-called resort fees for the pool and another CAD 30 to 55 for overnight parking.
For families and couples who don’t want to spend a fortune just on a bed, there’s a great alternative in the town of Canmore. It sits just twenty minutes’ drive from the national park and offers accommodation 25 to 35% cheaper than the more famous Banff. You’ll find huge supermarkets for cheap grocery shopping, great cafés and, above all, a calmer atmosphere without the claustrophobic crowds. If you’re planning your trip through Booking.com, I’d recommend looking for apartments with a kitchenette, which will massively help cut your food costs. Here are a few specific tips on strategic locations:
Canmore (best value for money): Stay at hotels like the Coast Canmore Hotel or The Malcolm Hotel, which offer great comfort for more reasonable money than the resorts in the national park.
Banff and Lake Louise (for luxury and comfort): If you want to treat yourself and aren’t watching your budget, the iconic Fairmont Chateau Lake Louise or the Moose Hotel and Suites in Banff will give you an unforgettable experience — but expect prices from CAD 700 upwards.
Calgary (before and after your flight): For the night before flying out or after landing, treat yourself to Le Germain Hotel in the centre (it’s a bit of an extravagance, but after a long flight you really deserve that bed).
Solo travellers and backpackers have it much harder, because cheap options in the mountains are genuinely scarce. A bed in a shared room at the Hostelling International (HI) network costs CAD 50 to 100 in season, and even those have to be booked many months ahead. Another option is the state campsites around Lake Louise or Tunnel Mountain, which we’ll cover more in the money-saving section, since they’re the cheapest sleeping option of all.
Photo: Dietmar Rabich / Wikimedia Commons, CC BY-SA 4.0
Where to eat
Eating out in the mountain resorts is a chapter all of its own. A plain sandwich for lunch will set you back CAD 15 to 22, and dinner at a mid-range restaurant typically runs CAD 30 to 45 per person before tax. Tourist traps lurk everywhere, and food near the main attractions carries a hefty high-altitude markup — you’re basically paying for that gorgeous view, not for the quality of the ingredients.
If you don’t want to spend your whole trip cooking but you’re after more reasonable prices, try fast food like the famous sweet BeaverTails or the popular Asian poke bowls, which will fill you up quickly after a long hike. For lovers of plant-based food, I’d recommend trying modern bistros like Coyotes Deli or Crazy Weed in Canmore. You’ll find a fantastic selection of interesting vegetarian and plant-based dishes at fair prices of around CAD 25, so you’ll eat well without wrecking your budget.
Photo: Dietmar Rabich / Wikimedia Commons, CC BY-SA 4.0
7 tips on what to see and do in Alberta and BC (and what it’ll cost)
The budget for the Canadian Rockies isn’t just about one big number — it’s about understanding how the whole system works. I’ve put together a detailed overview of everything that’ll affect your wallet, so you can plan your trip exactly to fit your means.
Photo: Dietmar Rabich / Wikimedia Commons, CC BY-SA 4.0
1. Why it’s actually so expensive and what to prepare for
Simply put, everyone wants to see Banff all at once, and the local infrastructure just isn’t built for it. Banff National Park alone recently welcomed a record 4.5 million visitors in a single year, which logically sent the price of everything into the stratosphere. People on discussion forums commonly admit they spent 50 to 80% more money than they originally budgeted for at the start.
And it’s not just the hotels themselves — it’s the constant stream of small expenses we often don’t know in Europe. You pay for parking at the hotel, fork out eye-watering sums for the cable car, leave a huge tip at the restaurant, and suddenly find your daily budget has vanished before dinner. Many visitors compare today’s Banff price-wise to Disneyland, where you pay a premium markup for absolutely everything, including ordinary parking at the lakes, which can run CAD 36 a day.
If you’re heading here, you simply have to accept that the words “budget-friendly” and “the Rockies” don’t go together all that well 😅. Another huge item tourists often forget about is the various reservation fees — for example the ferries in British Columbia, which add another CAD 22 to your ticket just to guarantee you a spot. All the figures in this article are based on the hard reality for the 2026 season, so the numbers might catch you off guard a little, but it’s always better to be well prepared than to stand there counting every last dollar on the spot.
Photo: Jillson, Herbert L., [from old catalog] ed / Wikimedia Commons, No restrictions
2. Three realistic budget scenarios based on trip length
To get a clear picture, I’ve put together three model scenarios that include flights from London, mid-range hotels, a car, food and attractions. The first option is a quick long weekend of three to four days for a couple, which will set you back roughly CAD 5,500 — that’s about £2,900 with a bit of breathing room. It covers accommodation in Banff, a smaller car and basic entry fees.
The golden middle road is a classic week-long road trip for two, taking in Banff, Lake Louise and the Icefields Parkway. Here you should budget around CAD 9,000, or roughly £4,700. That covers a week’s SUV rental, petrol, restaurant meals and the annual Discovery Pass, which is worth buying from your seventh day in the parks.
If you’re planning a two-week family holiday for four people, the budget will exceed £9,600 (roughly CAD 18,700). That sum covers four flights, fourteen days with a large car, the Kananaskis pass and a ride on the Athabasca Glacier (the real big adventure, basically).
💡 Tip: For all your calculations I’d recommend using a conservative rate of around £0.62 per Canadian dollar. Although the official mid-market rate sits lower, this cushion will reliably protect you from bank fees.
Photo: Dietmar Rabich / Wikimedia Commons, CC BY-SA 4.0
3. Flights and a car as the biggest upfront investment
Choosing your arrival airport fundamentally shapes not only your itinerary but also the overall cost of the trip. From the UK there are some direct options, but most travellers will face at least one connection via Frankfurt, Amsterdam or a North American hub. Outside peak season you can grab a return flight to Calgary or Vancouver for £400 to £600, but in the summer peak be ready for £700 to £1,100 per person. The golden rule for a road trip is the so-called open-jaw flight, where you arrive in Vancouver and fly home from Calgary, saving yourself nine hours of pointless driving back.
Renting a car is the second huge item, because without one you’ll barely move in the Canadian wilderness. In the summer peak you’ll pay CAD 100 to 180 a day for an SUV rental, and you have to add insurance on top. The biggest financial trap is the fee for returning the car in a different city (the one-way drop fee). If you pick the car up in Vancouver and return it in Calgary, the rental company will charge you another CAD 300 to 500 without batting an eyelid.
At least the petrol price is good news — it’s traditionally the lowest in all of Canada in Alberta, hovering around CAD 1.40 to 1.60 per litre. But as soon as you cross into British Columbia, prices at the pump immediately jump towards the two-dollar mark. So the rule always applies: fill up the tank in Banff or Lake Louise before you cross the provincial border heading west.
Photo: Dietmar Rabich / Wikimedia Commons, CC BY-SA 4.0
4. Taxes and tips, or why the numbers on the bill don’t add up
The tax system is exactly the thing that trips up just about every newcomer at the start. Prices on menus, on shop shelves and on booking sites are always listed without tax. Only at the till does a chunky surcharge jump onto the number, depending on which province you’re in and exactly what you’re buying.
Here comes the key geographic and budget lesson. Alberta is the only province with no provincial tax of its own, so you pay only the five-percent federal GST. British Columbia, however, adds another seven percent PST on top of the five, so the total tax comes to a dizzying 12%. The Yoho and Kootenay national parks already fall under British Columbia, so any pricey camping gear, souvenirs or outdoor clothing is definitely worth buying while you’re still in Banff or Calgary, since you’ll save those seven percent on every item.
You then have to head into restaurants knowing that tipping works here as a hard social obligation. Servers may earn minimum wage, but the card terminal will automatically offer you 15, 18 or 20% when you pay anyway. Leaving less than 15% is taken as a sign of serious dissatisfaction, and staff may take it as a personal insult. Order a CAD 30 lunch and nearly CAD 40 leaves your card — and you stand at the till staring into space for a moment 😅.
5. The exchange rate and hidden bank fees
You basically don’t need cash in Canada these days, because you can pay by card absolutely everywhere without a problem — even at a lonely food truck somewhere at a motorway rest stop deep in the forest. The Canadian dollar officially sits just above £0.55, but for safe holiday planning you need to count on £0.58 to £0.62.
Why such a big difference? Your bank takes a currency conversion fee on every payment, and if you pay at the weekend when the foreign exchange markets are closed, the rates tend to be even worse. A few small coins in your pocket will only come in handy for tipping the hotel porter or buying fresh fruit at local farmers’ markets — otherwise you’ll get by just fine with plastic or your phone.
💡 Tip: For travel overseas I’d recommend getting a Revolut or Wise card. You can transfer pounds onto it and convert them to Canadian dollars at the moment the rate is most favourable. The amount is then locked in your account in the foreign currency, neatly sidestepping all those annoying weekend surcharges and the poor conversions of traditional high-street banks. On a month-long trip you can easily save a few hundred pounds this way, and that counts.
Photo: Jakub Fryš, CC BY-SA 4.0, Wikimedia Commons
6. Attractions without bleeding your wallet dry
The prices of popular attractions are also at their absolute peak in 2026, because the operators often have a monopoly. Renting a canoe on the famous Lake Louise costs an incredible CAD 170 for just one hour (which is more than a night at an average European hotel).
A ride on the Sulphur Mountain Gondola in Banff costs CAD 74, and the popular trip on the giant glacier bus across the Athabasca Glacier will set an adult back CAD 130. So choose very carefully what you spend your money on — the surrounding nature itself, thankfully, is still free.
7. How to save hundreds of pounds (budget hacks)
The clear saviour for any family budget is cooking your own food. Shopping at the huge supermarkets like Save-On-Foods or Safeway in Canmore will cost you roughly 30% more than back home, but it’s still an absolute fraction of local restaurant prices. Making your own sandwiches and snacks for full-day hikes can easily save a couple CAD 50 a day, and on top of that you get to enjoy your meal in peace by the lake with the best possible view in the world.
The absolute cheapest accommodation option is camping at the state campsites run by Parks Canada, which cost a negligible CAD 26 to 47 a night. There’s one huge catch, though, that forums discuss at length. Bookings open as early as January and the best spots vanish within the first ten minutes. Anyone who hesitates at the computer simply has nowhere to stay in summer and has to settle for hotels that cost many times more.
2026 also brings one absolutely fantastic piece of news for all travellers. Thanks to the government’s Canada Strong Pass programme, entry to all national parks is completely free from 19 June to 7 September. That removes the need to buy pricey day passes or the annual Discovery Pass, saving an ordinary family over CAD 150, which you can invest in better dinners. Outside this exclusive summer window, though, buying the annual pass pays off from the seventh day in the parks.
Where to go next from the Canadian Rockies
If you’re planning a wider itinerary and want to explore Canada in depth, we’ve prepared more detailed guides for you. Find out exactly how the summer Canada Strong Pass 2026 works and what its rules are. To avoid disappointment at the most beautiful lakes, be sure to read our guide to the Moraine Lake and Lake Louise shuttle, because you can no longer get there by private car.
Before a first trip to Canada, a whole host of practical questions always crops up. Here’s an overview of the most common ones, which will help you plan your holiday better and avoid unnecessary complications on the ground.
Do I need a visa to travel to Canada?
You don’t need a classic visa, but you must arrange electronic registration eTA in advance. It costs exactly 7 CAD, is valid for five years, and you can sort it out online in just a few minutes. But be very careful of fraudulent websites that look official but will happily charge you up to 80 dollars. Always use only the official government website canada.ca, otherwise you’ll needlessly rip yourself off right before departure.
How is it in the mountains with bears and safety?
The basic rule is to hike in a group, make loud noises, and always carry bear spray (a special pepper spray that you can buy or rent in every mountain town), just don’t forget that you can’t take it on a plane, not even in checked luggage. Grizzly bears and black bears are absolutely common in the national parks and you’ll encounter them even close to roads, so it really doesn’t pay to underestimate prevention.
Is there cell service in the national parks?
Outside the main tourist towns like Banff, Canmore, or Jasper, expect that mobile signal in the mountains is virtually non-existent. Once you hit the Icefields Parkway, you can easily go a hundred kilometers without signal, so download offline maps to your phone while you’re still on hotel Wi-Fi, otherwise you’ll simply get lost and no one will be able to call you.
Is a Czech driver’s license enough to rent a car?
While British Columbia and Alberta theoretically recognize Czech driver’s licenses for a limited period, car rental agencies at the counter strictly require an International Driving Permit. You can get one in the Czech Republic at any extended authority office for €2 on the spot. Definitely don’t underestimate this step, so you don’t end up stuck at the airport without your dream car.
What to do when I can’t make it to the campground in time?
If you miss the January opening of campground reservations, you still have a small chance to snag so-called first-come, first-served sites, which can’t be booked in advance. However, this means arriving at your chosen campground ideally before 8 AM and patiently waiting to see if anyone leaves. It’s a big gamble, but sometimes luck might smile upon you.
Where can I get a Canada Strong Pass?
The pass for summer 2026 isn’t a physical card that you’d have to complicatedly order or pick up somewhere. The gates of the national parks will simply be freely passable in the period from June 19 to September 7, and Parks Canada staff will let you in for free. However, you still have to pay for camping, parking at popular lakes, and all commercial activities, so keep an eye on your budget going forward.
Is the water in Canadian lakes good for swimming?
Most of the most beautiful turquoise lakes, such as Lake Louise, Peyto Lake or Moraine Lake, are fed directly from melting high-mountain glaciers. The water is only a few degrees above zero even in the hottest summer, so swimming is only for the really hardened cold-water enthusiasts and in most cases ends with an extremely quick retreat back to shore 😅.
Tips and Tricks for Your Vacation
Don’t Overpay for Flights
Search for flights on Kayak. It’s our favorite search engine because it scans the websites of all airlines and always finds the cheapest connection.
Book Your Accommodation Smartly
The best experiences we’ve had when looking for accommodation (from Alaska to Morocco) are with Booking.com, where hotels, apartments, and entire houses are usually the cheapest and most widely available.
Don’t Forget Travel Insurance
Good travel insurance will protect you against illness, accidents, theft, or flight cancellations. We’ve had a few hospital visits abroad, so we know how important it is to have proper insurance arranged.
Where we insure ourselves: SafetyWing (best for everyone) and TrueTraveller (for extra-long trips).
Why don’t we recommend any Czech insurance company? Because they have too many restrictions. They set limits on the number of days abroad, travel insurance via a credit card often requires you to pay medical expenses only with that card, and they frequently limit the number of returns to the Czech Republic.
Find the Best Experiences
Get Your Guide is a huge online marketplace where you can book guided walks, trips, skip-the-line tickets, tours, and much more. We always find some extra fun there!
TL;DRThis classic ten-day road trip through southern and western Norway runs from Oslo via Flåm, Bergen, the Hardangerfjord, the Geirangerfjord, the Trollstigen, and the Atlantic Road, finishing up in the Art Nouveau town of Ålesund. Highlights include Oslo’s opera house, the Flåmsbana railway, a cruise along the Nærøyfjord, the Vøringsfossen waterfall and the Storseisundet Bridge. The best time to go is late May to early September, when the mountain roads are open. A hire car with an AutoPASS chip for the tolls is the way to do it, with a budget of around 2,000 to 2,800 NOK a day for two people. You can trim the route to 7 days by skipping the northern stretch, or stretch it to 14 days by adding Stavanger and Preikestolen, or the Lofoten Islands and Tromsø.
If you’re thinking about heading north to explore Scandinavia, I have to give you an honest warning right from the start. The Norwegian landscape will utterly bewitch you, plant a stubborn bug in your head, and you’ll probably never want to spend your summer holiday anywhere else again. This classic loop through southern and western Norway ranks among the most beautiful road trips in all of Europe, because it combines modern cities with completely wild nature, deep fjords and mountain passes. If you’re looking for the perfect Norway itinerary, you’ve come to the right place.
The land of trolls and waterfalls is enormous, and distances here are deceptive, so a well-planned route is the foundation of any successful trip. In this article we’ll walk through a detailed 10-day itinerary together, taking you from the iconic Opera House in Oslo all the way to the art nouveau streets of the west coast. You’ll also find out roughly how much such a journey costs, how toll payments work, and why it pays not to leave your ferry bookings until the last minute.
TL;DR
Length of the route: The ideal amount of time to set aside for this loop is exactly 10 days, which lets you keep a comfortable pace without daily stress behind the wheel.
Main stops: Along the way you’ll see Oslo, ride the famous railway down to Flåm, explore historic Bergen, and you won’t miss Geirangerfjord or the legendary Trollstigen mountain road.
When to go: The best conditions run from late May to early September, when even the high mountain roads are safely passable.
Transport: The greatest freedom comes hands down from a rental car, which lets you stop at every other waterfall (and trust me, there’ll be plenty).
Budget: Norway isn’t a cheap destination — expect rough costs of around 2,000 to 2,800 NOK per day for two people (roughly £150–£210) if you opt for mid-range accommodation.
Top tip: Accommodation around the most famous fjords sells out months in advance during the summer season, so book your hotels well ahead of time.
When to Take This Trip and How to Adjust the Route
Norwegian weather can be unpredictable even in the middle of July, but as a general rule, summer is by far the best season for a road trip through the fjords and mountains. From late May to early September you can count on the mountain passes — like Trollstigen — being cleared of snow and fully open. On top of that, all the tourist ferries and sightseeing cruises run at full capacity in summer, so you won’t have to worry about missing out on any of those iconic experiences.
If you’re considering a trip in autumn or spring, be prepared for frequent road closures and the fact that many smaller hotels outside the big cities shut their doors. Winter in Norway has its own unmistakable magic, but this particular itinerary isn’t suited to it at all, because you’d spend most of your time detouring around impassable mountain ranges.
Photo: Nils R / Pexels
What If You Only Have 7 Days?
If you’re pushed for time and can only afford a week’s holiday, you’ll have to trim the route a little and pick up the pace. In that case, I’d recommend skipping the more northerly part with the Atlantic Road and the city of Ålesund. Focus purely on the golden triangle made up of Oslo, the Flåm area with Bergen, and then Hardangerfjord with Geiranger. From Geiranger you can head straight back to Oslo, saving roughly two to three days of driving — even if it means missing out on the famous Trollstigen.
A 14-Day Version for Connoisseurs
Got a full two weeks at your disposal instead? Then a world of fantastic options opens up for extending the itinerary. At the start of the trip you can add the southern tip with the city of Stavanger, the launching point for the famous Preikestolen rock plateau, which towers majestically over the Lysefjord. The second — and perhaps even more tempting — option is to fly north at the end of your trip from Ålesund or Oslo to the Lofoten Islands or Tromsø, where you’ll enjoy the never-setting midnight sun in summer.
Photo: Nils R / Pexels
Practical Info: Car, Transport and Budget
The basic rule for driving in Norway is to come to terms with the fact that distances here are incredibly deceptive. If your sat-nav shows your destination is two hundred kilometres away, don’t for a second assume you’ll be there in two hours. The roads constantly wind along inlets, climb up steep hills, and very often you’ll face a wait for a ferry — the only way to cross the deep waters of the fjords.
When you rent a car at the airport, you don’t need to stress too much about paying tolls, because most vehicles are automatically fitted with an AutoPASS chip. It records your passes through toll gates, city entry charges and payments for most ferries, and at the end of the trip the rental company simply charges everything to your credit card. Petrol prices in 2026 hover at roughly 21 to 24 NOK per litre (about £1.55–£1.80), so a more fuel-efficient car definitely pays off.
As for the overall budget, Norway is one of the pricier European destinations, but with a bit of planning it’s manageable. If you stay in nice mid-range hotels and eat out occasionally, budget for daily costs of roughly 2,000 to 2,800 NOK for two people (around £150–£210). You can save significantly by shopping at supermarkets like REMA 1000 or Kiwi, where you’ll pick up great ingredients for picnics you can enjoy with a view of majestic mountains.
Photo: Geert Rozendom / Pexels
The Day-by-Day Itinerary
Let’s take a look at the trip plan itself, designed so that you see the very best while not spending your entire holiday just sitting in the car. This schedule assumes you’ll pick up your car right after landing in Oslo, or alternatively collect it the next morning before leaving the city.
Day 1: Modern Architecture and Parks in Oslo
Your Norwegian adventure begins in the capital, which has undergone an incredible architectural transformation in recent years. Straight after landing and checking in, head down to the harbour, where the famous Opera House dominates the landscape — you can freely walk up its sloping roof all the way to the very top. Right next door you’ll find the modern Bjørvika district with the new Munch Museum building, whose shape resembles a bent book.
In the afternoon, move to a quieter part of the city and stroll through the sprawling Vigeland Park, full of fascinating sculptures depicting the cycle of human life. If you’re interested in history, take a boat over to the Bygdøy peninsula, home to several excellent museums, including one about the polar expeditions aboard the ship Fram. In the evening, unwind in one of the cosy cafés in the Grünerløkka district.
💡 Tip: The fastest way into central Oslo from Gardermoen Airport is the Flytoget express train, which runs every ten minutes, but the regular regional train is noticeably cheaper and only takes a few minutes longer.
Day 2: From Oslo to the Deep Waters of Flåm
On day two your first big westward transfer awaits, and you have a choice between two completely different but equally fascinating options. You can set off by car across the Hardangervidda plateau and through the famous Lærdal Tunnel, which at over 24 kilometres is the longest road tunnel in the world. The drive itself takes roughly five hours of pure driving time, but with the inevitable photo stops, plan for a whole day.
The second, hugely popular option is to set driving aside for a while and take the train. From Oslo you board the famous Bergensbanen line, ride up to the mountain station of Myrdal, and there change onto the iconic historic Flåm Railway (Flåmsbana). It descends steeply into the valley and offers some of the best views in all of Norway, passing right by thundering waterfalls. In the evening you’ll stay in the picturesque village of Flåm, right on the shore of the fjord.
💡 Tip: Tickets for the Flåmsbana train tend to sell out well in advance during the summer months. Just like the sightseeing cruises, you can easily and safely book them ahead of time through GetYourGuide.
Day 3: Nærøyfjord and Views into the Abyss
On day three you’ll stay in the area and focus on what makes Norway, well, Norway. In the morning, set off on an unforgettable cruise along the Nærøyfjord, which is on the UNESCO list and in places is so narrow you feel as if you could reach out and touch the cliffs on both shores. The boats depart directly from Flåm and take you to the village of Gudvangen, from where you can easily return by shuttle bus.
After returning from the cruise, hop in the car and head up a narrow road to the Stegastein viewpoint. This elegant wooden platform juts a full thirty metres out into the void above the Aurlandsfjord and ends in nothing but a sheet of transparent glass, which will reliably get the pulse racing for anyone with a fear of heights. In the afternoon you can fit in a short walk to nearby waterfalls and then rest up at your hotel in the evening.
💡 Tip: To avoid the biggest crowds at the Stegastein viewpoint, go either early in the morning before breakfast or, conversely, in the early evening, once most of the tourists from the cruise ships have already left.
Day 4: Over the Mountains to Rainy Bergen
After breakfast you’ll leave Flåm and head towards the west coast to historic Bergen. The journey takes roughly three hours of pure driving time and runs mostly through the scenic Voss region, known as the centre of Norwegian adrenaline sports. Along the way you’ll pass dozens of smaller lakes and deep forests that practically beg you to make short stops and picnic out in nature.
You’ll probably reach Bergen shortly after noon, which gives you plenty of time for a first taste of the city. Park the car, drop your things at the hotel, and head out for an early-evening stroll around the harbour, where the smell of the sea mingles with the historic atmosphere. Bergen is notorious for its rainy weather, so keep an umbrella or a good waterproof jacket to hand, even when there isn’t a single cloud in the sky.
💡 Tip: There’s an environmental toll for entering central Bergen, which changes depending on the time of day and rush-hour traffic. The AutoPASS system records it automatically — you don’t need to stop anywhere or pay in cash.
Photo: Barnabas Davoti / Pexels
Day 5: Bryggen and Bergen’s Streets
Dedicate the whole of day five to exploring Bergen, nicknamed the gateway to the fjords. Your first steps should lead to the Bryggen district, a row of colourful wooden Hanseatic houses lining the waterfront, whose narrow, slightly crooked lanes hide craft workshops, galleries and cosy cafés. Right across from it you’ll find the famous fish market. The local specialities are, naturally, fish and seafood, but if meat isn’t your thing, you’ll also find great stalls offering fresh artisan bread and excellent local cheeses.
In the afternoon, don’t miss the ride up the Fløibanen funicular to Mount Fløyen, which rises right above the city. From the summit you’ll get a breathtaking panoramic view over the whole of Bergen and the surrounding islands, and if you fancy a bit of exercise, you can head back to the centre on foot along well-marked forest trails.
💡 Tip: If it’s really pouring (which happens often in Bergen), take shelter in the KODE museums, an extensive complex of art galleries set along a picturesque little lake in the city centre.
Day 6: Apple Orchards in Hardanger
You’ll leave Bergen and head back inland, this time to the Hardangerfjord region, famous for its fruit orchards. Along the way, be sure to stop at Steindalsfossen waterfall, which is unique in that you can walk along a safe little path right behind its falling wall of water without getting wet. It’s a stunning experience and a great spot for photos.
Once you reach the fjord itself, the landscape shifts slightly and turns more rugged. Your main goal for today is the staggering Vøringsfossen waterfall, located near the town of Eidfjord. The water plunges into a deep, narrow canyon from a height of over 180 metres, and a new, very boldly designed footbridge was recently built here, leading you right out over the abyss. You’ll spend the night in one of the villages along the fjord, ideally in Eidfjord or the picturesque Lofthus.
💡 Tip: The Hardanger region grows the best apples in all of Norway. Be sure to stop at one of the small farm stalls by the road and buy some local artisan apple cider (eplemost).
Photo: Geert Rozendom / Pexels
Lukáš and Lucie recommend
Where to Stay in Norway
6 accommodations — wellness hotels, hotels and other accommodation options
Brace yourself: in terms of driving, day seven will be the most demanding of the entire itinerary. You face a crossing from Hardanger northwards to the legendary Geirangerfjord. This route takes at least five to six hours of pure driving and also involves crossing fjords by ferry, so the total travel time easily stretches into a full day. Don’t let that put you off, though, because the road itself is the destination here, and the scenery changes around every bend.
You’ll drive across vast highland plateaus, where remnants of snow often linger even in the middle of summer, pass lakes with turquoise water fed by glaciers, and travel through countless shorter and longer tunnels. When the view into the deep valley of Geiranger first opens up before you in the early evening, you’ll understand why the whole world admires this place. Check into accommodation right in the town and enjoy a well-earned rest.
💡 Tip: For long crossings, always stock the car the evening before with plenty of food and drink. Refreshment options in remote mountain areas tend to be limited, and petrol stations appear only rarely.
Day 8: Geiranger, the Eagle Road and Magical Trollstigen
Start your morning in Geiranger as early as possible, before the town fills up with tourists from the big cruise ships. Hop in the car and drive the endless hairpin bends up to the Dalsnibba viewpoint, which sits at an altitude of 1,500 metres and offers a breathtaking view down onto the fjord, which from up here looks like nothing more than a small blue ribbon. After heading back down, don’t miss a cruise along the Geirangerfjord itself, during which you’ll see the famous Seven Sisters waterfalls up close.
The afternoon brings another driving thrill. You’ll set off along the steep Eagle Road (Ørnevegen) and travel over the mountains to one of Europe’s most famous roads. The Troll Road (Trollstigen) cuts into a sheer rock face in eleven sharp hairpin bends, and driving it is a genuine adrenaline rush, especially when you meet a coach coming the other way. After successfully descending into the valley, you’ll arrive in the town of Åndalsnes, known as the main hub of Norwegian mountaineering, where you’ll also spend the night.
💡 Tip: At the top of the Troll Road there’s a modern visitor centre with several viewing platforms suspended in the air over the valley. Give yourself plenty of time here for photos.
Day 9: Leaping Over the Waves on the Atlantic Road
After yesterday’s mountain massifs, the landscape changes dramatically on day nine as you head straight to the ocean coast. From Åndalsnes you’ll make your way towards the town of Molde, from where a ferry takes you closer to the famous Atlantic Road (Atlanterhavsveien). This architectural marvel links islets and reefs by means of eight bridges, and driving it feels more like flying low over the water.
The most famous and most photographed spot is the Storseisundet bridge, which thanks to its asymmetrical shape looks, from certain angles, as though it ends in mid-air and the cars are dropping straight into the sea. If you’re lucky enough to catch wilder weather, you’ll see the ocean waves crashing right into the pillars, with the spray occasionally drenching passing cars. In the evening you’ll stay either in the modern town of Molde or in the more historic Kristiansund at the northern end of the road.
💡 Tip: An excellent scenic walking trail with boardwalks runs right by the sea along the Atlantic Road. Park at one of the rest areas and take a stroll on foot — you might even spot seals playing in the waves.
Day 10: Art Nouveau Ålesund and the Flight Home
The final day of your Norwegian road trip belongs to the town of Ålesund, which sits across several small islands and boasts utterly unique architecture. After a devastating fire at the beginning of the 20th century, the entire centre was completely rebuilt in elegant art nouveau style, which is why you’ll find houses adorned with turrets, gargoyles and colourful ornaments that form a perfect contrast with the cold ocean waters all around.
Before you head to the nearby Vigra Airport (or set off on the long drive back south), be sure to climb up to the Aksla viewpoint. There are 418 steps leading up directly from the town park, and the view of the bay, the islands and the mountains in the background is an absolutely perfect way to round off the whole journey.
💡 Tip: Ålesund is also a great place to pick up your last souvenirs. In the local galleries you’ll find beautiful glass and ceramic pieces that will remind you of your Nordic trip for years to come.
Photo: Barnabas Davoti / Pexels
Where to Stay Along the Route
💡 Tip for accommodation and experiences: We prefer to look for places to stay on Booking.com, which tends to have the best cancellation terms. It’s then worth comparing and buying tickets, tours and activities through GetYourGuide.
Given that this is the most popular tourist route in the country, I’d recommend leaving nothing to chance and sorting out your accommodation as much as half a year in advance. If you turn up at a fjord in July without a reservation, you could very easily end up sleeping in the car, because every hotel within a fifty-kilometre radius will be hopelessly full. Good old Booking is perfect for reservations, with everything from small guesthouses to large luxury resorts.
Here’s a summary of the best bases along with specific hotel tips worth trying:
In Oslo: A great choice is the Thon Hotel Rosenkrantz, located right in the centre just a stone’s throw from parliament, and famous for serving one of the best and most generous breakfasts in the entire city.
In Flåm: If you want a taste of history, stay at the gorgeous Fretheim Hotel, a grand historic building with beautiful gardens that dates back to the dawn of Norwegian tourism in the late 19th century.
In Bergen: Go for a strategic location near the harbour — the Thon Hotel Orion is excellent, just a few minutes’ walk from the famous Bryggen Hanseatic houses and the funicular.
In Geiranger: For maximum comfort and relaxation in the heart of the mountains, the iconic Hotel Union Geiranger fits the bill, perched on a hill above the village and boasting a fantastic wellness centre with mountain views.
In Åndalsnes: A wonderful family atmosphere and modern Nordic design are on offer at Hotel Aak, which caters to active travellers — and after a full day of driving, you’ll find perfect peace and quiet here.
Where to Go Next
If you already have your itinerary roughly figured out and you’re after more detail on specific places, or you need to soak up more practical advice before your trip, take a look at these companion articles:
Norway: 50 Things to See — A huge overview of the most interesting places across the whole country, perfect if you’re considering stretching out your route.
Norwegian Fjords — A Guide — A detailed look at the most beautiful inlets of the west coast and tips on how to enjoy them both from the deck of a boat and from mountain viewpoints.
Geirangerfjord — A standalone guide dedicated to the king of all fjords, because this place simply deserves an article of its own.
Frequently Asked Questions
How many days is enough for Norway?
If you want to see the main highlights of the western fjords, 7 days is the absolute minimum. The ideal and most recommended length is 10 days, which allows you to drive the route at a relaxed pace. If you want to add Preikestolen in the south or fly to the north, set aside at least 14 days or more.
Can this itinerary be done without a car?
“`html
Partly yes, but you’ll miss out on a great deal of freedom. You can use the popular “Norway in a Nutshell” package, which combines trains and boats between Oslo, Flåm and Bergen, but getting to more remote places and mountain viewpoints like Trollstigen by public transport is very complicated.
“`
Is it better to go for 7, 10, or 14 days?
The golden middle ground is 10 days, because you’ll cover all the icons of the south and west without a frantic pace. The one-week option is very condensed and you’ll have to cut out interesting places, while 14 days gives you space to discover lesser-known corners or combine the south with the Arctic north.
When to set out on this trip?
“`html
The safest and most beautiful period is roughly from the end of May to the beginning of September. During this time, the snow on mountain roads has usually melted, nature is beautifully green, and all tourist attractions including ferries operate at full capacity.
“`
How much does it all cost roughly?
Calculate that when traveling as a couple in a rental car and sleeping in mid-range hotels, your daily budget will be roughly between €170 and €240. This includes the car, petrol, tolls, accommodation and occasional restaurant visits, with the rest of your meals covered by supermarket shopping.
Where is the best place to start and end the route?
This classic circuit is best to start in Oslo, as it has the most flight connections and you can easily rent a car. You can finish either in Bergen or in Ålesund, from where you’ll fly home with a connection, or you can return to Oslo airport with one last long drive.
Can I handle this road trip even with small children?
Absolutely yes, Norwegians are an incredibly family-friendly nation. However, I recommend loosening the itinerary a bit, avoiding eight-hour car journeys and instead spending at least two nights in each place, so you can give the children time to rest and play in nature.
Tips and Tricks for Your Vacation
Don’t Overpay for Flights
Search for flights on Kayak. It’s our favorite search engine because it scans the websites of all airlines and always finds the cheapest connection.
Book Your Accommodation Smartly
The best experiences we’ve had when looking for accommodation (from Alaska to Morocco) are with Booking.com, where hotels, apartments, and entire houses are usually the cheapest and most widely available.
Don’t Forget Travel Insurance
Good travel insurance will protect you against illness, accidents, theft, or flight cancellations. We’ve had a few hospital visits abroad, so we know how important it is to have proper insurance arranged.
Where we insure ourselves: SafetyWing (best for everyone) and TrueTraveller (for extra-long trips).
Why don’t we recommend any Czech insurance company? Because they have too many restrictions. They set limits on the number of days abroad, travel insurance via a credit card often requires you to pay medical expenses only with that card, and they frequently limit the number of returns to the Czech Republic.
Find the Best Experiences
Get Your Guide is a huge online marketplace where you can book guided walks, trips, skip-the-line tickets, tours, and much more. We always find some extra fun there!