
Glacier National Park, Montana: 15 Best Things to See and Do

TL;DRGlacier National Park in northwest Montana comes with 15 essential tips, including driving the 80-kilometre Going-to-the-Sun Road over Logan Pass (2,025 m), hiking the Grinnell Glacier Trail and Iceberg Lake in the Many Glacier area, taking in Lake McDonald and St. Mary Lake with its Wild Goose Island, or heading to quieter spots like Two Medicine and Polebridge. The best time to visit is mid-July to mid-September, when the road is fully open and 3–5 days is enough for the main areas plus 2–3 hikes. Entry costs $35 per vehicle for 7 days, and in peak season you’ll also need a $2 vehicle reservation through recreation.gov. The cheapest option is camping, at $26–$30 a night.

You’re standing on Logan Pass, snow-capped peaks towering all around you, and somewhere below, a turquoise lake glistens like something cut straight from a fairytale. The wind hits your face with air so pure it feels like you’ve been suffocating your whole life and are only now truly breathing for the first time. Then you glance left and spot a mountain goat with her kid grazing peacefully on a meadow about 200 metres away. This is Glacier National Park — a place that makes you stop scrolling Instagram and simply stand there, staring in awe.

Lukáš and I headed to Glacier National Park in Montana during our road trip across the western US, and honestly? Of all the national parks we’ve visited, this one reminded us most of our beloved Canada — which is exactly why I’d love to go back.

Yellowstone is legendary, of course (and you should definitely check out our Yellowstone guide), but Glacier has something that’s hard to put into words — it’s wilder, less crowded, and the scenery is simply out of this world.

In this article, I’ve put together a complete guide to Glacier National Park — from when to visit and how to get there, to the best hikes and viewpoints, where to stay, how much it costs, and how to survive a grizzly encounter (spoiler: don’t play dead — that’s for black bears 😅). You’ll find 15 things to see and do, practical advice on vehicle reservations, and plenty of personal insights you won’t find in a standard guidebook.
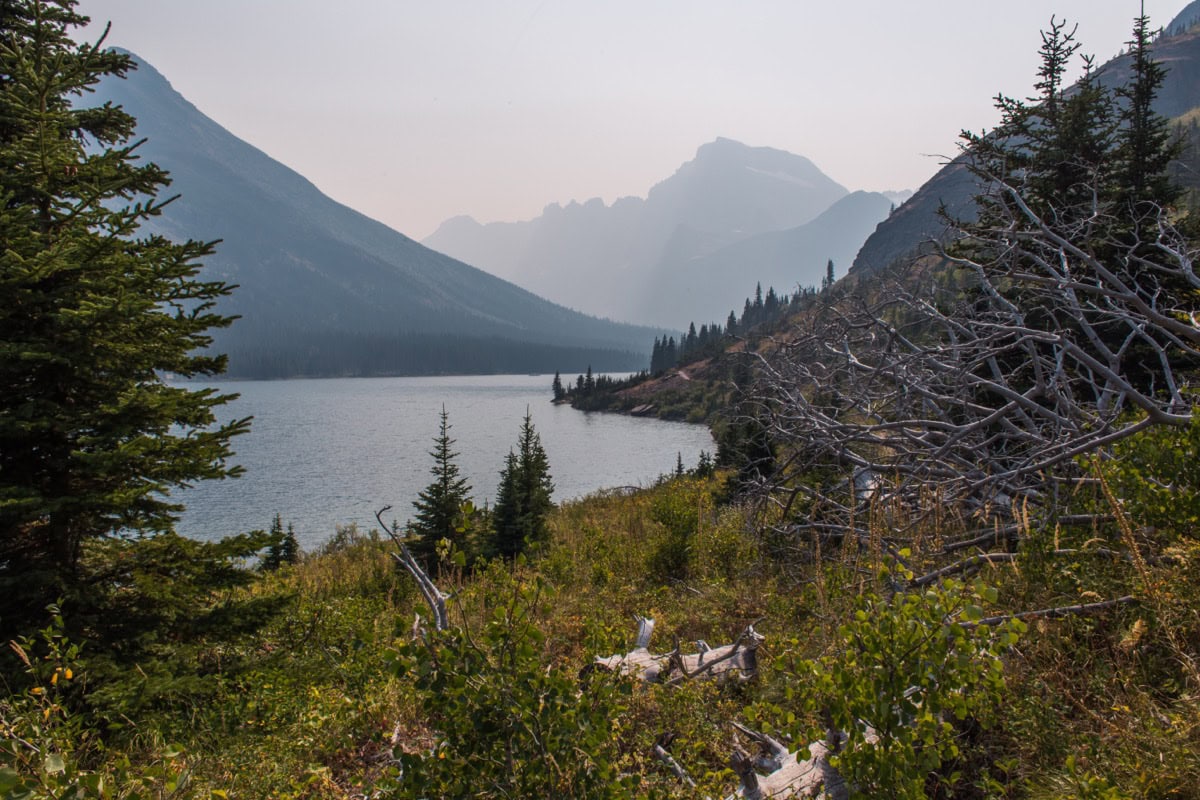
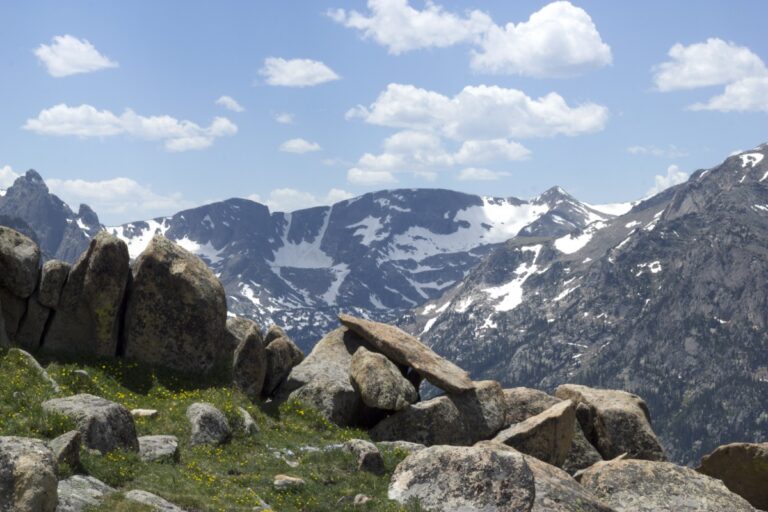
Mountain lake surrounded by forest and peaks in Glacier National Park

TL;DR

  • Glacier National Park sits in northwestern Montana, right on the Canadian border. Don’t confuse it with Glacier National Park in Canada — that’s a completely different park on the other side of the border (though they are neighbours).
  • Best time to visit is mid-July to mid-September, when the entire Going-to-the-Sun Road is open.
  • You need a vehicle reservation to access the Going-to-the-Sun Road — without one, you won’t get in during peak season. Reservations are released online and sell out within minutes.
  • Going-to-the-Sun Road is one of the most beautiful roads in the world — 50 miles through the heart of the park over Logan Pass (6,646 ft / 2,025 m).
  • Many Glacier is the park’s most stunning area for hiking — Grinnell Glacier Trail and Iceberg Lake rank among the best hikes in the entire US.
  • Accommodation is expensive and books up fast — reserve 6–12 months in advance. The cheapest option is camping ($26–30/night, roughly €24–28).
  • Bears live here — both black bears and grizzlies. Carry bear spray, make noise on the trails, and store food in bear boxes.
  • Plan 3–5 days to visit the park so you can cover the main areas and fit in at least 2–3 hikes.
  • Entrance fee is $35 per vehicle for 7 days (about €32), or you can get an America the Beautiful Pass for $80 (about €74) covering all national parks for a full year.

When to visit Glacier National Park and how to get there

Glacier National Park is one of those parks where timing genuinely makes or breaks your trip. Unlike Yellowstone, which you can visit pretty much any time of year, here nature sets the rules — and it doesn’t mess around.

Best time to visit

Going-to-the-Sun Road, the main road cutting through the heart of the park, is typically fully open from early/mid-July to mid-October. The exact date depends on that year’s snowfall — Glacier National Park is notorious for heavy snow, and some years the road isn’t cleared until late July.

The ideal window is mid-July to mid-September. During this time:

  • The entire Going-to-the-Sun Road is open
  • Most trails are snow-free
  • Wildflowers are in full bloom, especially in August
  • Daytime temperatures hover around 20–28°C (68–82°F)

If you can, avoid the first two weeks of August — that’s absolute peak season. We visited at the end of July/beginning of August, and some car parks were full by 7 AM. Yes, seven in the morning. On holiday. 😅

September is a lovely month — fewer people, the colours start turning autumnal, but it can get chilly and some services begin shutting down for the season.

How to get to Glacier National Park

So where exactly is Glacier National Park located? The park lies in northwestern Montana, right on the Canadian border. It’s about 300 miles (480 km) north of Yellowstone — roughly 5–6 hours by car. And to answer the question everyone seems to Google: the distance between Yellowstone and Glacier is approximately 285–360 miles (460–580 km) depending on the route, or 5–7 hours of driving. The two parks combine beautifully into one epic road trip!

Nearest airports:

  • Glacier Park International Airport (FCA) in Kalispell — 25 miles from the west entrance. By far the most convenient option.
  • Missoula (MSO) — about 175 miles south, a larger airport with more connections and cheaper flights.
  • Great Falls (GTF) — about 185 miles southeast.

From the UK, you’ll typically need to connect through a major US hub like Seattle, Denver, or Minneapolis. Keep an eye out for deals — Seattle in particular works well as a starting point for a Pacific Northwest road trip that includes Glacier. Comparison sites like Skyscanner or Google Flights are great for hunting down the best fares.

A car is essential. You simply can’t get around the park and its surroundings without one. We’ve had consistently great experiences with DiscoverCars, which we use all over the world — it compares offers across agencies and usually turns up the best price. In Montana, I’d recommend an SUV or at least a larger car — the roads are in good condition, but you’ll appreciate the higher clearance and comfort on long drives.

Vehicle reservation — important!

Since 2023, you need a vehicle reservation to access the Going-to-the-Sun Road corridor between late May and early September (exact dates vary each year). Without a reservation, you simply won’t be allowed onto this road during that period.

Reservations are released on recreation.gov in two rounds: 1. Main release — usually in March, when most reservations for the entire season go live 2. Rolling daily release — the day before at 8:00 PM MST (that’s 3:00 AM GMT), a limited number of slots are released for the following day

My tip: Set an alarm and be at your computer right on time. Reservations disappear within minutes, not hours. If you miss out — don’t give up. Try the daily releases; cancelled reservations pop up regularly.

The reservation costs $2 (about €2) and is in addition to the park entrance fee ($35 / €32 per vehicle for 7 days).

Alternative without a reservation: You can enter the park before 6:00 AM or after 3:00 PM — during these times, a reservation usually isn’t required (check the official NPS website for the current year’s rules). You can also head to the east side via Many Glacier, which doesn’t require a reservation at all.

Where to stay and how much Glacier National Park costs

This is probably the most important practical section in the entire article, because accommodation near Glacier National Park is problem number one for anyone planning a trip here. The park sits in sparsely populated Montana and capacity is simply limited. If you don’t book well in advance, you could end up in a motel an hour away — and trust me, that’s not ideal after a full day of hiking.

Accommodation inside the park

In-park accommodation is operated by Xanterra, and you’ll find several historic lodges:

  • Many Glacier Hotel — a stunning historic hotel right on Swiftcurrent Lake. Rooms from around $250–450/night (€230–415). Book 8–12 months ahead — it’s the most sought-after accommodation in the park.
  • Lake McDonald Lodge — on the shore of the park’s largest lake. Rooms from around $200–350/night (€185–325). Beautiful atmosphere, rustic interiors.
  • Rising Sun Motor Inn — simpler and more affordable, on the eastern side of Going-to-the-Sun Road. Rooms from around $160/night (€148).

Camping

The cheapest — and in my opinion the most authentic — way to experience the park! Glacier has 13 campgrounds, some reservable and others first-come-first-served.

  • Reservable campgrounds (Apgar, Fish Creek, Many Glacier, St. Mary): $26–30/night (€24–28) — book through recreation.gov as soon as the system opens (usually 6 months in advance).
  • First-come-first-served campgrounds: Arrive early morning (before 8:00 AM), or you won’t stand a chance, especially in July and August.

Towns near the park

What’s the best town to stay in when visiting Glacier National Park? It depends on which side of the park you want to explore:

  • West Glacier / Hungry Horse — closest to the west entrance, with the most accommodation options, restaurants, and shops. The ideal base for Going-to-the-Sun Road.
  • East Glacier Park — quieter, more authentic, and closer to the Two Medicine area.
  • St. Mary — at the eastern entrance to Going-to-the-Sun Road, a solid base for both Many Glacier and the Sun Road.
  • Whitefish — about 25 miles from the park, but a charming mountain town with an excellent restaurant scene. If you want comfort and evening entertainment, this is your pick.
  • Kalispell — a larger town with the cheapest accommodation, but 30+ miles from the park.

How much Glacier National Park costs — budget

Rough budget for 5 days for two people (mid-range, mix of hotel + camping):

ItemPrice in USDPrice in EUR
Entrance fee (vehicle, 7 days)3532
Vehicle reservation22
Accommodation (2 nights camping, 2 nights hotel)700–1,000650–925
Food (5 days, mix of restaurants + self-catering)300–500280–465
Petrol80–12074–111
Car hire (5 days)250–400230–370
Bear spray (2 cans)50–7046–65
Total1,417–2,1271,314–1,970

Let’s be honest — it’s not cheap, but the US national parks never are. On the other hand, the experience is priceless. And if you’re thinking about skipping the bear spray to save a few quid — don’t. You genuinely need it. 😅

Going-to-the-Sun Road and surroundings: 8 must-see spots

Going-to-the-Sun Road is the heart of Glacier National Park and one of the most spectacular scenic drives on the entire planet. This 50-mile road takes you from gorgeous Lake McDonald over Logan Pass to St. Mary Lake on the eastern side. Every bend reveals a new vista, every pullover takes your breath away. Have your camera ready — and your patience too, because you’ll be stopping roughly every 500 metres.

1. Lake McDonald — the most photogenic lake in the park
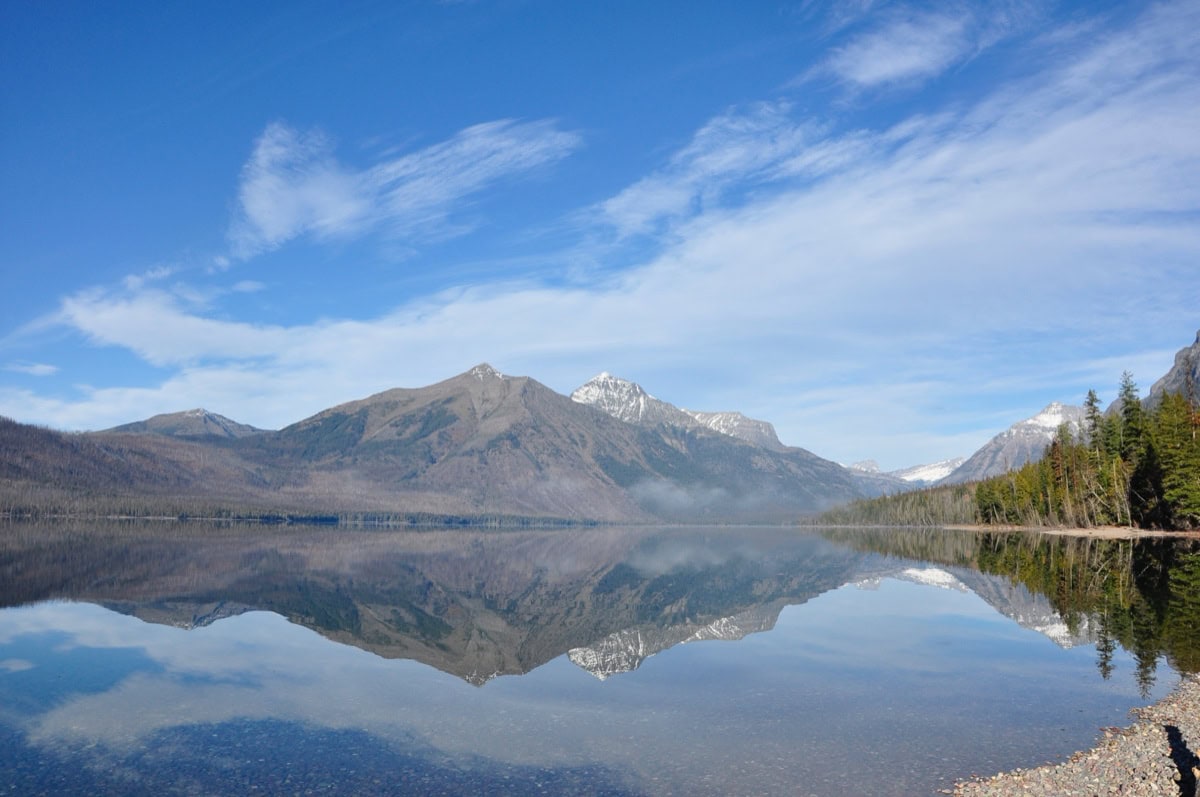
Lake McDonald with colourful pebbles and mountains in Glacier National Park
Photo: TLJones007 / CC BY-SA 4.0 / Wikimedia Commons

Lake McDonald is the largest lake in Glacier National Park and the first thing you’ll see when entering from the west side. The lake stretches over 10 miles long, plunges to depths of 470 feet, and on a clear day you can see the colourful pebbles on the bottom — those famous red, green, and blue stones you’ve probably seen all over Instagram.

The best views are early morning, when the surface is mirror-calm and the surrounding mountains reflect perfectly in the water. We were there at 6:30 AM and it was absolutely magical — not a soul around, just us and two ducks. I’d recommend parking at Lake McDonald Lodge and taking a stroll along the shore.

You can also hire a kayak or canoe on the lake, or hop on a scenic boat tour — it’s a wonderful way to see it from a different perspective, especially if you don’t fancy hiking all day.

2. Trail of the Cedars — an easy walk through ancient forest
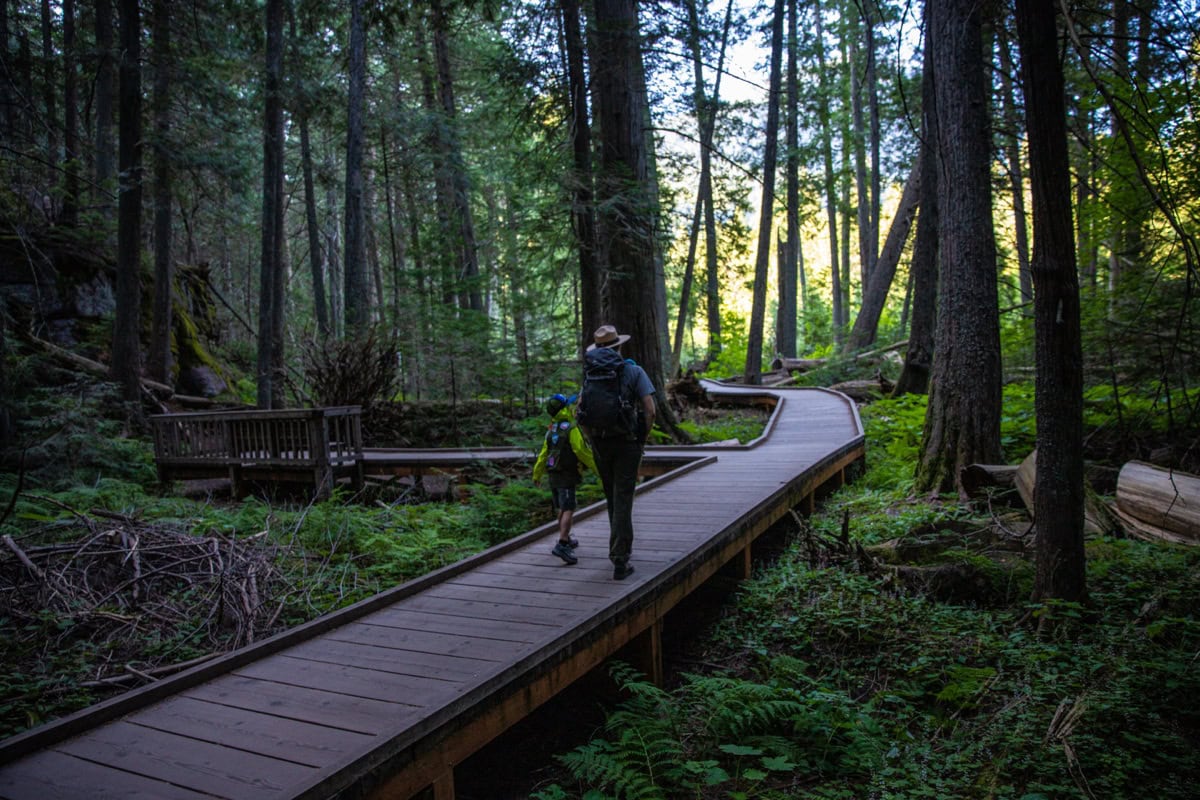
Trail of the Cedars boardwalk through old-growth cedar forest
Photo: GlacierNPS / Public domain / Wikimedia Commons

If you’re looking for something short and easy — perhaps as a warm-up or with small children — Trail of the Cedars is a perfect choice. It’s a short loop trail (just under a kilometre) winding through old-growth cedar forest along Avalanche Creek.

A boardwalk leads you past enormous trees, moss-covered rocks, and a turquoise stream that looks like someone poured food colouring into it. The colour of the water is so unreal that at first I thought my camera display was broken. 😁

From here, you can continue to Avalanche Lake Trail (roughly 5.5 miles / 9 km round trip), one of the most popular hikes in the park. A lake surrounded by sheer cliffs with waterfalls cascading down — it’s well worth the extra hour.

3. Going-to-the-Sun Road — the drive itself
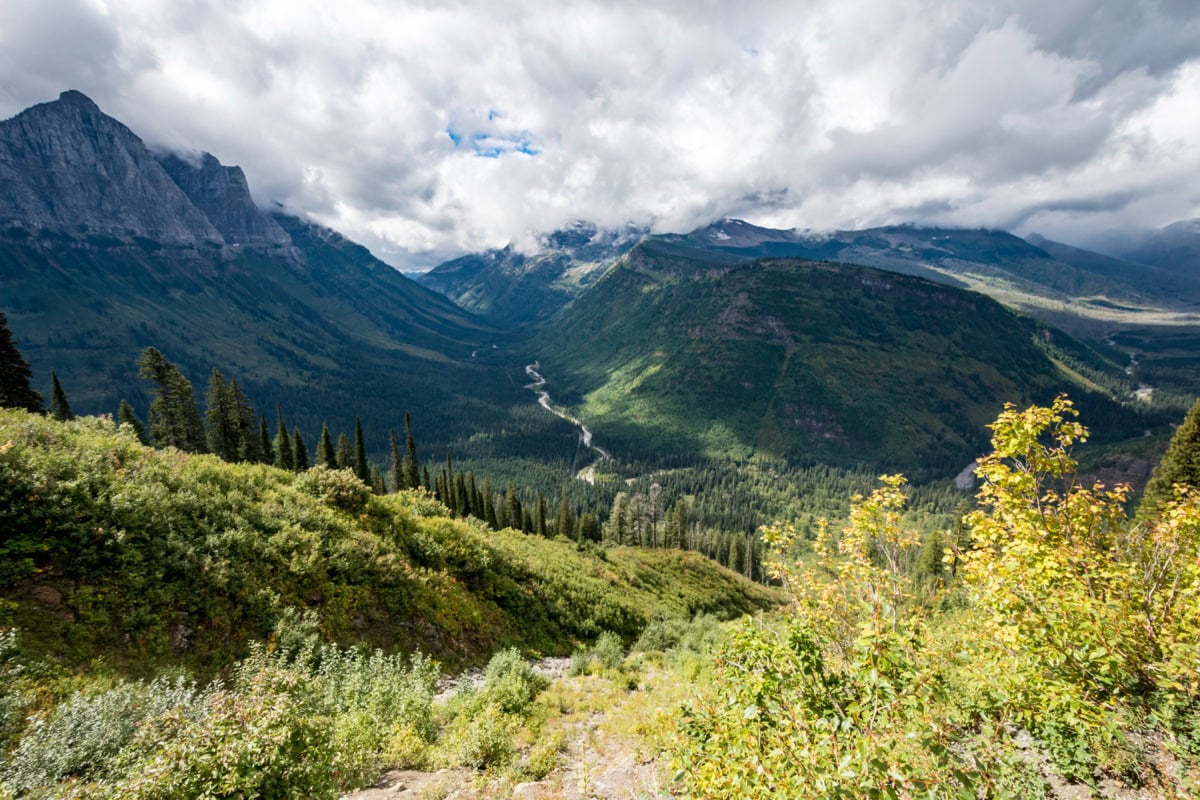
Mountain road Going-to-the-Sun Road in Glacier National Park
Photo: m01229 from USA / CC BY-SA 2.0 / Wikimedia Commons

The drive along Going-to-the-Sun Road is the experience that draws millions of people to Glacier National Park. Completed in 1932, the road is an engineering marvel — carved into cliff faces, with barriers barely knee-high, and views that’ll make your head spin (in both the good and the slightly terrifying sense).

A few practical tips:

  • Direction: If you have a choice, drive east to west (from St. Mary to Lake McDonald). You’ll be on the side with better views and won’t be as close to the edge. If you’re nervous about heights, sit on the passenger side when driving from the east.
  • Time: Allow at least 3–4 hours for the full road with stops, ideally a whole day.
  • Vehicles longer than 21 ft or wider than 8 ft aren’t allowed on the road — no large RVs!
  • Alternative: If you’d rather not drive yourself, the park operates historic Red Jammer Buses with open tops. A ride costs around $50–100 per person (€46–93), but it’s an absolutely incredible experience.

4. Logan Pass — the rooftop of the park
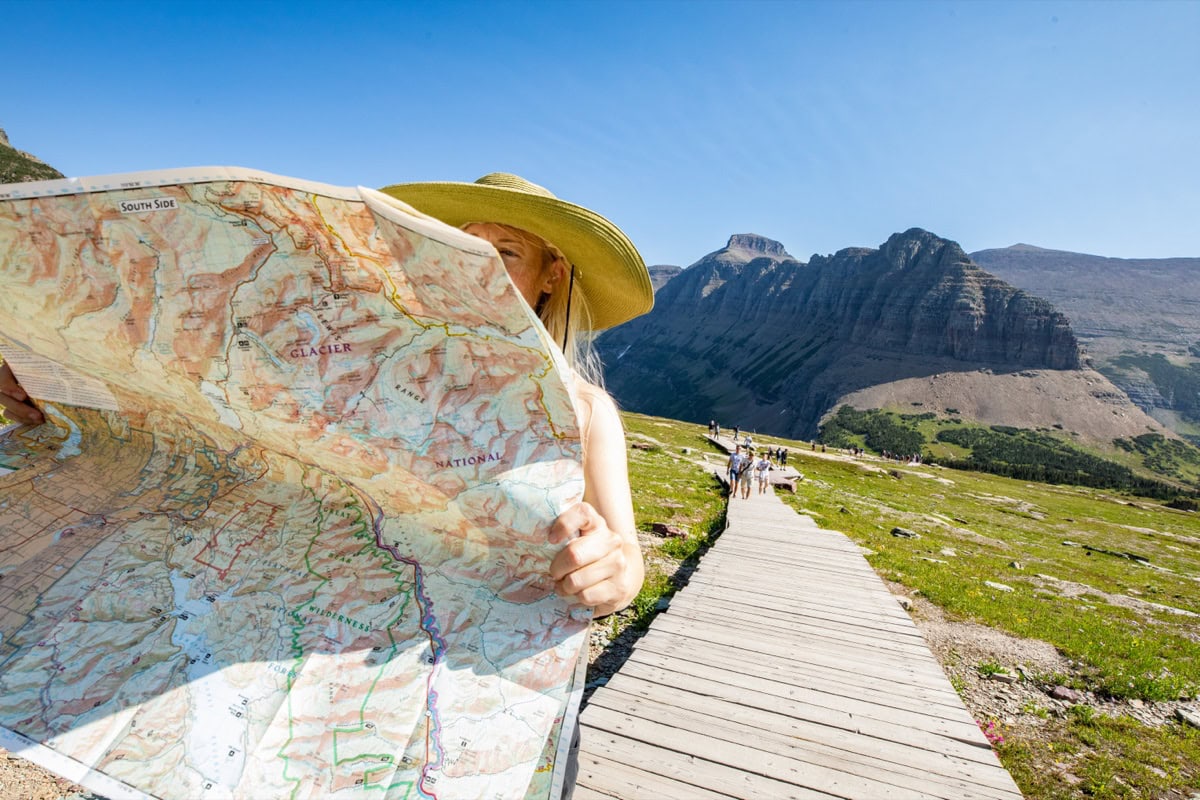
Logan Pass, the highest point of Going-to-the-Sun Road
Photo: GlacierNPS / Public domain / Wikimedia Commons

At 6,646 feet (2,025 m), Logan Pass is the highest point on Going-to-the-Sun Road and the starting point for the park’s two most famous hikes — Highline Trail and Hidden Lake Overlook. The elevation here is among the highest in all of Glacier National Park, and the views live up to it.

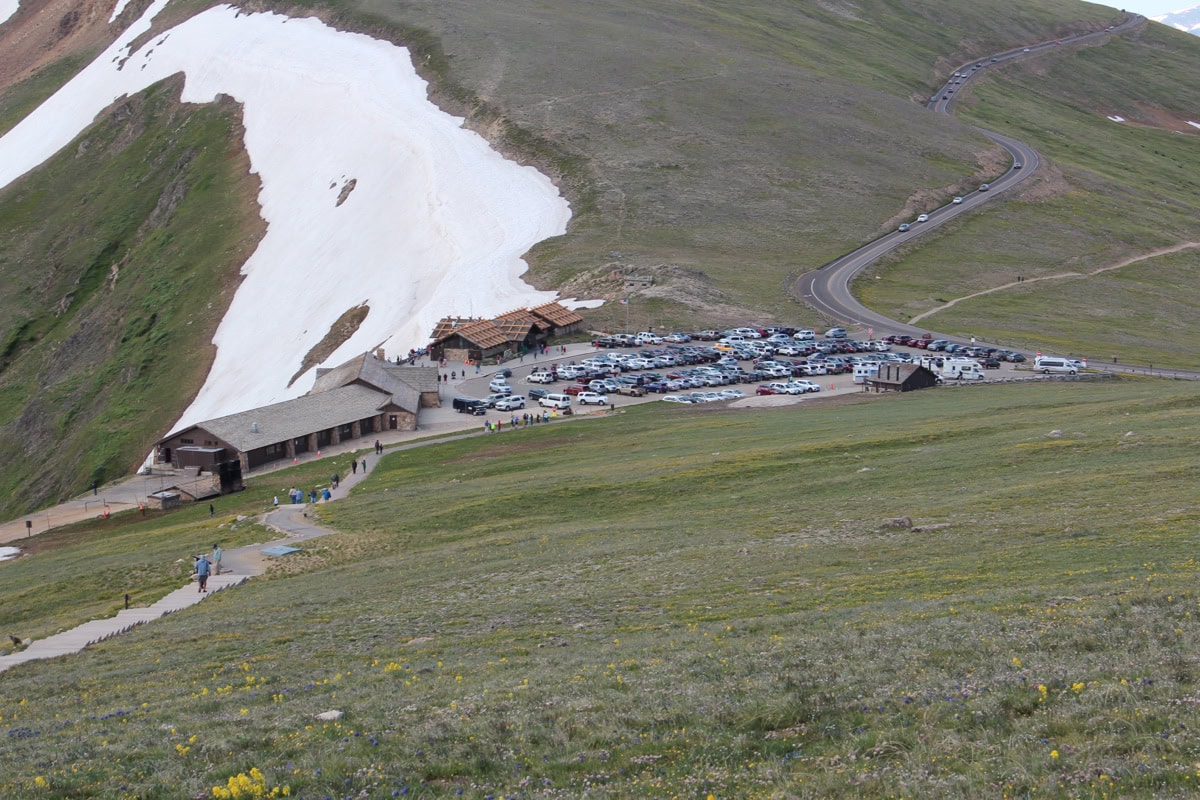
The Logan Pass car park is notoriously overcrowded. It holds about 200 cars and fills up by 7:30–8:00 AM in peak season. No exaggeration. Either arrive early or use the shuttle bus from Apgar Village or St. Mary.

From Logan Pass, you’re treated to a panorama spanning dozens of peaks, glaciers, and alpine meadows carpeted with wildflowers. In summer, you’ll regularly spot mountain goats here — they couldn’t care less about tourists and will happily stroll within a metre of your feet.

5. Hidden Lake Overlook — a short hike with a big payoff
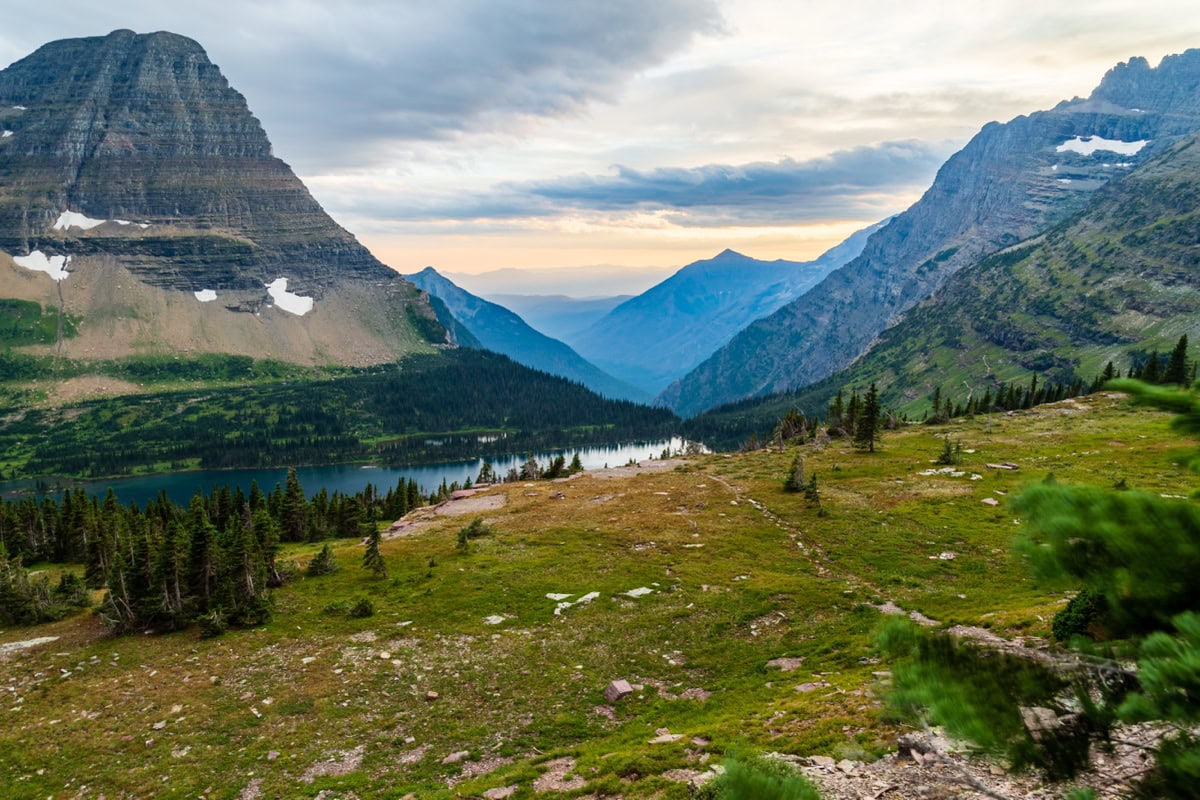
Viewpoint overlooking Hidden Lake in Glacier National Park
Photo: aparlette / CC BY 2.0 / Wikimedia Commons

Hidden Lake Overlook is probably the best effort-to-reward ratio in the entire park. The trail starts right at the visitor centre on Logan Pass and covers just 2.8 miles (4.5 km) round trip with roughly 460 feet (140 m) of elevation gain.

The path follows boardwalks across alpine meadows bursting with wildflowers (in July and August it’s an absolute explosion of colour), and at the end you’re rewarded with a viewpoint over Hidden Lake — a blue-green gem nestled between rock walls. If you want to go all the way down to the lake itself, add another 1.5 miles (and 650 ft of descent, which of course means climbing back up).

We went all the way to the lake and didn’t regret it — on the way down we spotted two mountain goats with kids, and the lake itself was so crystal-clear we could see the bottom. The hike back up, though? That gave us a proper workout, I won’t lie. 😅

6. Highline Trail — the legendary ridge walk
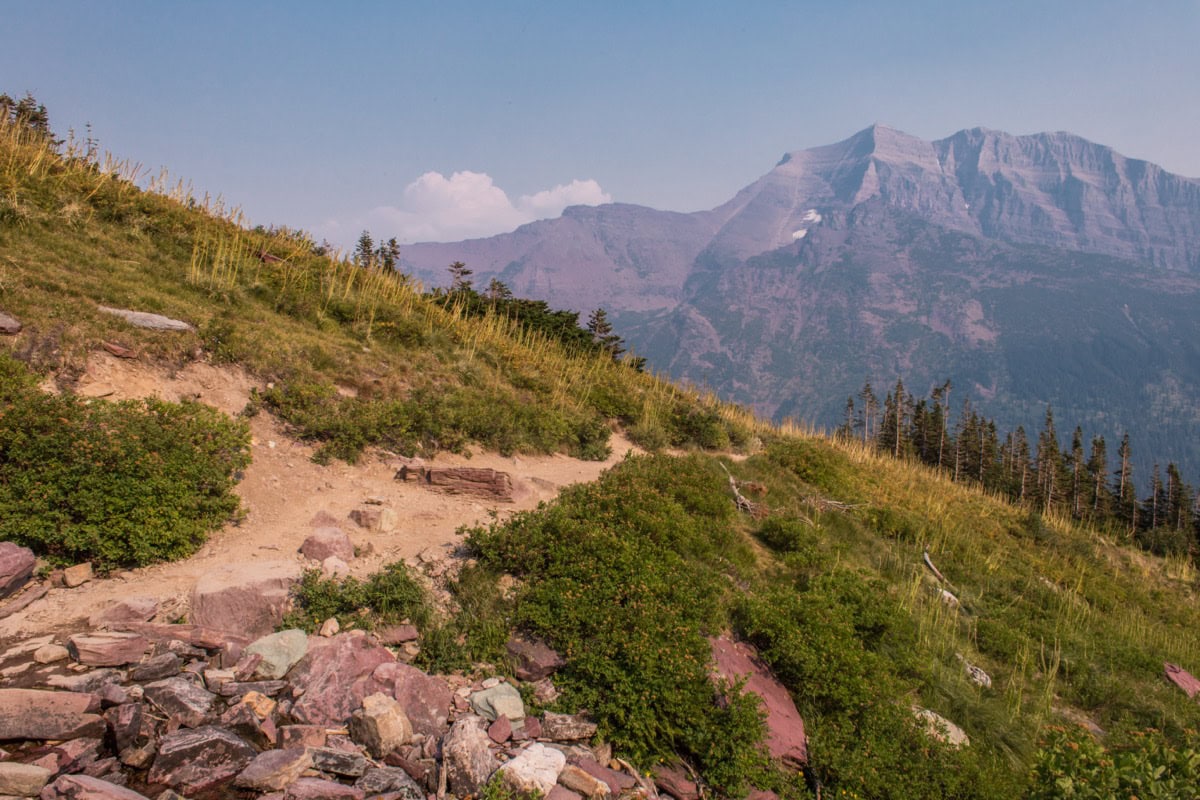
Rocky high-altitude trail with mountain views in Glacier National Park

Highline Trail is arguably the most famous hike in Glacier National Park, and rightfully so. The trail begins at Logan Pass and follows a narrow path carved into a cliff face, with a steel cable to grip and a valley hundreds of metres deep on your left.

The full trail to Granite Park Chalet covers roughly 7.5 miles (12 km, one way) with minimal elevation change — most of the route stays at a constant altitude of around 6,500 ft along the Continental Divide ridge. The views are non-stop and utterly breathtaking.

Important note: The first few hundred metres are narrow and a bit nerve-wracking — that’s where the steel cable comes in handy. If you have a serious fear of heights, you might want to consider a different hike. But if you push through, beyond that cable awaits the most beautiful 7.5 miles of your life. From Granite Park Chalet, you can continue to The Loop (roughly 12 miles / 19 km total, one way) and catch the shuttle bus back to Logan Pass.

For the Highline Trail, I’d recommend bringing proper hiking boots — the terrain is rocky and slippery in places, especially early in the morning. And don’t forget your bear spray!

7. St. Mary Lake and Wild Goose Island — an iconic view
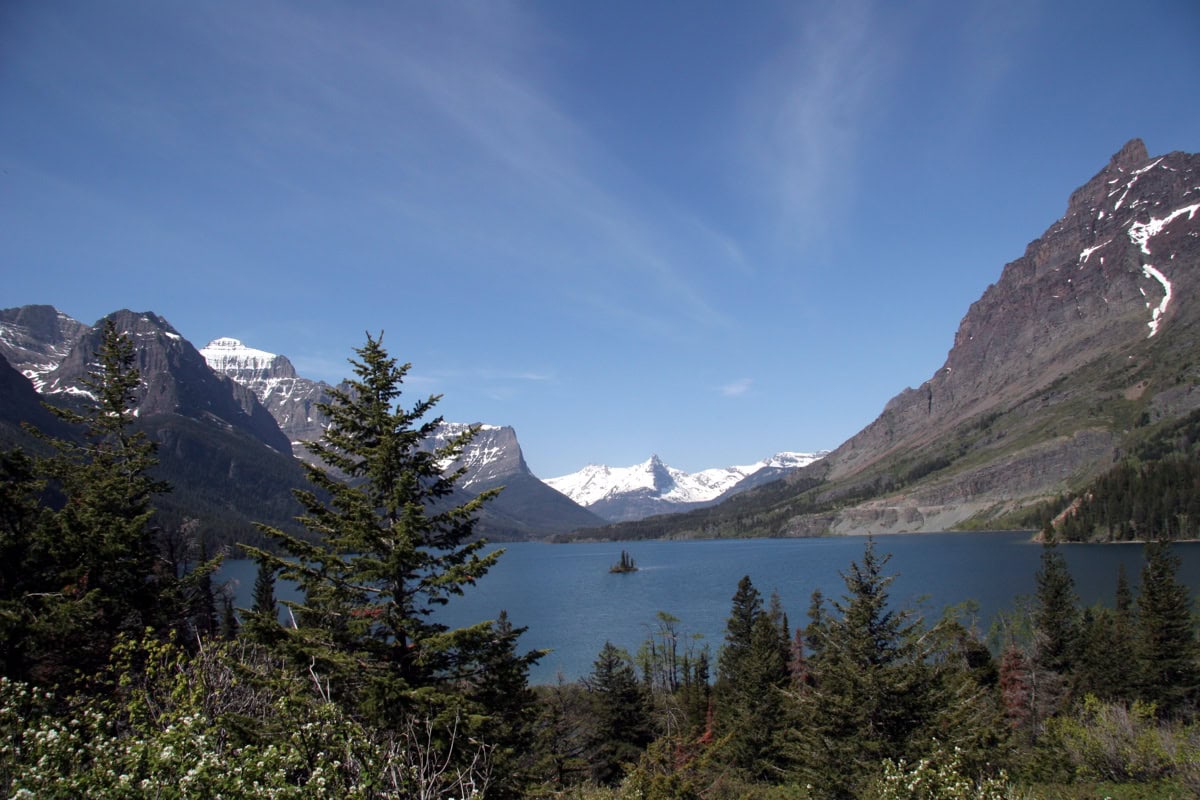
Wild Goose Island in St. Mary Lake
Photo: National Park Service Digital Image Archives / Public domain / Wikimedia Commons

On the eastern side of Going-to-the-Sun Road, you’ll encounter St. Mary Lake — the park’s second-largest lake, famous for its intensely blue colour and especially the view of Wild Goose Island, that tiny islet in the middle of the lake that you’ve almost certainly seen in photos.

The best viewpoint is from Wild Goose Island Overlook — the car park is right by the road and within 30 seconds you’ve got that famous shot. It’s most beautiful at sunrise, when the lake shifts through shades of pink, purple, and azure.

A bit further along the road, stop at Sun Point — there’s a short walk (about a mile) to Baring Falls, which are smaller but lovely and far less crowded than the main attractions.

8. Weeping Wall — waterfalls cascading onto the road

Weeping Wall is one of those spots you stumble upon while driving Going-to-the-Sun Road and think “you can’t be serious.” In spring and early summer (June–July), water streams and cascades from the high cliffs directly onto the road — you literally drive through a waterfall.

There’s no car park here (it’s in the middle of the narrow road), so enjoy it as you drive, ideally with the windows down. In late summer, the water typically dries up, so the biggest show is in June and early July. It’s brief but absolutely unforgettable.
lukas a lucka
Lukáš and Lucie recommend
Where to Stay in Glacier National Park in Montana
6 accommodations — hotels and other lodging options

Many Glacier: 4 hikes and experiences you can’t miss

Many Glacier is, according to many visitors (and I’m firmly in that camp), the most beautiful area in all of Glacier National Park. It sits on the park’s northeastern side and is accessed via the road from Babb — NOT via Going-to-the-Sun Road. That means you’ll need to dedicate a separate day here (ideally two).

The Many Glacier area is a hiker’s paradise — you’ll find some of the most spectacular trails in the entire United States. It also has the highest concentration of bears in the park, so keep your eyes peeled. 🐻

9. Grinnell Glacier Trail — to the park’s last glaciers
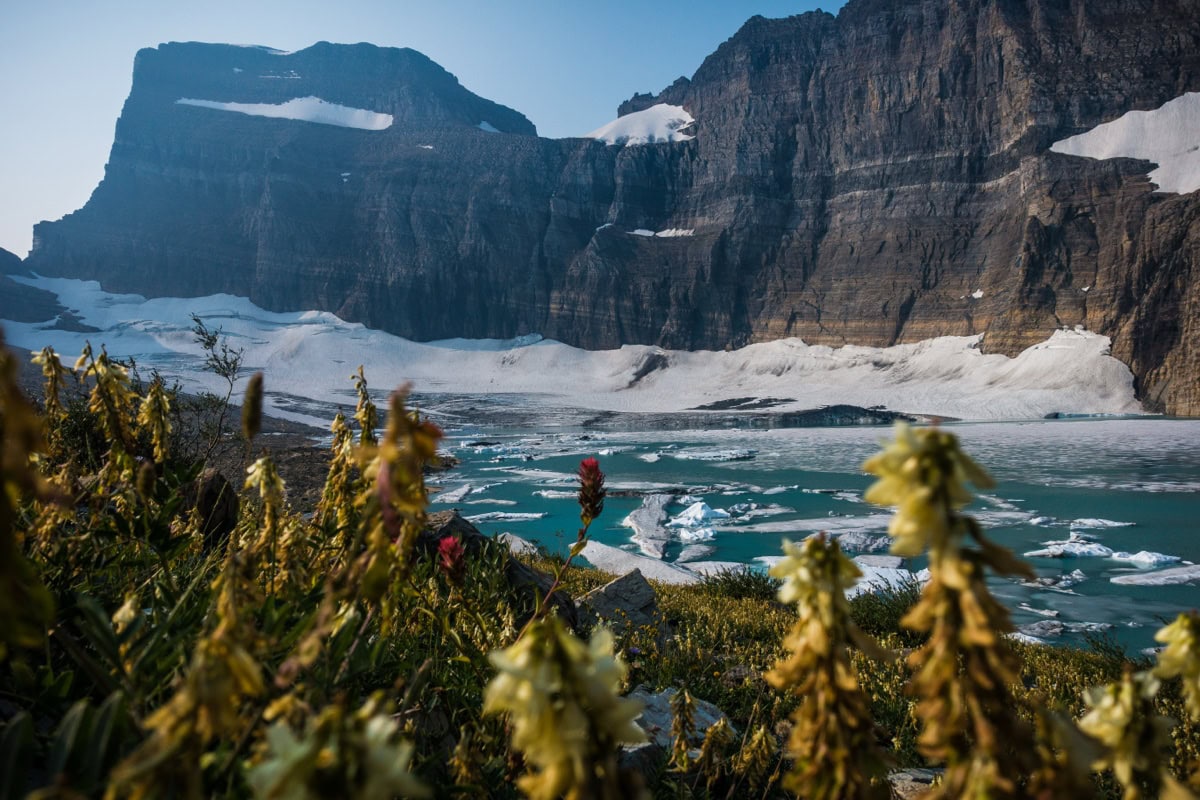
Grinnell Glacier above a turquoise glacial lake
Photo: GlacierNPS / Public domain / Wikimedia Commons

Grinnell Glacier Trail is the number one hike in Glacier National Park and, in my opinion, one of the finest in all of North America. The trail covers about 10.6 miles (17 km) round trip with around 1,600 ft (490 m) of elevation gain, leading you right up to one of the park’s last remaining glaciers.

A quick aside: how many glaciers are actually left in Glacier National Park? In 1850, there were over 150. Today, just 25 active glaciers remain (according to the latest USGS measurements). Scientists estimate that most could disappear by 2030. It’s sobering, but it also lends your visit a sense of urgency — you’re witnessing something your children may never see.

The hike itself is challenging but not extreme. The route passes two gorgeous turquoise lakes (Swiftcurrent Lake and Lake Josephine), crosses alpine meadows full of marmots, follows alongside waterfalls, and finally climbs to the glacier itself. That glacial blue-green tint of the meltwater is something no photograph can truly capture.

Tip: You can shorten the hike by taking the boat across Swiftcurrent Lake and Lake Josephine (operated by Glacier Park Boat Company) — it saves roughly 3 miles and a lot of energy.

10. Iceberg Lake — a lake full of floating ice
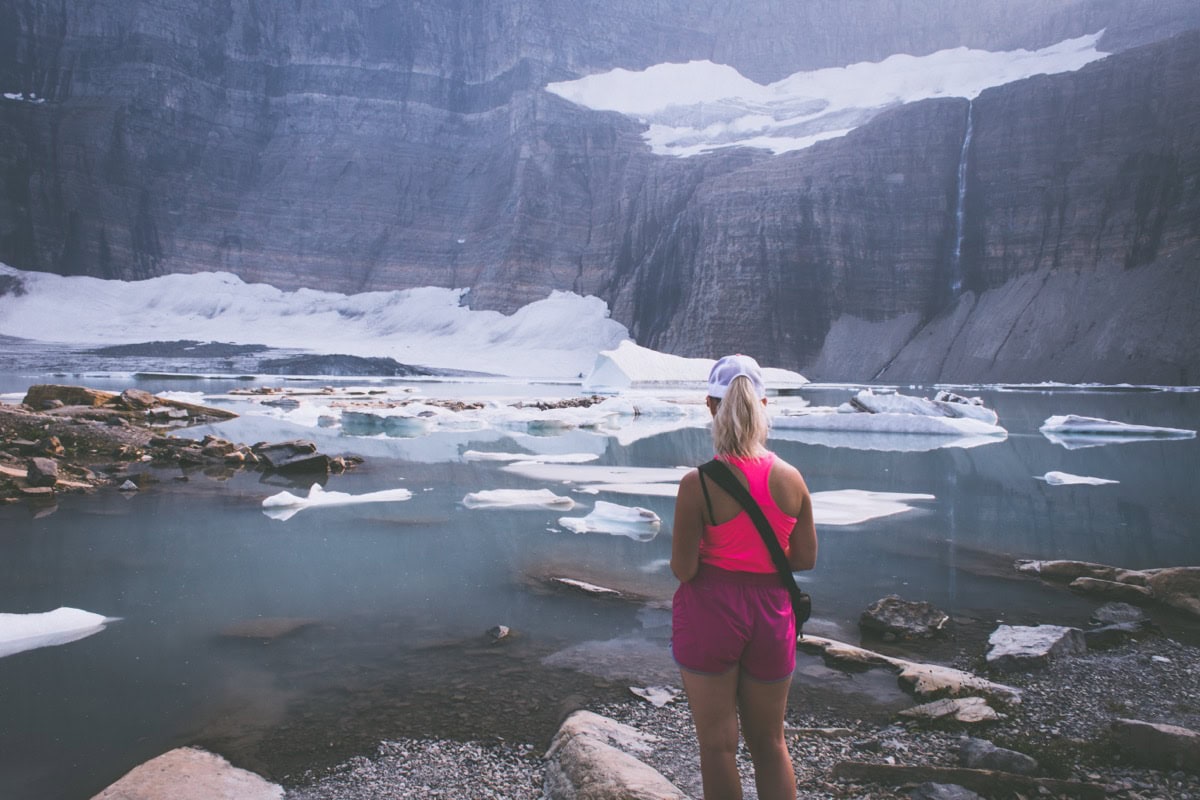
Visitors at Iceberg Lake with floating icebergs

Iceberg Lake is exactly what the name promises — a glacial lake where chunks of ice float on the surface even in August. The trail covers about 9.3 miles (15 km) round trip with gentle elevation gain (roughly 1,200 ft / 370 m) and is considered one of the most scenic in the park.

The lake sits in an enormous amphitheatre of rock walls surrounding it on three sides. The water is surreally blue, and the floating ice chunks give the whole scene an Arctic feel. Some brave souls even swim here — we dipped our feet in and pulled them right back out after three seconds. The water’s about 3°C (37°F). 😅

The trail is relatively easy (by Glacier standards) and excellent for bear watching — the area around Iceberg Lake is one of the most frequent grizzly bear hotspots in the park. We spotted a mother bear with her cub on a distant slope, and that was plenty close enough. Don’t worry — bears generally avoid humans as long as you make noise.

11. Swiftcurrent Pass Trail and Swiftcurrent Lookout

If you have a third day in Many Glacier (and I’d strongly recommend it), the Swiftcurrent Pass Trail takes you up to Swiftcurrent Lookout at 7,503 ft (2,286 m), where you’ll get a 360° panorama of the entire Many Glacier area.

The trail covers about 12 miles (19 km) round trip with roughly 2,300 ft (700 m) of elevation gain — it’s a full-day affair and definitely not a stroll. But the view from the lookout! You can see Grinnell Glacier, Swiftcurrent Valley, Granite Park, and on a clear day, allegedly all the way into Canada.

Alternative: If you don’t fancy the full trail, you can hike just to Redrock Falls (about 3.7 miles / 6 km round trip) — a beautiful waterfall with significantly fewer people than Grinnell or Iceberg.

12. Many Glacier Hotel — worth a stop even if you’re not staying
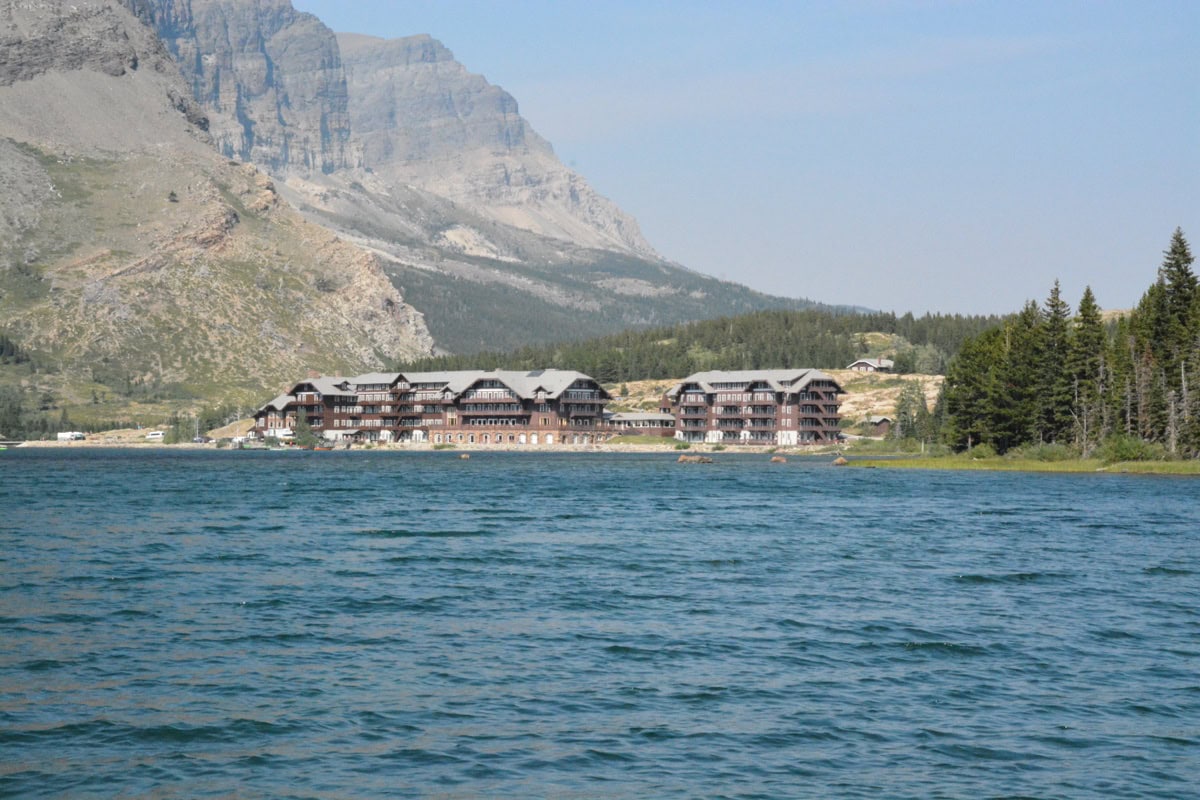
Historic Many Glacier Hotel on the shore of Swiftcurrent Lake
Photo: Hiremath.mayur / CC BY-SA 4.0 / Wikimedia Commons

Many Glacier Hotel is a historic gem dating back to 1915, built in the style of Swiss alpine hotels. It stands right on the shore of Swiftcurrent Lake with views of snow-capped peaks, and even if you can’t afford to stay here (or couldn’t snag a reservation), you should definitely pop in.

The lobby is open to all visitors, and the view from the veranda across the lake and mountains is one of the finest in the entire park. You can have lunch in the hotel restaurant (prices are on the high side, but the view is worth every penny) or simply grab a coffee and soak up the atmosphere.

More great spots in Glacier National Park: 3 tips you won’t want to miss

Beyond the main draws — Going-to-the-Sun Road and Many Glacier — Glacier National Park has several more areas well worth visiting if you have the time. The park is enormous (over 1,500 square miles / 4,000 km²), and most visitors only see a fraction of what it offers.

13. Two Medicine — a peaceful alternative without the crowds
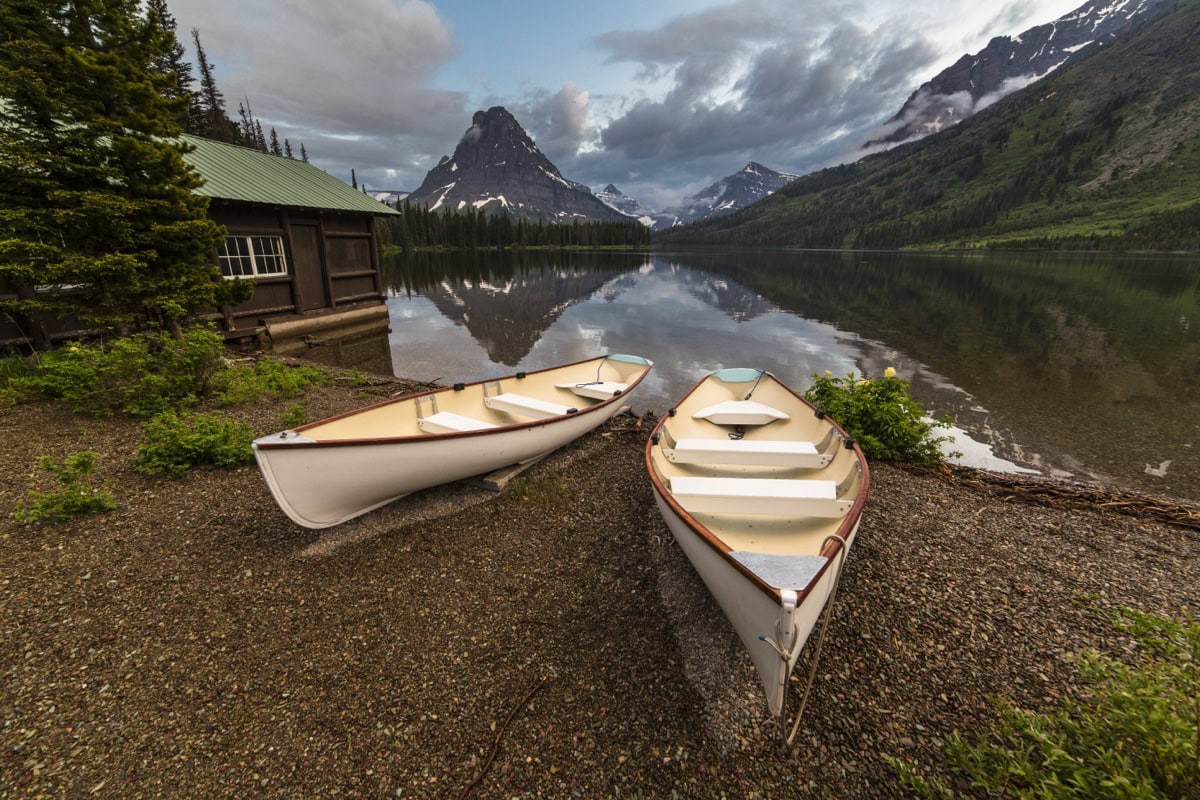
Peaceful Two Medicine Lake beneath mountain peaks
Photo: GlacierNPS / Public domain / Wikimedia Commons

Two Medicine is an area on the park’s southeastern side that sees significantly fewer visitors than Many Glacier or Going-to-the-Sun Road. And yet it’s gorgeous — lakes, waterfalls, hikes, and above all, peace and quiet.

I’d recommend the Scenic Boat Tour across Two Medicine Lake, followed by a hike to Twin Falls (about 2 miles on foot after getting off the boat). If you have more time, continue to Upper Two Medicine Lake — pristine wilderness at its best.

Two Medicine is also a brilliant option if your Going-to-the-Sun Road reservation didn’t work out — you don’t need one to come here.

14. Polebridge — an off-the-grid community in the park’s northwest

Polebridge is a tiny community in the park’s northwest, reached via an unpaved road (North Fork Road). There’s no electricity and no mobile signal, and the entire “shop” is essentially a bakery — Polebridge Mercantile, which bakes the best huckleberry bear claw pastry in all of Montana.

From Polebridge, you can head to Bowman Lake or Kintla Lake — two of the most remote and pristine lakes in the park. Bowman Lake is more accessible (about 6 miles down an unpaved road), while Kintla Lake requires even more commitment. Both lakes are absolutely stunning, and you’ll be sharing them with maybe five other people. Tops.

15. Goat Haunt and the boat trip across Waterton Lake to Canada

This is a truly unique experience. From the town of Waterton in Canada’s Waterton Lakes National Park (which borders Glacier and together they form a UNESCO World Heritage Site), you can take a boat across Waterton Lake to Goat Haunt on the American side. It’s one of the few boat crossings in the world that spans an international border.

The crossing takes about 30 minutes and the views from the boat are fantastic. From Goat Haunt, you can set off on several hikes or take the boat back to Canada. Important: You’ll need a valid passport, as you’re crossing the US-Canada border! And don’t confuse Glacier National Park in Montana with Glacier National Park in Canada (in British Columbia) — that’s an entirely different park, despite sharing the same name.

Where to eat and drink near Glacier National Park

Let’s be honest — Glacier National Park isn’t a foodie destination, and if you’re expecting Michelin-starred restaurants, you’ll be disappointed. But if you’re after hearty American food, local craft beers, and the atmosphere of small mountain towns, you’ll be well satisfied.

Inside the park

The restaurants in the park’s lodges (Lake McDonald Lodge, Many Glacier Hotel, Rising Sun) serve solid American fare — burgers, steaks, sandwiches, salads. Prices are on the higher side (mains $15–30 / €14–28), but the atmosphere and views make it worthwhile. At Many Glacier Hotel, I’d recommend the Ptarmigan Dining Room — order the bison steak and grab a window seat overlooking the lake.

The park also has camp stores stocking groceries for cooking, sandwiches, and basic supplies. If you’re camping, stock up beforehand in Kalispell or Whitefish.

Whitefish

If you’re staying in Whitefish (and I’d recommend it), here are a few suggestions:

  • Montana Coffee Traders — an excellent local roastery, the perfect stop before heading into the park in the morning
  • Craggy Range Bar & Grill — solid burgers and steaks in a relaxed atmosphere
  • Great Northern Brewing Company — a local brewery with a cracking selection of craft beers. The Wild Huckleberry IPA is a must-try.
  • Loula’s — a legendary breakfast spot, but expect a queue at weekends

West Glacier and Hungry Horse

  • Belton Chalet Grill — a historic hotel with surprisingly good food, right at the park’s west entrance
  • West Glacier Restaurant — nothing fancy, but honest breakfasts at reasonable prices before a full day’s hiking
  • Huckleberry Patch — huckleberry beer! And huckleberries prepared every which way. Montana = huckleberries, and this is where you’ll truly understand that.

Trail lunch tip: Pack sandwiches, fruit, energy bars, and — crucially — LOTS of water in your daypack. There are no food stalls on the trails, and dehydration at altitude creeps up on you faster than you’d expect.

Bear safety — what you need to know

Both black bears and grizzly bears live in Glacier National Park, and encounters aren’t uncommon — this is their home and you’re just visiting. But there’s no reason to panic — just follow the basic rules.

Bear spray

Bear spray is a necessity, not a suggestion. Pick some up right after you arrive (it’s sold at every outdoor shop and at the park’s visitor centres for $40–50 / €37–46). Carry it in a holster on your belt, not buried in your backpack — if you need it, you won’t have time to be fumbling with a zip.

On the trails

  • Make noise — talk, sing, clap, especially on blind corners and near streams (bears can’t hear you over rushing water)
  • Hike in groups — attacks on groups of 4+ people are extremely rare
  • Never run from a bear — it triggers their chase instinct
  • Grizzly vs. black bear: With a grizzly, back away slowly and if it attacks, lie face-down, protect your neck, and play dead. With a black bear, fight back. (I know it sounds terrifying, but attacks are extremely rare.)

At the campsite

  • Store all food and scented items (including toothpaste, deodorant) in the bear boxes provided at every campsite
  • Never cook near your tent — cook only in designated areas

During our entire visit, we saw bears three times — always at a safe distance and always a truly magical moment. Respect them, follow the rules, and you’ll be absolutely fine. ☺️

Practical tips to wrap up

What to pack

The weather in Glacier National Park changes literally from minute to minute — at Logan Pass it can be 25°C and sunny, and an hour later 10°C with rain. Dress in layers and always have a waterproof jacket in your daypack.

For a complete packing list, check out our article on how to pack carry-on only. For hiking in Glacier, add:

  • Bear spray (essential!)
  • Quality hiking boots — not trainers, proper boots
  • Trekking poles (optional, but a huge help on longer hikes)
  • Plenty of water and food
  • SPF 50+ suncream (the sun burns harder at altitude than you’d think)

Mobile data and eSIM

Mobile signal in Glacier National Park is virtually non-existent — you might pick up Wi-Fi at lodges and visitor centres, but on the trails and in the more remote parts of the park, you’ll be completely offline. Download offline maps (Google Maps and AllTrails) before you go!

For travelling around the US, I’d recommend an eSIM from Holafly — it works brilliantly in towns and along major highways, but don’t expect miracles inside the park itself.

Travel insurance

Do not travel to the US without insurance — healthcare in America costs astronomical amounts. We’d recommend reading our SafetyWing review — it’s insurance practically made for travellers.

FAQ — frequently asked questions about Glacier National Park

Tips and Tricks for Your Vacation

Don’t Overpay for Flights

Search for flights on Kayak. It’s our favorite search engine because it scans the websites of all airlines and always finds the cheapest connection.

Book Your Accommodation Smartly

The best experiences we’ve had when looking for accommodation (from Alaska to Morocco) are with Booking.com, where hotels, apartments, and entire houses are usually the cheapest and most widely available.

Don’t Forget Travel Insurance

Good travel insurance will protect you against illness, accidents, theft, or flight cancellations. We’ve had a few hospital visits abroad, so we know how important it is to have proper insurance arranged.

Where we insure ourselves: SafetyWing (best for everyone) and TrueTraveller (for extra-long trips).

Why don’t we recommend any Czech insurance company? Because they have too many restrictions. They set limits on the number of days abroad, travel insurance via a credit card often requires you to pay medical expenses only with that card, and they frequently limit the number of returns to the Czech Republic.

Find the Best Experiences

Get Your Guide is a huge online marketplace where you can book guided walks, trips, skip-the-line tickets, tours, and much more. We always find some extra fun there!
Grand Teton National Park, Wyoming: Guide & 15 Things to See and Do

TL;DRGrand Teton National Park in Wyoming is a mountainous park just south of Yellowstone, known for the jagged Teton peaks, glacial lakes and plenty of wildlife — elk, bears and bison among them. June to September is the best window, and September brings the fewest crowds, golden autumn colours and active wildlife. Entry costs $35 per car for 7 days, or you can get an $80 America the Beautiful pass valid for a year at every national park. The 15 key tips include Jenny Lake, Schwabacher Landing, Mormon Row, the Cascade Canyon Trail and Oxbow Bend. Give the park at least 2 days, ideally 3–4, so you’ve got time for hiking as well as early-morning wildlife watching.

You’re standing on the bank of the Snake River, the jagged peaks of the Tetons towering above you, the air thick with the scent of pine resin and wet grass — and you can’t shake the feeling you’ve accidentally wandered into a desktop wallpaper. Except this is real. And even more stunning than any photo of Grand Teton Wyoming could ever capture.

When Lukáš and I first drove into Grand Teton National Park, we figured nothing could surprise us after Yellowstone. We were so wrong. Grand Teton knocked us flat on our very first morning, when we spotted a moose wading through Schwabacher Landing in the mist while the snow-capped Teton peaks slowly emerged behind it. I still remember that moment — we just stood there, mouths agape, coffees in hand, completely forgetting to even take a photo. 😅

Grand Teton National Park is like the quieter, humbler sibling of its more famous neighbour Yellowstone, which sits just to the north. It doesn’t have geysers or rainbow-coloured hot springs, but it has something else entirely — raw, unfiltered mountain beauty that will literally take your breath away. Add to that wildlife around every corner, gorgeous hikes, and some of the most photogenic scenery in the entire United States.

In this article, you’ll find a complete guide to Grand Teton — 15 things to see and do, where to stay, when to go, how much it all costs, and how to combine the park with Yellowstone. Let’s dive in.

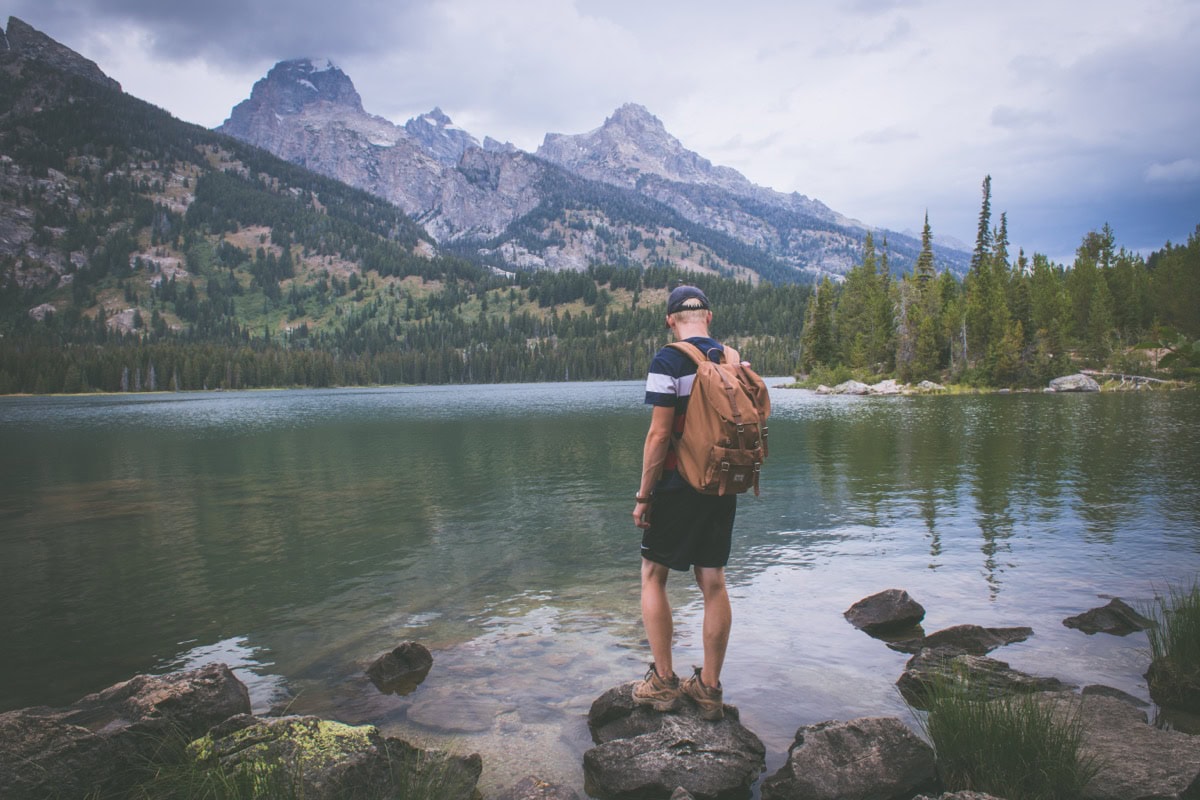
Hiker on a lakeshore with a view of the Teton Range

TL;DR

  • Grand Teton National Park is located in northwestern Wyoming, right below Yellowstone — you can easily combine both parks in one trip.
  • Best time to visit is June through September, with September being the absolute jackpot — fewer crowds, golden colours, and active wildlife.
  • Entrance fee is $35 per vehicle (about €32) for 7 days, or you can buy the America the Beautiful Pass for $80 (about €74), which covers all national parks for a full year.
  • Top spots: Jenny Lake, Schwabacher Landing (sunrise!), Mormon Row, Cascade Canyon Trail, and Oxbow Bend.
  • Wildlife sightings are almost guaranteed — moose are practically everywhere, and with a bit of luck you’ll spot bears, bison, and bald eagles too.
  • Accommodation in the park is pricey and fills up fast — book 3–6 months ahead. The town of Jackson is a more affordable alternative.
  • You don’t need special gear for the main hikes, but proper hiking boots are a must — the terrain is rocky and sometimes wet.
  • Two days is the minimum, ideally 3–4 days so you can fit in hikes and early morning wildlife watching.

When to visit Grand Teton and how to get there

Grand Teton is a park that lives and breathes with the seasons, and when you visit will dramatically shape your experience. Here’s a quick breakdown to help you pick the perfect time.

Best time to visit

June through September is the main season when the park is fully accessible. But there are huge differences between these months:

  • June: Snow is still melting in the mountains, and some higher trails may be closed or snow-covered. But the meadows are in bloom, waterfalls are thundering, and crowds are relatively thin. Nights can be chilly (around 2–5 °C / 36–41 °F).
  • July and August: Peak season. Everything is open, the weather is at its most stable (daytime temperatures 25–30 °C / 77–86 °F), but the car park at Jenny Lake fills up by around 8 a.m. If you’re visiting in summer, get up early or head for lesser-known trails.
  • September (our favourite ❤️): Crowds thin out, aspens turn gold, wildlife becomes more active (moose rut!), and the light is simply magical. Nights are cold (around 0 °C / 32 °F), but daytime is pleasant — 15–20 °C (59–68 °F). Some campgrounds and boat services close towards the end of the month, so check ahead.
  • October: Beautiful autumn colours, but the weather is unpredictable. It could be 15 °C (59 °F) or -5 °C (23 °F). Most facilities are closed.
  • Winter (December–March): The park is accessible, but roads are closed or restricted. Great for cross-country skiing and snowshoeing, not for a standard visit.

How to get to Grand Teton

By air: The nearest airport is Jackson Hole Airport (JAC) — and it’s a unique one, because it sits right inside the national park. Seriously, you land with a view of the Tetons. 😁 You can fly here from Denver, Salt Lake City, or Dallas. From the UK, look for connecting flights via Denver or Salt Lake City — airlines like United, American, and Delta serve Jackson Hole from major US hubs.

By car: If you’re doing a road trip (which we wholeheartedly recommend), Grand Teton is about a 5-hour drive from Salt Lake City and an hour south of Yellowstone. We’ve had great experiences over the years with DiscoverCars, which we use all over the world — in the US, having a car is an absolute necessity.

From Yellowstone: If you’re coming from Yellowstone, just continue south along the John D. Rockefeller Jr. Memorial Parkway. You’ll be in Grand Teton within half an hour. Your entrance fee covers both parks (if you have the 7-day pass or an America the Beautiful Pass).

Where to stay and how much Grand Teton National Park costs

Accommodation in Grand Teton is a story in itself — the park is relatively small, but demand is enormous, so prices soar and availability plummets. Here’s a rundown of all your options, from camping to luxury lodges.

Accommodation inside the park

There are three main lodging options inside the park, all operated by Grand Teton Lodging Company:

  • Jackson Lake Lodge — an iconic hotel with a view of the Tetons right from the lobby. Rooms from $350/night (about €320). Book at least 6 months in advance.
  • Jenny Lake Lodge — the most exclusive (and priciest) accommodation in the park. Wooden cabins by Jenny Lake, all-inclusive breakfast and dinner. Prices from $700/night (about €645). For special occasions.
  • Colter Bay Village — the most affordable option inside the park. Cabins from $250/night (about €230), tent pitches from $40/night (about €37). Summer camp vibes — simple but clean.

Camping in the park is the cheapest and most authentic experience. Campgrounds at Gros Ventre, Jenny Lake, and Signal Mountain cost $40–45/night (about €37–41) per pitch. Jenny Lake Campground is the smallest and most sought-after (first-come, first-served — arrive before 8 a.m.). Gros Ventre is the largest and easiest to get into even without a reservation.

Accommodation in Jackson

The town of Jackson (note: not Jackson Hole — that’s the name of the entire valley) sits 20 minutes south of the park and serves as the main base for most visitors. You’ll find everything from hotels and Airbnbs to hostels here.

💡 TIP: Jackson is expensive in summer. If you want to save money, try Driggs or Victor on the other side of Teton Pass in Idaho — it’s about 45 minutes to the park, but accommodation prices are 30–40% lower.

How much Grand Teton costs — budget for 3 days for two

Here’s a rough budget breakdown so you know what you’re getting into:

  • Entrance fee: $35 (€32) per vehicle for 7 days, or $80 (€74) for an annual America the Beautiful Pass (recommended if you’re also visiting Yellowstone and other parks)
  • Accommodation (3 nights): camping $120–135 (€110–125) / hotel in Jackson $450–750 (€415–690) / lodge in the park $1,050+ (€965+)
  • Petrol: about $30–50 (€28–46) — distances within the park aren’t huge
  • Food: $80–150/day for two (€74–138) depending on whether you’re self-catering or eating at restaurants
  • Activities: shuttle boat across Jenny Lake $20/person (€18), kayak from $30/hour (€28), rafting from $80/person (€74)

Total for 3 days for two: roughly $500–1,500 (€460–1,380) depending on your travel style. Camping + self-catering = lower end, lodge + restaurants = upper end.

Grand Teton National Park: 15 things to see and do

Grand Teton National Park isn’t huge — you can drive through it in a few hours. But trust me, you’ll want to stop at every turn. Here are 15 tips covering the best the park has to offer, from iconic viewpoints and stunning hikes to spots where you’re almost guaranteed to see wildlife. The tips are roughly ordered from south to north, following the route through the park.

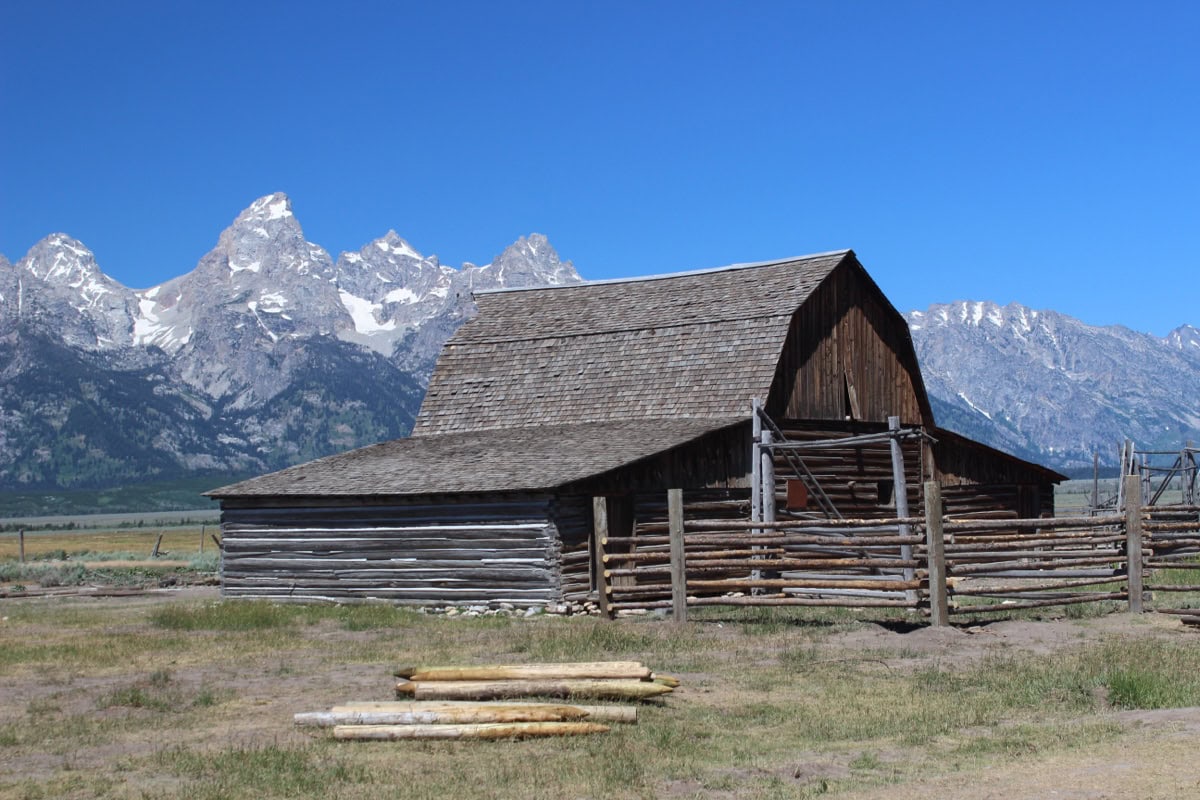
1. Mormon Row — the most photographed barn in America

Historic barn at Mormon Row beneath the Teton peaks
Photo: Miguel Hermoso Cuesta / CC BY-SA 4.0 / Wikimedia Commons

If you’ve ever seen a photo of an old wooden barn with the Tetons rising behind it, you’re looking at Mormon Row. These historic 19th-century buildings — specifically the T.A. Moulton Barn and the John Moulton Barn — are probably the most photographed subject in all of Wyoming.

Get here at sunrise. Seriously, set your alarm for 5 a.m., grumble, down a coffee, and go. When the first rays of sunlight hit the snowy Teton peaks and the barn glows in golden light, you’ll understand why photographers flock here from around the world. We counted about fifteen people with tripods that morning, but there’s plenty of room for everyone.

Beyond the photogenic barns, Mormon Row is a brilliant spot for watching bison. Herds regularly graze in the meadows right beside the road. Keep a safe distance of at least 25 metres (that’s the law in the park, not just a suggestion) and soak it all in — bison with the Tetons behind them is the kind of scene that screams classic Wyoming.

You don’t need more than an hour at Mormon Row, but you could easily spend two if you’re photographing or waiting for the perfect light.

2. Schwabacher Landing — a breathtaking sunrise

Sunrise at Schwabacher Landing with Teton reflections
Photo: Andrew Parlette from Elkridge, MD, US / CC BY 2.0 / Wikimedia Commons

Schwabacher Landing is my personal favourite spot in the entire park. It’s a short dirt road off the main highway that leads you to quiet pools along the Snake River. On a calm morning, the Tetons reflect perfectly in the still water, creating a scene so flawless it looks photoshopped.

Again, arrive early — ideally before sunrise. A windless morning equals perfect reflections. The walk from the car park to the river is short (about 5 minutes on flat ground), so it’s accessible to absolutely everyone.

Schwabacher Landing is also famous for its frequent moose sightings. One morning, we watched a cow moose and her calf wade across the river about fifty metres from where we stood — the stillness, the silence, just the gentle splash of water… it’s one of those moments you travel for. ☺️

Heads up: The dirt access road can get muddy after rain. An SUV or higher-clearance vehicle is a bonus, but we managed it in a regular saloon car (carefully).

3. Jenny Lake — the heart of Grand Teton

Calm lake with Teton reflections and conifer forest

Jenny Lake is probably the most visited spot in the entire park — and deservedly so. This turquoise glacial lake at the foot of Cathedral Group (the three highest Teton peaks) looks like something out of a fairytale. If you only have time for one stop in Grand Teton, make it this one.

You have two options for exploring the lake:

  • Shuttle boat across the lake: $20/person return (€18), $12 one-way (€11). The ride takes 12 minutes to the west shore, where trails to Cascade Canyon and Hidden Falls begin (see tip #4). Buy tickets online in advance — the queue at the dock can be an hour long in summer.
  • Walking around the lake: The Jenny Lake Loop Trail is a beautiful, flat 12 km (7.5-mile) circuit around the entire lake. Allow 3–4 hours — lovely for an afternoon.

💡 TIP: The car park at Jenny Lake Visitor Center fills up by 8:30 a.m. in summer. Show up at 9 and you’ll be circling like a vulture. An alternative is parking at South Jenny Lake Junction and taking a short walk.

4. Cascade Canyon Trail — the best hike in the park

Cascade Canyon trail between the Teton peaks
Photo: G. Edward Johnson / CC BY 3.0 / Wikimedia Commons

If you love hiking in the mountains, Cascade Canyon Trail is the number-one must-do. This trail starts on the west shore of Jenny Lake (take the shuttle boat or walk around the lake) and leads you deep into a glacial valley flanked by the sheer walls of the Tetons.

Route: Jenny Lake boat dock → Inspiration Point → Cascade Canyon and back. About 15 km (9.5 miles) round trip (if you take the boat), with roughly 330 metres (1,080 ft) of elevation gain.

The first 1.5 km climbs steeply to Hidden Falls (a gorgeous waterfall, perfect photo spot) and then on to Inspiration Point with its view over Jenny Lake. Most hikers turn back here — and that’s a mistake! Because Cascade Canyon is only just beginning. Once you pass Inspiration Point, the crowds melt away and you’re walking through wildflower meadows along a babbling creek, with sheer rock walls rising on both sides.

There’s also a good chance you’ll spot bears (both black and grizzly) and marmots in Cascade Canyon — carry bear spray and make noise on blind corners. This isn’t scaremongering; it’s standard safety practice in the Tetons.

Allow 4–6 hours for the full hike there and back. Bring plenty of water, snacks, and definitely proper hiking boots — the terrain is rocky and sometimes wet.

5. Oxbow Bend — mirror reflections of the Tetons

Mirror reflection of the Tetons in the Snake River meander at Oxbow Bend
Photo: Tony Hisgett from Birmingham, UK / CC BY 2.0 / Wikimedia Commons

Oxbow Bend is one of those “stop the car and shoot from the window” moments. This meandering bend in the Snake River offers one of the most iconic views of Mount Moran — on a calm morning, the mountain reflects perfectly in the water along with the clouds.

It’s best early in the morning or late afternoon, when the light is soft and the wind is still. Oxbow Bend is also a superb wildlife-watching spot — pelicans, bald eagles, cow moose with calves, and occasionally otters or beavers all make regular appearances.

A stop here takes 15–30 minutes, but local photographers spend hours. It’s right off the main road (Teton Park Road), so there’s absolutely no reason not to pull over — wherever you’re headed.

6. Signal Mountain Summit Road — panoramic views of the valley

Signal Mountain is a hill in the middle of Jackson Hole valley that rises above the surrounding flatlands and offers a 360° panoramic view. The best part? A road leads to the summit, so you don’t even have to get out of the car (though I do recommend at least a short stroll along the viewpoint trail at the top).

From the top of Signal Mountain, you can see the entire Teton Range spread out from left to right, Jackson Lake below, the Snake River winding through the valley, and on a clear day even the Yellowstone Plateau to the north. It’s the best place to grasp the geography of the whole park — from here you can see just how dramatically the Tetons shoot up from the plains with no foothills whatsoever. It’s flat land, and then BAM — 4,000-metre peaks.

The drive to the top is about 8 km (5 miles) along a narrow but paved road. It takes 15 minutes up and 15 down. At the summit, there are two viewpoints — Jackson Point Overlook (south-facing) and the actual summit (west-facing towards the Tetons). Visit both.

Best time? Sunset. The Tetons glow pink and orange, and if the clouds cooperate, you’ll witness a show that rivals anything in Utah or Arizona.

7. Jackson Lake — kayaking, paddling, and a picnic with a view

Wooden cabin by a lake beneath the Tetons

Jackson Lake is the largest lake in the park and offers a completely different experience from the intimate Jenny Lake. Here you’ll find space, peace, and the feeling of being at the edge of the world — mountains ahead, water all around, forest behind.

The best way to experience Jackson Lake is from the water. You can hire kayaks and paddleboards at Colter Bay Marina or Signal Mountain Lodge (from $30/hour, about €28). Paddling across the glassy surface with the Tetons right in front of you is an experience you won’t forget.

If paddling isn’t your thing, head out on the Colter Bay Lakeshore Trail — an easy 3 km (2-mile) walk along the shore with lovely views. Or pack a picnic and enjoy it at one of the many viewpoints along the northern shore.

Watch out for afternoon wind. Jackson Lake is big, and the wind picks up in the afternoon, which can catch kayakers off guard. Paddle in the morning and enjoy dry land in the afternoon.

lukas a lucka
Lukáš and Lucie recommend
Where to Stay in Grand Teton National Park
6 accommodations — wellness hotels, hotels and other lodging options

8. Laurance S. Rockefeller Preserve — silence and nature meditation

This corner of the park is different. The Laurance S. Rockefeller Preserve is a former private ranch belonging to the Rockefeller family, donated to the national park in 2001. And you can tell — the entire area is designed to encourage a deep connection with nature.

The Visitor Center is an architectural gem — none of the typical American “gift shop full of stuffed bears” vibe, but a minimalist space with sound installations, large windows looking into the forest, and invitations to slow down. Honestly, it’s probably the most beautiful visitor centre we’ve seen in any national park.

From the centre, a network of trails (about 13 km / 8 miles in total) winds through meadows, forests, and down to the shore of Phelps Lake. The Phelps Lake Loop (10.5 km / 6.5 miles) is a gorgeous full-day hike with the option of swimming in the lake (in summer, if you’re brave — the water is glacially cold).

💡 TIP: The car park is small, and once it fills up, the entrance is closed. Arrive before 9 a.m. or after 3 p.m. There’s no reservation system — it’s first-come, first-served.

9. Snake River Overlook — Ansel Adams’ famous shot

Snake River Overlook viewpoint with river and Teton Range
Photo: Kailash U / CC0 / Wikimedia Commons

This is the spot where, in 1942, legendary photographer Ansel Adams captured one of the most famous black-and-white photographs of American wilderness. The Snake River winds through the valley like a silver serpent, with the entire Teton Range rising behind it.

The viewpoint is right off the road (Highway 89/191), easily accessible, with a small car park. It’s most beautiful in the morning or during autumn, when the river reflects the golden aspens along its banks. A stop takes 10–15 minutes, but the photos from this spot will be among the best from your entire trip.

Fun fact: Since Adams’ day, the trees in the foreground have grown and now partially obscure the view of the river. But it’s still a magical place.

10. Rafting on the Snake River — the river from water level

Canoe on a lakeshore in Grand Teton National Park

Rafting on the Snake River is one of the best ways to experience Grand Teton from an unusual perspective. You have two options:

  • Scenic float trip (gentle raft): You sit in an inflatable raft while a guide paddles and talks about the history and wildlife. You’ll spot eagles, moose, beavers — and see the Tetons from an angle you simply can’t get from shore. Perfect for families and photographers. From $80/person (€74), lasting 2–3 hours.
  • Whitewater rafting: This takes place on a different section of the river (Snake River Canyon south of the park) with class III–IV rapids. Adrenaline, soaked clothes, and lots of laughing. From $90/person (€83).

We went for the scenic float and have zero regrets — our guide pointed out a bald eagle nest we’d never have spotted from the bank, and we saw a cow moose just metres from the raft. The calm on the water, the silence broken only by paddles and birdsong…

Book in advance, especially in July and August. There are several operators — Barker-Ewing, Solitude Float Trips, and National Park Float Trips are among the best.

11. Taggart Lake Trail — the perfect hike for everyone

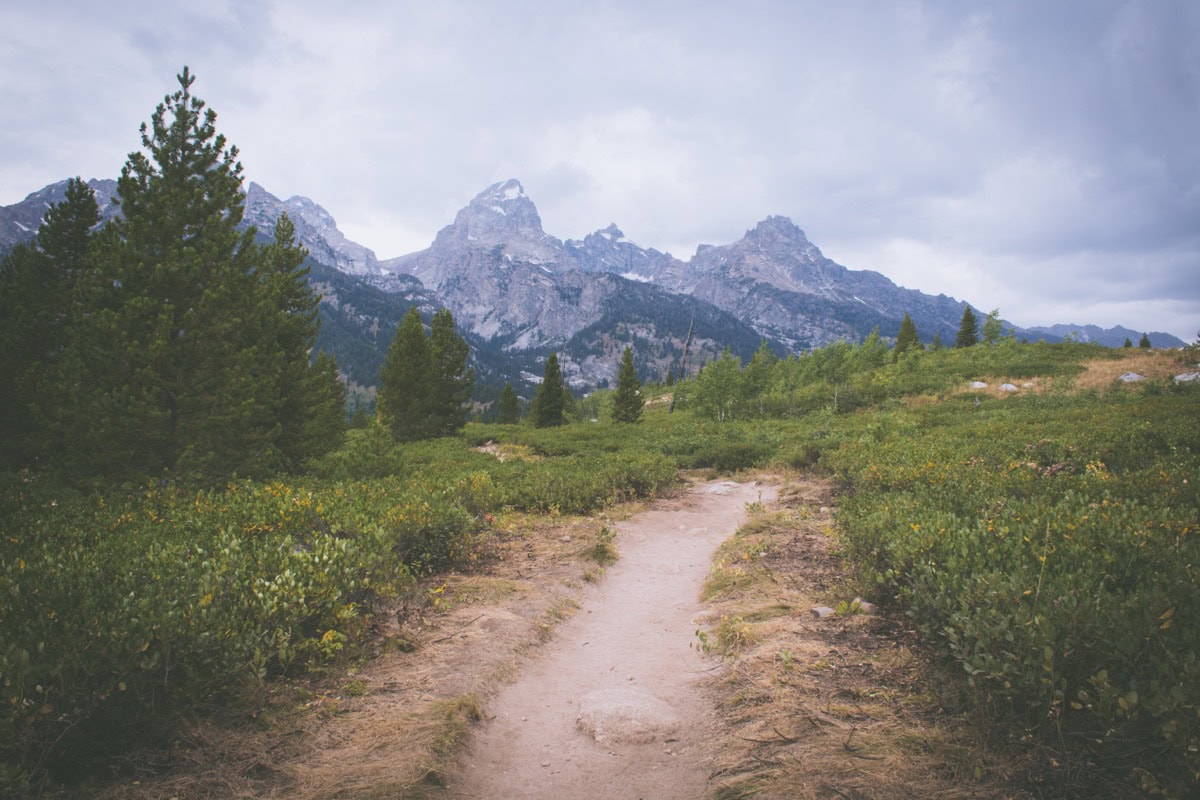
Trail through a meadow heading towards the Teton Range

If Cascade Canyon sounds too demanding (or you don’t have a full day), Taggart Lake Trail is the perfect alternative. It’s about 5.5 km (3.4 miles) round trip with just 170 metres (560 ft) of elevation gain, and the reward is a stunning glacial lake surrounded by conifers with the Tetons as a backdrop.

The trail starts at the Taggart Lake Trailhead (the car park fills up, so arrive early) and climbs gently through meadows and forest. At the lake, you can rest, have a snack, and in summer even dip your toes in — the water is cold but refreshing.

For those who want more: From Taggart Lake, you can continue to Bradley Lake (adding about 3 km / 2 miles) — it’s quieter and less visited. The loop through both lakes is about 9 km (5.6 miles) and one of the loveliest half-day hikes in the park.

12. Teton Park Road — the most beautiful scenic drive

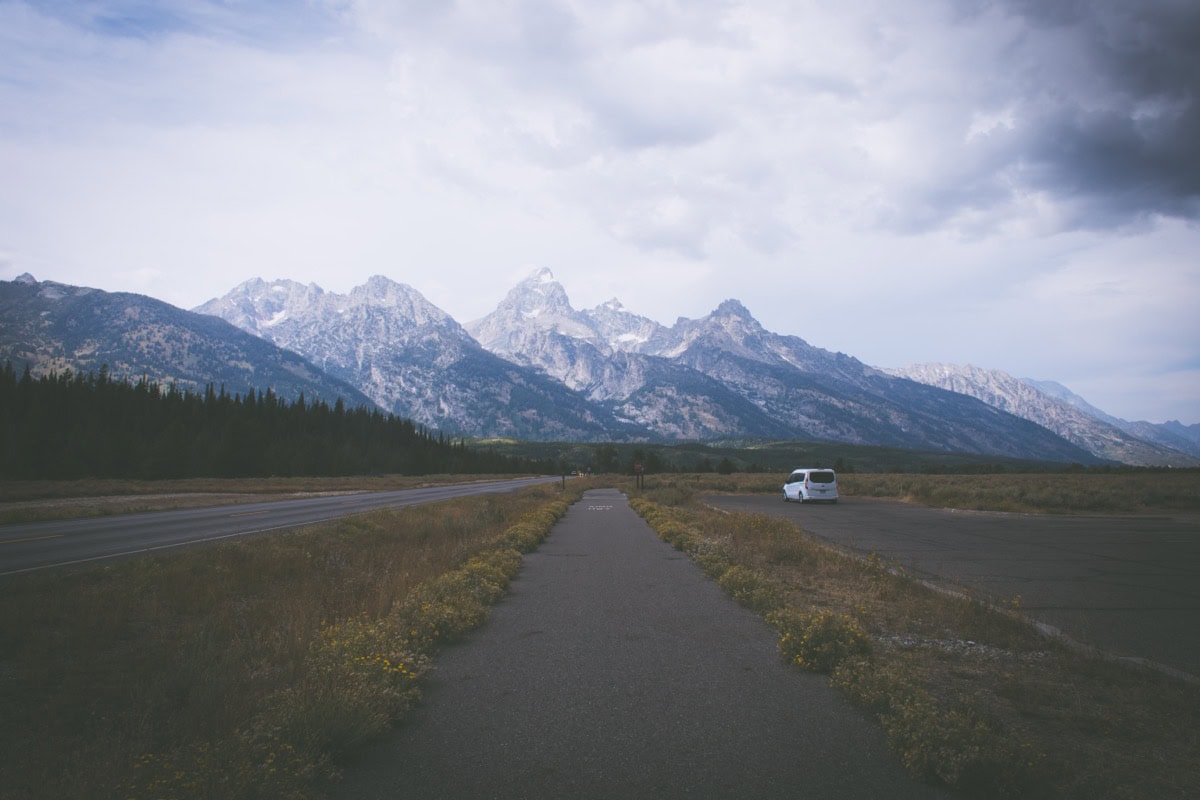
Road heading towards the jagged Teton peaks

Teton Park Road is the main road through the park, running along the base of the Tetons from Moose Junction in the south to Jackson Lake Junction in the north. It’s about 32 km (20 miles) long and practically every single kilometre offers a place where you’ll want to stop.

Key stops along Teton Park Road (from south):

  • Chapel of the Transfiguration — a tiny wooden chapel from 1925 whose window behind the altar perfectly frames the Tetons. One of the most photogenic little churches in America.
  • Menor’s Ferry — a historic ferry crossing on the Snake River and an old general store.
  • Teton Glacier Turnout — a view of the remnants of the glacier on Grand Teton.
  • South Jenny Lake — the starting point for Jenny Lake and Cascade Canyon.
  • Mount Moran Turnout — a head-on view of the massive Mount Moran.

Drive this road at least twice — once in the morning (for the light and the wildlife) and once in the afternoon or evening (for different light and different wildlife). Seriously, it looks completely different each time.

13. Wildlife watching — where and when to look

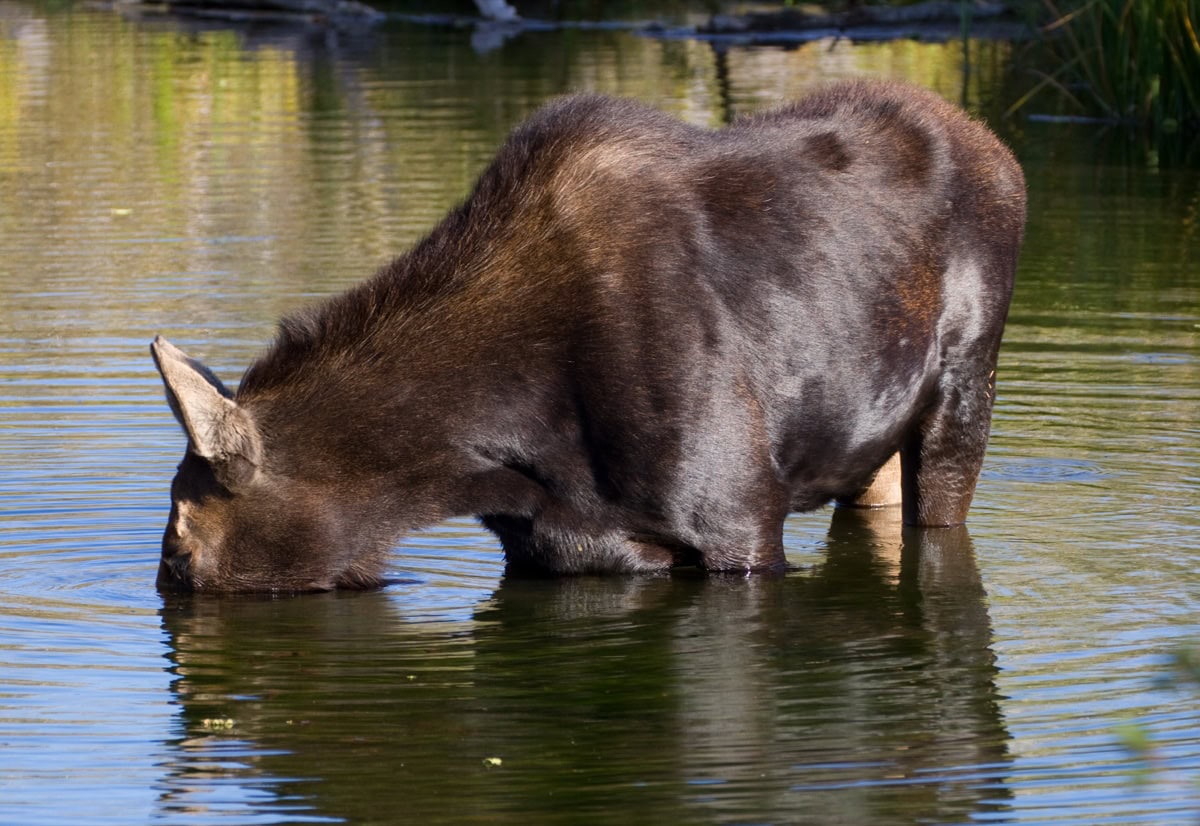
Moose in Grand Teton National Park
Photo: Tony Hisgett from Birmingham, UK / CC BY 2.0 / Wikimedia Commons

Grand Teton is a paradise for wildlife watching. Compared to Yellowstone, the area is more compact, so animals are more concentrated and easier to find. Here’s what you might spot:

  • Moose: Most commonly at Schwabacher Landing, along Moose-Wilson Road, and by the Snake River. Cows with calves in June and July, bulls with antlers in September and October. Note — moose are the most dangerous animal in the park. They’re unpredictable and fast. Minimum distance: 25 metres (82 ft).
  • Grizzly and black bears: Cascade Canyon, Berry Creek, around Jackson Lake. Carry bear spray (available at every visitor centre, about $50/can, €46).
  • Bison: Mormon Row, Antelope Flats, meadows along Highway 89.
  • Bald eagles: Along the Snake River, Oxbow Bend.
  • Otters: Oxbow Bend, String Lake.
  • Elk: Everywhere, but especially in the Jackson Hole valley in autumn.

Best time for wildlife watching is the first and last hour of daylight — the so-called golden hours. Animals are active, light is beautiful, and other tourists are still asleep. Win-win-win.

💡 TIP: In Jackson, you can rent or buy a telephoto lens — even a relatively affordable 200mm lens will transform your wildlife photos from “there’s a dot in the grass” to “look at those incredible antlers on that moose.” 😅

14. Moose-Wilson Road — the secret route through the park

Moose-Wilson Road is a narrow, partly unpaved road on the southern edge of the park connecting Moose Junction with Teton Village. It’s arguably the best spot in the entire park for encountering moose and bears from the safety of your car.

The road is about 13 km (8 miles) long, with a speed limit of 25 mph (40 km/h), and in places it’s so narrow that two larger vehicles can barely pass each other. That’s why coaches don’t come here and traffic is relatively light — which the wildlife loves.

On one half-hour drive along this road, we spotted two cow moose, a mother bear with a cub (from a safe distance!), a deer, and a ground squirrel — basically like a National Geographic documentary, except we were sitting in a rented Hyundai with the air conditioning on. 😁

Note: The road is one-way for RVs and trailers — they can only pass from south to north. Regular cars can go both directions, but the road is seasonal (closed in winter and spring until roughly May).

15. Town of Jackson — cowboy charm and the best food

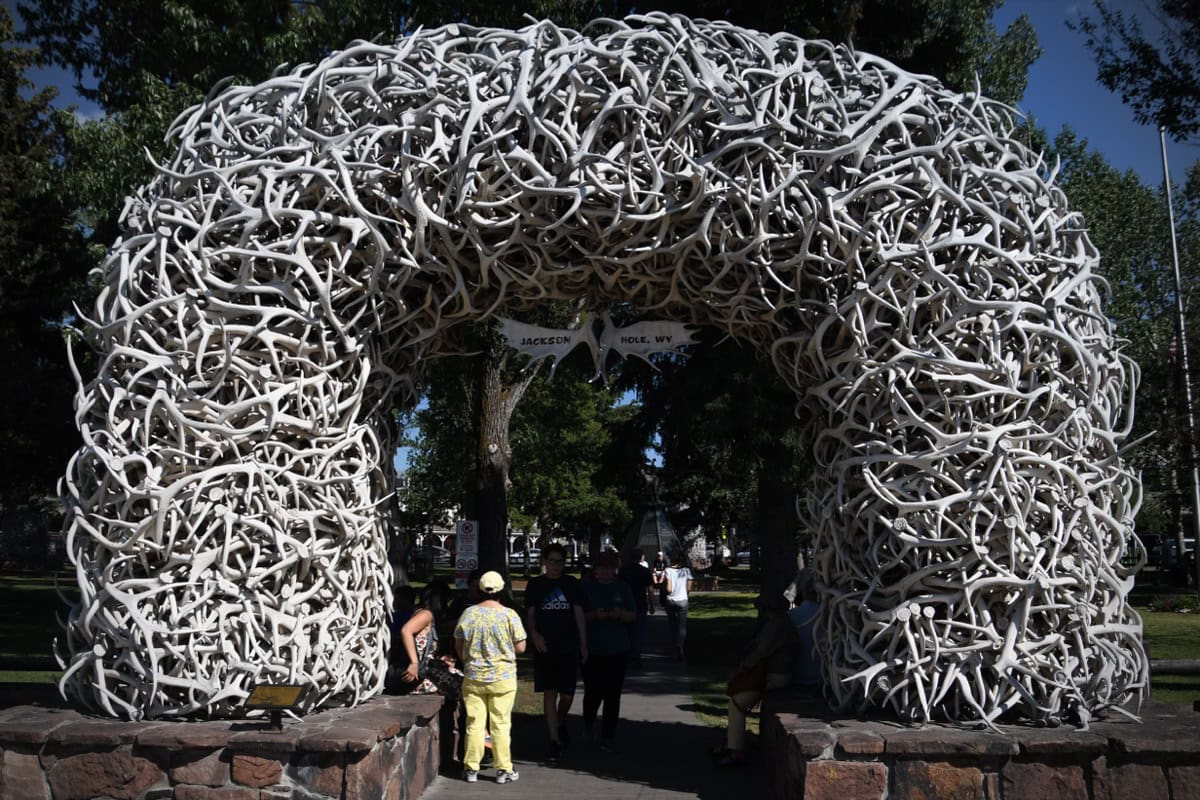
Town of Jackson with its iconic elk antler arches
Photo: Schwerdf / CC BY 4.0 / Wikimedia Commons

Jackson isn’t just a place to crash for the night — it’s a lively little town with its own charm that’s worth a few hours of exploring. You’ll recognise the central square (Town Square) by the four arches made from elk antlers at each corner — it looks like an entrance to Jurassic Park, but it’s a tradition dating back to the 19th century.

In Jackson, you’ll find galleries, western-style shops, excellent restaurants (see the food section below), and in winter the Jackson Hole Mountain Resort ski area, one of the best in the US.

What to do here:

  • Stroll around Town Square and photograph the antler arches.
  • Visit the National Museum of Wildlife Art — a surprisingly brilliant museum overlooking the National Elk Refuge. Admission $20 (€18).
  • Go to the Jackson Hole Rodeo (Wednesdays and Saturdays in summer) — an authentic American rodeo experience. Tickets from $40 (€37).
  • Pick up souvenirs — but skip the generic made-in-China tat. Look for local artists and craftspeople instead.

Where to eat and drink in Grand Teton and Jackson

The food inside the national park is surprisingly decent — and in Jackson, it’s downright excellent. Here are our tips on where to eat, wherever you find yourself.

In the park

  • Dornan’s Pizza & Pasta Company (Moose Junction) — Pizza with a view of the Tetons. You literally sit on the terrace, stare at the mountains, and eat decent pizza. It’s no Italian trattoria, but for park food it’s excellent. Pizza from $18 (€17).
  • Signal Mountain Lodge — A restaurant overlooking Jackson Lake. The trout is superb. Mains $20–35 (€18–32).
  • Leek’s Marina — A casual pizzeria on Jackson Lake, perfect after kayaking. Pizza and beer on the dock.

In Jackson

  • Persephone Bakery — The best breakfast in town. Croissants, avocado toast, brilliant coffee. There’s a morning queue, but it moves fast. From $12 (€11).
  • Hatch Taqueria — Mexican tacos that are genuinely addictive. Quick, cheap ($10–15, €9–14), and incredibly good.
  • Bin22 — A wine bar with small plates and local ingredients. A romantic dinner for two runs $80–120 (€74–110).
  • Snake River Brewing — A local brewery with award-winning beers. If you’re a beer drinker, this is a mandatory stop. A pint from $7 (€6.50).
  • Liberty Burger — The best burgers in Jackson. The bison burger for $18 (€17) is an absolute must — you’re in Wyoming, after all. 😁

💡 TIP: There are no supermarkets inside the park. If you’re camping and self-catering, stock up in Jackson — the Albertsons supermarket has everything you’ll need.

Practical tips and final advice

How many days in Grand Teton?

  • 1 day: You can fit in the scenic drive, Mormon Row, Oxbow Bend, and a quick stop at Jenny Lake. It’ll be hectic, but you’ll get a taste of the park.
  • 2 days: Add Cascade Canyon Trail or Taggart Lake, rafting on the Snake River, and an evening in Jackson.
  • 3–4 days (ideal): You’ll have time for everything — hikes, kayaking, wildlife safaris, Rockefeller Preserve, sunset from Signal Mountain, and a proper lunch at Dornan’s.

Combining with Yellowstone

Grand Teton and Yellowstone are about an hour’s drive apart, and a single entrance fee covers both parks. The ideal combination is 3 days in Yellowstone + 2–3 days in Grand Teton (or vice versa). We recommend starting with Grand Teton — after the dramatic mountains, Yellowstone will feel like a refreshing change with its geysers and colourful hot springs.

What to pack

The weather in the Tetons is unpredictable — even in summer, mornings can be 5 °C (41 °F) and afternoons 30 °C (86 °F). Pack in layers. And do check out our guide on how to pack into carry-on luggage.

  • Proper hiking boots (not trainers, not sandals)
  • Bear spray ($45–55 in the park, about €41–51 — you can return it to certain shops after your trip)
  • Binoculars for wildlife watching
  • A fleece or lightweight down jacket for mornings and evenings
  • A rain jacket — afternoon thunderstorms in July and August are common
  • Sunscreen — at 2,000 m (6,500 ft) elevation, you’ll burn faster than you think

Mobile signal and connectivity

Mobile signal inside the park is very limited. It works fine in Jackson, but as soon as you enter the park, expect to be offline. Download maps and trails in advance for offline use (Google Maps or AllTrails). If you’re visiting the US for an extended period, consider getting an eSIM from Holafly — it works great in towns, though it won’t rescue your signal inside the park.

Travel insurance

Don’t travel to the US without travel insurance — healthcare costs are astronomically high. For shorter trips, we recommend SafetyWing, and for longer adventures, True Traveller — a UK-based provider that offers excellent coverage for US trips.

FAQ — Frequently asked questions about Grand Teton National Park

Is Grand Teton National Park safe?

Yes, the park is safe as long as you follow basic guidelines. The biggest risks come from bears (carry bear spray and store food in bear boxes) and moose (maintain a distance of at least 25 metres / 82 ft). Don’t underestimate mountain weather either — afternoon thunderstorms with lightning are common in summer, especially above the treeline.

How much does it cost to enter Grand Teton National Park?

The entrance fee is $35 (about €32) per vehicle for 7 days. Pedestrians and cyclists pay $20 (€18) per person. If you’re planning to visit Yellowstone and other national parks too, the America the Beautiful Pass at $80 (€74) is well worth it — it covers all US national parks for a full year.

Can you combine Grand Teton with Yellowstone?

Absolutely — the two parks are about an hour’s drive apart, and a single entrance fee covers both. We recommend planning 3 days for Yellowstone and 2–3 days for Grand Teton. The drive between the parks is a beautiful scenic route in itself.

When is the best time to visit Grand Teton?

September is ideal — fewer tourists, stunning autumn colours, active wildlife, and pleasant temperatures. July and August are the warmest months with everything open, but car parks at popular spots fill up early. June is lovely for waterfalls and wildflowers, though some higher trails may still be snow-covered.

Do I need a car in Grand Teton?

Practically, yes. There’s no public transport inside the park (apart from the shuttle boat across Jenny Lake). Some hotels in Jackson offer shuttles, but for flexible exploration, a car is essential. You can rent one through DiscoverCars — we use it on all our road trips.

Are there bears in Grand Teton?

Yes, the park is home to both grizzly and black bears. Encountering a bear on a trail is possible, though not common. Always carry bear spray, hike in groups, make noise on blind corners, and store food in bear boxes. If you encounter a grizzly, DO NOT RUN — back away slowly and speak in a calm voice.

How many days do I need for Grand Teton?

Two days is the minimum, with 3–4 being ideal. In two days, you can cover the main viewpoints, one hike, and basic wildlife watching. With three to four days, you can add kayaking, rafting, lesser-known trails, and proper early morning safaris. If combining with Yellowstone, plan 5–7 days total for both parks.

Tips and Tricks for Your Vacation

Don’t Overpay for Flights

Search for flights on Kayak. It’s our favorite search engine because it scans the websites of all airlines and always finds the cheapest connection.

Book Your Accommodation Smartly

The best experiences we’ve had when looking for accommodation (from Alaska to Morocco) are with Booking.com, where hotels, apartments, and entire houses are usually the cheapest and most widely available.

Don’t Forget Travel Insurance

Good travel insurance will protect you against illness, accidents, theft, or flight cancellations. We’ve had a few hospital visits abroad, so we know how important it is to have proper insurance arranged.

Where we insure ourselves: SafetyWing (best for everyone) and TrueTraveller (for extra-long trips).

Why don’t we recommend any Czech insurance company? Because they have too many restrictions. They set limits on the number of days abroad, travel insurance via a credit card often requires you to pay medical expenses only with that card, and they frequently limit the number of returns to the Czech Republic.

Find the Best Experiences

Get Your Guide is a huge online marketplace where you can book guided walks, trips, skip-the-line tickets, tours, and much more. We always find some extra fun there!
Capitol Reef National Park, Utah: 15 Tips on What to See and Do

TL;DRCapitol Reef National Park comes with 15 essential tips, and the standouts are the Scenic Drive (13 km), the Hickman Bridge trail (2.7 km) to its rock bridge, Cassidy Arch, the historic orchards at Fruita, and the wild Cathedral Valley with its Temple of the Sun and Temple of the Moon formations. It’s the least-visited of Utah’s Mighty Five, so you won’t find the crowds you’d get at Zion or Arches. Entry costs $20 per car for 7 days, or it’s free with an America the Beautiful Pass at $80 a year. Give yourself at least 1–2 days here, ideally 3 if you want to fit in Cathedral Valley, and the best time to come is spring (April–May) or autumn (September–October). Torrey is your best base, just 15 minutes from the park entrance.

When Lukáš and I first drove through Utah, we planned to “just stop by” Capitol Reef National Park Utah on our way between Bryce Canyon and Arches. An hour or two, snap a few photos of some rocks, and move on. We ended up staying two days — and still left feeling like it wasn’t enough. 😅

Capitol Reef is that park your friends never tell you about, because they don’t know about it themselves. While you’re crammed into shuttle buses at Zion and queuing for Delicate Arch at Arches, here you stand completely alone amid red canyons, 100-million-year-old geological layers, and fruit orchards where you can pick peaches. Yes, peaches. In a national park. In the desert. 🍑

In this article, you’ll find a complete guide to Capitol Reef National Park — from the most beautiful hikes and viewpoints to the mysterious Cathedral Valley, plus practical tips on where to stay, how much it costs, and how long to spend here. I’ve put together 15 tips on what to see and do, and trust me, you’ll fall in love with this place just as much as we did.

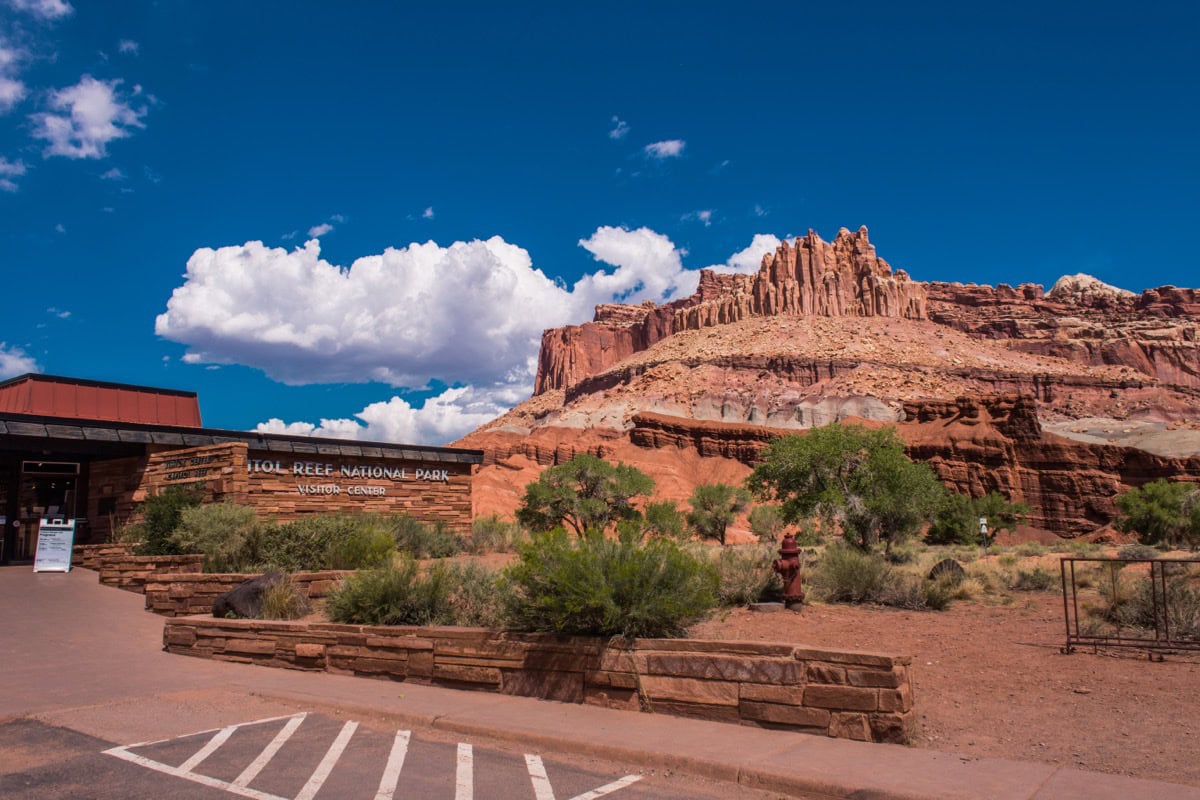
Capitol Reef Visitor Center beneath red sandstone cliffs

TL;DR

  • Capitol Reef is the least visited of Utah’s five national parks — the so-called Mighty Five — and that’s its greatest charm. No crowds, no reservations needed, just you and 100 million years of geology.
  • Waterpocket Fold is the main geological attraction — a nearly 100-mile-long “wrinkle” in the Earth’s crust that you won’t find anywhere else.
  • Scenic Drive (about 8 miles) can be enjoyed from your car, so even those who’d rather not hike for miles will appreciate the park.
  • The best hikes are Hickman Bridge (easy, 1.7 miles), Cassidy Arch (moderate, jaw-dropping views), and Cohab Canyon (a hidden gem).
  • Fruita — a historic settlement in the heart of the park with orchards where you can pick fresh fruit in season (for a small fee).
  • Cathedral Valley is the wild, remote section of the park accessible only by 4WD — and worth every minute of bouncing along rough roads.
  • The nearest town is Torrey (15 minutes from the entrance), where you’ll find accommodation and restaurants.
  • Allow at least 1–2 full days for the park, ideally 3 if you want to explore Cathedral Valley.
  • Entry fee is $20 per vehicle (7-day pass) or free with an America the Beautiful Pass ($80 per year for all US national parks).
  • The best time to visit is spring (April–May) and autumn (September–October) — pleasant temperatures and gorgeous colours.

When to visit Capitol Reef and how to get there

Capitol Reef sits in central Utah, far from everything yet surprisingly well connected to a loop of the other Utah national parks. Let’s go over when to visit and how to actually get here so you can plan your trip stress-free.

Best time to visit

Spring (April–May) and autumn (September–October) are ideal. Temperatures hover between 15–25 °C (60–77 °F), which is perfect for hiking. In spring, the fruit trees in Fruita burst into bloom — it’s a stunning sight, and if you’re lucky, you’ll catch a few late wildflowers in the canyons too.

Summer (June–August) is brutal. Temperatures regularly exceed 35 °C (95 °F), and on exposed trails it can climb above 40 °C (104 °F). If you’re visiting in summer (we did too, because we simply had no choice 😅), hit the trails early in the morning or late in the afternoon and bring at least 3 litres of water per person. And a hat. Seriously, a hat.

Winter (December–February) is quiet and has its own charm — red rocks dusted with snow are incredibly photogenic. However, some roads (Scenic Drive, Cathedral Valley) may be closed due to snow or mud. Night-time temperatures drop well below freezing.

How to get to Capitol Reef

The park sits on Highway 24, which runs right through it — and it’s one of the most beautiful roads we’ve driven in the USA. The nearest major cities:

  • Salt Lake City — approx. 230 miles (3.5–4 hours by car)
  • Las Vegas — approx. 370 miles (5.5–6 hours)
  • Moab (Arches, Canyonlands) — approx. 145 miles (2.5 hours)
  • Bryce Canyon — approx. 120 miles (2 hours)

The most common scenario is fitting Capitol Reef into a Utah national parks road trip. Something like Zion → Bryce → Capitol Reef → Canyonlands → Arches. We did exactly this and it worked perfectly — Capitol Reef fell right in the middle as the “relaxing” park (relaxing in quotation marks, because the hikes will still give your legs a proper workout).

A car is essential. There’s no public transport here. If you’re flying into the US from the UK, you’ll most likely land at Salt Lake City or Las Vegas and pick up a hire car. We’ve had consistently good experiences with DiscoverCars, which lets you compare offers from multiple agencies — you’ll usually find a better deal than going directly to the rental company’s website. For Capitol Reef you don’t necessarily need a 4WD (unless you’re heading to Cathedral Valley); a standard saloon or SUV is fine for Scenic Drive and all the main trails.

Park entrance fees

Highway 24 is free — it runs through the park and you can stop at several viewpoints and trailheads without paying. But if you want to drive Scenic Drive (and you do, trust me), you’ll need to pay the entrance fee:

  • $20 per vehicle (valid for 7 days)
  • Free with an annual America the Beautiful Pass ($80, about £65), which covers all US national parks

If you’re road-tripping through multiple parks, the America the Beautiful Pass pays for itself from the third park onwards. We had one and it saved us roughly three times over. If you’re planning to visit more parks in the US, check out our article on the most beautiful places in the USA — Capitol Reef is in there, of course.

Where to stay and how much Capitol Reef costs

There’s no accommodation inside the park itself (unless you count campsites), but the surrounding area offers a surprisingly decent selection. The closest and most practical base is the small town of Torrey, just a 15-minute drive from the park’s western entrance. Another option is Bicknell (20 minutes) or Hanksville (50 minutes east, handy if you’re heading towards Moab).

Torrey — the best base

Torrey is a tiny community of a few hundred people, but it has everything a visitor needs — motels, B&Bs, a handful of restaurants, and even a charming little café. Prices are noticeably more affordable than accommodation near more popular parks (hello, Springdale near Zion and your $300-a-night rooms 😅).

Approximate prices per night (for two):

  • Budget motel — $80–120 (about £65–95)
  • Mid-range (B&B, lodge) — $120–200 (about £95–160)
  • Upscale lodge — $200–350 (about £160–280)

Camping in the park

If you love sleeping under the stars, Fruita Campground is one of the most beautiful campsites we’ve stayed at in America’s national parks. It sits right among the fruit orchards, at night there’s absolute darkness (Capitol Reef is a certified International Dark Sky Park!), and in the morning you wake to birdsong. You might even snag a pitch beneath a centuries-old tree.

  • Price: $25/night (about £20)
  • 71 sites, reservations via Recreation.gov
  • In season (March–October) it fills up fast — book at least 2–3 months ahead
  • There are NO showers, but drinking water and toilets are available

Another option is Cathedral Valley Campground (6 sites, free, no water) on a first-come-first-served basis — strictly for those with a 4WD and an adventurous spirit.

How much 2–3 days at Capitol Reef costs (for two)

A rough budget for 2–3 days for two people:

  • Accommodation (2 nights in a motel in Torrey): $160–300 (£130–240)
  • Entrance fee (or a proportional share of America the Beautiful Pass): $20–40 (£16–32)
  • Petrol (from Bryce Canyon and back + driving around the park): $40–60 (£32–48)
  • Food (restaurants in Torrey + snacks): $80–150 (£65–120)
  • Total: roughly $300–550 (£240–440)

Compared to other Utah parks, Capitol Reef is significantly cheaper — mainly thanks to accommodation prices in Torrey, which are often 30–50% lower than Springdale (Zion) or Moab (Arches).

Capitol Reef: 15 things to see and do

Now for the main event — specific tips on what to see and do in Capitol Reef National Park. I’ve arranged them from must-sees you can tick off in half a day through to the Cathedral Valley adventure for those with more time. Below each tip you’ll find practical info — distance, difficulty, and how long to allow.

1. Scenic Drive — the most beautiful 8 miles on four wheels

Scenic Drive road through Capitol Reef National Park
Photo: bobistraveling / CC BY 2.0 / Wikimedia Commons

If you’re really short on time at Capitol Reef, Scenic Drive is the absolute minimum you need to see. It’s an 8-mile paved road heading south from Fruita along the base of Waterpocket Fold, and I guarantee you’ll be pulling over every few hundred metres.

The road winds through red, orange, and white layers of rock that look as if they’ve been painted. Several short side roads and viewpoints branch off — Grand Wash and Capitol Gorge are the two most interesting (and each has its own hike, see below). At the end, Scenic Drive transitions into an unpaved road continuing further south — you’ll need a higher-clearance vehicle for that stretch.

Practical info: Scenic Drive takes roughly 1–2 hours without stops, but with photos and short detours, budget 3–4 hours. It requires the $20 entrance fee or an America the Beautiful Pass. There are virtually no facilities along the road — bring water and snacks.

2. Waterpocket Fold — a geological marvel found only here

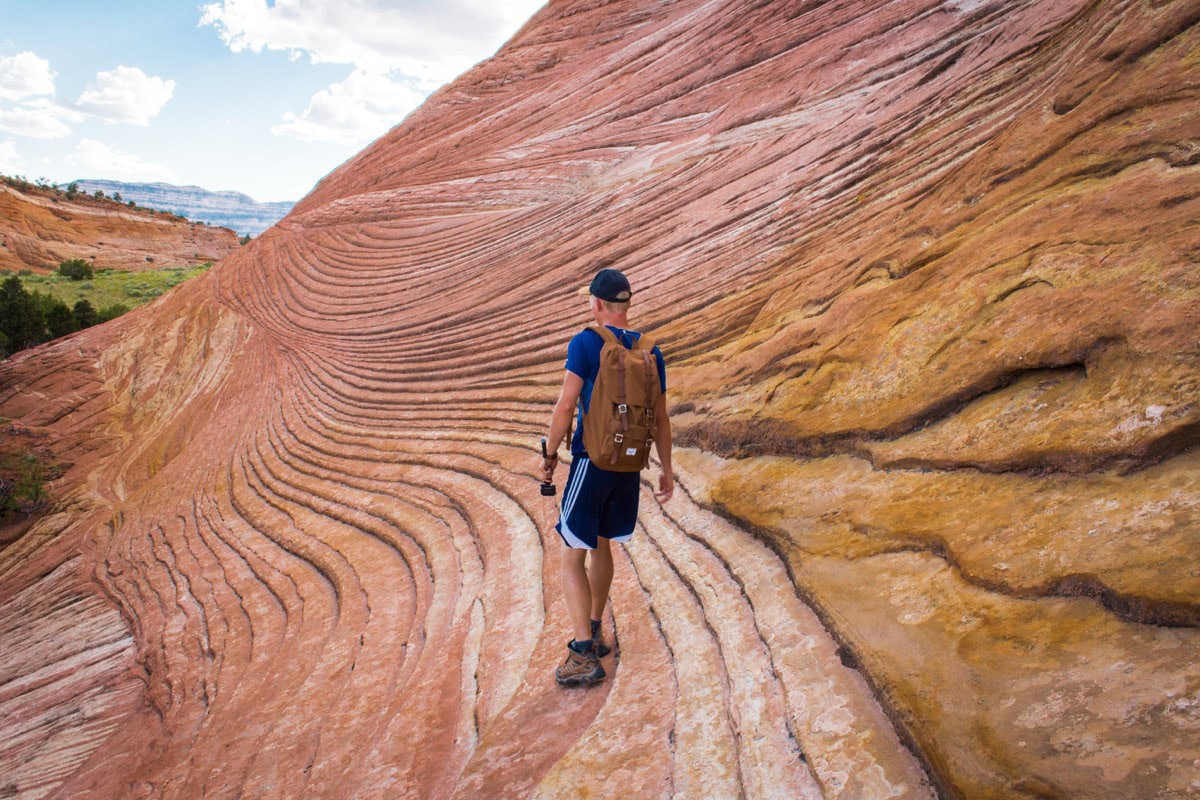
Hiker on the undulating sandstone layers of Waterpocket Fold

This is the reason Capitol Reef exists as a national park in the first place. Waterpocket Fold is a nearly 100-mile-long monocline — a massive “wrinkle” in the Earth’s crust where geological layers have been tilted upward, exposing millions of years of the planet’s history like the pages of an open book.

You can see it best from viewpoints along Highway 24 and Scenic Drive, but if you want to truly grasp its scale, head to Strike Valley Overlook (at the southern end of the park, high-clearance vehicle needed). From there, the Fold stretches in both directions beyond the horizon, looking like a rumpled blanket in shades of red, white, and grey.

Waterpocket Fold formed roughly 50–70 million years ago during the same mountain-building process that created the Rocky Mountains, and erosion has been slowly uncovering it ever since. The result is simply breathtaking. You stand there thinking how absurd it is that so few people know about this.

3. Hickman Bridge Trail — the perfect hike for everyone

Red sandstone cliffs with desert vegetation along the trail

If you only do one walk at Capitol Reef, make it Hickman Bridge. This trail is short (1.7 miles round trip), relatively easy, and the reward at the end is huge — a natural rock bridge spanning 130 feet, one of the largest in Utah.

The trailhead is on Highway 24 (parking is free, no entrance fee required) and it climbs gently along the side of a canyon. Along the way you’ll pass smaller rock formations and views of the Fremont River in the valley below. When you reach the bridge itself, it feels like standing inside a cathedral — the arch soars high above you and light filters through it in the most magical way.

Practical info: About 400 feet of elevation gain. Allow 1–1.5 hours. Morning light is gorgeous for photos and it’s not yet scorching hot. Bring water even for this short trail — we’re in the desert.

4. Cassidy Arch Trail — for those who want a bit of adrenaline

Cassidy Arch rock formation in Capitol Reef
Photo: bobistraveling / CC BY 2.0 / Wikimedia Commons

Named after Butch Cassidy (yes, the infamous outlaw actually hid out around here!), Cassidy Arch Trail takes you to the top of a rock arch that you can stand on. And look down. And gulp. 😅

The trail starts at Grand Wash on Scenic Drive and is rated moderate — 3.5 miles round trip with about 650 feet of elevation gain. Most of the climbing is in the first half; then the path levels out and follows the canyon rim with views that will take your breath away. When you reach the arch, you can climb onto it (at your own risk) and stand right on its spine. Lukáš lay on his stomach and photographed the drop — I stood a bit further back pretending I was totally fine with it. 😁

Practical info: Allow 2–3 hours. Avoid the midday sun — the trail is largely exposed. Don’t forget sturdy footwear (check out our favourite hiking boots).

5. Grand Wash — a walk along the canyon floor

Sandstone domes with characteristic holes in Capitol Reef

Grand Wash is one of those trails where you feel truly small. You walk along the bottom of a narrow canyon with walls towering hundreds of feet on either side, and all you can see above is a thin strip of sky. It’s a bit like The Narrows in Zion — minus the water, minus the crowds, and minus the shuttle bus.

The trail is flat (2.8 miles round trip, virtually no elevation gain), so absolutely anyone can manage it — families with children, grandparents, everyone. In some spots the canyon walls are just a few metres apart and display gorgeous stripes in shades of orange and cream.

Important warning: Grand Wash is a flash flood area. If there’s any forecast of storms (even distant ones!), DO NOT enter the canyon. Flash floods in Utah are deadly and arrive without warning. Check the weather on the NPS website each morning.

Practical info: 1–1.5 hours, easy. Starts from Scenic Drive or from Highway 24 (the opposite end of the canyon). Most beautiful in the morning when sunbeams penetrate the canyon and illuminate the walls.

6. Capitol Gorge Trail — petroglyphs and historic inscriptions

Narrow canyon of Capitol Gorge with historic inscriptions
Photo: Mobilus In Mobili / CC BY-SA 2.0 / Wikimedia Commons

Capitol Gorge is another canyon walk, but with a historical bonus. At the end of Scenic Drive (where the tarmac gives way to dirt) you’ll find a trail leading through a narrow gorge. Along the way you’ll pass the Pioneer Register — a rock wall where early settlers and travellers scratched their names starting back in 1871.

It’s a peculiar feeling — standing before the names of people who passed through here with ox-drawn wagons 150 years ago, wondering what they must have felt when they first laid eyes on these red canyons. Further along the trail you’ll also find “water tanks” — natural rock hollows that collect rainwater (and that’s actually where the whole park gets its name — “waterpocket” fold).

The trail is easy, 2 miles round trip, and works brilliantly as a combo with Scenic Drive — park at the end of the road, walk through the gorge, and head back.

Practical info: 1–1.5 hours. The same flash flood warning applies as for Grand Wash. The car park at the end of Scenic Drive is small — arrive in the morning if possible.

7. Fruita — orchards in the middle of the desert

Historic Fruita settlement with fruit orchards
Photo: J Brew from near Seattle, USA / CC BY-SA 2.0 / Wikimedia Commons

This is probably the most surreal experience in Capitol Reef. In the middle of a desert national park, you stumble upon lush green orchards of cherries, apricots, peaches, pears, and apples. Fruita is the remnant of a 19th-century Mormon settlement, and the National Park Service maintains the orchards to this day — irrigation canals and all.

And here’s the best part: when it’s harvest season, you can pick the fruit yourself. You pay just a small fee (in 2024 it was $1 per pound) and pick straight from the tree. Cherries in June, apricots and peaches in July and August, apples and pears in autumn. A sign at the entrance to each orchard tells you whether it’s currently “open for picking” or not.

We picked apricots in July and I have to say they were the best apricots I’ve ever eaten. Maybe because we’d travelled thousands of miles from Europe to get them. 😅 Or maybe because they’d ripened on the tree in the desert sun and were warm and sweet. Either way — an unforgettable experience.

Around the orchards you’ll also find historic buildings (a schoolhouse, a barn, and Gifford Homestead, where they sell homemade pies) plus a lovely picnic spot by the Fremont River.

8. Petroglyphs Panel — art that’s 1,000 years old

Thousand-year-old petroglyphs on a sandstone wall
Photo: mark byzewski / CC BY 2.0 / Wikimedia Commons

Right along Highway 24, just a few minutes from the Visitor Center, you’ll find one of the most accessible displays of rock art in all of Utah. The Fremont Petroglyphs were created by the Fremont people, who lived here roughly 600–1,400 years ago, and depict human figures, bighorn sheep, and other animals.

The petroglyphs are visible right from the car park — just walk to the information board and look up at the rock wall above. They’re surprisingly detailed and well preserved. I recommend bringing binoculars or a telephoto lens — some details are best appreciated with magnification.

Practical info: A 15–30-minute stop. Free (on Highway 24). Don’t try to climb closer — it’s prohibited and damages the rock.

9. Cathedral Valley — wild and remote beauty

Monoliths of Cathedral Valley in the remote section of Capitol Reef
Photo: NPS/ Damian Popovic / Public domain / Wikimedia Commons

If you have the time, courage (and a 4WD vehicle), Cathedral Valley is the most dramatic part of Capitol Reef. Enormous rock monoliths — “cathedrals” — rise from the desert floor to heights of dozens of metres and look like they belong on another planet.

The most famous formations are the Temple of the Sun and Temple of the Moon — two rock towers standing side by side in the middle of absolutely nothing, looking utterly unreal at sunrise or sunset. If you’ve ever seen iconic photos from Capitol Reef, chances are they featured these two.

How to get there: The Cathedral Valley Loop is a roughly 60-mile circuit on unpaved roads. You need a 4WD with high clearance — the route includes a ford across the Fremont River (depth varies by season, typically 1–2 feet). The drive takes a full day (6–8 hours with stops). No petrol, no water, no phone signal.

Important: Before setting out, stop at the Visitor Center and ask about current road conditions and the water level at the ford. The rangers are brilliant and will honestly tell you whether it’s doable in the current conditions or not.

10. Cohab Canyon Trail — a hidden gem

View of undulating sandstone walls in Capitol Reef

Cohab Canyon is my personal favourite and a trail that barely anyone talks about. The name is short for “cohabitation” — the canyon was supposedly used as a hiding spot by Mormon polygamists fleeing federal marshals in the 19th century. The backstory is fascinating, but the trail itself is even better.

The climb from the road near Fruita is short but steep (the first 10 minutes will leave you breathless), but then you enter a hidden canyon filled with small caves, rock windows, and bizarre eroded formations. The full trail is 3.4 miles round trip, and at the far end you have the option of descending to Highway 24.

Practical info: About 400 feet of elevation gain, 1.5–2 hours. Most beautiful in the afternoon when the sun lights up the canyon. Remarkably few people — we only encountered three other couples during our entire walk.

lukas a lucka
Lukáš and Lucie recommend
Where to Stay in Capitol Reef National Park
4 accommodations — campgrounds and other lodging options

11. Sunset Point — a sunset you’ll never forget

Sunsets in Utah are generally incredible, but Sunset Point at Capitol Reef is something else entirely. The viewpoint sits just off Highway 24 (a short detour, about a 10-minute walk) and offers a panoramic view of Waterpocket Fold as it transforms from orange through deep red to purple in the fading light.

We turned up with a bottle of wine and a bag of crisps and spent an hour and a half here. Not a soul around — just us and that view. This moment burned itself into our memory more than any famous trail.

Practical info: Arrive about 45 minutes before sunset. The car park is tiny (roughly 5 spaces). Bring a jacket — temperatures drop quickly after dark.

12. Capitol Dome — the iconic “Capitol building”

Detail of striped sandstone in Capitol Reef National Park

This is the formation that gave the entire park its name. Capitol Dome is a massive white sandstone dome of Navajo sandstone that bears a striking resemblance to the dome of the US Capitol in Washington, D.C. You’ll get the best view from Highway 24, roughly where the Hickman Bridge Trail car park is located.

You don’t need to walk up to it specifically — it’s clearly visible from the road and makes a brilliant backdrop for photos. But if you fancy getting closer, the Hickman Bridge trail will take you right into its neighbourhood.

13. Notom-Bullfrog Road — a drive to the end of the world

If you love driving remote roads (and who doesn’t?), Notom-Bullfrog Road is a 60-mile route running along the eastern side of Waterpocket Fold. The first 30 miles are paved, the rest is unpaved — but passable in a standard car in dry conditions.

The road offers an entirely different perspective of the park compared to Scenic Drive — here you’re on the “other side” of the Fold, viewing its eastern face, which is less dramatic but far more intimate. Hardly any cars, no car parks, no tourists. Just you and an endless red landscape.

14. Night skies — Capitol Reef as a Dark Sky Park

Capitol Reef has been a certified International Dark Sky Park since 2015, and the night sky here is in a league of its own. If you’ve never seen the Milky Way with the naked eye, this is where you’ll see it. Clearly, vividly, stretching across the entire sky like a painting.

The best stargazing spots are Panorama Point and Goosenecks Overlook (both off Highway 24, short detours). The park also occasionally hosts ranger-led stargazing programmes — check the current schedule at the Visitor Center.

Tip: The night before your visit, check the moon phase. The best conditions are around the new moon, when the sky is darkest. And bring warm layers — even in summer, night-time temperatures can drop to around 10 °C (50 °F).

15. Goosenecks Overlook and Panorama Point — viewpoints from the car

Goosenecks Overlook viewpoint over entrenched meanders
Photo: Ken Lund from Reno, Nevada, USA / CC BY-SA 2.0 / Wikimedia Commons

To round things off, two spots you can tick off in 15 minutes that will still leave you gobsmacked. Goosenecks Overlook offers a view of Sulphur Creek’s meanders far below — the creek twists through tight bends like a snake, carving a deep canyon as it goes.

Panorama Point is right next door and delivers a 360° view of the entire area — Waterpocket Fold on one side, Boulder Mountain on the other, and an endless red plain everywhere in between. Both viewpoints are accessed via short side roads off Highway 24 and have small car parks.

Practical info: Perfect on your way into or out of the park — no extra time needed. Morning or late afternoon for the best light.

Where to eat and drink near Capitol Reef

Don’t worry, you won’t go hungry around Capitol Reef — though the choice is naturally more limited than in a big city. Most restaurants are in Torrey, with a few options in Bicknell as well.

Restaurants in Torrey

Capitol Reef Café — the most well-known restaurant near the park, and deservedly so. Local ingredients, excellent burgers, veggie options, and homemade desserts. Mains run about $15–25 (£12–20). I recommend the trout — it’s fresh and beautifully prepared.

Rim Rock Restaurant — a slightly more upscale place with views of the red cliffs. Steaks, pasta, wine. Mains $20–35 (£16–28). Reservations recommended in season.

Torrey Schoolhouse B&B — if you’re staying here, their breakfasts are legendary. Homemade baked goods, fresh fruit, and strong coffee.

Inside the park

There’s no restaurant inside the park — but at Gifford Homestead in Fruita they sell homemade pies made with fruit from the local orchards. An apricot pie for $2–3 is an obligatory stop. They also sell jams, honey, and other local products.

Otherwise, bring your own snacks, plenty of water, and fruit. There are no shops or vending machines inside the park. The nearest (small) supermarket is in Torrey or Bicknell; for a bigger shop, stock up in Richfield or Moab beforehand.

Practical tips to wrap up

What to pack

Capitol Reef is a desert — pack smart. The essentials:

  • Lots of water (3+ litres per person per day when hiking)
  • Sun protection — wide-brimmed hat, SPF 50 sunscreen, sunglasses
  • Sturdy hiking boots (see our hiking boot recommendations)
  • Layers — mornings and evenings can be chilly even in summer
  • Torch or headlamp — for stargazing and finding your way back from Sunset Point in the dark
  • Snacks — you can’t buy anything in the park

Flights and getting there

For affordable flights to the US from the UK, search on Skyscanner or Google Flights — they’re great for comparing airlines and routes. The most common gateways to Utah are Salt Lake City or Las Vegas, both served by direct flights from London. From either city you’ll continue by car.

Travel insurance

Don’t travel to the US without insurance — healthcare costs are astronomically expensive. For shorter trips we use AXA, and for longer adventures around the world we recommend checking out our SafetyWing review.

Mobile data

Phone signal at Capitol Reef ranges from very weak to non-existent — don’t count on mobile data in the central part of the park. In Torrey you’ll usually get signal (depending on your provider). Download offline maps before you go! If you’d like an eSIM for your US trip, have a read of our Holafly review or check out Yesim as an alternative.

FAQ — Frequently asked questions about Capitol Reef

What makes Capitol Reef so special?

Capitol Reef protects Waterpocket Fold — a nearly 100-mile-long geological “wrinkle” in the Earth’s crust and one of the largest exposed monoclines in the world. Combined with the fruit orchards at Fruita, petroglyphs over 1,000 years old, natural rock arches, and minimal crowds, Capitol Reef is a truly unique national park. It’s the least visited of Utah’s “Mighty Five” and that’s exactly why it retains a Wild West atmosphere that you’ll struggle to find at the more popular parks.

Can you see Capitol Reef from your car without getting out?

Yes! Highway 24 passes through the park for free and offers several viewpoints right from the road (Panorama Point, Goosenecks Overlook, the petroglyphs). Scenic Drive (8 miles, $20 entrance fee) is another beautiful road where you can enjoy most of the scenery from behind the wheel. Of course, I’d recommend at least one short trail — Hickman Bridge (1.7 miles) or Grand Wash (2.8 miles) — but if you have limited mobility or are short on time, even just driving through is absolutely worth it.

How much time do you need at Capitol Reef?

At a minimum, half a day for Scenic Drive and one trail. Ideally 1–2 full days for the main attractions (Scenic Drive, Hickman Bridge, Cassidy Arch, Fruita, Sunset Point). If you want Cathedral Valley, add another full day. We spent two days here and left feeling we could easily have filled a third.

What is the nearest town to Capitol Reef?

Torrey, Utah — it’s a 15-minute drive west of the park entrance. You’ll find accommodation, restaurants, and basic amenities here. Other options include Bicknell (20 minutes) and Hanksville (50 minutes east, handy if you’re continuing on to Moab).

Do I need a 4WD vehicle?

For Scenic Drive, Highway 24, and all the main trails, a standard saloon or SUV will do. You only need 4WD for Cathedral Valley (unpaved roads + river ford) and the unpaved section of Notom-Bullfrog Road in wet conditions. Most visitors get by perfectly fine without 4WD.

Is Capitol Reef safe? What should I watch out for?

The park is safe, but nature here doesn’t mess about. Three main risks: dehydration (bring plenty of water, even on short hikes), flash floods (never enter narrow canyons if storms are forecast — even distant ones!), and heat (summer temperatures exceed 40 °C / 104 °F in the sun). Mobile signal inside the park is minimal, so don’t rely on it. Always tell someone where you’re going and bring a physical map.

Is the America the Beautiful Pass worth it?

If you’re visiting at least 3 national parks in a year, absolutely. The pass costs $80 (about £65) and covers entry to all US national parks and federal recreation areas for one year. Entry to Capitol Reef alone is $20, Zion is $35, Arches is $30 — so on a typical Utah road trip the pass pays for itself straight away.

Tips and Tricks for Your Vacation

Don’t Overpay for Flights

Search for flights on Kayak. It’s our favorite search engine because it scans the websites of all airlines and always finds the cheapest connection.

Book Your Accommodation Smartly

The best experiences we’ve had when looking for accommodation (from Alaska to Morocco) are with Booking.com, where hotels, apartments, and entire houses are usually the cheapest and most widely available.

Don’t Forget Travel Insurance

Good travel insurance will protect you against illness, accidents, theft, or flight cancellations. We’ve had a few hospital visits abroad, so we know how important it is to have proper insurance arranged.

Where we insure ourselves: SafetyWing (best for everyone) and TrueTraveller (for extra-long trips).

Why don’t we recommend any Czech insurance company? Because they have too many restrictions. They set limits on the number of days abroad, travel insurance via a credit card often requires you to pay medical expenses only with that card, and they frequently limit the number of returns to the Czech Republic.

Find the Best Experiences

Get Your Guide is a huge online marketplace where you can book guided walks, trips, skip-the-line tickets, tours, and much more. We always find some extra fun there!
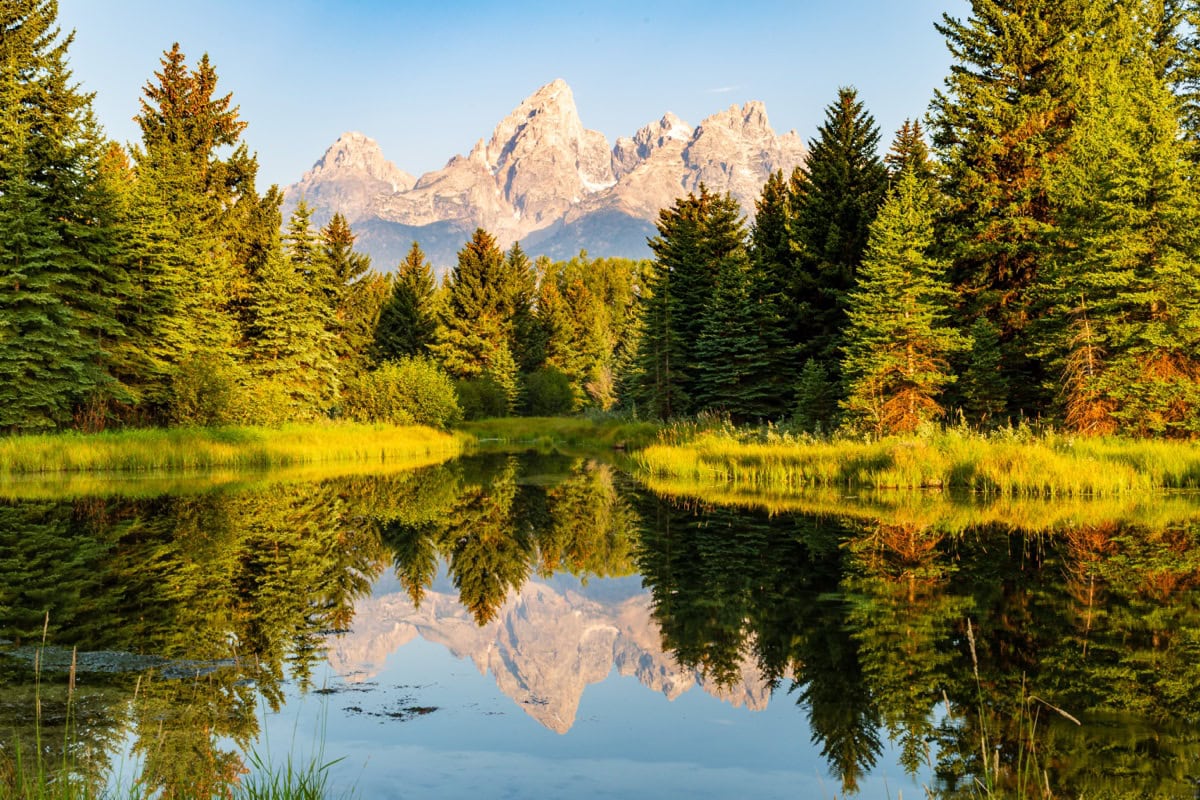
Bryce Canyon, Utah: 15 Best Things to See and Do

TL;DRBryce Canyon National Park in southern Utah is famous for thousands of orange rock spires called hoodoos, clustered mainly around Bryce Amphitheater and its viewpoints — Sunrise Point, Sunset Point, Inspiration Point and Bryce Point. Among the 15 tips on what to see and do, one combo stands out: the Navajo Loop and Queen’s Garden Trail (about 4.5 km, 2–3 hours), plus stargazing after dark, since the park is a certified Dark Sky Park. One or two days is enough for a visit, and the best months are May–June and September–October. Entry costs $35 per car for 7 days. The park sits just 1.5 hours from Zion National Park and around 4 hours (430 km) from Las Vegas, making it easy to fold into a wider Utah road trip.

You’re standing on the edge of a cliff and below you opens up something your brain simply refuses to process. Thousands of orange, pink and white spires — hoodoos — jut out of the ground like an army of petrified sentinels, and you feel like you’ve accidentally stepped onto another planet. That’s exactly what our first moment in Bryce Canyon Utah felt like, and it’s exactly how everyone feels when they arrive. Nobody is prepared for this, even if you’ve seen hundreds of photos. 😅

Bryce Canyon National Park in Utah is one of those places that makes you put down your phone and simply stare. We visited twice with Lukáš — the first time as a stop on a Utah road trip, the second time deliberately, because we knew one day wasn’t enough. And we were right. Bryce Canyon isn’t just a viewpoint from a car park — it’s a place where you want to descend among the hoodoos, where you want to watch both sunrise and sunset, and where you want to lie on your back at night gazing at the Milky Way, because you’ve never seen a sky this clear in your life.

In this article, you’ll find a complete guide to Bryce Canyon National Park Utah — from 15 best things to see and do, through practical advice on accommodation and getting there, to food tips and answers to the questions you’ll want to know. I’ll tell you the best time to visit, how much it all costs, whether you can combine Bryce Canyon with Zion, and why this place is so famous.

View of the hoodoos amphitheatre in Bryce Canyon

TL;DR

  • Bryce Canyon National Park sits in southern Utah and is famous for its hoodoos — thousands of slender rock spires unlike anything else on Earth.
  • Best time to visit is May–June and September–October. Summer (July–August) is packed with tourists and afternoon storms; winter is magical but demands preparation.
  • One to two days is enough for Bryce Canyon, but if you want to hike more trails and catch both sunrise and sunset, two days are ideal.
  • The best trail is the Navajo Loop + Queen’s Garden combo — it takes about 2–3 hours and is an absolute must-do.
  • Bryce is only 1.5 hours from Zion National Park — both parks combine perfectly on one road trip.
  • From Las Vegas, it’s roughly a 4-hour drive — making it an ideal stop on a Utah national parks road trip.
  • Entrance fee is $35 (about £28) per vehicle for 7 days, or you can use the America the Beautiful Pass for $80 (about £64), valid for all US national parks for a full year.
  • Accommodation inside the park is limited and pricey — most visitors stay in the small town of Bryce Canyon City, where hotels start from around €90 per night.
  • The night sky at Bryce Canyon is among the clearest in North America — the park runs regular stargazing programmes with rangers.
  • In winter, Bryce is blanketed in snow and the hoodoos look like something out of a fairy tale — with barely any tourists around.

When to visit Bryce Canyon and how weather changes throughout the year

The weather at Bryce Canyon can catch even seasoned travellers off guard. The park sits at an elevation of over 2,400 metres, which is significantly higher than neighbouring Zion, meaning it’s considerably cooler than you’d expect in Utah. Let’s walk through each season so you know what to pack and what to expect.

Spring (April–May): Our favourite time

May is probably our favourite month to visit Bryce Canyon. Daytime temperatures hover around 15–20 °C, there are far fewer tourists than in summer, and nature is waking up. Watch out for April though — snow can still fall and some trails may be partially closed or slippery. If you’re visiting in April, bring proper hiking boots and plenty of layers.

Summer (June–August): Crowds and afternoon storms

Summer is peak season and the park is heaving. July and August bring afternoon monsoon storms — sunshine in the morning, clouds rolling in around 2 pm, then a downpour. That can be a problem if you’re planning a longer hike. On the other hand, storms above the hoodoos look absolutely dramatic. Daytime temperatures sit around 25–28 °C, but at night they can easily drop to 5 °C. Yes, you’ll need a fleece at night in Utah in summer. 😅

Autumn (September–October): Fewer people, beautiful colours

September and early October are fantastic. Temperatures around 15–22 °C, minimal rain, gorgeous autumn colours in the surrounding forests, and significantly fewer visitors than in summer. If you have flexibility, this is the sweet spot.

Winter (November–March): Magical but demanding

Now for the best-kept secret — Bryce Canyon in winter. Orange hoodoos dusted with snow are one of the most photogenic sights you’ll see anywhere in the USA. Temperatures plunge well below zero (commonly -10 to -15 °C at night), but if you dress properly, it’s absolutely worth it. The main road and viewpoints stay open, though some trails may require snowshoes or micro spikes. And best of all — you’ll practically have the place to yourself.

How to get to Bryce Canyon

Bryce Canyon National Park sits in southern Utah, relatively far from major cities, but perfectly connected to the classic road trip routes across the American Southwest.

By car (the only sensible option)

You simply can’t reach Bryce Canyon without a car — there’s no public transport. If you’re flying from the UK, the nearest airports with good connections are:

  • Las Vegas (LAS) — about 430 km, roughly a 4-hour drive. The most popular starting point for road trips. “Is Bryce Canyon close to Vegas?” — well, by American standards, 4 hours behind the wheel is a breeze. 😁
  • Salt Lake City (SLC) — about 435 km, roughly 4.5 hours. A great option if you want to drive through Utah from north to south.
  • St. George (SGU) — about 210 km, roughly 2.5 hours. A smaller airport, but the closest one.

We’ve had consistently great experiences with DiscoverCars, which we use all around the world — it compares prices from different rental companies and the insurance options are clear and straightforward.

Good to know: If you’re driving from Las Vegas, you’ll pass right through Zion National Park, so both parks combine perfectly (more on that in tip #15).

Shuttle in the park

From May to October, a free shuttle bus operates within the park, stopping at all the major viewpoints. In summer, we highly recommend using it — the car parks around Bryce Amphitheater fill up completely by 9 am. The shuttle runs every 10–15 minutes and departs from the Bryce Canyon Visitor Center.

Where to stay and how much Bryce Canyon costs

Accommodation around Bryce Canyon is fairly straightforward — you essentially have three options that differ in price and comfort. Generally, the closer to the park, the pricier, and during peak season (June–September) you’ll need to book well in advance. Park entrance is $35 (about £28) per vehicle for 7 days. If you’re road-tripping through multiple parks, the America the Beautiful Pass at $80 (about £64) is brilliant value — it covers all US national parks for a full year.

Inside the park: The Lodge at Bryce Canyon

The only accommodation inside the park is the historic The Lodge at Bryce Canyon, built in the 1920s. Rooms range from $250 to $350 per night (roughly €230–€320), and during the season they sell out months in advance. It’s a beautiful place with real character, but at those prices it’s not for everyone.

Bryce Canyon City: The most practical choice

The small town of Bryce Canyon City (sometimes listed simply as Bryce) sits right at the park entrance and offers the widest selection of accommodation. Prices range from about $100 (€90) for a basic motel to $200–$300 (€180–€275) for a nicer hotel. We recommend Best Western Plus Ruby’s Inn — it’s the main hub in Bryce Canyon City, with not just a hotel but also a restaurant, souvenir shop and bike rental.

Tropic and Panguitch: Budget-friendly alternatives

If you’re looking to save money, head to the small town of Tropic (15 minutes from the park) or Panguitch (40 minutes). Accommodation prices drop to $70–$120 (€65–€110) per night and the atmosphere is far more authentic — small Utah towns with all the charm that comes with them.

Camping

There are two campgrounds right inside the park: North Campground (open year-round, most sites reservable) and Sunset Campground (seasonal, May–October). The cost is $30 (about €27) per night. In summer, pitches vanish within minutes of reservations opening on recreation.gov, so book as soon as they become available (usually 6 months ahead).

How much does a weekend in Bryce Canyon cost for two?

Here’s a rough budget for 2 days / 2 nights for two people:

  • Accommodation (2 nights in Bryce Canyon City): $200–$400 (€180–€365)
  • Park entrance: $35 (€32) per vehicle
  • Petrol (from Las Vegas and back): approx. $80–$100 (€73–€90)
  • Food (restaurants + snacks): $80–$150 (€73–€137)
  • Total for two for a weekend: approx. $400–$700 (€365–€640)

If you camp and cook for yourselves, you can do it for significantly less.

Bryce Canyon: 15 best things to see and do

Now for the main event — let’s dive into 15 things to see and do in Bryce Canyon National Park. From iconic viewpoints and the best trails to night-time stargazing. I’ve ordered the tips the way I’d recommend exploring the park — start with the viewpoints, then head down among the hoodoos, and save the most magical experiences for last.

1. Bryce Amphitheater — the heart of the park

Orange hoodoos rock spires among pine trees

Let’s start with the most important bit. Bryce Amphitheater is a massive natural amphitheatre (technically an erosional basin) that holds the largest concentration of hoodoos on the planet. This is the spot you see in 90% of Bryce Canyon photos, and it’s the reason people come here.

The amphitheatre has four main viewpoints — Sunrise Point, Sunset Point, Inspiration Point and Bryce Point — all accessible from the main road, usually just a few steps from the car park. If you only have an hour in the park (which I wouldn’t recommend, but I understand it happens), walk at least these four viewpoints.

A lovely, easy-going path called the Rim Trail connects the viewpoints. It’s largely paved and even pushchair-accessible. The full trail is about 9 km, but the prettiest section runs between Sunrise and Sunset Point (roughly 800 metres), where the amphitheatre stretches out right before your eyes.

2. Sunrise Point — the best sunrise of your life

White-capped hoodoos rock spires against a blue sky

The name doesn’t lie. Sunrise Point is where you want to be when the first rays of sunlight hit the hoodoos and the entire amphitheatre lights up in shades of orange and pink. We set our alarm for 5 am for this — and didn’t regret a single second.

Practical tip: Arrive at least 30 minutes before sunrise to grab a good spot. In summer that means being here around 5:30 am, in autumn around 6:30 am. Bring warm clothing — even in summer it’s around 5 °C in the early morning and it’s windy.

Sunrise Point is also the starting point for Queen’s Garden Trail, so after the sunrise you can head straight down (more on that in tip #5).

3. Sunset Point — the iconic view of Thor’s Hammer

The distinctive Thor's Hammer rock formation in Bryce Canyon

Sunset Point is probably the most photographed spot in the entire park. From here you look straight at Thor’s Hammer — a hoodoo shaped like a giant hammer that has become the unofficial symbol of Bryce Canyon. Sunset from here is gorgeous, but honestly? Sunset Point is beautiful at any time of day.

This viewpoint is also where the Navajo Loop Trail begins — the most popular trail in the park (more in tip #4). The car park at Sunset Point is a nightmare in summer — seriously, take the shuttle.

Fun fact: Thor’s Hammer looks like it could topple at any moment, but geologists say it’s been standing for tens of thousands of years. The harder upper layer protects the softer rock beneath from erosion. Nature really is an incredible architect.

4. Navajo Loop Trail — descend into the hoodoos

Sandy trail winding between hoodoos rock spires

This is an absolute must-do. Navajo Loop Trail is short (about 2.2 km) but intense — it takes you from the rim of the amphitheatre right down among the hoodoos. Suddenly you’re not looking down at them — you’re surrounded by them, with spires towering tens of metres above your head, and you feel like you’ve shrunk.

The trail descends via steep switchbacks (about 170 metres of elevation change) and passes through the narrow Wall Street section — a slot canyon so tight that sunlight barely reaches you. In the middle stand two enormous Douglas firs that look completely out of place. It’s a magical spot.

Important note: The trail goes steeply down and then steeply back up. Remember you’re at over 2,400 metres elevation, so the ascent will take longer than you expect and will leave you breathless (literally). Bring water and allow 1–1.5 hours for the full loop.

Heads up: The Wall Street section is often closed in winter and spring due to ice. Always check the current trail conditions at the Bryce Canyon Visitor Center.

5. Queen’s Garden Trail — the most beautiful trail in the park

Orange hoodoos rock spires along a ridge

If Navajo Loop is the most popular, Queen’s Garden Trail is, in my opinion, the most beautiful. The descent from Sunrise Point is gentler than Navajo Loop, and the trail leads you through a landscape that feels like gardens full of rock sculptures. It gets its name from a rock formation that supposedly resembles Queen Victoria (if you squint and use a healthy dose of imagination 😁).

Our #1 tip: Combine both trails — Navajo Loop + Queen’s Garden. Descend via Navajo Loop (from Sunset Point), walk the connecting trail at the bottom, and climb back up via Queen’s Garden to Sunrise Point. About 4.5 km total, 170 m elevation gain, 2–3 hours. It’s the best hike in the entire park, and anyone with a reasonable level of fitness can handle it.

6. Inspiration Point — a viewpoint that earned its name

Hoodoos rock spires against a dramatic blue sky

Of the four viewpoints overlooking Bryce Amphitheater, Inspiration Point is arguably the most dramatic. You’re standing higher than at Sunrise and Sunset Point, giving you a wider panorama of the entire amphitheatre — and when you peer into the depths, you begin to grasp the sheer scale of what nature has sculpted over millions of years.

Inspiration Point has three levels — lower, middle and upper. Most tourists stay at the lower level (right next to the car park), but if you walk just a few dozen metres up to the upper level, you’ll get a much better view with far fewer people around.

7. Bryce Point — the best panorama of the amphitheatre

Visitor on a ridge overlooking the hoodoos amphitheatre

Bryce Point sits at the southern end of the amphitheatre and offers what is probably the most complete panoramic view of the entire Bryce Amphitheater. It’s also the trailhead for the Peekaboo Loop Trail (tip #8) and one of the best spots for sunset — fewer people than at Sunset Point and more dramatic light.

From Bryce Point you can also see beyond the amphitheatre — to the southwest towards the so-called Sinking Ship (a rock formation that looks like a sinking vessel) and on a clear day you can see over 150 km into the distance. Come here in the late afternoon, when shadows lengthen and the hoodoos shift from yellow through orange to deep crimson.

8. Peekaboo Loop Trail — for those who want more

Peekaboo Loop trail winding among hoodoos in Bryce Canyon
Photo: Fabio Achilli from Milano, Italy / CC BY 2.0 / Wikimedia Commons

If Navajo Loop + Queen’s Garden isn’t enough and you’re craving a proper hike, Peekaboo Loop is for you. It’s an 8.8 km loop with 460 metres of elevation gain that takes you through the most remote part of the amphitheatre. You’ll pass through narrow tunnels carved into the rock, duck under natural arches, and see formations that are completely invisible from the viewpoints above.

The trail is tougher and longer (3–4 hours), but the reward is encountering a fraction of the people compared to Navajo Loop. On some sections we were completely alone, and that was in June. Note — you share this trail with horses and mules (yes, you can go on horseback rides in Bryce Canyon!), so you’ll occasionally need to step aside and let them pass.

9. Scenic Drive — 29 km of wonder

Green forested valley with hoodoos along the Scenic Drive

The park’s main road, Bryce Canyon Scenic Drive, runs 29 km from the park entrance all the way to Rainbow Point at the southern end. Along the way you’ll pass 13 viewpoints, each offering a different perspective on the park — from the amphitheatre in the north to densely forested plateaus in the south.

Our recommendation: Drive to the end first (Rainbow Point) and stop at viewpoints on the way back. Why? The car parks at viewpoints are on the right-hand side when heading back north, so you won’t have to make U-turns. Plus, most tourists drive from the north and turn around at the first few viewpoints, so the southern part is much quieter.

Don’t miss Natural Bridge (a large rock arch visible right from the car park — technically it’s an arch, not a bridge, but nobody seems too bothered 😅) and Paria View, which offers a gorgeous view of a meandering stream far below you.

10. Stargazing — a night sky you’ll never forget

Starry night sky above the rock spires of Bryce Canyon
Photo: AnthonyTPope / CC BY-SA 4.0 / Wikimedia Commons

This is what makes Bryce Canyon truly exceptional. Since 2019, the park has been a certified International Dark Sky Park, boasting one of the clearest night skies in North America. On a moonless night you can see over 7,500 stars with the naked eye — for comparison, from London you might spot about 200.

From May to September, the park runs regular Astronomy Ranger Programs (usually on Fridays and Saturdays), where a ranger uses professional telescopes to show you planets, nebulae, galaxies and star clusters. It’s free and absolutely fantastic — arrive early, as places are limited (typically 50–100 people).

Even without the programme, all you need to do is step outside your hotel, find a dark spot (the Bryce Point car park works perfectly) and lie down. The Milky Way is so bright it casts shadows. We lay there with Lukáš for about an hour, just staring. One of those moments you remember for the rest of your life. ☺️

11. Mossy Cave Trail — a hidden gem most tourists miss

Mossy Cave Trail with waterfall in Bryce Canyon
Photo: Julianibarra / CC0 / Wikimedia Commons

This short trail (1.3 km return) is the only one in the park you can’t reach from the main Scenic Drive — the access is from Highway 12 on the eastern side. And that’s precisely why it’s so much quieter here.

The trail follows a stream to a small moss-covered cave (hence the name) and a surprisingly large waterfall. It’s an easy hike, suitable for families with children, taking about 30–45 minutes. It’s particularly beautiful in spring when the waterfall flows at full force, or in winter when it freezes into spectacular icicles.

12. Fairyland Loop — a full-day adventure away from the crowds

Rock spires along the Fairyland Loop trail
Photo: Ronnie Macdonald from Chelmsford, United Kingdom / CC BY 2.0 / Wikimedia Commons

If you’re an experienced hiker and want to see Bryce Canyon from a completely different perspective, Fairyland Loop is the trail for you. At 12.9 km with over 500 metres of elevation gain, it takes you through the northern part of the park where most tourists never venture.

The trail starts at Fairyland Point (a viewpoint off the main shuttle route, so you’ll need to drive there) and passes through a landscape full of bizarre formations — including Tower Bridge, a rock formation resembling the famous London landmark. It’s quiet, peaceful, and gives you the feeling of having the park entirely to yourself.

Allow 4–5 hours and bring plenty of water (at least 2 litres per person) and snacks. There are no drinking water sources on any trails in the park.

13. Bryce Canyon in winter — a snowy fairy tale

Snow-covered hoodoos in Bryce Canyon in winter
Photo: Emanuel Hahn hahnbo / CC0 / Wikimedia Commons

This is something most people don’t even have on their radar — yet it might just be the most beautiful way to experience Bryce Canyon. When snow falls, the orange and red hoodoos draped in white create a contrast that looks straight out of a fantasy film.

In winter the park stays open and the main road (as far as Paria View) is maintained. The southern section of the Scenic Drive is typically closed, but the amphitheatre — the main attraction — remains accessible. You can go snowshoeing (the park offers free ranger-led snowshoe hikes when there’s enough snow) or cross-country skiing.

A winter visit requires preparation — warm layers, snowshoes or micro spikes for your boots, and snow chains for your car (just in case). But the reward is a park virtually free of tourists and scenery that will take your breath away. Winter temperatures at Bryce Canyon typically range from -5 to -15 °C, so pack properly.

lukas a lucka
Lukáš and Lucie recommend
Where to Stay near Bryce Canyon
5 accommodations — hotels, campgrounds and other lodging options

14. Horseback riding among the hoodoos

For something completely different, try a horseback (or mule) ride operated by Canyon Trail Rides right inside the park. They offer two-hour rides that take you down into the amphitheatre along the Peekaboo Loop — the same trail you’d hike on foot, but from an entirely different perspective (and height).

Prices are around $75–$100 (roughly €70–€90) per person, and capacity is limited, so book ahead — especially in peak season. No riding experience is necessary — the horses (and mules) know this route by heart.

15. Combining Bryce Canyon + Zion National Park

One of the most frequently asked questions is: “Which is better, Bryce or Zion?” And the answer is simple — both. They’re completely different parks just an hour and a half apart, so visiting only one would be a missed opportunity.

Bryce Canyon is about viewpoints from above, slender hoodoos and an otherworldly landscape. Zion is about a deep canyon, a river valley and dramatic rock walls towering hundreds of metres above you. Bryce looks down, Zion looks up. The perfect combination for 3–5 days.

Suggested itinerary: 2 days in Zion (The Narrows, Angels Landing, Observation Point) → drive along Highway 12 (one of the most beautiful roads in the USA!) → 1–2 days in Bryce Canyon. If you have more time, add Capitol Reef and Grand Staircase-Escalante — and you’ve got yourself an epic Utah national parks road trip.

Where to eat and drink near Bryce Canyon: A guide for hungry hikers

Let’s be honest — nobody visits Bryce Canyon for the culinary scene. We’re in a small town in southern Utah, so expect solid American fare rather than Michelin stars. That said, a few places are worth knowing about so you’re not surviving on cereal bars from your backpack.

Inside the park: Lodge at Bryce Canyon Dining Room

The only restaurant inside the park, open seasonally. Breakfasts are solid (American-style — eggs, pancakes, bacon), while lunch and dinner feature burgers, steaks and salads. Prices match the location — main courses around $20–$35 (€18–€32). Nothing extraordinary, but sitting on the veranda overlooking the surrounding forest has its charm.

Bryce Canyon City: Ruby’s Inn

Ruby’s Inn Cowboy’s Buffet and Steak Room is the biggest restaurant in the area, offering both buffet and à la carte. It’s a classic American tourist restaurant — massive portions, decent flavour, western vibes. Expect $15–$30 (€14–€27) for a main course. In summer they also have an outdoor grill and country music evenings.

Tropic: Hidden little gems

The small town of Tropic (15 minutes from the park) has a few pleasant surprises. Clarke’s Restaurant serves up homestyle American cooking with excellent beer and a laid-back atmosphere. IDK Barbecue (yes, that really is the name 😅) does brilliant smoked meats. And if you’re craving pizza after a full day of hiking, Stone Hearth Grille serves solid Italian-inspired food with local ingredients.

Our recommendation

If you’re spending the whole day in the park, pack a hearty picnic — sandwiches, fruit, nuts, and plenty of water. There are no food stands in the park and the nearest restaurant is at the Visitor Center or in Bryce Canyon City. For dinner, head to Tropic — it’s more pleasant and cheaper than Bryce Canyon City.

Practical tips to wrap up

Bryce Canyon Visitor Center

Your first stop should be the Bryce Canyon Visitor Center, right at the park entrance. Rangers can advise on current trail conditions (especially important in winter and spring), weather and scheduled programmes. Have a look at the small geology exhibition — understanding how hoodoos form makes it all the more fascinating when you see them in person.

Opening hours vary by season: in summer typically 8:00–20:00, in winter 8:00–16:30. Tickets can be purchased here or in advance online at recreation.gov.

What to pack

  • Layers of clothing — even in summer, mornings and evenings are chilly (remember the elevation!).
  • Good hiking boots — trails are rocky and steep in places.
  • Plenty of water — at least 2 litres per person per day, more in summer. The dry climate dehydrates you faster than you’d think.
  • Sunscreen and a hat — at 2,400 m elevation, UV radiation is fierce.
  • A headtorch — essential if you’re planning a sunrise visit or stargazing.
  • Sunglasses — the glare off the pale rock is intense.

Internet and eSIM

Mobile signal in the park and surrounding towns ranges from weak to non-existent. If you need data (for navigation, offline maps), download everything in advance. For travelling in the USA, we recommend an eSIM from Holafly — it works reliably even in more remote areas (where there’s at least some signal). Alternatively, you can pick up a local SIM at Las Vegas or Salt Lake City airport upon arrival.

Flights and travel insurance

Look for cheap flights to Las Vegas or Salt Lake City on Skyscanner or Google Flights — both offer excellent route comparisons from UK airports. For a road trip across the USA, travel insurance is absolutely essential — American healthcare costs are astronomical. For longer trips we use SafetyWing, and for shorter ones a standard UK travel insurance policy does the job.

FAQ — frequently asked questions about Bryce Canyon

Why is Bryce Canyon so famous?

Bryce Canyon is famous for its hoodoos — slender rock spires formed by millions of years of erosion. Bryce Canyon boasts the largest concentration of hoodoos anywhere on Earth. The combination of unique geological formations, dramatic colours (from white through yellow and orange to deep crimson) and one of the clearest night skies in North America makes it one of the most photogenic places on the planet.

Which is better — Bryce Canyon or Zion?

They’re completely different parks and ideally you should visit both (they’re only 1.5 hours apart). Bryce Canyon offers views from above, looking down at thousands of hoodoos — it’s all about panoramas and an otherworldly landscape. Zion is about a deep canyon where you walk along the bottom with rock walls towering hundreds of metres above you. If you can only choose one and love unique geological formations, head to Bryce. If you’re after adventurous canyon hikes (The Narrows, Angels Landing), choose Zion. But seriously — do both. ☺️

Is Bryce Canyon close to Las Vegas?

Relatively, yes — it’s about 430 km, roughly a 4-hour drive on the motorway. From Las Vegas it’s one of the most popular road trip routes in the USA, because you can visit Zion National Park along the way (2.5 hours from Vegas). Many people combine Las Vegas → Zion → Bryce Canyon into a 3–5 day trip.

How much time do I need for Bryce Canyon?

Half a day is the bare minimum — enough for the main viewpoints around Bryce Amphitheater and one short trail. Ideally, plan for 1–2 full days. In two days you can cover all the viewpoints, the combined Navajo Loop + Queen’s Garden hike, the scenic drive, sunrise and sunset, and an evening of stargazing. If you’re a keen hiker, add a third day for the Fairyland Loop or Peekaboo Loop.

Can you visit Bryce Canyon in winter?

Absolutely — and it’s magical! The park is open year-round, with the main road and viewpoints kept clear. Snow-covered hoodoos look absolutely enchanting and there are barely any tourists. Just be prepared for temperatures well below freezing, the possible need for snowshoes on trails, and snow chains for your car. The park offers free ranger-led snowshoe hikes in winter, which is a fantastic experience.

Have any films been shot at Bryce Canyon?

Bryce Canyon has appeared in several films and TV shows, though not as frequently as Monument Valley or Dead Horse Point. The most well-known is probably the western Butch Cassidy and the Sundance Kid (1969) starring Robert Redford and Paul Newman, which was partly filmed in the park’s surroundings. The Bryce Canyon landscape has also featured in National Geographic documentaries and various adverts.

Do I need to be fit for the hikes in Bryce Canyon?

For the main viewpoints (Sunrise, Sunset, Inspiration, Bryce Point) you don’t need to hike at all — they’re right next to the car parks. For shorter trails like Navajo Loop or Queen’s Garden, a basic level of fitness is enough, but keep the elevation (over 2,400 metres) in mind — even fit people may find themselves getting winded more quickly than usual. Longer trails (Fairyland Loop, Peekaboo Loop) require better fitness and preparation. Always bring plenty of water, snacks, and remember that whatever you walk down, you’ll need to hike back up.

Tips and Tricks for Your Vacation

Don’t Overpay for Flights

Search for flights on Kayak. It’s our favorite search engine because it scans the websites of all airlines and always finds the cheapest connection.

Book Your Accommodation Smartly

The best experiences we’ve had when looking for accommodation (from Alaska to Morocco) are with Booking.com, where hotels, apartments, and entire houses are usually the cheapest and most widely available.

Don’t Forget Travel Insurance

Good travel insurance will protect you against illness, accidents, theft, or flight cancellations. We’ve had a few hospital visits abroad, so we know how important it is to have proper insurance arranged.

Where we insure ourselves: SafetyWing (best for everyone) and TrueTraveller (for extra-long trips).

Why don’t we recommend any Czech insurance company? Because they have too many restrictions. They set limits on the number of days abroad, travel insurance via a credit card often requires you to pay medical expenses only with that card, and they frequently limit the number of returns to the Czech Republic.

Find the Best Experiences

Get Your Guide is a huge online marketplace where you can book guided walks, trips, skip-the-line tickets, tours, and much more. We always find some extra fun there!
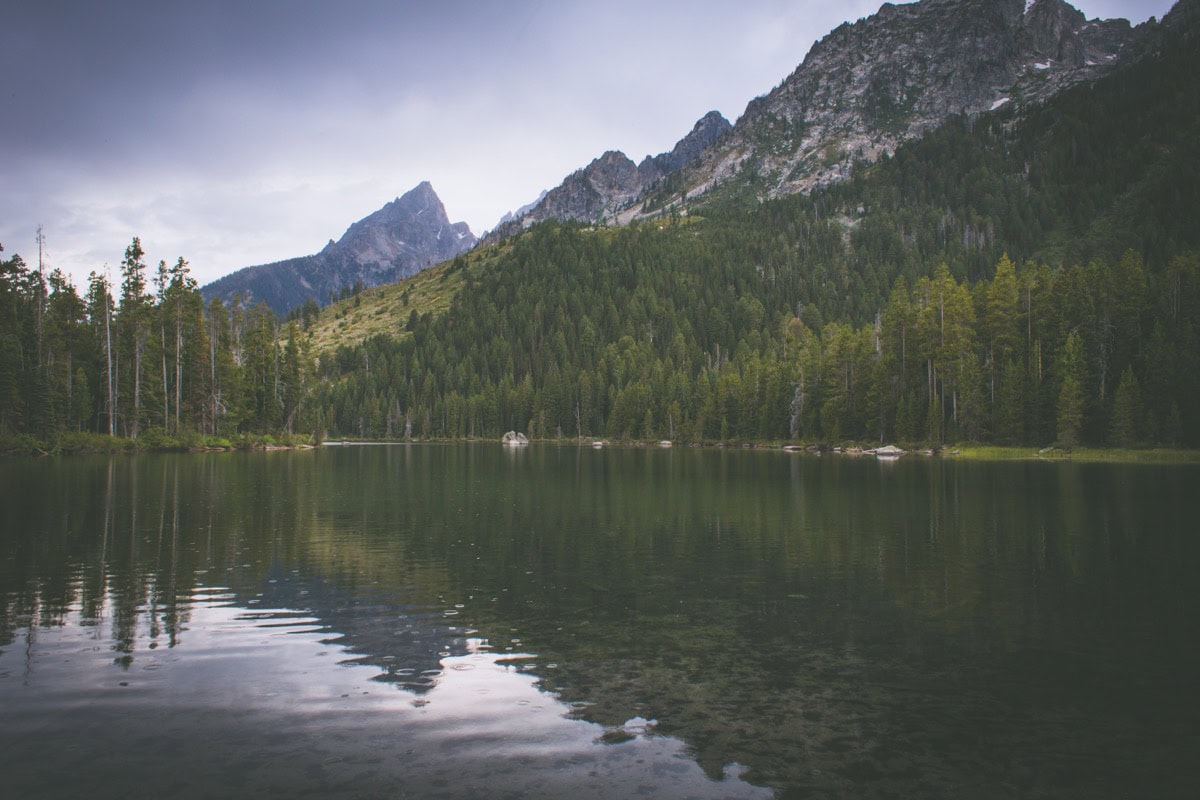
Rocky Mountain National Park, Colorado: 15 Tips on What to See and Do

TL;DRRocky Mountain National Park in Colorado comes with 15 essential tips, and a few really stand out: the drive along Trail Ridge Road (the highest paved road in the US, climbing to 3,713m), the hike to Emerald Lake (5.6km round trip from Bear Lake), and the tougher trek out to Sky Pond (14.5km). The park sits about 105km from Denver, entry costs $30 per car for 7 days, and from late May to mid-October you’ll need a free timed-entry reservation. June and July are best for wildflowers, while September and October bring the elk rut and autumn colour. Plan on 2–5 days, staying in Estes Park or the quieter Grand Lake for $150–$300 a night.

There are places you arrive at and think: Yeah, that’s nice. And then there are places where you step out of the car, look around, and simply forget to breathe. Rocky Mountain National Park is the latter. Lukáš and I came here for the first time in September, and I still remember the exact moment we drove Trail Ridge Road above the treeline — nothing but bare peaks around us, dramatic clouds, and a silence you’ll never experience in a city. Oh, and we happened to run into an elk herd that looked at us like “What are you doing here?” before going right back to chewing grass. 😅

Rocky Mountain National Park sits in Colorado, less than two hours from Denver, and it’s one of the most visited national parks in the USA — with very good reason. You’ll find alpine meadows bursting with wildflowers, turquoise lakes nestled in cirques beneath soaring peaks, some of the most spectacular scenic roads on the planet, and wildlife you’ll literally spot in the car park. Best of all, it’s surprisingly easy to reach — just fly into Denver, hire a car, and two hours later you’re in a completely different world.

In this article, you’ll find a complete guide to Rocky Mountain National Park — from the best hiking trails and the iconic Trail Ridge Road to practical tips on where to stay, how much it all costs, and how to deal with the annoying timed entry system that will block your summer access without a reservation. Let’s get into it.

TL;DR

  • Rocky Mountain National Park is in Colorado, roughly 1.5–2 hours by car from Denver. Entrance is $30 per vehicle for 7 days (or free with an America the Beautiful Pass at $80).
  • From May to October you need a timed entry reservation — without one, you won’t get into the park during peak season. Reservations are released on recreation.gov in advance and disappear within minutes.
  • Best time to visit: June–September for hiking, late September–October for autumn colours and the elk rut, June–July for wildflowers.
  • Trail Ridge Road is the park’s most famous scenic drive — climbing to 3,713 m (12,183 ft) and open roughly from late May to mid-October.
  • Best easy hikes: Bear Lake → Emerald Lake (5.6 km round trip), Sky Pond, Alberta Falls.
  • Accommodation: Estes Park on the east side (more convenient for tourists) or Grand Lake on the west side (quieter, fewer crowds). Budget around $150–300 per night in season.
  • Longs Peak (4,345 m / 14,259 ft) is the park’s most iconic summit — experienced hikers can summit in 10–15 hours, but it’s no walk in the park.
  • Wildlife: Elk, bighorn sheep, marmots, and the occasional bear or moose. In September and October, the elk rut is one of the most spectacular natural events in Colorado.
  • No food inside the park — pack snacks and water. Restaurants are in Estes Park and Grand Lake.
  • Minimum recommended stay: 2–3 full days, ideally 4–5 if you want to tackle the tougher hikes.

When to visit Rocky Mountain National Park and how to get there

Rocky Mountain National Park is open year-round, but your experience will vary dramatically depending on the month you visit. Each season has its own magic — and its own challenges. Here’s a breakdown so you know what you’re in for.

Summer (June–August): Best hiking, but crowds

Summer is peak season, and it’s easy to see why — most trails are snow-free, Trail Ridge Road is fully open, and the alpine meadows above the treeline explode into incredible colours. June and July are the absolute best months for wildflowers — the meadows along Trail Ridge Road and in the Kawuneeche Valley look straight out of a postcard.

The downside? Crowds. Rocky Mountain is the fifth most-visited national park in the US, and in summer over 10,000 cars pour in daily. The Bear Lake car park is often full by 6:30 in the morning (yes, morning 😅). That’s exactly why the timed entry system exists — without it, the place would be absolute chaos. If you’re visiting in July or August, get up early and aim to be inside the park before 6:00.

Autumn (September–October): Elk rut and golden colours

September is hands-down our favourite month. Temperatures are pleasant (5–20 °C / 41–68 °F), there are fewer visitors than summer, and the elk rut begins — when bull elk bugle across the valleys, lock antlers, and show off for the cows. It’s utterly mesmerising, and you can watch it right from the road in Moraine Park and Horseshoe Park. You won’t be alone — the elk rut is a huge draw — but the atmosphere is magical.

October brings autumn colours — aspens turn gold and orange, and the entire valley looks like a painting. Trail Ridge Road typically closes around mid-October due to snow, though, so if you want both, aim for late September to early October.

Winter and spring: For the adventurous

In winter (November–April), Trail Ridge Road is closed and most high-altitude trails are buried under snow. But if you’re into snowshoeing, cross-country skiing, or simply enjoy winter solitude, it’s a beautiful time — just dress properly and expect limited services. Spring (May) is a transitional period — snow melts, roads gradually reopen, and the park comes back to life. Weather is unpredictable, though, and many trails remain inaccessible.

How to get to Rocky Mountain National Park

By air: Fly into Denver (DEN) — it’s a major hub with plenty of transatlantic connections. From London, you can find direct flights with British Airways and United, or affordable one-stop options with various airlines. Use a flight comparison site to hunt down the best deals.

By car: From Denver, it’s about 105 km / 1.5 hours to Estes Park (the east entrance) via I-25 and US-36. The drive is straightforward, well-signposted, and the landscape gradually shifts from prairie to mountain valley — like a warm-up act before the main show. A car is essentially a must — public transport to the park is virtually non-existent.

Lukáš and I have had consistently great experience with DiscoverCars, which we use all over the world. A standard sedan or small SUV is more than enough for all the paved roads in the park.

Entrance fees and timed entry: Park entrance is $30 per vehicle (valid for 7 days) or free with an America the Beautiful Pass ($80 per year, valid for all US national parks — if you’re planning to visit more than two parks, it pays for itself easily). If you’re also eyeing other national parks, check out our Yellowstone guide where we cover the pass in more detail.

From late May to roughly mid-October, you also need a timed entry reservation — a free, time-slotted entry permit. There are two types:

  • Bear Lake Road Corridor (also covers the entire park) — the most popular, sells out fastest
  • Rest of Park (the whole park minus Bear Lake Road) — easier to grab

Reservations are released on recreation.gov the day before at 5:00 PM (Mountain Time) and vanish literally within seconds. Set an alarm, create your account in advance, and click fast. Alternatively, try your luck in the morning — cancelled reservations occasionally pop back up.

Where to stay and how much Rocky Mountain National Park costs

Rocky Mountain National Park has two main base camps — the towns of Estes Park on the east side and Grand Lake on the west. Both have their perks, and your choice depends on what you want to do in the park and how many fellow tourists you can tolerate.

Estes Park is by far the more popular option. It has more restaurants, shops, accommodation, and buzz — a charming town centre packed with cafés, souvenir shops, and stunning mountain views. From here, you’re closer to most of the best-known trails (Bear Lake, Emerald Lake, Alberta Falls) and the Trail Ridge Road entrance. The downside: it gets busy in summer.

Grand Lake is quieter, smaller, and has its own charm — sitting on a lakeshore with mountain views and a fraction of Estes Park’s crowds. A great choice if you want to explore the park’s west side (Kawuneeche Valley, Colorado River) or simply crave some peace.

How much accommodation costs

During peak season (June–September), expect these prices for accommodation in Estes Park:

  • Budget motels and hostels: $100–150/night (approx. €90–135)
  • Mid-range (hotels, Airbnb): $150–250/night (approx. €135–225)
  • Upscale cabins and lodges: $250–400+/night (approx. €225–360+)

Grand Lake tends to be slightly cheaper, but the selection is smaller. Off-season (October–May) prices drop by 30–50%, though some businesses close entirely.

Tip: If you’re looking to save, consider camping. The park has five campgrounds — the most popular are Moraine Park and Glacier Basin, where sites are reserved on recreation.gov months in advance. The cost is around $30/night per campsite. We camped at Moraine Park and woke up to elk grazing right by our tent — no hotel compares to that.

Budget for 3–4 days for two

Approximate budget for 3–4 days at Rocky Mountain National Park for two people:

  • Accommodation (3 nights, mid-range): $450–750 (approx. €400–675)
  • Car hire (4 days including insurance): $200–350 (approx. €180–315)
  • Petrol: $40–60 (approx. €35–55)
  • Park entrance fee: $30 per vehicle / $0 with America the Beautiful Pass
  • Food (restaurants + snacks): $200–350 (approx. €180–315)
  • Total for two: approximately $920–1,540 (€830–1,390) excluding flights

15 things to see and do in Rocky Mountain National Park

Now for the best bit — our concrete tips on what to see and do in Rocky Mountain National Park. I’ve ranked them from “absolute must-do” to “if you have time to spare, you won’t regret it.” Most are accessible even for casual hikers, though a few will appeal to those who love a full day on the trail. For each tip, I’ve included practical details — trail length, difficulty, and what to bring.

1. Trail Ridge Road — the highest continuous paved road in the US

Scenic Trail Ridge Road above the treeline in Rocky Mountain National Park
Photo: capt_tain Tom / CC BY 2.0 / Wikimedia Commons

If you do only one thing at Rocky Mountain National Park, make it a drive along Trail Ridge Road. This road is absolutely jaw-dropping — it climbs from the forested Estes Park valley all the way up to 3,713 metres (12,183 ft), where there’s nothing around you but alpine tundra, snowfields on the horizon, and the feeling that you’re standing on top of the world. Lukáš and I stopped every five minutes because every bend revealed an even better view than the last.

The full route from Estes Park to Grand Lake stretches about 77 km (48 miles) and takes at least 2–3 hours (without stops, but trust me — you won’t drive it without stopping). Along the way, there are numerous pull-offs and viewpoints — make sure to stop at Forest Canyon Overlook, Rock Cut (a short trail to Toll Memorial, about 1 km, with stunning 360° views), Lava Cliffs, and Gore Range Overlook.

The road is open roughly from late May to mid-October — the exact dates depend on snow conditions and change every year. Check the NPS website for current status. Important: Above the treeline, it’s significantly colder — even in summer it can be 5–10 °C (40–50 °F) with fierce winds. Bring a jacket even if it’s 25 °C (77 °F) down in Estes Park. We were up there in September, shivering in our fleeces, and I was cursing my blind faith in the weather forecast. 😅

2. Alpine Visitor Center — coffee at 3,595 metres

Alpine Visitor Center at the top of Trail Ridge Road
Photo: Thomson M / CC BY 3.0 / Wikimedia Commons

Right on Trail Ridge Road, at the highest visitor centre in the entire national park system, you’ll find the Alpine Visitor Center — and honestly, even without the exhibits, the view alone would be worth the stop. From the terrace, you can see Fall River Valley and a chain of peaks that’ll give you goosebumps.

Inside, there’s a small but fascinating exhibition about alpine tundra — you’ll learn how plants that grow just a few centimetres per year survive, and why it’s so crucial to stay on marked trails (the tundra takes decades to recover). There’s also the Trail Ridge Store with basic refreshments — the coffee won’t win any awards, but the sheer fact that you’re sipping a latte at 3,595 metres makes it pretty special.

From the centre, a short but steep trail leads to Alpine Ridge Trail (about 1 km round trip) — you’ll climb to a ridge with panoramic views of both sides of the mountains. The trail is short, but at that elevation, even 500 metres can feel like a marathon. Take your time, drink plenty of water, and if you feel dizzy or get a headache, head back down — altitude sickness is no joke.

3. Bear Lake — the most famous starting point

Mountain lake Bear Lake surrounded by conifer forest
Photo: Jonathan Wisner / CC BY 2.0 / Wikimedia Commons

Bear Lake is probably the most photogenic spot in the entire park — and also the most crowded. The lake sits at the base of Hallett Peak and Flattop, surrounded by spruce and fir, and on a clear day the mountains reflect perfectly on the water’s surface. Walking the full loop around the lake on the paved trail takes about 20 minutes (Bear Lake Trail, 1 km loop) and is genuinely suitable for everyone, including small children and grandparents.

But Bear Lake’s real magic lies in the fact that the park’s best hikes start from here — to Emerald Lake, Sky Pond, Loch Vale, and Flattop Mountain. It’s the Grand Central Station of the Rockies. And that’s precisely why there’s nowhere to park — in summer, the car park is usually full by 5:30 AM. Yes, half five. In the morning.

The solution: Either arrive absurdly early, or (the smarter option) park at the Park & Ride on Bear Lake Road and use the free shuttle bus, which runs from late May to October every 10–15 minutes. It works reliably and will save you a lot of stress.

4. Emerald Lake Trail — turquoise gem beneath the peaks

Turquoise Emerald Lake beneath rocky peaks
Photo: Nicolas Henderson from Coppell, Texas / CC BY 2.0 / Wikimedia Commons

This is probably our favourite trail in the whole park. The route from Bear Lake to Emerald Lake is 5.6 km (3.5 miles) round trip with about 200 metres of elevation gain — comfortably manageable for anyone with average fitness. Along the way, you’ll pass two other gorgeous lakes — Nymph Lake (0.8 km from Bear Lake, full of water lilies in summer) and Dream Lake (1.6 km, a mirror-like surface beneath Hallett Peak).

And then you reach Emerald Lake and just stand there, staring. The water is an incredible turquoise-emerald colour, hemmed in by steep rock walls, and in the early morning sun it looks like something from a fantasy film. This is exactly the spot where you sit on a boulder, eat your packed lunch, and wonder why you ever chose to live in a city.

Practical tip: Start as early as possible — ideally around 6:00–7:00 AM. Partly for parking, partly for crowds (by midday the trail is as packed as a Saturday shopping centre), and mostly for the light — the morning sun illuminates the lakes from the front, making photos a thousand times better than in the flat midday glare. Plus, afternoon thunderstorms roll in regularly in summer — being above the treeline during a storm is not fun.

5. Alberta Falls — a perfect hike for everyone

Alberta Falls waterfall in Rocky Mountain National Park
Photo: Christian Collins / CC BY-SA 2.0 / Wikimedia Commons

If you’re looking for a short, easy, yet beautiful hike, Alberta Falls is the obvious pick. From the Glacier Gorge trailhead (or directly from Bear Lake), it’s just 2.7 km (1.7 miles) round trip with gentle elevation gain, and the trail winds through forest alongside a creek — pleasant even on a hot day.

The waterfall itself is lovely — about 9 metres (30 ft) high, with plenty of boulders around where you can sit and let the cascading water hypnotise you. It’s no Niagara, but that intimate atmosphere among the trees and rocks has a charm all its own. A brilliant hike for families with children or for a day when you simply don’t fancy covering 20 kilometres.

Tip: Alberta Falls also makes a great warm-up hike — you can continue on to Glacier Gorge, Mills Lake, or all the way to Sky Pond (14.5 km round trip total, but that’s a full-day affair for the fitter hikers).

6. Sky Pond — for those who want more

Alpine lake Sky Pond beneath granite towers
Photo: Christian Collins / CC BY-SA 2.0 / Wikimedia Commons

If Emerald Lake is the most popular easy hike, Sky Pond is the most popular challenging one — and in my opinion, the most beautiful spot in the entire park. An alpine lake wedged between granite walls, with Timberline Falls that you literally have to scramble up (it’s not rock climbing, but it is a scramble over wet boulders — you’ll need your hands).

The trail is 14.5 km (9 miles) round trip with about 530 metres (1,740 ft) of elevation gain. You start at Glacier Gorge, pass Alberta Falls, then the beautiful The Loch (a lake that’s well worth a visit in its own right), up past Timberline Falls to Lake of Glass, and finally to Sky Pond.

Important: The section past Timberline Falls is the crux — about 15 metres of steep scrambling up wet rocks beside the waterfall. It’s not technically difficult, but it’s slippery and a bit nerve-wracking if you’re not keen on heights. In winter and spring there’s often ice — don’t attempt it without crampons and an ice axe. In summer, it’s perfectly doable for reasonably fit hikers, just take care. Proper hiking boots are a must — check out our tips on hiking boots.

7. Moraine Park — the valley where elk graze

Wide Moraine Park valley with meadows and mountains
Photo: Frank Schulenburg / CC BY-SA 4.0 / Wikimedia Commons

Moraine Park is a sprawling valley on the park’s east side and one of the best spots for wildlife viewing — particularly elk. In September and October, during the rut, hundreds of people flock here to watch bull elk bugle, lock antlers, and gather their harems. It’s absolutely fascinating, and you don’t have to walk anywhere — you can see elk right from the car park or the road.

Even outside the rut, Moraine Park is stunning — vast meadows with the Big Thompson River winding through, surrounded by mountains on all sides. Mornings and evenings, you’ll often spot elk, coyotes, and occasionally moose. I’d recommend coming at sunset — golden light over a meadow full of elk is one of those moments when you wonder why you don’t do this every single day.

Practical tip: During the elk rut (typically late September to early October), keep at least 23 metres (75 feet) from the elk — bulls are aggressive during this period and faster than you’d expect. Every year there are incidents with tourists trying to get closer for a better photo. It’s not worth it. Bring binoculars or a telephoto lens instead.

8. Sprague Lake — tranquillity and mountain reflections

Peaceful Sprague Lake with mountain reflections
Photo: naturenps / Public domain / Wikimedia Commons

If Bear Lake feels too overcrowded and you want mirror-still water reflecting the mountains without the throngs, head to Sprague Lake. It’s a small lake just off Bear Lake Road — you can walk around it on a flat trail in 20–30 minutes (1.2 km loop), and mornings here are often blissfully quiet.

Sprague Lake is also fully accessible — the entire trail is paved and suitable for pushchairs and wheelchair users. An ideal spot for families with small children or for a calm start to the day before tackling a tougher hike. Lukáš and I were here one morning and saw a grand total of three other people and a family of beavers. Perfect ratio. 😁

9. Longs Peak — the roof of Colorado (for the bold)

Summit of Longs Peak, the highest mountain in Rocky Mountain National Park
Photo: OKJaguar / CC BY-SA 4.0 / Wikimedia Commons

Longs Peak (4,345 m / 14,259 ft) is the highest mountain in Rocky Mountain National Park and the park’s only fourteener — a peak exceeding 14,000 feet. The summit via the Keyhole Route is roughly 24 km (15 miles) round trip with 1,500 metres (4,900 ft) of elevation gain and takes 10–15 hours. This isn’t a hike — it’s a mountaineering expedition.

The toughest section begins beyond the Keyhole — a rock arch on the ridge, after which comes an exposed route across the Ledges (a narrow shelf above a drop), the Trough (a steep gully with fixed cables), and the Narrows (a thin rock ledge). In good weather, an experienced and fit hiker can manage it, but this is a serious mountain — injuries and sadly fatalities occur every year.

If you’re planning the summit: Set off around 3:00–4:00 AM (yes, in the dark, with a headtorch) so you reach the top before noon — afternoon thunderstorms are almost guaranteed in summer, and being on an exposed ridge in lightning is genuinely life-threatening. Check the forecast, bring plenty of water (at least 3 litres), food, warm clothing, and above all be honest with yourself about your fitness. If you’d rather enjoy a beautiful view without the risk, hike at least to Chasm Lake (13.5 km round trip) — it sits right beneath Longs Peak’s dramatic east face and is absolutely breathtaking.

lukas a lucka
Lukáš and Lucie recommend
Where to Stay in Rocky Mountain National Park
2 accommodations — wellness hotels and other lodging options

10. Kawuneeche Valley and Colorado River Trail

The park’s west side is a bit of a hidden treasure — most visitors head east towards Bear Lake and Trail Ridge Road, so the Kawuneeche Valley tends to be significantly quieter. And yet it’s gorgeous — a flat green valley through which the young Colorado River flows (yes, THAT Colorado River, the one that carved the Grand Canyon — up here it’s still a stream you can hop across).

The Colorado River Trail is an easy, flat path alongside the river — you can opt for a short version (3 km round trip to a pretty meadow) or a longer version (11 km round trip to Lulu City, a former mining town that’s now little more than a pile of timber). Along the way, you’ll often encounter moose — they’re far more common here than on the east side of the park. Keep your distance — moose look docile but can be aggressive, especially cows with calves.

Tip: If you’ve got time for more, continue from Lulu City towards Thunder Pass or La Poudre Pass — but those are full-day backcountry adventures.

11. Gem Lake Trail — a hidden gem off the beaten path

This is the kind of trail most tourists don’t know about — and that’s exactly why it’s brilliant. Gem Lake is a small lake tucked into granite rocks outside the main park area, accessible from the Lumpy Ridge trailhead north of Estes Park. The trail is 5.5 km (3.4 miles) round trip with 300 metres of elevation gain.

The whole route passes through fascinating rock formations — giant boulders, stone arches, and overlooks towards Estes Park and the valley. The lake itself is small but surprisingly photogenic — crystal-clear water in a granite basin with views of the Continental Divide. Best of all: you don’t need a timed entry reservation, because the trailhead is outside the main park boundary. A perfect alternative for days when you couldn’t snag a reservation.

12. Old Fall River Road — a historic alternative to Trail Ridge

If Trail Ridge Road feels a bit too “civilised,” try Old Fall River Road — the original historic route into the park, dating back to 1920. It’s a one-way (uphill only), unpaved gravel road stretching about 15 km that climbs to the Alpine Visitor Center via steep switchbacks. You come back down via Trail Ridge Road.

The road is narrow, slow (budget 30–45 minutes), and a touch adventurous — but a regular car handles it without issue (campervans and trailers are prohibited). The advantages? Far fewer vehicles, a different perspective on the mountains, and that wonderful feeling of driving a road that the park’s very first visitors used a century ago. We drove up on this road and came back down via Trail Ridge Road — the perfect combination.

Open usually from early July to late September (conditions permitting).

13. Wildlife watching — where and when

Elk herd on a meadow in Rocky Mountain National Park
Photo: mark byzewski / CC BY 2.0 / Wikimedia Commons

Rocky Mountain National Park is one of the best parks in the US for spotting wildlife right from the road. You don’t need to hike for hours into the backcountry — you just need to be in the right place at the right time.

Elk: The most common large animal in the park. Best spotted in Moraine Park, Horseshoe Park, and on the meadows along Trail Ridge Road — ideally early morning or late evening. In September–October, it’s elk rut season (see tip #7). Elk are genuinely everywhere — you’ll see them on the golf course in Estes Park or in the supermarket car park. 😁

Bighorn sheep: Look for them on the rocky slopes around Sheep Lakes (Horseshoe Park) and on the steep hillsides along Trail Ridge Road. Most common in May and June, when they come down to mineral licks.

Moose: West side of the park, Kawuneeche Valley and around Grand Lake. Most common early morning. They’re enormous animals and look gentle, but they are NOT — keep a very wide berth.

Marmots and pikas: On the rocky slopes above the treeline, especially around Rock Cut on Trail Ridge Road. You’ll hear pikas before you see them — they make a distinctive high-pitched “EEEP!” call.

Black bears: Rare but present. If you encounter a bear, stay calm, give it space, and DO NOT feed it. The park has strict rules about storing food in bear-proof containers.

14. Wildflowers on alpine meadows

If you visit in June or July, you’re in for a bonus that photos simply don’t do justice — wildflower season. The alpine meadows above the treeline (above roughly 3,500 m / 11,500 ft) become carpeted with miniature flowers — yellow, purple, white, pink — that have just a few short weeks to bloom before winter returns.

The best spots for wildflowers are the meadows along Trail Ridge Road (stop at Forest Canyon Overlook and Rock Cut), Ute Trail, and Tundra Communities Trail. Down in the valleys, you’ll find meadow flowers in Moraine Park and along the Cub Lake Trail (6.8 km round trip, a flat trail through meadows and forest — beautiful even outside flower season).

Important: Alpine tundra is an extremely fragile ecosystem. Plants here grow only millimetres per year, and a single boot print on tundra can remain visible for decades. Please stay on the marked trails.

15. Estes Park — the charming gateway town

Town of Estes Park, gateway to Rocky Mountain National Park
Photo: Nyttend / Public domain / Wikimedia Commons

Estes Park isn’t just somewhere you sleep — it’s a fully-fledged part of the experience. This mountain town of about 6,000 permanent residents has a surprisingly rich offering of restaurants, cafés, galleries, and shops. And then there’s the famous Stanley Hotel — the hotel that inspired Stephen King to write The Shining. Yes, THAT hotel. Tours are available and well worth it, even if you’re not a horror fan.

A stroll along Elkhorn Avenue (the main street) makes for a pleasant hour or two — pop into shops selling Native American jewellery and outdoor gear, grab an ice cream, and watch elk nonchalantly wandering across front lawns. In October, the town hosts Elk Fest — a festival celebrating the elk rut with bugling demonstrations, talks, and local food.

Viewpoint above town: Drive up to Prospect Mountain — by car or on foot (but the route is steep). The view over Estes Park with mountains as a backdrop is gorgeous, especially at sunset.

What to eat and drink: a guide for hungry travellers

Inside Rocky Mountain National Park itself, you won’t find any restaurants — there’s only the aforementioned Trail Ridge Store at the Alpine Visitor Center with basic refreshments (hot dogs, soups, coffee). For every day in the park, pack plenty of snacks, a packed lunch, and most importantly water — at least 2 litres per person. You’ll dehydrate faster than you think at altitude and in the sun.

All the food is made up for in Estes Park, which has a surprisingly good food scene:

Breakfast: Notchtop Bakery & Café — excellent bakery with fresh croissants and decent coffee. There’s often a morning queue, but it moves quickly. Alternatively, The Egg & I — classic American breakfast with enormous portions.

Lunch/dinner: Smokin’ Dave’s BBQ & Brew — if you love American BBQ, this is a dead cert. The ribs and brisket are superb. Nepal’s Café — unexpectedly authentic Nepalese food in the middle of Colorado. The momos (Nepalese dumplings) are fantastic. Bird & Jim — more upscale American cuisine with local ingredients, slightly pricier, but worth it for a special dinner.

Coffee: Inkwell & Brew — the best speciality coffee in Estes Park. Small, cosy space with a lovely vibe.

In Grand Lake: The selection is smaller, but Sagebrush BBQ & Grill serves solid American classics with a lake view. Fat Cat Café is decent for a quick lunch.

Picnic tip: Stock up at the Safeway supermarket in Estes Park — sandwich supplies, fruit, and trail mix. A picnic at Sprague Lake or on a meadow in Moraine Park with a mountain backdrop beats any restaurant.

Practical tips and tricks

What to bring

Rocky Mountain National Park is a high-altitude environment where the weather changes fast. Layering is key — mornings can be 5 °C (41 °F), midday 25 °C (77 °F), and by afternoon a hailstorm might roll through. Every day, make sure you have:

  • A rain jacket or waterproof shell (afternoon storms are the norm in summer)
  • A warm layer (fleece or lightweight down jacket)
  • Quality hiking boots (trail runners are fine for easy trails; for Sky Pond and Longs Peak, you’ll want ankle support)
  • Sunscreen SPF 50+ (UV radiation is significantly stronger at altitude)
  • A hat and sunglasses
  • At least 2–3 litres of water per person
  • Snacks and a packed lunch

For a longer trip to the US, definitely check our tips on how to pack with carry-on luggage only.

Altitude sickness

Most activities in the park take place at 2,400–3,700 metres (7,900–12,100 ft) above sea level. If you’re flying in from sea level, take it easy on the first day — a gentle walk around Bear Lake and Sprague Lake, no big hikes. Drink plenty of water, skip the alcohol on your first evening, and listen to your body. Symptoms of altitude sickness (headache, nausea, dizziness) can hit anyone — regardless of fitness level.

eSIM and internet

Mobile signal in the park is very limited — on most trails and in the valleys you’ll have nothing. In Estes Park and along main roads, signal works. Download offline maps in advance (Google Maps or AllTrails) and don’t rely on the internet. For a trip to the US, it’s worth getting an eSIM — check out our Holafly review.

Travel insurance

Healthcare costs in the US are astronomical — a broken leg could run into tens of thousands of dollars. Travel insurance is a necessity, not a luxury. Make sure your policy covers activities at altitude (some budget policies have an elevation limit). Have a look at our SafetyWing review — they cover outdoor activities without any issues.

Car hire

A car is practically essential at Rocky Mountain National Park. Lukáš and I have had consistently great experiences with DiscoverCars, which we use all over the world. You can easily hire a car in Denver — a standard sedan is perfectly fine for all the paved roads in the park. Petrol in Colorado is generally cheaper than on the coasts — expect about $3.50–4.50 per gallon (roughly €0.85–1.10 per litre).

Frequently asked questions (FAQ)

Tips and Tricks for Your Vacation

Don’t Overpay for Flights

Search for flights on Kayak. It’s our favorite search engine because it scans the websites of all airlines and always finds the cheapest connection.

Book Your Accommodation Smartly

The best experiences we’ve had when looking for accommodation (from Alaska to Morocco) are with Booking.com, where hotels, apartments, and entire houses are usually the cheapest and most widely available.

Don’t Forget Travel Insurance

Good travel insurance will protect you against illness, accidents, theft, or flight cancellations. We’ve had a few hospital visits abroad, so we know how important it is to have proper insurance arranged.

Where we insure ourselves: SafetyWing (best for everyone) and TrueTraveller (for extra-long trips).

Why don’t we recommend any Czech insurance company? Because they have too many restrictions. They set limits on the number of days abroad, travel insurance via a credit card often requires you to pay medical expenses only with that card, and they frequently limit the number of returns to the Czech Republic.

Find the Best Experiences

Get Your Guide is a huge online marketplace where you can book guided walks, trips, skip-the-line tickets, tours, and much more. We always find some extra fun there!
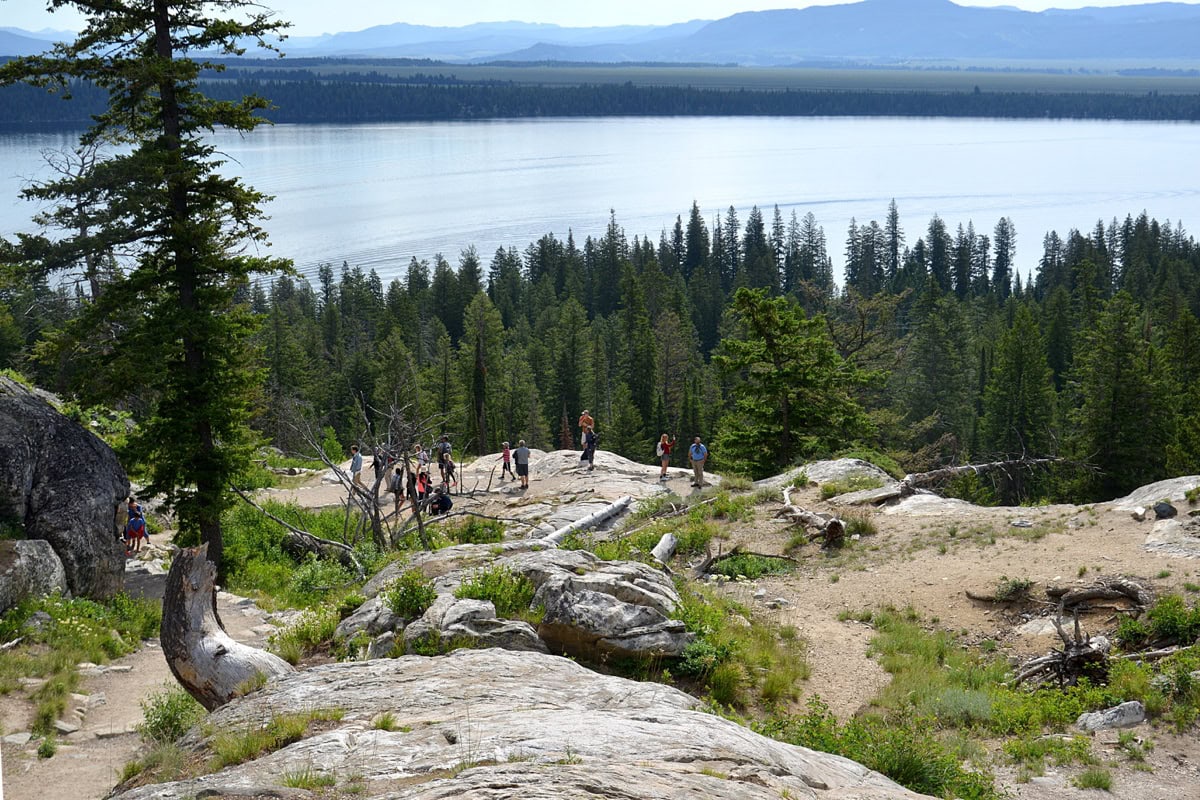
Death Valley National Park: 15 Tips on What to See and Do

TL;DRDeath Valley National Park, straddling the California-Nevada border, packs in 15 essential stops: Badwater Basin, the lowest point in North America (-86m), the viewpoints at Zabriskie Point and Dante’s View, the rainbow-hued Artists Palette, the Mesquite Flat sand dunes, and the eerie Racetrack Playa with its sailing stones. The best time to visit is November to March, when temperatures sit at 15–25°C, compared with summer highs above 45–50°C, when dehydration becomes a real risk. Give yourself 1–2 days for the main sights, or 3 if you want to take in the more remote spots too. Park entry costs $30 per car for 7 days, and a 2–3 day budget for two comes to roughly 8,400–23,000 CZK depending on where you stay.

You’re standing in a car park, it’s nine in the morning, and the thermometer reads 38 °C. The air shimmers above the scorching tarmac and you think: “Why on earth did I come here?” Then you look down — at that endless white salt flat stretching to the horizon, framed by mountains in shades of purple and rust — and suddenly it all makes sense. Death Valley is a place that first intimidates you, then takes your breath away. Quite literally, because breathing in that heat feels like sitting in a sauna. 😅

I’ve visited Death Valley National Park several times, and each trip has been a completely different experience. The first time we hit the wildflower bloom and the entire valley was ablaze with yellows and purples (that only happens once every few years). The second time we arrived for sunset over Zabriskie Point, and I felt like we’d landed on Mars.

In this article you’ll find 15 tips on what to see and do in Death Valley — from the iconic Badwater Basin, the lowest point in North America, to the psychedelic Artists Palette and sand dunes that’ll make you feel like you’re in the Sahara. I’ll tell you when to go (because bad timing can literally put your life at risk), where to stay, how much it all costs, and what to watch out for so your visit to Death Valley National Park is unforgettable — in the best possible way.

TL;DR

  • Death Valley National Park sits on the border of California and Nevada and is the driest, lowest, and hottest place in North America. In summer, the Death Valley temperature exceeds 50 °C — that’s not a typo.
  • The best time to visit is November to March, when temperatures hover around a pleasant 15–25 °C. Avoid summer unless you fancy the sensation of being shoved inside an oven.
  • Allow at least 1–2 full days for Death Valley, ideally 3 if you want to reach more remote spots like Racetrack Playa.
  • Top 5 must-see spots: Badwater Basin, Zabriskie Point, Dante’s View, Artists Drive, and Mesquite Flat Sand Dunes.
  • Accommodation inside the park is pricey and limited — alternatives include the towns of Beatty (Nevada) or Pahrump. Book well ahead, especially in peak season.
  • Park entrance fee is $30 per vehicle (roughly €28) for 7 days, or you can grab an America the Beautiful Pass for $80 (roughly €75) covering all US national parks for a year.
  • Bring LOTS of water — at least 4 litres per person per day. There’s no mobile signal, petrol stations are few and far between, and a tow truck will cost a fortune.
  • The night sky in Death Valley is among the best in the world — the park holds Dark Sky certification and the Milky Way is visible with the naked eye so clearly your jaw will drop.

When to visit Death Valley and how to get there

Death Valley, California — two words that conjure images of scorching heat and endless desert. And that’s true — but only for part of the year. Timing your visit here matters more than almost anywhere else, because getting it wrong doesn’t just mean an unpleasant trip — it can be genuinely dangerous.

Best time to visit

November through March is hands-down the best time to visit Death Valley. Daytime temperatures sit around 15–25 °C, while nights can drop close to freezing (yes, the desert gets cold at night — that caught Lukáš and me off guard on our first camping trip 😅). Skies are mostly clear, the air is crisp, and the crowds are manageable.

March and April are brilliant if you want to catch the wildflower season — after a wetter-than-average winter, the whole valley can erupt into incredible colours. It doesn’t happen every year, but when it does, it’s absolutely magical.

May and October are transition months — the Death Valley weather brings temperatures around 30–35 °C, which is still bearable, but shorter hikes already demand caution.

June through September? Give it a miss. Average temperatures exceed 45 °C, and the record-breaking 56.7 °C (134 °F) measured in 1913 makes Death Valley the hottest place on the planet. In summer only hardcore enthusiasts visit, and even they spend most of the day in an air-conditioned car. The park service strongly advises against any hiking after 10 am. Trust me, they mean it — every year rescue teams deal with dozens of dehydration and heatstroke cases.

How to get to Death Valley

By car — the only sensible option. Death Valley National Park is enormous (larger than the whole of Yorkshire!) and there’s simply no public transport. The nearest major cities:

  • Las Vegas — roughly 2 hours (190 km) via Highway 160 and 190. The most convenient starting point and often where you’ll find the cheapest flights from the UK (British Airways, Virgin Atlantic, and budget carriers fly direct from London).
  • Los Angeles — around 4.5–5 hours (450 km). Perfect as part of a bigger US national parks road trip.
  • Bakersfield — roughly 4 hours from the west via the mountain pass.

Lukáš and I have had consistently great experiences with DiscoverCars, which we use all over the world — it compares prices from all the major rental companies and makes insurance straightforward. Definitely pick up your car with a full tank and fill up every time you see a petrol station. There are barely any inside the park (Furnace Creek and Stovepipe Wells only) and prices are 50–100% higher than outside.

Important: If you’re planning to drive to Racetrack Playa or more remote parts of the park, you’ll need a 4WD with high clearance. A regular saloon car is fine for the main roads, but forget about unpaved tracks.

Entrance fees and getting around the park

Entry costs $30 per vehicle (roughly €28) for 7 days. If you’re planning to hit multiple US national parks, grab an America the Beautiful Pass for $80 (about €75) — it’s valid for a year and covers every national park and federal recreation area. We buy one every time and it pays for itself after just three parks.

Download a Death Valley map of attractions to your phone beforehand (Google Maps offline maps are a lifesaver here, because signal only works in Furnace Creek and Stovepipe Wells — and even that’s patchy). You can also pick up an official park map at the Visitor Center in Furnace Creek.

Where to stay in Death Valley and how much it costs

Accommodation in and around Death Valley has its quirks — choice is limited and prices reflect that. Let’s run through all the options, from camping under the stars to that one “luxury” hotel in the middle of the desert.

Accommodation inside the park

The Oasis at Death Valley (Furnace Creek) — formerly Furnace Creek Ranch, now a modernised resort. Two tiers:

  • The Ranch at Death Valley — simpler rooms, a thermal-water pool, from around $250/night (€235). In peak season expect $350+.
  • The Inn at Death Valley — a historic 1927 hotel in Spanish Colonial Mission style. Beautiful, but prices start at $500/night (€465). If your budget stretches that far, it’s quite an experience.

Stovepipe Wells Village — motel-style accommodation, from roughly $150–200/night (€140–185). It has a restaurant, pool, and petrol station. Great location near the sand dunes.

Panamint Springs Resort — on the western edge of the park, small and cosy, from $100/night (€93). A bit off the beaten track from the main attractions, but peaceful and reasonably priced.

Camping — the best experience

Honestly? Camping is the single best way to experience Death Valley. Falling asleep beneath a billion stars in absolute darkness and silence is something no hotel can match.

  • Furnace Creek Campground — the only campsite that takes reservations (via recreation.gov), $22/night. In season it fills up weeks in advance, so book as early as you can!
  • Sunset, Texas Springs — first-come, first-served, $16/night. Arrive early in the morning.
  • Free camping — backcountry camping is allowed at designated spots inside the park, completely free but with zero facilities. No water, no toilets, no signal. Best suited to experienced campers.

Accommodation outside the park (cheaper option)

Beatty, Nevada (60 km from Furnace Creek) — our recommendation for anyone on a budget. A small town with a handful of motels and restaurants. Prices from $80–120/night (€75–110).

Pahrump, Nevada (100 km) — a larger town with more options, a Walmart, and restaurants. Cheaper, but a longer drive.

Lone Pine, California (165 km from the west) — a gorgeous little town at the foot of the Sierra Nevada and the launch point for Mt. Whitney. Perfect if you’re combining Death Valley with parks further west.

How much Death Valley costs — budget for 2–3 days for two

  • Entrance fee: $30 (€28) per vehicle / $80 (€75) annual pass
  • Accommodation (2 nights): $200–700 (€185–650) depending on type
  • Petrol: $40–60 (€37–56) — pricier inside the park
  • Food (2 days): $80–150 (€75–140) — restaurants in the park are expensive
  • Activities/tours: $0–50 — most attractions are free; you only pay the park entrance
  • Total for 2–3 days for two: roughly $350–960 (€325–895)

Budget tip: camp, bring a cool box full of food, and stock up on water before you arrive. On our first visit we camped and cooked on a portable stove — it cost us a fraction of the price.

Death Valley: 15 things to see and do

Now for the good stuff — let’s dive into the best things to see and do in Death Valley National Park. I’ve ranked them roughly by “must-see” factor, but honestly — everything here is stunning, even the drive itself is an experience.

1. Badwater Basin — the lowest point in North America

Salt flats at Badwater Basin, the lowest point in North America
Photo: King of Hearts / CC BY-SA 3.0 / Wikimedia Commons

Badwater Basin is THE spot in Death Valley. You’re standing 86 metres below sea level — the lowest point in all of North America — surrounded by an endless salt flat, white and crunchy underfoot, hemmed in by mountains with a “Sea Level” sign bolted to the cliff face above you. You stare up at it and think: “Wait, the ocean is normally up there?”

A short paved path leads from the car park to the edge of the salt flat, but I’d recommend walking further — the deeper you go (a good 15–20 minutes), the more regular and photogenic the salt crust becomes, with those iconic hexagonal patterns. The whole round trip takes about 30–60 minutes.

Timing is everything. Morning or late afternoon offers the best light and far more bearable temperatures. At midday the heat is unbearable and the white salt reflects the sun so fiercely you won’t last a minute without sunglasses. Badwater Basin Death Valley is an absolutely iconic experience, but if you rock up at 2 pm in June, it’ll be more torture than treat.

Fun fact: The name “Badwater” comes from early surveyors whose mules refused to drink the water here. It’s not poisonous, but it’s so salty and mineral-rich that it’s genuinely undrinkable.

2. Zabriskie Point — sunset from another planet

Eroded hills at the Zabriskie Point viewpoint
Photo: © Pierre André / CC BY-SA 4.0 / Wikimedia Commons

Zabriskie Point is probably the most photographed spot in the entire park — and rightly so. From the viewpoint you gaze across a labyrinth of golden and cream-coloured eroded hills that look like giant scoops of ice cream left out in the sun. Or like Mars. Or like a sci-fi film set (which, incidentally, it’s been used as many times).

It’s only a couple of minutes’ walk from the car park along a paved, wheelchair-accessible path — literally anyone can get here. Come for sunrise — that’s the golden hour when the entire landscape glows orange and gold. Sunset is lovely too, but the sun dips behind the mountains at your back, so the last light fades sooner than you’d expect.

From Zabriskie Point you can continue onto the Golden Canyon Trail (about 5 km round trip), which threads right through those eroded formations. Well worth it, but bring plenty of water and set off early.

3. Dante’s View — a jaw-dropping panorama

Valley panorama from the Dantes View viewpoint
Photo: Steven Lek / CC BY-SA 4.0 / Wikimedia Commons

If you can only pick one viewpoint in Death Valley, Dante’s View should be it. From 1,669 metres above sea level you look down across the entire valley — Badwater Basin appears as a tiny white smudge far below, while on the opposite side the Sierra Nevada rises with Mt. Whitney, the highest point in the contiguous United States. The lowest and highest points of the lower 48 in a single panorama — it’s quite the head-spinner.

The Death Valley road to Dante’s View follows a narrow paved road (13 miles from the Highway 190 junction); the final stretch is fairly steep and winding but manageable in a regular car. At the top there’s a car park and a short path to the viewpoint.

Best time: Sunrise here is pure magic — you watch the first rays slowly illuminate the valley from below. But heads up, mornings can be windy and chilly (below 10 °C in winter months), so bring a jacket. Lukáš and I arrived at half five in the morning in November and I was wearing my puffer — after a full day exploring in a T-shirt down in the valley, the contrast was quite the shock. 😅

4. Artists Drive and Artists Palette — nature was painting

Colourful mineral hills at Artists Palette
Photo: Alisha Vargas from Reno, NV, US / CC BY 2.0 / Wikimedia Commons

Artists Drive is a one-way loop (14 km) that winds through rocks in shades of green, pink, purple, turquoise, and orange. It looks just like a painter’s palette — hence the name of the main viewpoint, Artists Palette. The colours come from the oxidation of various minerals: iron produces reds and yellows, manganese gives purple, and mica creates green.

Driving the whole of Artists Drive takes about 30–45 minutes, but pull over as often as you can — the best Death Valley photos are often from unexpected spots along the road. Artists Palette itself has a small car park and a short stroll to the most colourful stretch.

Good to know: Artists Drive is one-way and closed to vehicles longer than 25 feet (7.6 m) — so no RVs or large motorhomes. The colours look most vivid in late-afternoon light, when the low sun intensifies every shade.

5. Mesquite Flat Sand Dunes — the Sahara in California

Mesquite Flat Sand Dunes in Death Valley
Photo: Alexander Migl / CC BY-SA 4.0 / Wikimedia Commons

Mesquite Flat Sand Dunes are the sandy dunes you’ve seen in every other Death Valley photo. And they’re every bit as photogenic in person — golden waves of sand with razor-sharp edges and dramatic shadows, backed by a mountain range. The tallest dune reaches about 30 metres, and the entire dune field covers roughly 14 km².

It’s just a few minutes’ walk from the car park near Stovepipe Wells to the dunes. There’s no marked trail — you simply wander wherever you like. But be warned: walking in sand is hard work, distances are deceptive, and in hot weather the sand surface temperature can soar past 70 °C. Only take your shoes off if you’ve thought it through very carefully (or better yet, don’t).

Best time: Sunrise or sunset, when the shadows create those dramatic contrasts across the dunes. At midday the light is flat and the dunes look dull. Plus — at noon you could literally fry an egg on them. We arrived for sunset and Lukáš insisted he’d only taken better photos in the Sahara. (He’s never been to the Sahara, but we’ll let that slide. 😁)

6. Golden Canyon and Red Cathedral — a short hike with big payoff

Golden Canyon Trail is one of the most popular short hikes in Death Valley, and deservedly so. You walk through a narrow canyon with walls in golden and orange hues that tower above you like cathedral walls. The destination is Red Cathedral — a massive rock face in deep red that looks like a rusted Gothic cathedral.

The trail is roughly 5 km round trip with about 100 metres of elevation gain. Nothing strenuous, but in the heat it can be draining — set off early in the morning. The terrain is mostly sandy and gravelly; hiking boots are recommended but sturdy trainers will do (that said, we swear by our favourite hiking boots).

You can extend the route into the Gower Gulch Loop, a roughly 7 km circuit — up through Golden Canyon, over the ridge, and back via Gower Gulch. A brilliant option if you have the time and energy.

7. Dante’s Ridge Trail — for those who want more than a viewpoint

If simply standing at Dante’s View isn’t enough and you want to earn your panorama, head out along Dante’s Ridge, an unmarked trail running along the ridgeline to the north. It’s roughly 1.5 km one way, but you’re on a narrow ridge with views on both sides — down into Death Valley on one side and across Greenwater Valley on the other.

Warning: The trail is unmaintained, exposed in places, and unpleasant in strong wind. It’s not for everyone. But if there’s one thing from Death Valley that’s etched into our memory, it’s that feeling of standing on the ridge completely alone, wind whistling past your ears, with a 1,700-metre drop below. A bit like being on top of the world — except here you’re on top of the deepest valley.

8. Natural Bridge — a rock arch in a canyon

Natural Bridge is a natural rock arch spanning a narrow canyon — and reaching it is a pleasant, short hike (about 2 km round trip). The path follows a dry streambed between steep rock walls where you can see layers of sediment millions of years old.

It’s one of the lesser-visited spots in the park, so you’ll often have it to yourself. The access road (2 miles of unpaved track) is a bit bumpy — you don’t strictly need 4WD, but watch your clearance.

9. Racetrack Playa — the mystery of the sailing stones

Mysterious sailing stones on Racetrack Playa
Photo: Daniel Mayer (mav) / CC BY-SA 3.0 / Wikimedia Commons

Racetrack Playa is one of the most mysterious places on Earth — rocks “move” on their own across a smooth, dried-out lake bed, leaving trails behind them. Scientists only cracked the phenomenon in 2014: in winter, a thin layer of ice forms on the playa and, pushed by wind, slides along carrying the rocks with it. Even with the explanation, it’s a fascinating sight.

BUT — and this is a big but: The route to Racetrack Playa is 42 km (26 miles) of rough, unpaved road from Ubehebe Crater and you need a 4WD with high clearance. Budget at least 2 hours each way (max speed 25 km/h). There’s no phone signal, no services, nothing. If you get a flat tyre, you’re on your own. Bring two spare tyres, plenty of water, and a full tank.

But it’s worth every bump. Racetrack Playa is utterly surreal — a perfectly flat dry lake bed surrounded by mountains, absolute silence, not a soul in sight. One of those experiences you never forget.

10. Ubehebe Crater — the explosion that reshaped the landscape

Ubehebe volcanic crater in Death Valley
Photo: samiamx / CC BY 2.0 / Wikimedia Commons

Ubehebe Crater is a massive crater 800 metres across and 237 metres deep, created by a volcanic explosion a “mere” 2,000–7,000 years ago. You stand on the rim and peer into an abyss of coloured layers — orange, black, and grey.

From the car park it’s literally a few steps to the crater’s edge. You can walk the entire rim (about 2.4 km) or descend to the bottom (roughly 0.5 km down, but be warned — the climb back up through the loose gravel is considerably harder than it looks). Allow 30–60 minutes for the whole stop.

Ubehebe Crater is also the jumping-off point for the drive to Racetrack Playa — if you’re heading to the “sailing stones,” make a stop here on the way.

11. Devil’s Golf Course — a salt landscape from a horror film

Jagged salt landscape at Devils Golf Course
Photo: samiamx / CC BY 2.0 / Wikimedia Commons

Devil’s Golf Course is fascinating — picture a salt flat, but not the smooth kind like Badwater. Here the surface is broken into sharp, jagged salt crystals and formations that resemble miniature mountains and turrets. The name comes from a 1934 guidebook that declared “only the devil could play golf here.”

You can drive right to the edge and walk on the surface — but tread carefully, because those salt crystals are razor-sharp. Proper shoes are a must; sandals would be suicidal. On a still day, press your ear to the ground — you’ll hear a faint crackling. That’s the salt crystallising and expanding in the heat. A bit eerie, a bit cool.

lukas a lucka
Lukáš and Lucie recommend
Where to Stay in Death Valley National Park
6 accommodations — wellness hotels, campgrounds and other lodging options

12. Night sky in Death Valley — Dark Sky Park

Death Valley holds Gold Tier International Dark Sky Park certification, and the night sky here is in a league of its own. The Milky Way is visible with the naked eye so clearly that the first time you see it, you’ll wonder if it’s an optical illusion. It’s not.

Best stargazing spots:

  • Harmony Borax Works — flat, easily accessible, minimal light pollution
  • Mesquite Flat Sand Dunes — dunes + starry sky = Instagram jackpot
  • Badwater Basin — the salt flat reflects the starlight

When: Around the new moon, ideally in winter months (longer nights). Bring a blanket or camping mat to lie on, a warm jacket (the desert gets properly cold at night), and if you have a tripod, you’ll come away with the best photos of your life. Lukáš and I lay on the Badwater salt flat staring upward for about an hour. I think we said maybe three sentences the entire time — there’s simply nothing to say when the entire universe is hanging above you.

13. Mosaic Canyon — marble-walled canyon

Marble walls of Mosaic Canyon
Photo: Adam Jones from Kelowna, BC, Canada / CC BY-SA 2.0 / Wikimedia Commons

Mosaic Canyon is a short but visually stunning hike right near Stovepipe Wells. You walk through a narrow canyon whose walls are smooth as polished marble — literally, because they’re formed from a mosaic (hence the name) of different rock types cemented into a sleek surface.

The trail is roughly 3 km round trip and fairly easy, though at a few points you’ll need to scramble over rock ledges. Older children can manage it fine. The canyon looks its best in the early morning, when angled light illuminates the polished walls.

14. Father Crowley Vista Point — the fighter jet viewpoint

This one’s a bit different. Father Crowley Vista Point is a viewpoint overlooking Rainbow Canyon (a.k.a. Star Wars Canyon), where the US military practises low-level flying. Yes, you read that right — with a bit of luck you’ll see an F/A-18 or F-35 fighter jet blast through the canyon below the level of the viewpoint. It sounds bonkers if you haven’t heard of it before, but it’s very real and incredibly thrilling.

Flyovers are most common on weekdays, but there’s no timetable. Sometimes you wait an hour and see nothing; other times three jets scream past back to back. Even without the planes, it’s a gorgeous viewpoint into a deep, rainbow-coloured canyon. And if no jets show up, at least you’ve got a cracking view and a great pub story.

15. Wildrose Charcoal Kilns — historic kilns in the mountains

Wildrose Charcoal Kilns are ten beehive-shaped stone kilns built in 1877 to produce charcoal for smelting silver. They sit at an elevation of 2,000 metres, so it’s noticeably cooler here than down in the valley — a welcome relief on warmer days.

The kilns are beautifully preserved and you can step inside — the acoustics are fantastic, so try whistling or clapping. The site is off the main tourist trail, so you’ll likely have it to yourself. The road here (Wildrose Road) is mostly paved, but the last few miles are unpaved.

Where to eat and drink in Death Valley (and survive)

Let’s be honest — nobody goes to Death Valley for the gastronomy. 😅 Options are limited, prices reflect the fact that you’re in the middle of a desert miles from civilisation, and quality varies. But you won’t starve (unlike dying of thirst, which is a genuine risk if you don’t pack enough water).

Restaurants in the park

The Inn at Death Valley Dining Room — the best restaurant in the park, solid American cuisine, decent steaks and salads. But prices match the luxury setting — mains $30–50 (€28–47). Book ahead in season.

The Last Kind Words Saloon (Furnace Creek) — a casual restaurant and bar. Good burgers, nachos, pizza. Prices are reasonable by local standards ($15–25, or €14–23 for a main). Western saloon vibes — grab a beer on the terrace and swap desert stories.

Toll Road Restaurant (Stovepipe Wells) — straightforward American fare and buffet breakfasts. Nothing world-beating, but after a day in the desert absolutely anything tastes good.

Panamint Springs Restaurant — a small restaurant with surprisingly good burgers and portions big enough to satisfy a famished cowboy.

Tip: Bring your own food

We mean it. A cool box filled with water, fruit, sandwiches, and snacks will save you both money and time. The park has one small Furnace Creek General Store with eye-watering prices for basic supplies. Do your shopping in Las Vegas or Pahrump before you arrive.

And above all — water, water, water. A minimum of 4 litres per person per day, more if you’re hiking. Dehydration in Death Valley can sneak up on you surprisingly fast, even when you think you’re not sweating — in reality the sweat evaporates instantly in the dry air, so you don’t realise how much fluid you’re losing.

Practical tips and what to pack

Safety in Death Valley

This isn’t scaremongering — Death Valley is genuinely a place where you need to respect nature:

  • Fill up your tank whenever you see a petrol station. There are only two in the park (Furnace Creek and Stovepipe Wells) and prices are brutal ($6–7/gallon).
  • Mobile signal is virtually non-existent outside Furnace Creek. A satellite communicator (Garmin InReach, SPOT) is a smart idea for longer excursions.
  • Never set off on a hike without enough water. The park service recommends 1 gallon (3.8 litres) per person for a longer hike.
  • Roads can flood. After rain (even distant rain) dry washes can be hit by flash floods with no warning. Never park in a wash and keep an eye on the weather forecast.
  • Tell someone your plan — where you’ll be and when you expect to be back.

What to pack

  • Wide-brimmed hat — sunglasses alone aren’t enough; you need shade on your face and neck
  • SPF 50+ sunscreen — in the desert you can burn even through clouds
  • Layered clothing — 30 °C during the day, below 5 °C at night (in winter months)
  • Sturdy footwear — essential for hikes and recommended on the salt flats (see our hiking boot recommendations)
  • Head torch — for stargazing, camping, and early-morning starts
  • Offline maps — Google Maps and maps.me both work offline; download the whole park area in advance
  • eSIM — useful for when you arrive and leave the park; we recommend Holafly (but inside the park there’s mostly no signal anyway, so don’t rely on it)
  • For more packing tips, check out our guide on how to pack carry-on only

Travel insurance

Never travel to the US without travel insurance — healthcare there is astronomically expensive (a helicopter evacuation from Death Valley could set you back tens of thousands of dollars). For shorter trips we like AXA, and for longer stays we recommend SafetyWing, which we’ve tested ourselves.

Why is it called Death Valley? A brief history

We get this question a lot, so let’s tackle it. The name Death Valley dates back to the Gold Rush in 1849, when a group of emigrants — the so-called “49ers” — got lost in the valley while trying to find a shortcut to California. They spent weeks in inhuman conditions, without enough water or food, and eventually had to eat their oxen.

Surprisingly — despite the brutal conditions — only one person from the entire group actually died. Still, when the survivors were finally rescued and crossed out over a mountain pass, one of the women reportedly turned around and said: “Goodbye, Death Valley.” And the name stuck.

But Death Valley’s history reaches much further back. The Timbisha Shoshone people have lived here continuously for over a thousand years and still maintain a reservation within the park. They thrived in conditions that nearly killed European settlers — which rather says it all.

FAQ — Frequently asked questions about Death Valley

What to see in Death Valley?

The most famous attractions include Badwater Basin (the lowest point in North America, 86 m below sea level), Zabriskie Point with its surreal eroded hills, the Dante’s View panorama overlooking the entire valley, the colourful Artists Palette, the Mesquite Flat Sand Dunes, and the mysterious Racetrack Playa with its “sailing stones.” Allow at least 2 full days for the main sights, ideally 3. In the article above you’ll find a detailed description of all 15 top spots.

Why is it called Death Valley?

The name dates back to 1849, when a group of Gold Rush prospectors (the “49ers”) got lost in the valley on their way to California. They endured weeks in extreme conditions without enough water or food. As the group finally departed over a mountain pass, one member reportedly turned around and said: “Goodbye, Death Valley.” Ironically, only one person from the group actually died — but the harrowing experience was enough for the name to stick forever.

Where is Death Valley located?

Death Valley National Park lies on the border of California and Nevada in the southwestern United States. The nearest major city is Las Vegas (roughly 2 hours by car, 190 km). From Los Angeles it’s about 4.5–5 hours. The park sits in the Mojave Desert and is the driest, lowest, and hottest place in all of North America.

How many days do I need for Death Valley?

A minimum of 1–2 full days covers the main attractions (Badwater Basin, Zabriskie Point, Dante’s View, Artists Drive, Mesquite Sand Dunes). For a more relaxed pace and remote spots like Racetrack Playa or Ubehebe Crater, we recommend 3 days. If you want to fit in hikes (Golden Canyon, Mosaic Canyon), add a 4th day. On our second visit we allowed 3 days and still didn’t manage everything.

Is Death Valley dangerous?

If you follow basic precautions, no — but underestimating it is not an option. The main risks are dehydration and heatstroke (summer temperatures exceed 50 °C), vehicle breakdowns in remote areas with no signal, and flash floods after rain. Always carry enough water (at least 4 litres per person per day), tell someone your plans, and limit outdoor activity in the summer months. The park service advises against camping below 1,500 m elevation in summer.

What car do I need for Death Valley?

For the main roads and most top attractions (Badwater, Zabriskie Point, Dante’s View, Artists Drive, Sand Dunes), a regular saloon or SUV is fine. For Racetrack Playa, Titus Canyon, and certain other unpaved routes you’ll need a 4WD with high clearance. In all cases, make sure you have a full tank and two spare tyres for more remote excursions.

How much does it cost to visit Death Valley?

Park entrance is $30 (about €28) per vehicle for 7 days, or $80 (€75) for an annual America the Beautiful Pass covering all US national parks. Accommodation inside the park ranges from $150 to $500+ per night; camping costs $16–22 per night. The total budget for 2–3 days for two ranges from roughly €325 (camping, own food) to €895 (hotel, restaurants).

Tips and Tricks for Your Vacation

Don’t Overpay for Flights

Search for flights on Kayak. It’s our favorite search engine because it scans the websites of all airlines and always finds the cheapest connection.

Book Your Accommodation Smartly

The best experiences we’ve had when looking for accommodation (from Alaska to Morocco) are with Booking.com, where hotels, apartments, and entire houses are usually the cheapest and most widely available.

Don’t Forget Travel Insurance

Good travel insurance will protect you against illness, accidents, theft, or flight cancellations. We’ve had a few hospital visits abroad, so we know how important it is to have proper insurance arranged.

Where we insure ourselves: SafetyWing (best for everyone) and TrueTraveller (for extra-long trips).

Why don’t we recommend any Czech insurance company? Because they have too many restrictions. They set limits on the number of days abroad, travel insurance via a credit card often requires you to pay medical expenses only with that card, and they frequently limit the number of returns to the Czech Republic.

Find the Best Experiences

Get Your Guide is a huge online marketplace where you can book guided walks, trips, skip-the-line tickets, tours, and much more. We always find some extra fun there!
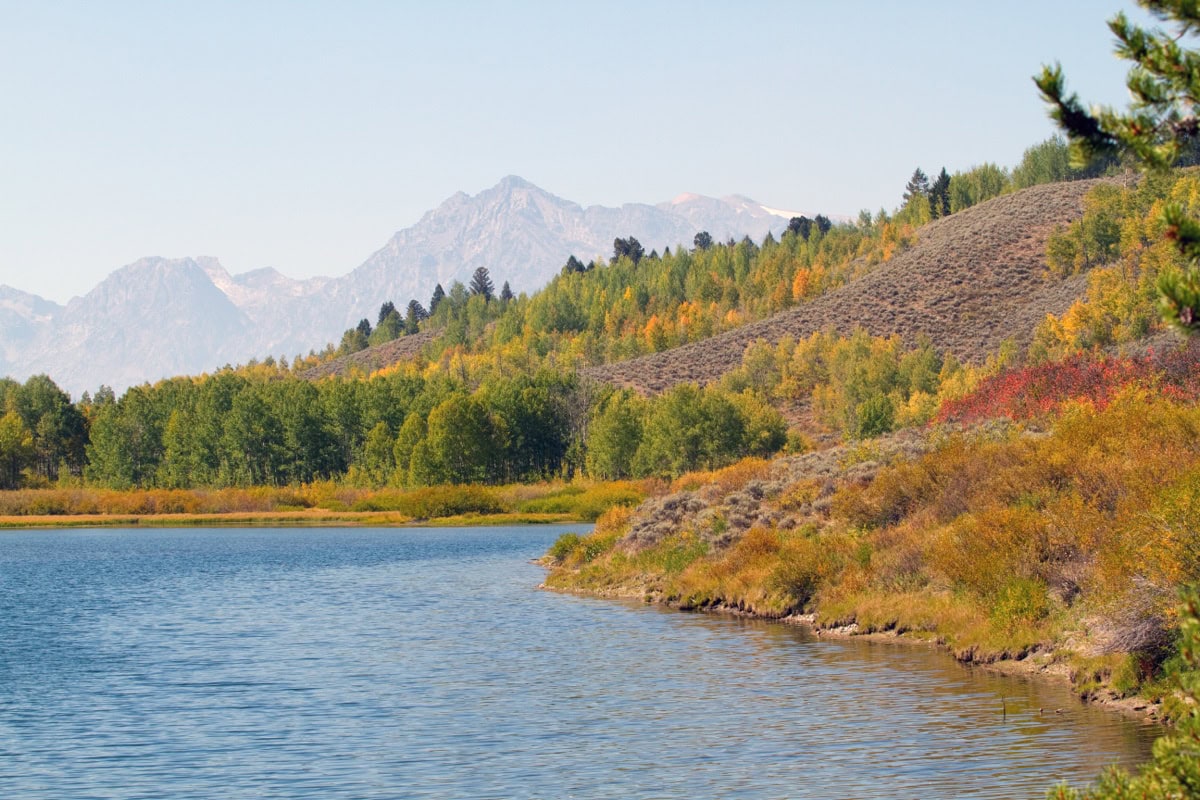
Pinnacles National Park, California: 13 Best Things to See and Do

TL;DRPinnacles National Park has 13 highlights worth building a visit around, including two talus caves (Bear Gulch Cave and Balconies Cave), the rocky High Peaks Trail with views of California condors (around 90 live here), and easier walks like Condor Gulch Trail or Moses Spring Trail. The park sits just under two hours (about 190 km) south of San Francisco. Entry costs $30 per car for 7 days, and one or two days is enough to see it properly. The best time to go is March to May, when the wildflowers are out, or October and November — summer’s best avoided, with temperatures topping 40°C. There are two entrances, east and west, with no road connecting them inside the park. The only campground, on the east side, starts at $23 a night.

When Lukáš and I first drove into Pinnacles National Park in California, I was expecting — honestly — some smallish hills with a few rocks scattered about. I mean, it’s one of the smallest national parks in the US, so how impressive could it be, right? Then we stepped onto the trail, towering rock spires shot up into the sky like something out of a fantasy film, we crawled through a cave where we couldn’t see a thing without a torch, and a California condor with a wingspan of over three metres circled above our heads. So yeah, I definitely wasn’t expecting that. 😅

Pinnacles National Park California is the kind of park that completely floors you precisely because you had zero expectations. It sits less than two hours south of San Francisco, yet most visitors blow straight past it on their way to Yosemite or Big Sur. Their loss, your gain — because this park is an absolute gem.

In this article, you’ll find a complete guide to Pinnacles National Park — from the best trails and famous talus caves to tips on spotting rare California condors, plus practical advice on entrance fees, accommodation, and the best time to visit. I’ve put together 13 things to see and do, along with answers to the most frequently asked questions about the park.

TL;DR

  • Pinnacles National Park lies roughly 2 hours south of San Francisco — perfect for a day trip, but even better for a weekend with camping.
  • The park has two entrances (east and west) and they are NOT connected by road — this is crucial for planning. Most attractions are accessible from the east entrance.
  • The main draws are the talus caves (Bear Gulch Cave and Balconies Cave) — boulder caves where you absolutely need a torch or headlamp.
  • High Peaks Trail is the best hike in the park — rock-carved steps, jaw-dropping views, and a good chance of spotting a condor.
  • California condor — one of the rarest birds on Earth, with around 90 living in the park. Your best bet for seeing them is from High Peaks.
  • The best time to visit is March to May (wildflowers, pleasant temperatures) or October to November (fewer crowds, still lovely weather).
  • Summer is brutal — temperatures above 40 °C, and many trails become practically unbearable.
  • Entrance fee is $30 per vehicle (about £24), valid for 7 days. Free with an America the Beautiful annual pass ($80).
  • There’s one campground in the park (east side) — in peak season, book months in advance.
  • Nearest towns with accommodation: Soledad (west) and Hollister (east).
  • You can cover the park in one full day, but two days are ideal if you want to explore all the main trails and caves.

When to Visit Pinnacles and What Weather to Expect

Pinnacles weather is something you really shouldn’t underestimate — and I speak from personal experience. The climate here is quite extreme, and bad timing can seriously ruin your visit. Let’s break down what to expect in each season.

Spring (March–May) — the absolute best time

Spring in Pinnacles is pure magic. Temperatures hover between a pleasant 18–28 °C, the hills turn green, and spring wildflowers blanket the meadows and slopes in carpets of yellow, purple, and orange. If you’ve seen those stunning photos of Pinnacles with blooming hillsides — this is when that happens.

March and April also offer the best chance of both caves being open (Bear Gulch Cave closes seasonally for bat conservation — more on that below). The trails aren’t as crowded as autumn weekends, and morning mists give the rock spires an unbelievably atmospheric quality.

The downside? On weekends in April and May, the east-side car park can fill up by around 9 AM. Get there early.

Summer (June–September) — honestly? Avoid it

I’ll be straight with you: summer in Pinnacles is brutal. Temperatures routinely hit 38–42 °C and there’s virtually no shade on the trails. The park stays open, but most visitors (ourselves included) can only manage one short walk early in the morning before the heat becomes unbearable. Rangers advise against heading up High Peaks after 10 AM — and trust me, they’re right.

If you have no other option, arrive as early as possible in summer (the gate opens at dawn), walk through one cave, and get out by midday. But ideally — just come at a different time of year.

Autumn (October–November) — second best time

Temperatures drop to a bearable 20–30 °C, there are far fewer visitors than in spring, and the park takes on a beautiful golden glow. October and November are also excellent for spotting California condors, as the air is clearer and the condors are more active.

Winter (December–February) — surprisingly good

Pinnacles in winter has its own charm. Temperatures sit around 10–18 °C, which is actually ideal for hiking. The park is half-empty, occasional rain falls (a rarity in southern California), and after a downpour the rock formations look gorgeously saturated and dramatic. The only downsides: shorter days and Bear Gulch Cave is typically closed in winter due to bat hibernation. Balconies Cave, however, stays open year-round.

How to Get to Pinnacles National Park

Here comes arguably the most important practical tip in this entire article, so pay attention: Pinnacles National Park has two entrances — east and west — and they are NOT connected by any road. I’ll say it again: no road connects them. If you drive in from one side, you can’t reach the other by car without going all the way around the park (roughly a 90-minute drive). This catches loads of people off guard — and they end up blaming Google Maps. 😅

East Entrance (main)

Most visitors — and I’d recommend the same to you — enter through the east entrance via the town of Hollister and Highway 25. Here you’ll find:

  • Visitor Center with maps, rangers, and a condor exhibit
  • Pinnacles Campground — the only campground in the park
  • Access to Bear Gulch Cave, High Peaks Trail, and Condor Gulch Trail
  • A small shop with snacks and souvenirs

From San Francisco: approximately 2 hours (190 km) via Highway 101 South → Highway 25 South. From San Jose: roughly 1.5 hours (130 km). From Monterey: about 1.5 hours (110 km) via Soledad and around to the east side. If you’re flying into California from the UK, the most convenient airports are San Francisco (SFO) or San Jose (SJC). British Airways, United, and Virgin Atlantic all operate direct flights from London Heathrow to SFO.

West Entrance

The west entrance is smaller, quieter, and accessed via a narrow, winding road through the town of Soledad (Highway 146 West). There’s no visitor center or campground here, but it’s the quickest route to Balconies Cave and Balconies Cliffs Trail.

Heads up: Highway 146 is genuinely narrow — don’t attempt it with a large vehicle or RV.

From Monterey/Big Sur: If you’re coming from the coast, the west entrance is closer — roughly 1 hour from Soledad.

Park Entrance Fee

The Pinnacles National Park entrance fee is $30 per vehicle (about £24), and it’s valid for 7 days. If you have an America the Beautiful Annual Pass ($80 / roughly £64), entry is free — and if you’re planning to visit more than two national parks in the US, the pass pays for itself.

You can pay at the gate or buy your ticket online in advance via Recreation.gov. On spring weekends, I’d recommend having your ticket sorted beforehand — queues at the gate can build up.

We’ve had consistently good experiences with DiscoverCars, which we use all over the world. You’ll need a car to reach Pinnacles — there’s no public transport to the park.

Where to Stay and How Much Pinnacles Costs

Accommodation inside the park is limited to a single campground, but the surrounding area offers several options ranging from camping and motels to charming wine country ranches. Pinnacles campground is by far the most popular (and cheapest) option, but if camping isn’t your thing, don’t worry — alternatives exist.

Pinnacles Campground (inside the park)

The campground sits near the east entrance and offers 134 sites — for both tents and RVs. Each site has a table, fire ring, and access to showers and toilets. There’s also a small camp store with basic groceries and a few essentials.

  • Price: $23 per tent site/night (about £18), $36 per RV site with electricity (about £29)
  • Reservations: Via Recreation.govin peak season (March–May), book 2–3 months ahead. Weekend spots sell out within minutes of reservations opening.
  • Group campsites for larger parties at $75/night.

We camped in April and it was wonderful — we sat around the fire in the evening, bats literally swooped overhead, and birdsong woke us up in the morning. The only drawback is that nights can be quite chilly (around 5 °C in spring), so bring a warm sleeping bag.

Soledad (west side, 30 min from the park)

The small town of Soledad is the nearest civilisation to the west entrance. You’ll find a handful of motels and basic hotels — nothing fancy, but fine as a one-night base. Expect prices around $80–$120/night (£64–£96).

Hollister (east side, 40 min from the park)

Hollister is a somewhat larger town with a better selection of accommodation and restaurants. It’s the nearest town to the east entrance. Hotel prices typically range from $100–$150/night (£80–£120).

King City and Salinas Valley (wine region)

If you fancy combining Pinnacles with a spot of wine tasting — and why wouldn’t you — the Salinas Valley area is packed with vineyards and wineries. Some even offer accommodation. It’s a gorgeous area, and if you love wine and tranquillity, I’d recommend spending an extra night here.

How Much Does a Trip to Pinnacles Cost?

A quick budget breakdown for a day trip for two from San Francisco:

  • Entrance fee: $30 (£24)
  • Fuel (round trip, approx. 380 km): ~$40 (£32)
  • Lunch/snacks: ~$30 (£24)
  • Total: roughly $100 / £80 per couple

For a camping weekend (2 nights):

  • Entrance fee: $30
  • Campground 2 nights: $46
  • Fuel: ~$40
  • Food (2 days): ~$80
  • Total: roughly $200 / £160 per couple

That’s genuinely reasonable for an American national park. Compare it with Yosemite, where a single night at Yosemite Valley Lodge can easily set you back $300.

13 Best Things to See and Do in Pinnacles National Park

Let’s get to the good stuff — what to actually see and do in Pinnacles. Despite being one of the smallest national parks in the US, it’s surprisingly packed with experiences. Here are 13 specific tips, from the famous caves and condors to the best trails and lesser-known spots that most visitors miss. The Pinnacles National Park map is fairly straightforward — the main trails fan out from a few car parks, and you can cover most of them in a day.

1. Bear Gulch Cave — the park’s most famous cave

Bear Gulch Cave rock cave in Pinnacles National Park
Photo: Ken Lund from Reno, Nevada, USA / CC BY-SA 2.0 / Wikimedia Commons

This is THE top attraction in Pinnacles and the reason many people visit in the first place. Bear Gulch Cave is a talus cave — not a traditional limestone cave, but a series of massive boulders that tumbled into a canyon and created a network of dark passageways, tunnels, and cathedral-like chambers. In some spots you’re crawling; in others you’re standing in spaces as tall as a church.

A torch or headlamp is absolutely essential. Seriously, it’s pitch black inside. Your phone light won’t cut it — you need a proper lamp. We watched people try to navigate with their phone torches and end up knee-deep in water because they couldn’t see where they were stepping. 😅

The cave is about 400 metres long and takes 15–30 minutes to walk through (unless you get distracted taking photos, which you will). There’s even a small waterfall inside — quite impressive after rain.

Important: Bear Gulch Cave closes seasonally (typically mid-May to mid-July) to protect a maternity colony of Townsend’s big-eared bats. It can also be closed in winter. Always check the current status on the NPS website before your visit.

How to get there: From the Bear Gulch car park (east entrance) via Moses Spring Trail — about 1 km, easy terrain.

2. Balconies Cave — second cave, fewer crowds

Talus cave Balconies Cave in Pinnacles National Park
Photo: Joyce Cory on Flickr as docentjoyce / CC BY 2.0 / Wikimedia Commons

If Bear Gulch Cave happens to be closed (or even if it isn’t — ideally visit both!), Balconies Cave on the west side of the park is equally fascinating and tends to be far less crowded. It’s a touch shorter, but the atmosphere is just as epic — dark passageways between enormous boulders, and in places you’re wading through a stream.

Balconies Cave is open year-round, which is a big advantage over Bear Gulch. You’ll need a torch here too — no, really, don’t go in without one.

How to get there:

  • From the west entrance: the shortest route, about 1.6 km via Balconies Trail
  • From the east entrance: a longer but beautiful route via Old Pinnacles Trail (roughly 4.2 km one way) — makes for a brilliant full-day hike

3. High Peaks Trail — the best hike in the park

High Peaks Trail winding between rock spires
Photo: Sierra Willoughby / CC0 / Wikimedia Commons

If you only have time for one thing in Pinnacles, do the High Peaks Trail. In my opinion, it’s the best trail in the entire park and one of the most fun hikes I’ve done anywhere in California. The path takes you up onto a rocky ridge where you squeeze through narrow gaps, climb stone steps carved into the rock, and in several spots cling to metal railings above sheer drops.

It’s not technically demanding — you don’t need any climbing gear — but if you’re not great with heights, some sections will be a challenge. Lukáš, who isn’t exactly a fan of exposed ledges, had a slightly interesting expression at one point, but he made it through. 😁

Stats:

  • Loop via High Peaks + Condor Gulch Trail: approximately 8.8 km, 400 m elevation gain
  • Time: 3–5 hours
  • Difficulty: moderate

From the ridge, the views are absolutely breathtaking — you can see the entire park’s rock spires, valleys, and on a clear day all the way to the coast. And crucially, this is the best spot in the park for spotting condors.

4. California Condor — a meeting with a legend

California condor, a rare bird of Pinnacles National Park
Photo: Milkisverytasty / CC BY-SA 4.0 / Wikimedia Commons

I get a bit emotional writing about this, because seeing a California condor in the wild is a truly unforgettable experience. In the 1980s, only 22 condors remained in the entire world. Twenty-two. Thanks to a massive recovery programme, there are now over 500, with around 90 living in the Pinnacles area.

The California condor is the largest flying bird in North America — with a wingspan of up to 2.9 metres. When one soars overhead, you feel it. Literally — the sound of those wings is extraordinary.

Where to look:

  • High Peaks Trail — hands down the best spot. Condors often perch on rock outcrops or circle above the ridge.
  • Condor Gulch Overlook — a shorter trail (roughly 3.2 km return) if you don’t fancy the full High Peaks loop.
  • Early morning or late afternoon is the best time — condors ride the thermal currents.

Tip: Bring binoculars. Each condor has a numbered wing tag — you can look it up in the NPS database and learn its story. The rangers at the Visitor Center are always happy to help with identification.

lukas a lucka
Lukáš and Lucie recommend
Where to Stay in Pinnacles National Park
3 accommodations — hotels, campgrounds and other lodging options

5. Condor Gulch Trail — a shorter alternative with views

If you don’t have the time or energy for the full High Peaks loop, Condor Gulch Trail is the perfect compromise. The trail runs from the Bear Gulch car park to Condor Gulch Overlook — a viewpoint with panoramic vistas of the rock formations and valley below.

  • Length: 3.2 km return
  • Elevation gain: 140 m
  • Time: 1–1.5 hours
  • Difficulty: easy to moderate

It’s also the best trail for Pinnacles photography — from the overlook, you get a superb composition of rock spires with the valley behind them. Golden hour just before sunset here is absolutely stunning.

6. Moses Spring Trail to Bear Gulch Reservoir — an easy stroll

This is the ideal trail for families with children or anyone who fancies a pleasant walk without much climbing. The trail leads from the Bear Gulch car park along a creek through a gorgeous rocky canyon to Bear Gulch Reservoir — a small dam surrounded by rock walls.

  • Length: 2.8 km return
  • Elevation gain: 100 m
  • Time: 1–1.5 hours

En route, you pass through part of Bear Gulch Cave (if it’s open), so you’re essentially getting two attractions in one. The reservoir itself is a peaceful spot — perfect for a snack with a view.

7. Rock Formations and the Park’s Volcanic History

Volcanic rock formations millions of years old
Photo: Hiroooooo / CC BY-SA 4.0 / Wikimedia Commons

The geological history of Pinnacles is fascinating, and understanding it will take your whole experience of the park to another level. Those dramatic rock spires and pinnacles aren’t just random boulders — they’re the remnants of an ancient volcano that formed around 23 million years ago.

And here’s the mind-blowing part: that volcano originally stood 320 km further south, in what’s now the Los Angeles area. The San Andreas Fault shifted it to its current location over millions of years. Literally — half of the volcano is here in Pinnacles and the other half (the Neenach Formation) still sits near LA. It’s one of the most striking demonstrations of tectonic plate movement anywhere on Earth.

Best places to see it:

  • High Peaks Trail — rock spires of volcanic rhyolite and breccia
  • Visitor Center — an excellent interactive geology exhibit
  • Balconies Cliffs — massive rock walls with visible layering

For geology enthusiasts (and I’ll admit I’m one of them 😁), this park is an absolute paradise.

8. Pinnacles Visitor Center — start your visit here

I know, a visitor center doesn’t exactly sound like a must-see tip, but at Pinnacles you genuinely shouldn’t skip it. It’s small but incredibly well done. You’ll find:

  • An interactive exhibit on condors, geology, and the park’s history
  • Up-to-date information on trail and cave conditions (rangers will tell you what’s closed, where water is available, and where condors were last spotted)
  • A Pinnacles National Park map — both paper and digital
  • A Junior Ranger programme for kids
  • A small shop with books and souvenirs

Tip: Ask the rangers where they last saw condors. They’re incredibly helpful and usually have fresh intel. One ranger even lent us binoculars when we mentioned we’d forgotten ours. ☺️

The Visitor Center is at the east entrance, open daily 9:00–17:00 (shorter hours in winter).

9. Old Pinnacles Trail — a walk through the wilderness

If you want to escape the crowds (though Pinnacles doesn’t really get that crowded by American standards), Old Pinnacles Trail is your pick. This trail leads from the east side of the park through a valley filled with oaks and wildflowers to Balconies Cave — it’s the longest route to reach Balconies from the east entrance.

  • Length: approximately 8.4 km (return to Balconies Cave and back)
  • Elevation: gentle — the trail runs mostly through a valley
  • Time: 3–4 hours return

In spring, the trail is lined with wildflowers — lupins, poppies, wild mustard. When we were here in April, the display of yellow and purple flowers was so spectacular that we kept stopping to take photos and could barely make any progress. And the birds! Pinnacles is a birdwatcher’s paradise — beyond condors, you might spot peregrine falcons, burrowing owls, hummingbirds, and dozens of other species.

10. Bench Trail — for peace and nature

Bench Trail is the flattest and easiest longer trail in the park. It runs along the eastern boundary through open countryside with views of the rock formations in the distance. It’s the ideal trail for wildlife spotting — Pinnacles National Park animals include deer, grey foxes, wild boar, rabbits, rattlesnakes (watch out!), and a huge variety of birds.

  • Length: 8.2 km (one way)
  • Elevation: minimal
  • Time: 2–3 hours

It’s often used as a connector between Bear Gulch and Old Pinnacles Trail to create a longer loop. In the late afternoon, it’s beautifully peaceful — ideal for a meditative stroll after a tough day on High Peaks.

11. Evening Programmes and the Night Sky

Pinnacles lies far from any major cities and light pollution is minimal. If you’re camping, you’re in for a treat once the sun goes down — the Milky Way is visible to the naked eye here, and so brilliantly clear that the first time I looked up, I forgot to breathe.

Stargazing tips:

  • The best spots are the campground or the Visitor Center car park
  • New moon = best visibility (check the moon phase before you go)
  • Rangers occasionally run Night Sky Programmes — astronomy talks with telescopes. Check the park website for dates.

At night you might also hear owls, coyotes, and the occasional mysterious sound you’d rather not identify. 😅 (It’s usually just a deer.)

12. Rock Climbing in Pinnacles

Pinnacles has been a popular rock climbing destination since the 1930s, and that tradition endures today. The volcanic breccia towers offer hundreds of routes across a range of difficulties — from beginner-friendly to extremely challenging.

Important:

  • Climbing is permitted, but you need to bring your own gear — nothing is available for hire in the park.
  • Some areas have seasonal closures due to condor and falcon nesting (typically February–July). Always check the NPS website for current restrictions.
  • Most popular sectors: Discovery Wall, Tourist Trap, Monolith
  • Difficulty: from 5.4 to 5.13 (YDS scale)

Even if you don’t climb yourself, watching climbers on the rock walls is great entertainment. From the Visitor Center, you can see them on the cliffs right above you.

13. Wildflowers and the Spring Colour Show

I’ve already mentioned the spring wildflowers, but they deserve their own tip because they’re one of the main reasons to visit Pinnacles in spring. From mid-March to mid-May, an incredible array of wildflowers blooms across the park:

  • California poppies (the golden state flower)
  • Lupins (purple and blue carpets)
  • Shooting stars
  • Clarkia, brodaea, mariposa lily, and dozens more

Best spots for wildflowers:

  • Old Pinnacles Trail — meadows in the valley
  • Bench Trail — open countryside
  • Around the campground — surprisingly, loads of flowers bloom right next to the tent sites

The intensity of the bloom depends on winter rainfall — after a wet winter, spring is absolutely explosive. After a dry year, the display is more muted. Check the park’s social media or website for the latest conditions.

Pinnacles National Park: Practical Tips and Advice

A few things that will save you time, stress, and money — and that I wish I’d known in advance.

Park Map and Navigation

Download the Pinnacles National Park map to your phone before you arrive — mobile signal in the park is essentially non-existent (no network works reliably here). Save an offline map via Google Maps or download the PDF map from the NPS website. You’ll also receive a paper map at the entrance gate or Visitor Center.

If you’re planning a California road trip and want an eSIM card, check out our Holafly review — it won’t help inside the park, but it’ll cover the rest of California without a hitch.

What to Pack

  • Headlamp or torch — an absolute must for the caves. Seriously, don’t underestimate this.
  • Plenty of water — drinking water sources in the park are limited. For a full day of hiking, count on at least 2–3 litres per person. In summer, even more.
  • Good footwear — trail shoes or at least sturdy trainers. Wet rock on High Peaks is slippery. Take a look at our hiking boot guide.
  • Sunscreen and a hat — shade is a luxury here
  • Snacks — there’s only a small camp store at the campground and no restaurant in the park. Bring your own food.
  • Binoculars — for condors and general birdwatching
  • Layered clothing — mornings can be 8 °C, afternoons 28 °C. Layer up.

If you’re heading off on a longer trip to the US, have a look at our guide to packing light with carry-on only.

Safety

  • Rattlesnakes — they live in the park. Stay on the trail, don’t kick rocks, and watch where you step. If you spot one, slowly back away. They’re shy and only strike in self-defence.
  • Heat — dangerously hot in summer. Carry plenty of water, don’t hike at midday, and know the signs of heatstroke.
  • Caves — watch out for wet, uneven rocks. Be careful with children in narrow passages.

Flights and Travel Insurance

Search for cheap flights to San Francisco (or LA if you’re combining with a wider California road trip) on Skyscanner or Google Flights to find the best deals from the UK. And before you set off, don’t forget travel insurance — here’s our review of SafetyWing, which we use ourselves.

Where to Eat Near Pinnacles

I’ll be honest — this is probably Pinnacles’ weakest point. There’s no restaurant inside the park itself. The campground on the east side has a small shop where you can pick up basic groceries, sandwiches, and ice cream, but that’s about it. So either stock up in advance or eat on the way.

Soledad (west side)

  • La Fuente — hearty Mexican food, generous portions, reasonable prices. A perfect stop on the way out of the park.
  • Valley Greens Gallery & Café — nicer setting, good sandwiches and coffee.

Hollister (east side)

  • Palo’s Mexican Restaurant — absolutely brilliant tacos and burritos, with a local vibe. They cook for locals, not tourists — always a good sign.
  • Ridgemark Golf & Country Club Restaurant — if you’re craving something a touch more “refined” after a day covered in trail dust. Decent steaks and a view of the golf course.
  • Starbucks / Subway / McDonald’s — yes, Hollister has the usual chains. Don’t judge us — sometimes after a full day of hiking, all you want is a frappuccino. 😅

Picnic Tip for the Park

The best option is to bring your own food and have a picnic. There are several picnic tables near the Bear Gulch car park and at the campground. Stop on the way in at Hollister or Soledad, grab supplies from a supermarket, and make an occasion of it. A sandwich with a view of the rock spires tastes completely different from a sandwich at a petrol station — I promise.

Films Shot in Pinnacles

Here’s a fun bit of trivia that a lot of people ask about: what films have been shot in Pinnacles? With its dramatic rocky scenery, the park has been attracting filmmakers since the silent film era. The most notable shoots took place in the 1920s and 30s, when Westerns used the rock spires as a backdrop for the Wild West.

In more recent times, National Geographic documentaries about condors and various outdoor adverts have been filmed here. No major Hollywood blockbuster has been shot here (Pinnacles isn’t Monument Valley), but the landscape is so dramatic that you half-expect a cowboy to leap out from behind a rock at any moment. Or a condor. Or both. 😁

FAQ — Frequently Asked Questions about Pinnacles National Park

Tips and Tricks for Your Vacation

Don’t Overpay for Flights

Search for flights on Kayak. It’s our favorite search engine because it scans the websites of all airlines and always finds the cheapest connection.

Book Your Accommodation Smartly

The best experiences we’ve had when looking for accommodation (from Alaska to Morocco) are with Booking.com, where hotels, apartments, and entire houses are usually the cheapest and most widely available.

Don’t Forget Travel Insurance

Good travel insurance will protect you against illness, accidents, theft, or flight cancellations. We’ve had a few hospital visits abroad, so we know how important it is to have proper insurance arranged.

Where we insure ourselves: SafetyWing (best for everyone) and TrueTraveller (for extra-long trips).

Why don’t we recommend any Czech insurance company? Because they have too many restrictions. They set limits on the number of days abroad, travel insurance via a credit card often requires you to pay medical expenses only with that card, and they frequently limit the number of returns to the Czech Republic.

Find the Best Experiences

Get Your Guide is a huge online marketplace where you can book guided walks, trips, skip-the-line tickets, tours, and much more. We always find some extra fun there!
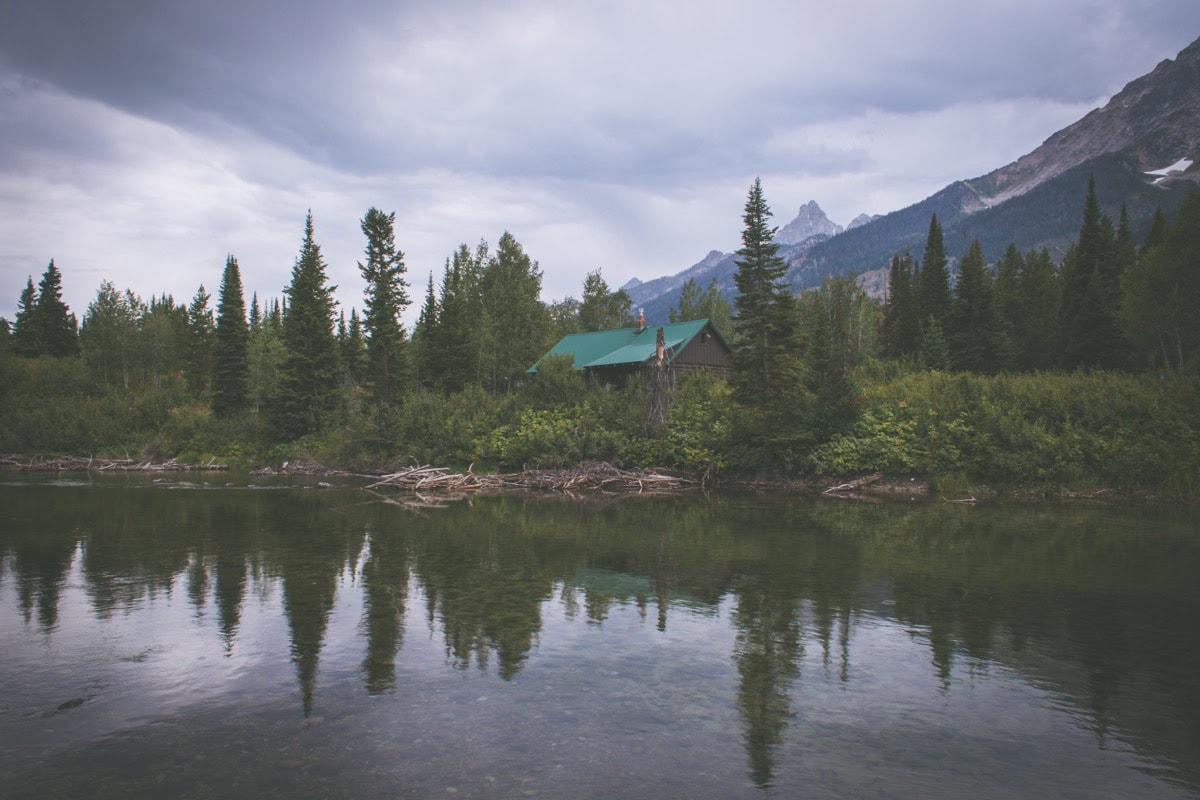
Joshua Tree National Park, California: Guide with 15 Things to See and Do

TL;DRJoshua Tree National Park in California packs in 15 essential tips on what to see and do – from the rocky amphitheatre at Hidden Valley and the iconic Skull Rock, to the Keys View lookout over the Coachella Valley, right through to the surreal Cholla Cactus Garden and stargazing in this certified Dark Sky Park. One day covers the main sights, but allow 2–3 days if you want to fit in hiking and stargazing. The park is 2.5 hours from Los Angeles and just 45 minutes from Palm Springs, and entry costs $30 per car for 7 days. The best time to visit is October to May, and campsites in the park start at $15 a night.

You’re standing in the middle of nowhere. Nothing but boulders, sand, and bizarre trees that look like they belong on another planet. The silence is so absolute you can hear your own heartbeat. Then you look up — and above you stretches a starry sky so immense it feels like the universe has reached down to touch the earth. That’s what an evening at Joshua Tree National Park looks like.

I first visited Joshua Tree over 15 years ago with my dad, and with every road trip since, I’ve been itching to go back. In photos, it looks like a desert full of rocks. In reality, it’s one of the most magical places we’ve ever visited in the USA. And trust me, we’ve been to quite a few. 😅

Joshua Tree is the California nobody talks about. No surf beaches, no Hollywood. Just the raw beauty of the desert, bizarre rock formations, and those iconic trees that gave the park its name. And yet it’s only about two hours from Los Angeles or Palm Springs — perfect for a day trip or a weekend escape from civilisation.

In this article, you’ll find 15 things to see and do in Joshua Tree National Park — from the most stunning viewpoints and hiking trails to stargazing, practical tips on where to stay, how much it costs, and the best time to visit. Let’s dive in.

Retro campervan in the desert landscape of Joshua Tree

TL;DR

  • Joshua Tree National Park sits at the meeting point of two deserts — Mojave and Colorado — and each looks completely different. Mojave is home to the iconic Joshua trees, while Colorado is lower and filled with cacti.
  • The best time to visit is from October to May — in summer, temperatures exceed 40 °C and the park becomes genuinely inhospitable.
  • From LA, it’s about a 2.5-hour drive, and from Palm Springs just 45 minutes. Perfect for a day trip or a weekend getaway.
  • Entry fee is $30 per vehicle (about €28) for 7 days, or free with an annual America the Beautiful Pass ($80/€75).
  • Skull Rock, Keys View, Cholla Cactus Garden, and Hidden Valley are among the top attractions you can cover in a single day.
  • Joshua Tree is one of the best stargazing spots in all of California — the park is designated an International Dark Sky Park.
  • Accommodation is relatively affordable — campsites in the park start from $15/night, Airbnbs in surrounding towns from $80/night.
  • If you love US national parks, Joshua Tree should be high on your list.
  • Bring water! There are no drinking water sources in the park. Plan on at least 4 litres per person per day.

When to visit Joshua Tree and how to get there

Joshua Tree National Park is open year-round, but not every season is ideal for a visit. In fact — you really don’t want to come in summer. I know that sounds like a cliché, but 45 °C in the shade (and shade is nearly impossible to find here) is a completely different ball game compared to a pleasant 25 °C in autumn.

Best time to visit

October to May — that’s the sweet spot. The most beautiful time is spring (March–April), when the Joshua trees bloom and the desert comes alive with wildflowers. Daytime temperatures hover around 20–25 °C, dropping to 5–10 °C at night. Autumn (October–November) is similarly pleasant with fewer crowds.

December to February — surprisingly gorgeous, though you’ll want to prepare for colder nights (around 0 °C). During the day, it’s sunny and around 15 °C, which is actually ideal for hiking. And the tourist numbers are at their lowest.

June to September — unless you enjoy saunas, stay away. Temperatures regularly exceed 40 °C and most trails are in full sun. Rangers recommend going outside only in the early morning or late afternoon. We wouldn’t visit in summer. Just no. 😅

How to get to Joshua Tree

From Los Angeles — roughly 2.5 hours by car on the I-10 East. If you’re coming from LA, I’d recommend entering through the West Entrance near the town of Joshua Tree Village, so you drive through the most interesting part of the park.

From Palm Springs — just 45 minutes! Palm Springs makes a great base if you want to combine the desert with some poolside relaxation. You’ll reach the park via the North Entrance near Twentynine Palms.

From San Diego — about 3 hours via the I-15 North and CA-62.

From the UK, you’ll want to fly into Los Angeles (LAX) or Palm Springs (PSP). Airlines like British Airways, Virgin Atlantic, and Norwegian offer direct flights from London to LAX. From there, you’ll need to hire a car — there’s no public transport in the park and the distances between attractions are huge (the park covers over 3,200 km²). We’ve had consistently good experiences with DiscoverCars, which we use all over the world — prices in California start from about $35/day (around €33) for a compact car.

💡 TIP: Fill up your tank BEFORE entering the park. There are no petrol stations inside. The last chance is in the towns of Joshua Tree Village, Twentynine Palms, or Cottonwood Spring.

Where to stay and how much Joshua Tree costs

The area around Joshua Tree National Park has a surprisingly wide range of accommodation — from primitive desert campsites to stylish Airbnbs with hot tubs and views of the stars. It all depends on whether you want the full desert immersion experience, or you’d rather return to a bed with air conditioning after a day of hiking (no judgement here 😁).

Camping in the park

The park has 9 campgrounds with roughly 500 sites in total. Most operate on a first-come, first-served basis, but Black Rock and Indian Cove can be reserved in advance through Recreation.gov.

  • Cost: $15–$25/night per site (about €14–€23)
  • Jumbo Rocks — our favourite. Massive boulders right around your tent, absolute silence, stunning stars. No water or showers, but the atmosphere is priceless.
  • Black Rock — more comfortable, with drinking water and flush toilets. Ideal if you’re new to camping.
  • Indian Cove — beautiful setting among the rocks, close to the North Entrance.

⚠️ Important: During peak season (October–May, especially weekends), campsites fill up early in the morning. Arrive on Friday morning, or even Thursday. On bank holiday weekends, you’ve got no chance without a reservation.

Accommodation outside the park

The towns of Joshua Tree Village, Twentynine Palms, and Yucca Valley offer hundreds of unique Airbnbs — this area has become a hotspot for designer desert cabins. Many feature a hot tub under the stars, which is an absolutely divine experience after a full day of scrambling over rocks.

  • Airbnb/VRBO: from $80/night (about €75) for a simple studio; stylish homes with pools $150–300/night (€140–€280)
  • Hotels: Holiday Inn Express in Twentynine Palms from $100/night (€93), Fairfield Inn from $120/night (€112)
  • Palm Springs (45 min from the park): more upscale hotels from $150/night, but factor in the commute

How much does a trip to Joshua Tree cost

To give you an idea — here’s what a weekend trip for two from LA looks like:

  • Entry fee: $30 per vehicle for 7 days (€28) or free with an America the Beautiful Pass ($80/€75 per year — well worth it if you’re visiting 3+ parks)
  • Fuel (LA return + driving in the park): around $40–60 (€37–€56)
  • Accommodation (2 nights): campsite $30–50 (€28–€47) / Airbnb $160–400 (€150–€373)
  • Food (2 days): $50–100 per person (€47–€93)
  • Total for two: from about €160 (camping, self-catering) to €600 (Airbnb, restaurants)

Joshua Tree is simply one of the most affordable national parks in California. Especially if you camp and cook for yourself.

Joshua Tree National Park: 15 things to see and do

Now we’re getting to the good stuff — specific tips on what to see and do in Joshua Tree. The park is surprisingly diverse and sprawling, so even if you spent an entire week here, you’d still be discovering new corners. I’ve arranged these tips so you can drive them in order from the West Entrance heading south — but of course, adjust the route to your own pace.

1. Hidden Valley — a rock amphitheatre straight out of a western

Giant boulders in the Hidden Valley area of Joshua Tree

Hidden Valley is where you truly understand why Joshua Tree became a mecca for rock climbers. It’s a 1.6 km loop trail (rated easy) that winds through an enclosed rock valley surrounded by enormous granite boulders. It looks like a natural amphitheatre — and legend has it that cowboys used to hide stolen cattle here, since the valley has only one narrow entrance.

The trail is flat and comfortable — even small children can manage it. But that doesn’t mean it’s boring — far from it. At every turn, you’ll be surprised by a new rock formation, Joshua trees growing out of cracks in the stone, and views that’ll stop you in your tracks. Allow about 45–60 minutes if you plan to stop for photos (and you will, trust me).

💡 TIP: Come either early morning or late afternoon. Partly for the photography light (golden hour here is absolutely magical), but mainly because the car park is small and gets packed during the day. On weekends, it’s already full by 10 a.m.

2. Skull Rock — the most photogenic rock in the park

Skull Rock formation resembling a human skull

Skull Rock is exactly what the name suggests — a massive boulder that looks like a human skull. It’s one of the most iconic attractions in Joshua Tree and you’ve probably seen it on every other Instagram post from the park. And you know what? It’s even better in person.

The rock sits right along the main road (Park Boulevard), so you don’t even need to walk far — just park up and it’s right there. However, there’s also a 2.4 km Discovery Trail that passes Skull Rock and continues among other fascinating rock formations. I’d definitely recommend it, because the area around the skull itself can get crowded, but walk just 200 metres and you’ll have peace and quiet.

For the best photos, get a slightly elevated angle — walk around the back of the rock, climb up a bit, and you’ll get a perfect shot of the “eye sockets.” If you don’t mind a little scrambling, that is. 😉

3. Keys View — panoramic views over Coachella Valley

View from Keys View over Coachella Valley
Photo: Farragutful / CC BY-SA 4.0 / Wikimedia Commons

If you only have time for one viewpoint in Joshua Tree, make it Keys View. You’ll stand on the edge of a ridge at 1,581 metres and below you stretches the entire Coachella Valley — from Palm Springs across the Salton Sea all the way to the Mexican mountains in the distance. On a clear day, you can even see Signal Mountain in Mexico, over 150 km away.

You reach the viewpoint by car via Keys View Road — it’s a turnoff from Park Boulevard heading south, about a 30-minute drive. The car park is right at the top and the viewpoint is just a few dozen metres along a paved path (wheelchair accessible). No hiking required.

It’s most beautiful at sunset, when the entire valley turns shades of orange and pink. But be warned — lots of people head here for sunset, so arrive at least 30 minutes early to secure a parking spot. We got there an hour before sunset and just managed to find a space.

From Keys View, you can also clearly see the San Andreas Fault — the famous tectonic fault line that runs through all of California. It looks like an enormous scar in the landscape. Fascinating and a little terrifying at the same time.

4. Cholla Cactus Garden — cacti that look cuddly (but don’t touch!)

Cholla Cactus Garden in Joshua Tree National Park
Photo: Steven Lek / CC BY-SA 4.0 / Wikimedia Commons

This place is utterly surreal. Imagine a garden filled with thousands of cacti that look like cuddly teddy bears covered in golden fuzz. In the late afternoon light, they literally glow. It’s one of the most photogenic spots in the entire park.

Cholla Cactus Garden lies in the southern part of the park, in the Colorado Desert (the lower, warmer section), and you reach it via Pinto Basin Road. A short loop trail (about 400 metres) leads right among the cacti along a marked path. And here comes the important warning:

⚠️ DO NOT TOUCH THE CACTI. Seriously. Teddy bear cholla (Cylindropuntia bigelovii) look adorable, but their spines literally latch onto anything that brushes past them. All it takes is a light graze with your sleeve and they’re embedded in your skin. They’re so sneaky they’re called “jumping cactus” — people say they jump at you. They don’t actually jump, but the spines do break off and attach incredibly easily. Wear closed shoes and keep children (and dogs, though dogs aren’t actually allowed on trails in the park) close by.

The best time to visit is late afternoon, when the setting sun backlights the cactus spines and the whole garden looks like it’s burning with golden fire. It’s one of those moments where you put your phone away and just take it all in.

5. Barker Dam — a desert oasis with water (if you’re lucky)

Desert reservoir Barker Dam in Joshua Tree National Park
Photo: King of Hearts / CC BY-SA 3.0 / Wikimedia Commons

Barker Dam is a 2.2 km loop trail (easy) that takes you to a small dam built by ranchers at the turn of the 19th and 20th centuries. When it rains (which is far from guaranteed in the desert), a small lake forms here that attracts wildlife — bighorn sheep, rabbits, birds, and occasionally coyotes.

Even when the reservoir is dry (which happens during the drier months), the trail itself is well worth it. It winds through beautiful rock formations and Joshua trees, and a short detour from the main trail leads to petroglyphs — ancient rock art by the area’s indigenous peoples (Cahuilla and Serrano). They’re hundreds of years old, and it’s humbling to realise that people walked through this very place long before us.

💡 TIP: The trail starts at the Barker Dam car park, which it shares with Hidden Valley. If you arrive early in the morning, you can easily do both trails back to back — roughly 2–3 hours of relaxed walking in total.

6. Arch Rock — a natural stone arch

Natural stone arch Arch Rock in Joshua Tree
Photo: John D. from Pasadena, USA / CC BY 2.0 / Wikimedia Commons

If you love natural stone arches (and who doesn’t?), Arch Rock is a must-see. It’s not as grand as the famous arches in Utah, but it has its own charm — and the trail leading to it from White Tank Campground is lovely (about 1.2 km return).

The rock arch is quite photogenic, especially in the golden afternoon light. Lots of people come here for sunset too. The trail is easy and well-marked, though the final stretch involves some rock hopping, so I’d recommend sturdy hiking boots rather than flip-flops.

Around Arch Rock, there are also plenty of boulders perfect for bouldering — you’ll see climbers everywhere. Even if you don’t climb yourself, it’s great fun to sit down for a bit and watch people scrambling up vertical walls. Better entertainment than the telly. 😁

7. Ryan Mountain — the best view in the park (for those up for a climb)

Joshua tree among boulders along a trail in the park

If you want the best 360° panorama of the entire Joshua Tree National Park, you need to tackle Ryan Mountain. It’s a bit more challenging though — the trail is 4.8 km return with 305 metres of elevation gain. Nothing extreme, but the desert sun makes it harder than the numbers suggest.

From the summit (1,768 m), you can see virtually the entire park — Lost Horse Valley, Queen Valley, Pleasant Valley, and on a clear day even San Gorgonio Mountain (the highest peak in Southern California). It’s simply jaw-dropping.

When to go: Definitely early morning (ideally before 8:00) or late afternoon. There’s virtually no shade on the trail and the midday sun can make it genuinely dangerous. Bring plenty of water (at least 2 litres per person), a hat, and sunscreen.

The ascent takes around 1.5–2 hours including photo stops. The trail is exposed to the sun the entire way, but the surface is well-maintained and the markings are clear. There’s plenty of space at the summit to rest and soak in the views.

8. Stargazing — a night sky like a planetarium

Joshua Tree has been certified as an International Dark Sky Park since 2017, which means light pollution is minimal and the night sky is absolutely spectacular. The Milky Way isn’t just a faint smudge here — it’s a wide, brilliant band of stars stretching from horizon to horizon.

If you’re camping in the park, all you need to do is step outside your tent and look up. If you’re staying elsewhere, the park is open 24 hours a day and you can return in the evening specifically for stargazing. The best spots are:

  • Cottonwood Spring — the southernmost part of the park, furthest from any light sources
  • Keys View — great views plus dark skies
  • Jumbo Rocks — if you’re camping here, it’s right outside your tent

When: The best conditions are around the new moon, when there’s no moonlight in the sky. Apps like Star Walk or Sky Guide will help you identify constellations, planets, and satellites. Rangers also run Night Sky Programs — free sessions with telescopes, usually on Saturday evenings (check nps.gov/jotr for details).

For us, this was one of the highlights of the entire trip. Lying on a blanket in the middle of the desert, the Milky Way overhead and absolute silence all around. No hotel can replicate moments like these. ☺️

9. Rock climbing and bouldering — a climber’s mecca

Granite boulders in Joshua Tree, a paradise for rock climbers

Joshua Tree is one of the most famous climbing destinations in the USA. The park boasts over 8,000 climbing routes across more than 400 rock formations — from simple boulders to challenging multi-pitch climbs. The granite here has an amazing texture with natural holds and cracks.

Even if you’ve never climbed before, you can give it a go. Several local companies offer half-day and full-day climbing courses for complete beginners — they provide all the equipment and teach you the basics. It’s a fantastic experience that gives you an entirely new appreciation for the rocks you’d otherwise just walk past.

Popular bouldering areas for beginners include Quail Springs and the Hidden Valley Campground Area. If you just want to watch climbers in action, stop by Intersection Rock right at the junction near Hidden Valley — there’s almost always someone on the wall.

lukas a lucka
Lukáš and Lucie recommend
Where to Stay in Joshua Tree National Park
6 accommodations — hotels, campgrounds and other lodging options

10. Cap Rock — an easy trail with iconic views

Cap Rock is a short 0.6 km loop trail around an interesting rock formation that looks like someone placed a giant beret on top of a stone pillar. It’s a quick stop that won’t take more than 20 minutes, but it’s photogenic and fully accessible.

The main reason to stop here, though, is the views of the surrounding landscape full of Joshua trees. The Cap Rock car park also serves as a good starting point for longer trails towards Lost Horse Mine (see tip #12). And if you’re a music fan — there’s a memorial to Gram Parsons at Cap Rock, a member of The Byrds and pioneer of country-rock, who died here in 1973.

11. 49 Palms Oasis — a hidden desert oasis

Hidden palm oasis 49 Palms Oasis
Photo: Joshua Tree National Park / Public domain / Wikimedia Commons

This is one of those trails mainly known to locals. 49 Palms Oasis Trail is 4.8 km return with about 200 metres of elevation gain, leading to a hidden oasis full of California fan palms. After walking through the desert for an hour, you’ll suddenly spot a green dot in the middle of the parched landscape — and when you get closer, you find yourself in the shade of tall palms beside a small spring.

The trail starts outside the main part of the park — the trailhead is off Canyon Road near Twentynine Palms. The path follows a ridge with views over Coachella Valley (stunning!) and then descends into a canyon towards the oasis. The return climb out of the oasis is more demanding since you’re heading uphill — allow 2–3 hours for the round trip.

⚠️ Warning: There is no shade on the trail (except at the oasis itself). In warmer months, start early in the morning. Water, water, water.

12. Lost Horse Mine — a journey into the gold rush

If you’re into history, Lost Horse Mine is a fascinating stop. It’s the remains of a gold mine from 1890, reached via a 6.4 km loop trail (moderate). The mine was one of the most productive in the area — gold and silver worth over $5 million was extracted here (much more in today’s money).

On site, you’ll see the remnants of mining equipment including a 10-stamp mill (an ore crusher), shafts, and other structures. Everything is fenced off for safety (the shafts are deep!), but it’s still impressive. The trail itself passes through beautiful landscape with views over Queen Valley.

💡 TIP: This trail is less visited than Hidden Valley or Ryan Mountain, so if you’re looking for some solitude, it’s a great choice. Best in the late afternoon, when the sun bathes the mine ruins in warm light.

13. Cottonwood Spring — gateway to the Colorado Desert

Most visitors focus on the northern part of the park (Mojave Desert), but the southern section — the Colorado Desert — is an entirely different world and well worth a visit. Cottonwood Spring is an oasis near the park’s south entrance, where massive cottonwood trees and palms grow around a year-round spring.

Several beautiful trails start from here, including the Mastodon Peak Trail (4.8 km, moderate) with views of the Eagle Mountains and Salton Sea, and the Lost Palms Oasis Trail (11.6 km, moderate-difficult), which takes you to the largest natural palm oasis in the park. You’ll also find the remains of another gold mine — Mastodon Mine.

What you’ll notice: The landscape here looks completely different from the north. No Joshua trees (they only grow in the Mojave above about 900 m), but plenty of ocotillo, cholla cacti, and creosote bushes. It’s also warmer and drier here, making it a pleasant spot in winter when the cold wind blows up north.

14. Geology Tour Road — an off-road adventure

Car on a desert road in Joshua Tree National Park

If you’ve got a vehicle with decent ground clearance (ideally 4WD, though a standard SUV can manage in dry conditions), Geology Tour Road is a fantastic way to explore a remote part of the park. It’s a 29 km unpaved road with 16 stops where information boards explain the geological formations around you.

The first 5 km are relatively flat and manageable for a normal car. Beyond that, the road deteriorates — deep sand, rocks, steeper sections. We made it in our hire SUV, but there were some nerve-wracking moments. 😅 The whole route takes about 2–3 hours.

Why bother: You’ll have the place practically to yourself. No crowds, no coach-filled car parks. Just you, the desert, and millions of years of geological history. Along the road, you’ll see alluvial fans, rock dykes, dry lakebeds, and remnants of ancient earthquakes.

15. Joshua trees — get to know the iconic tree that gave the park its name

Blooming Joshua trees in the desert landscape

And finally — you can’t visit Joshua Tree National Park without spending some time with the Joshua trees themselves (Yucca brevifolia). These bizarre plants (technically they’re not trees at all, but giant succulents from the asparagus family!) can grow up to 15 metres tall and live for hundreds of years.

Legend has it they were named by Mormon settlers who saw the outstretched branches as the prophet Joshua pointing the way to the promised land. Whether you see a biblical figure or a peculiar alien, they’re endlessly fascinating.

The densest “forests” of Joshua trees can be found in the Queen Valley area and along Park Boulevard between the West Entrance and Skull Rock. Simply pull over anywhere along the road where you spot a lovely cluster of trees and wander among them. In spring (March–May), they may be in bloom — large creamy-white flowers at the tips of their branches. Blooming depends on winter rainfall and temperatures, so it’s not guaranteed, but when it happens, it’s breathtaking.

A sobering note: Joshua trees are threatened by climate change. Rising temperatures and drought mean young seedlings are struggling to survive. Scientists estimate that by the end of the century, most of the park’s natural populations could disappear. All the more reason to visit now.

Where to eat and drink near Joshua Tree

There are no restaurants or shops inside the park — you need to bring all your food and water with you. But the surrounding towns have a surprisingly good food scene, shaped by a mix of LA hipsters, desert artists, and health-conscious Californians.

Joshua Tree Village

  • Crossroads Café — a legendary local joint where climbers, artists, and tourists all converge. Brilliant breakfasts (pancakes!) and solid burgers. The portions are massive. Prices around $12–18 per main (about €11–€17).
  • La Copine — if you love speciality coffee and brunch, this is your spot. A small café with incredible food — avocado toast with chilli oil, pulled pork sandwich, homemade lemonades. There’s often a queue, but it’s worth the wait.
  • Joshua Tree Saloon — a classic western bar with live country music at weekends. The food is average, but the atmosphere is priceless.

Twentynine Palms

  • Kitchen in the Desert — a family-run restaurant with surprisingly creative cooking. Pasta, steaks, seasonal menus. Pleasant interior, friendly service.

Yucca Valley

  • Frontier Café — another solid breakfast spot with a proper local feel.

Piet’s Camp

  • Pappy & Harriet’s Pioneertown Palace — this is probably the most famous venue in the entire area. A honky-tonk bar in the setting of the western movie town Pioneertown (built in 1946 as a film set). The grilled meat is superb, there’s live music nearly every evening, and the atmosphere is completely unique. Expect to pay around $20–30 for a main course (about €19–€28). It’s roughly 20 minutes from the park.

💡 FOOD TIP FOR THE PARK: If you’re camping or heading out for a full day’s hike, stop at Joshua Tree Natural Foods in Joshua Tree Village — they have a great selection of sandwiches, snacks, and local produce for the trail.

Practical tips before you go

Entry fees and passes

  • Entry fee: $30 per vehicle for 7 days (about €28), $25 per motorcycle, $15 per pedestrian/cyclist
  • America the Beautiful Pass: $80 (about €75) per year — valid for all national parks and federal recreation areas in the USA. If you’re planning to visit more than two parks (perhaps Yellowstone as well), get the pass.
  • Passes can be purchased at the entrance gates or online at nps.gov/jotr

What to pack

  • Water, water, water — at least 4 litres per person per day. There are no drinking water sources in the park (except at the Black Rock and Cottonwood campgrounds).
  • Sunscreen and a hat — the desert sun is relentless
  • Layers of clothing — 25 °C during the day, potentially 5 °C at night (even less in winter)
  • Torch/headlamp — for stargazing and finding your way around the campsite
  • Sturdy boots — proper hiking boots ideally, not flip-flops
  • For a full packing guide, check out our article on how to pack a carry-on bag

Phone and signal

Mobile signal in the park is very limited — most areas have none at all. Near the entrance gates and along the roads, you might catch a weak signal. Download offline maps (Google Maps or Maps.me) and information from nps.gov before you go. If you’re travelling with an eSIM, check out our Holafly review — signal works fine in the towns surrounding the park.

Safety

  • Heat: In warmer months, dehydration is a real danger. Drink regularly, even if you don’t feel thirsty.
  • Snakes and scorpions: Yes, they’re here. Watch where you step, and use your headlamp at night. They’re mostly shy and will flee.
  • Flash floods: After rain, dry riverbeds can fill up quickly. Don’t camp in dry washes.
  • Getting lost: Stick to marked trails. The desert is disorienting — rock formations look the same everywhere.

Flights and insurance

For cheap flights from the UK to California, check comparison sites like Skyscanner or Google Flights — direct routes from London Heathrow to LAX are available with several airlines. Whatever you do, don’t skimp on travel insurance for a US trip — healthcare in America costs astronomical amounts. For longer trips, we recommend SafetyWing; for shorter holidays, a standard provider like World Nomads or your bank’s travel cover can work too.

FAQ — Frequently asked questions about Joshua Tree National Park

Tips and Tricks for Your Vacation

Don’t Overpay for Flights

Search for flights on Kayak. It’s our favorite search engine because it scans the websites of all airlines and always finds the cheapest connection.

Book Your Accommodation Smartly

The best experiences we’ve had when looking for accommodation (from Alaska to Morocco) are with Booking.com, where hotels, apartments, and entire houses are usually the cheapest and most widely available.

Don’t Forget Travel Insurance

Good travel insurance will protect you against illness, accidents, theft, or flight cancellations. We’ve had a few hospital visits abroad, so we know how important it is to have proper insurance arranged.

Where we insure ourselves: SafetyWing (best for everyone) and TrueTraveller (for extra-long trips).

Why don’t we recommend any Czech insurance company? Because they have too many restrictions. They set limits on the number of days abroad, travel insurance via a credit card often requires you to pay medical expenses only with that card, and they frequently limit the number of returns to the Czech Republic.

Find the Best Experiences

Get Your Guide is a huge online marketplace where you can book guided walks, trips, skip-the-line tickets, tours, and much more. We always find some extra fun there!
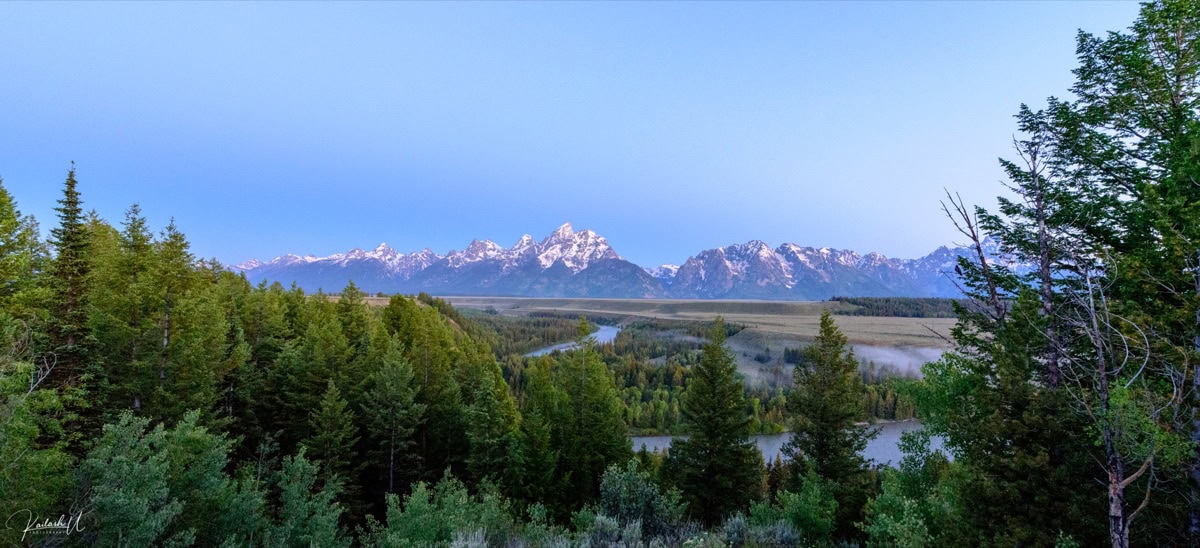
Redwood National Park, California: 15 Tips on What to See at the Home of the World’s Tallest Trees

TL;DRRedwood National Park in Northern California, about 5–6 hours’ drive from San Francisco along Highway 101, is actually a complex of four parks protecting coastal redwoods — the tallest trees on Earth. Entry is free (the exception being Gold Bluffs Beach at $12 per car), and you’ll want at least 2–3 days, ideally 4. June to September is the best time to come. Among the 15 key tips are Fern Canyon, familiar from Jurassic Park, Lady Bird Johnson Grove, Tall Trees Grove (you’ll need a free permit), the elk meadows at Prairie Creek, and the scenic Avenue of the Giants. The world’s tallest tree, Hyperion (115.9 m), grows somewhere in the park, but its location has been kept secret since 2022, and trying to find it can land you a $5,000 fine. A car is essential — there’s next to no public transport out here.

You’re standing on a narrow trail, looking up. And further up. And you still can’t see the tops of the trees. That’s the moment you understand why this place is called nature’s cathedral — because standing in a forest of giant redwoods makes you feel just as tiny as standing inside Notre-Dame, except here, instead of stained glass, misty Californian sunlight filters through the canopy. And it’s a million times more beautiful.

Redwood National Park in northern California is the kind of place that literally takes your breath away. Not metaphorically — you will genuinely stand there with your jaw on the floor, staring. Lukáš and I spent several days here, and to this day we agree it was one of the most powerful nature experiences we’ve ever had in the USA. And we’ve seen Yellowstone and the Grand Canyon.

In this article, I’m bringing you a complete guide to Redwood National Park — you’ll find 15 tips on what to see and do, from the famous Fern Canyon (yes, the one from Jurassic Park! 🦕) to herds of Roosevelt elk grazing in meadows and Avenue of the Giants, a road that’ll make you feel like you’ve shrunk to the size of an ant. I’ll tell you when to visit, where to stay, how much it all costs, and what you absolutely shouldn’t miss.

TL;DR

  • Redwood National Park is located on the northern coast of California, roughly a 5–6 hour drive north of San Francisco. It’s not a single park, but a complex of four parks — one national and three state parks.
  • Entry is free — there’s no admission fee (the exceptions are Gold Bluffs Beach with a $12 per car day-use fee and a few special permits).
  • The best time to visit is from mid-May to October, ideally June–September, when there’s the least rain. But even misty days have their own charm.
  • For a thorough exploration, you’ll need at least 2–3 days, ideally 4 if you want to comfortably walk the main trails.
  • The nearest towns are Crescent City to the north and Orick to the south of the park — both are tiny, so don’t expect big-city amenities.
  • Must-see: Fern Canyon, Lady Bird Johnson Grove, Tall Trees Grove (permit required!), Prairie Creek and Roosevelt elk herds, Avenue of the Giants.
  • Hyperion — the world’s tallest tree (115.9 m / 380 ft) — stands somewhere in the park, but its exact location is officially undisclosed to prevent damage. Don’t try to find it — since 2022, you face a fine of up to $5,000 (approx. £4,000).
  • A car is essential — public transport is virtually non-existent. Renting a car is the best option.

When to visit Redwood National Park and how to get there

Redwood National Park sits on the far northwestern edge of California, along Highway 101, roughly 50 km south of the Oregon border. If you’re picturing it somewhere near Los Angeles or San Francisco, I’m afraid you’re off — it’s quite a drive. But every single minute behind the wheel is worth it.

Best time to visit Redwood National Park

The most pleasant period is from June to September — temperatures hover around 15–20 °C (yes, even in summer it’s cooler than you’d expect — this isn’t Southern California 😅), it rains less, and the trails are in their best condition. July and August are the driest months, but prepare for morning fog, which is quintessential to this forest and gives it that incredible atmosphere.

Spring (April–May) is beautiful thanks to blooming rhododendrons and wildflowers, though it can be rainier. Autumn (October–November) is stunning with its colours and emptier trails, though some roads may be in poor condition after rains.

What about Redwood National Park in winter? Honestly — it’s not ideal. It rains heavily and often, some roads and trails close due to landslides or flooding (particularly the access to Fern Canyon). On the flip side, if you don’t mind rain and mud, you’ll experience the park almost entirely to yourself, and the forest in the rain has its own mystical beauty. Just expect limited accommodation and dining options.

How to get to Redwood National Park

The nearest airports to Redwood National Park are:

  • Arcata-Eureka Airport (ACV) — about a 1.5-hour drive south of the park’s centre. A small regional airport with flights from San Francisco, Los Angeles, and other Californian cities.
  • Crescent City Airport (CEC) — right by the park’s northern edge, but with very limited service.

Most travellers, however, choose one of these options:

  • Fly into San Francisco (SFO) + road trip — roughly 5.5–6 hours north along Highway 101. It’s a long drive, but it passes through gorgeous scenery and can be beautifully combined with other stops along the way.
  • Fly into Portland (PDX) + drive south — about 5.5 hours via I-5 and Highway 199. A great option if you’re combining your trip with Oregon.

From the UK, you’ll find direct flights to San Francisco from London Heathrow with British Airways and United, or to Portland with Delta (often via a connection). For the best deals, compare prices well in advance. Don’t forget to get an eSIM card before you go — mobile signal in the park is patchy at best, and you’ll need offline maps.

A car is an absolute must. Public transport in this part of California is practically non-existent. We’ve had consistently great experiences with DiscoverCars, which we use all over the world. I’d recommend picking up your car right at the airport — whether that’s in San Francisco or Arcata.

Consider renting an SUV or crossover — some roads in the park (especially Davison Road to Fern Canyon) are unpaved and can get quite muddy after rain. You can manage in a regular car, but you’ll be white-knuckling it. We were nervous even in an SUV. 😅

Where to stay and how much does Redwood National Park cost

Great news right off the bat: entry to Redwood National Park is completely free. No admission fee, no advance reservations needed (with a few exceptions I’ll cover below). That’s actually quite rare in the US national park system and a pleasant surprise for your wallet.

There are costs, of course — mainly for accommodation, petrol, and food. Here’s a rough budget for 3 days for two people:

  • Accommodation: $80–200/night (£65–160) depending on the type — camping from $35/night (£28), motels $80–130 (£65–105), Airbnb $120–200 (£95–160)
  • Petrol: approx. $50–80 (£40–65) for 3 days of driving around the park
  • Food: $30–60/day for two (£24–48) — there aren’t many restaurants, so plan accordingly
  • Fees: Gold Bluffs Beach day-use fee $12 (£10), Tall Trees Grove permit free
  • Total for 3 days for two: approx. $500–900 (£400–720) excluding flights and car rental

Where to stay — by location

The park stretches along the coast and its different sections are spread out, so where you base yourself matters. You essentially have three options:

Crescent City (north of the park): The largest town in the area, though “largest” is a very relative term — it has about 7,000 residents and a handful of motels. The advantage is its proximity to Jedediah Smith Redwoods and Howland Hill Road. You’ll find a supermarket, a few restaurants, and petrol stations here.

Klamath / Orick (centre and south of the park): Small settlements with limited accommodation, but closest to Fern Canyon, Prairie Creek, and Lady Bird Johnson Grove. Orick is literally a few houses along the road — don’t expect much, but it’s the heart of the park.

Eureka / Arcata (further south): Larger towns with a full range of accommodation, restaurants, and services. The downside is the distance — it’s over an hour’s drive to the park’s centre. But if you want comfort and choice, it’s a good option for your first or last night.

Camping in the park is fantastic and I highly recommend it — falling asleep surrounded by giant redwoods is an unforgettable experience. The most popular campgrounds:

  • Jedediah Smith Campground — right among old-growth redwoods, beside the Smith River. $35/night (£28). Reservations through Recreation.gov are essential in season!
  • Mill Creek Campground — in Del Norte Coast Redwoods, quieter, fewer people. $35/night.
  • Elk Prairie Campground — in Prairie Creek, Roosevelt elk wander right between the tents. $35/night. Our favourite!
  • Gold Bluffs Beach Campground — right on the beach, a stone’s throw from Fern Canyon. $35/night + $12 day-use fee. A magical spot, but it fills up fast.

Book your campsite as early as possible — in summer, popular campgrounds fill up months in advance. Some operate on a first-come-first-served basis, but relying on that during peak season is a gamble.

Redwood National Park: 15 tips on what to see and do

Now let’s dive into the best that Redwood National Park has to offer. I’ve put together 15 tips on places and experiences you simply can’t miss — from fairytale canyons to elk herds and trails among the tallest trees on the planet. Keep in mind that Redwood National and State Parks is actually a complex of four parks (Redwood National Park, Jedediah Smith Redwoods, Del Norte Coast Redwoods, and Prairie Creek Redwoods), so there’s truly loads to see.

1. Fern Canyon — the Jurassic Park canyon

Fern Canyon covered in ferns
Photo: Ken Lund from Reno, Nevada, USA / CC BY-SA 2.0 / Wikimedia Commons

Fern Canyon is probably the most photogenic spot in the entire park and for many visitors the main reason for coming. Imagine a narrow canyon with 15-metre walls completely covered in five different species of ferns that look straight out of the age of dinosaurs. And that’s no coincidence — Steven Spielberg filmed scenes here for The Lost World: Jurassic Park (1997) and declared it “the most beautiful place on Earth.” Standing there, you completely understand why.

The canyon itself is fairly short — the walk is about 1.2 km (a loop) and takes 30–45 minutes. But you’ll want to stop every few metres because you simply can’t take in the beauty of those green walls in a hurry. Prepare for wet feet — you wade through the stream that flows along the canyon floor (it’s shallow in summer, deeper in winter). Waterproof boots or sandals you don’t mind getting wet are a must-have.

How to get there: Fern Canyon lies at the end of Davison Road — about 10 km of unpaved road from Highway 101. The road is passable in a regular car (in dry conditions), but it’s narrow, bumpy, and at points you need to ford a shallow stream with your car. In winter and after heavy rains, it’s often closed. Parking at Gold Bluffs Beach costs $12 (£10) per car.

Tip: Arrive early in the morning (ideally before 9:00) or late afternoon. During peak season, the car park fills up quickly and the park has introduced a shuttle system — in summer 2024, on certain days you had to take a shuttle from Prairie Creek Visitor Center. Check the park’s website for the latest information before your visit.

2. Lady Bird Johnson Grove — an easy walk among giants

Visitor at the base of a giant redwood surrounded by ferns

If you only have time for one trail in the entire park, make it this one. Lady Bird Johnson Grove Trail is a 2.2 km loop along a boardwalk and well-maintained path that takes you through a stand of old-growth redwoods. It’s an easy stroll suitable for families with children or anyone who isn’t particularly sporty.

The grove was named after First Lady Lady Bird Johnson, who championed the protection of the redwood forests. The park was officially established in 1968, and this grove was the site of the dedication ceremony. Standing among trees that are hundreds of years old, with trunk diameters exceeding 4 metres, you understand why people fought so hard to save these forests.

The trailhead is at the end of Bald Hills Road, about 3 km from Highway 101. The road to the trailhead is paved and easy. Allow 45–60 minutes for the walk — but feel free to take longer. There’s no rush here.

Fun fact: In 1968, a commemorative plaque was unveiled here — but someone stole it. So they replaced it. That one got nicked too. The current plaque is the third one. People are just… people. 😅

3. Tall Trees Grove — a meeting with giants (permit required)

The tallest redwoods in the world at Tall Trees Grove
Photo: Redwood National and State Parks / Public domain / Wikimedia Commons

Tall Trees Grove is one of the park’s most sacred spots — this is where the world’s tallest trees were discovered in the 1960s and the very reason the national park was created. Trees here reach heights of over 100 metres and are between 500 and 2,000 years old. Walking in feels like entering a temple.

You’ll need a free permit — pick one up at Thomas H. Kuchel Visitor Center in Orick or at Hiouchi Visitor Center near Crescent City. The number of permits per day is limited (around 50 cars), so in summer, arrive early in the morning to get yours. The permit includes a code for the gate lock on Tall Trees Access Road.

The drive to the trailhead is about 11 km along a narrow gravel road (manageable in a regular car, just take it slow). The trail itself is a 5.3 km loop with about 240 metres of elevation change — down into the Redwood Creek valley and back up. Allow 2.5–3.5 hours.

Why it’s worth the effort: Tall Trees Grove is far quieter than Fern Canyon or Lady Bird Johnson Grove. There are very few people thanks to the limited permits, and the trees are utterly monumental. We stood beside a tree with a trunk circumference of over 20 metres and felt like hobbits meeting an Ent.

4. Prairie Creek Redwoods and Roosevelt elk herds

Prairie Creek Redwoods State Park is probably the most diverse section of the entire complex. You’ll find old-growth redwood forests, coastal meadows, waterfalls, and beaches — all within a relatively small area. But the real stars are the Roosevelt elk — massive animals that graze freely in the meadows right along the road.

Elk Prairie (the meadow by Elk Prairie Campground and Visitor Center) is the spot where you’ll almost certainly see them. Bulls with enormous antlers graze peacefully while visitors photograph them from a respectful distance. And please — genuinely keep your distance! These are large animals (males weigh over 400 kg) and during the rut (September–October) they can be aggressive. Maintain at least 25 metres at all times.

Another great spot for elk watching is Davison Road (the same road leading to Fern Canyon) and Gold Bluffs Beach, where elk sometimes stroll right along the sand. Elk on the beach with fog rolling in behind them — that’s a photo you’ll be showing everyone. 😁

Several lovely trails depart from Prairie Creek Visitor Center — I’d recommend the Prairie Creek Trail (a pleasant easy walk along the creek) and Revelation Trail (a short accessible trail with sensory experiences).

5. Avenue of the Giants — a road among giants

Avenue of the Giants road lined with giant redwoods
Photo: Alanthebox / CC0 / Wikimedia Commons

Avenue of the Giants is a 51 km scenic road that runs parallel to Highway 101 through Humboldt Redwoods State Park, about an hour’s drive south of Orick. Technically it’s not part of Redwood National Park, but it’s so close and so jaw-droppingly beautiful that you simply cannot skip it.

Imagine driving along with redwoods so massive on both sides that their crowns merge high above the road, creating a green canopy. Light filtering through the branches paints a mosaic of shadows and patches on the tarmac. It’s like driving through a tunnel made of trees. You’ll be doing about 20 mph, not because of speed limits, but because you keep wanting to pull over and stare.

There are numerous stops and short trails along the way. The best ones:

  • Founders Grove — a short trail (0.8 km) to the Founders Tree and the fallen Dyerville Giant, which was once the world’s tallest tree.
  • Rockefeller Forest — the largest remaining old-growth redwood forest in the world. The Bull Creek Flat Trail is 15 km, but even a short stroll here is worth it.
  • Shrine Drive-Thru Tree ($10 per car / £8) — yes, it’s a tourist trap, but honestly? Driving your car through a tree is just fun. At least once in a lifetime. 😅

6. Howland Hill Road — the most beautiful unpaved road

Unpaved Howland Hill Road winding through redwoods
Photo: Chmee2 / CC BY-SA 3.0 / Wikimedia Commons

If Avenue of the Giants is the main highway, Howland Hill Road is the secret back road for those in the know. This 10 km unpaved road winds through Jedediah Smith Redwoods State Park and is — in my opinion — the most beautiful thing you’ll see in the entire park.

The road is so narrow that in some places two cars can barely pass each other. Trees stand literally a metre from the road and their trunks are so massive that you feel like an ant walking between table legs. Some of the oldest and largest redwoods grow here — many over 300 years old with trunk diameters of 5 metres or more.

Stout Memorial Grove — a short trail (about 1 km) branching off Howland Hill Road — takes you to some of the most imposing trees. The Stout Tree is roughly 100 m tall and over 5 m in diameter. And it’s surprisingly uncrowded, because most visitors head to the more popular attractions.

Practical tip: The road is passable in a regular car (in dry weather), but campervans and large trailers won’t make it through. Drive slowly (15–20 km/h) and take your time. The drive itself is the experience.

lukas a lucka
Lukáš and Lucie recommend
Where to Stay in Redwood National Park
6 accommodations — hotels, campgrounds and other lodging options

7. Simpson-Reed Trail — a short walk for everyone

If you arrive at the park in the afternoon with just an hour of daylight left, head for Simpson-Reed Trail. It’s a short, easy loop (1.6 km) that starts right off Highway 199 near Crescent City and can be done in 30 minutes.

For such a brief trail, it packs a surprising punch — giant redwoods, ferns, carpets of moss, and a quiet little creek. It’s like a taster of the very best the redwood forest has to offer, in a compact package. Ideal for families with small children or people with limited mobility too (the trail is fairly flat, though not fully accessible).

A short way from Simpson-Reed Trail you’ll also find Peterson Loop Trail (0.6 km) — even shorter and equally beautiful. You can easily do both in an hour.

8. Enderts Beach — a hidden beach with tide pools

Redwood National Park isn’t just about trees — it also has gorgeous coastline. Enderts Beach is one of the most beautiful beaches in the area and surprisingly undervisited. The trail to the beach (Enderts Beach Trail) is 2.1 km long with about 240 m of elevation change — the way down is a doddle, the way back up will get your heart pumping.

On the beach you’ll find tide pools teeming with sea anemones, starfish, crabs, and other marine life. The best time for tide pooling is at low tide — check tide times in advance (on the NOAA Tides website).

On a clear day, you might also spot whales migrating along the coast (best chances: December–May for grey whales, May–October for humpbacks). Even without whale sightings, it’s simply stunning — rocky shoreline, crashing waves, fog, and blissful quiet.

Access: The trailhead is at the end of Enderts Beach Road, a turnoff from Highway 101 just south of Crescent City. Free parking.

9. Coastal Trail — a hike along the ocean

Pacific Ocean coastline in Redwood National Park
Photo: W. Bulach / CC BY-SA 4.0 / Wikimedia Commons

If you love walking and want to spend a full day on your feet, the Coastal Trail is for you. The entire route stretches over 70 km along the park’s coastline, but you certainly don’t have to do the whole thing — it splits beautifully into sections.

The most popular sections:

  • Crescent Beach → Enderts Beach (about 4 km) — an easy coastal walk with ocean views.
  • Flint Ridge Section — a side route through the forest to the beach, beautiful and peaceful.
  • Hidden Beach — accessible from the Coastal Trail, a small secluded beach surrounded by rocks. Romance level: 100. ☺️

The trail is well-marked, but the terrain is uneven in places and can be slippery — good hiking boots are essential. Don’t underestimate it — this isn’t a promenade.

10. Newton B. Drury Scenic Parkway — the driver’s alternative

Not everyone wants to (or can) walk the trails. If you have limited mobility, are travelling with small children, or simply want to see redwoods from the comfort of your car, Newton B. Drury Scenic Parkway is your answer.

This 16 km road branches off Highway 101 and runs right through Prairie Creek Redwoods. Trees stand close to the roadside, elk graze in the meadows, and you can pull over at numerous short trails along the way (many under 1 km). Think of it as Avenue of the Giants, just quieter and with less traffic.

Big Tree Wayside — one of the stops along the parkway — takes you to a tree that’s roughly 93 m tall and over 6.5 m in diameter. And it’s literally 100 metres from the car park. Probably the easiest giant tree you’ll ever visit.

11. Jedediah Smith Redwoods — the wildest corner of the park

Jedediah Smith Redwoods State Park at the northern end of the complex is the least developed part of the park — and that’s exactly what makes it so special. Seven percent of all remaining old-growth redwoods on Earth grow right here. Seven percent of ALL of them. In one place.

Named after the famous Wild West explorer, the park features dense, dark forests where the canopy is so intertwined that barely any light reaches the ground. The Smith River, which flows through the park, is the cleanest river in California — you could technically drink straight from it (though that’s not officially recommended).

Beyond Howland Hill Road (tip #6) and Simpson-Reed Trail (tip #7), I’d recommend Boy Scout Tree Trail — a 9 km trail (out and back) leading deep into the forest to the Boy Scout Tree and Fern Falls, a small waterfall surrounded by ferns. The trail is moderately challenging and less visited — a brilliant choice if you want the forest a bit more to yourself.

12. Klamath River Overlook — ocean and river views

Klamath River Overlook is a viewpoint where the Klamath River meets the Pacific Ocean, offering some of the best panoramic views in the entire park. You stand on a cliff high above the surf and watch the brown-green river water merge with the blue of the ocean.

The overlook is accessible from Requa Road (a turnoff from Highway 101 near the village of Klamath). The car park is small, but the spot is refreshingly uncomplicated — no long hike, no permit required. Just park and walk a few metres to the cliff edge.

It’s also a fantastic spot for whale watching, and on a clear day you can see miles of coastline in both directions. I’d recommend arriving in the late afternoon — the sunset over the ocean from here is breathtaking.

13. Trees of Mystery — a tourist attraction that’ll surprise you

Sure, Trees of Mystery is a paid commercial attraction and you might wonder if it belongs on this list. But you know what? We genuinely enjoyed it. 😁 Admission is $20/person (£16), which isn’t cheap, but you get an excellent SkyTrail — a gondola ride that lifts you high above the treetops for a completely different perspective on the forest.

There’s also a Native American museum on site (surprisingly well done and included with your ticket) and a trail featuring oddly shaped trees and cheesy-but-fun wooden sculptures. At the entrance stand enormous statues of Paul Bunyan and his blue ox Babe, and absolutely everyone takes a photo there. Yes, us too. Yes, it went on Instagram.

Trees of Mystery is on Highway 101 near Klamath, roughly halfway between Orick and Crescent City.

14. Trillium Falls Trail — a waterfall hidden in the forest

Trillium Falls Trail is another beautiful, easy trail (4.2 km loop) that leads to a small but photogenic waterfall tucked away in the redwood forest. The waterfall is about 3 metres tall — nothing earth-shattering, but set against a backdrop of mossy forest full of ferns and towering trees, it looks like something from a fantasy novel.

The trail starts off Davison Road (about 2 km from Highway 101) and is gently hilly but nothing strenuous. It’s popular with families and can be done in 1–1.5 hours. The car park fills up quickly in season — arrive in the morning.

The name “Trillium” comes from the trillium flower that blooms here in spring. White three-petalled flowers among green ferns — it’s a sight to behold.

15. Crescent Beach and Battery Point Lighthouse

Battery Point Lighthouse near Crescent City
Photo: Frank Schulenburg / CC BY-SA 3.0 / Wikimedia Commons

To round off the tips, we’re heading to Crescent City — the town that serves as a base for the northern section of the park. It’s not going to win any beauty contests on its own, but it has two things worth stopping for.

Crescent Beach is a long, wide crescent-shaped beach (hence the name) with lovely views along the coastline. On a good day, you can spot harbour seals and sea lions resting on the rocks.

Battery Point Lighthouse is a historic lighthouse from 1856 built on a rocky island that you can only reach on foot at low tide. That’s the fun part — you need to keep an eye on tide times, because if you get the timing wrong, you either can’t get there or you can’t get back. 😅 A tour of the lighthouse costs $5 (£4) and the volunteers who run the tours have plenty of stories about hurricanes, the 1964 tsunami that devastated Crescent City, and life on a cut-off island.

Where to eat and drink near Redwood National Park

I’ll be honest — this isn’t a foodie destination. We’re in the remote far north of California and the restaurant selection reflects the size of the local towns. But you can definitely eat well, and there are a few pleasant surprises.

Crescent City

  • Good Harvest Cafe — a lovely café serving breakfast and brunch made with local ingredients. Excellent omelettes and coffee. Probably the best breakfast spot in town.
  • Chart Room — fish and seafood with harbour views. The clam chowder is outstanding. Main courses around $15–25 (£12–20).
  • SeaQuake Brewing — a craft brewery with great burgers and local IPAs. If you’re into craft beer, you’ll be well happy.

Orick and surroundings

In Orick, the options are… let’s say limited. The best-known spot is Palm Cafe & Motel — a classic American diner with burgers and breakfasts. Nothing fancy, but after a full day hiking through the forest, anything tastes brilliant.

Picnic tip: Since restaurants are few and far between, I’d recommend stopping at a supermarket in Crescent City or Eureka and bringing food with you. Picnic tables are available at most trailheads and campgrounds. A sandwich in the forest among redwoods tastes better than any restaurant — tried and tested. ☺️

Eureka / Arcata (if taking the southern route)

Here the selection is much better:

  • Brick & Fire Bistro (Eureka) — excellent wood-fired pizza and local wines.
  • Restaurant 301 (Eureka, in Hotel Carter) — fine dining with a focus on local ingredients. A treat for foodies.
  • Wildberries Marketplace (Arcata) — an organic shop with prepared food, great for stocking up for the road.

Practical tips and advice

How many days at Redwood National Park

For a basic tour of the main attractions, you’ll need a minimum of 2 days — one day for the Fern Canyon + Prairie Creek area, and another for Jedediah Smith + Howland Hill Road. Ideally, plan for 3–4 days, which gives you time for Tall Trees Grove, Avenue of the Giants, coastal trails, and a pace that this landscape truly deserves. This is not a place to rush.

What to pack

  • Layers — even in summer, mornings can be 10 °C and afternoons 20 °C, and the fog can change the temperature in minutes
  • Waterproof jacket — always, in any season
  • Waterproof boots or water-friendly sandals (for Fern Canyon)
  • Good hiking boots for the longer trails
  • Insect repellent — mosquitoes and ticks are a real thing in the forest
  • Torch/headlamp — the forest floor is dim even during the day and it gets dark early at the campgrounds
  • More packing tips in our guide on how to pack a carry-on

Safety and wildlife

The park is home to black bears — they’re not as aggressive as grizzlies, but they still deserve your respect. Store food in bear boxes (available at campgrounds), make noise on the trail, and NEVER feed wildlife. More troublesome than bears, though, are ticks (Lyme disease is present in the area) and poison oak growing along the trails. Learn to identify it — “Leaves of three, let it be.”

Mobile signal and internet

Signal in the park is very limited to non-existent. In Crescent City and Orick it works fairly reliably, but as soon as you drive into the forest, expect to be offline. Download offline maps in advance (both Google Maps and Maps.me) as well as trail information. An eSIM from Holafly will help with connectivity in towns, but nothing will help in the deep forest.

Travel insurance and health

Definitely don’t travel to the USA without solid travel insurance — healthcare in America is astronomically expensive. One twisted ankle on a trail and you could be looking at thousands of dollars in bills. For shorter trips, have a read of our SafetyWing review.

Coast redwoods vs. giant sequoias — what you’re actually admiring

One of the most common questions is whether Sequoia National Park and Redwood National Park are the same thing. The answer: NO, and it’s an important distinction.

In Redwood National Park, you’ll find coast redwoods (Sequoia sempervirens) — the tallest trees on Earth. The tallest of them all, Hyperion, measures 115.9 metres (roughly the height of a 38-storey building). These trees thrive in the foggy belt of the northern California coast.

In Sequoia National Park (in the Sierra Nevada mountains, about 800 km further south) grow giant sequoias (Sequoiadendron giganteum) — the most massive trees on Earth by volume. General Sherman is “only” 84 m tall, but its trunk has a volume of over 1,400 m³. Comparing the two is like comparing a basketball player and a sumo wrestler — one is taller, the other is heavier.

Both species are remarkable, both parks are worth visiting, but they’re different parks in different parts of California.

And what about Hyperion? The world’s tallest tree does indeed grow somewhere in Redwood National Park, but its exact location has been officially undisclosed since 2022. The park introduced this measure after crowds of tourists began trampling the surrounding vegetation trying to reach it. Illegally accessing the protected zone around Hyperion carries a fine of up to $5,000 (approx. £4,000) and up to 6 months in prison. So please — don’t try to find it. Every tree in this park is equally awe-inspiring. ☺️

FAQ — Frequently asked questions about Redwood National Park

What makes Redwood National Park so special?

Redwood National Park protects nearly half of all remaining old-growth coast redwoods — the tallest trees on Earth. Some trees here exceed 100 metres in height and are between 500 and 2,000 years old. Beyond the redwood forests, you’ll find dramatic coastline, herds of Roosevelt elk, tide pools, and a fern-covered canyon where Jurassic Park was filmed. It’s one of the few places on the planet where you feel like you’ve stepped into a different geological era.

Where exactly is Redwood National Park located?

Redwood National and State Parks are located on the northern coast of California, along Highway 101, approximately 50 km south of the Oregon border. The park stretches in a narrow strip along the Pacific coastline for about 80 km from Crescent City in the north to Orick in the south. It falls within Del Norte County and Humboldt County in northwestern California.

What is the nearest town to Redwood National Park?

The nearest town is Crescent City (population around 7,000) on the park’s northern edge — you’ll find motels, restaurants, a supermarket, and petrol stations there. On the southern edge lies the small settlement of Orick with limited facilities. The larger towns of Eureka and Arcata (with an airport) are about 1–1.5 hours’ drive south of the park’s centre.

Are Sequoia National Park and Redwood National Park the same?

No! They’re two entirely different parks in different parts of California, about 800 km apart. Redwood NP is home to coast redwoods — the world’s tallest trees. Sequoia NP in the Sierra Nevada mountains is home to giant sequoias — the world’s most massive trees by volume. Both parks are well worth visiting, but mixing them up is like confusing London with Edinburgh — both brilliant, but completely different.

How much does it cost to enter Redwood National Park?

Entry to Redwood National Park is completely free — no tickets or America the Beautiful Pass required (though the pass comes in handy at other national parks on your trip). The only fees are: a $12 (£10) day-use fee at Gold Bluffs Beach, camping fees ($35/night, approx. £28), and the free but limited-number permits for Tall Trees Grove.

Can you visit Redwood National Park in winter?

Yes, the park is open year-round, but a winter visit comes with caveats. Expect frequent heavy rain, possible road closures (especially Davison Road to Fern Canyon) due to flooding and landslides, and limited accommodation and dining options. On the plus side — in winter you’ll have the park virtually to yourself, the forest in the rain is hauntingly beautiful, and the Roosevelt elk are just as photogenic in any weather.

How many days do I need for Redwood National Park?

Two days is the minimum, 3–4 days is ideal. In two days, you can cover the main highlights (Fern Canyon, Lady Bird Johnson Grove, Prairie Creek, Howland Hill Road). With three days, add Tall Trees Grove, Avenue of the Giants, and coastal trails. Four days lets you slow down, tackle longer hikes, and simply sit in the forest soaking up the atmosphere — which, honestly, is the best thing you can do here.

Tips and Tricks for Your Vacation

Don’t Overpay for Flights

Search for flights on Kayak. It’s our favorite search engine because it scans the websites of all airlines and always finds the cheapest connection.

Book Your Accommodation Smartly

The best experiences we’ve had when looking for accommodation (from Alaska to Morocco) are with Booking.com, where hotels, apartments, and entire houses are usually the cheapest and most widely available.

Don’t Forget Travel Insurance

Good travel insurance will protect you against illness, accidents, theft, or flight cancellations. We’ve had a few hospital visits abroad, so we know how important it is to have proper insurance arranged.

Where we insure ourselves: SafetyWing (best for everyone) and TrueTraveller (for extra-long trips).

Why don’t we recommend any Czech insurance company? Because they have too many restrictions. They set limits on the number of days abroad, travel insurance via a credit card often requires you to pay medical expenses only with that card, and they frequently limit the number of returns to the Czech Republic.

Find the Best Experiences

Get Your Guide is a huge online marketplace where you can book guided walks, trips, skip-the-line tickets, tours, and much more. We always find some extra fun there!
Sequoia National Park, California: 15 Things to See and Do

TL;DRSequoia National Park in California’s Sierra Nevada, about 4 hours’ drive from Los Angeles, packs in 15 highlights, from the General Sherman Tree (the most massive living tree on Earth, standing 84 metres tall) to Moro Rock and Crystal Cave, plus neighbouring Kings Canyon with its Zumwalt Meadow. Entry costs $35 per car for 7 days and also covers Kings Canyon National Park. The best time to visit is May to October, ideally June or September, when there are fewer crowds. Give the park at least 2–3 days, ideally 3–4, so you’ve got time for Kings Canyon too. You can stay right in the park at Wuksachi Lodge or at one of the campgrounds, or base yourself in the nearby town of Three Rivers.

You stand at the base of a tree, craning your neck so far back it hurts — and you still can’t see the top. General Sherman Tree, the largest living tree on the planet, soars 84 metres high with a trunk circumference of an incredible 31 metres. And there you are, utterly tiny, thinking: Is this even real?

That’s exactly how we felt when we first stepped into the Giant Forest in Sequoia National Park in California. You think you’re prepared for America’s national parks — you’ve seen the photos, watched the documentaries, read hundreds of articles. But nothing prepares you for the moment you’re standing among sequoias that have been growing for thousands of years and you realise just how absurdly small we are. It’s humbling and absolutely euphoric at the same time. 😊

Sequoia National Park is one of those parks that gets far less attention than neighbouring Yosemite, but honestly? In some ways, it captivated us more. No crowds (well, not nearly as bad), wilder nature, and the feeling of being in a forest that remembers ancient Rome. What more could you want?

In this article, you’ll find a complete guide to Sequoia National Park — from the best time to visit and how to get there, through 15 specific things to see and do, to practical advice on accommodation, food, and budget. I’ll show you how to plan your trip so you see as much as possible while actually enjoying it. Let’s dive in!
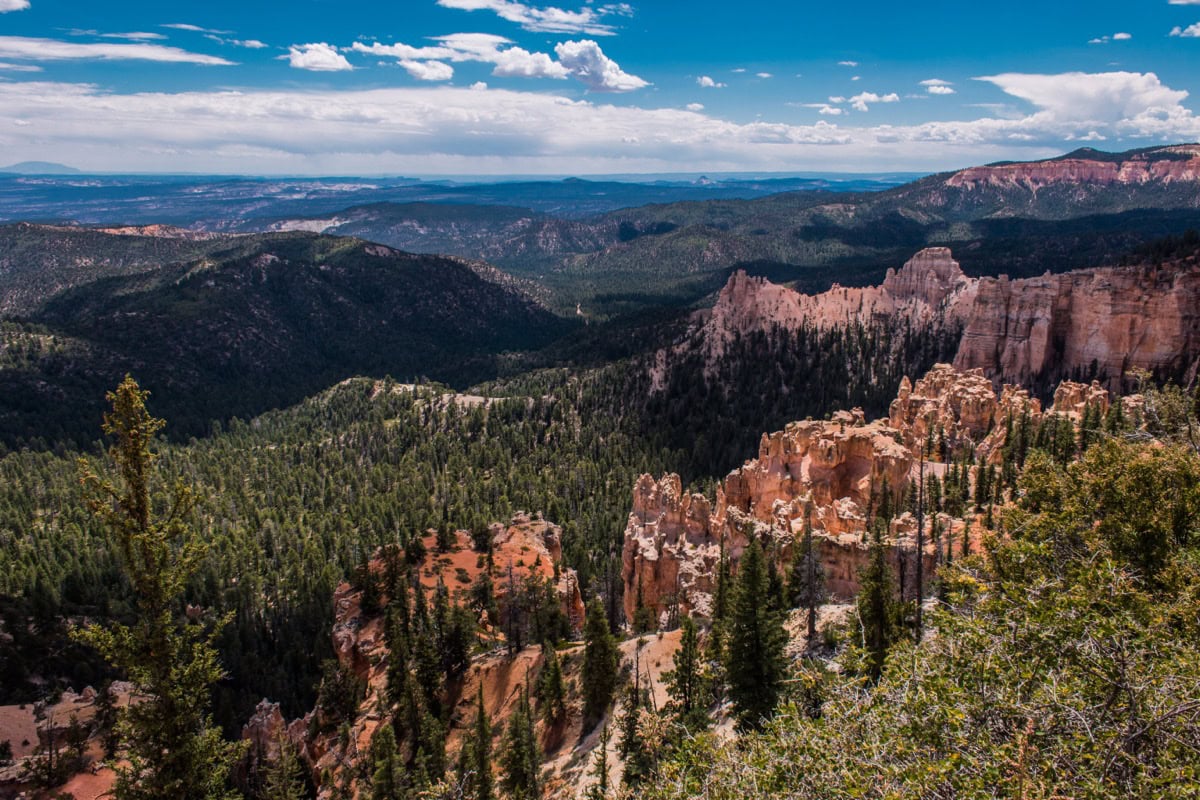
TL;DR

  • Sequoia National Park is located in California’s Sierra Nevada, about 4 hours’ drive northeast of Los Angeles.
  • The park is famous for its giant sequoias (Sequoiadendron giganteum) — the largest trees on Earth by volume.
  • The main star is General Sherman Tree — the largest living tree on the planet, approximately 2,200 years old.
  • The best time to visit is May to October, ideally June or September when there are fewer tourists than in July and August.
  • Park entrance costs $35 per vehicle (7 days) and also covers neighbouring Kings Canyon National Park.
  • Accommodation inside the park is limited — the most accessible bases are the town of Three Rivers or Visalia.
  • Plan for at least 2–3 days, ideally 3–4 if you want to explore Kings Canyon as well.
  • The park sits at an elevation of 2,000–2,400 m — even in summer, expect cool evenings and the occasional thunderstorm.
  • Crystal Cave is a stunning stalactite cave, but tickets must be purchased in advance online.
  • Compared to Yosemite, you’ll find significantly fewer crowds and a more authentic wilderness experience.

When to Visit Sequoia National Park and Weather

Sequoia National Park sits in the Sierra Nevada mountains, and elevation plays a massive role in what you’ll experience. Giant Forest, where most of the main attractions are located, lies at around 2,000–2,400 metres, so the weather here can be dramatically different from California’s valleys.

The best months to visit are June and September. In June, the park is fresh after winter, waterfalls are at their peak, and the sequoia groves are beautifully green. In September, the summer crowds have thinned out, temperatures are pleasant (around 20–25 °C during the day), and the air is crystal clear. July and August are the warmest (daytime temperatures around 27–30 °C at lower elevations) but also the busiest — expect queues at General Sherman and parking headaches.

What to avoid: Winter, unless you have experience driving on snowy mountain roads. Generals Highway, the main road through the park, is partially or fully closed from November to April due to snow. Yes, it snows in California — and in the Sierra Nevada, it snows a lot. 😅 If you visit in spring (April–May), check the current road conditions on the NPS website, as some sections may still be closed.

What to wear: Even in summer, it gets chilly above 2,000 metres — evening temperatures drop to 5–10 °C. Pack layers, a fleece jacket, and definitely good hiking boots. Comfortable trainers will do for shorter trails, but you’ll appreciate ankle support on longer hikes.

How to Get to Sequoia National Park

Sequoia National Park is located on the eastern edge of California’s Central Valley, about 270 km (4 hours) northeast of Los Angeles and 420 km (4.5 hours) southeast of San Francisco. The nearest major city is Visalia (about 1 hour from the park entrance), but the charming little town of Three Rivers sits right at the park’s doorstep.

By Car (the Best Option by Far)

There’s virtually no way to reach the park other than by car — public transport doesn’t run here. You enter the park via Ash Mountain Entrance from the south (from Three Rivers). From there, the famous Generals Highway winds up into the mountains — a twisting mountain road that gets you to Giant Forest in about 45 minutes. The drive is stunning, but expect to crawl behind lorries and pass enormous trees that’ll make you want to stop every five minutes. 😁

If you’re coming from the north (from Yosemite, for example), you’ll enter via Big Stump Entrance into Kings Canyon National Park and continue south along Generals Highway into Sequoia.

You can hire a car in LA, San Francisco, or directly in Visalia. If you’re flying from the UK, your best bet is to fly into Los Angeles (LAX) or San Francisco (SFO) — airlines like British Airways, Virgin Atlantic, and United all offer direct flights from London. We’ve had consistently great experiences with DiscoverCars, which we use everywhere — it compares prices from all rental companies in one place and their insurance options are straightforward.

Important: Generals Highway

Generals Highway is the park’s backbone road, stretching about 75 km and connecting Sequoia and Kings Canyon. It’s a two-lane mountain road with sharp bends and sometimes steep drops. RVs and vehicles longer than 6.7 m (22 ft) are prohibited on certain sections. If you’re driving a large motorhome, carefully check the restrictions on the NPS website before setting off.

Where to Stay and How Much Sequoia National Park Costs

Accommodation around Sequoia National Park isn’t exactly cheap (we’re in California, so no surprises there 😅), but there are a few clever ways to save money. Park entry costs $35 per vehicle (about €32) for 7 days and also covers neighbouring Kings Canyon National Park — that’s a brilliant deal since both parks are connected by Generals Highway.

Inside the Park

Inside the park, you have two main options:

Wuksachi Lodge — the only year-round hotel inside Sequoia National Park. It’s located right by Giant Forest at 2,200 m elevation. Rooms are clean and comfortable, but nothing luxurious — expect $200–$350 per night (€185–€325) during peak season. The huge advantage is that you’ll be first on the trails in the morning, well before day visitors arrive. Book well ahead — it fills up months in advance during summer.

Camping — the park has several campgrounds. The most popular are Lodgepole (214 sites, reservations required via recreation.gov) and Dorst Creek (218 sites, open June–September). The cost per night is around $22–$25 (€20–€23). If you enjoy camping, this is by far the best way to experience the park — you fall asleep under sequoias and wake up to birdsong. We camped and it was a completely different experience compared to staying in a hotel.

Three Rivers — the Best Base Outside the Park

The town of Three Rivers sits right at the park’s southern entrance and is the most popular base for visitors. You’ll find a mix of motels, Airbnbs, and small guesthouses. Prices range from $120 for a basic motel to $300+ for a nicer cabin with a view (€110–€280). Three Rivers is picturesque, has a few restaurants and a grocery shop. The downside — it’s about a 45-minute drive uphill from Three Rivers to Giant Forest.

Visalia — a Cheaper Alternative

Visalia is a city of about 140,000 people, located an hour from the park. The selection of accommodation is much wider and prices are considerably lower — $80–$150 per night (€75–€140) for a decent hotel. There’s also the Sequoia Shuttle (a seasonal bus service to the park), so you don’t have to worry about parking.

How Much Sequoia National Park Costs — Budget for 3 Days for Two

ItemCost (USD)Cost (EUR)
Entrance fee (vehicle, 7 days)$35€32
Campsite 3 nights$66–$75€61–€70
OR hotel Three Rivers 3 nights$360–$900€335–€835
Petrol (from LA and back + park)$80–$120€75–€110
Food (3 days, 2 people)$120–$200€110–€185
Crystal Cave tickets$32 (2×$16)€30
Total (camping)$330–$460€305–€425
Total (hotel)$630–$1,250€585–€1,160

Giant Forest and Surroundings: 8 Must-See Spots

Giant Forest is the heart of Sequoia National Park and the reason most people come here. Within a relatively small area, you’ll find the most massive trees on the planet, breathtaking rocky viewpoints, and a network of trails you could wander for days. Let’s look at the best of what Giant Forest has to offer.

1. General Sherman Tree — the Largest Living Tree on Earth

Woman inside the hollow trunk of a giant sequoia in Giant Forest

This is the main star. General Sherman Tree is the largest living tree in the world — not the tallest (that honour goes to coastal redwoods) and not the oldest (that’s the bristlecone pines), but the largest by volume. Standing 84 metres tall with a trunk circumference of 31 metres and an estimated age of 2,200 years. When you realise this tree started growing around the time the Roman Colosseum was built, it’s genuinely mind-boggling.

A short trail leads from the car park to General Sherman Tree (about 800 metres, partly down steps — and yes, the walk back is uphill, which you’ll definitely feel at 2,100 m elevation 😅). The trail is accessible for pushchairs and wheelchair users, though the return climb is steep. Get there as early as possible in the morning — ideally before 9:00 — if you want to have the tree to yourself for even a moment. From 10 o’clock in summer, it’s absolutely heaving.

One tip we learnt from experience: no photo of General Sherman ever captures its true size. Take photos with a person in the frame for scale — otherwise it just looks like a big tree. And it’s so, so much more than that.

2. Congress Trail — a Walk Among Giants

Congress Trail path winding between giant sequoias
Photo: Fabio Achilli from Milano, Italy / CC BY 2.0 / Wikimedia Commons

If you only have time for one trail in the park, make it Congress Trail. This 3.2 km loop starts right at General Sherman Tree and takes you through the densest grove of giant sequoias in the world. You’ll pass trees named after presidents and senators (hence the name “Congress”), and at one point you’ll be standing in the middle of a cluster of sequoias called The Senate, where each tree’s trunk is over 5 metres in diameter.

The trail is mostly flat, well-maintained, and manageable for absolutely everyone — including children and older visitors. Allow 1–2 hours, because you’ll be stopping every few metres to stare upwards with your mouth open. We spent nearly three hours on the trail because we kept stopping at every tree going “Look, this one’s even bigger!” 😁

3. Moro Rock — 400 Steps to the Best View

Granite dome of Moro Rock in Sequoia National Park
Photo: Birdyland at English Wikipedia. By Danny Covell of El Cajon, California. / CC BY 3.0 / Wikimedia Commons

Moro Rock is a granite monolith with 400 carved steps leading to its summit, where you’re rewarded with a 360° panoramic view of the Great Western Divide — a chain of snow-capped Sierra Nevada peaks. On a clear day, you can see for dozens of miles, and the view down into the valley is simply breathtaking.

The climb is short (about 500 metres) but steep — the elevation gain is around 90 metres and the steps are narrow in places. If you’re afraid of heights, this will be a challenge — there are railings, but in some spots you can see a sheer drop just a few feet from the path. We were at the top for sunset and it was one of the most beautiful moments of our entire trip.

💡 TIP: Moro Rock faces west, so sunset from here is absolutely magical. Arrive at least an hour before sundown so you have time for the climb and can enjoy it at the top without rushing.

4. Tunnel Log — Drive Through a Tree

Tunnel Log, a fallen sequoia trunk with a car-sized tunnel carved through it
Photo: Greg Schechter from San Francisco, USA / CC BY 2.0 / Wikimedia Commons

Yes, exactly what it sounds like — in Sequoia National Park there’s a fallen sequoia that you can drive your car through. Tunnel Log is an enormous tree that fell across the road in 1937, and instead of removing it, they carved a tunnel through the trunk. The opening is about 5.2 m wide and 2.4 m tall, so a standard car fits through easily. SUVs and pickups have to use the bypass.

Is it a tourist attraction? Absolutely. Is it a bit cheesy? Maybe. Will you stop and drive through it? One hundred percent yes. 😁 And you’ll take a photo, just like everyone else. Tunnel Log is on Crescent Meadow Road, about 15 minutes’ drive from Giant Forest Museum.

5. Crescent Meadow — the “Gem of the Sierra”

Mountain meadow of Crescent Meadow surrounded by giant sequoias
Photo: Davide D’Amico from London, United Kingdom / CC BY-SA 2.0 / Wikimedia Commons

John Muir, the father of America’s national parks, called Crescent Meadow the “Gem of the Sierra” — and he wasn’t wrong. This small mountain meadow surrounded by giant sequoias is one of the most peaceful and photogenic spots in the park. A simple 2.6 km loop trail circles the meadow, and along the way you’ll find Tharp’s Log — a hollow sequoia trunk that served as a home for farmer Hale Tharp in the 1860s. Yes, he lived inside a tree. With a view of this meadow. Jealous? You should be.

Crescent Meadow is also the starting point for longer trails — if you’re up for a full-day hike, the High Sierra Trail sets off from here, one of the most famous long-distance routes in California (116 km all the way to Mount Whitney, but you probably won’t manage that in an afternoon 😅).

6. Crystal Cave — Underground Beauty You Won’t Expect

Crystal Cave is a marble cavern hidden deep beneath the park’s surface, and it’s a completely different experience from everything else in Sequoia. Step inside and you’re suddenly in an underground world of stalactites, stalagmites, and crystal-clear subterranean streams. The cave maintains a constant temperature of about 9 °C year-round, so bring a jacket even if it’s scorching outside.

IMPORTANT: You must buy Crystal Cave tickets in advance online at recreation.gov — they are not sold at the cave. Tours last about 50 minutes and cost $16 per person (about €15). They sell out quickly during peak season, so book ahead. From the car park, it’s another 800-metre walk down a steep slope to the cave entrance (and back up again afterwards).

From the main road, you turn off onto Crystal Cave Road — a narrow, winding road that takes about 30 minutes to drive (only 11 km, but it’s very slow going). Crystal Cave is typically open from mid-May to mid-November.

7. Giant Forest Museum — the Context That Ties It All Together

Pop in here for at least half an hour, ideally as your first stop in Giant Forest. This small but excellently curated museum explains the ecology of sequoia forests — why giant sequoias need fire to reproduce, how old they are, and why they grow here and nowhere else on Earth. After visiting the museum, you’ll see the forest in a completely different light. Entry is free.

There are also some beautiful sequoia specimens outside the museum, and the facilities are good — toilets, drinking water, and a ranger station where staff can help you plan your routes. Pick up a current Sequoia National Park map at the ranger station — mobile signal is virtually non-existent here.

8. Big Trees Trail — an Easy Loop Around the Meadow

If you’re looking for a gentle, accessible trail suitable for pushchairs and wheelchair users, Big Trees Trail is the ideal choice. This 1.9 km loop follows a paved path around Round Meadow, lined with giant sequoias. Interpretive panels along the way explain the forest’s ecology.

It’s the perfect trail for an introduction to the park or for families with small children. And even on such a simple route, you’ll be standing there with your jaw on the floor, because the trees around you are simply unbelievable.

Beyond Giant Forest: 4 Places Worth the Detour

Sequoia National Park has much more to offer than just Giant Forest. If you’re spending more than one day in the park (and I highly recommend you do!), venture out to explore the more remote corners where you’ll encounter a fraction of the visitors.

9. Generals Highway — a Drive That’s an Experience in Itself

Mountain road Generals Highway in Sequoia National Park
Photo: Pavel Špindler / CC BY 3.0 / Wikimedia Commons

Generals Highway, the main road connecting Sequoia and Kings Canyon National Park, is one of the most beautiful scenic drives in all of California. Over 75 km of winding mountain road, you’ll pass viewpoints overlooking deep valleys, drive through sequoia groves, and skirt moss-covered rock walls. Make sure to stop at the pull-offs — Amphitheater Point and Hospital Rock are particularly photogenic.

You can drive the entire route from Ash Mountain Entrance to Kings Canyon in about 1.5–2 hours without stopping. But why would you rush? Set aside half a day and savour every moment.

10. Mineral King — for Adventurers Who Want to Escape the Crowds

Mineral King is a remote alpine valley in the park’s southern section, reached via a 40 km winding road (allow 1.5 hours of driving from Three Rivers). There are no shops, no hotels — just a few primitive campgrounds and gorgeous mountain trails. It feels like an entirely different park — no sequoias, but instead alpine meadows, lakes, and jagged peaks.

Warning: The road to Mineral King is narrow, steep, and has over 600 bends (no, that’s not an exaggeration). It’s not suitable for motorhomes or for anyone who gets carsick easily. But if you can handle it, the reward is absolutely stunning, crowd-free wilderness.

Bonus: Mineral King is home to marmots who have developed a fondness for chewing hoses and cables in the engines of parked cars. Yes, really. The ranger station recommends wrapping the underside of your car with a tarp. Welcome to the wild! 😅
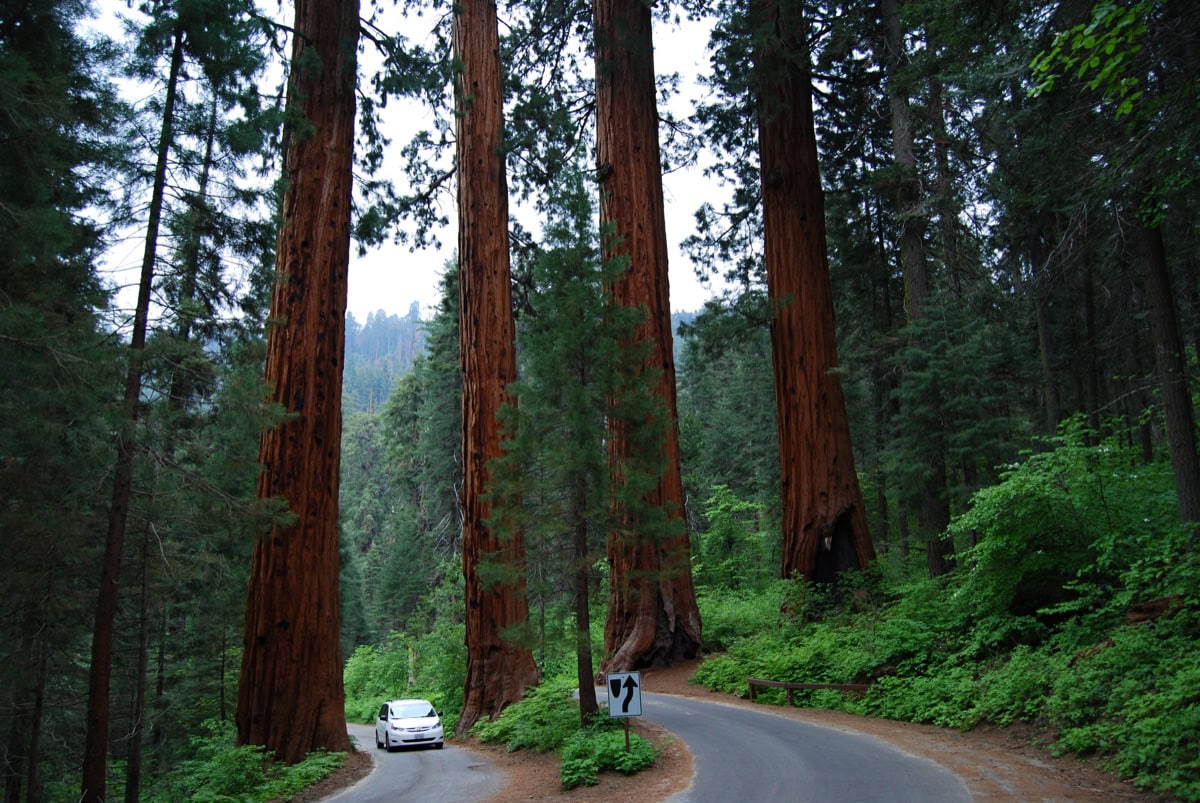
Experiences & tickets
traveler-rated · GetYourGuide
Sequoia National Park: Giant Forest Private Tour
★★★★★ 5.0 · 1 reviews
from €516
I want this experience →
🔗 These are affiliate links — they don't change your price and help us create content. · All experiences →
lukas a lucka
Lukáš and Lucie recommend
Where to stay in Sequoia National Park
4 accommodations — hotels, campgrounds and other lodging options

11. Little Baldy Trail — a View Without the Crowds

If Moro Rock felt too crowded for your liking, Little Baldy is the perfect alternative. This 5.6 km out-and-back trail leads to a granite summit with 360° views of Giant Forest, Kings Canyon, and the Great Western Divide. The elevation gain is about 200 metres and the trail winds through beautiful forest.

We had the summit completely to ourselves — and this was in August. The view is comparable to Moro Rock, perhaps even better, because you also get a bird’s-eye view of Giant Forest. The trailhead is right off Generals Highway, about 10 km north of Giant Forest.

12. Tokopah Falls — a Waterfall in a Granite Canyon

Of all the trails in the park, Tokopah Falls Trail was probably our most pleasant surprise. This 5.6 km out-and-back trail follows the Marble Fork Kaweah River through a deep granite canyon to an impressive waterfall that cascades 365 metres down granite walls.

The trail is mostly flat, so almost anyone can manage it. It’s at its most spectacular in spring and early summer when the waterfall is at peak flow. By late summer and autumn, it may be reduced to a mere trickle. The trail starts at Lodgepole Campground — if you’re camping there, it makes for the perfect morning walk.

Kings Canyon: 3 Reasons Not to Skip the Neighbouring Park

Kings Canyon National Park sits right next to Sequoia, and your entrance fee covers both — the same ticket gets you into both parks. It would be a shame to miss it, as it offers a somewhat different landscape and set of experiences. Kings Canyon is wilder, less accessible, and in many ways reminiscent of Yosemite — but without the crowds.

13. Grant Grove — Home of the General Grant Tree

General Grant Tree in the Grant Grove sequoia grove
Photo: Bradluke22 / Public domain / Wikimedia Commons

General Grant Tree is the second largest tree in the world (right after General Sherman) and is officially designated as the “Nation’s Christmas Tree”. A short, accessible loop trail (about 800 m) circles around it, passing several other named giant sequoias along the way.

In Grant Grove, you’ll also find Fallen Monarch — a massive fallen trunk that in the old days was used to shelter horses and even served as a makeshift hotel. You can walk inside it and grasp just how absurdly huge this tree must have been when it was standing.

14. Kings Canyon Scenic Byway — a Road Into the Depths of the Canyon

Kings Canyon Scenic Byway viewpoint road
Photo: Pavel Špindler / CC BY 3.0 / Wikimedia Commons

From Grant Grove, Kings Canyon Scenic Byway (Highway 180) plunges down into the canyon of the Kings River. The road descends from 2,000 m to just 1,400 m, and the views along the way are dramatic — deep chasms, granite walls, and the river far below.

At the end of the road in Cedar Grove, you’ll find a few short trails, a campground, and the starting point for longer backcountry trips. You can hire a kayak here or simply sit by the river and soak up the atmosphere of one of the deepest canyons in North America (deeper than the Grand Canyon, though nobody seems to talk about it!).

15. Zumwalt Meadow — a Fairytale Meadow

At the very end of the road in Cedar Grove lies Zumwalt Meadow, one of the most beautiful alpine meadows in the entire Sierra Nevada. A gentle 2.4 km loop offers views of the sheer granite walls of North Dome and Grand Sentinel.

In the morning, you’ll spot deer, the Kings River sparkles in the sunshine, and all around you granite monoliths stand like fortress walls. It’s like a miniature Yosemite Valley, but without a single tour bus in sight. If you love peace and stunning natural beauty, this is the place you won’t want to leave.

Food and Drink: Where to Eat Around Sequoia

Let’s be honest — nobody visits Sequoia National Park for the food. 😅 But you’ve got to eat, so here’s a rundown of what’s available.

Inside the Park

Peaks Restaurant at Wuksachi Lodge is practically the only restaurant inside Sequoia. The food is surprisingly decent — steaks, fish, salads — but prices reflect its monopoly position (mains $20–$40, or €18–€37). Breakfasts are solid and portions are generously American-sized.

Lodgepole Market Center serves quick bites — burgers, wraps, sandwiches, ice cream. Prices are reasonable by national park standards (around $10–$15 per meal). There’s also a small shop with basic camping supplies, though the selection is limited and prices higher than in town.

Three Rivers

In Three Rivers you’ll find a handful of restaurants worth a stop:

  • Gateway Restaurant & Lodge — classic American cuisine with river views. Steaks, burgers, fish. Pleasant atmosphere and fair prices.
  • Sierra Subs & Salads — if you want a quick, quality sandwich for the road into the park. Huge portions at a fair price.
  • Ol’ Buckaroo — a small café with great coffee and homemade baked goods. The perfect stop in the morning on your way into the park.
  • Anne Lang’s Emporium — do yourself a favour and stop in for their homemade pie. They don’t have it every day, but when they do, it’s absolutely worth it.

Our Tip: Cook for Yourself

If you’re camping (and we highly recommend it!), the best strategy is to stock up on supplies in Visalia on your way to the park. You’ll find regular supermarkets there (Walmart, Vons) with normal prices. In the park and Three Rivers, you’ll pay significantly more for the same products. We cooked simple meals on our camping stove — pasta, eggs, sandwiches — and spent barely anything on food. One evening we treated ourselves to a restaurant meal in Three Rivers, and that was the perfect balance.

Practical Tips and Tricks for Visiting Sequoia National Park

Sequoia National Forest vs. Sequoia National Park — What’s the Difference?

This catches people out all the time. Sequoia National Park is a national park managed by the National Park Service (NPS) — $35 entry, protected land with regulated trails and campgrounds. Sequoia National Forest is a national forest managed by the Forest Service (USFS), which surrounds the park on all sides — entry is free, rules are more relaxed, but infrastructure is minimal. Most tourist attractions (General Sherman, Moro Rock, Crystal Cave) are in the national park, not the forest.

Mobile Signal

Virtually non-existent. In Giant Forest, at Wuksachi Lodge, and at Lodgepole you might occasionally pick up a weak signal, but otherwise assume you’ll be completely offline. Download offline maps to your phone (Google Maps or maps.me) BEFORE you arrive. If you need reliable connectivity on your travels, check out our Holafly eSIM review — while it won’t help inside the park itself, it’s handy on the road and in towns.

Bears and Food Safety

Black bears live in Sequoia and they’re well accustomed to human food. All food, cool boxes, toiletries, and anything scented must be stored in bear boxes, which you’ll find at every campground and trailhead. NEVER leave food in your car — bears can open car doors (no, we’re not joking). Fines for improper food storage can reach up to $5,000.

What to Pack

You’ll find a full packing list in our article on How to pack carry-on only, but specifically for Sequoia, don’t forget:

  • Layered clothing (mornings can be 5 °C, afternoons 25 °C)
  • Good hiking boots
  • A head torch (if you’re camping)
  • High-factor sun cream (you burn faster at altitude)
  • Plenty of water (1–2 litres per person per trail)

Flights and Getting to California

From the UK, direct flights to Los Angeles are available with British Airways, Virgin Atlantic, and United from London Heathrow. Return flights typically cost £400–£800 depending on the season and how far in advance you book. San Francisco is another good option if you’re combining Sequoia with Yosemite or a wider California road trip. Use flight comparison sites like Skyscanner to find the best deals.

Travel Insurance

Don’t underestimate travel insurance for a trip to the USA — healthcare in America costs astronomical amounts. We have a detailed article on SafetyWing insurance, which we use for longer trips.

Sequoia vs. Yosemite — Which Park Should You Visit?

This question comes up constantly, and the honest answer is: if you have time, visit both. They’re two completely different experiences. But if you have to choose:

Yosemite is more dramatic — the granite walls of El Capitan and Half Dome, Yosemite Falls, glacial valleys. It’s more famous, more photogenic, and… more crowded. In summer, 15,000–20,000 people visit daily and Yosemite Valley feels more like a theme park than wilderness.

Sequoia is more intimate — giant trees, fewer people, a genuine sense of wilderness. You won’t queue for an hour for a shuttle bus. You won’t spend 45 minutes hunting for a parking spot. You’ll stand in a forest among trees that have been growing for two thousand years, and you’ll have peace and quiet.

We love both, but if we had to be completely honest over a glass of wine? Sequoia moved us more emotionally. Those trees do something to you.

If you’re planning a big road trip across America’s national parks, you can easily combine Sequoia → Kings Canyon → Yosemite over 5–7 days. The distance between Sequoia and Yosemite is about 3–4 hours by car.

How Many Days in Sequoia National Park — Planning Your Visit

Number of DaysWhat You’ll Cover
1 dayGeneral Sherman, Congress Trail, Moro Rock, Tunnel Log. It’ll be a sprint, but you’ll see the highlights.
2 daysAll of the above + Crystal Cave, Crescent Meadow, Tokopah Falls, Giant Forest Museum. The ideal minimum.
3 daysAdd Kings Canyon — Grant Grove, Kings Canyon Scenic Byway, Zumwalt Meadow. A perfect pace.
4+ daysLittle Baldy, Mineral King, longer backcountry trails, relaxation. For those who aren’t in a rush.

We spent three days in the park and it felt just right. We didn’t rush, had time for coffee, for sitting by the river, for a second breakfast (essential! 😁), and still saw everything that mattered.

FAQ — Frequently Asked Questions About Sequoia National Park

Why is Sequoia National Park famous?

Sequoia National Park is famous for its giant sequoia groves — home to the largest trees on Earth by volume. The main attraction is General Sherman Tree, the largest living tree on the planet, approximately 2,200 years old. The park also features dramatic Sierra Nevada mountain scenery, Crystal Cave (a stunning marble cavern), and some of the oldest living organisms on Earth.

What is the nearest major city to Sequoia National Park?

The nearest major city is Visalia (about 100,000 residents), approximately one hour’s drive from the park entrance. The small town of Three Rivers sits right at the park’s doorstep. Of the larger cities, Fresno is closest (2.5 hours) followed by Los Angeles (4 hours).

When is the best time to visit Sequoia National Park?

The ideal months are June and September. In June, the park is fresh after winter, waterfalls are flowing strongly, and temperatures are pleasant (15–25 °C). In September, summer crowds thin out and the weather is stable. July and August are the warmest but busiest. In winter (November–April), Generals Highway may be closed due to snow.

Is Yosemite or Sequoia better?

It depends on what you’re looking for. Yosemite offers dramatic granite walls, waterfalls, and iconic scenery but tends to be very crowded. Sequoia is more intimate, quieter, and centred around giant trees — the sense of wilderness is much stronger. Ideally, visit both parks; the distance between them is just 3–4 hours by car.

How much does it cost to enter Sequoia National Park?

Entry costs $35 per vehicle (about €32) for 7 days. The same ticket also covers neighbouring Kings Canyon National Park. If you’re planning to visit multiple national parks in the US, it’s worth getting the America the Beautiful Pass for $80 (about €75), valid for one year at all national parks and federal recreation areas.

Do I need a reservation to enter Sequoia National Park?

As of 2025, no reservation is needed for park entry — simply pay the entrance fee at the gate. However, you do need reservations for camping (Lodgepole, Dorst Creek — via recreation.gov) and for Crystal Cave (tickets only available online in advance). During summer, we recommend arriving early in the morning as car parks at the main attractions fill up fast.

Can you visit Sequoia National Park as a day trip from Los Angeles?

Technically yes, but we wouldn’t recommend it. The drive from LA takes 4 hours each way, meaning you’d spend 8 hours driving and only have a few hours in the park. It’s much better to stay overnight in Three Rivers or Visalia and dedicate at least 2 full days to the park. If you truly only have one day, focus on General Sherman, Congress Trail, and Moro Rock.

Tips and Tricks for Your Vacation

Don’t Overpay for Flights

Search for flights on Kayak. It’s our favorite search engine because it scans the websites of all airlines and always finds the cheapest connection.

Book Your Accommodation Smartly

The best experiences we’ve had when looking for accommodation (from Alaska to Morocco) are with Booking.com, where hotels, apartments, and entire houses are usually the cheapest and most widely available.

Don’t Forget Travel Insurance

Good travel insurance will protect you against illness, accidents, theft, or flight cancellations. We’ve had a few hospital visits abroad, so we know how important it is to have proper insurance arranged.

Where we insure ourselves: SafetyWing (best for everyone) and TrueTraveller (for extra-long trips).

Why don’t we recommend any Czech insurance company? Because they have too many restrictions. They set limits on the number of days abroad, travel insurance via a credit card often requires you to pay medical expenses only with that card, and they frequently limit the number of returns to the Czech Republic.

Find the Best Experiences

Get Your Guide is a huge online marketplace where you can book guided walks, trips, skip-the-line tickets, tours, and much more. We always find some extra fun there!