
Canyonlands National Park, Utah: 14 Tips on What to See and Do

TL;DRCanyonlands National Park in southeastern Utah, near Moab, splits into three sections: the accessible Island in the Sky, wilder trekking in The Needles, and the seriously remote Maze. Among the 14 tips, the standout viewpoints are Mesa Arch, Grand View Point and Green River Overlook, all doable in half a day to a full day. From Moab, it’s about 40 minutes to Island in the Sky and an hour and a half to the Needles. Entry costs $30 per car for 7 days, and since there are no restaurants or shops in the park, bring your own food and water. April–May and September–October are the best months, with pleasant temperatures and fewer crowds.

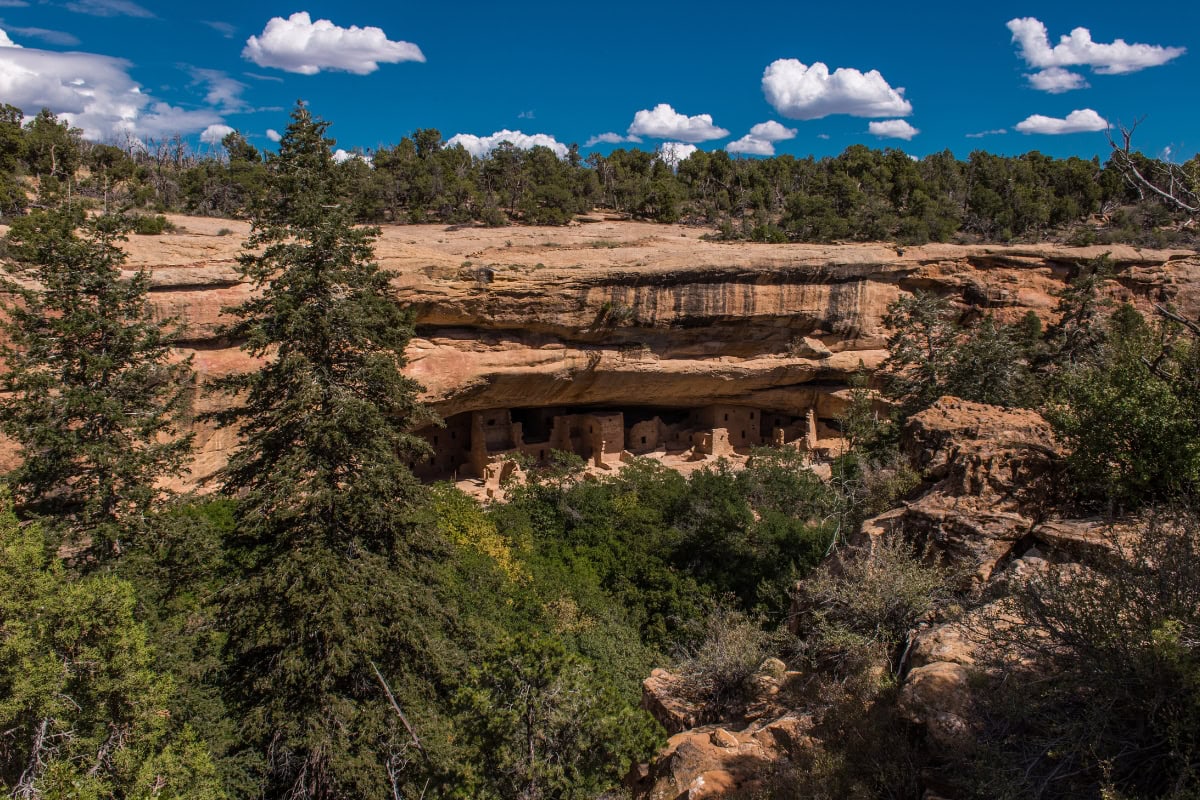
You’re standing on the edge of a cliff and below you stretches a landscape that looks like it was sculpted on another planet. Canyons extend into infinity, red rock towers rise from the earth like monumental statues, and you feel like you’ve just stepped into a movie. That’s exactly how Lukáš and I felt when we first arrived at Canyonlands Utah — one of the most dramatic national parks in the American Southwest.

Honestly? Canyonlands hit us harder than the more famous Arches National Park just around the corner. Arches is gorgeous, no question — but Canyonlands is raw, vast, and wild in a way that no photo can prepare you for. It’s a place where you stand at an overlook, gaze across hundreds of square miles of chasms and mesas, and the only thing running through your mind is: “Wow.” 😅

In this article, you’ll find a complete guide to Canyonlands National Park — from the most stunning viewpoints and hikes to practical tips on when to visit and where to stay, plus advice on how to combine Canyonlands with Arches National Park. I’ve put together 14 tips on what to see and do so you can make the most of your visit, whether you have half a day or an entire week.

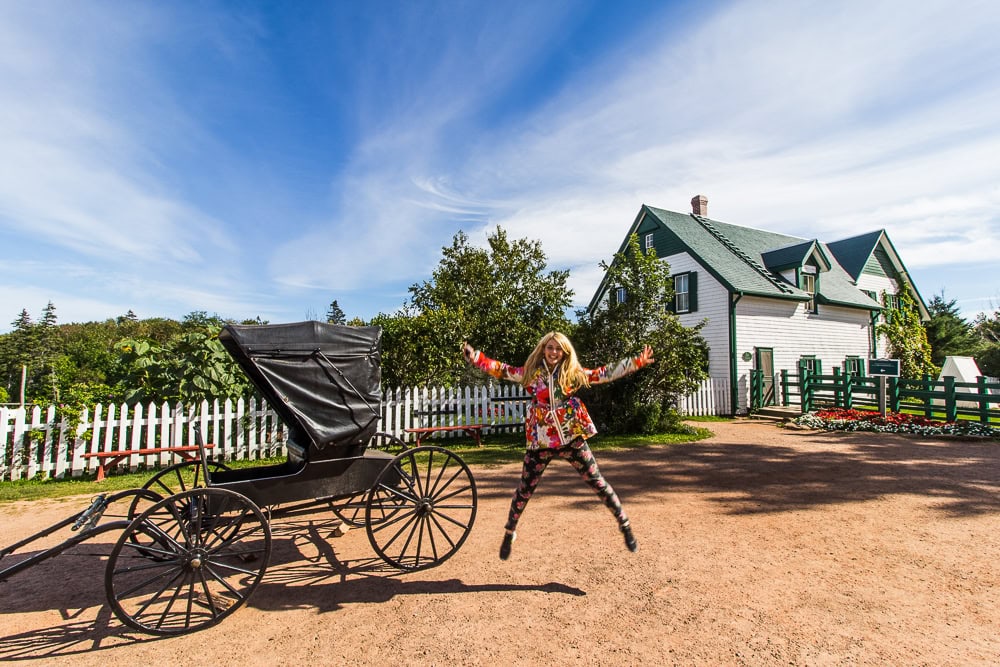
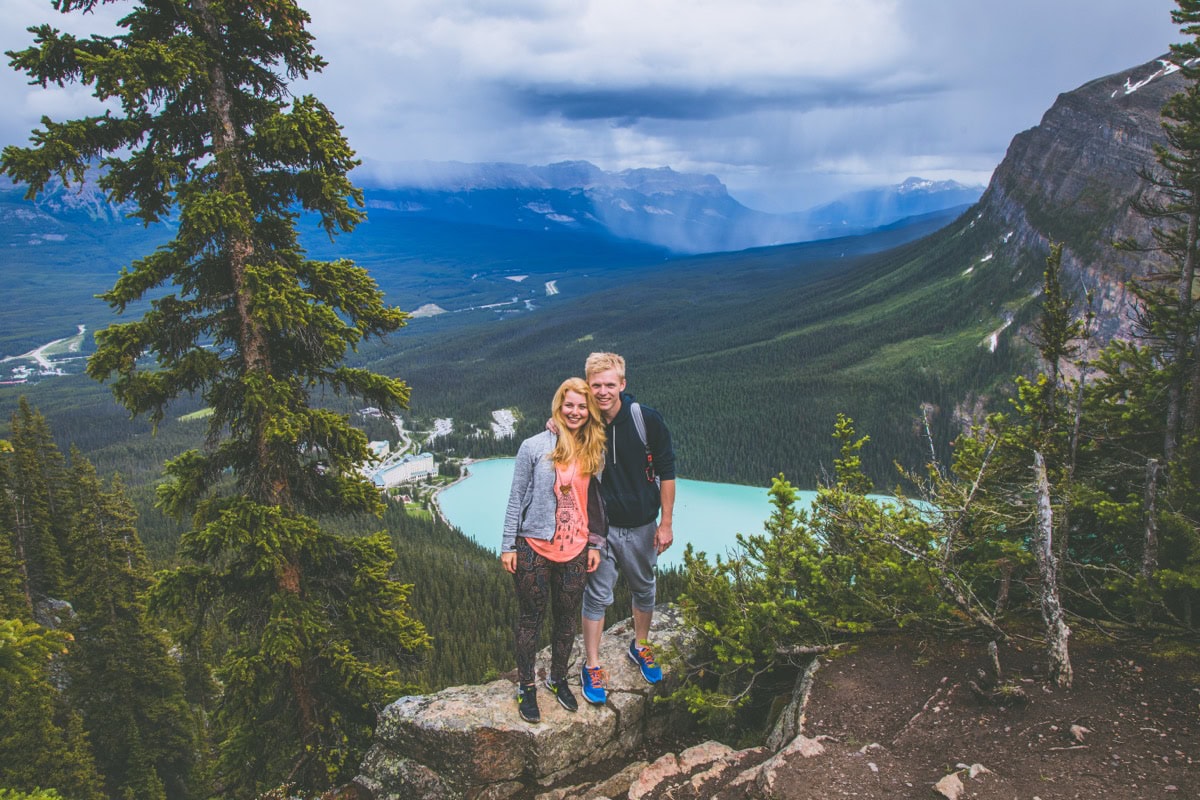
At first Canyonlands didn't seem like much, but looking back, it wasn't bad at all
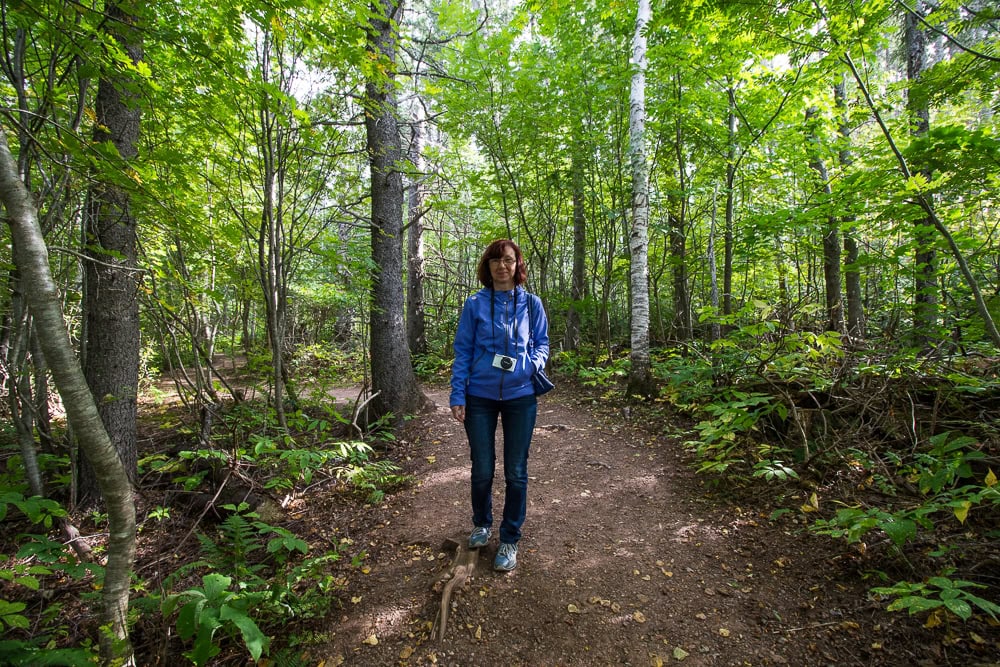
I still regret that I only have a photo of Lukáš at this spot and not one of myself

TL;DR

  • Canyonlands National Park is divided into three main sections: Island in the Sky (the most accessible), The Needles (wild hiking terrain), and The Maze (extremely remote).
  • Most visitors head to Island in the Sky, where you’ll find iconic viewpoints like Mesa Arch, Grand View Point, and Green River Overlook — and you only need half a day to a full day.
  • Mesa Arch at sunrise is one of the most photographed spots in all of Utah. Arrive at least 30–45 minutes before dawn.
  • From Moab (the nearest town), it’s roughly 40 minutes by car to Island in the Sky; about an hour and a half to The Needles.
  • The park can be perfectly combined with Arches National Park — both are just a short drive from Moab.
  • Entrance fee is $30 per vehicle (7 days) or free with the America the Beautiful Pass ($80 per year, pays for itself from the third park).
  • There are no restaurants or shops inside the park — bring plenty of food and especially water.
  • The best time to visit is April–May and September–October (pleasant temperatures, fewer crowds).
  • The Needles is a hiker’s paradise — fewer people, colourful rock formations, and a real sense of adventure.
  • White Rim Road is an epic 4×4 road trip, but it requires a permit and a minimum of 2–3 days.

When to Visit Canyonlands and How to Get There

Canyonlands National Park lies in southeastern Utah, near the town of Moab, and is open year-round. But not every season is the same — and trust me, the difference between visiting in April and in July is like the difference between a pleasant stroll and surviving on Mars.

Best Season

Spring (April–May) and autumn (September–October) are by far the best times to visit. Temperatures hover around 15–25 °C (59–77 °F), which is ideal for hiking. In spring, you might stumble upon wildflowers in the valleys, while autumn brings gorgeous warm light that sets the red rocks ablaze in breathtaking shades.

Summer (June–August) is brutal. Temperatures regularly exceed 38 °C (100 °F) and there’s virtually no shade on the trails. If you visit in summer, start your hikes early in the morning (ideally before 7:00 AM) and carry at least 3 litres of water per person. This isn’t an exaggeration — dehydration creeps up faster than you’d think in the desert.

Winter (November–March) is quiet and beautiful, but expect temperatures around freezing at night and occasional snow. Some roads (especially gravel roads in The Needles and The Maze) may be impassable.

How to Get to Canyonlands

By car from Moab is by far the easiest option. To reach Island in the Sky (the northern section), take UT-313 — the drive from Moab takes roughly 35–40 minutes. For The Needles (the southern section), head south on US-191 and then take UT-211 — the journey takes about an hour and a half. Note: you can’t drive “through the park” between Island in the Sky and The Needles — you have to go back to the main highway. The distance between the two entrance gates is roughly 150 km (93 miles) and takes about 2 hours.

The nearest airport is Canyonlands Field Airport (CNY) right near Moab, with flights from Denver and Salt Lake City. The larger Salt Lake City airport (SLC) is about a 4-hour drive — but the journey through Utah is stunningly beautiful in its own right. From the UK, you can find connecting flights to Salt Lake City via major hubs like Denver, Dallas, or Los Angeles.

We’ve had consistently good experiences with DiscoverCars, which we use everywhere around the world. A car in Utah is absolutely essential — there’s no public transport to the park.
Canyonlands, Utah: What to see and do
The most beautiful place in Utah

Canyonlands National Park Entrance Fee

The entrance fee is $30 per private vehicle (approximately €28) and is valid for 7 days. A motorcycle costs $25, and pedestrians or cyclists pay $15 per person. If you’re planning to visit multiple national parks in the USA (and Utah alone has five stunning ones!), get the America the Beautiful Pass for $80 (approximately €74) — it covers all national parks and federal recreation areas in the US for a full year. It paid for itself by our third park. Find more about planning a road trip through US national parks in our article.
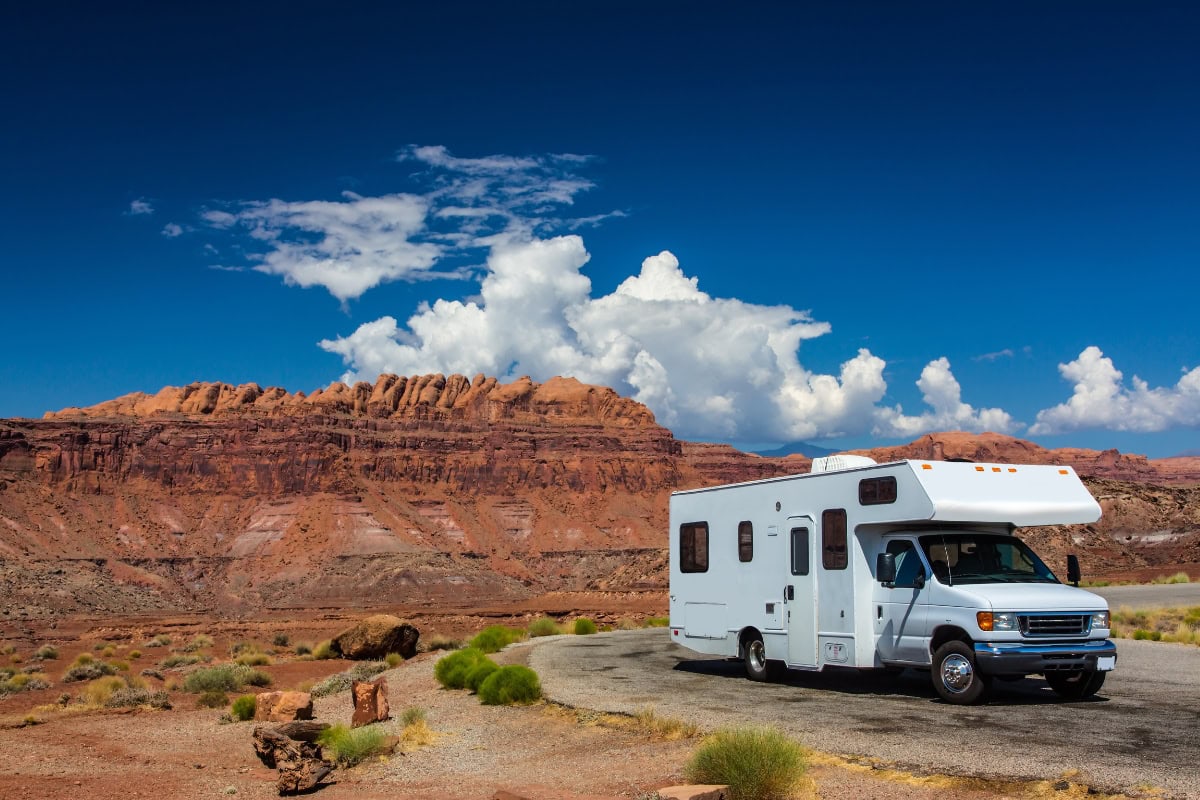
Canyonlands, Utah, USA: 14 tips on what to see and do, best hikes and trails

Where to Stay and How Much a Holiday Near Canyonlands Costs

Moab serves as the base for both Canyonlands and Arches National Park, and you’ll find accommodation for every budget — from camping under the stars to cosy boutique hotels. Just a heads-up: during peak season (March–October), accommodation sells out quickly, so book well in advance.

Accommodation in Moab

Moab is hands-down the best place to stay. It’s a small desert town with surprisingly good infrastructure — restaurants, cafés, outdoor gear shops, and plenty of accommodation. From Moab, you’re close to both main sections of the park and to Arches.

Peak season prices are roughly as follows:

  • Hostel/budget: $40–80 per night (approximately €37–74)
  • Mid-range (motel, Airbnb): $120–200 per night (approximately €111–185)
  • Upper range (hotel with pool): $200–350 per night (approximately €185–325)

Popular places to stay include Hoodoo Moab (a stylish hotel with a pool and stunning views of the red rocks), Gonzo Inn (a boutique hotel in the centre), or the more affordable but clean Moab Valley Inn. In winter, prices can drop by as much as half.

Camping in Canyonlands

If you love camping, Canyonlands National Park camping is a phenomenal experience. There are two campgrounds inside the park:

  • Willow Flat Campground (Island in the Sky) — 12 sites, $15 per night, no reservations (first come, first served). Basic facilities, vault toilets, no water. But those morning views…
  • Squaw Flat Campground (Needles) — 26 sites, $20 per night, reservations via recreation.gov. Better facilities, drinking water available.

Both campgrounds fill up very early during the season (Willow Flat often by 9:00 AM). If you’re out of luck, there are plenty of private campgrounds near Moab — such as Sun Outdoor Arches Gateway or ACT Campground, which offer showers and full amenities.

How Much Does a Trip to Canyonlands Cost — Budget

Approximate budget for 3–4 days for two people (Moab + Canyonlands + Arches):

  • Accommodation (3 nights, mid-range): $450–600 (€415–555)
  • Car rental (4 days): $200–300 (€185–278)
  • Petrol: $50–80 (€46–74)
  • Food (restaurants + groceries): $200–300 (€185–278)
  • Entrance fees (America the Beautiful Pass): $80 (€74) or $30 for Canyonlands + $30 for Arches
  • Total for two: approximately $1,000–1,400 (€925–1,300)

On our trip through Utah, we didn’t go extremely budget — we ate at restaurants, stayed in mid-range accommodation, and occasionally treated ourselves to a guided tour. But you can definitely do it much cheaper with a tent and self-catering.

Island in the Sky: 8 Must-See Places

Island in the Sky is the most visited and most accessible section of Canyonlands National Park. Imagine an enormous flat “mesa” (table mountain) that towers 300 metres above the surrounding canyons — offering knee-buckling views from every direction. The scenic drive through this section follows a paved road, and most viewpoints are accessible right from the car park or via short walks. Ideal for half a day to a full day.

1. Mesa Arch at Sunrise — Utah’s Iconic Shot

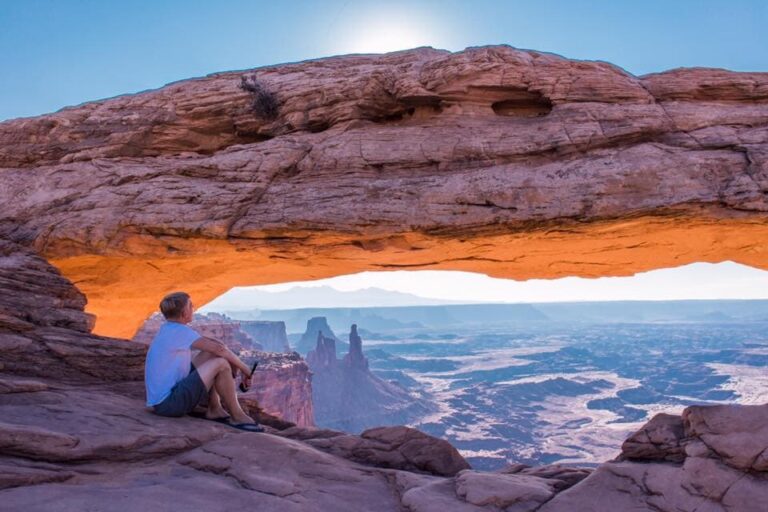
This is the shot you’ve seen in thousands of photos. Mesa Arch is a natural rock arch perched right on the edge of a cliff, and at sunrise, it glows orange-red from underneath with light reflected off the canyons below. It literally looks like the arch is on fire.

The trail to Mesa Arch is short — roughly 800 metres round trip with minimal elevation gain. Absolutely anyone can do it, including children. BUT: if you want to see the sunrise, you need to arrive at least 30–45 minutes before dawn, because photographers and tourists start claiming spots while it’s still dark. During peak season, it looks like a cinema — rows of people with tripods, quiet whispers, and then a collective “ahhh” when the first ray pierces through the arch. 😁

Even if you miss the sunrise, Mesa Arch is worth visiting any time of day. The view through the arch towards Washer Woman Arch and the canyons beyond is stunning in any light.

Mesa Arch Trail in Canyonlands

2. Grand View Point — A View to the End of the World

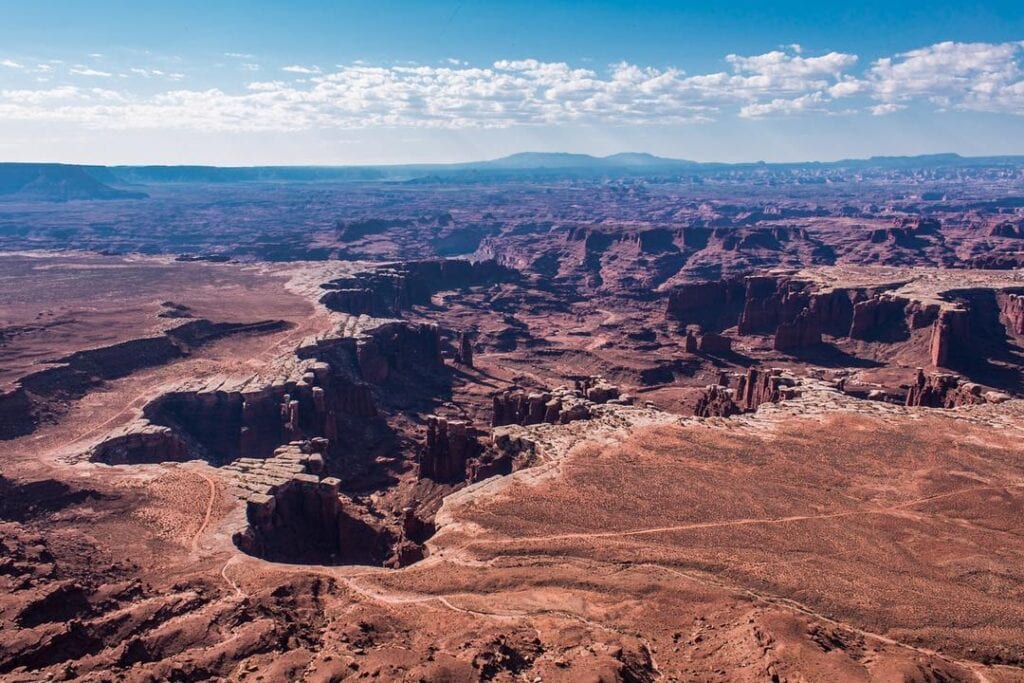
Grand View Point is the final stop on the scenic drive in Island in the Sky — and it’s the view that defines the entire park. You stand on a rocky promontory and all around you stretch canyons, mesas, buttes, and gorges in shades of red, orange, and white. On a clear day, you can see tens of miles into the distance, all the way to the La Sal Mountains.

Grand View Point Overlook is accessible right from the car park. If you have the time and energy, set off on the Grand View Point Trail — it’s about 3 km (1.8 miles) round trip along a flat rocky ridge with views on both sides. It’s not a difficult hike, but the feeling of walking along a narrow ridge with chasms on either side is unforgettable.

We were here in the late afternoon as the sun began to set and the entire landscape transformed into a palette of warm colours. We sat on the edge of the cliff with our legs dangling over the void (safely, of course 😅) and simply gazed. Sometimes you don’t need to do anything — you just need to be.
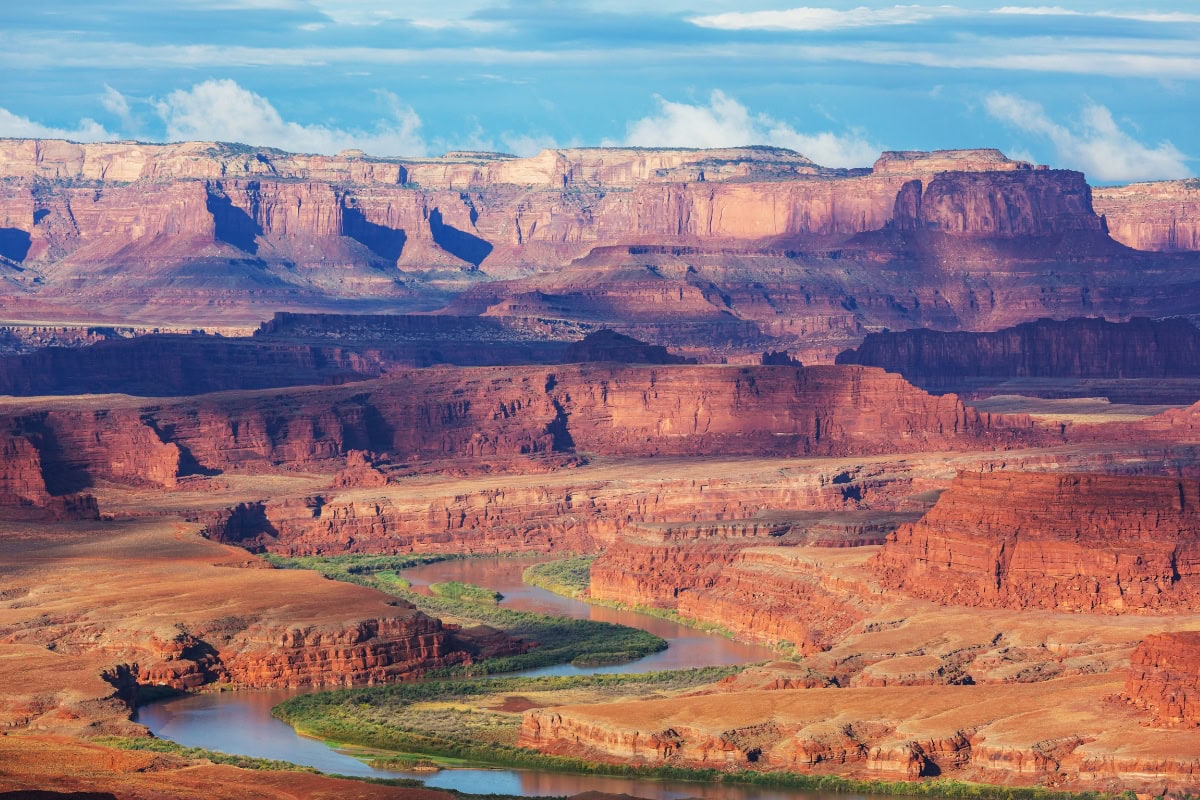
Grand View Point, Canyonlands National Park Utah

3. Green River Overlook — The Most Beautiful River Viewpoint

Green River Overlook is perhaps my favourite viewpoint in the entire park. You stand on the edge and below you the Green River winds through the canyon in a perfect meander — like a huge green “U” set into the red rocks.

The turnoff to the overlook branches from the main scenic drive and it’s just a short walk from the car park. Unlike Grand View Point, there are significantly fewer people here, so you can enjoy the view in peace. The best times to visit are morning or late afternoon, when the low sun creates dramatic shadows in the canyons.

4. Upheaval Dome — A Geological Mystery

Upheaval Dome is a peculiar geological formation that looks like a massive crater in the middle of an otherwise flat mesa. Scientists still debate whether it was formed by a meteorite impact or by the erosion of a salt dome. Whatever the truth, it’s a fascinating sight.

The First Overlook is an easy walk of about 800 metres. If you want a better view and perspective of the entire “crater,” continue to the Second Overlook — roughly 2.5 km (1.5 miles) round trip. The path is rocky but not particularly challenging.

Most tourists skip Upheaval Dome because it’s not as photogenic as Mesa Arch or Grand View Point. But that’s precisely why it’s wonderfully peaceful — and the thought that you might be looking at a meteorite impact site is just plain cool.
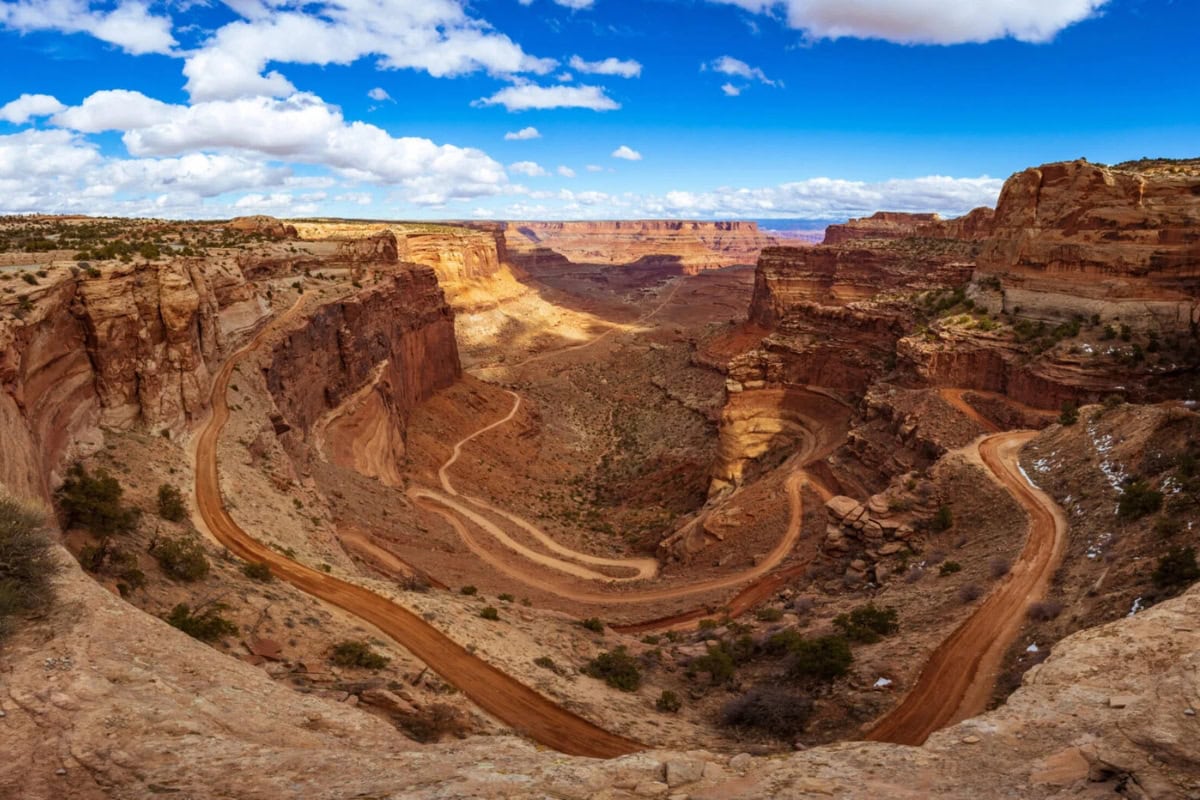
Shafer Canyon Overlook in Canyonlands Utah, USA

5. Shafer Canyon Overlook — Guaranteed Vertigo

Shafer Canyon Overlook is one of the first viewpoints you’ll encounter after entering Island in the Sky, and it packs a serious punch right away. You stand at the edge of an abyss and directly below you the Shafer Trail winds — a switchback gravel road that zigzags down into the canyon. It looks like a road nobody sane should drive. (Spoiler: people do.)

The overlook is right by the road, so no hiking required. It’s a great place to stop at the very beginning of your visit — it sets the tone for everything that follows.

6. White Rim Overlook Trail — A Short Hike with an Epic Finale

If you want something more than just standing at a railing, White Rim Overlook Trail is the perfect choice. It’s about 3 km (1.8 miles) round trip over relatively flat terrain, and at the end you’re rewarded with a view down to the White Rim Road — the legendary off-road route that winds 300 metres below you.

The hike is easy and manageable for anyone with average fitness. At the end of the trail, you’ll find yourself on a rocky outcrop where you can sit and watch as the occasional Jeep crawls along White Rim Road far below. It’s strangely meditative.

7. Canyonlands Scenic Drive — Island in the Sky from the Car

If you’re short on time, the Canyonlands National Park scenic drive in Island in the Sky is the best thing you can do. The main road runs from the visitor centre all the way to Grand View Point and is roughly 20 km (12 miles) one way. Along it, you’ll find most of the major viewpoints and trailheads.

You can complete the entire scenic drive with short stops in 2–3 hours. If you add Mesa Arch and the Grand View Point Trail, allow for half a day. The road is well-paved tarmac and you don’t need any special vehicle.

Tip: Head out early in the morning for Mesa Arch (sunrise) and then continue along the scenic drive towards Grand View Point. Stop at Green River Overlook and Upheaval Dome along the way. In the afternoon, you can still fit in Arches National Park — the distance from Arches National Park to Canyonlands (Island in the Sky) is only about 40 minutes’ drive.

8. White Rim Road — A 4×4 Adventure for the Bold

White Rim Road is a 160 km (100-mile) off-road route that follows a contour roughly halfway between Island in the Sky above and the rivers below. It’s one of the most famous 4×4 road trips in America and a once-in-a-lifetime experience.

For White Rim Road you need a 4×4 vehicle with high clearance, a park permit (which must be reserved in advance via recreation.gov), and at least 2–3 days. Most people do it in 2–3 days, camping overnight at primitive sites along the route. Some fit cyclists tackle it on mountain bikes in 3–4 days.

This isn’t a trip for everyone — it’s a remote, demanding route with no mobile signal, no water, and no facilities of any kind. But if you love adventure and have off-road experience, it’s one of the most epic things you can do in Utah.
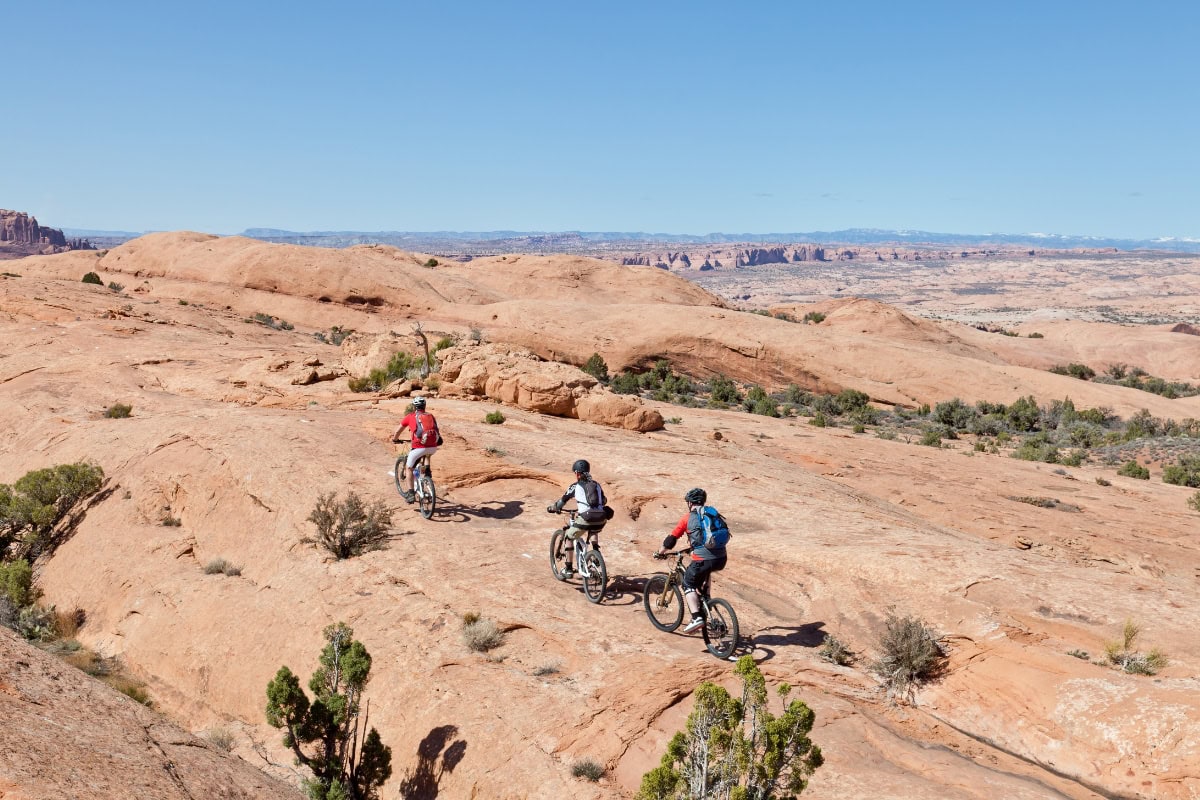
Canyonlands National Park Utah landscape
lukas a lucka
Lukáš and Lucie recommend
Where to stay near Canyonlands National Park
4 accommodations — hotels and other lodging options

The Needles: 4 Reasons to Visit the Wild Southern Section

The Canyonlands National Park Needles district is a completely different world from Island in the Sky. While Island in the Sky offers panoramic views from above, in The Needles you’re down among the rocks — surrounded by colourful towers, pillars, and rock “needles” that gave the area its name. It’s a hiker’s paradise with a true sense of wilderness.

The Needles lies about an hour and a half’s drive from Moab (via US-191 and UT-211) and attracts significantly fewer visitors than Island in the Sky. If you have at least two days in Moab, dedicate one to Island in the Sky and another to The Needles — you won’t regret it.

9. Chesler Park Loop — The Most Beautiful Hike in Canyonlands

Chesler Park Loop is an approximately 18 km (11-mile) circuit that takes you through the heart of the Needles district. You’ll pass through narrow rock passages (joints), open grassy meadows surrounded by rock towers, and landscapes that look straight out of a fantasy film.

The hike is moderately strenuous — the elevation gain isn’t extreme, but the distance and rocky terrain require solid fitness and good hiking boots. Allow 5–7 hours. Bring plenty of water (at least 3 litres per person) — there are no drinking water sources on the trails in The Needles.
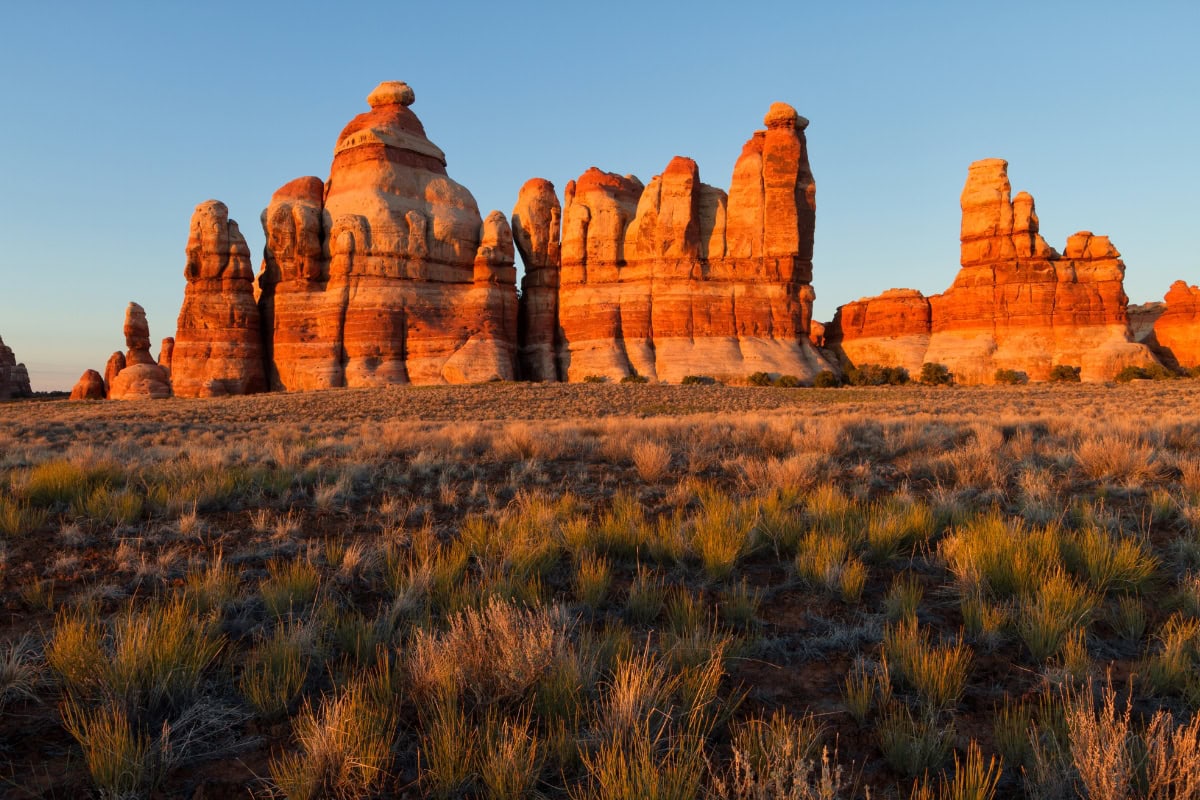
Chesler Park Loop
Chesler Park Loop

10. Slickrock Trail — An Easy Hike for Everyone

If you don’t fancy hiking 18 km, Slickrock Trail is the perfect shorter alternative. It’s about 4 km (2.5 miles) round trip over rocky terrain with gorgeous views of the surrounding “needles” and distant canyons. The trail is well marked with cairns and is manageable even for less experienced hikers.

Tip: Slickrock Trail is ideal for an evening walk, when the low sun beautifully illuminates the colourful rock formations.
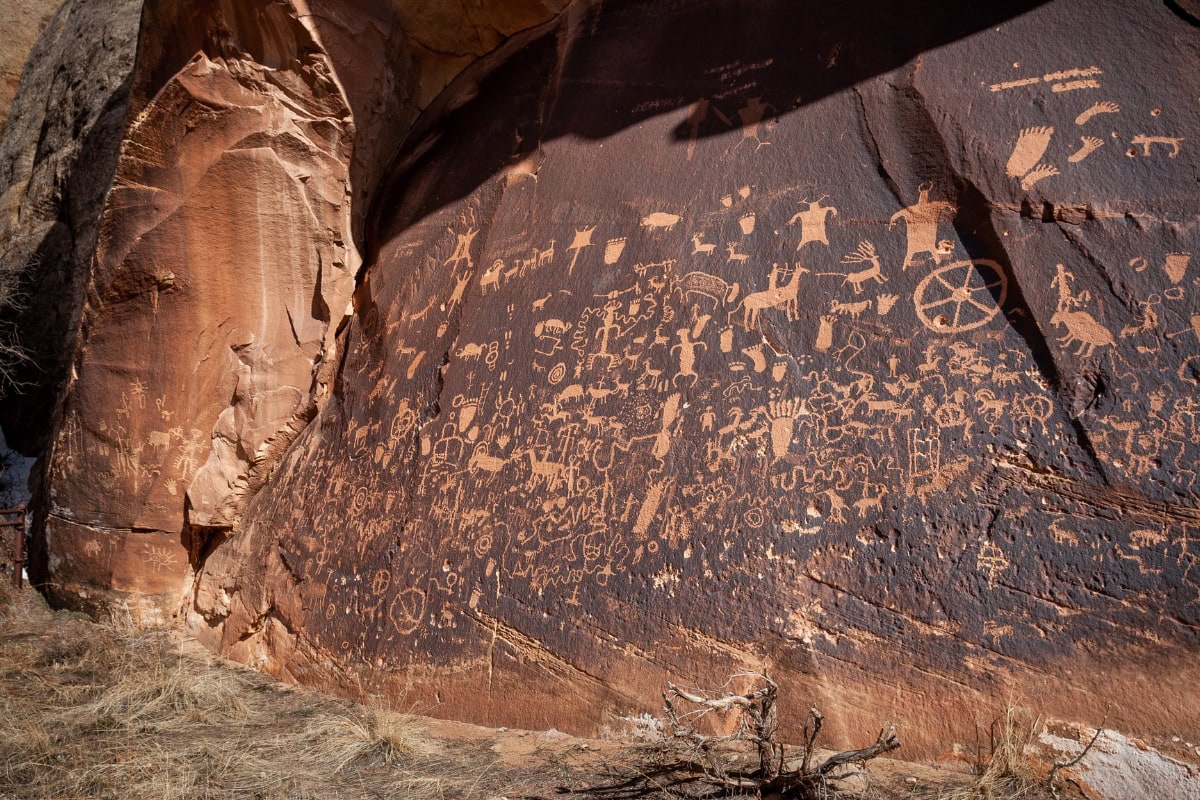
Newspaper Rock, Utah

11. Newspaper Rock — A Prehistoric Comic Strip

On your way to The Needles (along UT-211), stop at Newspaper Rock State Historical Monument. It’s a massive rock wall covered in hundreds of petroglyphs — rock carvings created by Native American peoples over thousands of years. You’ll find figures of hunters, animals, symbols, and patterns whose exact meaning remains a mystery to this day.

Newspaper Rock is right by the road, the stop takes 15–20 minutes, and it’s free. But the feeling of looking at artwork thousands of years old is priceless.
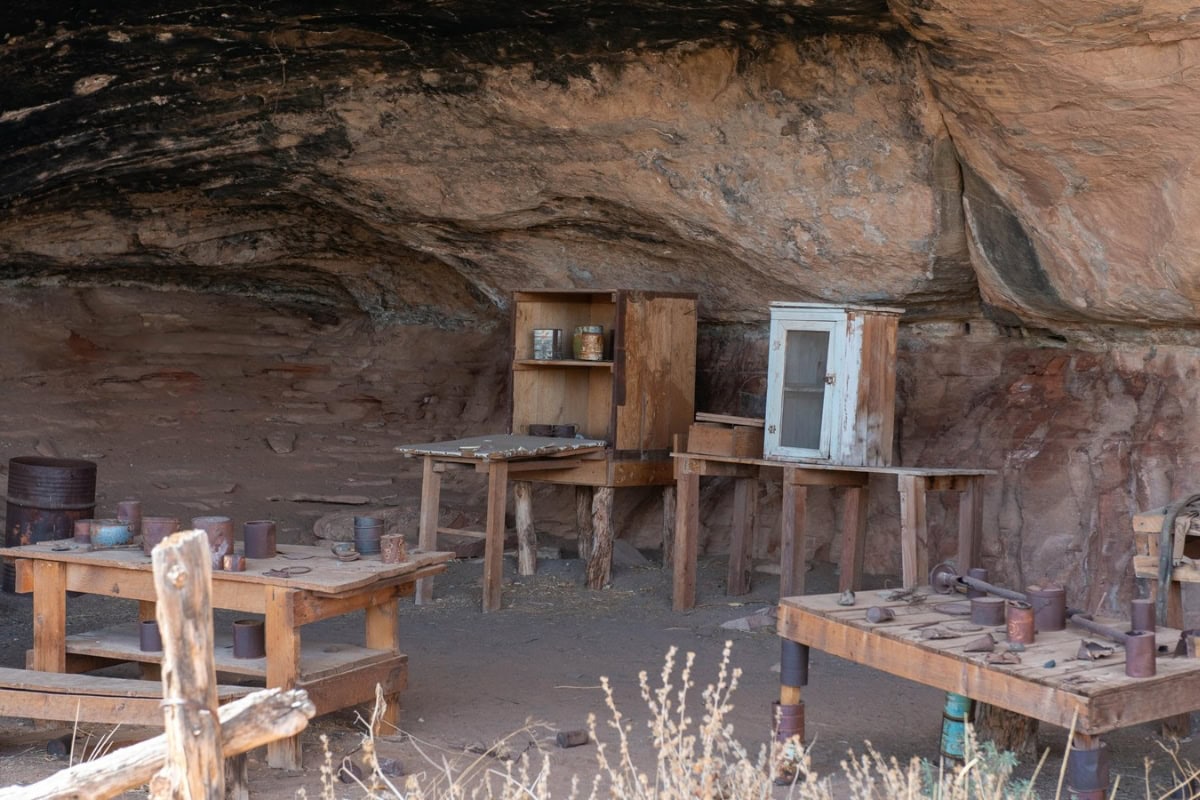
Cave Spring Trail
Cave Spring Trail, Canyonlands, Utah

12. Cave Spring Trail — A Visit to a Cowboy Camp

Cave Spring Trail is a short loop (about 1 km / 0.6 miles) that takes you past a historic 19th-century cowboy camp and prehistoric pictographs. The route also crosses a couple of rock ladders, which kids absolutely love.

It’s an ideal trail for families with children or for anyone who wants a quick taste of the area’s history without hiking all day.

The Maze: The Most Remote Corner of the Park

Now let’s take a look at the section that’s made for adventurers.

13. The Maze — Only for True Adventurers

The Maze is the most remote and least visited section of Canyonlands National Park. Getting here requires a 4×4 vehicle, off-road experience, and at least 3 days. The nearest access point is via Hans Flat Ranger Station, from which it’s still hours of driving on unpaved roads.

To give you some perspective: The Maze receives fewer visitors in an entire year than Island in the Sky gets in a single day. There’s no infrastructure, no mobile signal, and the ranger station is hours away by car. It’s a place for people who want absolute wilderness — and are prepared for it.

We didn’t make it to The Maze (we didn’t have enough time and, I’ll admit, perhaps not quite enough courage 😅), but everyone we’ve spoken to who has been there delivers the same verdict: it’s the wildest and most beautiful part of the entire park. One day we’ll go — I promise.

14. Horseshoe Canyon — World-Class Prehistoric Art

Horseshoe Canyon technically belongs to Canyonlands but lies detached from the rest of the park. The main attraction is the Great Gallery — one of the most significant collections of rock art in North America. The paintings are over 4,000 years old and depict larger-than-life human figures in an eerie style known as “Barrier Canyon Style.”

The hike to the Great Gallery is about 10 km (6.2 miles) round trip with a 230-metre (750-foot) descent into the canyon (and of course the climb back out). The access road is unpaved and may be impassable after rain. I recommend checking conditions with the ranger station beforehand.
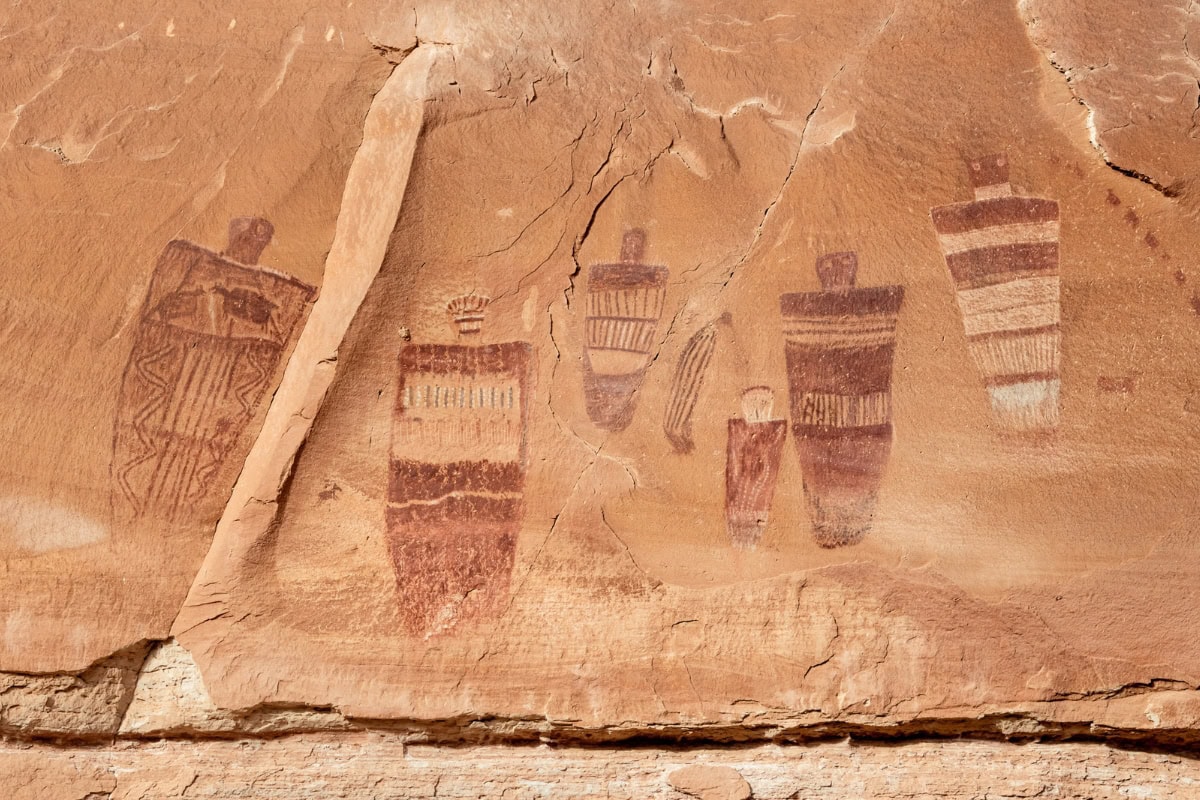
The Gallery, Canyonlands, Utah

Where to Eat and Drink: A Guide for Hungry Travellers

Inside Canyonlands National Park itself, you won’t find a single restaurant, shop, or even a water vending machine. Nothing. Zero. This isn’t Yellowstone — this is true wilderness. You must bring all your food and water with you.

Stocking Up Before Your Hike

In Moab, stock up at City Market (the largest supermarket in town) or the smaller Village Market. Buy plenty of water — we recommend at least 3–4 litres per person per day, especially during the warmer months.

For the trail, pack sandwiches, fruit, nuts, energy bars, and a salty snack (you sweat a lot in the desert and lose salts).

Restaurants in Moab

Moab is a small town, but the dining scene is surprisingly good:

  • Quesadilla Mobilla — a food truck with phenomenal quesadillas. The queue can be long, but it’s worth it. Prices around $10–14 (€9–13).
  • Thai Bella — the best Thai restaurant in town. The curry is fantastic and portions are generous.
  • Antica Forma — an Italian restaurant with excellent Neapolitan pizza. Lovely outdoor seating.
  • Love Muffin Café — great breakfast and brunch. Come early, as queues form quickly.
  • Milt’s Stop & Eat — a classic American diner with excellent burgers and milkshakes. Cheap, fast, authentic.
  • Moab Brewery — a local brewery with solid food and their own craft beers. Perfect after a full day of hiking.

Coffee tip: Red Rock Bakery has excellent coffee and fresh pastries — the perfect stop on your way to the park in the morning.

How to Combine Canyonlands with Arches National Park

Arches National Park is literally just around the corner — from Moab it’s only 10 minutes to Arches and about 40 minutes to Island in the Sky. It would be a shame not to visit both. Here’s a suggested itinerary:

3-day plan:

  • Day 1: Island in the Sky — Mesa Arch (sunrise), scenic drive, Grand View Point, Green River Overlook
  • Day 2: The Needles — Chesler Park Loop or shorter hikes + a stop at Newspaper Rock on the way
  • Day 3: Arches National Park — Delicate Arch (sunset!), Devils Garden, Landscape Arch

If you only have 1 day: Focus on Island in the Sky (scenic drive + Mesa Arch + Grand View Point) and head to Arches in the afternoon. It’s intense but doable.

The distance from Arches National Park to Canyonlands (Island in the Sky) is roughly 50 km (31 miles) and the drive takes about 40 minutes. Between Arches and The Needles, it’s approximately 120 km (75 miles) or 1.5 hours.

Practical Tips and Tricks

What to Pack

Utah is a desert — dress and pack accordingly. Essentials:

  • Plenty of water (3–4 litres per person/day — no, I’m not exaggerating)
  • Sunscreen SPF 50+ and a hat — UV radiation at an altitude of around 1,800 m (5,900 ft) is intense
  • Good hiking boots — the terrain is rocky and slippery. Check out our hiking boot tips.
  • Layered clothing — mornings and evenings can be chilly even in season
  • Torch/headlamp — if you’re going to Mesa Arch for sunrise, it’ll be dark
  • For a complete packing guide, read our article on how to pack into carry-on luggage

Where to Find Flights

Look for affordable flights to the USA on Kiwi or Skyscanner — they’re great tools for finding the best deals. There are direct flights to Salt Lake City from several European cities, or you can connect through London, Frankfurt, or another major hub.

Car Rental

A car in Utah is absolutely essential. We regularly use the comparison site DiscoverCars.com, where you can find offers from all the major rental companies. For Island in the Sky and the main roads, a standard car will do. For White Rim Road, The Maze, or unpaved roads in The Needles, you’ll need a 4×4 with high clearance.

Internet and eSIM

In Moab, you’ll have WiFi and mobile signal without any issues. Inside the park itself, there’s virtually no signal — not even on Island in the Sky, let alone in The Needles or The Maze. Download offline maps beforehand (Google Maps or maps.me) and a Canyonlands National Park map. If you’re travelling in the USA for an extended period, check out our review of Holafly eSIM.

Travel Insurance

Don’t underestimate travel insurance for a trip to the USA — healthcare in America is astronomically expensive. Read our SafetyWing review, which we use for longer trips.

FAQ — Frequently Asked Questions About Canyonlands National Park

What is Canyonlands National Park known for?

Canyonlands is the largest national park in Utah and offers some of the most dramatic canyon landscapes in the world. Unlike the Grand Canyon, which you typically view from one rim, Canyonlands surrounds you from all sides — mesas, buttes, rock needles, rivers, and arches in a landscape that feels almost extraterrestrial. There are also significantly fewer tourists here than at neighbouring Arches, so you can enjoy the wilderness in peace.

Which national park is better — Arches or Canyonlands?

It depends on what you’re looking for. Arches is more compact, more photogenic, and easier to explore in half a day — ideal for those who want to see iconic rock arches. Canyonlands is more expansive, wilder, and offers a deeper experience of the American West. We personally prefer Canyonlands — there’s more space, more silence, and that feeling of endlessness is unbeatable. But honestly? Visit both. From Moab, they’re both just a short drive away.

How long does it take to drive through Canyonlands?

The scenic drive in Island in the Sky (the main road from the entrance gate to Grand View Point) is roughly 20 km (12 miles) one way. Without stops, you can drive it in 30 minutes, but with short stops at viewpoints, allow 2–3 hours. If you add hikes (Mesa Arch, Grand View Point Trail), it’ll fill an entire morning or afternoon. The scenic drive in The Needles is shorter, but the hikes are longer.

What city is Canyonlands National Park in?

Moab — it’s the nearest town with full infrastructure (accommodation, restaurants, shops, petrol stations). From Moab to Island in the Sky takes about 35–40 minutes, to The Needles roughly 1.5 hours. Moab is also the gateway to Arches National Park and is the ideal base for exploring the entire area.

How many days do I need for Canyonlands?

For Island in the Sky (scenic drive + main viewpoints + Mesa Arch at sunrise), half a day to one full day is enough. If you want to visit The Needles as well, add another day. For White Rim Road or The Maze, allow 2–3 extra days. The ideal combination is 1 day Island in the Sky + 1 day The Needles + 1 day Arches = 3 days in Moab.

Do I need a 4×4 for Canyonlands?

For the Island in the Sky scenic drive and main viewpoints — NO. The road is well-paved and you can manage it in a standard car. For The Needles, the main road is also fine with a regular car, but some side roads (Elephant Hill, Salt Creek) require 4×4. For White Rim Road and The Maze, you absolutely need a 4×4 with high clearance.

Is Canyonlands National Park dangerous?

The park is safe as long as you follow basic desert hiking rules: carry enough water (dehydration is the main risk), avoid hiking in the midday heat, stick to marked trails, and be careful near cliff edges — most viewpoints have no railings. Watch out for rattlesnakes especially during the warmer months — but don’t be alarmed, attacks are extremely rare. Mobile signal doesn’t work in the park, so always tell someone where you’re going and have offline maps ready.

Tips and Tricks for Your Vacation

Don’t Overpay for Flights

Search for flights on Kayak. It’s our favorite search engine because it scans the websites of all airlines and always finds the cheapest connection.

Book Your Accommodation Smartly

The best experiences we’ve had when looking for accommodation (from Alaska to Morocco) are with Booking.com, where hotels, apartments, and entire houses are usually the cheapest and most widely available.

Don’t Forget Travel Insurance

Good travel insurance will protect you against illness, accidents, theft, or flight cancellations. We’ve had a few hospital visits abroad, so we know how important it is to have proper insurance arranged.

Where we insure ourselves: SafetyWing (best for everyone) and TrueTraveller (for extra-long trips).

Why don’t we recommend any Czech insurance company? Because they have too many restrictions. They set limits on the number of days abroad, travel insurance via a credit card often requires you to pay medical expenses only with that card, and they frequently limit the number of returns to the Czech Republic.

Find the Best Experiences

Get Your Guide is a huge online marketplace where you can book guided walks, trips, skip-the-line tickets, tours, and much more. We always find some extra fun there!
Digby, Nova Scotia: 15 Tips on What to See and Do in the Scallop Capital

TL;DRDigby in Nova Scotia is famous for its scallops, the working harbour at Digby Wharf, and as your gateway to the Digby Neck peninsula, with Long Island and Brier Island offering whale watching for 70–80 CAD (roughly £40–£47) a person. There are 15 tips here for exploring the area – from the Bay of Fundy, where tides can reach 16 metres, and the Balancing Rock, to the Acadian Shore and historic Annapolis Royal. Plan on 2–3 days, and come between June and September – August and September are best for whales, with a spotting rate above 95%. A B&B or motel room starts around £115 a night, and a three-day budget for two runs to roughly 800–1,200 CAD (about £460–£690). A ferry also runs from Digby to Saint John in New Brunswick, with the crossing taking around 2.5 hours.

I’ll admit that I knew almost nothing about Digby, Canada before our road trip through Nova Scotia. I knew that a ferry runs from here to New Brunswick, and somewhere online I’d read that they supposedly have the best scallops in the world. That was about it. And that’s exactly how — completely unprepared — I fell in love with one of the most charming corners of Atlantic Canada. 😊

Digby is the kind of town that doesn’t hit you over the head with monumental landmarks. There are no museum giants or Instagram hotspots with queues of tourists here. Instead, you’ll find a wooden wharf full of fishing boats, an ocean that transforms beyond recognition every six hours thanks to the Bay of Fundy tides, and a plate of golden fried scallops that’ll have you wondering whether you could emigrate to the southern coast of Nova Scotia.

In this article, you’ll find 15 tips on what to see and do in Digby and the surrounding area — from the famous waterfront and Digby Neck to whale watching on Brier Island, Acadian culture, and restaurants where you’ll have the freshest seafood of your life. I’ll also share the best time to visit, where to stay, and how much it all costs.

What to see and do in Digby, Nova Scotia

TL;DR

  • Digby is famous for its scallops (Digby scallops) — they’re considered some of the best in the world, and you can get them fresh practically everywhere.
  • Bay of Fundy with the highest tides on the planet is the main natural attraction of the entire region.
  • Digby Neck, Long Island, and Brier Island form a fascinating chain of peninsulas and islands where you can spot whales, seals, puffins, and some of the most beautiful cliffs in Canada.
  • A ferry runs from Digby to Saint John in New Brunswick — a practical link if you’re planning a road trip across multiple provinces.
  • Acadian culture (Acadian Shore) is alive and well here, giving the town a unique Francophone character.
  • Accommodation is surprisingly affordable — a pleasant B&B or motel starts from around €60 per night, even in peak season.
  • The best time to visit is June to September — warm enough for swimming, whales are active, and restaurants are open.
  • Allow at least 2–3 days for Digby and the area — one day isn’t enough, trust me.

When to visit Digby and how to get there

Digby sits on the southwestern coast of Nova Scotia, right on the Bay of Fundy, and is one of the key stops on any road trip through this province. Let’s look at when it’s best to visit and how to handle the logistics.

Best time to visit

Peak season runs from mid-June to mid-September. During this period, temperatures are a pleasant 18–25 °C, most restaurants and attractions are open, and — most importantly — whale watching season is in full swing. July and August are the warmest months and also when Digby Scallop Days takes place (usually early August), a festival where the whole town celebrates its most famous delicacy.

If you can’t stand crowds (and honestly there are no mega crowds in Digby, but still), September is an absolutely ideal month. Tourist numbers drop, the weather is still lovely, and the autumn colours are slowly starting to appear. We were here at the turn of summer and autumn and it was perfect.

I’d avoid the period from November to April — most whale watching companies and smaller restaurants close, and the weather tends to be rainy and windy. Digby in the off-season is a very quiet town.

How to get to Digby

By car from Halifax, it’s about 2.5 hours along Highway 101 — the drive is pleasant and takes you through lovely countryside. If you’re coming from the southern part of Nova Scotia (Lunenburg, Mahone Bay), expect 3–4 hours.

By ferry from New Brunswick — this is the famous connection. Bay Ferries operates the ferry from Saint John (NB) to Digby. The crossing takes about 2.5 hours across the Bay of Fundy and is an experience in itself — from the deck, you might spot dolphins or whales. A return ticket for a car plus two adults costs around 200–250 CAD (approximately €135–170), so it’s not exactly cheap, but it saves you hours of driving around. Book your spot in advance, especially in July and August — the ferry fills up fast.

A rental car is a must. Without a car, you simply can’t explore Digby Neck, Long Island, and Brier Island. We’ve had great long-term experience with DiscoverCars, which we use all over the world — it compares prices from different rental companies, saving you both time and money. You can pick up your car at Halifax airport.

Where to stay in Digby + how much does a holiday in Nova Scotia cost

Accommodation in Digby and the surrounding area is pleasantly cheaper compared to, say, Halifax or Lunenburg — and often much cosier too. Family-run B&Bs, small motels with harbour views, and cottages in nature are the norm here. Don’t look for five-star resorts, but honestly — that’s exactly what you want in a place like this.

Where exactly to stay

In central Digby (near the waterfront), stay if you want restaurants and the wharf within walking distance. A pleasant B&B room starts from 100–160 CAD (€65–105) per night. Motels along Highway 101 offer rooms from 80 CAD (€52), but they lack charm.

On Digby Neck or Long Island, smaller cabins and cottages are ideal for those who want to be closer to nature. Prices range from 120–200 CAD (€78–130) per night, and you often have a kitchenette, which comes in handy.

On Brier Island, options are more limited — there are a handful of B&Bs and guesthouses. If you’re planning whale watching, it’s worth spending at least one night here so you don’t have to rush through two ferries in the morning. Just book well in advance, as capacity is small.

How much does a holiday in Digby cost (approximate budget for two)

ItemPrice per day (2 people)
Accommodation (B&B / motel)100–160 CAD (€65–105)
Food (lunch + dinner at a restaurant)60–100 CAD (€39–65)
Petrol20–35 CAD (€13–23)
Whale watching70–80 CAD/person (€46–52)
Ferry to Long/Brier IslandFree!

For 3 days in Digby and the area, budget around 800–1,200 CAD (€520–780) for two — including accommodation, food, petrol, and one whale watching trip. Nova Scotia isn’t the cheapest Canadian province, but compared to British Columbia or Ontario, it’s more affordable. And for those scallops… it’s absolutely worth it. 😁

lukas a lucka
Lukáš and Lucie recommend
Where to stay in Digby, Nova Scotia
2 accommodations — wellness hotels and other lodging options

Digby and surroundings: 15 things to see and do

Let’s get to the most important part — what to actually do in Digby and the surrounding area? I’ve put together 15 tips covering the town itself, the entire Digby Neck all the way to Brier Island, nearby beaches, and Acadian culture. Some are classic “must-sees,” while others are more like hidden gems you’ll only discover if you’re not afraid to venture off the main road.

1. Digby Wharf — the heart of town with ocean air

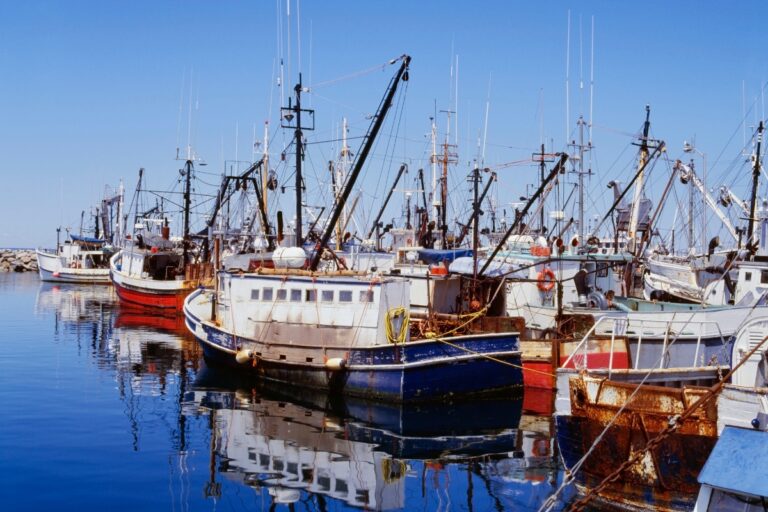
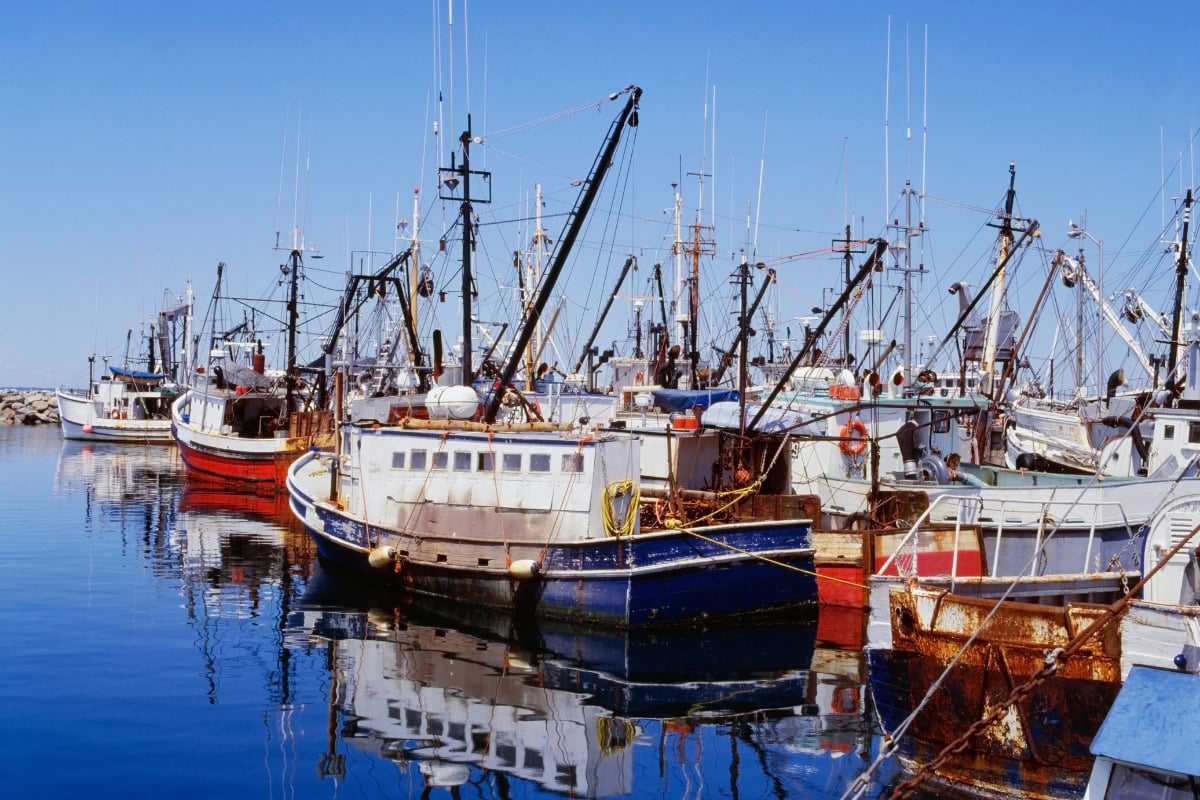
The Digby waterfront is where the town truly comes alive. This wooden wharf is home to one of the largest scallop fishing fleets in the world — and that’s no exaggeration. In the morning, you can watch fishermen returning with their catch; in the afternoon, sit on a bench and observe how the Bay of Fundy tides dramatically change the water level.

A stroll along the wharf is free and takes about 20–30 minutes. At the end of the pier, you’ll find information boards about the history of scallop fishing in Digby and the Bay of Fundy. If you’re lucky enough to be there when the boats come in, the fishermen are usually friendly and happy to show you what they caught today.

Right by the harbour, there are several restaurants specialising in seafood (more on those in the food section below), making the wharf the ideal place to start and end your day. It’s most beautiful at sunset, when the entire harbour turns orange and you’re sitting with a plate of scallops and a glass of wine, wondering why you didn’t come here sooner. 😊

Digby waterfront, Nova Scotia

2. Digby Scallops — taste the world’s most famous scallops

This isn’t a tip about a specific place, but about an experience that defines all of Digby. The town is literally synonymous with scallops — Digby scallops are considered some of the best on the planet thanks to the icy waters of the Bay of Fundy, which give them a sweeter and more delicate flavour than scallops from warmer waters.

You can get them at practically every restaurant in town — fried, grilled, buttered, in chowder, on pasta. The local classic is pan-seared scallops with a squeeze of lemon and herb butter. A serving at a restaurant typically costs 18–30 CAD (€12–20) and portions are generous.

If you want the absolute freshest, stop by Digby Fish Market or one of the vendors right at the harbour — buy them raw and prepare them yourself if your accommodation has a kitchenette. The locals say the best way to cook them is the simplest — a bit of butter, salt, pepper, and two minutes per side. And they’re right.

If you’re in Digby in early August, you’ll hit Digby Scallop Days — a festival where the whole town celebrates its most famous delicacy with live music, boat races, and of course tonnes of scallops in every form imaginable.

3. Bay of Fundy — the highest tides on Earth

The Bay of Fundy is a natural phenomenon you have to see with your own eyes to believe. The difference between high and low tide here reaches up to 16 metres — that’s the height of a five-storey building. In six hours, the landscape transforms completely: where there was ocean, there’s suddenly a muddy plain full of starfish and seaweed, and vice versa.

From Digby, the Bay of Fundy is literally a few steps away — the entire town sits on its southern shore. The best way to experience the contrast is to visit the beach or wharf twice a day — once at high tide and once at low tide. The difference will blow your mind.

For an even more dramatic experience, head to Burntcoat Head on the other side of the bay (about 3 hours by car), where the world’s highest tides are officially measured. But honestly — even right in Digby and on Digby Neck, the tidal effect is fascinating and well worth your attention. Download an app or check the website tides.gc.ca to find exact tide times for your location — planning around them will significantly enhance your experience.

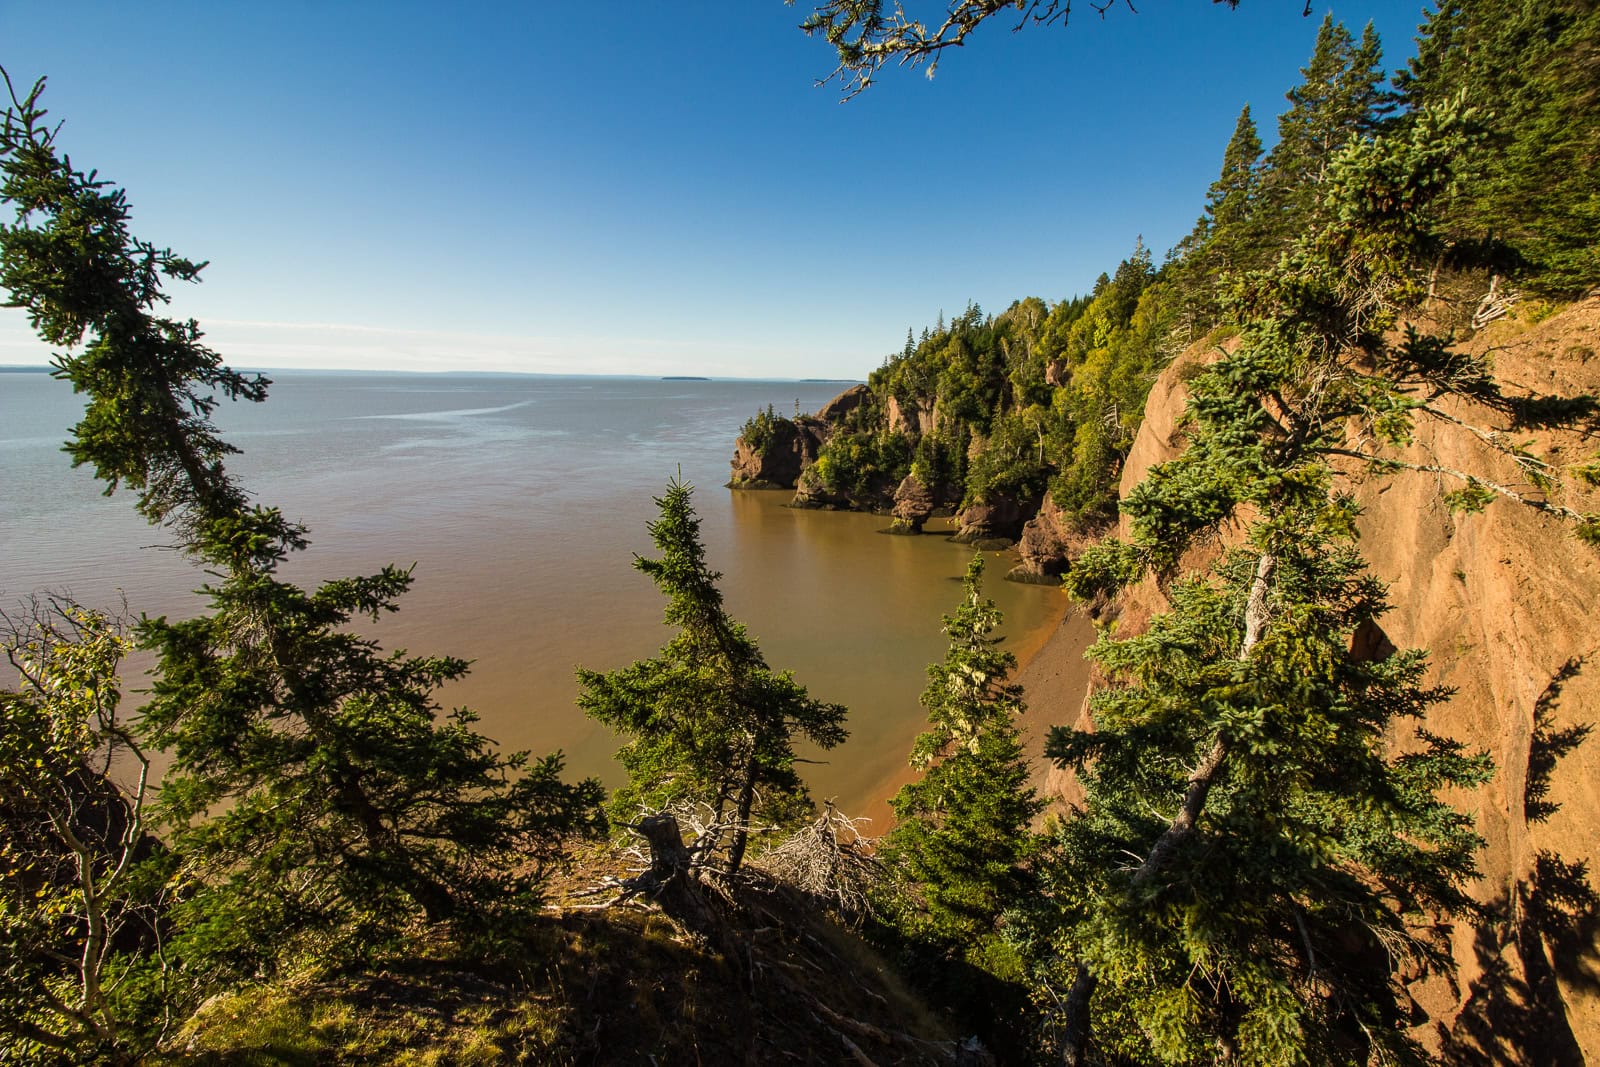
Bay of Fundy rock formations
Bay of Fundy

4. Digby Neck — a peninsula where time stands still

Digby Neck is a narrow peninsula stretching about 45 km southwest of Digby and continuing across two small islands (Long Island and Brier Island) out into the open Atlantic. It’s one of the most beautiful and peaceful places in all of Nova Scotia — and honestly, one of the main reasons it’s worth making the trip to Digby at all.

The drive along Digby Neck is an experience in itself. Route 217 winds along a narrow strip of land with ocean on both sides — the Bay of Fundy to the left, St. Mary’s Bay to the right. Along the way, you’ll pass tiny fishing villages where time seems to have stopped somewhere in the 1980s. Sandy Cove, Centreville, Tiverton — each has its own small harbour, a handful of houses, and absolute tranquillity.

Don’t plan Digby Neck as an hour-long stop. Ideally, set aside an entire day for the whole peninsula including Long and Brier Islands, or better still a day and a half. The round trip with exploration of all the stops takes at least 5–6 hours, not counting waiting for ferries.

5. Balancing Rock — a geological wonder defying gravity

On Long Island (just past the first ferry from Digby Neck), you’ll find one of the most iconic natural attractions in all of Nova Scotia — Balancing Rock, a massive basalt column balancing on a narrow rocky base. It looks like it could topple at any moment, but it’s been standing here for thousands of years.

The trail to Balancing Rock is about 2.5 km one way from the car park on Route 217. The path is fairly easy, but the final section involves 235 wooden steps down to the shoreline (and of course back up again 😅). The entire round trip takes about 1.5–2 hours. At the end, you’re rewarded not only with the famous rock but also a stunning view of the Bay of Fundy.

Tip: Go at low tide, when the rock formation is even more dramatic and you can see more of the coastal formations. And bring proper shoes — the trail can be slippery after rain. If you’re looking for quality footwear for such hikes, check out our hiking boots guide.

6. Long Island — a peaceful island with fishing villages

Long Island lies between Digby Neck and Brier Island, and you reach it via a free ferry from East Ferry (at the end of Digby Neck) to Tiverton. The ferry runs every half hour, the crossing takes about 5 minutes, and it’s free — for cars and passengers alike. No reservation needed, just drive up and onto the boat.

Tiverton, the main village at the northern end of the island, is a charming fishing port where you can watch lobster traps being stacked on the pier and buy fresh seafood straight from the fishermen. There are a few small cafés and shops in the centre.

On Long Island, be sure to visit Boar’s Head Lighthouse — a lighthouse on a dramatic cliff edge with views over the Bay of Fundy. The walk to the lighthouse is short (about 15 minutes from the car park) and the view is worth it. It’s one of those places where you sit on a rock, listen to the waves, and forget about the rest of the world for a while.

Drive through the island slowly, stopping at small harbours and beaches. From Tiverton to the southern end of the island (Freeport, where the ferry to Brier Island departs), it’s about a 20-minute drive — but with stops, allow an hour.

7. Brier Island — whales, puffins, and the end of the world

Brier Island is the last link in the chain of Digby Neck → Long Island → Brier Island, and it’s the place that excited us the most on our entire trip to Digby. You reach the island via a second free ferry from Freeport (Long Island) to Westport (Brier Island) — again, it runs every half hour and takes just a few minutes.

Brier Island has only about 200 permanent residents, one shop, a few B&Bs, and two whale watching companies. And it’s the whales that draw most people here. But even if you skip whale watching, the island itself is stunning — dramatic basalt cliffs, moss, mud flats at low tide, and the feeling of being at the end of the world (because technically, you are).

Walk through Brier Island Nature Preserve — a network of trails leads through bogs, along cliffs, and to the lighthouse on the island’s western tip. In summer, Atlantic Puffins nest here, though for the best puffin viewing, a boat trip is better (whale watching operators often include them on their route). You can also spot seals resting on rocks at low tide.

Practical tip: There’s no petrol station on Brier Island. Fill up on Digby Neck or in Digby before you set off. Food options are limited too — Westport has a few small eateries, but don’t expect a wide selection.

8. Whale watching from Brier Island — a once-in-a-lifetime experience

If whale watching is on your bucket list, Brier Island is one of the best spots on the east coast of North America to see them. The waters around the island are rich in nutrients thanks to the mixing currents of the Bay of Fundy and the Atlantic, attracting humpback whales, fin whales, right whales, and dolphins.

Two main companies offer whale watching trips:

  • Brier Island Whale and Seabird Cruises
  • Mariner Cruises Whale & Seabird Tours

Both operate from Westport and offer 3–4 hour trips for approximately 70–80 CAD (€46–52) per person. The season runs from June to October, with August and September being the best for whales — the chance of a sighting during this period is reportedly over 95%.

We saw three humpback whales, one of which breached about 50 metres from our boat. Lukáš caught it on video and I was so startled that I dropped my camera. Fortunately, it landed on the deck and not in the ocean. 😅

Book ahead, especially in July and August. And bring warm clothing — even when it’s 25 °C on land, it’s noticeably colder on the water. Several layers and a windbreaker are essential.

9. Point Prim Lighthouse — one of the oldest lighthouses in Nova Scotia

A short distance from Digby, along the coast heading south, stands Point Prim Lighthouse — one of the oldest lighthouses in the province. It’s not the most photogenic lighthouse you’ll see in Nova Scotia (that’s probably Peggy’s Cove), but it has its own charm — it sits on a quiet rocky headland surrounded by nothing but ocean and wind.

A short path leads to the lighthouse from a small car park. The surrounding rocks are perfect for sitting and watching the tide come in. It’s a perfect 30–45 minute stop, especially if you’re driving along the coast and need a break from the road.

10. Bear River — the “Little Switzerland” village on stilts

About 15 minutes by car from Digby lies Bear River — a tiny village nicknamed “The Switzerland of Nova Scotia” because of the steep hills surrounding the river. That’s a slightly exaggerated comparison (it’s definitely not the Alps 😅), but the village is genuinely charming — a row of buildings stands on wooden stilts above the river and at high tide, they look as though they’re floating on water.

Bear River is known for its arts community — you’ll find several galleries, studios, and craft workshops. Bear River First Nation Heritage and Cultural Centre offers insight into the culture of the indigenous Mi’kmaq people. The village is small — you can walk through it in an hour — but the atmosphere is unique.

In summer, the Bear River Cherry Carnival takes place (usually July/August), a festival with live music and local cherries. If the festival isn’t on, at least stop by one of the local cafés or galleries.

Bear River, Nova Scotia

11. Acadian Shore — Francophone culture within reach

South of Digby, along St. Mary’s Bay, stretches the Acadian Shore (Municipality of Clare) — an area home to a strong Acadian (Francophone) community. It’s a fascinating cultural mix that you won’t find in such concentration anywhere else in Canada.

The main stop is the village of Church Point (Pointe-de-l’Église), where you’ll find Église Sainte-Marie — reportedly the largest wooden church in North America. The building is impressive and a guided tour lasts about 30 minutes. Admission is by donation (suggested contribution 5 CAD / €3).

On the Acadian Shore, people speak a unique dialect of French (Acadien), eat rapure (a traditional Acadian potato pie with meat), and in summer celebrate the Festival Acadien de Clare — one of the largest Acadian festivals in the world. If you’re interested in history, Rendez-vous de la Baie in Church Point is an interpretive centre that explains Acadian history and culture.

Tip: Even if you don’t speak French, don’t worry — most people speak English too and are used to tourists. But if you attempt a “Bonjour!”, their faces will light up.

Wooden church in Digby, Nova Scotia with a tall spire and surrounding landscape.
Impressive wooden church in Digby, Nova Scotia with a tall spire and surrounding nature.

12. Kejimkujik Seaside Adjunct — wild beaches without the crowds

About an hour’s drive from Digby (on the southern coast of Nova Scotia) lies Kejimkujik National Park Seaside Adjunct — the coastal section of Kejimkujik National Park, which is one of the best-kept secrets in the entire province. There are no car parks full of coaches or souvenir stalls here. Just kilometres of untouched white sand beaches, lagoons, and wild nature.

Trails of about 3–4 km lead from the car park to the two main beaches (Harbour Rocks and St. Catherine’s River Beach). The walk is flat and easy, but it’s precisely this distance that ensures you’ll find very few people on the beaches — sometimes you’ll have them entirely to yourself.

Note: There is no public transport here and mobile signal is non-existent. Bring plenty of water, snacks, and let someone know where you’re heading. Park entry costs 8.50 CAD (€5.50) per person/day (Parks Canada parking fees).

13. Annapolis Royal — a historic town near Digby

About 40 minutes by car from Digby lies Annapolis Royal, one of the most historically significant towns in Canada — it was the site of the first European settlement in North America north of Florida (1605). Today it’s a charming town with Fort Anne National Historic Site, where you can explore the remains of an old fortress and a museum.

Annapolis Royal Historic Gardens are beautiful gardens spread across 7 hectares, featuring Acadian, Victorian, and modern garden designs. Admission is around 15 CAD (€10) and you should allow at least an hour for a stroll.

The main street (St. George Street) is full of small shops, galleries, and cafés. If you enjoy ghost tours, Annapolis Royal offers the Candlelight Graveyard Tour — a night-time tour of the historic cemetery by candlelight, considered one of the best ghost tours in Canada. A bit morbid? Perhaps. Fun? Absolutely.

14. Ferry crossing to Saint John (New Brunswick)

If you’re planning a road trip across broader Atlantic Canada (which I’d highly recommend), the ferry from Bay Ferries running from Digby to Saint John in New Brunswick is both a practical and scenic link between two provinces.

The ferry The Fundy Rose runs once or twice daily (depending on the season), and the crossing across the Bay of Fundy takes approximately 2.5 hours. On board, there’s a café, a small shop, and an outdoor deck where you can watch the coastline and, with a bit of luck, spot marine wildlife.

Prices (approximate, 2025):

  • Adult passenger: approximately 45 CAD (€29) one way
  • Car (standard): approximately 110 CAD (€72) one way
  • Return tickets work out cheaper

Important: Book online in advance on the Bay Ferries website, especially during the summer months. Arrive at the terminal at least one hour before departure — loading cars takes time and a late arrival means they may not take you.

Historic buildings at sunset, Saint John, New Brunswick

15. Sunset from Digby Pines — a scenic end to the day

Digby Pines Golf Resort & Spa is a historic hotel in the style of a Norman château that has stood on a hill above the town since 1929. Even if you’re not staying here (prices are higher, around 200–300 CAD / €130–195 per night), come for dinner or a drink at sunset.

From the hotel’s terrace and expansive gardens, you get one of the most beautiful views of Annapolis Basin and Bay of Fundy. At sunset, the entire bay turns shades of orange and purple, and it’s exactly the kind of moment that makes you think Nova Scotia might be the most beautiful place in Canada.

The hotel also has a golf course and spa if you have a free day and want to treat yourself to a bit of luxury. But even just a stroll through the gardens and the view alone are worth the stop.

Digby Pines - Things to see and do in Digby

What to eat and drink in Digby: a foodie travel guide

In Digby, it’s all about seafood. That’s the alpha and omega of the local gastronomy. But let’s get specific — where to eat and what to order.

Digby restaurants we recommend

Captain’s Cabin — right by the wharf, a classic seafood restaurant with harbour views. The scallops here are of course excellent (pan-seared and deep-fried), portions are generous, and prices are reasonable (mains 18–28 CAD / €12–18). The atmosphere is casual — turn up in shorts and a t-shirt, nobody cares.

Fundy Restaurant — another local classic, slightly simpler setting but with fresh fish and scallops. The fish & chips here are excellent and well priced.

Shoreline Restaurant (on Digby Neck, Sandy Cove) — if you’re driving through Digby Neck, stop here for lunch. A smaller restaurant with a homely feel and views over the bay. The chowder (thick fish/scallop soup) here is phenomenal.

Royal Fundy Seafood Market — if you want to buy fresh seafood to cook at home (in accommodation with a kitchenette), this is the place. Scallops, lobster, shrimp — all fresh from today’s catch.

Must-try dishes

  • Digby scallops — in any form, but pan-seared with herb butter is the classic
  • Lobster roll — a bun packed with lobster meat, a quintessential Atlantic Canadian treat
  • Seafood chowder — a creamy soup with a mix of seafood, perfect on chilly days
  • Rapure / Rappie Pie — if you’re heading down the Acadian Shore, try this traditional Acadian speciality (a potato pie with chicken or lobster). It looks… odd, but tastes fantastic.
  • Blueberry grunt — a traditional Nova Scotian dessert with blueberries, served warm with ice cream. Blueberries grow wild here and in August, they’re absolutely everywhere.

Practical travel tips

Internet and mobile data

In Digby itself, WiFi in hotels and cafés works fine. On Digby Neck, Long Island, and Brier Island, however, expect very weak or no signal at all. Download offline maps (Google Maps or Maps.me) in advance — you’ll need them.

If you want data throughout Canada without any hassle, check out our review of the Holafly eSIM — it works brilliantly and you don’t have to bother with local SIM cards.

What to pack

  • A windbreaker and warm layer — even in summer, it’s noticeably colder on the coast and on the water
  • Proper shoes — for trails (Balancing Rock, Kejimkujik Seaside), you need at least sturdy trainers, ideally hiking boots
  • A rain jacket — Nova Scotia weather is unpredictable and rain can arrive at any time
  • Binoculars — for whale watching and birdwatching on Brier Island
  • Cash — smaller businesses and markets on the islands don’t always accept cards

If you’re travelling with carry-on only, here’s our guide on how to pack everything into hand luggage.

Flights and transport

The nearest international airport is Halifax Stanfield International Airport (YHZ). From the UK, you can get here via London direct (seasonal routes operate in summer), or through Toronto or Montreal year-round. Search for cheap flights on Kiwi — it’s our favourite portal for finding connections.

From Halifax, rent a car (you can’t do Nova Scotia without one) and hit the road. We’ve had consistently great experiences with DiscoverCars.

Travel insurance

Don’t forget travel insurance for a trip to Canada — healthcare here costs astronomical amounts. For shorter trips, we opt for a standard travel policy, and for longer ones, we use SafetyWing.

FAQ — Frequently asked questions about Digby, Nova Scotia

What is Digby, Nova Scotia famous for?

Digby is world-renowned for its scallops (Digby scallops), which are considered some of the tastiest in the world thanks to the cold waters of the Bay of Fundy. The town is home to one of the largest scallop fishing fleets, and scallops form the backbone of the local economy and cuisine. Digby is also a gateway for trips to Digby Neck and Brier Island and the port for the ferry to New Brunswick.

Is Digby worth visiting?

Absolutely — but with one condition: you have to love nature, peace, and seafood. If you’re looking for buzzing nightlife or big-city attractions, Digby isn’t for you. But if you love wild coastlines, whale watching, authentic fishing villages, and some of the best seafood in Canada, then Digby is paradise on earth. I’d recommend spending at least 2–3 days to make the trip truly worthwhile.

How many days should you spend in Digby?

Ideally 2–3 days. One day for Digby itself and the surrounding area (wharf, Bear River, Annapolis Royal), one day for Digby Neck, Long Island, and Brier Island (including whale watching), and optionally a third day for the Acadian Shore or Kejimkujik Seaside. In a single day, you’d only manage the town and harbour — it would be a shame to come all this way and not see Brier Island.

How do you get from Digby to Brier Island?

Drive along Route 217 through Digby Neck to East Ferry, where you board a free ferry to Long Island (5-minute crossing). Drive across Long Island and from Freeport, board a second free ferry to Brier Island (again, just a few minutes). Both ferries run every half hour and no reservation is needed. The entire journey from Digby to Brier Island takes about 1.5 hours (including waiting for ferries).

When is the best time for whale watching near Digby?

June to October, with August and September being the absolute best for whales. During this period, the chance of spotting humpbacks, fin whales, or dolphins is over 95%. Whale watching trips depart from Brier Island (Westport) and last 3–4 hours. The price is around 70–80 CAD (€46–52) per person.

Is Digby one of the prettiest towns in Nova Scotia?

Digby is beautiful in a different way to, say, Lunenburg (UNESCO) or Peggy’s Cove (iconic lighthouse). Digby captivates you with its authenticity — it’s a working fishing town, not a tourist attraction. The most beautiful part of Digby is its surroundings — Digby Neck, Brier Island, Bay of Fundy. If I had to name the “prettiest towns” in Nova Scotia, I’d put Lunenburg, Mahone Bay, Annapolis Royal, and Digby with its surroundings on the list.

How much does a holiday in Digby cost?

Digby is one of the more affordable destinations in Nova Scotia. B&B or motel accommodation starts from 100 CAD (€65) per night, and a seafood dinner costs 20–35 CAD (€13–23) per person. Whale watching costs 70–80 CAD (€46–52). For three days for two people, budget around 800–1,200 CAD (€520–780) including everything. Ferries to Long Island and Brier Island are free, which is a pleasant surprise.

Experiences & tickets
traveler-rated · GetYourGuide
Cabot Trail Scenic Tour by Highland Tours
★★★★★ 5.0 · 2 reviews
from €114
I want this experience →
🔗 These are affiliate links — they don't change your price and help us create content. · All experiences →

Tips and Tricks for Your Vacation

Don’t Overpay for Flights

Search for flights on Kayak. It’s our favorite search engine because it scans the websites of all airlines and always finds the cheapest connection.

Book Your Accommodation Smartly

The best experiences we’ve had when looking for accommodation (from Alaska to Morocco) are with Booking.com, where hotels, apartments, and entire houses are usually the cheapest and most widely available.

Don’t Forget Travel Insurance

Good travel insurance will protect you against illness, accidents, theft, or flight cancellations. We’ve had a few hospital visits abroad, so we know how important it is to have proper insurance arranged.

Where we insure ourselves: SafetyWing (best for everyone) and TrueTraveller (for extra-long trips).

Why don’t we recommend any Czech insurance company? Because they have too many restrictions. They set limits on the number of days abroad, travel insurance via a credit card often requires you to pay medical expenses only with that card, and they frequently limit the number of returns to the Czech Republic.

Find the Best Experiences

Get Your Guide is a huge online marketplace where you can book guided walks, trips, skip-the-line tickets, tours, and much more. We always find some extra fun there!
Saint John, New Brunswick: 15 Tips on What to See and Do in Canada’s Oldest City

TL;DRSaint John, Canada’s oldest incorporated city (since 1785), sits on the Bay of Fundy coast in New Brunswick. There are 15 tips here, from the Reversing Falls to the Saint John City Market (Canada’s oldest market, running since 1876) and the free Irving Nature Park with its 11km of trails. The best time to visit is June to September, when temperatures sit at 18–25°C and whale watching in the Bay of Fundy is in full swing — August and September are best for that. Two to three days is enough for the city itself; add a day or two more for side trips like the Fundy Trail Parkway and whale-watching tours. Budget CAD 350–500 a day for two, including accommodation.

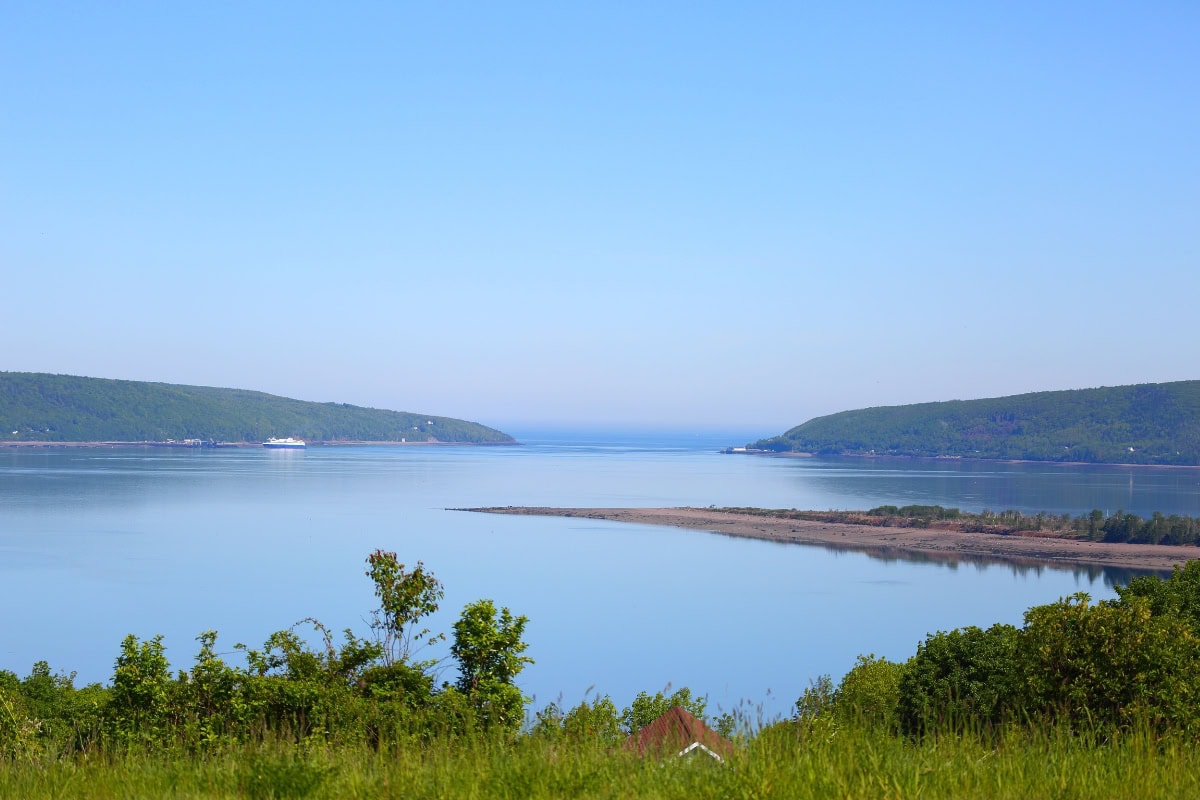
I’ll admit that Saint John, New Brunswick was never a city I dreamed of visiting. Honestly? I didn’t even know much about it. Whenever I looked at a map of Canada, my eyes were always drawn to the Rocky Mountains, Vancouver, or Quebec. But then my mum and I started planning a road trip through eastern Canada, and Saint John simply “snuck in” as a stop between Halifax and Québec City. And I’m so glad it did. 😊

Imagine a city that looks like it belongs in another century — Victorian brick buildings, narrow streets winding down to the harbour, fishing boats bobbing on the waves of the Bay of Fundy. And then there’s the famous fog that rolls in from the ocean and wraps the entire city in a mysterious haze, making you feel like you’ve stepped into a Nordic novel. Then the fog lifts and suddenly you’re gazing at the most beautiful sunset you’ve ever seen. Saint John in Canada is simply a city of contrasts and surprises.

In this article, you’ll find 15 tips on what to see and do in Saint John, New Brunswick — from the iconic Reversing Falls and Canada’s oldest market to stunning nature parks, whales, craft beer, and seafood that will make your knees buckle. I’ll also advise you on the best time to visit, where to stay, and how much it all costs.

Historic buildings in Saint John, New Brunswick

TL;DR

  • Saint John is the oldest incorporated city in Canada (since 1785) and sits on the shores of the Bay of Fundy in the province of New Brunswick. Don’t confuse it with St. John’s in Newfoundland — that’s a completely different city!
  • The best time to visit is June to September, when temperatures are pleasant and most outdoor activities are running, including whale watching.
  • Reversing Falls is the main attraction — the Bay of Fundy’s tidal forces actually make the river flow backwards. It sounds insane, but it’s real.
  • Saint John City Market is the oldest continuously operating market in Canada (since 1876) and a paradise for lovers of local food.
  • Irving Nature Park offers 11 km of coastal trails — and it’s completely free.
  • Whale watching in the Bay of Fundy is one of the best experiences on Canada’s entire east coast.
  • 2–3 days make it an ideal stop on an eastern Canada road trip.
  • Daily budget for two: approximately €120–210 (excluding accommodation), depending on activities.
  • Craft beer and seafood — Saint John has a surprisingly vibrant food scene.

When to Visit Saint John and How to Get There

Before we dive into specific tips, let’s clarify two essential points — when to go and how to actually get to Saint John. Because timing really matters here, especially when it comes to weather and whales.

Best Time to Visit

Saint John, New Brunswick has a maritime climate, which in practice means: summer is short but beautiful, and fog is your constant companion. The best months to visit are June to September, when temperatures hover around 18–25 °C. July and August are the warmest but also the busiest.

If you want to see whales (and why wouldn’t you?), the ideal period is mid-June to October. You’ll spot the most whales in August and September, when humpbacks, fin whales, and North Atlantic right whales — one of the rarest whales on Earth — gather in the Bay of Fundy.

Be prepared for one thing: fog. Saint John is one of the foggiest cities in Canada. Locals say fog is like an uninvited guest — it arrives whenever it pleases and leaves when it feels like it. On our first day, we could barely see a thing, and the next day the sun was blazing like we were in Portugal. So pack layers and a waterproof jacket, even if you’re visiting in summer. 😅

Avoid the winter months (December–March) unless you love temperatures well below freezing and reduced opening hours. Many outdoor attractions are closed or significantly limited in winter.

How to Get to Saint John

By air: Saint John Airport (YSJ) has connections to Toronto, Montreal, and other Canadian cities. There are no direct flights from the UK — you’ll most likely fly via Toronto or Halifax. Search for affordable flights on Kiwi — it’s our favourite portal for finding multi-stop connections.

By car: If you’re doing a road trip through eastern Canada (which I highly recommend!), Saint John is strategically located along the route. It’s about 4 hours from Halifax, roughly 7 hours from Québec City, and around 9 hours from Montreal by car. We’ve had great long-term experience with DiscoverCars, which we use all over the world — you can compare offers and often find better prices than booking directly with rental companies.

By ferry: If you’re coming from Nova Scotia, you can take the Digby–Saint John ferry, which crosses the Bay of Fundy in about 2.5 hours. It’s a beautiful way to arrive in the city, and you might even spot dolphins along the way.

Getting around: Saint John is a surprisingly compact city. You can walk the entire Uptown (that’s what they call the centre here — no “downtown”) in half an hour. For more distant spots like Irving Nature Park, you’ll need a car.

Things to see and do in Saint John Canada
Historic buildings in Saint John, New Brunswick

Where to Stay in Saint John + How Much It Costs

Compared to western Canadian cities, Saint John is significantly more affordable, which is great news for every traveller. You’ll find accommodation across a wide price range — from cosy B&Bs in historic houses to modern hotels with harbour views.

Approximate accommodation prices per night (for two):

  • Budget (hostel/motel): from 80 CAD / approx. €55
  • Mid-range (hotel/Airbnb): 120–200 CAD / approx. €80–135
  • Luxury (boutique hotel): 200–350 CAD / approx. €135–235

Where to stay:

I recommend staying in Uptown Saint John — you’ll be within walking distance of City Market, restaurants, the historic centre, and the harbour. If you prefer being closer to nature, you could stay towards the West Side, which is nearer to Irving Nature Park and Reversing Falls. You can compare the best deals on Booking.com.

One of the top-rated places in the centre is the Hilton Saint John, which has lovely harbour views. For lovers of historic atmosphere, I recommend Chipman Hill Suites — boutique apartments in renovated Victorian houses where you feel like you’re living in a museum. In the best possible way. 😊

If you’re looking for something more affordable, there are solid motels in the surrounding area, and on Airbnb you can find entire flats in the centre from around 100 CAD per night.

How much does a holiday in Saint John cost?

Saint John is significantly cheaper than Toronto or Vancouver. Here’s an approximate daily budget for two:

  • Accommodation: 150 CAD / €100 (mid-range)
  • Food (3 meals, restaurants + café): 80–120 CAD / €55–80
  • Activities (whale watching, admissions): 100–200 CAD / €70–135
  • Transport (petrol/parking): 20–30 CAD / €14–20

In total, expect around 350–500 CAD per day for two (approx. €235–335), including accommodation. For 3 days, Saint John will cost you roughly €700–1,000 for two, which is very reasonable for Canada. Compare that to Banff, where accommodation alone costs more. 😅

Saint John Uptown and Surroundings: 8 Must-Visit Places

Let’s get to the most important part — specific tips on what to see and do in Saint John. We’ll start with Uptown, the historic city centre where most of the action happens. Uptown Saint John is compact, wonderfully walkable, and packed with Victorian architecture you wouldn’t expect to find in Canada.

1. Reversing Falls — A Natural Phenomenon That Defies Logic

This is Saint John’s main attraction and one of the most bizarre things you’ll see in Canada. Reversing Falls is the spot where the Saint John River flows into the Bay of Fundy. And here’s the mind-blowing part: the Bay of Fundy has the highest tides on the planet — the tidal range here reaches up to 8.5 metres. When the tide comes in, it’s so powerful that it literally reverses the river’s flow. The river starts flowing backwards.

It looks like science fiction, but it’s reality. One moment the water is surging in one direction over rocky rapids, and a few hours later the same spot looks completely different — the water is flowing the opposite way and the surface is several metres higher.

Practical tip: To see the full effect, you need to come twice — once at low tide and once at high tide. Ideally about 5–6 hours apart. You can find tide tables online or at the Reversing Falls Visitor Centre, which stands right above the gorge. Entry to the centre and the lookout is free.

If you’re after a more adrenaline-fuelled experience, local operators offer jet boat rides right through the rapids. We watched from below and even that was enough — the power of the water is incredible.

2. Saint John City Market — Canada’s Oldest Market

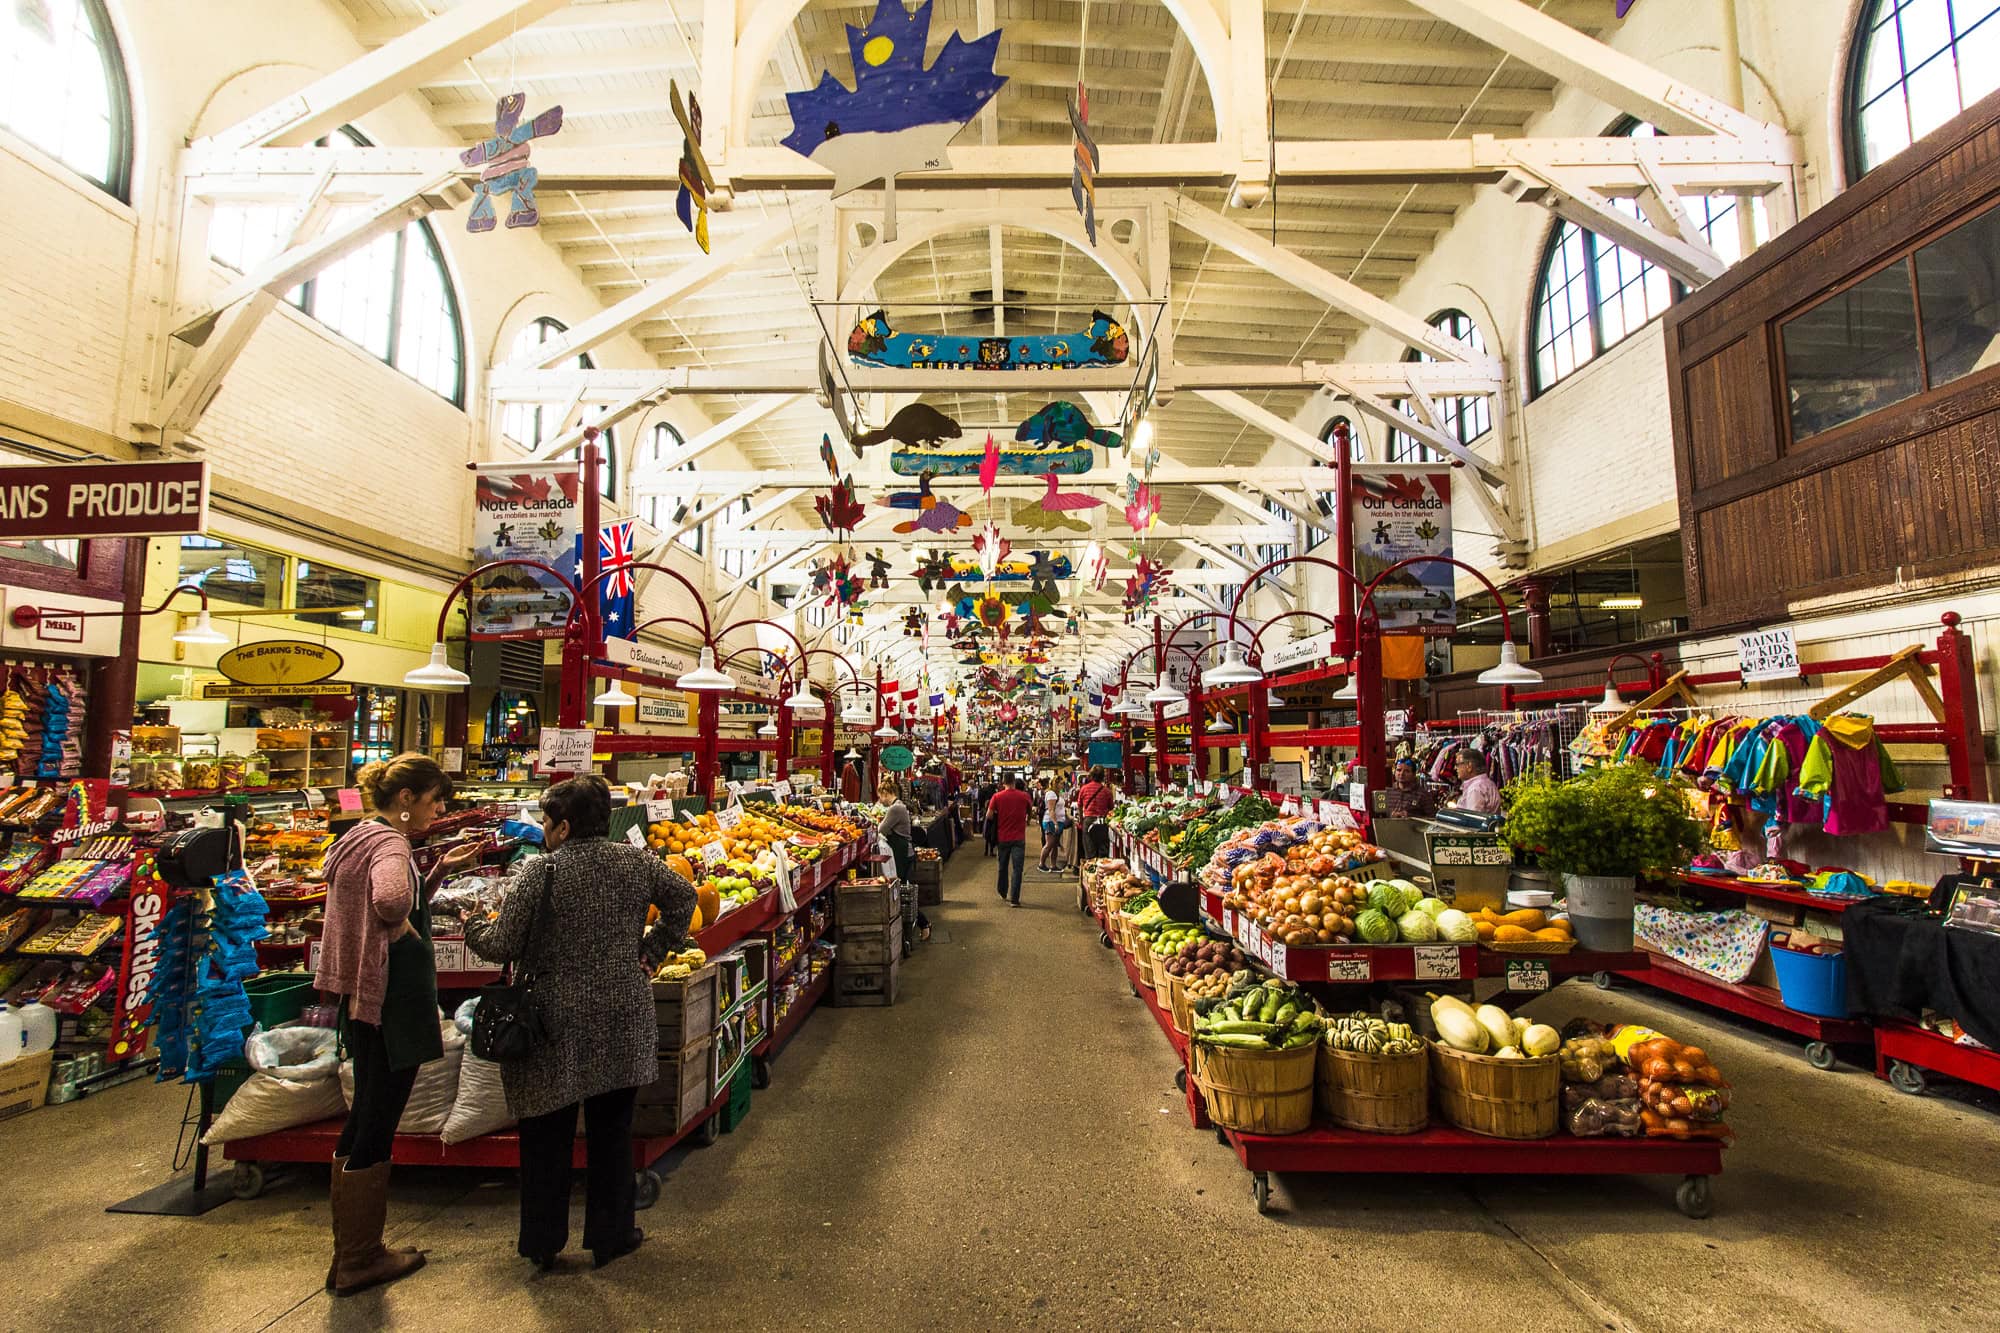
If there’s one place where you’ll feel the soul of Saint John, it’s City Market. It has been operating continuously since 1876 and is the oldest continuously running indoor market in all of Canada. The building itself is gorgeous — the wooden ceiling resembles an inverted ship’s hull and the entire space exudes history.

Inside, you’ll find dozens of stalls selling fresh seafood, local cheeses, homemade baked goods, artisan crafts, and the best coffee in town. You absolutely must try dulse — dried seaweed that’s a Bay of Fundy specialty. It sounds suspicious, but it tastes like salty crisps and is completely addictive. 😁

The great thing about the market is that you can find breakfast, lunch, and afternoon snacks — from fresh lobster to homemade pies to craft coffee. We spent nearly two hours here and left with full stomachs and a bag brimming with local goodies.

Opening hours: Monday–Friday 7:30–18:00, Saturday 7:30–17:00. Closed on Sundays. Come in the morning when the atmosphere is most authentic and the selection is at its best.

Canada's oldest market in Saint John

3. Uptown Saint John — A Stroll Through Victorian Streets

Uptown is the heart of the city, and the best way to discover it is simply to get lost. Seriously — put the map away (or at least tuck it into your pocket) and let the streets guide you. You’ll stumble upon beautiful brick facades, historic churches, galleries, cafés, and harbour views you didn’t know existed.

Don’t miss Prince William Street — Uptown’s main thoroughfare, lined with boutique shops and restaurants. Then head down to the harbour along King Street and admire the Victorian architecture that survived the Great Fire of 1877 (which destroyed nearly the entire city, but what remains is stunning).

Fun fact: Saint John is the oldest incorporated city in Canada — it received its city charter in 1785, before either Toronto or Montreal. Today, Saint John has a population of around 70,000 (over 130,000 in the metropolitan area), making it a pleasantly compact yet lively city where everyone greets you on the street.

If you’re into street art, wander through the side streets — in recent years, a number of murals have appeared, bringing the otherwise conservative brick facades to life. And don’t forget to check out Loyalist Burial Ground — a historic cemetery in the middle of the city dating back to 1784, where the first settlers rest.

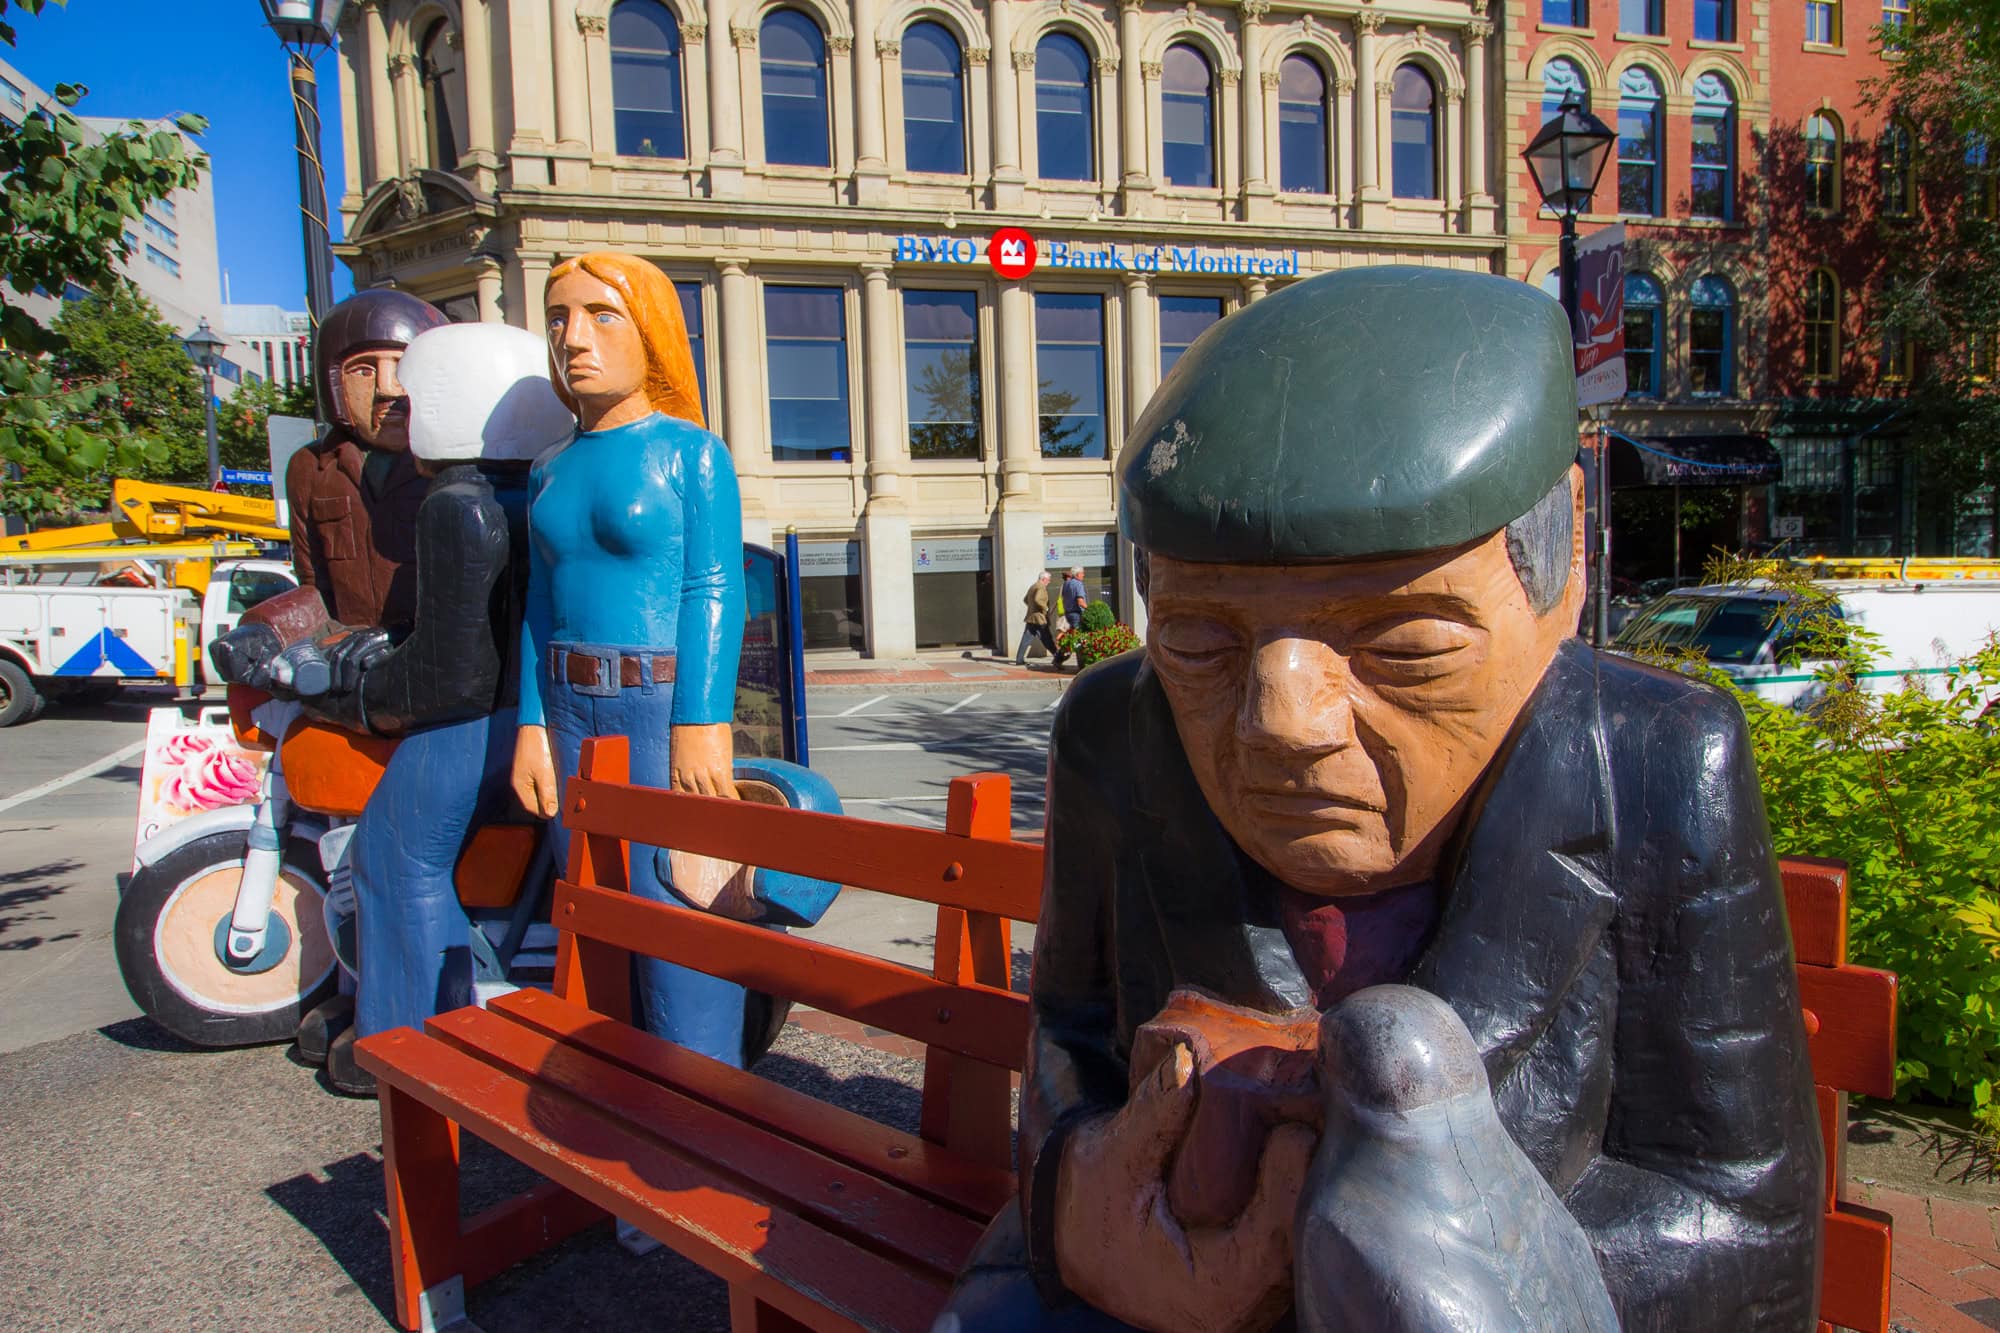
The Waiting People, Saint John, New Brunswick

4. New Brunswick Museum — Culture and Nature Under One Roof

If the weather isn’t cooperating (and in Saint John, that happens surprisingly often 😅), the New Brunswick Museum is the perfect rescue plan. It’s the oldest museum in Canada (yes, there are a lot of “oldest” things here) and offers a fascinating mix of natural sciences, history, and art.

What impressed us most was the Bay of Fundy exhibition — an interactive display where you learn everything about tides, marine life, and the bay’s geology. There’s even a life-size whale skeleton that will leave you standing there with your mouth open. Kids will love it, but honestly, I thoroughly enjoyed it as an adult too.

Admission: approx. 12 CAD / €8 per adult. Open daily except Mondays.

5. Harbour Passage — A Waterfront Promenade

Harbour Passage is a trail and promenade along the harbour that connects the city centre with other parts of town. It’s ideal for a morning walk, a jog, or simply sitting on a bench with a coffee and watching the boats. The entire route is about 4 km and leads through parks, past historic buildings, and offers gorgeous views of the bay.

Along the way, you’ll come across Market Slip — a small harbour where Loyalists fleeing the USA after the American Revolution landed in 1783 and founded the city. Today, yachts are moored here, and in summer it hosts concerts and festivals.

6. Carleton Martello Tower — Views Over the Entire City

This round stone fort from 1813 stands on a hill on the West Side and offers one of the best views of Saint John and its surroundings. It was built to defend against the Americans (who ultimately never attacked, but better safe than sorry) and during World War II served as an anti-aircraft command bunker.

Inside, you’ll find a small exhibition on military history, and on the roof there’s a viewing platform. On a clear day, you can see the entire harbour, Uptown, the Bay of Fundy, and the hills towards Irving Nature Park on the other side. Admission is minimal, and the place is pleasantly uncrowded even in peak season.

Tip: Come before sunset — the views are magical. If you’re lucky with clear skies (that fog, you know), you’re in for an unforgettable sunset over the bay.

7. Loyalist House — A Leap Back to the 18th Century

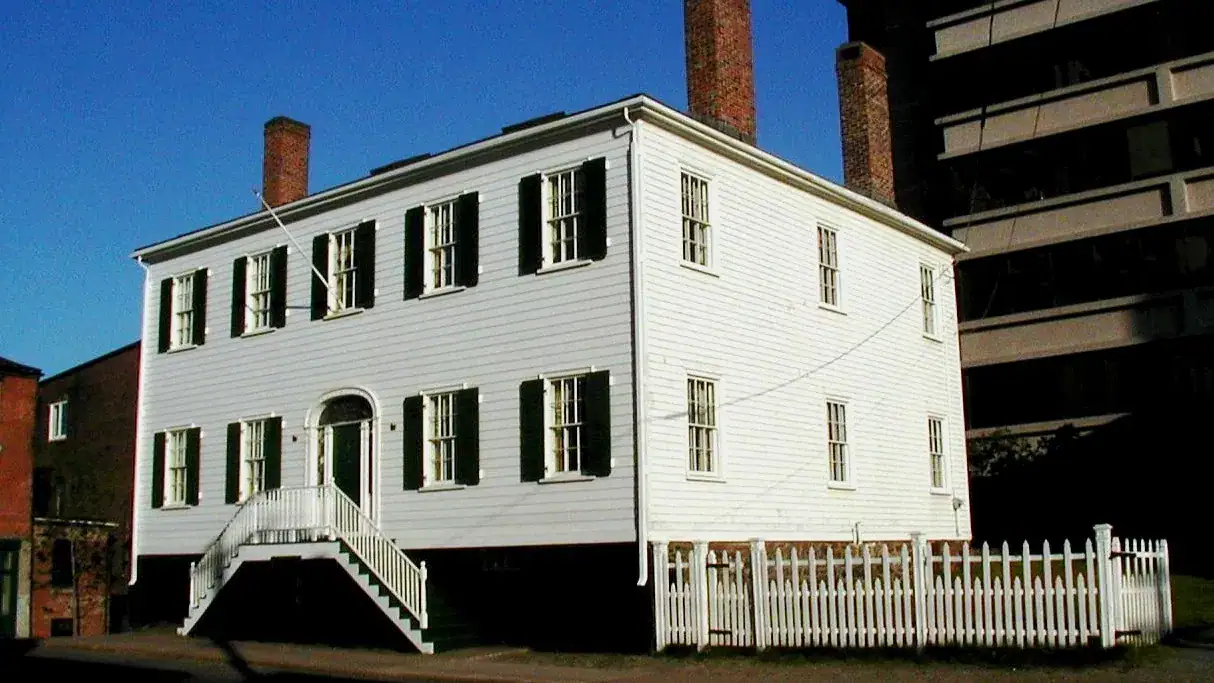
If you’re curious about what life was like in Saint John in its earliest days, visit Loyalist House on Union Street. It’s the oldest unaltered building in the city, built in 1817 for the Merritt family — Loyalists who fled the USA. The interior is beautifully preserved, including original furniture and decorations.

The tour takes about 30 minutes, and the guides are local enthusiasts who lovingly share stories about the first residents. It’s a small, intimate place — no crowds, no queues. A refreshing change from the overcrowded attractions of bigger cities.

The Loyalist House, Saint John

8. Fort Howe Lookout — A Secret Viewpoint Almost Nobody Knows About

I say “secret” even though it’s technically open to the public — it’s just that hardly anyone comes here because it’s not in any major guidebook. Fort Howe is a replica of a wooden fort perched on a rocky outcrop above the city, offering a 360° panoramic view of Saint John. You can see the harbour, Reversing Falls, Uptown, and the surrounding hills.

You can drive right to the top (free parking) and be at the viewpoint in 5 minutes. It’s ideal for a quick stop, some photos, and getting your bearings — especially if you’ve just arrived and want to get the lay of the land.

Nature Around Saint John: 4 Day Trips

One of Saint John’s greatest strengths is its proximity to stunning nature. The Bay of Fundy, forests, and rocky coastline are literally just around the corner. Here are places you shouldn’t skip, even if you only have two days in the city.

9. Irving Nature Park — The Best Free Attraction

Irving Nature Park is probably the best thing you’ll do for free in Saint John. And possibly the best thing you’ll do in Saint John, full stop. It sits on a peninsula on the city’s western edge and offers 11 km of trails leading through forests, along rocky coastline, around quiet coves, and across mudflats that reveal incredible natural scenery at low tide.

Start with the Saints Rest Beach Trail — an easy path along a sandy beach where at low tide you can walk hundreds of metres across the ocean floor (thanks to those insane Fundy tides). Then continue to the Sheldon Point Trail, which has views over the bay and islands, and with a bit of luck, you might spot seals.

The park is also an important birdwatching site — in autumn, hundreds of thousands of shorebirds migrate through. Even if you’re not ornithologists, the spectacle will blow you away.

Practical info: Free entry. The park is open from May to November. Drive there — parking is available at the main entrance. Allow 2–3 hours for a walk, more if you want to tackle all the trails.

Irving Nature Park, Canada

10. Rockwood Park — An Urban Park with Lakes and Caves

Rockwood Park is an enormous urban park (for comparison — it’s 10 times larger than Central Park in New York) right in Saint John. You’ll find lakes for swimming and paddleboarding, kilometres of hiking trails, a golf course, playgrounds, and even a zoo.

If you only have time for one lake, head to Fisher Lakes — a tranquil body of water surrounded by forest where you can hire a kayak or paddleboard. In summer, locals swim here and the atmosphere is wonderfully laid-back.

For the adventurous: the park contains Rockwood Park Caves, small limestone caves you can explore on your own (it’s more scrambling than walking, but nothing dangerous). And Cherry Brook Zoo on the park’s edge is small but children love it.

Bay of Fundy
Bay of Fundy

11. Whale Watching — Whales in the Bay of Fundy

This is a must-do experience if you’re in Saint John between June and October. The Bay of Fundy is one of the best places in the world for whale watching — those extreme tides bring in enormous amounts of food, and with it, whales.

What will you see? Humpback whales are the most common — they surface, slap their fins, and occasionally breach entirely out of the water, leaving your jaw on the deck. You’ll also encounter fin whales, minke whales, and with tremendous luck, North Atlantic right whales, of which only around 350 remain in the entire world.

Trips depart from Saint John’s harbour or from nearby St. Andrews by-the-Sea (about an hour’s drive). Prices are around 60–90 CAD / €40–60 per person for a 2–3 hour excursion. Book ahead, especially in July and August — tours sell out fast.

Seasickness tip: Take motion sickness tablets BEFORE boarding the boat. The Bay of Fundy can be rough, and even “I never get seasick on boats” won’t help when you find yourself on two-metre waves. Speaking from personal experience. 😅

Bay of Fundy

12. Fundy Trail Parkway — A Coastal Road Straight Out of a Film

About 40 minutes’ drive east of Saint John, you’ll find the Fundy Trail Parkway — one of the most beautiful coastal roads in Canada. This 30 km route runs along the cliff edge above the Bay of Fundy and features viewpoints that will take your breath away.

Along the way, there are dozens of lookout points and trails of varying lengths. Don’t miss Big Salmon River at the end of the parkway — a lovely waterfall and a historic fishing village. And Fuller Falls — a short trail (10 minutes) to a gorgeous waterfall hidden in the forest.

Admission: approx. 12 CAD per car. The road is open from May to October. Allow at least half a day, ideally a full day if you want to include hiking trails.

Fundy Trail Parkway, New Brunswick
lukas a lucka
Lukáš and Lucie recommend
Where to stay in Saint John, New Brunswick
3 accommodations — hotels and other lodging options

Where to Eat and Drink in Saint John: A Foodie’s Guide

Saint John has a surprisingly vibrant food scene that has evolved significantly in recent years. The combination of fresh seafood from the Bay of Fundy, local farm produce, and a wave of craft breweries makes it an unexpected paradise for food lovers. Here are our tips.

13. Seafood — The Best of the Bay of Fundy

In Saint John, you simply must try lobster. Here on Canada’s east coast, it’s actually everyday food, not a luxury — prices are significantly lower than in Europe. A fresh lobster roll (lobster in a bun) starts from 15 CAD / around €10, and it’s probably the tastiest sandwich you’ll ever eat.

Where to go:

  • Billy’s Seafood — a legendary restaurant at City Market. Fresh oysters, lobster, mussels, and fish straight from local fishermen. It’s not the cheapest, but the quality matches. Their lobster chowder is divine.
  • East Coast Bistro — one of the best restaurants in town. Modern cuisine with local ingredients, creative menus, and excellent wine. Ideal for dinner.
  • Reversing Falls Restaurant — if you want to dine with a view of the Reversing Falls. The food is solid, but you’re really going for the scenery.

Beyond lobster, try the scallops — from the Bay of Fundy, they’re sweet and buttery soft. And if you’re feeling brave, go for dulse — those dried seaweed snacks from City Market that I mentioned earlier.

Lobster in Canada

14. Craft Beer — A Brewing Revolution

Saint John has undergone a craft beer revolution in recent years, and today you’ll find several excellent breweries here. Whether you’re a beer lover (or even if you’re not — this might convert you), here are our tips:

  • Picaroons General Store — the best-known brewery in New Brunswick. Their Blonde Ale is a perfect summer beer, and the taproom on German Street is cosy and relaxed.
  • Big Tide Brewing Company — the first brewpub in New Brunswick, right in Uptown. They have a rotating beer menu and solid food to go with it.
  • Moosehead Brewery — an iconic Canadian brewery based right in Saint John. They offer brewery tours with tastings. Moosehead isn’t craft beer in the strictest sense, but it’s a tradition, and the tour is well worth it.

Tip: If you have time, do a self-guided beer trail through Uptown — distances are short and the atmosphere at the bar is always friendly. The locals are incredibly welcoming and happy to advise you on what to try.

Craft beer in Canada
Craft beer in Saint John, Canada

15. Cafés and Breakfast — Mornings Like a Local

For lovers of great coffee, I have good news — Saint John has several excellent cafés:

  • Java Moose — the most popular local café, with several branches around the city. Excellent espresso and homemade pastries.
  • Hopscotch Coffee — a smaller, hipster café with specialty coffee. If you’re a coffee snob (like me 😁), this is your spot.
  • Port City Royal — a combination of café and brunch bistro. Their avocado toast is absolutely top-notch and portions are generous.

For breakfast, I recommend either City Market (fresh baked goods and coffee straight from the vendors) or Regis & Ruby — a laid-back brunch spot with a creative menu and brilliant eggs Benedict.

Practical Tips for Visiting Saint John

A few things that will come in handy and that I learned the hard way.

Parking and Getting Around

In Uptown, there are parking meters that operate until 18:00 — after six and on weekends, parking is free. All-day street parking costs around 10 CAD. There are also car parks for about 12–15 CAD per day.

As I mentioned, Uptown is small and walkable — you don’t need a car to explore the centre. For Irving Nature Park, Rockwood Park, or Fundy Trail Parkway, however, you’ll need one.

What to Pack

  • Waterproof jacket — even in summer. The fog is real.
  • Layers — mornings can be 12 °C and afternoons 25 °C.
  • Good hiking shoes — trails in Irving Nature Park and along the Fundy Trail can be slippery in places. If you don’t have any and need suggestions, check out our article on the best hiking boots.
  • Motion sickness tablets — if you’re planning whale watching.

eSIM and Mobile Data

Mobile data in Canada is notoriously expensive. I recommend getting an eSIM before you fly — we last used Holafly and were happy with it. You can find a detailed review in our Holafly eSIM article.

Travel Insurance

Don’t underestimate travel insurance for a trip to Canada — healthcare here is extremely expensive. For shorter trips, we use AXA, and for longer journeys, we’ve had excellent experience with SafetyWing.

How Many Days in Saint John?

For Saint John itself, 2–3 days is enough. If you also want to do the Fundy Trail Parkway and a whale watching trip, plan for 3–4 days. Ideally, combine Saint John with other spots in New Brunswick — such as St. Andrews by-the-Sea, Hopewell Rocks, or Fundy National Park.

And if you’re planning a bigger road trip across Canada, Saint John fits beautifully into an east coast route. If the west coast tempts you too, check out our western Canada road trip itinerary — and if you’d like to add Niagara Falls along the way, we also have an article on what to see at Niagara Falls.

Day Trips from Saint John: What to Visit Nearby

If you have more time in Saint John or are doing a road trip through New Brunswick, here are some day trip ideas that are well worth it:

St. Andrews by-the-Sea (1 hour by car) — a picturesque seaside town with colourful houses, an excellent food scene, and one of the best whale watching spots in the region. Ideal for a day trip.

Hopewell Rocks (1.5 hours by car) — the iconic “flowerpot rocks,” giant rock formations sculpted by the tides. At low tide, you can walk on the ocean floor between them — an utterly surreal experience.

Fundy National Park (2 hours by car) — dozens of kilometres of trails, waterfalls, coastal scenery, and camping options. If you love hiking, this is paradise.

Alma (2 hours by car) — a tiny fishing village near Fundy National Park, famous for its homemade pies (the sticky buns in Alma are legendary). Worth a stop for lunch.

FAQ — Frequently Asked Questions About Saint John, Canada

Is Saint John Worth Visiting?

Absolutely. Saint John may be a smaller city, but it offers a unique combination of history (Canada’s oldest city!), the stunning nature of the Bay of Fundy, fantastic food, and a friendly atmosphere. It’s not a city for a week, but for 2–3 days it’s a perfect stop. The biggest surprise? That so few people know about it.

What Is the Difference Between Saint John and St. John’s?

This is the most common source of confusion! Saint John (no full stop, no apostrophe) is in the province of New Brunswick on mainland eastern Canada. St. John’s (with a full stop and apostrophe) is the capital of Newfoundland and Labrador — that’s on an island far to the east. They’re over 1,500 km apart. Double-check your flight booking. 😅

When Is the Best Time to Visit Saint John?

June to September — pleasant temperatures, all attractions open, and most importantly, whale season. The best month for whale watching is August–September. May and October are shoulder months — fewer tourists but unpredictable weather. Avoid winter unless you love frost and snow.

How Many Days Do I Need for Saint John?

For the city alone, 2 days is enough. With the surrounding area (Fundy Trail, whale watching, Irving Nature Park), plan for 3–4 days. Ideally, work Saint John into an eastern Canada road trip.

Is Saint John Safe?

Yes, Saint John is generally a safe city. As with any city, be cautious at night in poorly lit areas, but overall the atmosphere is friendly and safe. The locals are incredibly kind — just ask for directions and you’ll get a fifteen-minute chat about the city’s history. 😊

What Is the Prettiest City in New Brunswick?

That’s a tough one! Saint John has its industrial charm and history, but St. Andrews by-the-Sea is often considered the “prettiest” — a picturesque seaside town with colourful houses and a peaceful atmosphere. Other contenders include Moncton with its Acadian culture and Fredericton, the provincial capital, which has a beautiful historic centre on the riverbank.

Tips and Tricks for Your Vacation

Don’t Overpay for Flights

Search for flights on Kayak. It’s our favorite search engine because it scans the websites of all airlines and always finds the cheapest connection.

Book Your Accommodation Smartly

The best experiences we’ve had when looking for accommodation (from Alaska to Morocco) are with Booking.com, where hotels, apartments, and entire houses are usually the cheapest and most widely available.

Don’t Forget Travel Insurance

Good travel insurance will protect you against illness, accidents, theft, or flight cancellations. We’ve had a few hospital visits abroad, so we know how important it is to have proper insurance arranged.

Where we insure ourselves: SafetyWing (best for everyone) and TrueTraveller (for extra-long trips).

Why don’t we recommend any Czech insurance company? Because they have too many restrictions. They set limits on the number of days abroad, travel insurance via a credit card often requires you to pay medical expenses only with that card, and they frequently limit the number of returns to the Czech Republic.

Find the Best Experiences

Get Your Guide is a huge online marketplace where you can book guided walks, trips, skip-the-line tickets, tours, and much more. We always find some extra fun there!
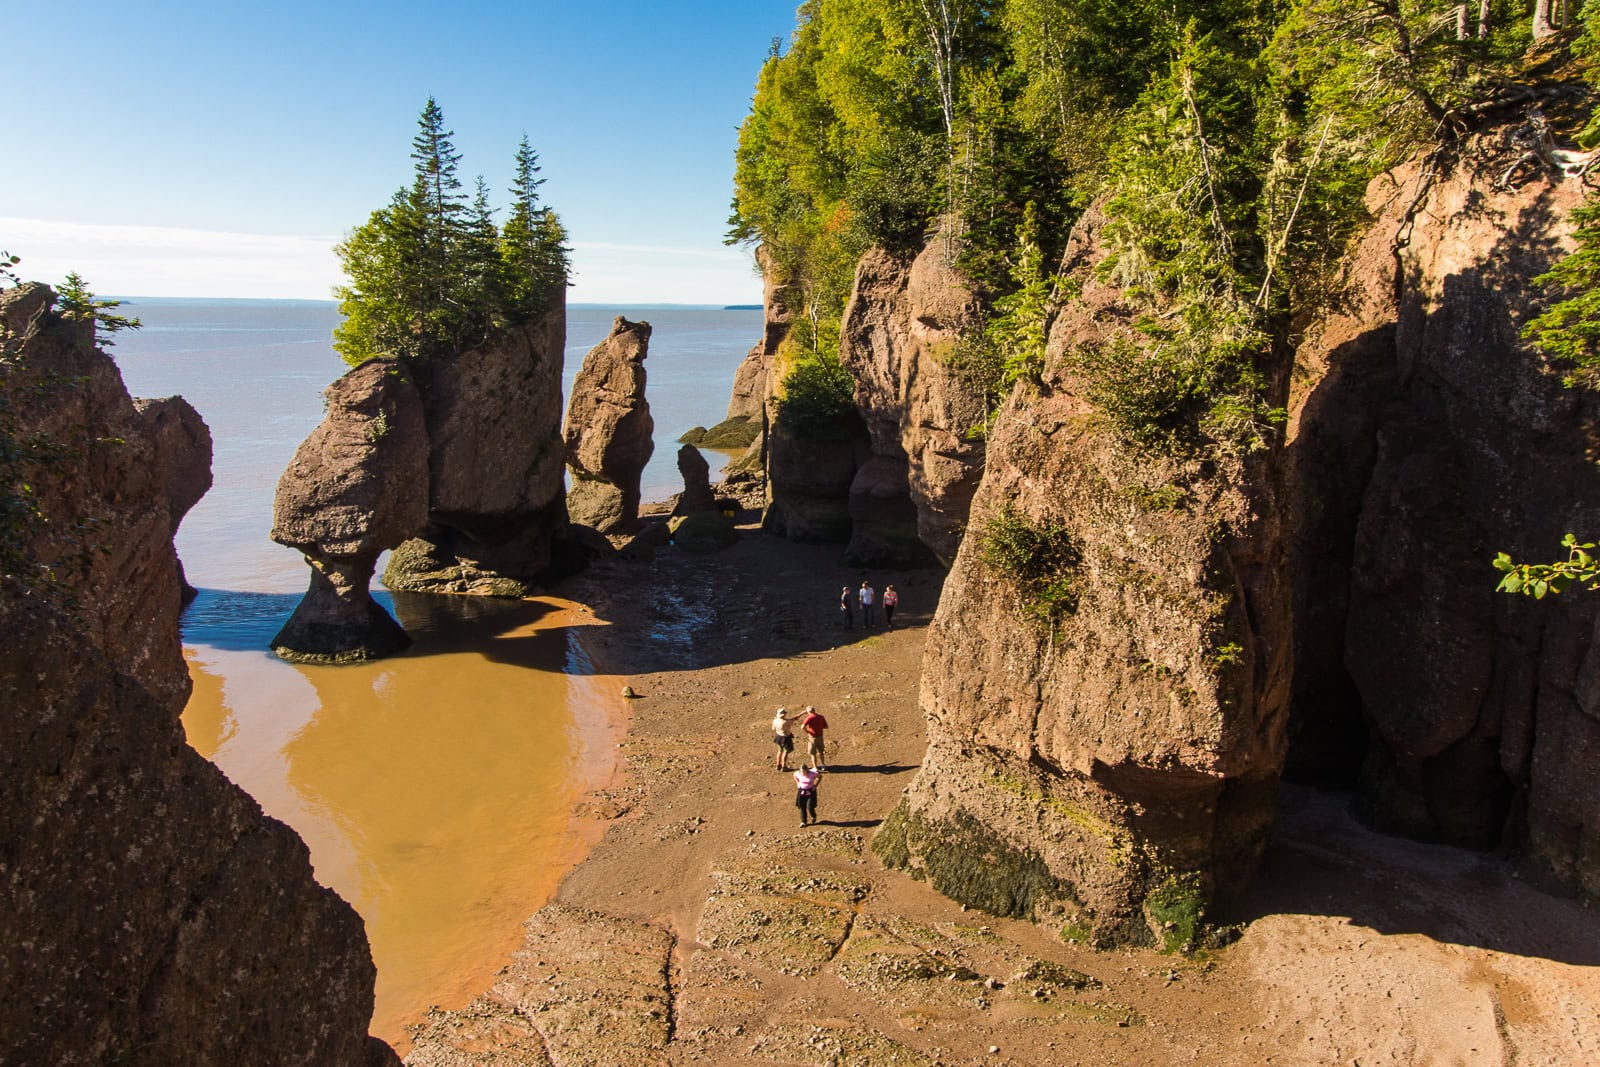
Green Gables Heritage Place, PEI: 7 Things to See and Do

TL;DRGreen Gables Heritage Place is a real farmhouse in Cavendish, on Prince Edward Island’s north shore, that inspired Lucy Maud Montgomery to write Anne of Green Gables, and it’s run by Parks Canada. Admission costs 8.50 CAD (roughly 145 Kč) for adults, while anyone under 17 gets in free. The site is open from May to October, and 2–3 hours is plenty for the house and trails. The seven main highlights are the house itself, the Haunted Wood Trail and Lovers Lane, the Balsam Hollow Trail, the gardens, the visitor centre, and sunset by the house, plus nearby Cavendish Beach with its red sand. June and September are the best months to visit, with fewer crowds and cheaper accommodation.

I’m standing on the porch of a white farmhouse with green shutters and a green roof, and I can literally feel the goosebumps rising. This is it. Green Gables on Prince Edward Island Canada — the place that made me cry over a book as a little girl, that made me want to dye my hair red (thankfully someone talked me out of it 😅), and that made us fly halfway around the world to a Canadian province most people hadn’t even heard of.

And you know what? It was worth every single penny.

Prince Edward Island — Canada’s smallest province — is a place where time has stood still. Red cliffs, endless beaches, potatoes as far as the eye can see (seriously, it’s the island’s main export 😁), and nestled among it all, Green Gables Heritage Place — the farmhouse that inspired Lucy Maud Montgomery to write one of the most famous children’s books in the world.

In this article, you’ll find a complete guide to Green Gables on Prince Edward Island — from the Anne of Green Gables house itself to enchanting forest trails, red sand beaches, and the places where Montgomery was born and raised. I’ll tell you when to go, where to stay, how much it all costs, and what to expect so you can enjoy your visit stress-free and packed with memories.

Anne of Green Gables house on Prince Edward Island Canada

TL;DR

  • Green Gables Heritage Place is located in Cavendish on the north shore of Prince Edward Island (PEI). It’s the real farmhouse that inspired L.M. Montgomery — and yes, it’s absolutely worth visiting, even if you haven’t read the book.
  • Admission is 8.50 CAD (approx. €6) per adult, children under 17 free. Open from May to October.
  • Best time to visit is June or September — fewer tourists, lovely weather, reasonable accommodation prices.
  • For the house tour and trails, allow 2–3 hours; for all of Cavendish and surroundings, easily a full day.
  • Haunted Wood Trail and Lovers Lane are two enchanting trails right next to the house — both included in the admission price.
  • A short drive from Green Gables is Cavendish Beach with red sand and dunes — one of the most beautiful beaches on PEI.
  • Nearby you’ll also find the birthplace of L.M. Montgomery, the historic Avonlea Village, and other sites connected to the book.
  • Accommodation in Cavendish ranges from around 120 CAD (approx. €80) per night for a motel to 300+ CAD for a luxury cottage.
  • A car is practically essential on PEI — public transport outside Charlottetown is virtually non-existent.
Green Gables Heritage Place, PEI: A guide for all Anne of Green Gables fans

When to Go and How to Get to Prince Edward Island

Timing your visit to Prince Edward Island matters more than you might think. The island is a seasonal destination, and outside the summer months, a lot of things simply don’t operate — closed restaurants, closed attractions, closed accommodation. It really is the kind of place that goes into hibernation in October and slowly wakes up in May.

Best Time to Visit

June and September are, in our opinion, the absolute ideal months. In June, everything is freshly open, nature is in bloom, and there are significantly fewer tourists than in July and August. September offers stunning autumn colours (PEI is surprisingly amazing for fall foliage), temperatures around 15–20 °C, and peace and quiet.

July and August are peak season. Temperatures climb to around 25 °C, the water in the bays warms up enough for swimming (around 18–20 °C, which is a luxury by Canadian standards), and Green Gables is bursting at the seams. Expect queues, full car parks, and higher accommodation prices. If you have no other option, go first thing in the morning — around 9:00 it’s relatively calm.

May and October — Green Gables Heritage Place is open but with limited hours. Some trails and secondary attractions may be closed. The weather is unpredictable, but if you don’t mind a few extra layers and some flexibility, you might have the whole place almost to yourself.

November to April — Green Gables is closed. Cavendish is essentially a ghost town. Not recommended unless you enjoy existential solitude among snow-covered potato fields. 😅

How to Get to Prince Edward Island

There are two main ways to reach the island:

Confederation Bridge — a 12.9 km long bridge connecting New Brunswick with PEI. It’s one of the longest bridges over ice-covered waters in the world, and the crossing itself is an experience. The toll is only charged when leaving the island — 50.25 CAD (approx. €34) for a car. Arriving is free. Clever, right? They lure you in and then charge you to escape. 😁

Flying to Charlottetown — Charlottetown Airport (YYG) has connections to Toronto, Montréal, Halifax, and other Canadian cities. From the UK, you’d typically fly via Toronto or Halifax. From Charlottetown to Cavendish (Green Gables) it’s about a 40-minute drive.

Ferry from Nova Scotia — Northumberland Ferries runs from Caribou (NS) to Wood Islands (PEI). The crossing takes 75 minutes and is a lovely experience. Prices are similar to the bridge toll.

If you’re planning a road trip across Western Canada or combining it with the Maritimes, a car is by far the best option. We’ve had consistently great experiences with DiscoverCars, which we use all over the world — and on PEI a car is absolutely essential since public transport outside the capital is practically non-existent.

Cat in front of the Green Gables house on PEI

Where to Stay and How Much Green Gables and Area Cost

Accommodation on PEI during peak season (July–August) is surprisingly expensive — the island is a popular holiday destination for Canadians from the east coast and capacity isn’t unlimited. In June and September, prices drop by 30–40%, which is yet another reason to visit outside peak season. You can search for the best deals on Booking.com, which usually has good coverage for PEI accommodation.

Accommodation in Cavendish and Surroundings

If you want to be as close to Green Gables as possible, Cavendish is the obvious choice. It’s a typical tourist village — motels, cottages, a few restaurants, and souvenir shops. It’s no architectural gem, but the location is perfect.

Price overview per night (peak season):

  • Motel / budget: 120–180 CAD (approx. €80–120)
  • B&B / farmstay: 150–220 CAD (approx. €100–150)
  • Cottage with kitchen: 200–350 CAD (approx. €135–235)
  • Luxury resort: 300+ CAD (approx. €200+)

We stayed in one of the typical cottages with a small kitchenette and a porch — and honestly, it was absolutely perfect. We made coffee in the morning, gazed out at the meadow, and felt like we were living inside the book. At 200 CAD a night, it was a great deal.

Accommodation in Charlottetown

If you don’t mind a 40-minute drive to Cavendish, Charlottetown is an excellent base. It’s the capital of PEI with a charming town centre, restaurants, and nightlife (by the standards of an island with 170,000 people, that means two pubs and one theatre 😅). Prices are similar, but you get more choice and the option to combine Green Gables with other trips around the island.

How Much the Whole Visit Costs

Rough budget for 3 days / 2 nights for two (in peak season):

  • Accommodation: 400–600 CAD (€270–400)
  • Car rental (3 days): 150–250 CAD (€100–170)
  • Petrol: 40–60 CAD (€27–40)
  • Admission to Green Gables + Avonlea Village: approx. 50 CAD (€34) for two
  • Food and drink: 150–250 CAD (€100–170)
  • Total: approx. 800–1,200 CAD (€540–810) for two

That’s without flights and the Confederation Bridge toll. If you go in September and save a bit on food (cook in your cottage!), you can easily come in under 800 CAD.

Green Gables Heritage Place: 7 Things You Must Not Miss

Let’s get to the main event — everything to see and do right at Green Gables Heritage Place. The entire complex falls under Parks Canada and includes not just the famous house but also several trails, museum exhibits, and beautifully maintained gardens. Allow a minimum of 2–3 hours, but you could easily spend half a day here, especially if you love nature walks.

1. The Green Gables House — Where It All Began

A white farmhouse with green shutters. That house. When you see it for the first time, it’s a strange feeling — like stepping into a book you read as a child. And in a way, that’s exactly what you’re doing.

The house belonged to the Macneill family, who were cousins of Lucy Maud Montgomery. Young Lucy used to visit them here, and it was this very house — its location, the surrounding woods and meadows — that inspired the setting of Anne of Green Gables. The interior is furnished in the spirit of the story: you’ll see Anne’s room with the puffed sleeves (yes, they have the famous dress!), Marilla’s kitchen, Matthew’s room, and the cosy parlour.

The tour is self-guided — you walk through the house at your own pace, with information panels in English and French in every room. Parks Canada staff in period costumes are stationed throughout the house and are happy to answer questions. One of them told us how Montgomery used to name the trees in the surrounding forest as a child — and honestly, I nearly cried. 😅

Practical info: Admission is 8.50 CAD (approx. €6) per adult, youth aged 13–17 enter free, children under 12 free. The price includes the house, gardens, and all trails. Tickets can be purchased on-site or online on the Parks Canada website. In peak season, I recommend arriving right at opening (9:00) or after 16:00 — between 11:00 and 14:00 tour buses arrive and it gets very crowded.

2. Haunted Wood Trail — A Walk Through the Enchanted Forest

This trail is an absolute must. The Haunted Wood is the place Anne imagined to be full of ghosts, fairies, and secrets — and when you walk the trail, you’ll understand why.

The trail is about 1 km long and winds through dense spruce forest with moss-covered stones and roots jutting out of the ground like the hands of forest sprites (okay, now I understand why Montgomery called it the Haunted Wood). The path is well-maintained, with wooden boardwalks over the wetter sections. Along the route, you’ll find panels with quotes from the book — and even if you haven’t read the original, the atmosphere is absolutely magical.

The whole walk takes about 20–30 minutes, but I recommend not rushing. Stop, breathe in the scent of spruce and pine needles, listen to the birds. It’s one of those rare moments when tourism and nature work in perfect harmony.

Tip: If you’re here in September or October, the autumn colours in Haunted Wood are absolutely breathtaking — reds, oranges, and golds.

Walking through the Haunted Wood Trail at Green Gables Heritage Place

3. Lovers Lane — The Romantic Walk Anne Loved So Much

Lovers Lane is the second of the iconic trails right next to Green Gables, and personally, I found it even more beautiful than the Haunted Wood. It’s a narrow forest path lined with old trees whose canopies connect above you, creating a green tunnel.

In the book, this is where Anne would go to dream and think — and that’s exactly the feeling you get. The trail is flat, easy, about 800 metres long, and leads through a meadow to the forest. We met exactly two people here, which in contrast to the crowds at the house was wonderful.

Montgomery wrote about this place: “That lane is one of the prettiest places in the world.” And she was right. If you’re on PEI with a partner (or by yourself — self-love counts!), it’s the ideal spot for a romantic stroll.

4. Balsam Hollow Trail — For Those Who Want More Nature

If Haunted Wood and Lovers Lane aren’t enough (and you’re like us and could spend the whole day in the woods), Balsam Hollow Trail is a longer loop that takes you deeper into the landscape around Green Gables.

The trail is about 1.5 km long and winds through meadows, forests, and along a brook. It’s a bit less “manicured” than the previous two trails — more nature, fewer information panels — and that’s precisely what makes it beautiful. The terrain is uneven in places, so I recommend comfortable hiking boots or at least sturdy trainers.

In spring, wildflowers bloom here and you might spot small fish in the streams. In autumn, it’s a colourful paradise. And in summer, it’s a pleasantly cool escape from the sun on the beach.

Historical carriage at Green Gables Heritage Place

5. Gardens and Farm — A Slice of 19th-Century Life

Around the Green Gables house are beautifully maintained flower gardens that give you a sense of what the farm looked like at the end of the 19th century. Lavender, roses, herbs — and behind the house, a small orchard of apple trees.

During the season, Parks Canada organises interpretive programmes — guides in period clothing demonstrate household tasks from the era in which the story takes place. We watched a woman churning butter and explaining how laundry was done without a washing machine. My mum declared we wouldn’t survive a week. I agree. 😅

For families with children, there’s also a small barn with farming tools and interactive exhibits — kids can try out what life on a farm was like. It’s charming, low-key, and educational without being boring.

6. Visitor Centre and Museum — The Context You Need

Before entering the house itself, pop into the Visitor Centre right by the car park. There’s a permanent exhibition about L.M. Montgomery’s life, the history of the book, and how a farmhouse became a world-famous tourist attraction.

You’ll find the first edition of the book from 1908, photographs from Montgomery’s childhood, letters, and other artefacts. For fans of the book, it’s an absolute treasure. For everyone else, it provides context that makes the subsequent visit to the house and trails so much more meaningful.

In the gift shop, you can buy everything from bookmarks and teas to replicas of Anne’s red braids (yes, really). 😁

Historical kitchen interior at Green Gables Heritage Place

7. Sunset at Green Gables — A Bonus for the Patient

If your schedule is flexible, try to stay at Green Gables until the evening. The site usually closes around 17:00 (depending on the month), but the trails around it remain accessible longer. The sunset over the meadows and forests surrounding the house is one of the most beautiful experiences PEI has to offer.

Sit on the bench behind the house, watch the sun paint the white walls pink and gold, and you’ll understand why Montgomery wrote about this place with such love. There are moments when tourism stops being tourism and simply becomes — life.

Around Green Gables: 6 Places to Visit in Cavendish and on PEI

Green Gables Heritage Place may be the main attraction, but the surrounding area is full of other places worth visiting. Cavendish and the north shore of PEI offer stunning beaches, more Montgomery-related sites, and some of the best lobster in the world. Here are the best things to do in the area.

8. Cavendish Beach — Red Sand and Otherworldly Dunes

A stone’s throw from Green Gables (literally a 5-minute drive) lies one of Canada’s most photographed beaches. Cavendish Beach is part of Prince Edward Island National Park and features something you won’t see anywhere else — red sand. That peculiar, brick-red hue is caused by a high iron oxide content in the soil, and against the turquoise water of the Gulf of St. Lawrence, it creates scenery that will take your breath away.

The beach is vast and wide, with impressive sandstone cliffs and dunes in the background. The water is surprisingly pleasant in summer (18–21 °C in July and August) — definitely swimmable, if not warm. Outside the season, it’s an ideal spot for walks and collecting shells.

Practical info: Beach parking costs 8 CAD (approx. €5.50) per day, or you can use a Parks Canada Discovery Pass if you plan to visit multiple spots in the national park. There are toilets, showers, and a small refreshment kiosk. In July and August, there’s a lifeguard on duty.

Tip: Come in the morning — the sand is beautifully smooth from the tide, there are very few people, and the light is perfect for photos.

9. L.M. Montgomery Birthplace — Where It All Really Began

About 5 km from Green Gables, in New London, stands a small white house where Lucy Maud Montgomery was born on 30 November 1874. It’s a modest building — much smaller and simpler than Green Gables — but for true fans, it’s a pilgrimage site.

Inside you’ll find personal belongings of Montgomery, her wedding dress (beautiful, simple, period-appropriate), a replica of her wedding bed, and copies of her diaries. The guides are usually local volunteers who know absolutely everything about Montgomery — ask them any question and you’ll get a fifteen-minute answer packed with fascinating details.

Admission: 5 CAD (approx. €3.50) per adult. Open from June to September. The visit takes about 30–45 minutes.

A short distance from the house is also the site where her grandparents’ house once stood — where she grew up — sadly it hasn’t survived, but there’s a memorial plaque and a beautiful view of the landscape that shaped her imagination.

10. Avonlea Village — A Bit Touristy, but Charming

I’ll be honest with you — Avonlea Village is a commercial attraction, and at first glance it might feel a bit kitschy. But then you step inside, see the Victorian-style houses, children in period costumes, and a lady offering you homemade pie, and your heart melts.

It’s a replica of a village from the Anne of Green Gables era with shops, a chocolatier, a blacksmith, and a small theatre staging scenes from the book. For families with children, it’s fantastic — young visitors can try period games, wear costumes, and “live” in Anne’s world.

Admission: approx. 15 CAD (€10) per adult. In peak season it’s open daily; outside the season with a limited programme.

My honest assessment? If you’re a fan of the book or have children, go. If you’re only interested in nature and history, skip it and spend your time on the beaches and trails instead. But that pie is sinfully good. ☺️

Avonlea Village on Prince Edward Island

11. Prince Edward Island National Park — Cliffs, Dunes, and Endless Beaches

Green Gables Heritage Place is technically part of PEI National Park, but most visitors only see the car park and the house. What a shame! The national park stretches across 60 km of the island’s north shore and offers some of the most beautiful beaches and natural scenery in all of eastern Canada.

Besides Cavendish Beach, you’ll find:

  • Brackley Beach — wider, quieter, popular with locals
  • Greenwich — with a unique system of moving dunes (there’s also a beautiful boardwalk trail)
  • Dalvay Beach — elegant, peaceful, next to the historic Dalvay by the Sea hotel

The park also features several cycling and hiking trails. Homestead Trail (8 km) is a beautiful route through forests and meadows, while Gulf Shore Way offers coastal views that will take your breath away.

Tip: If you plan to spend more than two days on PEI, get a Parks Canada Discovery Pass (72.25 CAD / approx. €49 for a family for the whole year) — it pays for itself after just three park visits.

Red coastline at Prince Edward Island National Park

12. Site of Lucy Maud Montgomery’s Cavendish Home — Ruins with a Soul

This tip is for true Montgomery fans, but it’s worth mentioning. A few minutes from Green Gables are the foundations of the house where Lucy Maud grew up with her Macneill grandparents. The house itself no longer stands, but the foundations, garden, and — most importantly — the surrounding landscape that Montgomery describes in her diaries have been preserved.

There’s a small museum (more of a booth) with copies of her diaries and photographs. Admission is by voluntary donation. The site itself is unassuming, but it has a peculiar atmosphere — you’re standing in the place where a ten-year-old girl dreamed up stories that would one day be read by millions of people around the world.

13. Charlottetown — The Capital Where Canada Was Born

If you have more time on PEI (and I recommend you do!), head to Charlottetown. It may be the capital of Canada’s smallest province, but it has incredible charm — colourful Victorian houses, a pleasant harbour promenade, excellent restaurants, and the title of “Birthplace of Confederation” (the place where, in 1864, the idea of a united Canada was born).

Stroll along Victoria Row — a street full of restaurants and cafés with terraces. Visit Province House, where the historic conference took place. And if you’re here in the evening, try to catch the musical “Anne of Green Gables – The Musical” at the Confederation Centre of the Arts — it’s been running every summer since 1965 and is the longest-running musical in Canada.

From Charlottetown, it takes about 40 minutes to reach Cavendish via Route 13, so it’s easy to combine a city and nature itinerary.

Fresh lobster on Prince Edward Island

What to Eat and Drink on Prince Edward Island

You eat well on PEI — and above all, fresh. Here are some tips that will save both your stomach and your budget.

Lobster Is King — and You Must Try It

Prince Edward Island is one of the best places in the world for fresh lobster. Seriously, it’s not a cliché. Lobster is on practically every other menu and prices are significantly lower than in Toronto or Montréal. A lobster roll is a local speciality — expect to pay around 18–25 CAD (€12–17).

In Cavendish, I recommend Fisherman’s Wharf Lobster Suppers — touristy, yes, but the lobster is fresh and the portions are enormous. For a more authentic experience, head to one of the local lobster suppers — community dinners where locals serve you a whole lobster with potato, corn, and coleslaw. They cost around 40–55 CAD (€27–37) for the full meal and it’s an experience you won’t forget.

Other Food You Shouldn’t Miss

  • PEI mussels — the island is famous for its mussel farming. You’ll find them in every restaurant, usually steamed in white wine with garlic. A portion costs around 15–20 CAD.
  • Potatoes — PEI is the “Potato Province” of Canada. Yes, they take their potatoes seriously here. Try a loaded baked potato or poutine (chips with cheese curds and gravy — a Québec classic, but PEI does its own version).
  • Cows Ice Cream — a local ice cream parlour famous across Canada. You’ll find it in Cavendish and Charlottetown. Flavours like Wowie Cowie (chocolate with brownies) are dangerously addictive. 😅
  • Fresh oysters — Malpeque Bay oysters are world-renowned. Half a dozen for about 15 CAD.

Where to Eat Near Green Gables

  • The Pearl Eatery (Charlottetown) — a farm-to-table restaurant with an excellent tasting menu. Pricier, but worth it for a special occasion.
  • Carr’s Oyster Bar (Stanley Bridge) — 15 minutes from Cavendish, right by the river. Fresh oysters, mussels, and lobster rolls in a casual atmosphere.
  • Glasgow Glen Farm — a farm producing Gouda cheese. You can take a tour and sample the cheeses. Admission free, you’ll leave with a kilogram of cheese. (Or two. No judgement.)
  • Schoolhouse Brewery (Stanley Bridge) — a microbrewery in a former school. Local beers and simple food. Cosy.

Food and Prices in General

Expect food on PEI to be slightly more expensive than in other parts of Canada (island logistics, seasonality). Lunch at a restaurant for two will run you 40–70 CAD (€27–47), dinner with lobster 80–130 CAD (€54–88). If you have accommodation with a kitchen, shop at the local Sobeys or Co-op supermarket — you’ll save money and can prepare fresh seafood yourself (lobsters are sold live!).

Practical Tips and Advice

Getting Around the Island

You need a car on PEI. Public transport outside Charlottetown is virtually non-existent. The roads are in good condition, traffic is minimal, and navigation is straightforward — the island is about 200 km long and 50 km wide. Petrol costs around 1.60–1.80 CAD/litre (approx. €1.10–1.20).

Look for affordable flights to PEI (via Toronto or Halifax) on Kiwi — it’s our go-to portal for finding the best flight deals.

Weather and Clothing

Even in summer, expect cooler evenings (12–15 °C) and the occasional rain shower. Layers are essential. In spring and autumn, add a waterproof jacket and a scarf. For the trails around Green Gables, comfortable trainers will do, but for longer hikes in the national park, I recommend proper hiking boots.

How to Pack

If you’re flying to PEI with carry-on only (and if you’re flying with multiple connections, I recommend it), check out our guide on how to pack in carry-on luggage.

Internet and SIM Card

Canada is notorious for insane mobile data prices. If you don’t want to pay roaming charges, consider an eSIM from Holafly — we use it on all our trips outside Europe and it works brilliantly. You can find all the details in our Holafly review.

Travel Insurance

Medical care in Canada is extremely expensive for tourists — a simple A&E visit can cost thousands of dollars. Travel insurance is a necessity, not a luxury. For shorter trips, we recommend reading our SafetyWing review, where we compare different options.

FAQ — Frequently Asked Questions About Green Gables on Prince Edward Island

Where is the real Green Gables house?

The real house that inspired Green Gables from the Anne of Green Gables book is located in Cavendish on Prince Edward Island in Canada. It’s part of Green Gables Heritage Place, managed by Parks Canada. The address is 8619 Route 6, Cavendish, PE C0A 1N0. It’s about a 40-minute drive from Charlottetown (the capital of PEI).

Is Green Gables worth visiting?

Absolutely — even if you haven’t read the book. The house itself is beautifully furnished in period style, but the real magic lies in the surrounding nature. The Haunted Wood and Lovers Lane trails are gorgeous walks through forest and meadows. Combined with nearby Cavendish Beach (a red sand beach) and other attractions in the area, you can easily make it a wonderful full-day trip or weekend getaway.

Is Anne of Green Gables set on Prince Edward Island?

Yes! The entire story of Anne of Green Gables takes place on Prince Edward Island, specifically in the fictional town of Avonlea, which was inspired by the real Cavendish. Author Lucy Maud Montgomery grew up here and described PEI’s landscape in vivid detail — the red roads, green hills, sea, and forests. PEI remains inseparably linked with Anne, and hundreds of thousands of fans visit from around the world every year, particularly from Japan, where the book is incredibly popular.

Is Anne of Green Gables based on a true story?

Partially. Anne Shirley isn’t a real person, but Lucy Maud Montgomery drew from her own childhood on Prince Edward Island. Like Anne, Montgomery was raised by relatives (in her case, grandparents), had a vivid imagination, and loved nature. The Green Gables house belonged to the Macneill family — Montgomery’s cousins — and young Lucy used to visit them there. The landscape, house, and some characters have real-life counterparts, but the story itself is fiction.

How much does admission to Green Gables Heritage Place cost?

Admission for adults is 8.50 CAD (approx. €6). Youth aged 13–17 and children under 12 enter free. The price includes the house tour, visitor centre, gardens, and all trails (Haunted Wood, Lovers Lane, Balsam Hollow). Tickets can be purchased on-site or online on the Parks Canada website. If you also plan to visit other sites in PEI National Park, a Parks Canada Discovery Pass is worthwhile.

How much time do I need for Green Gables?

For the house tour and visitor centre, allow 45–60 minutes. If you also want to walk the Haunted Wood and Lovers Lane trails (and I highly recommend it!), add another hour. For the entire site including gardens and walks, the ideal time is 2–3 hours. If you add nearby Cavendish Beach, Montgomery’s birthplace, and lunch, it can easily become a full-day trip.

When is Green Gables Heritage Place open?

Green Gables Heritage Place is open seasonally, usually from May to October. During peak season (July–August), opening hours are the longest — typically 9:00 to 17:00 or 18:00. In May, June, September, and October, hours are reduced (10:00–16:00). In winter, the site is closed. Check the Parks Canada website for exact hours for the current season — I recommend verifying before your trip as they may vary from year to year. Visiting Green Gables on Prince Edward Island was one of those travel experiences that isn’t about adrenaline, exoticism, or luxury — but about a feeling. The feeling of returning somewhere you’ve never actually been, but where you felt at home as a child. And if you ever, however long ago, loved Anne of Green Gables — this place is for you. ☺️ And if you didn’t? Go anyway. The red sand, spruce forests, and lobster are worth it even without the sentiment. 😁

Tips and Tricks for Your Vacation

Don’t Overpay for Flights

Search for flights on Kayak. It’s our favorite search engine because it scans the websites of all airlines and always finds the cheapest connection.

Book Your Accommodation Smartly

The best experiences we’ve had when looking for accommodation (from Alaska to Morocco) are with Booking.com, where hotels, apartments, and entire houses are usually the cheapest and most widely available.

Don’t Forget Travel Insurance

Good travel insurance will protect you against illness, accidents, theft, or flight cancellations. We’ve had a few hospital visits abroad, so we know how important it is to have proper insurance arranged.

Where we insure ourselves: SafetyWing (best for everyone) and TrueTraveller (for extra-long trips).

Why don’t we recommend any Czech insurance company? Because they have too many restrictions. They set limits on the number of days abroad, travel insurance via a credit card often requires you to pay medical expenses only with that card, and they frequently limit the number of returns to the Czech Republic.

Find the Best Experiences

Get Your Guide is a huge online marketplace where you can book guided walks, trips, skip-the-line tickets, tours, and much more. We always find some extra fun there!
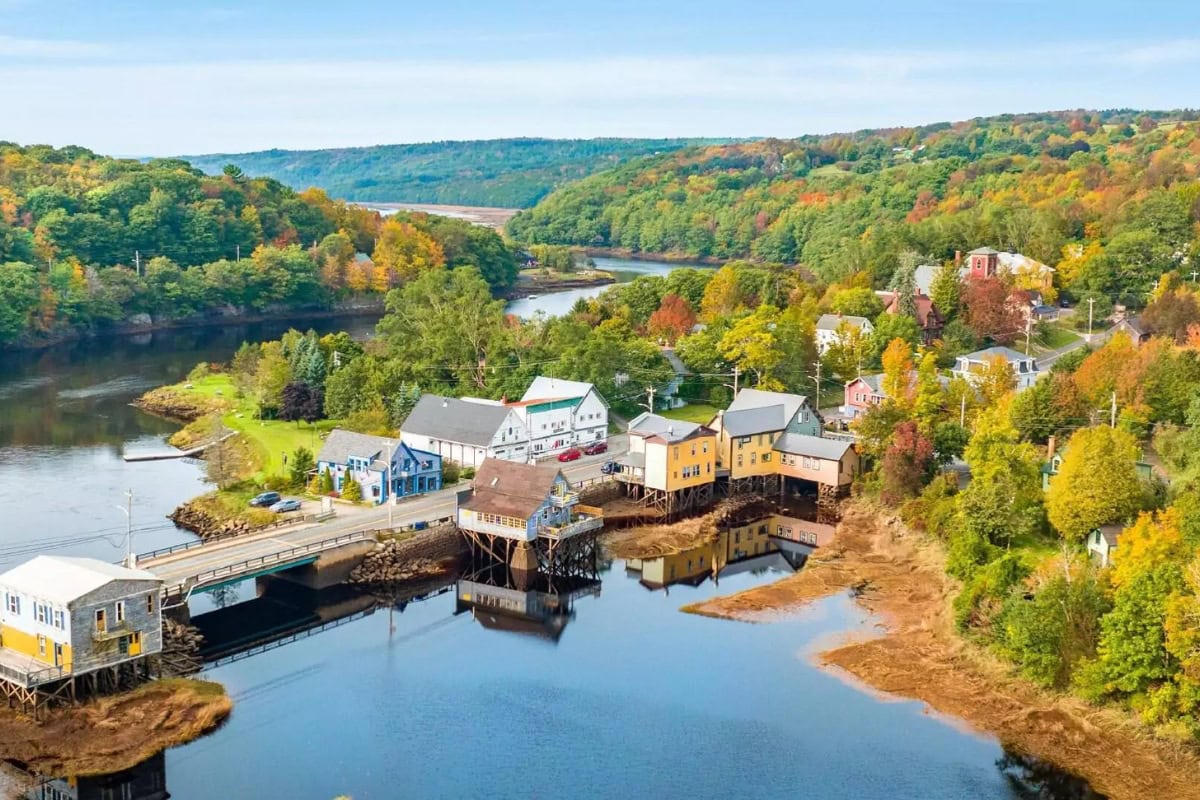
Mesa Verde Colorado: 13 Best Things to See and Do

TL;DRMesa Verde National Park in southwest Colorado has 13 ideas for things to see and do, from the legendary Cliff Palace, the largest cliff dwelling in North America with over 150 rooms, to the more adventurous Balcony House with its 10-metre ladder climb, to the quieter Long House out on Wetherill Mesa. Give it at least 1.5–2 days, park entry runs $30 per vehicle for 7 days, and ranger-led tours of the cliff dwellings cost $5–$8 a person. May–June and September–October are the best months, with fewer crowds and pleasant temperatures. Round things off with trails like the Petroglyph Point Trail or Point Lookout Trail, and day trips out to Hovenweep National Monument near the town of Cortez.

You’re standing on the edge of a canyon, hundreds of metres below you a valley stretches out, covered in junipers and pines, and then you see it — in a rock alcove across the way, as if someone carefully tucked it in, stands an entire building. Not just one. A whole village. With windows, towers, tiny rooms stacked one on top of another, as if someone lived there just yesterday. Except “yesterday” was more than 700 years ago.

Mesa Verde Colorado was the first place in the USA that truly caught me off guard. You know how sometimes you arrive at a famous landmark and think “yeah, nice”? This was something completely different. Lukáš and I stood at the overlook above Cliff Palace and neither of us said a word. We just stared. Because what the Ancestral Puebloans built into those cliff ledges is so incomprehensibly brilliant and beautiful that your jaw literally drops.

Mesa Verde National Park is the only national park in the USA that was established primarily to protect human cultural heritage, not nature. It’s been a UNESCO World Heritage Site since 1978 and contains over 5,000 archaeological sites, including around 600 cliff dwellings. And yet it receives far fewer visitors than Yellowstone or the Grand Canyon, so you can enjoy it in relative peace.

In this article, you’ll find a complete guide to Mesa Verde National Park — from 13 best things to see and do, through practical tips on when to visit, where to stay, and how much it all costs, to advice on ranger-led tours and food. Get ready for one of the most fascinating places you’ll ever visit in America. ☺️

Mesa Verde Colorado everything you need to know

TL;DR

  • Mesa Verde National Park lies in southwestern Colorado and protects hundreds of cliff dwellings built by the Ancestral Puebloans, who lived here from roughly 550 AD to the end of the 13th century.
  • The most famous site is Cliff Palace — the largest cliff dwelling in North America with over 150 rooms. You can only access it with a ranger (ranger-led tour).
  • Ranger-led tours need to be booked in advance on recreation.gov — they sell out weeks ahead during peak season.
  • The best time to visit is May to June and September to October — fewer crowds, pleasant temperatures.
  • The park is huge and spread across two main areas — Chapin Mesa (most popular) and Wetherill Mesa (quieter, but seasonal).
  • For a thorough visit, plan at least 1.5–2 full days — in one day you’ll only manage the bare essentials.
  • Park entrance fee is $30/vehicle (valid for 7 days). Ranger-led tours cost an additional $5–8/person.
  • Accommodation in the park is available at Far View Lodge (from $180/night), while a more affordable option is the town of Cortez, 15 minutes from the entrance, where you’ll find motels from $80–120/night.
  • Morefield Campground inside the park costs around $40–50/night and is the best option if you want to see amazing sunsets right from Mesa Verde.
  • Don’t forget to pack comfortable hiking shoes, plenty of water, and sunscreen — shade is scarce here and the altitude of 2,000–2,600 m (6,500–8,500 ft) will catch you off guard.
Mesa Verde cliff dwellings panoramic view

When to Visit Mesa Verde and How to Get There

Mesa Verde National Park is open year-round, but be warned — “open” doesn’t mean “fully operational”. Most cliff dwellings, ranger-led tours, and Wetherill Mesa are only accessible during the season, roughly from mid-May to mid-October (exact dates vary slightly each year — always check the NPS website). In winter, only Chapin Mesa and a few overlooks are accessible — plus plenty of snow and closed roads.

Best Time to Visit

The ideal months are May–June and September–early October. In May and June, everything is freshly open, nature is blooming, and there are fewer tourists than in summer. September is absolutely divine — temperatures around 20–25 °C (68–77 °F), golden light, minimal crowds.

July and August work too, but be prepared for heat (around 30 °C / 86 °F in the sun — on the mesa it’s relentless) and bigger crowds. It’s also thunderstorm season — afternoon showers are common and sometimes they close certain trails because of them.

A word about wildfires — Mesa Verde has an unfortunate history with forest fires (in 2000 and 2002, thousands of hectares burned). During summer months, the park or parts of it occasionally close due to fire risk. Monitor current conditions on the NPS website.

How to Get to Mesa Verde

The park lies in southwestern Colorado, about 10 km (6 miles) east of the town of Cortez and roughly 60 km (37 miles) west of Durango. The nearest park entrance is off Highway US-160.

By car — hands down the best option. There’s no public transport inside the park and distances between individual sites are substantial (from the entrance to Cliff Palace it’s nearly 35 km / 22 miles along a winding mountain road). We’ve had consistently great experiences with DiscoverCars, which we use all over the world — you can pick up a car in Durango or Cortez.

Driving to Mesa Verde National Park Colorado

Nearest airports:

  • Cortez Municipal Airport (CEZ) — tiny, with limited connections
  • Durango–La Plata County Airport (DRO) — better choice, with flights from Denver and Dallas
  • Albuquerque (ABQ) — about 5 hours by car, but often significantly cheaper flights

From Europe, you’ll most commonly fly via Denver and then either take a connecting flight to Durango, or pick up a rental car and do a road trip through US national parks, which we highly recommend.

Important: From the park entrance to the main sites on Chapin Mesa, the drive takes at least 45 minutes along a narrow, winding mountain road with over 600 metres (2,000 ft) of elevation gain. Factor this into your day — I wouldn’t say it’s dangerous, but RVs and large campervans go slowly and overtaking opportunities are limited. 😅

Where to Stay and How Much Mesa Verde National Park Costs

Mesa Verde isn’t a cheap park, but it’s not outrageously expensive compared to other American national parks either. Here’s an overview of the main costs:

Entrance fee:

  • $30/vehicle (approx. €28) — valid for 7 days
  • If you have an America the Beautiful Pass ($80/year, approx. €74), entry is free — if you’re planning to visit multiple US parks, it’s absolutely the best investment.

Ranger-led tours:

  • $5–8/person (approx. €5–7) per tour — Cliff Palace, Balcony House, Long House
  • Advance booking required on recreation.gov — they sell out in peak season!

Accommodation:

  • Far View Lodge (inside the park): from $180–280/night (approx. €165–260) — simple rooms, but the location is unbeatable
  • Motels in Cortez: $80–150/night (approx. €74–140) — best value for money
  • Motels in Durango: $100–200/night (approx. €93–185) — nicer town, but further from the park
  • Morefield Campground (inside the park): $40–50/night (approx. €37–46) — tent or RV

Food in the park:

  • Far View Terrace Café: sandwiches, salads, burgers — $10–18 (approx. €9–17)
  • Metate Room (upscale restaurant at Far View Lodge): main course $25–40 (approx. €23–37)

Budget for 2 days for two people (mid-range):

  • Park entrance: $30
  • 2× ranger-led tours (for two): $20–32
  • 2 nights in Cortez (motel): $160–300
  • Food (2 days, mix of restaurant and self-catering): $80–120
  • Petrol: $20–30
  • Total: approx. $310–510 (€290–475) for two people
Mesa Verde National Park cliff dwellings at sunset

Accommodation in the Park vs. Cortez

Far View Lodge is the only accommodation inside the park (apart from the campground). It’s a simple lodge with no TV and limited Wi-Fi — and that’s exactly its charm. In the morning you wake up to views across four states and in the evening you gaze at stars you’d never see in a city. The downside? The price, and the fact that it sells out quickly. You can check availability and book on Booking.com.

Cortez is a small town 15 minutes from the park entrance. It’s no beauty queen, let’s be honest — a typical American small town with motels, fast food, and a Walmart. But it’s a practical and affordable base. Hotel & Hostel & Spa Retro Inn at Mesa Verde or Holiday Inn Express are solid picks.

Durango is an hour further, but it’s a significantly nicer town with a historic centre, breweries, and an Old West atmosphere. If you have time, it’s worth spending an evening there.

Camping in Mesa Verde

Morefield Campground sits 6 km (4 miles) from the park entrance and is one of the best ways to experience Mesa Verde to the fullest. Picture this: you’re sitting by your tent, surrounded by silence broken only by crickets, above you a starry sky with zero light pollution, and you know that in the morning you’ll be among the first people in the park.

The campground has showers, a small shop with basic supplies, and sites for both tents and RVs with electricity. Book through recreation.gov — in summer I recommend reserving as early as possible.

Mesa Verde Colorado: 13 Best Things to See and Do

Now we’re getting to the best part — the cliff dwellings themselves and the other sites that draw people here from around the world. Mesa Verde is divided into two main areas: Chapin Mesa (the main one, accessible year-round) and Wetherill Mesa (open only in season, fewer people). We’ll start with the most famous sites and work our way through to the hidden gems.

1. Cliff Palace — the Largest Cliff Dwelling in North America

This is it. The reason most people come to Mesa Verde, and the reason they leave with their jaws on the floor. Cliff Palace is the largest cliff dwelling in all of North America — more than 150 rooms and 23 kivas (ceremonial underground chambers) crammed into a massive rock alcove.

The Ancestral Puebloans lived here from roughly the late 12th to the late 13th century — “only” about 75–100 years before abandoning the entire area. And that’s the fascinating part: why? Why would someone build such a sophisticated complex and then leave? Scientists still don’t fully agree — probably a combination of drought, soil exhaustion, and social changes. But when you stand there, you feel like the stones are still whispering.

You can only access Cliff Palace on a ranger-led tour. The tour lasts about an hour, the ranger tells you the history, answers questions, and meanwhile you’re climbing ladders and squeezing through narrow passages. Tickets ($8/person, approx. €7) are purchased in advance on recreation.gov — they sell out weeks ahead during peak season, so don’t delay!

The tour involves descending and climbing stone steps and ladders — it’s not extremely strenuous, but you need comfortable hiking shoes and a basic level of fitness. If you’re afraid of heights or enclosed spaces, think carefully — some of the passages are genuinely tight.

Tip: Book a morning tour (ideally the first one at 9:00 or 9:30). The light is beautiful, it’s cooler, and there are fewer people. Afternoon tours in summer tend to be hot and crowded.

2. Balcony House — an Adventure for the Brave

If Cliff Palace is “wow, that’s beautiful,” then Balcony House is “wow, that’s beautiful AND slightly terrifying.” 😅 This cliff dwelling is only accessible via a 10-metre (32-foot) ladder, a narrow tunnel you have to crawl through (literally — on all fours, with your backpack on), and another series of steep steps.

Balcony House has “only” about 40 rooms, but its position is absolutely dramatic — it hangs on the cliff face like an eagle’s nest, and its inhabitants had to reach it using the same ladders you do. Imagine doing that in winter, with children, carrying supplies of food. These people were incredible.

The ranger-led tour ($8/person) is more intense than Cliff Palace — the ranger clearly explains what awaits you, and if you have claustrophobia or serious issues with heights, they’ll recommend a different tour. Lukáš and I absolutely loved it, though I’ll admit the tunnel caught me slightly off guard. Fortunately, it’s short.

Important: Balcony House is typically open from late April/early May to mid-October. Even during the season, it occasionally closes due to weather (a slippery ladder after rain isn’t ideal). Tickets again through recreation.gov.

3. Spruce Tree House — the Best-Preserved Dwelling (Currently Closed)

Spruce Tree House was long the most accessible cliff dwelling in the park — the only one you could reach without a ranger-led tour, via a short trail right from the Chapin Mesa museum. With 130 rooms and 8 kivas, it was the third largest in the park.

But be warned: At the time of writing, Spruce Tree House is closed to the public due to the risk of falling rock from the cliff overhang. The closure has been in place since 2015 and it’s unclear when (or if) it will reopen. Check the current status on the NPS website before your visit.

Even though you can’t go inside, it’s worth walking to the overlook above Spruce Tree House — you can see the cliff dwelling beautifully from above and a ranger at the viewpoint will happily answer your questions. The Chapin Mesa Museum (right next door) is also excellent — small but with superb exhibits about the life of the Ancestral Puebloans.

4. Long House — a Quiet Alternative on Wetherill Mesa

Long House is the second-largest cliff dwelling in Mesa Verde — over 150 rooms stretched along a cliff overhang like a row of houses on a village street. And yet only a fraction of the visitors who go to Cliff Palace come here. Why? Because it’s on Wetherill Mesa, which is further from the main road and open only in season (usually May–September).

The ranger-led tour ($5/person, approx. €5) lasts about 90 minutes and follows a longer trail with ladders — it’s physically slightly more demanding than Cliff Palace, but the atmosphere is incomparably more peaceful. On our tour there were about 15 of us. At Cliff Palace it’s usually 40–60.

My honest tip: If you have two days in Mesa Verde and can manage the logistics, do Cliff Palace one day and Long House the next. The contrast — crowds vs. tranquillity — is unbelievable. Long House gives you an experience that’s much closer to how the place “feels” without the tourist bustle.

5. Mesa Top Loop Road — Cliff Dwellings from a Bird’s Eye View

If you don’t have a ranger-led tour (they’re sold out, you don’t have time, you don’t have the nerves for ladders), Mesa Top Loop Road is your lifesaver. This 10 km (6-mile) loop drive on Chapin Mesa takes you past a dozen overlooks of cliff dwellings that you can see from the opposite canyon rim.

You’ll stop at Square Tower House (the tallest structure in the park — a four-storey tower!), Sun Point View (from here you can see 12 cliff dwellings at once), and walk along short trails to pithouses and surface pueblos that show earlier phases of settlement here (from underground pit dwellings through above-ground villages to those famous cliff dwellings).

Mesa Top Loop doesn’t require a ticket or ranger-led tour — it’s accessible with your standard park entrance fee. Allow 2–3 hours if you want to stop at most overlooks and read the information panels.

Photography tip: The cliff dwellings on the opposite canyon wall are most beautifully lit in the morning and late afternoon, when the sun shines directly into the alcoves. At midday they’re in shadow and don’t stand out in photos.

6. Chapin Mesa Archeological Museum — Context That Changes Everything

I know, I know — a museum in a national park doesn’t sound sexy. But this museum gives you context that makes the cliff dwellings a completely different experience afterwards. It’s small, you can get through it in 30–45 minutes, and you’ll find answers to questions that will be popping into your head all day:

How did the Ancestral Puebloans grow corn in this arid landscape? Why did they move from their pueblos on the mesa top down into the cliff alcoves? Why did they suddenly leave? What did their daily life look like?

The museum has excellent dioramas, original artefacts (pottery, tools, textiles), and a short film that I recommend watching as the first thing after arrival. Free entry (included in the park admission). Open year-round.

Mesa Verde things to see and do

7. Petroglyph Point Trail — Rock Art and Views

This is probably the best hike in the entire park — a 4.6 km (2.8-mile) loop trail that follows the canyon rim with head-spinning views (in the best sense), rewarding you at the end with petroglyphs (rock carvings) left by the Ancestral Puebloans.

The trail is moderately difficult — narrow, steep in places, with a few sections where you steady yourself against the rock. Nothing dangerous, but I wouldn’t recommend it with small children or in flip-flops. Allow 2–3 hours including stops for photos and at the petroglyphs.

Important: You need to register at the trailhead (starting point near Chapin Mesa Museum) — it’s free, but you must fill out a form. The reason is safety — the ranger needs to know how many people are on the trail.

8. Step House on Wetherill Mesa — Two Eras in One Dwelling

Step House is unique because in one location you can see two completely different phases of settlement: a pithouse from approximately 626 AD (an underground pit with a wooden roof) and a cliff dwelling from the late 13th century. The contrast of six hundred years of human development in one spot is fascinating.

The best part? Step House is self-guided — you don’t need a ranger-led tour, just walk down the trail (short but steep, with stone steps) and explore the dwelling on your own. During the season there’s usually a ranger here who’ll answer questions, but it’s not mandatory.

Step House is on Wetherill Mesa, so fewer people make it here. Combine it with Long House for a perfect day on the quieter side of the park.

9. Far View Sites — Surface Villages

Before the Ancestral Puebloans moved into cliff alcoves, they lived on top of the mesa in above-ground villages made of stone and mud. Far View Sites is a complex of several pueblos right by the road that shows what “normal” life looked like before the era of cliff dwellings.

The tour is self-guided with information panels and takes about 30–45 minutes. It’s not as dramatic as the cliff dwellings, but it completes the picture — you’ll understand how the civilisation here evolved from simple pit dwellings through these stone villages to those incredible cliff palaces.

Stop here on your way to Chapin Mesa — it’s right by the road and won’t take much time.

10. Point Lookout Trail — Panoramic View of the Entire Park

If you want to see Mesa Verde from above, Point Lookout Trail is the clear choice. This 3.4 km (2.1-mile) out-and-back trail leads to a viewpoint at an elevation of 2,613 m (8,572 ft), from where you can see the entire park, Montezuma Valley, Sleeping Ute Mountain, and on a clear day even four states (Colorado, Utah, Arizona, New Mexico).

The elevation gain is about 130 metres (430 ft) and the trail is exposed — in summer there’s no shade and the sun beats down mercilessly. Set out early morning or late afternoon. Sunset from Point Lookout is reportedly one of the most beautiful things in the entire park — we unfortunately didn’t catch it ourselves, but the photos we’ve seen speak for themselves.

The trailhead is right by Morefield Campground, so if you’re camping, it’s an ideal evening hike.

11. Ranger Programs and Evening Campfire Talks

The rangers at Mesa Verde are absolutely exceptional. It’s not just “look left, look right” — these people live and breathe the history of the Ancestral Puebloans and tell it with such passion that you feel as if you were there with them.

Besides ranger-led tours to the cliff dwellings, the park offers:

  • Evening campfire programs at Morefield Campground (free, in season) — a ranger tells stories by the fire under the stars. This is an experience you won’t find anywhere else.
  • Twilight tours of Cliff Palace (limited availability, usually in summer) — a tour at sunset when the cliff dwelling glows with golden light. If you spot an available slot, grab it without hesitation.
  • Ranger talks at various overlooks and in the museum — shorter programs (20–30 minutes) on specific topics.

The schedule changes by season — find the current timetable in the Mesa Verde Guide, the newspaper you’ll receive at the park entrance, or on the NPS website.

12. Canyons and Wildlife Around Mesa Verde

Mesa Verde isn’t just archaeology — it’s also surprisingly beautiful nature. The green mesa (that’s where the name comes from — “green table” in Spanish) contrasts with the ochre canyons and blue sky in a way that’s typically southwestern and incredibly photogenic.

In the park you’ll encounter wild turkeys (massive ones that practically walk under your car 😁), mule deer, squirrels, and with a bit of luck even a black bear. In spring, cacti and wildflowers bloom, and in autumn the juniper and oak forests turn golden.

Knife Edge Road — the road leading from the campground to Chapin Mesa — is an experience in itself. It runs along a narrow ridge with views on both sides, and at times you feel like you’re driving along the roof of the world. Stop at Montezuma Valley Overlook on the edge of the mesa — the view across the entire valley is breathtaking, especially at sunset.

13. Cortez and Surroundings — What to Do After the Park

The town of Cortez itself isn’t exactly a dream destination, but it’s a practical base and you’ll find a few interesting things:

Anasazi Heritage Center (about 15 minutes from Cortez near the town of Dolores) — if Mesa Verde inspired you and you want more, this museum is excellent. Interactive exhibits, dwelling replicas, and the chance to try grinding corn on a stone metate. Admission $5 (approx. €5).

Hovenweep National Monument (about 45 minutes from Cortez) — a lesser-known “sibling” of Mesa Verde with fascinating towers and pueblos on canyon rims. Virtually no tourists. If you have a spare half-day, I highly recommend it.

Canyon of the Ancients National Monument — a vast area with thousands of archaeological sites scattered across the landscape. No marked trails, more for adventurers with a map and GPS. But the feeling of standing at a ruin that no one else will visit all day is priceless.

lukas a lucka
Lukáš and Lucie recommend
Where to stay in Mesa Verde National Park
5 accommodations — campgrounds, hotels and other lodging options

Food and Drink in Mesa Verde and Around

I’ll be honest — you don’t come to Mesa Verde for the culinary experiences. 😅 But you won’t go hungry, and a few pleasant surprises await.

In the Park

Far View Terrace Café is the park’s main dining spot — cafeteria style, sandwiches, salads, burgers, pizzas. The quality is surprisingly decent for a park canteen. Expect $10–18 per meal. Open only in season.

Metate Room at Far View Lodge is the park’s more upmarket restaurant with regional cuisine inspired by Native American culture — bison steak, trout, chilli, corn tortillas. Prices $25–40 for a main course. Very pleasant by national park standards, but I recommend making a reservation.

Morefield Campground Store — basic groceries, ice cream, beer. Sufficient for cooking at your campsite.

My tip: Bring your own snacks and plenty of water into the park. There are no refreshment stations between the individual sites, and in summer at 30 °C (86 °F) and an altitude above 2,000 m (6,500 ft) you dehydrate faster than you’d expect. We had a cooler in the car with fruit, sandwiches, and two litres of water per person per day — and that was just about right.

In Cortez

Pepperhead — our top choice for dinner. Mexican cuisine, enormous portions, fresh ingredients, and local beer. Reasonable prices ($12–20 for a main course).

The Farm Bistro — a local bistro with farm-fresh ingredients. Slightly pricier, but quality.

Loungin’ Lizard — a casual bar with great burgers and small-town Wild West atmosphere.

Main Street Brewery in Cortez or Steamworks Brewing in Durango — if you love craft beer, southwestern Colorado has a surprisingly vibrant brewing scene.

Practical Tips for Visiting Mesa Verde

What to Pack

Mesa Verde is unique because of its altitude (2,000–2,600 m / 6,500–8,500 ft), dry climate, and the fact that at the cliff dwellings you’re climbing ladders and crawling through tunnels. Pack:

  • Comfortable closed-toe shoes — essential for ranger-led tours (they won’t let you in with flip-flops!). We have a list of the best hiking shoes if you’re looking for inspiration.
  • Sunscreen and a hat — there’s practically no shade on the mesa
  • Plenty of water — at least 2 litres/person/day
  • A warm layer — mornings and evenings can be cool even in summer (especially at the campground)
  • A small daypack — you’ll need your hands free for ranger-led tours (ladders!)

If you’re wondering how to pack efficiently, check out our guide on how to pack in carry-on luggage only.

eSIM and Phone

There’s minimal to zero mobile signal in the park. Limited Wi-Fi is available at the campground and Far View Lodge. Download offline maps (Google Maps or maps.me) and park information before you arrive.

For your overall trip to the USA, I recommend getting an eSIM — read our review of Holafly, which works brilliantly for travels in America.

Travel Insurance

Don’t travel to the USA without insurance — hospital treatment can cost tens of thousands of dollars. We recommend checking out our review of SafetyWing, which we use ourselves on longer trips.

How Many Days in Mesa Verde

  • 1 day (minimum): Cliff Palace tour + Mesa Top Loop Road + museum. Doable, but it’s a rush.
  • 1.5–2 days (ideal): Day 1 — Chapin Mesa (Cliff Palace, Balcony House, Mesa Top Loop, museum). Day 2 — Wetherill Mesa (Long House, Step House) + hiking.
  • 3 days (luxury): All of the above + Petroglyph Point Trail, Point Lookout, evening programs, Hovenweep.

FAQ — Frequently Asked Questions About Mesa Verde National Park

Do I Need Tickets for Mesa Verde National Park in Advance?

Not for the park itself — you pay at the gate ($30/vehicle). However, ranger-led tours to Cliff Palace, Balcony House, and Long House require tickets purchased in advance on recreation.gov. During peak season (June–August) they sell out weeks ahead, so book as early as possible. Simple park entry without ranger tours doesn’t require any reservation.

What Are the Opening Hours of Mesa Verde National Park?

The park is technically open 24 hours a day, 365 days a year — but that applies to the road and campgrounds. Individual sites and roads to Chapin Mesa and Wetherill Mesa have seasonal restrictions. The visitor centre is typically open from 8:00 AM to 5:00 PM (longer in season). The road to Wetherill Mesa is usually open May–September, typically 8:00 AM to 5:00 PM. Always check current hours on the NPS website.

Can You Do Mesa Verde in One Day?

Yes, but you’ll only see the basics. In one full day you can manage a ranger-led tour of Cliff Palace, Mesa Top Loop Road, and the museum. You won’t have time for Balcony House, Wetherill Mesa, or hiking. If possible, plan for at least 1.5 days — you won’t regret it.

Can I Visit Cliff Dwellings Without a Ranger-Led Tour?

Some of them, yes. Mesa Top Loop Road offers overlooks of cliff dwellings from the opposite canyon rim (without going inside). Step House on Wetherill Mesa is self-guided. Far View Sites are freely accessible. However, Cliff Palace, Balcony House, and Long House are accessible ONLY with a ranger-led tour — and those are the ones truly worth seeing.

Is Mesa Verde Suitable for Children?

Yes, but with common sense. Children usually love the cliff dwellings — climbing ladders, crawling through tunnels, stories about ancient people. The Cliff Palace tour is manageable for children from about age 6 without problems. I’d recommend Balcony House for ages 8–10+ due to the physical demands and narrow tunnel. Mesa Top Loop Road and the museum are suitable for all ages. A pushchair is practically useless in the park — the terrain is uneven and steps lead to the cliff dwellings.

What Is the Weather Like at Mesa Verde?

Summer (June–August): daytime highs 27–32 °C (80–90 °F), occasional afternoon thunderstorms. Spring and autumn: 15–25 °C (59–77 °F), ideal for hiking, but mornings and evenings can drop to around 5 °C (41 °F). Winter: snow, temperatures around –5 to 5 °C (23–41 °F), most sites closed. The altitude (2,000–2,600 m / 6,500–8,500 ft) means the sun burns more than you’d expect and temperatures drop rapidly after sunset.

Is There a Downloadable Map of Mesa Verde National Park?

Yes. The NPS offers a free printed map at the park entrance and a digital version for download on their website (nps.gov/meve). I recommend downloading an offline map in Google Maps before you arrive — mobile signal in the park is minimal. The ranger at the entrance will also give you the Mesa Verde Guide newspaper with a current map, opening times, and ranger talk schedule.
Mesa Verde is a place that hits you differently than the classic scenic national parks. It’s not just about views and photos — it’s about standing in a space where centuries ago people lived who managed to build something incredible with their bare hands and minimal tools. And then they simply left.
When you stand at Cliff Palace and the ranger tells you that the last inhabitants departed sometime around 1285 and nobody knows exactly why, you’ll get goosebumps. And that’s exactly the feeling that makes Mesa Verde worth the journey. ☺️

Tips and Tricks for Your Vacation

Don’t Overpay for Flights

Search for flights on Kayak. It’s our favorite search engine because it scans the websites of all airlines and always finds the cheapest connection.

Book Your Accommodation Smartly

The best experiences we’ve had when looking for accommodation (from Alaska to Morocco) are with Booking.com, where hotels, apartments, and entire houses are usually the cheapest and most widely available.

Don’t Forget Travel Insurance

Good travel insurance will protect you against illness, accidents, theft, or flight cancellations. We’ve had a few hospital visits abroad, so we know how important it is to have proper insurance arranged.

Where we insure ourselves: SafetyWing (best for everyone) and TrueTraveller (for extra-long trips).

Why don’t we recommend any Czech insurance company? Because they have too many restrictions. They set limits on the number of days abroad, travel insurance via a credit card often requires you to pay medical expenses only with that card, and they frequently limit the number of returns to the Czech Republic.

Find the Best Experiences

Get Your Guide is a huge online marketplace where you can book guided walks, trips, skip-the-line tickets, tours, and much more. We always find some extra fun there!
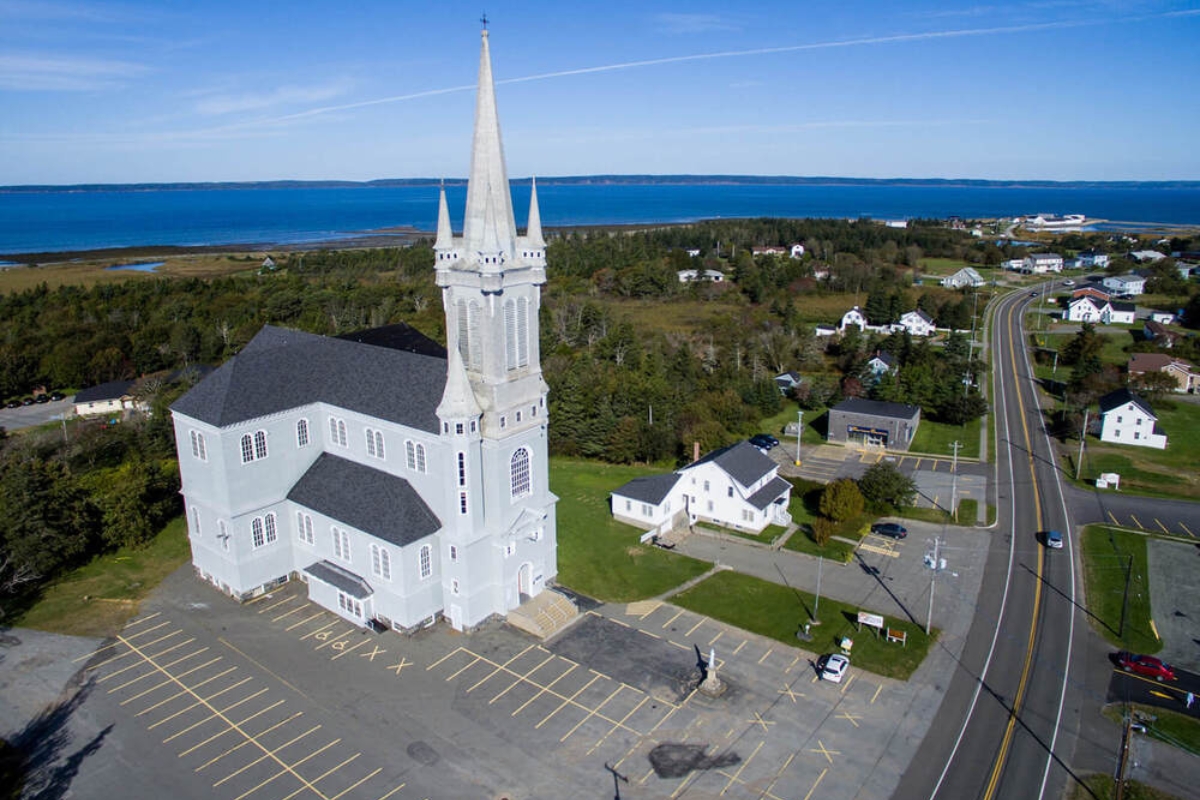
Lake Louise, Canada: 11 Best Things to See and Do + Practical Guide

TL;DRLake Louise, in Banff National Park (Alberta), is famous for its turquoise water beneath the Victoria Glacier, with nearby Moraine Lake and the Valley of Ten Peaks close by. Add in the hike to the Lake Agnes Tea House and Plain of Six Glaciers, Johnston Canyon, and the 232 km Icefields Parkway up to Jasper, and you’ve got plenty to fill an itinerary. Give it 2–3 days, ideally 4–5. June to September is best for that turquoise colour, while September and October bring golden larches and fewer crowds. It’s about 2 hours’ drive from Calgary and 40 minutes from Banff itself — you’ll need a car, though since 2023 Moraine Lake is only reachable by the Parks Canada shuttle. You’ll need a Parks Canada Discovery Pass to get into the park. Accommodation in Lake Louise starts at 450–530 CAD a night, while the luxury Fairmont Chateau Lake Louise comes in from 1,000 CAD a night.

You know when someone tells you “you absolutely have to see this” and you secretly think “yeah, yeah, just another overhyped destination”? That’s exactly how I felt about Lake Louise Canada. The internet is flooded with those perfect shots of a turquoise lake framed by snow-capped mountains, and I was convinced it was all about the right filter and a clever angle. But then I saw it for the first time with my mum — it was late summer and it was actually snowing at Lake Louise (yes, that can happen), and it was absolutely perfect. 😅

Lake Louise in Canada is simply a place where nature showed off everything it’s got — and then added a little more. The colour of the water is so unreal that your brain refuses to believe it’s genuine. It’s not a filter, it’s not Photoshop — it’s glacial dust that turns an ordinary mountain lake into something that looks like spilled turquoise ink.

We first visited Lake Louise during our road trip across western Canada, and later Lukáš and I actually lived here while working as mountain guides. There are very few corners of this area we haven’t explored… That’s why I sat down and put together this — a complete guide with 11 best things to see and do at Lake Louise, where to stay, how much it all costs, and what to watch out for so you can enjoy it stress-free.

TL;DR

  • Lake Louise sits in Banff National Park, Alberta — about 2 hours’ drive from Calgary and 40 minutes from the town of Banff. A car is essential.
  • Best time to visit is June to September — the turquoise colour is most intense from late June. September and October offer gorgeous golden larches and fewer crowds.
  • The car park at the lake fills up before dawn in summer — plan on using the Parks Canada shuttle bus.
  • Moraine Lake has been accessible only by shuttle since 2023 (no private vehicles!) — book your tickets well in advance.
  • You need a Parks Canada Discovery Pass to enter the park — a day pass costs 10.50 CAD (~€7), an annual pass 72.25 CAD (~€48).
  • Accommodation in Lake Louise is expensive — expect at least 450–530 CAD/night (~€300–€350). The Fairmont Chateau starts from 1,000 CAD/night (~€660).
  • Best hikes: Lake Agnes Tea House (cash only!), Plain of Six Glaciers, Johnston Canyon.
  • Don’t forget bear spray — you’re in bear country.
  • Icefields Parkway from Lake Louise to Jasper is quite possibly the most beautiful road you’ll ever drive.
  • In winter: skiing, ice skating on the frozen lake, and the Johnston Canyon Ice Walk.

When to Visit Lake Louise and How to Get Your Bearings

Lake Louise sits at an elevation of 1,600 metres in the heart of Banff National Park, Alberta. And because we’re in the Canadian Rockies, the weather does whatever it pleases and the seasons couldn’t be more different from one another — quite literally.

Summer (June–September): Peak Season and Turquoise Splendour

Peak season runs from June to September, and it’s the only time you’ll see that famous turquoise colour in its full glory. The colour comes from so-called glacial flour — fine rock dust released by melting glaciers that reflects light and makes the water look like liquid turquoise. The colour reaches its greatest intensity from late June through early September, when the glaciers are melting fastest.

The downside? People. Lots of people. In July and August, Lake Louise is absolutely packed, and the car park at the lake fills up before six in the morning. That’s no exaggeration — we arrived at half past six and it was already full. 😅

If you can swing it, September is the golden sweet spot — the lake is still beautifully turquoise, there are far fewer tourists, and the larch trees start turning golden yellow. The contrast of golden trees against turquoise water is something you’ll never forget.

Autumn (October): Larches and Tranquillity

October is stunning for autumn colours, but bear in mind that many services and the tea houses (Lake Agnes, Plain of Six Glaciers) will have closed for the season. It’s also cooler and the first snow can fall. Moraine Lake Road typically closes around mid-October.

Winter (November–March): Skiing and a Fairy Tale

In winter, Lake Louise transforms into a completely different world — the lake freezes over, gets blanketed in snow, and looks like something straight out of a fairy tale. You can ice skate right on the frozen lake (the Fairmont hires out skates), take on the Ice Walk in Johnston Canyon (frozen waterfalls!) or hit the slopes at Lake Louise Ski Resort, one of the best in Canada.

Winter tyres are mandatory in Alberta from 1 November to 1 April on most mountain roads — and trust me, you’ll need them.

Getting Your Bearings

Lake Louise itself is a tiny village (Village of Lake Louise) on the Trans-Canada Highway (Highway 1), where you’ll find a handful of hotels, a petrol station, a small shop and a few restaurants. The actual lake lies about 5 km up Lake Louise Drive from the village. Moraine Lake is another roughly 14 km along a separate road.

The town of Banff is 57 km to the south (about 40 minutes’ drive) and offers far more restaurants, shops and nightlife. Plenty of people base themselves in Banff and drive up to Lake Louise for the day — a perfectly valid strategy, especially if you’re trying to keep costs down. You can find current information about the whole area on the official Banff & Lake Louise Tourism website.

How to Get to Lake Louise: Flights, Car Hire and the Parks Canada Pass

You can’t really get to Lake Louise without a car — well, in theory you can, but in practice, not really. The nearest major airport is Calgary International Airport (YYC), which is about 185 km away (just under 2 hours’ drive) along the well-maintained Trans-Canada Highway.

⚠️ 2026 Update: What’s Changed at Lake Louise

  • Canada Strong Pass — FREE entry: From 19 June to 7 September 2026, entry to Banff National Park (and therefore Lake Louise) is completely free for everyone. Camping during this window gets a 25% discount. If you already have an annual Discovery Pass, it’s automatically extended by 3 months.
  • New prices: Outside the free window, a daily adult park pass costs 12.25 CAD (~€8). Annual Family Discovery Pass: 167.50 CAD (~€110).
  • Moraine Lake — reservation drama: The road to Moraine Lake has been permanently closed to private vehicles since 2023. The only option is the Parks Canada shuttle (12.75 CAD adult, 4 CAD child). Reservations for summer 2026 opened on 15 April at 8:00 AM MDT and instantly saw over 75,000 people in the queue. 40% of capacity was snapped up that day; the remaining 60% is released on a rolling basis 48 hours before each departure. If you miss out, private operators charge up to 550 CAD per trip.
  • Alpine Start Shuttle: For sunrise photographers, there’s a special Parks Canada shuttle departing at 4:00 AM (regular shuttles don’t start until 6:30). It’s absolutely worth it if you want to capture that classic golden hour over the Valley of the Ten Peaks.
  • Lake Louise parking: 36.75 CAD/day, and the car park fills up before 6:00 AM. RVs longer than 6 m or taller than 1.8 m are completely banned from the main Lakeshore car park — they must use the Fairview overflow lot 1.5 km from the lake.
  • Safety — fatal bear attack 2023: In autumn 2023, experienced couple Doug Inglis and Jenny Gusse were killed in the park despite carrying bear spray. Wear your spray in a chest holster (not buried in your rucksack), travel in groups of 3+ people, and make plenty of noise. Bear spray can’t go on a plane — buy it in Canmore or Calgary after you land.
  • BASIN Glacial Waters (new attraction): Fairmont Chateau Lake Louise opened a new thermal spa complex right by the lake in 2025. Access for non-guests is limited; hotel guests enter for free. If you’re considering a luxury night, this new addition makes it even more worthwhile.
  • Larch Madness — golden larches: If you’re aiming for the most photogenic week of the year, it’s 22–30 September 2026, when the larch needles (Larix lyallii) turn gold above Moraine Lake. The Larch Valley + Sentinel Pass trail is absolutely rammed during this week — book your shuttle a month in advance.
  • Lake Louise canoe prices 2026: Fairmont Boathouse rental is 170 CAD + GST/hour (110 CAD for hotel guests). Moraine Lake Lodge canoe is 160 CAD/hour, max 3 people per boat, no dogs.

Flights to Calgary

From the UK, you can fly to Calgary with a single connection — usually via Toronto, Vancouver, or sometimes Amsterdam. Return flights typically range from £400 to £700 depending on the season and how far in advance you book. We like searching on Kiwi.com — it’s our go-to flight search engine and genuinely good deals pop up there from time to time. Airlines like Air Canada, WestJet, and British Airways all serve the London–Calgary route (with connections).

Hiring a Car — a Necessity, Not a Luxury

A car is an absolute must in the Canadian Rockies. Public transport is virtually non-existent (apart from the shuttle buses to the lakes in peak season) and the distances are huge. Automatic transmission is standard in Canada and the roads are in excellent condition.

We always use Booking.com or DiscoverCars.com to compare prices from all the hire companies in one place. Car hire in Calgary starts from about 60–100 CAD/day (~€40–€65) depending on the season and vehicle type. In summer, book as early as possible — prices shoot up fast.

Important: If you’re visiting in winter, make sure your hire car has winter tyres. Most rental companies fit them automatically during winter, but double-check when you book. And fill up whenever you can — petrol stations in the mountains are few and far between, and pricey.

Parks Canada Discovery Pass

To enter Banff National Park (where Lake Louise is located), you need a Parks Canada Discovery Pass. You can buy one online from the Parks Canada website or at the park entrance gate.

  • Day pass: 10.50 CAD/person (~€7)
  • Annual pass: 72.25 CAD/person (~€48) — valid for all national parks in Canada

If you’re planning to spend more than 7 days in the parks (which you almost certainly will on a western Canada road trip), the annual pass is a no-brainer.

Where to Stay in Lake Louise + How Much It Costs

Accommodation in Lake Louise is, how to put this diplomatically… expensive. We’re in one of Canada’s most popular tourist destinations, deep inside a national park, so prices reflect that. But there are ways to soften the blow.

Fairmont Chateau Lake Louise — For the Ultimate Experience

The iconic hotel right on the shore of the lake — the one you’ve seen in every photo. The view from your window is literally the turquoise lake with a glacier behind it. Prices? From 1,000 CAD/night (~€660) in peak season, a bit less in winter. It’s a splurge, but if you want to tick off a bucket-list experience, it’s one you’ll remember for the rest of your life. Even if you don’t stay here, definitely pop in for a coffee or a drink at the lobby bar — the view is the same and a coffee only costs 7 CAD. 😉

Book here: Fairmont Chateau Lake Louise

Mountaineer Lodge — Our Pick

A cosy lodge right in the village of Lake Louise, with a pool, hot tub and breakfast included. The rooms are clean and comfortable — nothing fancy, but everything you need after a day in the mountains. Around 465 CAD/night (~€310) including breakfast. By Lake Louise standards, that’s a reasonable choice.

Find it on Booking.com — always compare prices with the hotel’s official website.

Lake Louise Inn — A Solid Base

The largest hotel in the village, with room types ranging from standard to apartments with a kitchenette. Having a kitchenette is a real bonus if you want to save on food (restaurants in Lake Louise are pricey). Around 530 CAD/night (~€350).

Alternative: Stay in Banff

If you want to save money and don’t mind a 40-minute drive, Banff offers a much wider range of accommodation at better prices — from hotels and hostels to Airbnb. In Banff, you’ll find rooms starting from around 200–300 CAD/night (~€130–€200). Plus, Banff has an incomparably better selection of restaurants and evening entertainment.

How Much Lake Louise Costs — Budget for 3 Nights for Two

ItemPrice in CADPrice in EUR
Accommodation (3 nights, mid-range)1,400~€930
Car hire (3 days incl. fuel)350~€230
Parks Canada Pass (2 people, 3 days)63~€42
Food (3 days, restaurants + some self-catering)300~€200
Activities (gondola, shuttle, canoe)200~€130
Total2,313~€1,530

Yes, it’s not cheap. But it’s one of the most stunning natural landscapes on the planet, so… worth every penny. ☺️

11 Best Things to See and Do in Lake Louise, Canada

Now for the main event — let’s dive into 11 places and experiences you absolutely shouldn’t miss around Lake Louise. From the lake itself to stunning hikes and the most beautiful road in the world. Some of these are full-day affairs, others take just an hour. Mix and match based on the weather, your mood, and how much time you’ve got.

1. Lake Louise — The Turquoise Stunner That Draws Everyone Here

This is the one. The main star. The reason over 4 million people visit each year. And they’re absolutely right to.

Lake Louise sits at 1,600 metres, surrounded by steep mountains and the Victoria Glacier towering above like a film set. The colour of the water shifts throughout the day and across the seasons — from pale blue through turquoise to an almost emerald green. It’s all down to rock flour, a fine sediment released by melting glaciers that reflects sunlight in the most extraordinary way.

A lovely promenade runs along the lakeshore, perfect for strolling and snapping photos from every angle. At one end stands the majestic Fairmont Chateau Lake Louise, and at the other the trails head up into the mountains. For the quintessential experience, hire a canoe — it costs an eye-watering 155 CAD/hour (~€100), but paddling across that turquoise mirror with a glacier looming ahead of you is pure magic. We told ourselves it was a once-in-a-lifetime thing, and we don’t regret a penny.

Practical tip: In summer, arrive either very early in the morning (before 6:00 AM!) or use the Parks Canada shuttle bus from the park-and-ride. The lakeside car park has limited capacity and fills up incredibly fast. Alternatively, come after 4:00 PM when people start heading back.

2. Moraine Lake and the Valley of Ten Peaks — Possibly Even More Beautiful Than Lake Louise

I’ll be straight with you: Moraine Lake might actually be even more beautiful than Lake Louise. I know that sounds mad, but the combination of turquoise water backed by ten mountain peaks (the Valley of Ten Peaks) is absolutely jaw-dropping. This view used to feature on the old Canadian twenty-dollar bill — and rightly so.

Important change since 2023: You can no longer drive to Moraine Lake. Parks Canada introduced a mandatory shuttle system to combat overcrowding. Shuttles run from the Lake Louise Park & Ride every 20 minutes and cost 8 CAD/adult (~€5).

Tickets are booked via the Parks Canada website — 40% of places are released in the spring (Parks Canada announces the exact date each year) and the remaining 60% are released on a rolling basis 2 days in advance at 8:00 AM (Mountain Time). Be at your computer at that exact moment — tickets sell out in minutes. It’s genuinely a scramble. 😅

Once you’re there, head straight for the short Rockpile Trail (300 metres, 5 minutes) — this is the famous viewpoint where all those perfect photos are taken. You’ll find it right by the car park and the view is absolutely breathtaking.

Moraine Lake Road is open from roughly June to mid-October — the exact dates depend on snow conditions.

3. Lake Agnes Tea House — A Hike With the Best Reward

This is probably our favourite hike in the entire Lake Louise area, and honestly one of the best hiking experiences we’ve had in Canada. A gorgeous trail, a mountain lake, and a historic tea house at the end — what more could you want?

The trail starts right at the Fairmont Chateau Lake Louise and runs 3.5 km (one way) with about 400 metres of elevation gain. The path winds through dense forest, past waterfalls, with gradually opening views of Lake Louise below you. After about an hour and a half, you’ll arrive at Lake Agnes — another beautiful turquoise lake — with the Lake Agnes Tea House perched on its shore.

The tea house has been operating since 1901 (!), has no electricity or running water, and all supplies are carried up on people’s backs. They serve teas from around the world, homemade cakes and sandwiches. And here’s the crucial bit — it’s cash only! No cards, no Apple Pay. Make sure you’ve got enough Canadian dollars on you. We nearly didn’t, and Lukáš had to empty every pocket he had. 😅

The tea house is open roughly from June to October (weather dependent), and there’s usually a queue, but it moves fairly quickly. That cup of tea with views of a mountain lake and surrounding peaks is worth every minute of waiting.

4. Plain of Six Glaciers Trail — For Those Who Want More

If Lake Agnes leaves you wanting more (or you’ve got an extra day), the Plain of Six Glaciers Trail is a longer and more challenging alternative that takes you even closer to the glaciers. The trail follows the Lake Louise shoreline and then climbs to a viewpoint overlooking six glaciers at once.

The route is about 5.5 km one way with 365 metres of elevation gain, taking roughly 2 hours. Along the way you’ll come across another historic tea house — the Plain of Six Glaciers Tea House — where you can refuel (again, cash only!). It’s smaller and more intimate than Lake Agnes, and the glacier views from here are absolutely phenomenal.

Both hikes (Lake Agnes and Plain of Six Glaciers) can be combined into one big loop via the Big Beehive saddle — but expect 6–8 hours of walking and you’ll need decent fitness. We did it, and I’ll admit we were in bed earlier than usual that evening. But it was absolutely worth it. ☺️

5. Johnston Canyon — Breathtaking Waterfalls (That Freeze in Winter!)

Johnston Canyon is probably the most popular and most accessible hike in all of Banff National Park. And for good reason — the trail is paved, with walkways bolted to the canyon walls in places, running alongside a beautiful canyon with waterfalls.

From the car park, it’s about 1.1 km to the Lower Falls — an easy stroll that anyone can manage. To the Upper Falls, it’s another 1.6 km and a bit steeper, but still perfectly doable for anyone with reasonable fitness.

The Lower Falls are gorgeous — the water plunges into a narrow gorge and you can walk out along a catwalk close enough to catch a bit of spray. The Upper Falls are even more powerful, and the view from the top is stunning.

In winter, Johnston Canyon becomes a completely different but equally magical experience — the waterfalls freeze solid and create enormous ice walls. You can do a guided Ice Walk (with crampons and headlamps) through the canyon in its winter beauty. It’s one of the most unique winter experiences in Canada.

Tip: Arrive early in the morning or late in the afternoon. Between 10:00 and 15:00, it’s absolutely heaving in summer. The car park is large, but even it fills up.

6. Lake Louise Gondola — Views and (Maybe) Bears

The Lake Louise Gondola (operated by Lake Louise Ski Resort) whisks you up to the ridge of Whitehorn Mountain, where you’ll get panoramic views of Lake Louise, the Valley of Ten Peaks, Bow Valley, and row upon row of Rocky Mountain peaks.

The ride up takes about 14 minutes, and at the top you’ll find a viewing platform, a restaurant and several short trails. And here’s the best bit — the area around the gondola is known as one of the best spots in the park for grizzly bear watching from a safe distance. The bears graze on berries on the slopes below the gondola in summer. We didn’t spot any (typical 😅), but plenty of visitors have better luck.

Tickets cost around 65 CAD/adult (~€43) — not cheap, but the views are phenomenal, and if you’re not keen on strenuous hikes, it’s the most comfortable way to gain some altitude.

More info on the Lake Louise Ski Resort website.

lukas a lucka
Lukáš and Lucie recommend
Where to Stay in Lake Louise
6 accommodations — wellness hotels, hotels and other lodging options
⭐ TOP CHOICE ⭐ Luxury
Fairmont Chateau Lake Louise
Iconic hotel right on the lakeshore with views of the turquoise lake and glacier in the background. In 2025, the new thermal complex BASIN Glacial Waters opened. The most luxurious accommodation in the area.
★★★★ from 1,000 CAD/night (~€570)
Check availability
🏨 Hotel
Mountaineer Lodge
Cozy lodge right in Lake Louise village, with a pool, hot tub and breakfast included. Rooms are clean and comfortable, everything you need after a day in the mountains. You can find it on Booking.com.
★★★★ approx. 465 CAD/night (~€265) including breakfast
Check availability
🏨 Hotel
Lake Louise Inn
The largest hotel in the village with several types of rooms from standard to apartments with kitchenette. A kitchenette is ideal if you want to save money on food.
★★★★ approx. 530 CAD/night (~€300)
Check availability
🏔️ Mountain
Num-Ti-Jah Lodge
Historic lodge by Bow Lake on the Icefields Parkway, famous in photos for its red roof. You can enjoy coffee here with views of Bow Glacier.
★★★★ Check prices
Check availability
🏡 Hostel
HI Lake Louise
Hostel with Bill Peyto’s Café, which offers the cheapest food in Lake Louise — simple soups, sandwiches and pizza. Ideal for a traveler’s budget.
★★★★ Check prices
Check availability
🔍 Search
View all accommodations in Lake Louise
Explore all available accommodation options in Lake Louise and find the best one according to your preferences and budget.
★★★★ Compare prices
Check availability

7. Bow Lake — A Hidden Gem on the Way to Icefields Parkway

Bow Lake lies about 40 km north of Lake Louise at the start of the famous Icefields Parkway, and it’s one of those places most people drive right past because they’re in a rush to reach Peyto Lake. Big mistake.

The lake is stunning, backed by mountains and the Bow Glacier, and crucially — there are far fewer people here than at Lake Louise or Moraine Lake. You can wander along the shore, sit on the rocks and simply soak it all in. On the lakeshore you’ll find the historic Num-Ti-Jah Lodge (the one with the iconic red roof you’ve seen in photos), where you can grab a coffee.

For more active travellers, a trail leads from the lake to Bow Glacier Falls — a beautiful waterfall about 4.5 km from the car park (one way). The elevation gain is gentle and the scenery is gorgeous.

8. Peyto Lake — The Fox-Shaped Lake (Or Wolf, Depending on Your Imagination)

Peyto Lake is arguably the most photogenic lake in the Canadian Rockies — and that’s really saying something. The lake has an incredibly intense turquoise colour, and from the Bow Summit viewpoint (the highest point on the Icefields Parkway at 2,088 m), it looks like a lake shaped like a fox. Or a wolf. Depends who you ask — Lukáš and I argued about it the entire drive back. 😁

From the car park, it’s only about a 10-minute walk along a paved path to the viewpoint — so even if you’re not into hiking, you can manage this one. The view is absolutely spectacular, and it’s one of those places where you truly understand why the Rockies are called Canada’s treasure.

Tip: Peyto Lake is about 40 km north of Lake Louise and fits perfectly as a stop along the Icefields Parkway. Head to Bow Lake in the morning, then Peyto Lake, and carry on northward.

9. Icefields Parkway — The Most Beautiful Road in the World (No Exaggeration)

The Icefields Parkway (Highway 93 North) is a 232 km road connecting Lake Louise to the town of Jasper, and I’m not afraid to say it’s the most beautiful road we’ve ever driven. And we’ve driven a fair few.

The road cuts through the heart of the Rockies, past glaciers, turquoise lakes, waterfalls and towering peaks. At every turn you’ll want to pull over and take photos. Without stops, the drive takes about 3 hours, but realistically plan for a full day because you’ll be stopping every few kilometres.

Key stops along the way (heading north from Lake Louise):

  • Bow Lake (km 36)
  • Peyto Lake / Bow Summit (km 41)
  • Mistaya Canyon (km 72) — a stunning narrow gorge, 15 minutes from the car park
  • Saskatchewan River Crossing (km 77) — the only petrol station on the entire route! Fill up!
  • Columbia Icefield (km 127) — a massive glacier with Ice Explorer tours onto the ice
  • Athabasca Falls (km 200) — powerful waterfalls
  • Jasper (km 232)

Important warning: Saskatchewan River Crossing is the only petrol station on the entire 232 km route and it closes in winter. Fill up your tank in Lake Louise. Seriously.

If you’re planning a full road trip including the Icefields Parkway, check out our detailed western Canada road trip itinerary, where we’ve mapped out the route day by day.

10. Lake Louise Ski Resort — A Winter Paradise for Skiers

If you’re visiting in winter, Lake Louise Ski Resort is one of the largest and most scenic ski areas in North America. With 4,200 acres of skiable terrain, 145 runs and an average of 360 cm of snow per year, it’s a paradise for skiers and snowboarders alike.

What makes Lake Louise Ski Resort truly special isn’t just its size — it’s the views. You’re skiing with a panorama of the Valley of Ten Peaks, Bow Valley and dozens of snow-covered summits. It’s a completely different league to your average Alpine resort.

A day lift pass starts from 135 CAD (~€90) and the season runs roughly from November to May. More info at skilouise.com.

And even if you don’t ski — in winter you can ice skate on the frozen Lake Louise (the Fairmont hires out skates), go snowshoeing, or simply enjoy the peace and quiet of the snow-covered mountains.

11. The Town of Banff — Everything Lake Louise Is Missing

Banff sits just 57 km (40 minutes’ drive) from Lake Louise and makes a perfect base or complement to your visit. Where Lake Louise is a tiny village with a handful of services, Banff is a lively mountain town packed with restaurants, bars, shops and galleries.

Things definitely worth checking out in Banff:

  • Banff Gondola on Sulphur Mountain — panoramic views over the entire area
  • Banff Upper Hot Springs — hot springs with mountain views (perfect after a day in the hills!)
  • Bow Falls — small but photogenic waterfalls right in town
  • Bear Street and Banff Avenue — the main strips with restaurants, shops and galleries

Banff is also a brilliant spot for dinner — the restaurant selection is incomparably better than Lake Louise and the prices are a touch more reasonable.

If you’re planning to visit other Canadian destinations too, such as Niagara Falls, Banff makes an excellent starting point for planning a bigger trip.

Where to Eat in Lake Louise: A Guide for Hungry Travellers

I’ll be honest — Lake Louise isn’t exactly a food lover’s paradise. The restaurant selection is limited, prices are high, and quality is… variable. But there are a few gems to be found, and you can always head to Banff for more options.

Laggan’s Mountain Bakery & Delicatessen

This is probably the most popular spot for breakfast and lunch in all of Lake Louise, and for good reason. A small bakery right in the village serving freshly baked bagels, sandwiches, cakes and excellent coffee. The portions are generous, prices are reasonable by Lake Louise standards (a sandwich runs about 15 CAD / ~€10), and the vibe is pleasantly laid-back.

Expect a queue — Laggan’s is popular and the space is small. We waited about 15 minutes, but the sandwich was absolutely worth it.

Lake Louise Station Restaurant

A restaurant housed in a historic railway station from 1910 — gorgeous interior with original wooden beams and views of the tracks. They serve steaks, fish, burgers and a solid selection of Canadian wines. Prices are on the higher side (mains 30–50 CAD / ~€20–€33), but the atmosphere and quality match.

Bill Peyto’s Café (HI Lake Louise)

The cheapest option in Lake Louise — a café inside the HI Lake Louise hostel. They serve simple dishes (soups, sandwiches, pizza) at reasonable prices. If you’re on a budget and don’t need fine dining, it’s a solid choice.

Restaurants at the Fairmont Chateau

The Fairmont Chateau has several restaurants ranging from formal (Fairview Bar & Restaurant with a tasting menu) to casual (Alpine Social with pizza and burgers). Prices match the five-star hotel surroundings (mains from 40 CAD / ~€26 upwards), but I’d recommend at least one dinner here — eating with a view of the turquoise lake at sunset is simply an experience you won’t forget.

Money-saving tip: If your accommodation has a kitchenette (Lake Louise Inn offers apartments), stock up at the Village Market in the village. The selection is limited and prices are higher than in town, but you’ll save compared to eating out. Do a bigger shop in Calgary or Banff before you head up.

Practical Tips Before You Head to Lake Louise

A few things we learned the hard way that’ll save you time, money and frustration.

Parking and the Shuttle System

In summer, parking at Lake Louise is an absolute nightmare. The lakeside car park fills up before 6:00 AM and no more cars are allowed in. Parks Canada runs a shuttle bus from the park-and-ride in the village of Lake Louise, which runs regularly and is by far the most hassle-free way to reach the lake.

Moraine Lake has been accessible by shuttle only since 2023 — no private vehicles at all. Book your tickets on the Parks Canada website as early as possible.

Bear Spray

You’re in bear country — Banff National Park is home to both black bears and grizzlies. You can buy bear spray (pepper spray for bears) at any outdoor shop in Banff or Lake Louise for around 50 CAD (~€33). On some trails, Parks Canada recommends hiking in groups of at least 4.

Bears are magnificent creatures, but respect them. Make noise on the trail (talk, clap, carry a bell), don’t store food in your car (bears can open doors), and never approach a bear. Remember that bear spray can’t be taken on a plane — buy it after you arrive in Canmore or Calgary.

What to Pack

  • Hiking boots — an absolute must. The trails are rocky and sometimes slippery. If you need a pair, check out our hiking boot recommendations.
  • Layers — even in summer, the mountains can be chilly (5°C in the morning, 25°C in the afternoon).
  • Waterproof jacket — afternoon thunderstorms are common in the mountains.
  • Suncream and sunglasses — UV radiation is significantly stronger at 1,600 m.
  • Cash in CAD — for the trail tea houses (Lake Agnes, Plain of Six Glaciers).
  • Bear spray (see above).

More packing tips in our article on how to pack everything into carry-on luggage.

Fuel and Driving

  • Lake Louise has one petrol station — fill up whenever you can.
  • The Icefields Parkway has one petrol station (Saskatchewan River Crossing) — closed in winter!
  • Winter tyres are mandatory 1 Nov – 1 Apr on mountain roads.
  • Book your car via DiscoverCars.com as early as possible — summer prices are significantly higher.

Mobile Data and Internet

In Lake Louise and Banff, mobile signal is decent, but on the trails and along the Icefields Parkway, signal is virtually non-existent. Download offline maps (Google Maps, Maps.me) before you set off. For mobile data in Canada, we recommend an eSIM from Holafly — it works brilliantly and you won’t need to fuss with a local SIM card.

Travel Insurance

Do not go to Canada without travel insurance. Healthcare for foreigners in Canada is extremely expensive — a broken leg on a hike could cost you tens of thousands of dollars. We use SafetyWing, which covers outdoor activities including hiking.

FAQ — Frequently Asked Questions About Lake Louise

Here are answers to the most common questions I get from readers planning a trip to Lake Louise.

How do you pronounce Lake Louise?

It’s pronounced “layk loo-EEZ” (Lake Louise). The lake was named after Princess Louise Caroline Alberta, Duchess of Argyll and daughter of Queen Victoria. The entire province of Alberta is also named after her.

Why is the water in Lake Louise turquoise?

The turquoise color comes from what’s called rock flour or glacial flour — fine particles of rock that glaciers grind up as they move. These microscopic particles get into the water and reflect the blue and green wavelengths of sunlight. The color is most intense from late June through September, when the glaciers are melting the most.

When is the best time to visit Lake Louise?

For the turquoise color and best hiking conditions: late June through September. For golden larches and fewer crowds: September to early October. For skiing and winter experiences: December through March. I’d avoid May and the first half of June — the snow is melting, trails tend to be muddy, and the lake doesn’t have that famous color yet.

Do I need a car to visit Lake Louise?

Practically speaking, yes. There’s a shuttle bus from Calgary to Lake Louise (Brewster Express), but once you arrive you’re dependent on the Parks Canada shuttle system, which only runs during peak season and only goes to the lakes. To visit Johnston Canyon, Icefields Parkway, and other nearby spots, a car is essential.

Can I drive my own car to Moraine Lake?

As of 2023, no. Access to Moraine Lake is only possible via Parks Canada shuttle bus. Tickets cost 8 CAD per adult and must be reserved in advance on the Parks Canada website. The shuttle runs from the park-and-ride lot in Lake Louise village every 20 minutes.

Is Lake Louise safe? What about bears?

Lake Louise is safe, but we’re in the wilderness. Both black bears and grizzly bears live in Banff National Park. Carry bear spray, hike in groups, make noise on the trail, and follow Parks Canada guidelines. Bears usually avoid people, but it’s good to be prepared.

How many days do I need for Lake Louise?

At least 2–3 days — one day for Lake Louise itself plus Lake Agnes Tea House, one day for Moraine Lake plus Johnston Canyon, and possibly one day for Icefields Parkway. If you want more hikes and a slower pace, 4–5 days is ideal. Combine it with a stay in Banff for the complete experience.

I hope this guide helps you plan an unforgettable trip to Lake Louise! If you’re planning a longer Canadian adventure, don’t forget to check out our complete western Canada road trip itinerary, with a day-by-day route including all our accommodation, restaurant and activity recommendations.

Got a question or a tip of your own? Drop me a comment below — I’m always happy to help! ☺️

Tips and Tricks for Your Vacation

Don’t Overpay for Flights

Search for flights on Kayak. It’s our favorite search engine because it scans the websites of all airlines and always finds the cheapest connection.

Book Your Accommodation Smartly

The best experiences we’ve had when looking for accommodation (from Alaska to Morocco) are with Booking.com, where hotels, apartments, and entire houses are usually the cheapest and most widely available.

Don’t Forget Travel Insurance

Good travel insurance will protect you against illness, accidents, theft, or flight cancellations. We’ve had a few hospital visits abroad, so we know how important it is to have proper insurance arranged.

Where we insure ourselves: SafetyWing (best for everyone) and TrueTraveller (for extra-long trips).

Why don’t we recommend any Czech insurance company? Because they have too many restrictions. They set limits on the number of days abroad, travel insurance via a credit card often requires you to pay medical expenses only with that card, and they frequently limit the number of returns to the Czech Republic.

Find the Best Experiences

Get Your Guide is a huge online marketplace where you can book guided walks, trips, skip-the-line tickets, tours, and much more. We always find some extra fun there!
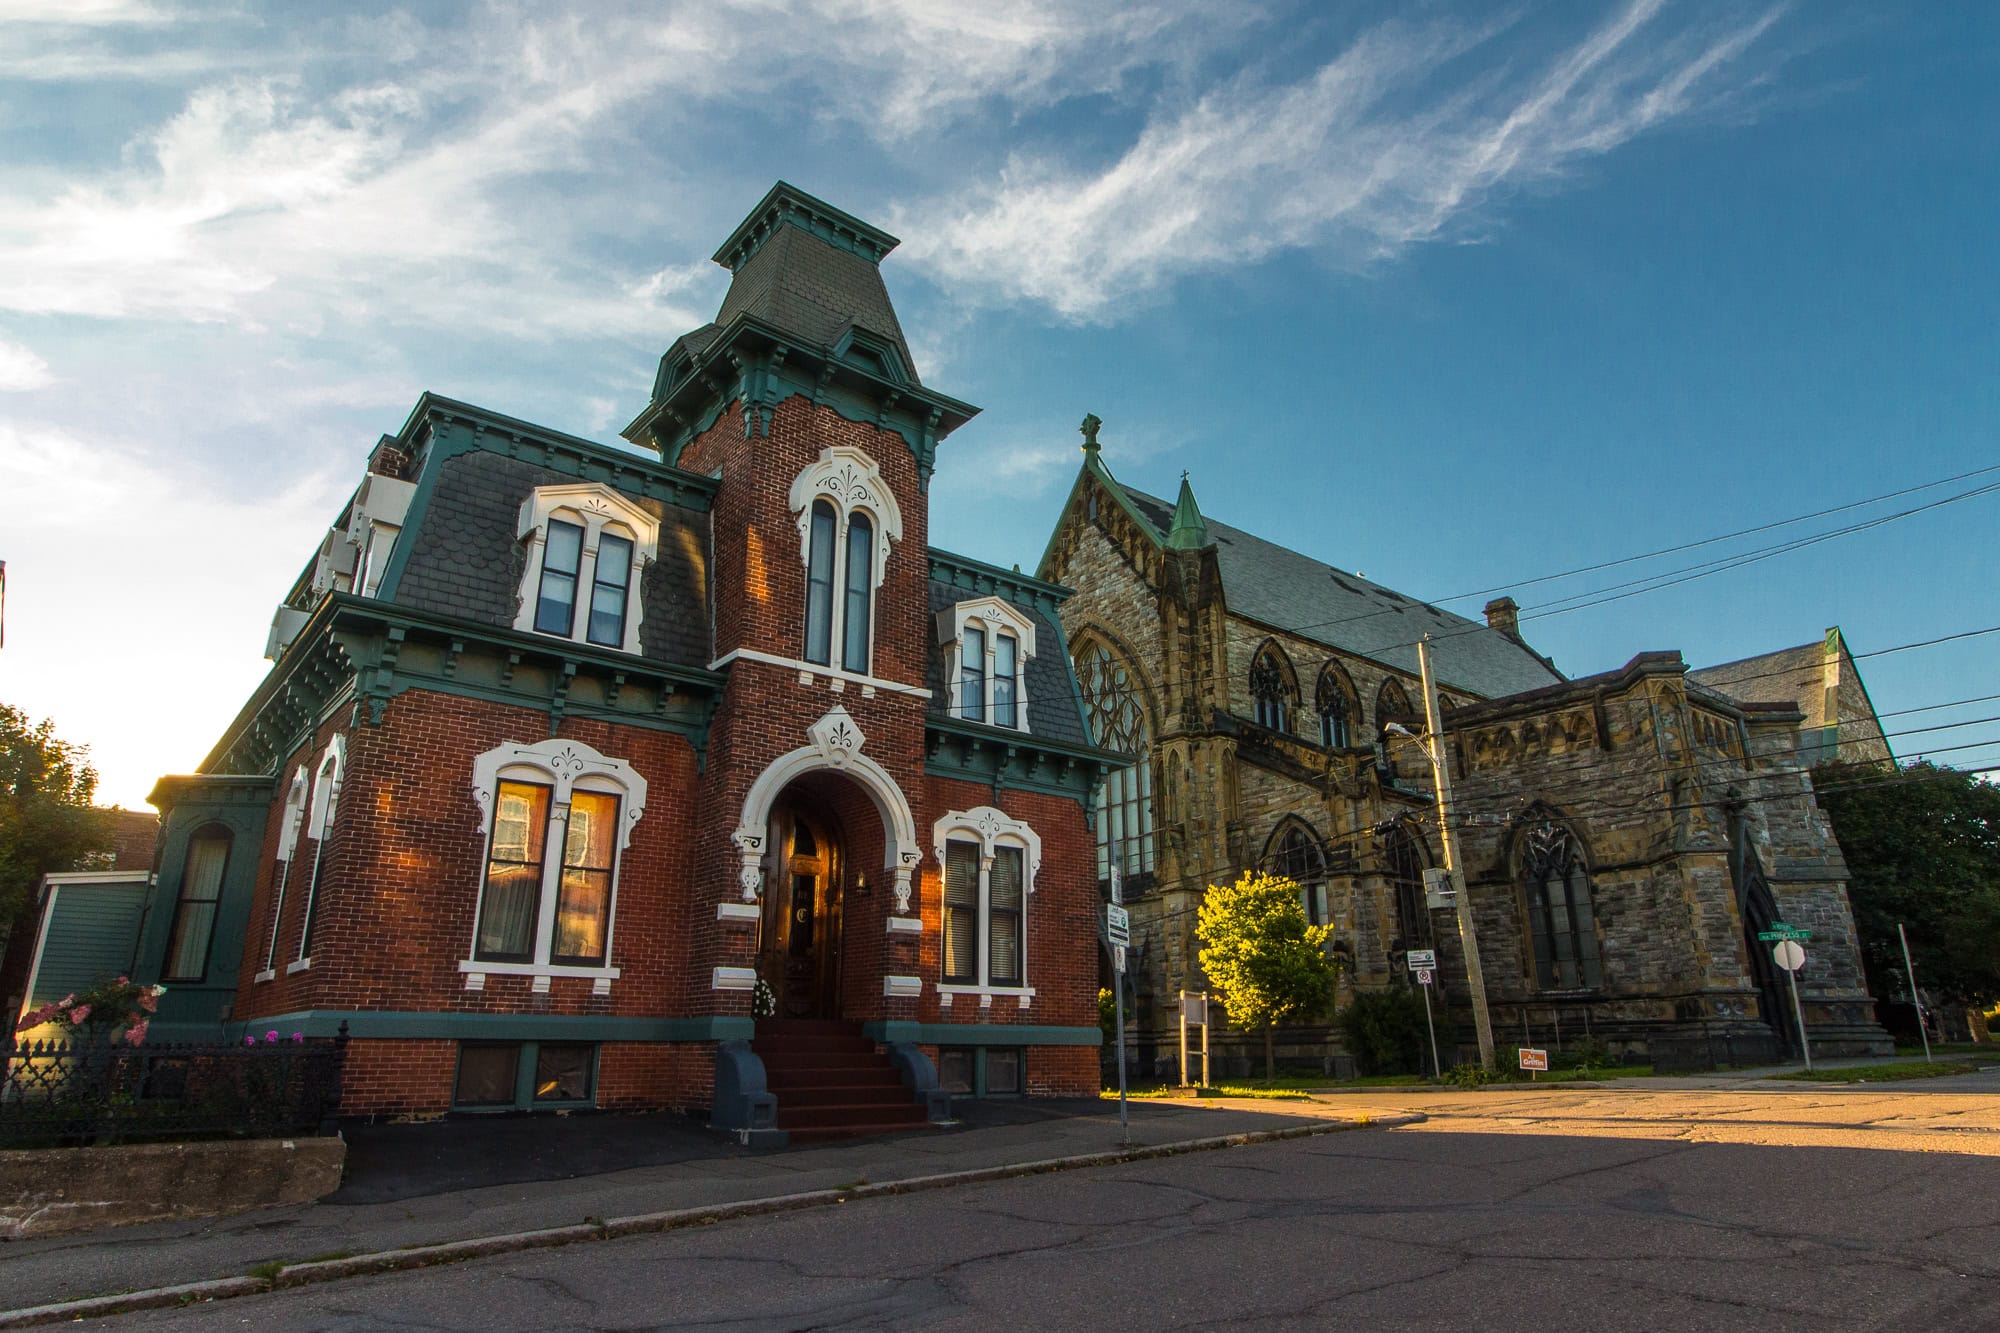
Niagara Falls Canada: 19 Tips on What to See, Do & Watch Out For

TL;DRThe best experience at Niagara Falls is the Niagara City Cruises boat trip, taking you right into the heart of the “Horseshoe” Falls. September to early October is the ideal time to come, with smaller crowds and pleasant warmth. The piece rounds up 19 specific tips, including Journey Behind the Falls, White Water Walk, Skylon Tower, and the quieter Dufferin Islands and Niagara Glen Nature Reserve. For food, skip overpriced Clifton Hill and head instead to the Flying Saucer bistro, or to the elegant town of Niagara-on-the-Lake, 20 minutes away. Watch out for “TIF” or “DMF” charges on restaurant bills — they’re not compulsory, and you can ask to have them removed. One day is enough to cover the main sights, and for parking, the cheap Rapidsview lot with its shuttle bus is well worth it.

“It roars like Niagara.” That phrase is so deeply embedded in popular culture that people sometimes forget the place actually exists. For many, Niagara Falls is just that kitschy postcard image from a geography textbook or a scene from a Marilyn Monroe film. You might think: “Sure, it’s famous, but it’s probably just a tourist trap full of noise and plastic souvenirs.” Honestly, I felt the same way. It never even crossed my mind to add Niagara Falls Canada to my travel bucket list, even though I’d already been across the Atlantic a few times.

When we stood beneath them, surrounded by that thundering mist, I understood why this is one of the wonders of the world. Right there, in the middle of that tourist frenzy, I fell in love with the incredible Canadian warmth when complete strangers helped us figure out the map. Since then, I kept coming back to Canada, eventually living there for a year. To make sure your experience is just as powerful — and you don’t leave feeling ripped off — I’ve put together 19 tips on what to see, do and watch out for at Niagara Falls, so you don’t pay more than you have to.

Niagara Falls from the Canadian side: What to see and do at Niagara Falls

TL;DR

  • Best experience: A boat cruise with Niagara City Cruises right into the heart of the Horseshoe Falls. You’ll be soaked, but happy.
  • When to go: September is the ideal sweet spot — crowds thin out, it’s warm, and the grape harvest begins.
  • Watch out for: Check your restaurant receipts. Charges labelled “TIF” or “DMF” are not government taxes — they’re voluntary surcharges. Ask to have them removed.
  • Where to eat: Escape the neon strip of Clifton Hill. Grab a cheap meal at the quirky Flying Saucer diner, or drive to the elegant town of Niagara-on-the-Lake.
  • Secret tip for drivers: Don’t pay extortionate parking fees by the water. Head to Rapidsview Parking Lot (often free or cheap) and take the shuttle bus.

When to Visit the Thundering Water

Timing is absolutely crucial at Niagara Falls. The waterfalls aren’t going anywhere, but your experience can vary dramatically depending on when you arrive. If I could recommend the ideal time, circle September or early October in your calendar. It’s the best period — the main summer crowds of families with children are gone, but the sun still has warmth and you can walk around in just a hoodie. Plus, the surrounding wine region is in full harvest mode, which gives the whole area a wonderful atmosphere.

Summer (July and August) is madness. The falls are running at full power, boats are constantly coming and going, and the warm spray feels lovely in the heat — but be prepared for crushing crowds and accommodation prices that’ll make your eyes water. Winter, on the other hand, is for loners. In January it’s quiet, cheap, and the frozen landscape looks like something from a fairy tale. The catch? Major attractions like the boats don’t run, and standing by the river in minus ten requires seriously warm clothing.

Niagara Falls Canada

Where to Stay: Views vs. Budget

Accommodation here is a bit of a puzzle. There’s a huge selection, but prices can bite. If you want to truly impress your partner and budget isn’t a concern, look for rooms labelled “Fallsview.” Hotels like Embassy Suites or Marriott offer rooms where you wake up in the morning and that wall of water is right before your eyes. It’s pricey, but the feeling is priceless. Just watch the wording when booking — “city view” or “river view” is not the same thing.

If you’d rather spend that money on food and drink (which I highly recommend), stay further from the falls. Lundy’s Lane is full of motels that are clean, cost a fraction of the price, and the WEGO tourist bus will get you to the centre. There are also decent hostels for younger travellers. You can browse options on Booking.com.

Important tip: Always check the parking price at your hotel. In the centre, they can easily charge $50 per night. Sometimes it’s better to leave the car in a public car park and walk.

Accommodation tip: Marriott Niagara Falls Fallsview Hotel & Spa – One of the highest-rated hotels with a direct view of the falls. Fallsview rooms offer an unforgettable panoramic view straight from your bed.

Niagara Falls
Niagara Falls

Adrenaline and Water: Must-Do Experiences

Watching from the shore is fine, but you’ll only feel the true power when you get closer. Here are the activities that are worth every penny.

1. A Boat Ride to Hell and Back

This is an absolute must. Niagara City Cruises takes you in red ponchos by boat right into the heart of the Horseshoe Falls. The roar is deafening, water sprays everywhere, and you feel like you’re in the middle of a storm. You can conveniently book everything through GetYourGuide.

Journey Behind the Falls at Niagara Falls, booked through GetYourGuide

2. Journey into the Rock

The Journey Behind the Falls attraction (link below) takes you down by lift and through old tunnels right behind the curtain of water. You can’t see anything but white darkness, but you can feel the entire rock trembling under the force of the water.

3. Lunch in the Clouds (and a Free Viewpoint)

Skylon Tower offers a stunning view. The observation deck costs money, but here’s my trick: Book lunch at their revolving restaurant. The food is pricier, but admission to the observation deck is then included in your meal. In the end, it works out about the same as a ticket, but you get a great lunch on top of it.

4. Power Station and Tunnel

A newer attraction is the tour of the old Niagara Parks Power Station. It’s a beautiful building, and you take a lift down into a deep tunnel that opens out at the river’s surface with a unique view of the falls.

5. The Wild Walk

White Water Walk is a wooden boardwalk along the river, but at the point where the water has already left the falls and rushes through a narrow gorge. These are some of the wildest rapids in the world and it’s a mesmerising sight.

Escape the Crowds: Quiet Spots Near Niagara

When you’ve had enough of the masses, here are a few places where you can hide away.

6. Islands of Calm

Just a short walk from the main centre lies Dufferin Islands. It’s a cluster of small islands and footbridges where locals come for picnics. Peace, ducks, tranquillity.

7. Hike into the Gorge

Niagara Glen Nature Reserve is the place for those who love hiking. You descend stairs down to the river, where trails wind through ancient forest among enormous boulders. You won’t find selfie-stick crowds here.

8. Butterfly Therapy

If it’s raining or cold, take shelter in the Butterfly Conservatory. It’s a huge greenhouse full of tropical plants and thousands of butterflies. A balm for the soul.

Skylon Tower at Niagara Falls
lukas a lucka
Lukáš and Lucie recommend
Where to stay at Niagara Falls
2 accommodations — wellness hotels and other lodging options

How Not to Get Ripped Off on Food

Be on your guard here. Central Niagara is a minefield of tourist traps.

9. Watch Out for the Hidden “Tax”

Check your restaurant receipt. If you see a line item for TIF, DMF or Luxury Fee, know that it’s not a government tax. It’s a surcharge that goes straight into the owner’s pocket. Politely ask for it to be removed — it’s not mandatory!

10. Avoid Clifton Hill

This is the street that looks like a funfair. Neon lights, overpriced attractions and fast food joints charging triple the normal rate. Go and have a look for the atmosphere, but don’t eat there.

11. Breakfast in a UFO

For a cheap and fun breakfast, try the Flying Saucer. The restaurant looks like a flying saucer and they serve honest food at normal prices.

12. A Proper Dinner

If you want something special, try AG Inspired Cuisine. They cook with ingredients from their own farm and it’s a true gastronomic experience.

Escape to Elegance: Niagara-on-the-Lake

When the falls wear you out, hop in the car or catch a bus and drive 20 minutes downstream.

Niagara-on-the-Lake, a charming town near Niagara Falls

13. A Town Straight from a Film

You’ll arrive at Niagara-on-the-Lake. It’s the exact opposite of the falls — Victorian houses, flowers, horse-drawn carriages and peace. Perfect for a coffee and a stroll.

14. Cycling Through Vineyards

The entire area is packed with vineyards. Hire a bike and ride from one to the next — it’s flat and absolutely gorgeous.

15. Liquid Gold

You absolutely must try (and buy as a souvenir) Icewine — ice wine. Canada is a world leader in producing it. It’s sweet, expensive, but totally worth it.

16. Theatre

If you love culture, check out the Shaw Festival. They stage world-class theatre here.

You can also walk across the bridge to the USA

Practical Tips to Finish

17. Pop Over to the USA

Got your passport? Walk across Rainbow Bridge to the American side. There’s a beautiful state park, much more greenery, and you can get closer to the smaller falls. UK citizens can enter the US under the Visa Waiver Program (ESTA), so make sure you have that sorted before your trip.

18. Getting There from Toronto

You can easily get here by train or GO Transit bus from Toronto. You’ll save yourself the stress of motorway traffic jams. If you’re flying in from the UK, Toronto Pearson International Airport is the main gateway, with direct flights from London Heathrow on several airlines.

19. Parking Hack

If you’re driving, don’t pay for the expensive car parks near the water. Head to Rapidsview Parking Lot. During the season, it’s often cheaper or free, and a shuttle bus runs from there directly to the falls.

Niagara Falls may be a commercial circus, but the nature beneath it all is so powerful that it overshadows everything. You just need to know where to look. Have a wonderful trip!

If you’re planning a longer trip around Canada, check out our other articles: what to see in Vancouver, tips for Calgary, a guide to Banff National Park or our complete Western Canada road trip itinerary.

Frequently Asked Questions (FAQ)

Will I get very wet on Niagara City Cruises?

Yes, count on it. Even though you’ll get a poncho, the mist is everywhere and the wind blows it in from all sides. Your shoes will likely be soaked, so in summer sandals are ideal, or bring a spare pair of socks.

Is the Canadian or American side better?

For that iconic panoramic view — the “wow” moment where you see all three waterfalls at once — the Canadian side is clearly better. The American side, however, is much greener, quieter, and you can get closer to the smaller falls. Ideally, see both.

Do I have to pay TIF/DMF fees in restaurants?

No, you don’t. These charges look official, but they’re not government taxes. They’re contributions towards “tourism development” and are voluntary. If you ask, the staff will remove them from your bill. Don’t be afraid to speak up — even locals do it.

How much time should I allow for a visit?

One day is enough for the essentials — seeing the falls, taking the boat cruise and walking the promenade. But if you also want to visit Niagara-on-the-Lake and taste some wine, I’d recommend staying overnight.

How can I save on admission fees?

If you want to see multiple attractions (the boat, Journey Behind the Falls, White Water Walk), buy the Niagara Falls Adventure Pass. It’s a bundle that works out significantly cheaper than buying individual tickets, and it also includes a pass for the local WEGO buses.

Tips and Tricks for Your Vacation

Don’t Overpay for Flights

Search for flights on Kayak. It’s our favorite search engine because it scans the websites of all airlines and always finds the cheapest connection.

Book Your Accommodation Smartly

The best experiences we’ve had when looking for accommodation (from Alaska to Morocco) are with Booking.com, where hotels, apartments, and entire houses are usually the cheapest and most widely available.

Don’t Forget Travel Insurance

Good travel insurance will protect you against illness, accidents, theft, or flight cancellations. We’ve had a few hospital visits abroad, so we know how important it is to have proper insurance arranged.

Where we insure ourselves: SafetyWing (best for everyone) and TrueTraveller (for extra-long trips).

Why don’t we recommend any Czech insurance company? Because they have too many restrictions. They set limits on the number of days abroad, travel insurance via a credit card often requires you to pay medical expenses only with that card, and they frequently limit the number of returns to the Czech Republic.

Find the Best Experiences

Get Your Guide is a huge online marketplace where you can book guided walks, trips, skip-the-line tickets, tours, and much more. We always find some extra fun there!
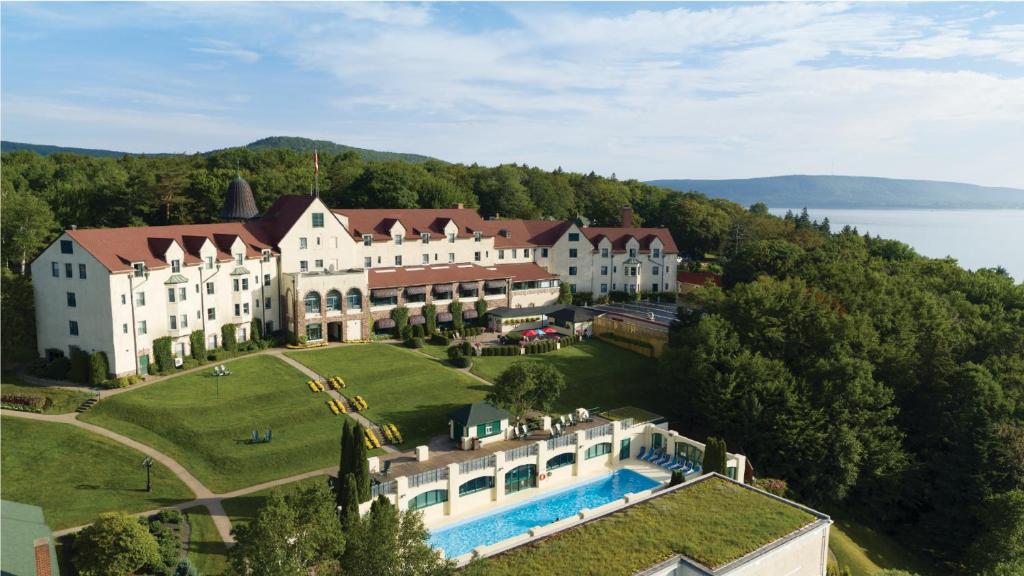
Western Canada Road Trip: 14–21 Day Itinerary from the Rockies to the Pacific

TL;DRThis Western Canada road trip runs from Calgary through Banff, Lake Louise, Moraine Lake, the Icefields Parkway and Jasper, all the way to the Pacific coast, Vancouver Island and the surf town of Tofino. Give yourself 21 days if you can — 14 days is the bare minimum — for a route of about 2,500 km. July and August are the best months, with reliably open roads and warm weather, though September’s popular too for the autumn colours and fewer mosquitoes. Budget 360–400 CAD for fuel, 260–300 CAD for ferries to the island, and around 167 CAD for an annual Discovery Pass covering the national parks (per group). You have to book the Moraine Lake shuttle and the Vancouver Island ferries well ahead of time.

When I first landed in Calgary with my mum, I had no idea how much that trip would change my life. The moment I first saw Banff, I fell in love — and it led to the most important decision I’ve ever made. That combination of the endless peaks of the Rocky Mountains and the incredible warmth of the local people hit me so hard that I decided to move here for a year.

I lived in bustling Calgary, but Banff, nestled in its mountain valley, also became my home. My husband (then boyfriend) and I drove the route from Calgary to the US border twice and even ventured all the way up to Alaska, coming back down to Vancouver. While we lived there, every spare day was spent in the mountains.

Yet when someone asks me for the best things to see, I always come back to the classic route. The loop from Alberta through the mountains to the Pacific is simply unbeatable. With a clear conscience and hand on heart, I can tell you that a Canada road trip itinerary through the west is the most beautiful journey you can take in your lifetime.

I’ve put together an itinerary and tips that don’t come from travel brochures but from our own thousands of kilometres behind the wheel, nights spent in the Canadian wilderness, and countless coffees in local bistros.

Western Canada Road Trip: 14–21 Day Itinerary from the Rockies to the Pacific
Peyto Lake in Banff National Park

TL;DR

  • Allow enough time: For the route from Calgary to Vancouver via Vancouver Island, ideally plan 21 days. 14 days is the absolute minimum, and you’ll have to rush.
  • Must-sees: The turquoise lakes in Banff (Moraine Lake and Lake Louise), the Icefields Parkway glacier road, the wild nature around Jasper, and the surfer town of Tofino.
  • Reservations are essential: Book ferries to Vancouver Island and the shuttle bus to Moraine Lake (you can no longer drive there) months in advance.
  • Car and gear: You don’t need a 4×4 — the roads are paved and in excellent condition. Budget for a Discovery Pass for national park entry.
  • When to go: July and August are a safe bet. September is gorgeous thanks to the autumn colours and fewer mosquitoes, but mornings can be frosty.

Best Time for a Western Canada Road Trip

Choosing the right time is absolutely crucial when it comes to the Canadian wilderness, as mountain weather can be unpredictable and winter lasts a long time. If you want to be sure you can drive through all the mountain passes without snow chains and see the lakes in their turquoise glory, you need to hit the right window — and it’s a fairly narrow one.

The driving season in this region runs from May to October, but there are caveats. Outside this period, you’ll face winter conditions and closed campgrounds. The most popular months are July and August. This is when the Rockies are warmest, the days are long, and all the tourist attractions are operating at full capacity. The trade-off is higher prices and crowds. June is lovely, but higher-altitude lakes like Moraine Lake may still be frozen at the start of the month — they only get their iconic blue colour as the glaciers melt.

My personal favourite time for a western Canada road trip is September. The air is crisp, the mosquitoes have mostly given up, and best of all, the trees start turning golden, giving the mountains a stunning contrast. However, keep in mind that some specific locations have their own rules. For example, the famous road to Moraine Lake closes with the first major snowfall in October. Similarly, the Icefields Parkway is open year-round but can be temporarily impassable after a snowstorm in winter.

Day-by-Day Itinerary: From the Prairies to the Edge of the World

I’ve put this Canada road trip itinerary together so you can see all the essential highlights without burning out. It’s based on approximately 14 days of travel. If you have three weeks, simply add rest days in Jasper, Whistler, or on Vancouver Island, where time seems to pass a little more slowly.

Day 1: Calgary – Banff

Your adventure begins with a flight into Calgary. After picking up your rental car at the airport, head straight west on the Trans-Canada Highway. The change in scenery is dramatic and never gets old — you drive across flat prairie for an hour, and then suddenly a massive wall of stone rises up before you: the Rocky Mountains. Within an hour and a half, you’ll pass through the national park gates and enter a different world. Your first stop is the town of Banff. Yes, it’s touristy and busy, but it has an unmistakable charm. Stroll down Banff Avenue with its iconic view of Cascade Mountain. In the afternoon, don’t miss the scenic loop around Lake Minnewanka. It’s a great spot for your first encounter with local wildlife — bighorn sheep often graze right by the roadside.

Calgary Tower: The best viewpoint in Calgary

Accommodation tip: Moose Hotel & Suites – A stylish hotel in the centre of Banff with a rooftop pool and mountain views. An ideal base for exploring the national park.

Day 2: Banff – Lake Louise and Moraine Lake

On day two, you need to get up early — and when I say early, I mean really early. Your targets are Lake Louise and Moraine Lake, the two most photographed lakes in Canada. The car park at Lake Louise fills up by seven in the morning, so if you don’t want the stress, use the shuttle bus from the overflow car park by the highway (reservation required!). Moraine Lake in the Valley of the Ten Peaks requires even more planning. Since 2023, private vehicles are no longer allowed, and you must book a Parks Canada shuttle bus. But the view of the turquoise water backed by towering peaks is so iconic that it’s worth the bit of bureaucracy. In the afternoon, hike up to the Lake Agnes Tea House, where you can enjoy tea with a view you’ll never forget.

View of Lake Louise
View of Lake Louise

Accommodation tip: Moose Hotel & Suites – A stylish hotel in the centre of Banff with a rooftop pool and mountain views. An ideal base for exploring the national park.

Day 3: Banff – Yoho National Park – Golden

Today you’ll briefly leave Alberta and dip into British Columbia, into Yoho National Park. It’s less crowded than Banff and offers gems like Emerald Lake, where you can rent a canoe, and Takakkaw Falls, one of the tallest waterfalls in Canada. Along the way, you’ll also see an engineering marvel — the Spiral Tunnels carved inside the mountain for trains. In the evening, drive to the town of Golden, which is a great and often cheaper base for an overnight stay before the next big leg of your journey.

Accommodation tip: Moberly Lodge – A cosy lodge surrounded by nature near Golden. A perfect stopover between Banff and Jasper with beautiful views of the Columbia Valley.

Emerald Lake in western Canada

Day 4: Golden – Icefields Parkway – Jasper

Get ready for the golden highlight of the entire road trip. Today you’ll drive the Icefields Parkway (Highway 93) north towards Jasper. Set aside the whole day for this stretch, because it’s not just a transfer — it’s a gallery of nature. You’ll want to stop every five minutes. You’ll see glaciers hanging directly above the road, the azure Peyto Lake shaped like a fox’s head, and of course the Athabasca Glacier. Here you can pay for a ride on a special ice explorer vehicle right onto the glacier, but even the view from the visitor centre is breathtaking. Important note: don’t forget to fill up your tank before entering this highway — there’s only one expensive petrol station along the way and you won’t find any mobile signal.

What to see in Banff National Park: Glacier from Parker Ridge Trail

Accommodation tip: The Crimson Jasper – An elegant hotel near the centre of Jasper with an outdoor hot tub and mountain views.

Day 5: Jasper and Surroundings

Jasper, where you arrived last evening, is Banff’s wilder and calmer sibling. Here you have a much better chance of spotting a moose or an elk wandering right through town or through the campground. In the morning, head to Maligne Lake. On the way, stop at Maligne Canyon and keep your eyes peeled — it’s a favourite spot for bears. At the lake, you can take a boat cruise to the famous Spirit Island, one of the most photographed spots in Canada, or simply stroll along the shore.

Accommodation tip: The Crimson Jasper – An elegant hotel near the centre of Jasper with an outdoor hot tub and mountain views.

Day 6: Jasper – Kamloops

Today is a longer driving day heading into the interior. You’ll leave the mountains behind and head west. Stop at Mount Robson, the highest peak in the Canadian Rockies. If you’re lucky and the summit isn’t hidden in clouds, it’s an awe-inspiring sight. The landscape then changes — the mountains recede and the scenery around Kamloops starts to resemble semi-desert. It’s a fascinating contrast to the forests and glaciers you’ve seen so far. Kamloops isn’t a typical tourist destination, but it’s an ideal place to overnight and stock up on supplies.

Accommodation tip: DoubleTree by Hilton Kamloops – A comfortable hotel with a pool and restaurant, ideal for an overnight stop between the Rockies and the coast.

Day 7: Kamloops – Whistler

From Kamloops, you’ll continue towards the coast — but not via the shortest motorway route. Instead, take the scenic Duffey Lake Road (Hwy 99). It’s a narrow, winding mountain road offering stunning views, including Joffre Lakes. This section is more demanding to drive but absolutely gorgeous. In the afternoon, you’ll arrive in Whistler, a world-famous ski resort that comes alive in summer too. Even if you don’t ski, take the Peak 2 Peak Gondola, which connects two mountain peaks at record height.

Accommodation tip: Sundial Boutique Hotel – A boutique hotel right on Village Stroll in Whistler with mountain views. Within easy reach of all attractions.

Day 8: Whistler – Vancouver

From Whistler to Vancouver, you’ll drive the Sea-to-Sky Highway. The name says it all — mountains plunge straight into the ocean and the views over Howe Sound fjord are unforgettable. Stop at Shannon Falls or ride the Sea to Sky Gondola in Squamish. Arriving in Vancouver is an experience in itself. The city, squeezed between the ocean and mountains, has a one-of-a-kind atmosphere that hits you the moment you spot the skyline.

Accommodation tip: L’Hermitage Hotel – An elegant boutique hotel in the centre of Vancouver with a pool and close to the city’s main attractions.

Garibaldi Lake from above — can anything be more stunning?
Garibaldi Lake from above (near Whistler) — can anything be more stunning?

Day 9: Vancouver (City Tour)

On day nine, leave the car parked and explore the city on foot. Vancouver is a fantastic city for walkers and cyclists. Rent a bike and ride along the Seawall around Stanley Park. Visit the historic Gastown neighbourhood with its steam clock, and definitely check out Granville Island Public Market. If you like heights, try the Capilano Suspension Bridge in North Vancouver. The city is also a paradise for foodies — the Asian cuisine here is world-class.

Accommodation tip: L’Hermitage Hotel – An elegant boutique hotel in the centre of Vancouver with a pool and close to the city’s main attractions.

Day 10: Vancouver – Victoria (Vancouver Island)

This is the part many people look forward to the most. You’ll take a ferry across to Vancouver Island. I strongly recommend booking your ferry ticket (e.g. from Tsawwassen to Swartz Bay) in advance — queues can be very long in summer. After disembarking, head to Victoria, the capital of British Columbia. It’s a city with a distinctly British atmosphere where you can enjoy afternoon tea and admire the Parliament Building. For flower lovers, Butchart Gardens are an absolute must.

Accommodation tip: Hotel Grand Pacific – A luxury hotel right on the Inner Harbour in Victoria with harbour views and close to the Parliament Building.

Vancouver
Vancouver

Day 11: Victoria – Tofino / Ucluelet

Today you’ll drive across the island to its wild west coast. The road is winding and long, but the destination is worth every minute. Stop at Cathedral Grove, where the trees are so ancient and enormous you’ll feel like an ant beneath them. Then continue along Highway 4 to the end of the world. Here, in the area of Tofino and Ucluelet, the road ends and the endless Pacific begins. Check into one of these towns and soak up the magical energy.

Accommodation tip: Pacific Sands Beach Resort – A resort right on Cox Bay beach with a kitchenette in every room. Perfect for surfers and nature lovers alike.

Day trip from Vancouver? Head to Victoria

Day 12: Pacific Rim National Park

Dedicate the whole day to Pacific Rim National Park. Walk along the vast stretches of Long Beach, where surfers in wetsuits ride the misty waves. Visit the rainforest on the Rainforest Trail, where wooden boardwalks wind through moss-covered giants. Tofino is also a brilliant base for whale watching and spotting black bears searching for crabs on the shore at low tide. It’s raw, wild beauty that will completely absorb you.

Accommodation tip: Pacific Sands Beach Resort – A resort right on Cox Bay beach with a kitchenette in every room. Perfect for surfers and nature lovers alike.

Day 13: Tofino – Nanaimo – Vancouver

It’s time to say goodbye to the Pacific. Drive back across the island to the port of Nanaimo (Departure Bay). From there, take the ferry back to the mainland at Horseshoe Bay in North Vancouver. Again — booking the ferry in advance is essential. After disembarking, check into your hotel in Vancouver or near the airport to be ready for tomorrow’s flight.

Accommodation tip: L’Hermitage Hotel – An elegant boutique hotel in the centre of Vancouver with a pool and close to the city’s main attractions.

Day 14: Vancouver – Flight Home

Use your last day for souvenir shopping, one final coffee with a mountain view, or a stroll by the ocean before heading to the airport to return your car and catch your flight home.

lukas a lucka
Lukáš and Lucie recommend
Where to Stay in Western Canada
6 accommodations — resorts, hotels and other lodging options

Accommodation and Practical Tips for a Comfortable Trip

When planning a road trip through west Canada, accommodation is something you shouldn’t underestimate. In peak season, rooms in Banff and Jasper disappear months in advance and prices aren’t exactly budget-friendly. If you want to save money and don’t mind staying a bit further from the centre, look for hotels in Canmore instead of Banff, or in Hinton instead of Jasper. The price difference can be significant and the parks are just a short drive away.

For national park entry, you’ll need a permit. If you plan to visit multiple parks and spend more than a week in them in total (which you will on this itinerary), it’s worth buying an annual Discovery Pass. It covers the entire vehicle (up to 7 people) and grants access to Banff, Jasper, Yoho, Glacier, and Pacific Rim. You can buy it at visitor centres or at the gate when entering the first park — just hang it on your rear-view mirror.

If you’d like to plan car camping instead of hotels, there are plenty of great options along the route. It’s an excellent way to save money and enjoy a more authentic Canadian wilderness experience. You might also want to pick up a portable espresso maker to keep you caffeinated on those early morning starts at remote trailheads.

Food and Souvenirs: Maple Syrup and the Best Pies

Canada isn’t just about burgers and chips with gravy (poutine) — though you absolutely must try that too. Along the way, you’ll come across plenty of brilliant local eateries. When driving from Jasper towards Vancouver and passing through the town of Hope (yes, that’s where they filmed Rambo!), make a stop at the Home Restaurant. It’s one of those classic diners you know from the movies, and they bake the best homemade pies for miles around.

On Vancouver Island, in Coombs, look for the Old Country Market. You’ll recognise it easily — live goats graze on the roof. And in Tofino? It’s practically a requirement to queue at the Tacofino food truck. Their fish tacos are legendary. For a sweet treat, seek out a “Nanaimo bar” — an incredibly sweet, no-bake dessert that originated in the port town of Nanaimo.

What to bring home? The classic is maple syrup. Buy it in a tin — it’s easier to transport. Smoked salmon in a wooden gift box also makes a brilliant present and survives the flight home. Just please don’t buy a Bear Spray canister as a souvenir — you won’t be allowed on the plane with it, even in checked luggage. It’s classified as a weapon and an explosive.

How Much Does a Western Canada Road Trip Cost? (Budget)

I won’t lie to you — Canada isn’t a cheap destination, but every dollar spent is worth it. The biggest expenses will likely be your rental car and accommodation. Petrol is somewhat cheaper than in Europe, but given the distances, you’ll use quite a lot. For fuel on a route of roughly 2,500 km, budget approximately CAD 360–400 (around €240–270).

Another expense is ferries. A return trip to Vancouver Island for one car and two people will cost around CAD 260–300 (roughly €175–200). Don’t forget national park entry fees — the Discovery Pass costs about CAD 167 (approx. €110) for a group. Overall, this kind of holiday adds up, but the memories you’ll take home are truly priceless.

Trip Overview Table

DayRoute (From – To)Km (approx.)Key Highlights
1CalgaryBanff130 kmArrival, Banff Avenue, Lake Minnewanka
2Banff area50 kmLake Louise, Moraine Lake (shuttle!), Lake Agnes
3Banff – Golden100 kmEmerald Lake, Takakkaw Falls, Spiral Tunnels
4Golden – Jasper310 kmIcefields Parkway, Peyto Lake, Athabasca Glacier
5Jasper area100 kmMaligne Lake, Spirit Island, Maligne Canyon
6Jasper – Kamloops440 kmMt. Robson, landscape change, long driving day
7Kamloops – Whistler300 kmDuffey Lake Road, Joffre Lakes, Whistler Village
8Whistler – Vancouver120 kmSea-to-Sky Highway, Shannon Falls, Vancouver
9Vancouver0 kmStanley Park, Gastown, Granville Island
10Vancouver – Victoria115 kmFerry Tsawwassen–Swartz Bay, Butchart Gardens
11Victoria – Tofino320 kmCathedral Grove, Pacific Rim Highway, Ucluelet
12Tofino area50 kmLong Beach, Rainforest Trail, whale watching
13Tofino – Vancouver200 kmFerry from Nanaimo to Horseshoe Bay
14Vancouver – Departure30 kmLast-minute shopping, car return, flight home

Conclusion

This western Canada road trip is an experience you’ll remember for the rest of your life. The combination of majestic mountains, wild animals, endless forests, and the ocean is something that gets deep under your skin. Just like it did for me, when I stood there for the first time and couldn’t believe my own eyes.

Tips and Tricks for Your Vacation

Don’t Overpay for Flights

Search for flights on Kayak. It’s our favorite search engine because it scans the websites of all airlines and always finds the cheapest connection.

Book Your Accommodation Smartly

The best experiences we’ve had when looking for accommodation (from Alaska to Morocco) are with Booking.com, where hotels, apartments, and entire houses are usually the cheapest and most widely available.

Don’t Forget Travel Insurance

Good travel insurance will protect you against illness, accidents, theft, or flight cancellations. We’ve had a few hospital visits abroad, so we know how important it is to have proper insurance arranged.

Where we insure ourselves: SafetyWing (best for everyone) and TrueTraveller (for extra-long trips).

Why don’t we recommend any Czech insurance company? Because they have too many restrictions. They set limits on the number of days abroad, travel insurance via a credit card often requires you to pay medical expenses only with that card, and they frequently limit the number of returns to the Czech Republic.

Find the Best Experiences

Get Your Guide is a huge online marketplace where you can book guided walks, trips, skip-the-line tickets, tours, and much more. We always find some extra fun there!
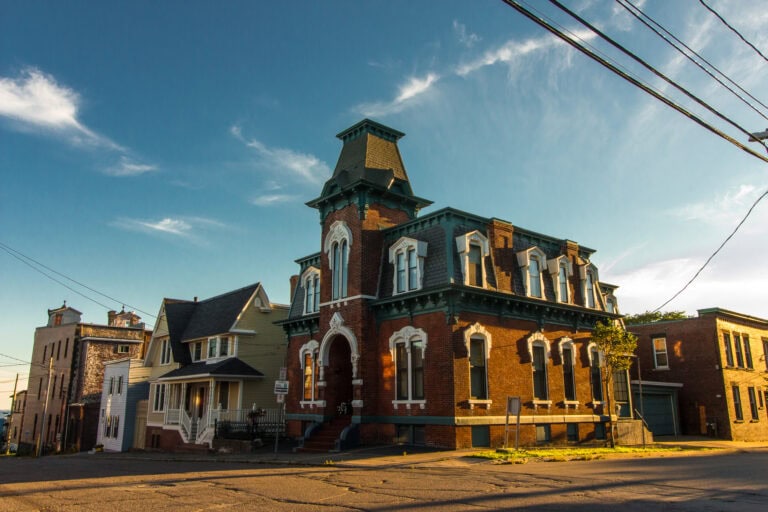
Anchorage, Alaska: 15 Tips on What to See and Do in the Land of the Midnight Sun

TL;DRAnchorage isn’t really a destination in itself — it’s your base camp for Alaska’s wilderness. Locals will tell you the “real Alaska” starts just twenty minutes out of town. Among the 15 tips here, standouts include the hike up Flattop Mountain, moose-spotting along the eleven-mile Tony Knowles Coastal Trail, a flightseeing trip to Denali from Talkeetna ($300–$600), and a boat tour to the glaciers of Kenai Fjords National Park from Seward. It’s also worth walking on the Matanuska Glacier (about 2 hours from Anchorage) and trying King Crab for $80 and up. Summer is the best time to go — book your car and accommodation up to six months ahead, since in-season prices have jumped 40%.

When you’re packing for Alaska, your head is probably spinning. It’s far away, it’s wild, and honestly, it’s expensive. But before we dive in, let me give you one piece of advice that’s worth more than Klondike gold: If you’re already going to Anchorage, Alaska, don’t overthink the money.

Seriously. You want to see everything that’s worth seeing. Pay for that flight to the summit of Denali, buy that boat ticket to the glaciers, order that overpriced king crab.

Because what you skip to save a hundred dollars, you’ll regret for the rest of your life. I speak from personal experience. You can earn the money back, but the moment a chunk of glacier crashes into the ocean right before your eyes will never happen again.

Anchorage is the artery that pumps life into the entire state, and a strategic base camp if you want to explore Alaska. Locals love to say that Anchorage is just twenty minutes from “the real Alaska.” Let’s take a look at what you need to experience to truly say you’ve felt Alaska in your bones.

Anchorage, Alaska: What to see and do in the city and surrounding area.
Anchorage, Alaska

TL;DR

  • Money aside: Prepare a generous budget. Hotel prices have risen by 40% and quality excursions cost hundreds of dollars, but the experiences are priceless and unrepeatable.
  • Respect the moose: There are 1,600 of them living in the city, and statistically they injure more people than bears. Never approach them, even if they look calm.
  • A base, not a destination: Sleep, eat, and visit museums in Anchorage, but head out on day trips every day (Seward, glaciers, Denali).
  • Layering is the law: The weather changes from hour to hour. Forget cotton – you need wool and a waterproof jacket, even if you’re visiting in July.
  • Book early: The Alaska season is short. Reserve your car, hotels, and popular excursions up to six months in advance, or you’ll be crying over the prices or sold-out availability.
Alaska
Alaska

Where to Stay in Anchorage?

The most important thing is to book your accommodation well in advance – otherwise you’ll be stuck with overpriced rooms that aren’t even worth the money. If you’re lucky enough to snag it, I recommend SunStar Alaska Bed and Breakfast LLCO. Those of you with a bigger budget will probably go for The Wildbirch Hotel – JdV by Hyatt, which is right in the city centre. You can also compare other options on Booking.com.

Where to Rent a Car

If you’re heading out in summer, be warned that you need to book your car well in advance – even six months ahead, as prices in summer climb to $150–250 per day and cars simply run out. DiscoverCars works brilliantly in the US, and you can pick the car up right at the Anchorage Alaska airport.

15 Best Things to See and Do in Anchorage and Its Surroundings

The city of Anchorage is completely different from anything you’re used to in Europe or the rest of North America. Make sure you explore the city itself before venturing into the surrounding wilderness.

1. Flattop Mountain: Baptism by Alaskan Fire

If you want to understand why locals love their city, you need to go up. Flattop Mountain isn’t just “some hill” – it’s the most climbed peak in Alaska and practically a rite of passage for visitors.

From the summit, you get a panoramic view of Anchorage, and on a clear day you can see all the way to majestic Denali. The hike isn’t a walk in the park – the final stretch requires you to use your hands and scramble over rocks, but the sense of triumph is worth every bit of effort. If you don’t have a car, a shuttle runs from the city centre for $23, dropping you right at the base of the mountain. It’s the quickest way to get from the urban jungle straight into the Chugach Mountain wilderness.

Flattop Mountain Alaska

2. Tony Knowles Coastal Trail: Moose Within Arm’s Reach

This is an 11-mile trail that winds along the coastline from the city centre all the way to Kincaid Park. Imagine cycling (you can easily rent a bike in town) with the steel-grey waters of Cook Inlet on your right, snow-capped mountains in the distance, and on your left… a moose. And it’s not a rare occurrence.

This trail is one of the best spots to see these enormous animals in their natural habitat while still being within city limits. Just please, keep your distance. It’s an idyllic walk or ride that shows you how intimately Anchorage is connected with nature.

3. Lake Hood: The World’s Busiest Seaplane Base

Forget Heathrow or JFK. Lake Hood is where the heart of Alaskan aviation beats. During summer, up to 800 planes take off or land here every day.

Sit on the shore, grab a coffee, and just watch the buzz. You’ll see small “bush planes” – which for many Alaskans are the only connection to the outside world – splashing down onto the water with a roar.

It’s a fascinating spectacle that reminds you you’re in a land where roads often end and the only way forward is by air. For aviation and tech enthusiasts, it’s absolute nirvana.

4. Alaska Native Heritage Center: A Deep Dive into Alaska’s Soul

Many people think Alaska’s history began with the arrival of the Russians or the gold prospectors. Wrong. At this centre, you’ll understand that this land has a thousand-year history written by the Dena’ina and other Indigenous peoples.

This isn’t a boring museum with glass cases. Outside, around Lake Tiulana, stand authentic replicas of the dwellings of all eleven major cultural groups. You can step inside, smell the wood and smoke, and listen to stories told directly by descendants of these nations. Admission is around $29, but the context you gain here will open your eyes for the rest of your trip.

5. Anchorage Museum

If you get a rainy day (and that happens a lot in Alaska), this is your refuge. But don’t just come here as a last resort. The Anchorage Museum is world-class.

The Smithsonian Arctic Studies Center in particular is a gem, where you’ll see incredibly well-preserved artefacts and art from Indigenous peoples. It’s not just about history – the museum also brilliantly documents contemporary life in the north, the oil boom, and climate change.

It’s a modern, interactive, and visually stunning space that helps you grasp the complexity of this enormous state.

Kincaid Park, Alaska
We had the best salmon of our lives in Alaska.

6. Kincaid Park: Wilderness at the End of the Runway

When you reach the end of the Coastal Trail, you’ll find yourself in Kincaid Park. It’s a massive wooded park full of trails for hikers and cyclists, but it has one quirk – it’s essentially a living room for the local moose population.

The chances of not spotting a moose here are slim to none. The park sits on rolling terrain of old moraines and even offers sandy dunes with sea views.

In winter it’s a cross-country skiing paradise, in summer a cyclist’s dream. But above all, it’s a place where you realise that in Anchorage, nature doesn’t end at your garden fence – it’s everywhere.

You'll encounter moose even more often than in Canada, where we used to live.
You’ll encounter moose even more often than in Canada, where we used to live.

7. Beluga Point and Turnagain Arm: A Safari Along the Highway

The Seward Highway, leading south from Anchorage, is considered one of the most beautiful roads in the world. And Beluga Point is its crown jewel. As the name suggests, this is the spot where you can see beluga whales – those white, smiling cetaceans. Your best chance is about 3–4 hours before high tide, when they swim into the inlet to hunt salmon. But even without whales, the scenery is jaw-dropping. On one side you have the sheer cliffs of the Chugach Mountains, where Dall sheep often perch, and on the other side a dramatic inlet with one of the largest tidal bores in the world. It’s an essential stop.

Life-Changing Day Trips from Anchorage

This is arguably the most important section: day trips from Anchorage that you’ll remember for the rest of your life.

8. Flightseeing Tour to Denali: Landing on Another Planet

This is exactly the moment when you must not worry about money. The trip from the small town of Talkeetna (about 2 hours by car from Anchorage) costs between $300 and $600, but believe me, once you see it, you’d happily pay double. A small plane takes you to the highest peak in North America. I recommend booking early – you can use GetYourGuide as always.

You’ll see glaciers that look like frozen motorways and mountain walls that touch the sky. And if you pay extra for a glacier landing, you’ll find yourself in absolute silence, surrounded by nothing but snow and rock, in an amphitheatre of giants. It’s a spiritual experience that will bring tears to your eyes.

9. Train to Seward: The Journey Is the Destination

The Alaska Railroad and its “Coastal Classic” route to Seward is a legendary scenic ride that takes four hours and passes through places no car can reach. The train winds through mountain passes, past Spencer and Bartlett Glaciers, and through deep forests.

Seward, Alaska
Seward, Alaska.

If you can, upgrade to GoldStar class. You’ll get a carriage with a glass-domed roof and an outdoor viewing platform where you can feel the wind in your hair and take photos without glass in the way. Meals are included, so you’ll feel like you’re on the Orient Express – just with wilder scenery.

10. Kenai Fjords Cruise: Face to Face with the Ice Age

Once you make it to Seward, you absolutely must get on a boat (I recommend booking in advance, for example through GetYourGuide). The cruise into Kenai Fjords National Park is the best way to see marine wildlife. Humpback whales breaching, orcas on the hunt, sea lion colonies, and adorable puffins.

And then there’s the grand finale – the face of a glacier calving straight into the sea. The sound of cracking ice, like a cannon shot, followed by the thunderous splash of tons of ice hitting the water, is utterly awe-inspiring. Fair warning: the sea can be rough, so if you have a sensitive stomach, seasickness tablets are a must. But the spectacle is absolutely worth it.

One of the most expensive trips we'd ever taken was a kayaking excursion among the glaciers in Seward.
One of the most expensive trips we’d ever taken was a kayaking excursion among the glaciers. The only thing we regret is not paying for more trips like this in Alaska.

11. Matanuska Glacier: A Walk on Blue Ice

Most glaciers you only see from a distance or from a boat. Matanuska is different. It’s the largest glacier in Alaska accessible by car (about 2 hours from Anchorage). You can hire a guide (access is regulated, expect to pay $100+ USD), strap on crampons, and walk directly on the glacier’s surface. You’ll peer into deep blue crevasses, drink water from melting streams that’s purer than anything from a bottle, and marvel at the sheer force of nature. It’s hands-on contact with the Ice Age, and it’s surprisingly accessible even for an averagely fit hiker.

12. 26 Glacier Cruise from Whittier: Serene Beauty

If you’re worried about seasickness in Seward, head to Whittier instead. The drive there takes you through a unique tunnel (cars and trains take turns using it, toll is $13), which is an experience in itself. The “26 Glacier Cruise” in Prince William Sound is calm, because you’re in protected waters. As the name suggests, you’ll see an incredible number of glaciers in a single afternoon. It’s a visual feast where the white and blue of ice blends with the dark green of forests and the grey of rock.

Whittier, Alaska

13. Alyeska Resort & Girdwood: Luxury in the Wilderness

Just 45 minutes from Anchorage lies Girdwood, a former gold-mining town and now home to the Alyeska Resort. Even in summer, you must take the aerial tram to the summit. The view of seven hanging glaciers is breathtaking. At the top you’ll find the Seven Glaciers restaurant – it’s pricey, it’s luxurious, and it’s exactly the kind of place where you shouldn’t worry about money. Have dinner at sunset over the mountains and feel like you’re on top of the world. For the more adventurous, the Winner Creek Trail in the valley below takes you through a temperate rainforest (yes, Alaska has a rainforest!).

lukas a lucka
Lukáš and Lucie recommend
Where to stay in Anchorage
3 accommodations — hotels and other lodging options

What to Eat in Anchorage and Where to Find It

If you love food as much as I do, this section is for you.

14. Moose’s Tooth Pub & Pizzeria: The Pizza That Defines the City

It might sound odd, sending you to a pizza place in Alaska, but Moose’s Tooth isn’t just any ordinary pizzeria. It’s the highest-grossing independent pizzeria in the entire United States, and locals absolutely worship it. Expect a queue, expect noise, expect buzz. They brew their own beer (Broken Tooth Brewing) and their pizzas feature wild combinations that somehow work brilliantly – think apricot, salmon, or reindeer meat toppings. It’s the perfect place to soak up the local atmosphere after a day in the mountains.

15. Reindeer Sausage on the Street and King Crab on the Plate

Alaska has its own distinct flavours, and if you eat meat, you absolutely cannot miss them. For a quick and affordable lunch, look for street stands in the city centre with signs saying “Reindeer Sausage.” Reindeer sausage with caramelised onions is Alaskan street food at its finest. And for dinner? Head to 49th State Brewing or Glacier BrewHouse and order the star of the menu – King Crab or fresh halibut. Yes, a portion of crab can cost $80 or more. But the meat is reportedly sweet, succulent, and was pulled from the icy Bering Sea by guys who risk their lives doing it. Pay for it, eat it, and be grateful.

Conclusion: The Call of the Wild

When you’re sitting on the plane home, gazing one last time at the endless mountains, you’ll understand why I started by talking about money. Nobody will remember saving $200 on a flight to Denali. But everyone will remember the moment the plane lifted off the ground and headed towards the white giant. Anchorage is a rugged but beautiful gateway to a world where humans are still not the masters of creation. Enjoy it to the fullest, without regrets and with your eyes wide open. (You might also find our article useful: How to plan a trip without a travel agency, where you’ll find tips on organising an independent trip).

Frequently Asked Questions (FAQ)

Is Anchorage a Safe City?

Generally yes, but it has its quirks. A bigger danger than people is often the moose – there are loads of them in the city. Keep your distance! As for crime, like any larger American city, avoid dodgy areas at night and don’t leave valuables in your car, especially at remote trailhead car parks.

Do I Really Need to Rent a Car?

If you want to see more than just the city centre and museums, then yes – a car is pretty much essential. Public transport doesn’t run to glaciers or mountains. For the summer season, book your car up to six months in advance. Prices in summer climb to $150–250 per day and cars simply run out. The best place to search is DiscoverCars.

What to Wear in Summer?

Alaskan summers are deceptive. It can be 20°C and sunny, or 10°C and raining. The key is layering. Start with a merino wool base layer, add a fleece, and top it off with a quality waterproof jacket. Leave the cotton at home – once it gets damp, it chills you to the bone. And don’t forget an eye mask for sleeping – when we were in Alaska in summer, it didn’t occur to me that it would still be light at midnight.

When Is the Best Time for Bear Watching?

For the famous Brooks Falls in Katmai (where bears catch salmon on the waterfall), the best months are July and September. In July there are the most salmon and bears; in September the bears are fat and preparing for winter. Day trips from Anchorage are expensive (around $1,000 USD), but absolutely worth it.

Can I See the Northern Lights in Summer?

Most likely not. In summer it’s simply too light. The Aurora Borealis season begins in late August, when the nights start getting longer, and lasts until April. If the northern lights are a priority for you, visit in September or March, when it’s dark but not brutally cold.

Tips and Tricks for Your Vacation

Don’t Overpay for Flights

Search for flights on Kayak. It’s our favorite search engine because it scans the websites of all airlines and always finds the cheapest connection.

Book Your Accommodation Smartly

The best experiences we’ve had when looking for accommodation (from Alaska to Morocco) are with Booking.com, where hotels, apartments, and entire houses are usually the cheapest and most widely available.

Don’t Forget Travel Insurance

Good travel insurance will protect you against illness, accidents, theft, or flight cancellations. We’ve had a few hospital visits abroad, so we know how important it is to have proper insurance arranged.

Where we insure ourselves: SafetyWing (best for everyone) and TrueTraveller (for extra-long trips).

Why don’t we recommend any Czech insurance company? Because they have too many restrictions. They set limits on the number of days abroad, travel insurance via a credit card often requires you to pay medical expenses only with that card, and they frequently limit the number of returns to the Czech Republic.

Find the Best Experiences

Get Your Guide is a huge online marketplace where you can book guided walks, trips, skip-the-line tickets, tours, and much more. We always find some extra fun there!
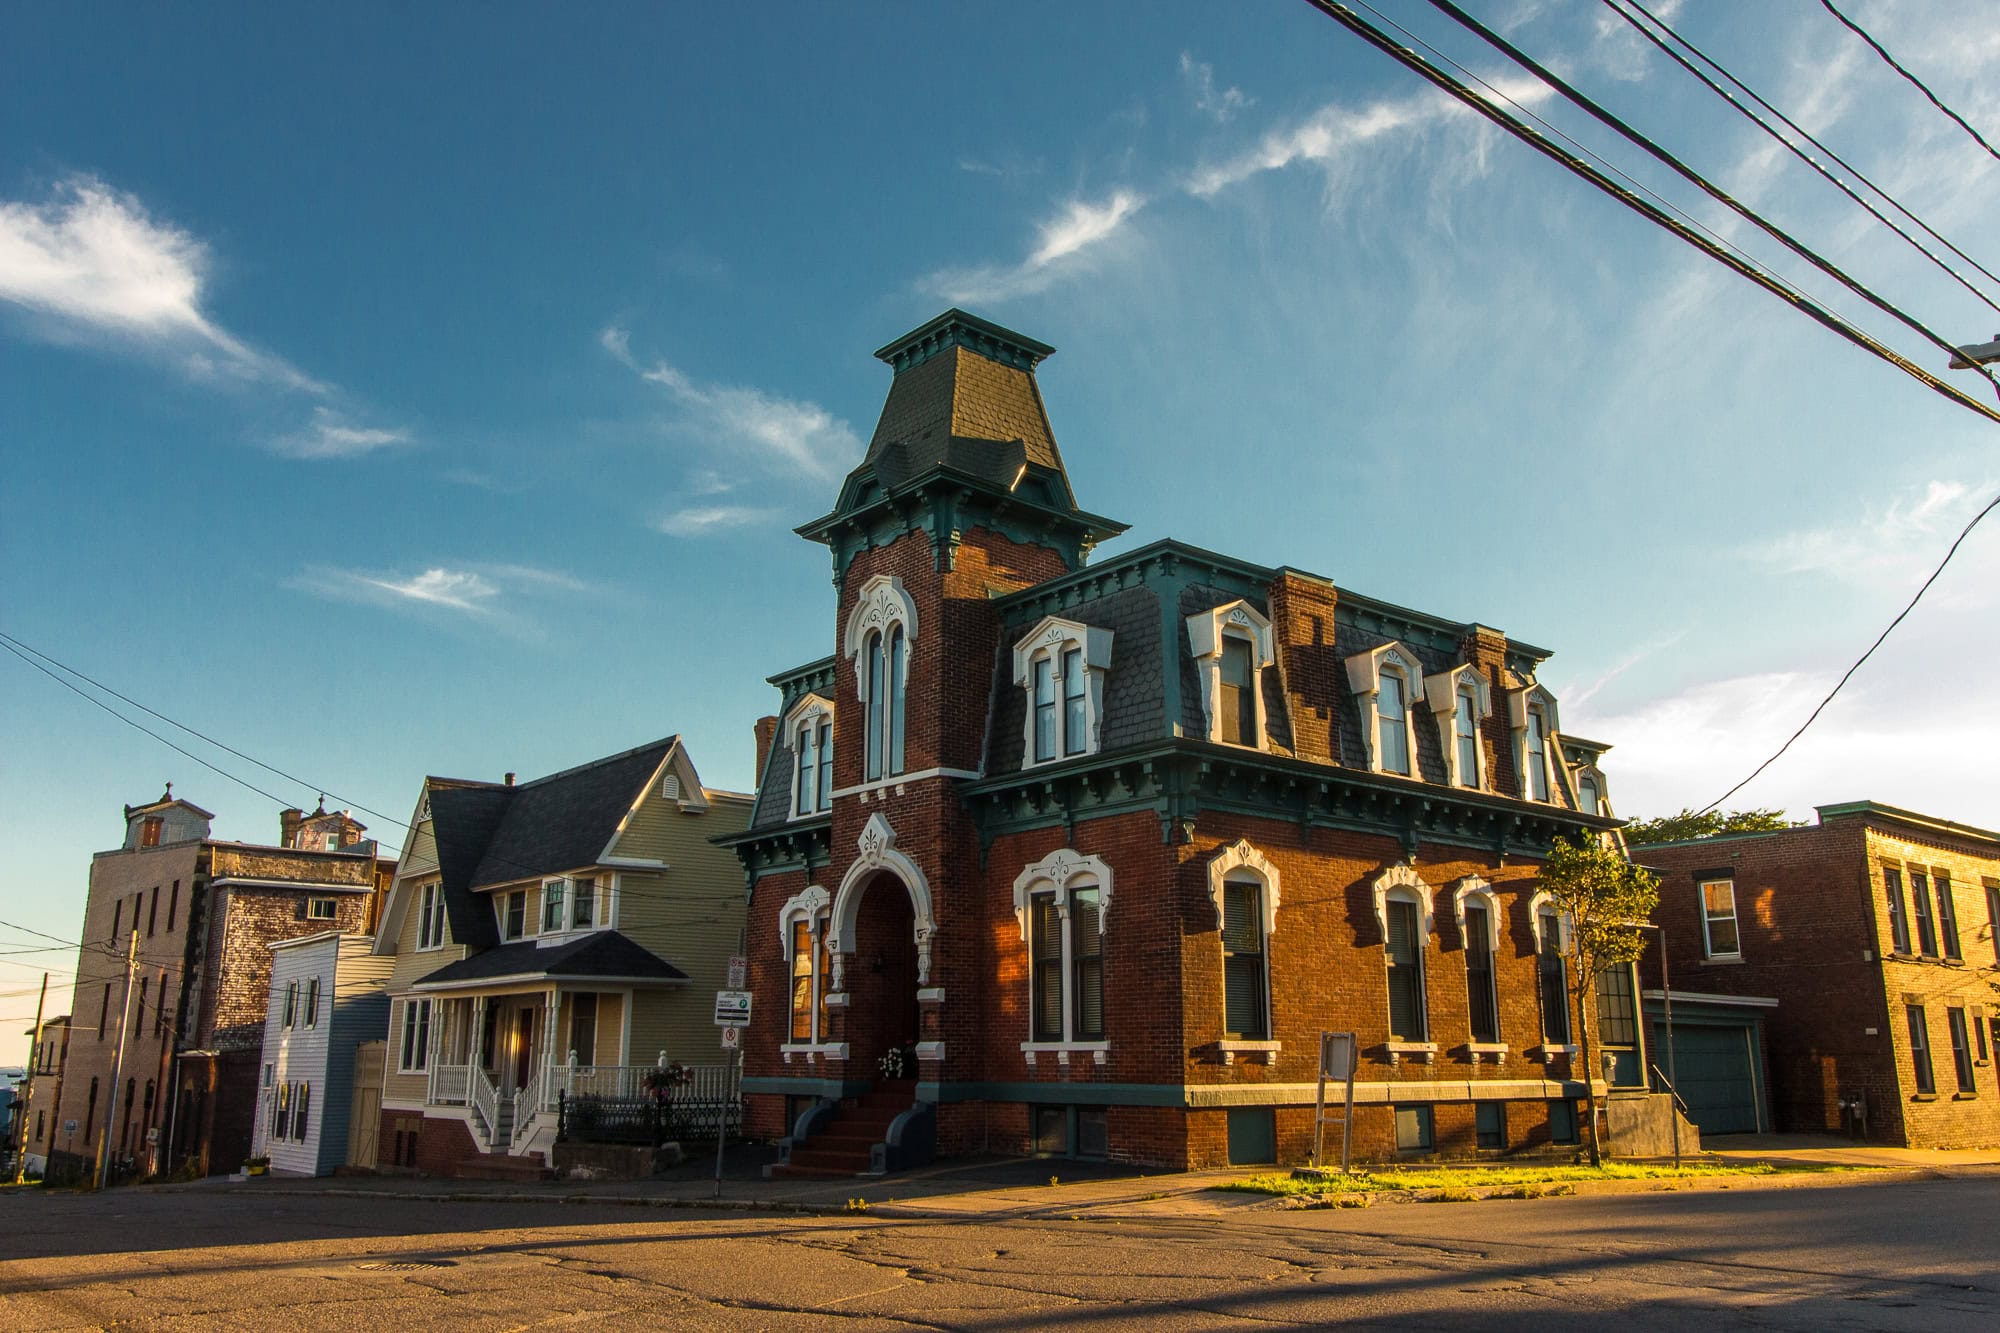
Skiing in Poland: A Cheaper Alternative to the Alps + 5 Best Ski Resorts

TL;DRSkiing in Poland is a cheaper alternative to the Alps, with day passes running 720–1260 CZK and most resorts within two to three hours of much of Czechia by car. The top 5 resorts are Szczyrk Mountain Resort, with 36 kilometres of pistes; Zieleniec in the Orlické Mountains; Szklarska Poręba, home to the Szrenica ski area in the Krkonoše range; Zakopane in the Tatras; and the spa town of Świeradów-Zdrój in the Jizera Mountains. Polish slopes tend to be steeper than their Czech counterparts, and a quirky microclimate keeps the snow at Szrenica going right into April. Crowds are noticeably thinner too, so you won’t be stuck queuing for lifts. The season runs from December to March, stretching into April at higher elevations, with the most reliable conditions from January through to early March.

Long lift queues, overcrowded slopes, and sky-high prices putting you off planning a ski holiday? We have a solution that might just have you grabbing your ski poles with both hands. Poland has dramatically modernised its ski resorts in recent years, making Poland skiing an exciting alternative not only to smaller Central European hills but also to the expensive Alps. And the best part? It’s likely just a short flight or drive away from wherever you are in Europe.

TL;DR

  • Polish ski resorts are easily accessible – with direct flights to Kraków from many European cities and excellent road connections, getting to the slopes is a breeze.
  • Ski pass prices range from around €17–€30 per day, which is significantly cheaper than the Alps and comparable to many Central European resorts.
  • The slopes are generally steeper than in Czechia, which is great news for sporty skiers looking for an adrenaline rush.
  • Significantly fewer crowds on the slopes means shorter lift queues and more space for safe skiing.
  • Modern infrastructure including gondola lifts, artificial snowmaking, and wellness centres guarantees Western European-level comfort.

TIP: Not into skiing? Try surfing in Europe instead.

Why go skiing in Poland?

Polish mountains have long remained under the radar for most international skiers, who traditionally headed straight to the Alps or other well-known destinations. But the situation is changing rapidly. Poland has invested billions in modernising its skiing resorts, and the results speak for themselves. Today, it’s no longer just a budget alternative – it’s a fully-fledged destination with modern infrastructure, quality services, and excellent resort management. Plus, with the added bonus of being incredibly affordable.

Affordable prices that save time and money

The biggest Polish ski resorts are surprisingly accessible. For example, Kraków – the main gateway to Polish ski areas – is served by direct flights from London, Manchester, Edinburgh, Dublin, Berlin, and many other European cities. From Kraków, the famous Zakopane resort is just a two-hour drive. Many resorts also offer skibus services from major cities, making car-free ski holidays perfectly feasible.

Prices that won’t break the bank

While famous Alpine resorts often charge over €50 for a day pass, skiing in Poland prices range from just €17 to €30. You can save even more by purchasing ski passes online in advance, where dynamic pricing can bring costs down further. Accommodation and food are also significantly more affordable than in the Alps, making Poland skiing holidays excellent value for money.

Snow that lasts into spring

The Polish side of the mountains often benefits from a unique microclimate. Take Szrenica in Szklarska Poręba on the northern side of the Karkonosze (Giant Mountains), for example. Thanks to its specific position and cooler microclimate, natural snow holds here well into March and April, long after lower-lying resorts have closed for the season. And if natural snow isn’t enough, most Polish resorts have state-of-the-art snowmaking systems.

When to go skiing in Poland: The ski season in Polish mountains

The ski season in Poland traditionally starts in December and runs until March, with some higher-altitude areas like the Tatras or Szrenica extending into April. The most reliable snow conditions are from January to early March, when most resorts are in full operation.

Want to avoid the crowds? The busiest periods on Polish slopes are during the Christmas holidays and the February half-term break. If you can choose a different time, weekdays and weekends outside school holidays are ideal for skiing in peace. The best tactic is to hit the slopes first thing in the morning when they open and the lift queues are non-existent.

You might also like: 12 tips for places to visit in Poland

Where to stay

Polish mountain resorts have undergone significant modernisation in recent years, and today you’ll find accommodation for every budget and taste. From family-run guesthouses for just a few euros per night to luxurious five-star hotels with wellness centres, water parks, and top-notch gastronomy. You can easily find and book great deals on Booking.com.

Accommodation for families with children

Families with children will appreciate hotels with extensive water parks and entertainment programmes. In Karpacz, you’ll find Hotel Gołębiewski with a huge water park and an outdoor toboggan run, where kids can enjoy themselves long after the skiing is done. In the Wisła area, you’ll find a resort with the largest hotel wellness centre in Poland, as well as hotels with their own ski slopes right at the doorstep.

For wellness and relaxation lovers

After a demanding day on the slopes, you’ll appreciate the chance to relax in a quality wellness centre. Polish hotels often offer more in this regard than some Alpine resorts – for example, the Lake Hill Hotel. You’ll commonly find not just saunas and hot tubs, but also thermal pools, massage parlours, and beauty centres. In Świeradów-Zdrój, for instance, some operators combine a long spa tradition with a modern ski resort – perfect for an active winter holiday.

Tips for saving money

If you want to save on accommodation, it pays to book in advance and look out for early-bird offers, where you can get discounts of up to thirty percent. Another option is private accommodation or apartments, which are significantly cheaper than hotels and allow you to cook your own meals. Many apartments also provide access to the wellness centre of a neighbouring hotel, so you won’t miss out on anything.

5 best Poland skiing resorts

Wondering where to go for your Poland skiing holiday? Here are our top 5 best Polish ski resorts.

TIP: Best wellness hotels in Poland

1) Szczyrk Mountain Resort – Silesian Beskids

The largest and most modern ski resort in the Polish Beskids offers an impressive 36 kilometres of slopes across all difficulty levels. This Szczyrk Poland ski resort has undergone extensive modernisation under Slovak ownership, which is reflected in the quality of services and infrastructure. You’ll find a ten-person gondola lift, modern chairlifts, and various types of drag lifts.

For families with children, there’s the Maxiland Arena zone covering five thousand square metres, where little skiers are looked after by the friendly mascot Max the Teddy. More experienced skiers will appreciate two black runs, including an FIS-certified slope with a gradient exceeding thirty percent. The cherry on top is that most slopes are floodlit, so you can ski in the evening too.

The resort is around two hours’ drive from Kraków. A day ski pass can be purchased online from as little as 88 PLN (around €21) when bought in advance, with standard prices ranging from 147 to 183 PLN (€35–€43) depending on the date and season.

Szczyrk Mountain Resort ski slopes in Poland
Szczyrk Mountain Resort

2) Zieleniec in the Orlické Mountains

Zieleniec Sport Arena is one of the best Poland ski resorts for beginners and families. Set between the peaks of the Orlické and Bystřické mountains, it offers 48 runs totalling over twenty kilometres. It’s an ideal resort primarily for families and recreational skiers, as the vast majority of runs are marked blue (easiest difficulty). With 31 lifts at your disposal, skiers are well distributed across the area and you won’t spend long waiting in queues.

Thanks to an Alpine-like microclimate, snow stays here for nearly 150 days a year, often well into the Easter holidays. The resort is also equipped with modern snowmaking technology, so even during warmer spells you needn’t worry about conditions. It’s approximately a three-hour drive from Wrocław or reachable via Kraków.

A day ski pass costs 160 PLN (around €38). Children and seniors benefit from reduced prices, and children under six ski for free.

Zieleniec Sport Arena aerial view
Zieleniec Sport Arena

3) Szklarska Poręba and Ski Arena Szrenica – Karkonosze

The Polish side of the Karkonosze (Giant Mountains) will surprise those looking for a steeper challenge. Ski Arena Szrenica stretches across the northern slopes of Mount Szrenica at elevations between 707 and 1,362 metres above sea level. Thanks to its northern exposure, the microclimate here is noticeably colder than on the southern side, meaning excellent snow conditions often lasting into April.

The resort offers a total of twelve kilometres of slopes, with the highlight for experienced skiers being the very demanding FIS run with an average gradient of 26 percent. The longest run, Lolobrygida, is an impressive 4,400 metres with a vertical drop of 637 metres. Eight modern lifts ensure a transport capacity of ten thousand people per hour.

A day ski pass costs 175 PLN (around €41) for adults and 145 PLN (around €34) for seniors and children.

4) Zakopane in the Tatras

The most famous Polish winter resort sits in the heart of the High Tatras and attracts visitors not only for skiing in Zakopane Poland but also for stunning mountain views and a rich cultural scene. The Zakopane area offers several resorts catering to different types of skiers.

The highest Polish ski resort, Kasprowy Wierch, reaches 1,987 metres and features two demanding black runs with average gradients of 32 to 37 percent. The second major area is Polana Szymoszkowa, accessed by a modern six-person chairlift to the summit of Gubałówka, offering panoramic views of the Tatras. For families with children, there’s a KidsPark with a magic carpet lift.

The Tatry Super Ski pass, valid at multiple resorts on both the Polish and Slovak sides, costs 170 PLN (around €40) in peak season. A day pass for Kasprowy Wierch starts from 175 PLN (around €41). Zakopane is roughly two hours by car from Kraków, which has excellent flight connections to London, Dublin, Berlin, and many other European cities.

5) Świeradów-Zdrój – Jizera Mountains

This charming spa town on the Polish side of the Jizera Mountains offers a perfect combination of winter sports and wellness relaxation. The modern Ski & Sun resort features one gondola lift and two drag lifts serving a 2,500-metre slope with a vertical drop of 443 metres. The run has an average gradient of nineteen percent and alternates between blue and red markings.

A major advantage is the option of evening skiing thanks to full floodlighting of the entire run. There’s a dedicated kids’ park for younger skiers and a snowpark with its own lift for snowboarders. From the top station, groomed cross-country trails head out into the mountains, so if someone in your group prefers Nordic skiing, this is the perfect spot.

A two-day ski pass in peak season costs 310 PLN (around €73), which works out very well per day.

Read also: 9 best water parks in Poland

Świeradów-Zdrój ski resort in Poland
Świeradów-Zdrój
lukas a lucka
Lukáš and Lucie recommend
Where to stay in Poland
3 accommodations — wellness hotels, hotels and other accommodation options

How to get to Poland for skiing

The most convenient way to reach Polish ski resorts from the UK is to fly into Kraków, which has direct connections from London (Stansted, Luton, Gatwick), Manchester, Edinburgh, Bristol, and other cities. From Kraków, you can rent a car or take a bus to Zakopane (around 2 hours) or other Tatra resorts. For resorts in the Karkonosze or Jizera Mountains, flying into Wrocław is another great option.

If you’re driving from elsewhere in Europe, Polish roads are in good condition and the journey is straightforward. Poland is part of the EU and the Schengen Area, so EU/EEA citizens only need a valid passport or national ID card — no visa required. For UK passport holders, you can stay for up to 90 days without a visa.

Many resorts also run seasonal skibus services connecting nearby cities with the mountain resorts, making car-free travel perfectly possible.

Skiing in Poland slopes
Skiing in Poland

Things to do besides skiing

Wondering what else to do on your Poland skiing holidays besides hitting the slopes?

Thermal baths and water parks

After a demanding day on the slopes, you’ll love unwinding in thermal baths or a water park. Białka Tatrzańska at the foot of the Tatras boasts a thermal water park right next to the ski slopes — a unique feature in Central Europe. The pleasantly warm water will warm you up even in freezing weather, and kids will enjoy countless slides and attractions.

Similarly, in Świeradów-Zdrój you’ll find quality spa treatments that combine tradition with modern wellness trends. Many hotels in the Polish mountains have their own wellness centres with pools, saunas, steam rooms, and massage parlours.

Cross-country skiing in Polish mountains

If you prefer cross-country skiing over downhill, the Polish mountains won’t disappoint. In Jakuszyce near Szklarska Poręba, you’ll find one of the largest and best-groomed cross-country skiing regions in Central Europe. There are 150 kilometres of trails of varying difficulty, from flat loops suitable for families to more challenging mountain routes. The grooming quality is truly world-class, which even the most demanding Nordic skiers will appreciate.

Ski jumps and toboggan runs

For adrenaline seekers, there are toboggan runs that operate year-round. For example, near the top station of the gondola in Świeradów-Zdrój, you can enjoy a 720-metre toboggan ride with plenty of twists and steep descents. In Karpacz, you can visit the famous Orlinek ski jumping hill and see where ski jumpers launch their flights. In good weather, the hill serves as a viewing platform with stunning panoramic views of the entire Karkonosze range.

Poland skiing winter landscape
Skiing in Poland

Polish cuisine: What to try while skiing in Poland

Polish cuisine is a delightful change from the standard mountain hut fare you might find elsewhere in Central Europe. While other resorts might offer little more than basic soups and sausages, Polish mountain restaurants serve up a much more varied and flavourful menu.

Oscypek and string cheese

The most famous Polish mountain delicacy is undoubtedly oscypek — a traditional smoked sheep’s cheese from the Tatras. It’s sold right on the slopes and in mountain huts, where it’s typically served grilled with cranberry jam. Similar string cheeses (korbáčiky) can be found throughout Poland. The flavour is very distinctive and specific, but absolutely worth trying.

Pierogi – Polish dumplings

If you’ve ever tried Russian pelmeni, Polish pierogi will be a pleasant surprise. These stuffed dumplings come in both sweet varieties (with cottage cheese and fruit, for example) and savoury ones (with cabbage, meat, or potatoes). They’re served with sour cream and fried onions. A single portion is filling enough to keep you going all afternoon on the slopes.

Żurek and other soups

There’s nothing better than a hot soup in cold winter weather. A traditional Polish speciality is żurek — a sour soup made from fermented rye flour, often served with sausage and a hard-boiled egg. For those who prefer something more familiar, you’ll also find excellent beef broths or cabbage soup (kapuśniak).

Practical information for your trip to Poland

If you’re planning your Poland skiing holidays, here are some handy practical tips.

Currency and payments

Poland uses the Polish złoty (PLN), although some places in tourist areas also accept euros. The best approach is to pay by card — we recommend Revolut or similar multi-currency cards for the best exchange rates. Avoid exchanging money at currency exchange kiosks in ski resorts, as they typically offer poor rates.

Language and communication

English is widely spoken in Polish tourist areas, hotel receptions, and ski rental shops. Younger Poles especially tend to speak good English. You’ll have no trouble getting by with English at all major ski resorts. Some staff also speak German. Poles are generally very welcoming and helpful to foreign visitors.

Fuel prices

Fuel prices in Poland are generally lower than in Western Europe, making driving a cost-effective option. Petrol stations are common along main roads, but they become scarcer in the mountains, so we recommend filling up before heading into the hills.

Travel insurance

While EU citizens are entitled to basic healthcare in Poland through the European Health Insurance Card (EHIC), and UK citizens can use the UK Global Health Insurance Card (GHIC), we strongly recommend taking out travel insurance — for example from SafetyWing. This will cover you not only for injuries on the slopes but also for repatriation or lost luggage.

Read more: SafetyWing travel insurance review

Frequently asked questions

Is skiing in Poland suitable for beginners?

Yes, most Polish resorts offer blue runs suitable for beginners and ski schools with English-speaking instructors. Ideal Poland ski resorts for beginners include Białka Tatrzańska and Zieleniec.

Are Polish slopes more difficult than average?

Generally yes. Polish slopes tend to be steeper and more technically demanding than those in many Central European countries, which is great news for advanced and sporty skiers. However, families with children and beginners will find plenty of gentle blue runs.

Can I pay with euros in Poland?

The official currency is the Polish złoty. Some tourist areas accept euros, but at unfavourable exchange rates. We recommend paying by card or exchanging money in advance for the best deal.

Do I need a visa to visit Poland?

No, Poland is part of the Schengen Area. EU/EEA citizens only need a valid national ID card or passport. UK citizens can visit visa-free for up to 90 days with a valid passport.

How good is snowmaking at Polish resorts?

Most modern Polish resorts have high-quality snowmaking systems. Additionally, resorts on north-facing slopes like Szrenica benefit from a naturally colder microclimate that helps preserve snow.

Are lift queues a problem in Poland?

One of the biggest advantages of skiing in Poland is the minimal queues. While Alpine resorts often see thirty-minute waits, in Poland you’ll typically get on the lift almost immediately.

Can I rent ski equipment on site?

All major Polish resorts have quality rental shops for skis, snowboards, boots, and protective gear. Rental prices are very reasonable compared to Western European resorts.

Tips and Tricks for Your Vacation

Don’t Overpay for Flights

Search for flights on Kayak. It’s our favorite search engine because it scans the websites of all airlines and always finds the cheapest connection.

Book Your Accommodation Smartly

The best experiences we’ve had when looking for accommodation (from Alaska to Morocco) are with Booking.com, where hotels, apartments, and entire houses are usually the cheapest and most widely available.

Don’t Forget Travel Insurance

Good travel insurance will protect you against illness, accidents, theft, or flight cancellations. We’ve had a few hospital visits abroad, so we know how important it is to have proper insurance arranged.

Where we insure ourselves: SafetyWing (best for everyone) and TrueTraveller (for extra-long trips).

Why don’t we recommend any Czech insurance company? Because they have too many restrictions. They set limits on the number of days abroad, travel insurance via a credit card often requires you to pay medical expenses only with that card, and they frequently limit the number of returns to the Czech Republic.

Find the Best Experiences

Get Your Guide is a huge online marketplace where you can book guided walks, trips, skip-the-line tickets, tours, and much more. We always find some extra fun there!