
Slavonice: 13 Things to See and Do (+ Accommodation & Family Tips)

TL;DRSlavonice is a Renaissance heritage town in southern Bohemia, just a few kilometres from the Austrian border, famous for its square lined with over 50 historic houses decorated in sgraffito. Beneath the streets lies a 13th-century underground network (1,375 m long, tickets from 40 CZK), plus a set of bunkers built in 1938. The article rounds up 13 tips on what to see and do, from the town tower with its 176 steps to Landštejn Castle, the U Jakuba lookout tower, and swimming at Osika pond. For families, it’s worth heading to the Fairytale Forest Trail and the mini zoo at Bejčkův mlýn. Accommodation starts at 350 CZK per person per night at Dobrohoř Chateau, right up to the luxury Hotel U Růže, with its wine bar tucked into medieval cellars. One day is enough for the town itself, or stretch it into a long weekend with day trips around the area — May to September is the best time to come.

I have to confess something that’s a bit embarrassing for someone who grew up in South Bohemia. I didn’t visit Slavonice until I was 27. 😅 I know, it sounds absurd — I grew up in the region, explored practically every small town from České Budějovice to Třeboň, but Slavonice Czech Republic somehow always slipped through the cracks. It wasn’t until Lukáš and I set off on a trip through Czech Canada that we finally stopped there — and I stood in the main square with my jaw on the floor, thinking: “Where has this been all my life?”

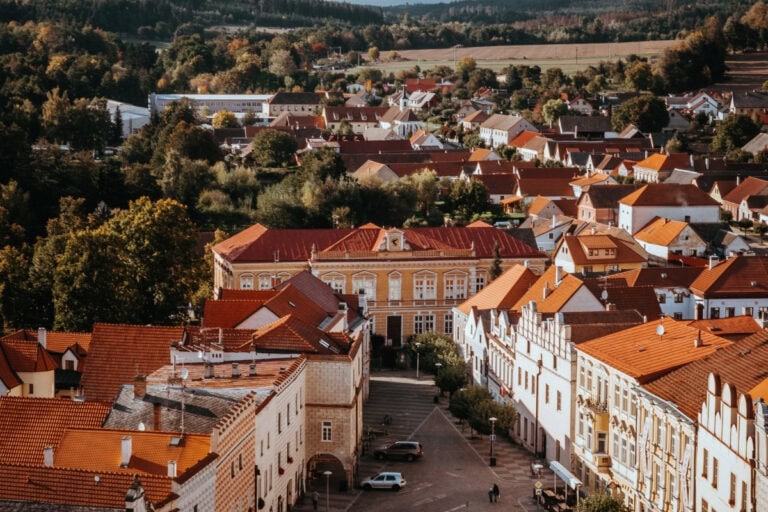
Imagine a small town at the very southern tip of Bohemia, just a few kilometres from the Austrian border, where time stopped somewhere in the 16th century. A square lined with Renaissance houses covered in sgraffito that look like they belong in an art history textbook. Narrow lanes where every corner reveals another stone detail that stops you in your tracks. Underground passages full of medieval tunnels where water reaches your ankles. And that special atmosphere of a place that sits well off the main tourist routes — no crowds, no queues, just you and centuries of history.

Slavonice immediately joined my list of TOP South Bohemian towns, right alongside Český Krumlov and Jindřichův Hradec. And honestly? In some ways, Slavonice surpassed them — with that authenticity and tranquillity that you can no longer find in the more famous towns.

In this article, you’ll find 13 things to see and do in Slavonice — from the Renaissance square and medieval underground to WWII-era bunkers and a fairy-tale forest for kids. I’ll tell you where to stay, where to eat well, where to go on day trips, and why Slavonice should be on your list, even if you’ve never heard of it before.
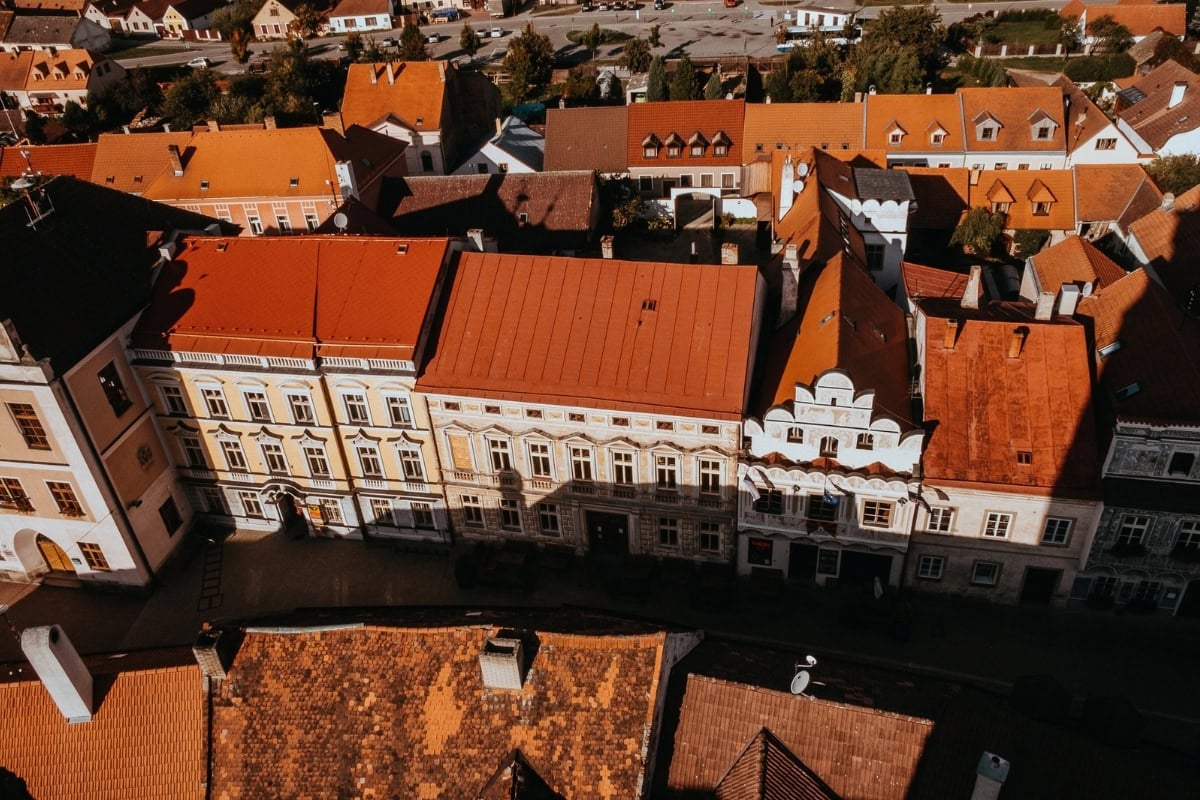
Slavonice Czech Republic things to see

TL;DR

  • Slavonice is an urban heritage reserve in South Bohemia with some of the most beautiful Renaissance sgraffito facades in all of Europe — and yet there are no tourist crowds.
  • The Renaissance square is an absolute treasure — over 50 historic houses with Gothic cores and Renaissance facades, richly decorated gables and arcades.
  • The Slavonice underground is a unique experience — medieval passages from the 13th century where you wade through water (wellies and rain ponchos are provided). Admission from around €1.60.
  • The town tower has 176 steps and the reward is a panoramic view of the entire town and Czech Canada.
  • Slavonice is a great base for day tripsLandštejn Castle, the U Jakuba lookout tower, or swimming at Osika Pond.
  • With kids, there’s plenty to do — Fairy-Tale Forest Trail, mini zoo at Bejčkův mlýn, the giant hornbeam Labyrinth near Dolní Pěna, or ZOO Na Hrádečku.
  • Accommodation from around €14/person/night (Dobrohoř Castle!) to the luxurious Hotel U Růže with a wine bar in medieval cellars.
  • Food tip #1: Hospůdka v Mázhauzu — the best restaurant in town according to TripAdvisor and according to us.
  • You can see Slavonice itself in one day, but with day trips to the surrounding area, you can easily spend a long weekend.
  • Slavonice lies on the Greenway Prague–Vienna cycle route — a paradise for cyclists.
  • The best time to visit is May–September, but Slavonice has its charm even out of season.

When to visit Slavonice and how to get there

Slavonice lies at the very southern tip of Bohemia, literally a few kilometres from the Austrian border, in an area known as Czech Canada. Before we dive into what to see, let’s talk about the best time to visit and how to get to this hidden gem.

Best time to visit Slavonice

The ideal period is from May to September — the weather is pleasant, all attractions are open (underground, tower, castles), and you can swim in the surrounding ponds. July and August are of course the warmest and liveliest months, but be aware — it’s also peak season and some restaurants may be busier. Even so, Slavonice sees a fraction of the visitors compared to Český Krumlov, so no need to panic. 😉

If you don’t mind cooler weather and aren’t fussed about swimming, spring (April–May) and early autumn (September–October) are absolutely beautiful — the town has a special melancholic atmosphere and the sgraffito on the facades looks stunning in the soft light. In winter, many things are closed, but the snow-covered square has its own charm too.

Tip: On the first Saturday in August, a military re-enactment called “Attack on the Bunkers 1938” takes place at the fortification site — if you time your visit right, it’s quite an experience.
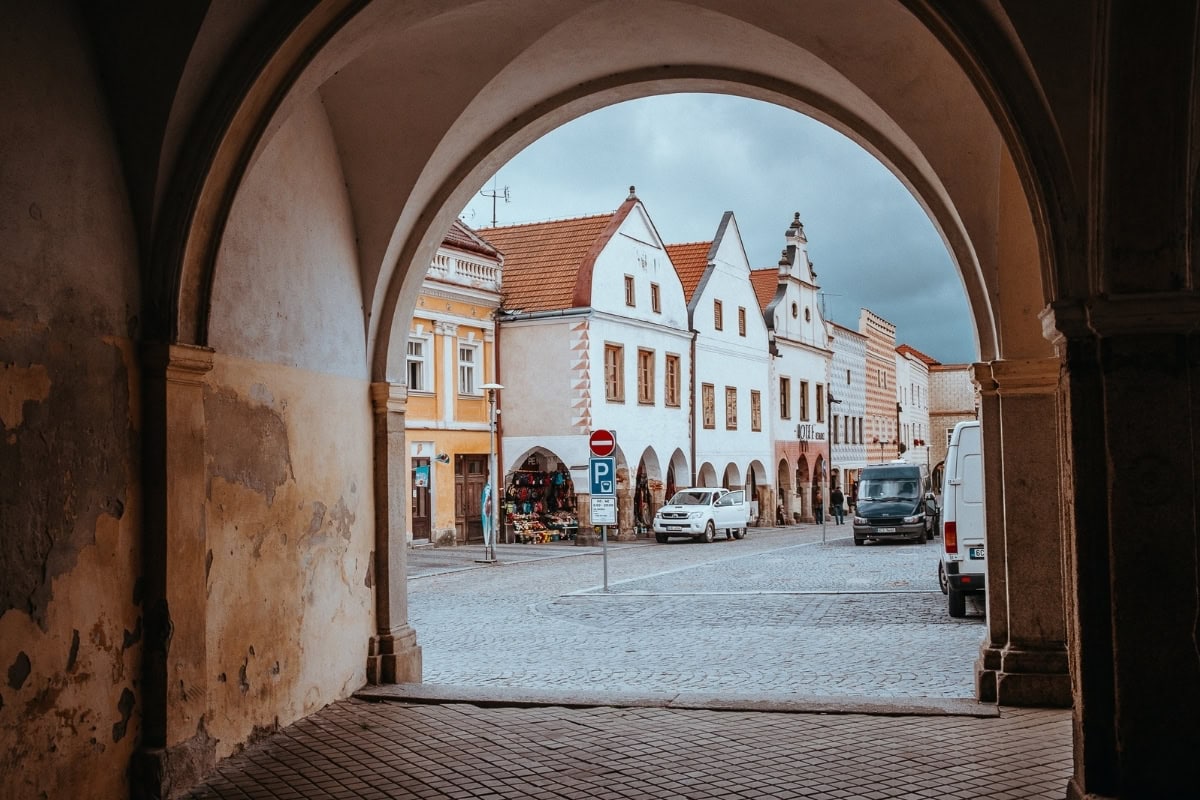
What to see in Slavonice

How to get to Slavonice

By car is the most convenient option, especially if you want to explore the surrounding area:

  • From Prague: approx. 2.5–3 hours (180 km, via D1 motorway and Jihlava, or via Tábor and Jindřichův Hradec)
  • From Vienna: approx. 2 hours (170 km) — Slavonice sits right near the Austrian border
  • From Brno: approx. 2 hours

By train or bus, you can reach Slavonice, but it requires patience and a transfer — usually via Jindřichův Hradec or Dačice. It’s not the most convenient option, but it’s doable.

By bike is perhaps the most romantic way — Slavonice lies on the international Greenway Prague–Vienna cycle route (route no. 48), which I write more about below.

Parking in Slavonice

Parking here is stress-free. Right on Náměstí Míru (Peace Square), you can park for about €0.40/hour, which is a laughable amount compared to larger cities. On surrounding streets and peripheral car parks, you can park for free. We left our car a short walk from the square and did everything on foot — the centre is tiny and you can walk around it in no time.

Where to stay in Slavonice + how much it costs

Slavonice is a small town, but the selection of accommodation is surprisingly varied — from historic hotels right on the square to family guesthouses and even a château where you can sleep for the price of a single cappuccino in Prague. 😅 Prices are generally much lower than in the more touristic South Bohemian towns, which is another reason I love Slavonice.

Here’s an overview of the best places where we’ve either stayed or that have excellent reviews:

Accommodation in Slavonice town

Hotel U Růže ★★★★ — If you want the best Slavonice has to offer, this is the clear choice. A luxury hotel right on the square with wellness facilities and — wait for it — a wine bar in cellars dating from the 8th–12th century, connected to the Slavonice underground. So you can sip wine literally surrounded by history. From approx. €48/person/night.

Hotel Besídka ★★★ — A Renaissance house with 19 unique rooms, each in a different style. Rated 8.4/10 on Booking. Important practical tip: at weekends, Besídka is one of the few restaurants where you can get dinner, so if you stay here, you’re sorted. From approx. €46/person/night.

Hotel Pivonka ★★★ (formerly Hotel Arkada) — A historic 16th-century house with a restaurant serving both Bohemian and Austrian cuisine — the proximity to Austria definitely shows. They also have bike rental, so if you’re planning to ride the Greenway, it’s practical.

Vila Slavonice — Our number one recommendation for families with children. The highest-rated accommodation in Slavonice, with a playroom for kids and a fully equipped kitchen. From approx. €80/night for the entire villa (up to 6 people) — that’s about €13 per person if you come in a full group. Absolute bargain.

Penzion Secesní dům — Beautiful Art Nouveau architecture and from €20/person/night, the most affordable option right in town.

Accommodation near Slavonice (within 10 km)

Bejčkův mlýn (2 km from centre) — Idyllic accommodation in the Slavonice nature area with a mini zoo where kids can feed donkeys, sheep, and goats (more about that in the family section). Plus a tennis court and wine cellar. Ideal for families who want to be close to town but in nature.

Zámek Dobrohoř (Dobrohoř Château) (10 km) — Want to sleep in a château? From €14/person/night! That’s not a typo. Dobrohoř Château offers accommodation at a price that will take your breath away. We haven’t stayed there ourselves, but at that price, it’s worth trying.

Landštejnský dvůr (10 km) — Right below Landštejn Castle, with a children’s playground and fish specialities in the restaurant. If you’re planning to visit the castle, you won’t find a better base.

Landštejn Castle near Slavonice

How much does a weekend in Slavonice cost for two

Slavonice is delightfully affordable. Here’s a rough budget for a long weekend (3 nights) for two:

  • Accommodation: €120–290 (€20–48/person/night × 2 × 3)
  • Food and drink: €80–140 (lunches and dinners at restaurants, cafés)
  • Admission fees: approx. €20–32 (underground, tower, Landštejn Castle)
  • Petrol from Prague and back: approx. €32–40
  • Total: approx. €250–500 for two for 3 nights, depending on accommodation level

Compared to Český Krumlov, for example, it’s significantly cheaper — and yet the experience is comparable.

Slavonice: 8 places you must see and things to do

Now let’s get to the main part — what to see and experience in Slavonice. The town may be small (home to fewer than 2,500 residents), but the concentration of points of interest per square metre is incredible. I’ve put together 8 tips right in town, from the Renaissance square and mysterious underground to a cycle path that takes you all the way to Vienna. ☺️
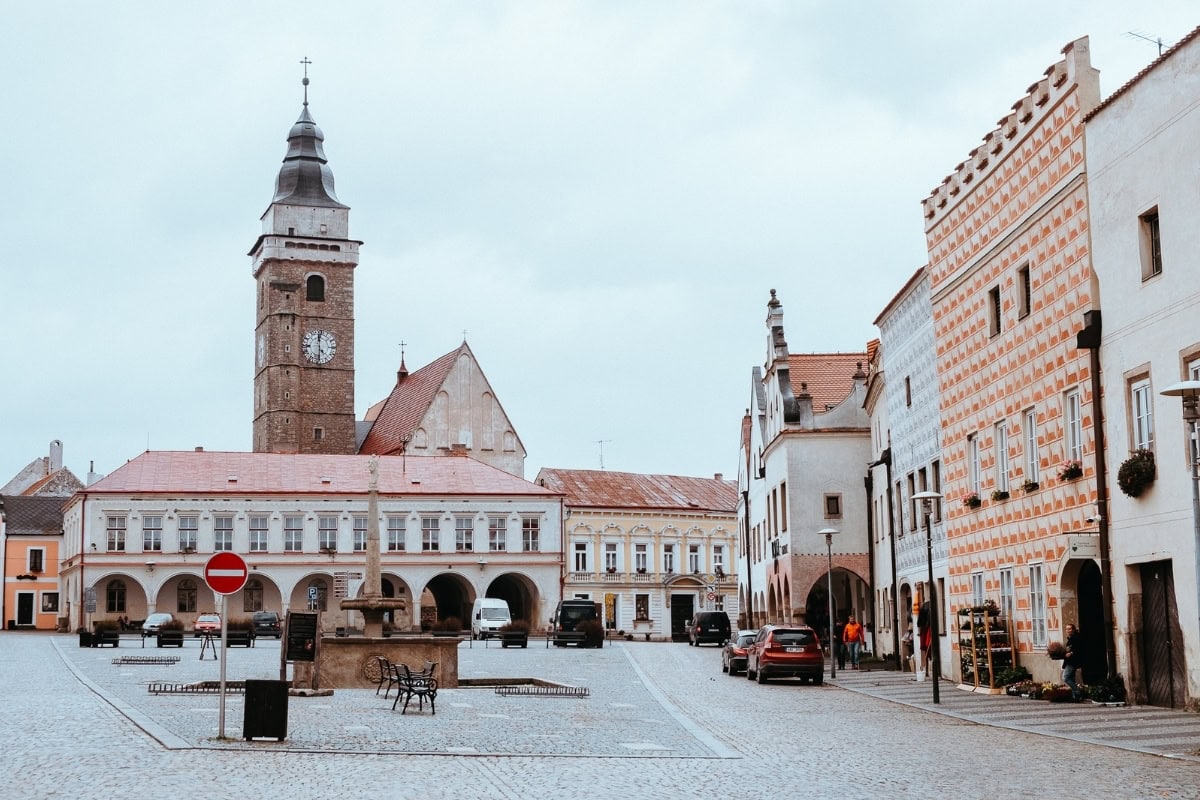
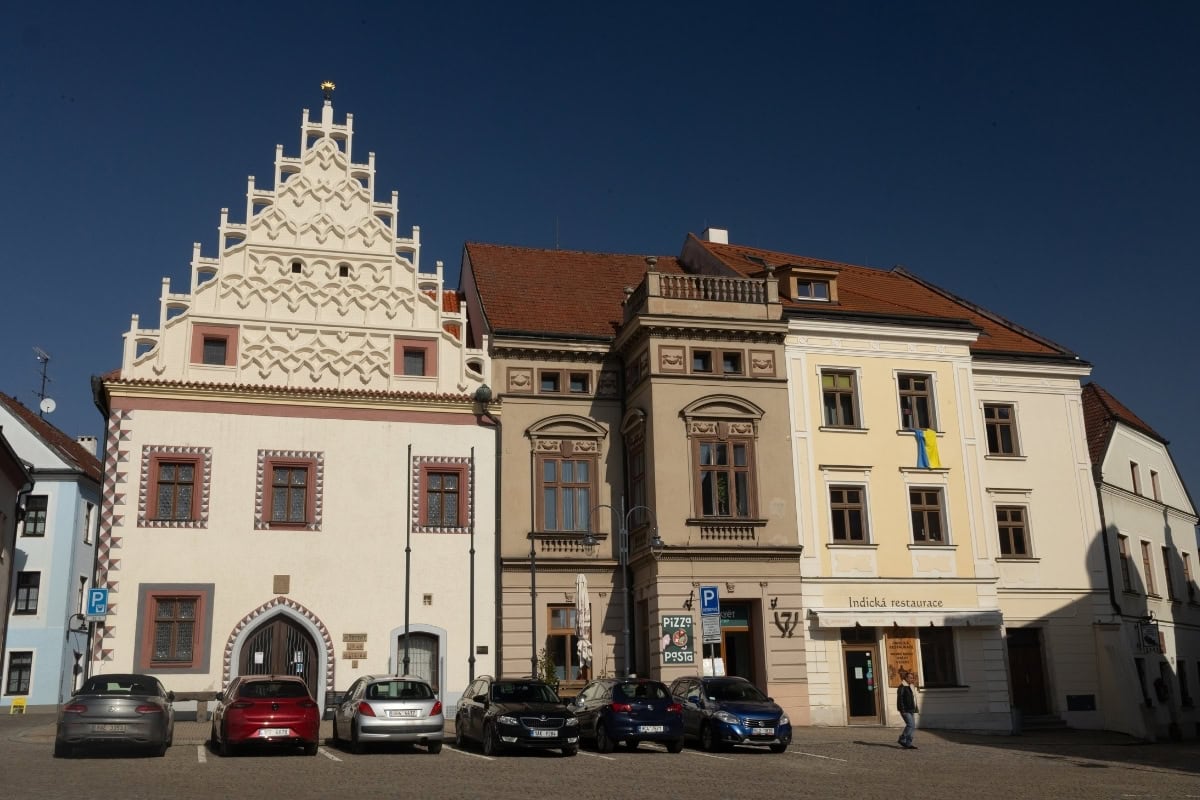
Main square in Slavonice

1. Renaissance square and sgraffito — a walk through the historic centre

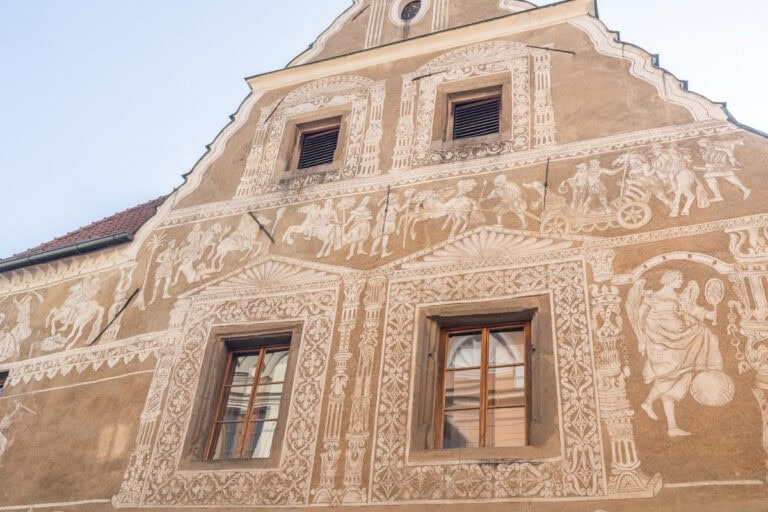
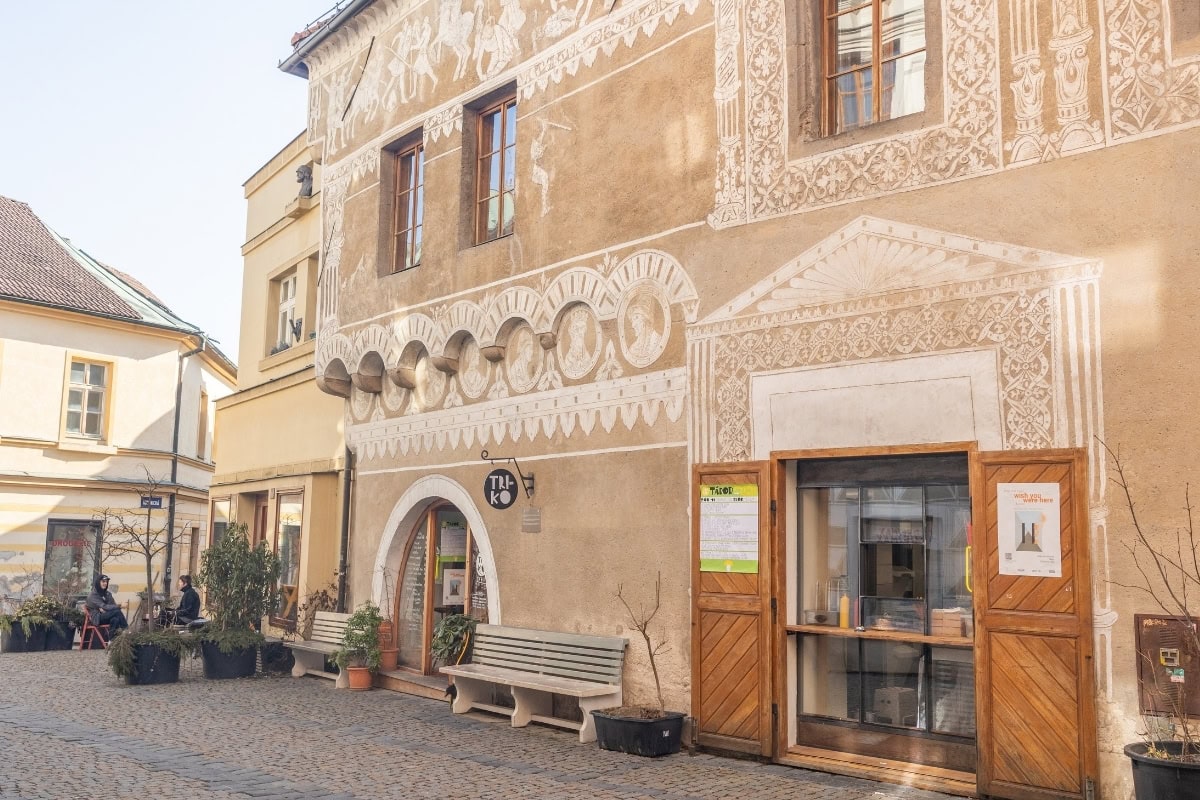
This is what made me stand in the square with my jaw on the floor. Náměstí Míru (Peace Square) and the adjoining Horní náměstí (Upper Square) are surrounded by more than 50 historic houses in Gothic, Renaissance, and Baroque styles. Over 20 of them are decorated with figurative, ornamental, and architectural sgraffito from the 16th century — those delicate, etched images on facades that look like giant engravings carved into plaster.

Slavonice grew wealthy in the 16th century because it sat on an important postal route between Prague and Vienna. The burghers invested in rebuilding their homes and hired the finest artists. The result? One of the most complete collections of Renaissance sgraffito decoration in all of Europe. And that’s no exaggeration — the town has been an urban heritage reserve since 1961.

My recommendation: Don’t follow any itinerary. Just stroll around the square and lanes, look up, and admire the details. Every house is different, every gable tells a different story. Under the arcades, you can sit down for a coffee (more on cafés below) and simply soak up the atmosphere. It’s like an open-air museum, just without admission fees and without a no-photography rule. 😁

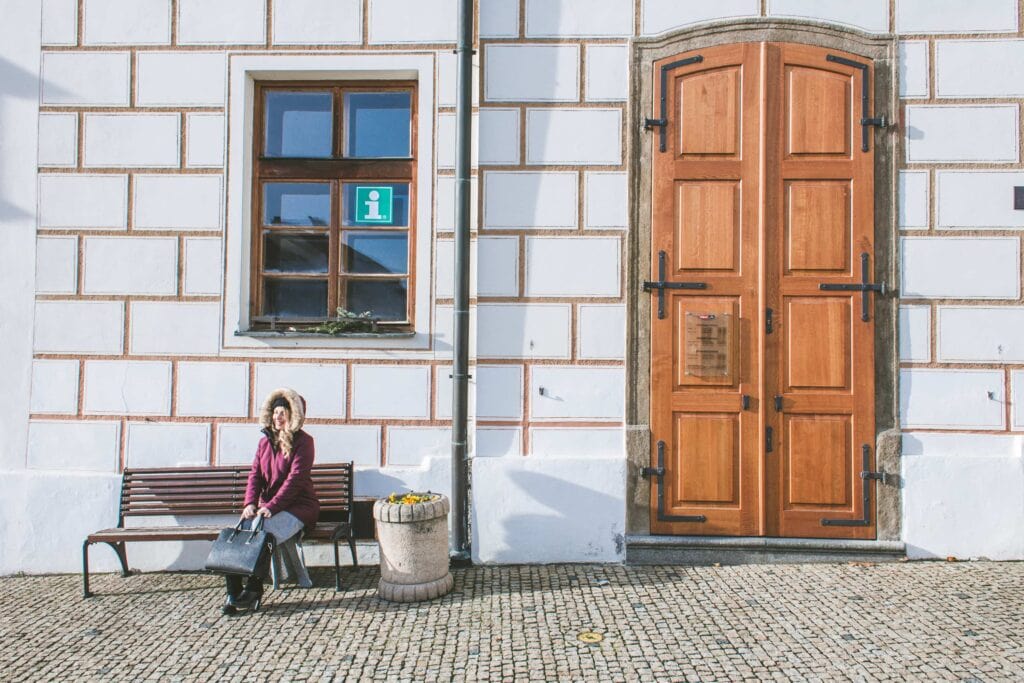
Practical tip: At the Tourist Information Centre on Náměstí Míru 476, you can pick up a map marking the most significant houses and sgraffito. It’s open during peak season (July–August) daily 9:00–17:00, and in June and September daily 8:00–17:00.
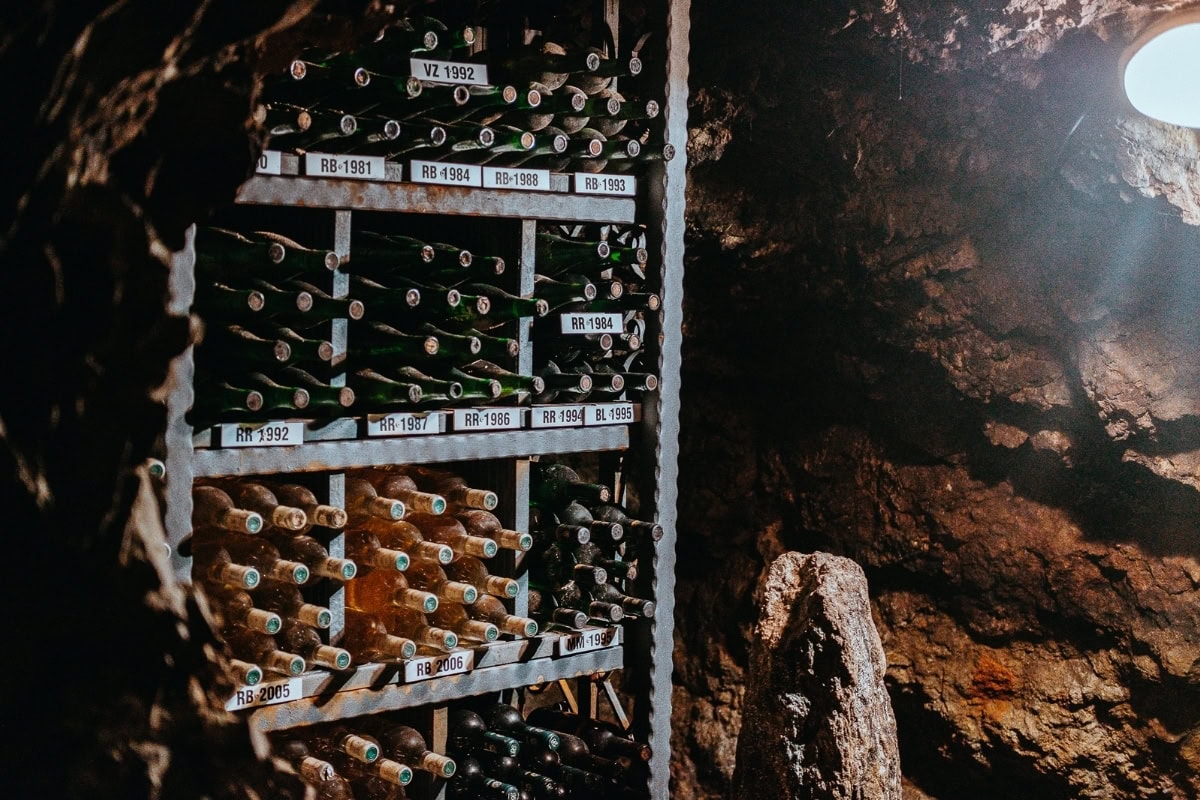
Underground tunnels in Slavonice

2. Slavonice underground — medieval tunnels where you wade through water

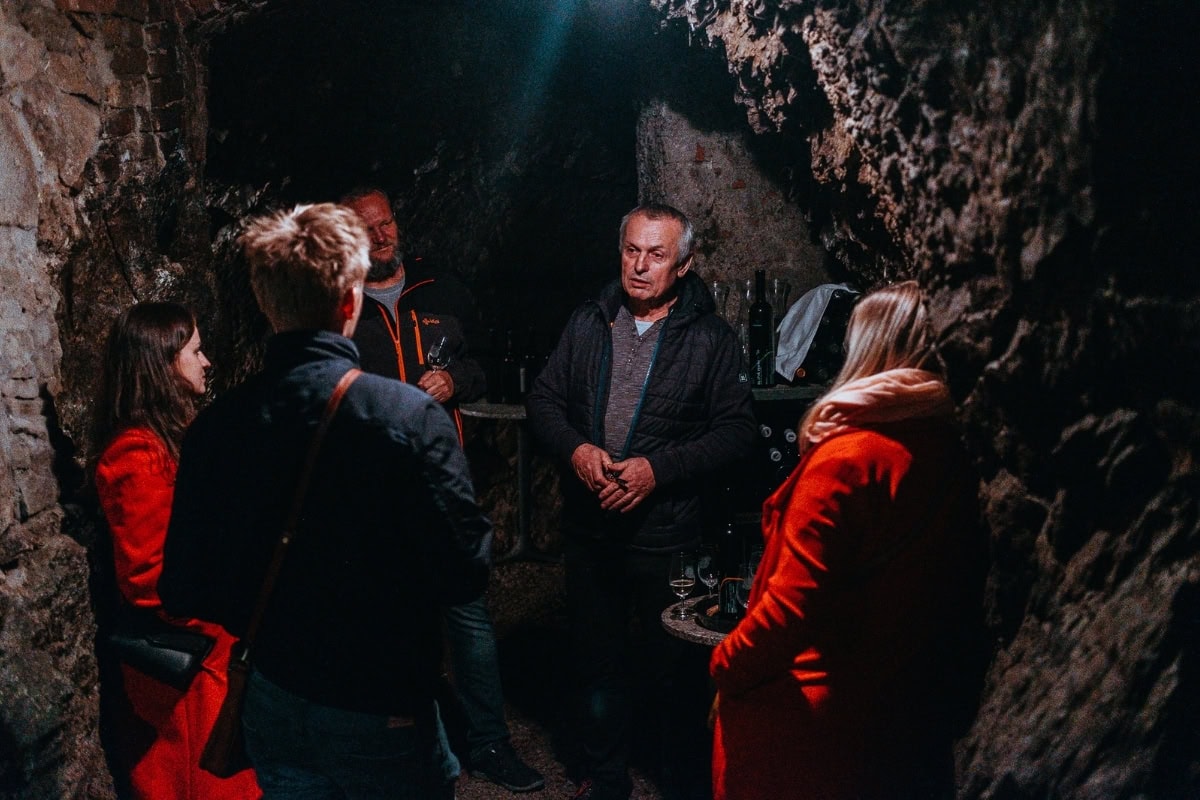
And now the best part — at least for me personally. The Slavonice underground is a network of medieval passages from the 13th century, hewn directly into the rock beneath the town. The total length is an incredible 1,375 metres and the tunnels lie 4–7 metres below the surface. They’ve been open to the public since 1998.

What makes the Slavonice underground so unique? Water. The passages have a constant level of groundwater that reaches up to about 20 cm. So you literally wade through medieval tunnels ankle-deep in water. 😅 Don’t worry — at the entrance you’ll receive a rain poncho and wellies included in the admission price — so even those who wore white trainers (like me) will be fine.

You can choose from two routes:

  • Long route: approx. 400 metres, 45–60 minutes, €2.80 adults / €1.60 reduced — I’d recommend this one if you have time. You’ll see most of the tunnels and the experience is more immersive.
  • Short route: approx. 150 metres, 20–25 minutes, €1.60 adults / €1.20 reduced — ideal if you’re visiting with smaller children or are short on time.

The entrance is from the mázhaus (great hall) of house no. 480 on Náměstí Míru — you’ll find it easily, it’s in a confectionery. Yes, you read that right — you enter the underground from a sweet shop. Slavonice knows how to surprise. ☺️

Honest warning: It’s cold underground (around 10°C year-round) and damp. Even in summer, bring a warm layer. And if you suffer from claustrophobia, some sections are quite narrow — consider the short route or skip it altogether.
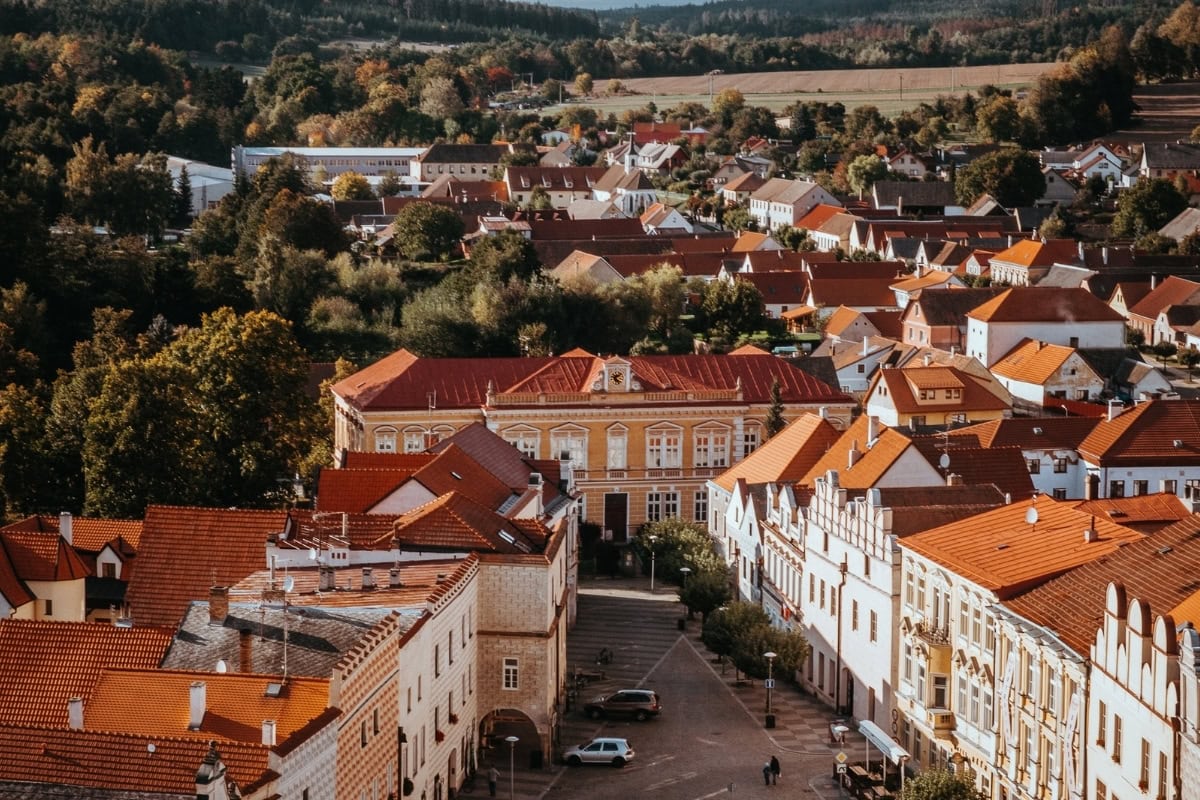
View from the tower in Slavonice

3. Town tower — 176 steps and a panoramic view

If you love views (and who doesn’t), the town tower at the Church of the Assumption of the Virgin Mary is a must. The tower is 56 metres tall, was completed in 1549, and 176 steps lead to the viewing platform. The reward is a panoramic view of the entire town — sgraffito-decorated rooftops, red tiles, the surrounding hills of Czech Canada, and on a clear day, you can see far into Austria.

The Church of the Assumption of the Virgin Mary itself is a late Gothic three-naved basilica from the 14th century with beautiful ribbed vaulting and is worth a peek inside, even if you don’t climb the tower.

Practical tip: The tower is mainly open during the summer season. Admission is symbolic (just a few euros). For current information, check the TIC on the square or the town’s website. With small children in a pushchair, it obviously won’t work — 176 steps are 176 steps. 😅
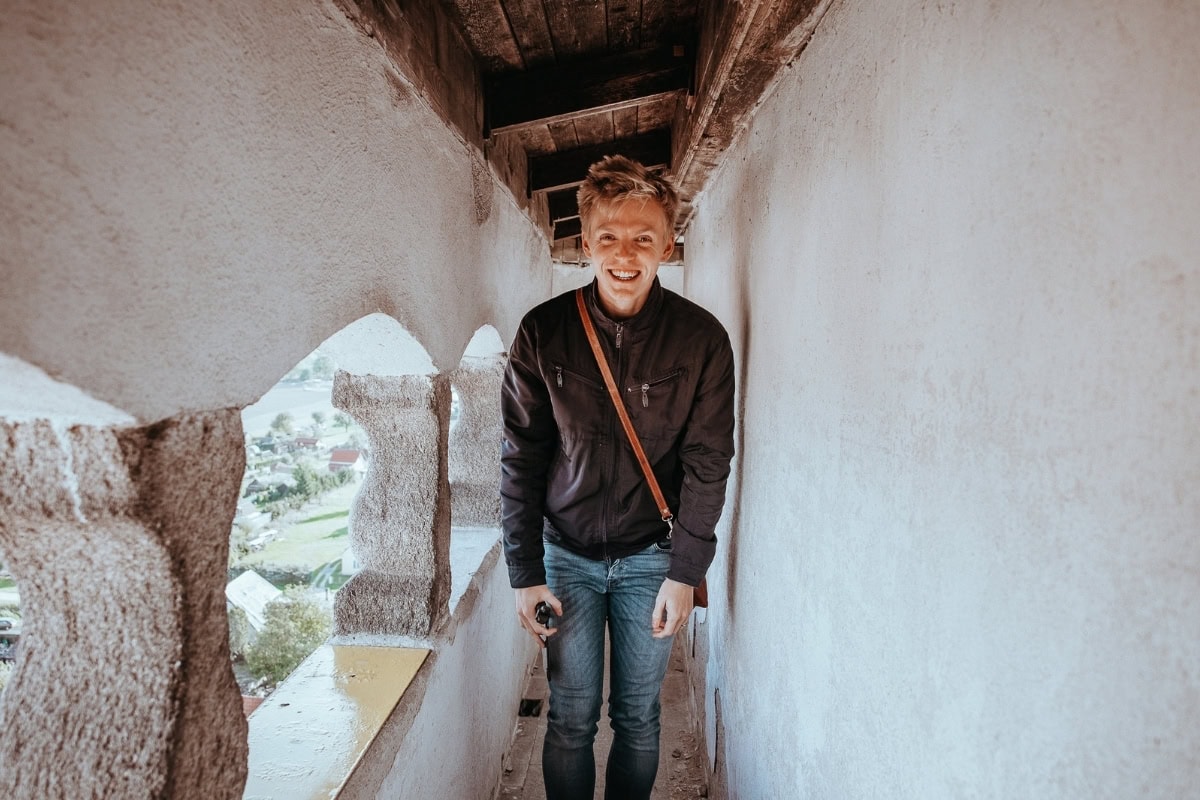
View from the tower in Slavonice

4. Fortification site and bunkers — a piece of the Iron Curtain

This one’s for all lovers of modern history and for anyone who wants a reminder of how close war once was. On the outskirts of Slavonice, you’ll find the Museum of Czechoslovak Fortification 1935–1938 — a site with 11 reconstructed Type 37 bunkers, colloquially known as “ropíky.”

Two of the bunkers are fully equipped and armed and open to the public. You can look inside, see what life was like for soldiers in these cramped spaces, and walk an educational trail with 13 stops that guides you through the entire fortification.

Slavonice sat right on the border of the Sudetenland, and the fortifications were meant to stop a potential invasion from Austria, which by 1938 had already been absorbed into Nazi Germany. When the Munich Agreement came, the fortifications were never used in battle — and yet (or perhaps because of that) walking among the bunkers is a powerful experience. You stand here and wonder what would have happened if…

Tip: Every year on the first Saturday in August, a military re-enactment called “Attack on the Bunkers 1938” takes place with period uniforms, equipment, and pyrotechnics. If your timing works out, it’s a great experience even for those who aren’t typically interested in military history.

Boys (and the boys inside grown men 😁) will love it. Lukáš and I spent more time there than I’d originally planned.
WWII bunkers near Slavonice

5. Keramika Maříž — paint your own mug

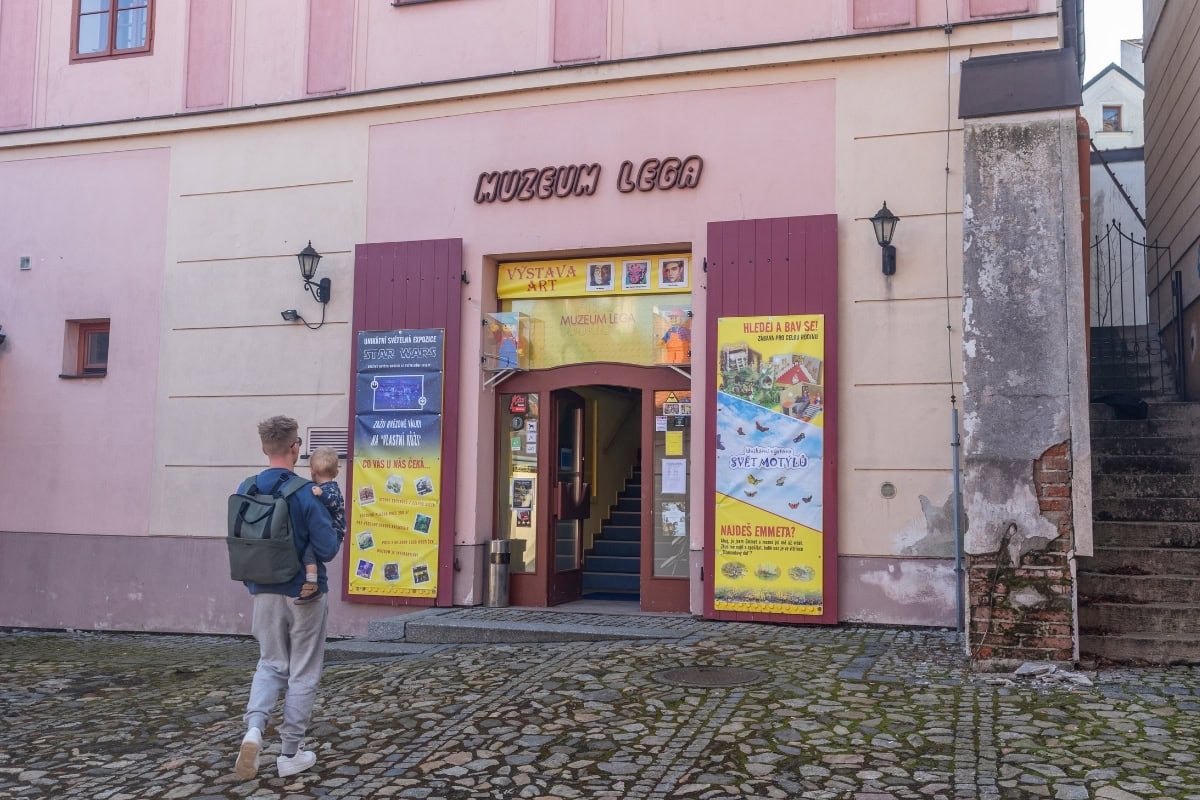
This is a tip that families with children will especially appreciate, but also adults who want to take home an original souvenir. Keramika Maříž has its main workshop in nearby Maříž (a few kilometres from Slavonice), but right on the square you’ll find their branch Ceramic Art & Salad — a café combined with a ceramics workshop.

Here’s how it works: you choose a mug, bowl, or plate and paint your own design on it. The ceramic is then fired and shipped to your home by post. It’s an absolutely brilliant activity, especially in bad weather when you don’t know what to do with yourself. Kids adore it, but I’ll admit I enjoy it just as much. 😅

In the Ceramic Art & Salad café, you can have a decent coffee and a light lunch — a salad or sandwich. So you combine something pleasant with something even more pleasant.

Practical tip: Allow about 1–2 hours for painting, and the price depends on the piece of ceramics you choose (roughly €8–20 per piece + postage). You’ll receive the finished product by post in 2–3 weeks.
Ceramic painting workshop in Slavonice

6. Where to eat in Slavonice — a food guide

Slavonice isn’t Prague or České Budějovice — the restaurant selection is limited, but the quality is surprisingly good. I do have to give you an honest heads-up though: outside peak season and at weekends, it can be tricky to find an open restaurant for dinner. We found this out the hard way. So plan ahead and make a reservation if possible.

Hospůdka v Mázhauzu — Our clear number one. It’s the top-rated restaurant in Slavonice on TripAdvisor and completely deservedly so. Hearty Czech cuisine, about 50 seats inside plus a terrace in summer. Portions are generous, prices reasonable, and the atmosphere is exactly what you’d expect in a South Bohemian town — no unnecessary pretension, just good food. I recommend booking, especially at weekends.

Restaurace Besídka (in Hotel Besídka) — Pizza and European cuisine. And here’s that important tip again: at weekends, this is one of the few restaurants that serves dinner. So if you’ve planned a romantic weekend and don’t want to eat bread rolls from your backpack for supper, keep Besídka as your backup.

Hotel U Růže — A restaurant right on the square with a summer terrace. Pleasant seating with a view of the sgraffito facades. Slightly pricier, but worth it.

Kavárna U nás doma — If you love speciality coffee, this is your place. Very good coffee in a cosy setting.

KAFE A HRNKY — Another café on the square, ideal for a quick stop.

Ceramic Art & Salad — I’ve already mentioned it above — a café combined with ceramics. Light lunches, salads, good coffee.

Honest warning: In Slavonice, you simply don’t have 50 restaurants to choose from like in Jindřichův Hradec. But the ones that are here do their job well. Just don’t count on walking into a restaurant at 9 PM without a reservation for dinner — this is a small town and restaurants close early.
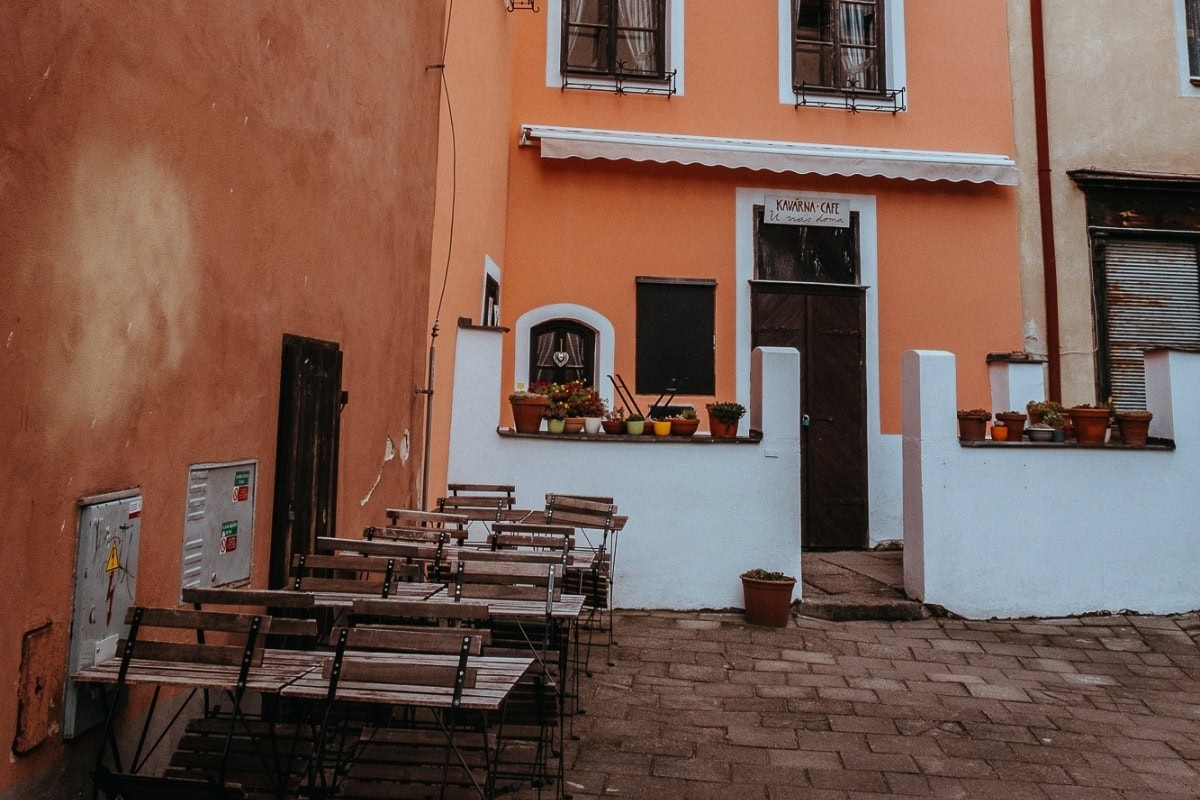
Dining in Slavonice

7. Greenway Prague–Vienna — a cycle route through Slavonice

If you’re a cyclist (or even just a recreational pedaller like me), this will interest you. Slavonice lies on the international cycle route Greenway Prague–Vienna (marked as route no. 48), which stretches a total of 470 km, with 350 km on Czech territory.

The route passes through gorgeous corners of Bohemia and Moravia: Prague–Týnec nad Sázavou–Sedlčany–Tábor–Jindřichův Hradec–Slavonice–Vranov nad Dyjí–Znojmo–Mikulov–Vienna. You don’t have to ride the whole thing — many people just pick a section. And the section around Slavonice and Czech Canada is among the most beautiful. Rolling countryside, forests, ponds, and romantic little towns.

At Hotel Pivonka (mentioned above), you can hire bikes if you don’t have your own. And if you’re planning just a shorter ride, I recommend the route Slavonice–Landštejn–Staré Město pod Landštejnem — beautiful scenery, easy terrain, and a reward at the end in the form of Landštejn Castle.

8. Tripoint Bohemia–Moravia–Austria

To wrap up the walk around Slavonice, here’s a small but symbolically interesting trip. Just outside the town, you’ll find a tripoint boundary stone where the borders of Bohemia, Moravia, and Austria meet. It’s one of those spots where you can stand in three places at once — one foot in Bohemia, the other in Moravia, and your hand reaching into Austria. 😁

The boundary stone itself isn’t anything spectacular, let’s be honest — it’s simply a stone in the landscape. But the walk there is pleasant, and for kids it’s great fun (they can say they’ve been in three “countries” at once). And in the context of history — the Iron Curtain ran through here, this is where the world ended — it’s a place with a quiet gravity.

Landštejn Castle near Slavonice
lukas a lucka
Lukáš and Lucie recommend
Where to stay in Slavonice
6 accommodations — wellness hotels, resorts and other lodging options

Day trips from Slavonice: 3 ideas

You can see Slavonice itself in a day, but the surrounding area offers so many beautiful places that it would be a shame not to venture beyond the town. Czech Canada is an area full of forests, ponds, hills, and historic landmarks — and Slavonice is the ideal base for exploring it. Here are 3 tips for the best day trips.

9. Landštejn Castle — one of the oldest stone castles in Czechia

About 15 km from Slavonice stands Landštejn Castle — one of the oldest and most imposing early Gothic stone castles in the entire Czech Republic. And I have to say, it’s exactly the kind of castle you imagine when someone says “medieval castle” — massive towers, stone walls, and a view that takes your breath away.

What I loved about Landštejn: the tour is self-guided. You move freely around the entire site, climb stairs, peek into rooms, and nobody rushes you. For families with children, it’s ideal — no “don’t touch” and no “shush.” Kids can be kids here.

Admission: adults approx. €4, children 6–15 approx. €2.80, children under 6 free. For that price, you get an experience that easily rivals castles costing several times more.

Near the castle, you’ll also find the Landštejn adventure rope course, where both kids and adults can climb. And if you’re looking for accommodation nearby, Landštejnský dvůr right below the castle is an excellent choice.

I’ve written more about the castle in a separate article: Landštejn Castle: practical tips for your visit.

10. U Jakuba lookout tower — views of Czech Canada

If you want to see why this area is called Czech Canada, climb the U Jakuba lookout tower on Havlova hora hill near Valtínov. It’s a wooden tower built in 2013 that offers a 360° view of the hilly landscape full of forests and ponds, which truly resembles Canadian wilderness — just smaller and without the bears. 😁

The lookout tower is part of an educational trail leading to the bizarrely named Ďáblova prdel (Devil’s Bottom) — a rock formation that’s worth a detour. The trail is undemanding and manageable even for smaller children.

Tip: Combine the lookout tower trip with a visit to Landštejn Castle — they’re relatively close to each other and together make a lovely half-day outing.

11. Swimming nearby: Osika Pond and more

Czech Canada is laced with ponds and in summer, swimming is one of the main activities. Here are the best spots for a dip near Slavonice:

Osika Pond (near the village of Albeř) — This is our clear recommendation, especially for families with small children. The pond covers 68 hectares and has a sandy beach with a gentle slope into the water — ideal for toddlers and small kids whom you don’t need to worry about near the water. We spent a lovely afternoon here and the kids were over the moon.

Dědkův rybník — The nearest swimming spot to Slavonice, practical if you don’t want to drive far.

Šatlava Pond (near Stálkov) — Smaller, quieter, fewer people. Ideal for those seeking peace.

Dačice Swimming Pool — If you prefer a classic swimming pool with water slides, a flume, and a children’s pool, head to nearby Dačice. It’s about 20 minutes by car from Slavonice and it’s paradise for kids.

Honest warning: The ponds in Czech Canada are beautiful, but the water tends to be cooler than at other South Bohemian ponds (thanks to the altitude and forested surroundings). In July and August it’s pleasant, but at the start and end of the season, expect to feel like a cold-water swimmer. 😅

Slavonice with kids: 2 tips for families

We travel with Lukáš and our small children, so I know what it’s like searching for activities that entertain the whole family — and not just the parents while the kids get bored and whinge. 😅 The area around Slavonice is absolutely brilliant in this regard — there are several places that seem tailor-made for families. Here are two main tips, each of which contains multiple activities.

12. Fairy-Tale Forest Trail + mini zoo at Bejčkův mlýn

This is a combination that will keep small children entertained for an entire morning (and honestly, their parents too).

The Fairy-Tale Forest Trail winds through Strážný vrch forest, just about 2 km from Slavonice’s centre. And it’s brilliantly designed — it offers three difficulty levels:

  • Bronze trail: 1.8 km, 4 stations — ideal for small children and pushchairs (you can manage with an off-road buggy)
  • Silver trail: 2.5 km — for older children
  • Gold trail: 4 km — for little adventurers and more active families

At each station, you complete tasks, search for fairy-tale characters, and collect stamps. And now the best part: for completing the trail, you receive a reward and a diploma at the TIC in Slavonice on the square. For kids, that diploma is probably more important than the entire trip. 😁

The mini zoo at Bejčkův mlýn is just 2 km from the centre and makes a perfect stop on the way to or from the Fairy-Tale Forest. You’ll find donkeys, sheep, goats, piglets, chickens, and even an ostrich. Animals can be fed — you’ll get the feed at reception. And now the best news: admission is FREE. Yes, free. In a time when you pay for everything, this is a joyful exception.

If you’re also staying at Bejčkův mlýn (see the accommodation section above), it’s right on your doorstep and the kids will want to visit the animals every morning.

Practical tip for parents: The combination of Fairy-Tale Forest + zoo + ice cream on the square takes about 3–4 hours and the kids will be so tired after lunch that they’ll happily fall asleep in the car or pushchair. And you can then explore the sgraffito in peace. Strategy! 😉

13. Labyrinth near Dolní Pěna + ZOO Na Hrádečku

If you have time for a trip a bit further from Slavonice (towards Jindřichův Hradec, about 30 minutes by car), a double combo awaits that will send the kids absolutely wild with joy.

The Labyrinth in Dolní Pěna near Jindřichův Hradec is the largest hornbeam labyrinth in Central Europe — and the dimensions are truly impressive: 6,000 m² in area, 3 km of paths, and 12,000 hornbeam trees. Hidden inside the labyrinth are 6 wooden monster sculptures that you have to find. The hedges are taller than an adult, so you genuinely have no idea where you’re going — and yes, you will get lost. We wandered around for a good 45 minutes while Lukáš insisted he “had a system.” He didn’t. 😅

For the very small and the desperately lost, there are SOS benches scattered around — and anyone who truly can’t find the way out can call for help. 😁 There’s also a playground and refreshments near the labyrinth.

ZOO Na Hrádečku is just a short distance from the Labyrinth — a private zoo on 10 hectares with more than 200 animal species. It’s one of those pleasant, not-too-large zoos where you feel the animals are genuinely well cared for. Children under 3 get in free, children approx. €2.80, adults approx. €4.80.

Bonus tip for families: If you’re heading to Jindřichův Hradec, also stop by the historic narrow-gauge railway Jindřichův Hradec–Nová Bystřice — a ride on this historic narrow-gauge train is an experience for the whole family. More tips on Jindřichův Hradec can be found in our separate article.

And one more tip for your pocket: Ranch Veselíčko (about 10 km from Slavonice) offers pony rides for children. If you have horse lovers at home, you’ll be heroes.

For even more inspiration on trips around South Bohemia, check out our article South Bohemia: 8 tips for day trips or our round-up of 20 weekend trip ideas in the Czech Republic. And if Slavonice inspires you to explore the whole of Czech Canada, here’s our guide: Czech Canada: 6 tips for trips in South Bohemia.
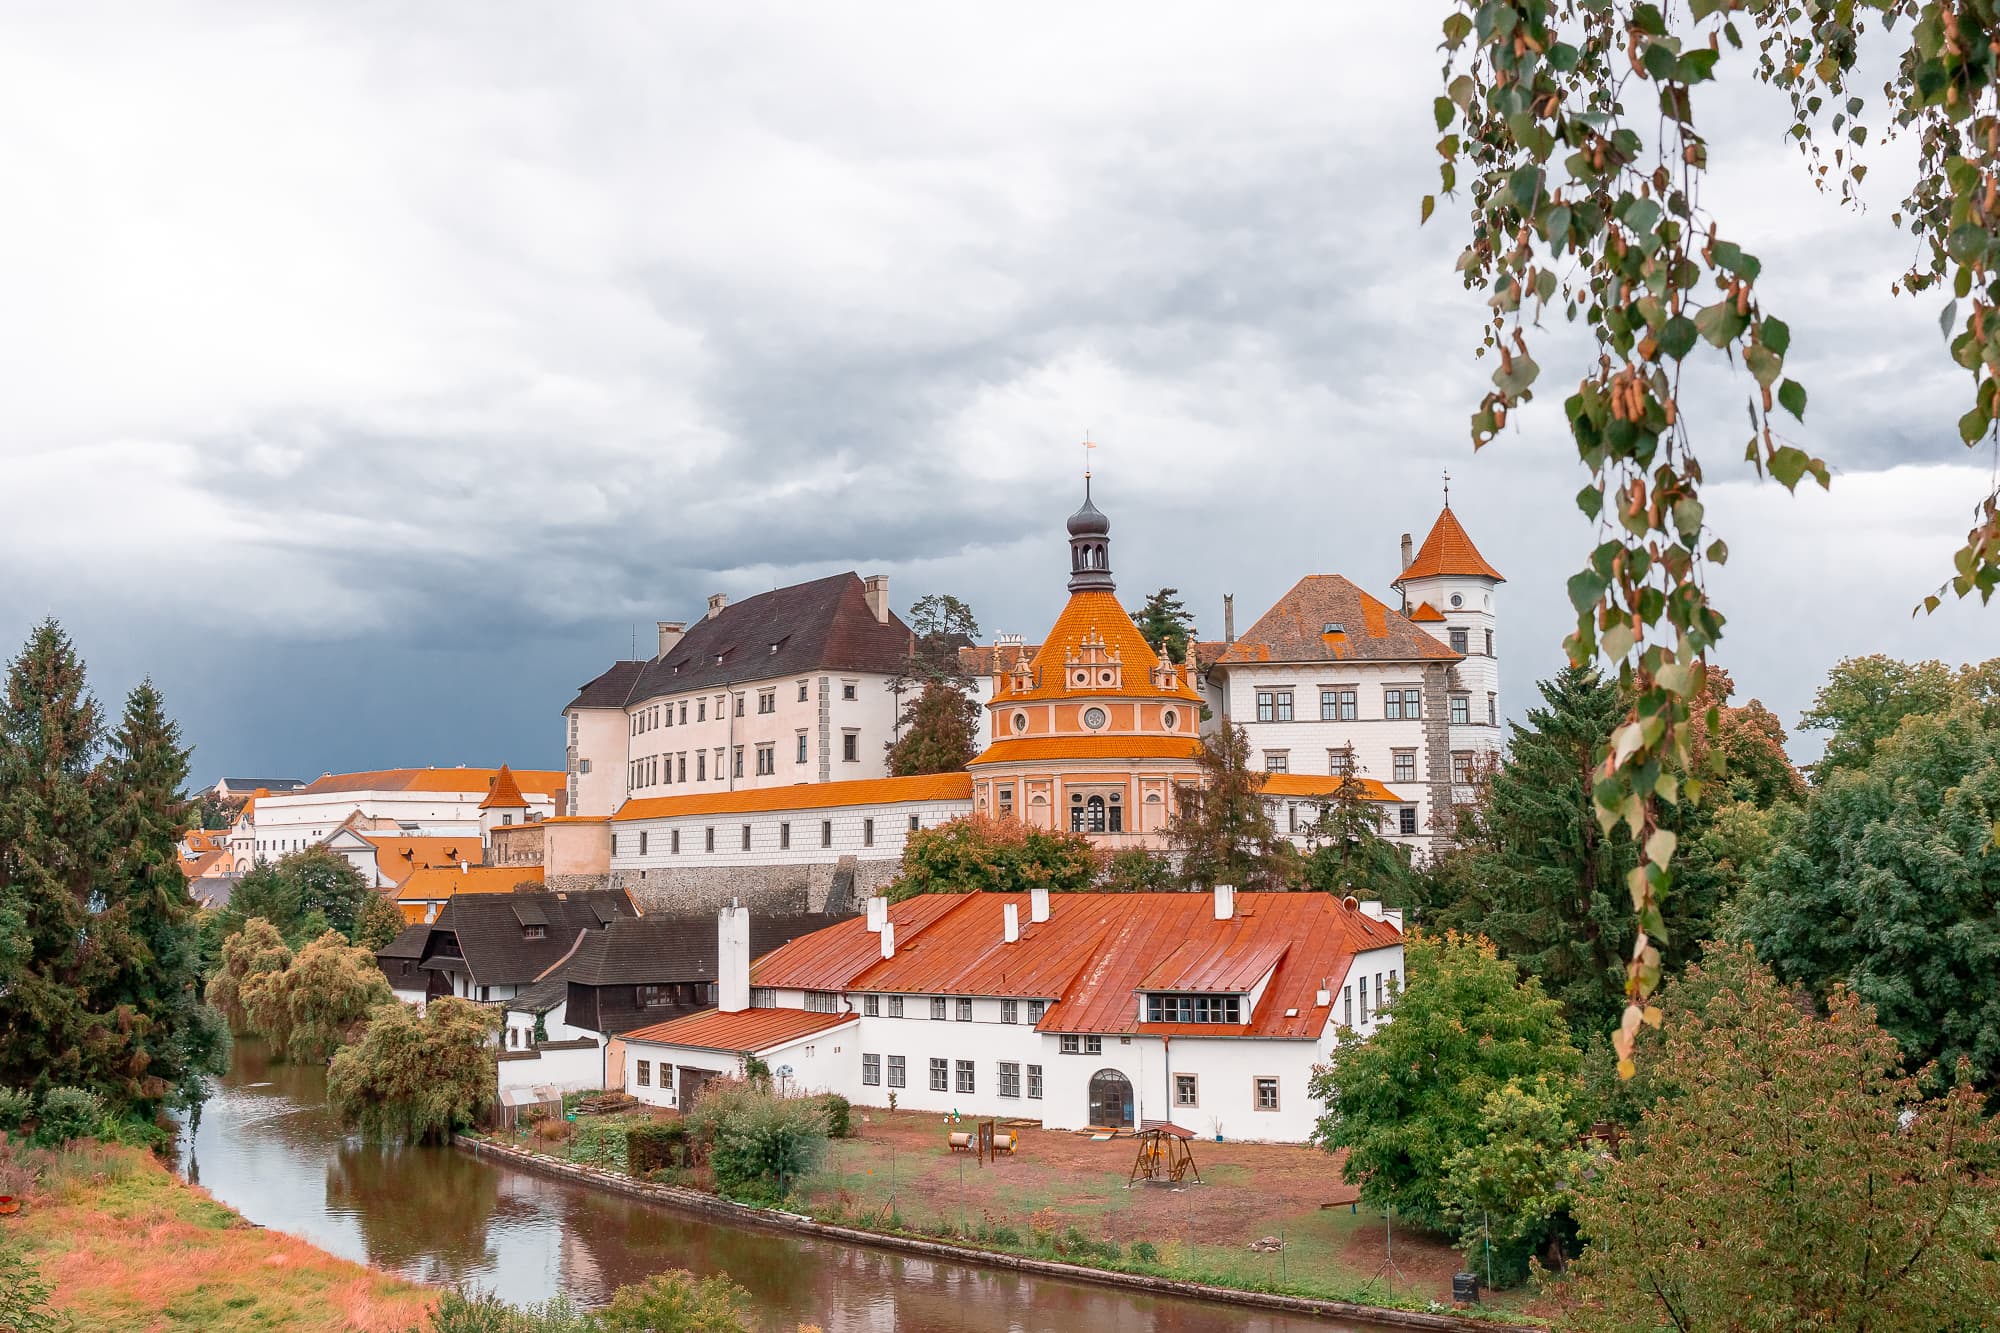
Jindřichův Hradec near Slavonice

Tips and tricks to finish

A few practical pointers that will come in handy:

Booking accommodation

For accommodation in Slavonice and the surrounding area, I recommend the classic Booking.com — it’s our favourite accommodation search engine and you’ll find most hotels and guesthouses in Slavonice on it. During the peak summer season (July–August), I recommend booking in advance, especially at weekends — Slavonice may be lesser-known, but those who know it love coming back.

What to pack

  • Comfortable walking shoes — Slavonice’s lanes are beautiful, but the cobblestones can be tough on your feet
  • A warm layer even in summer — you’ll need a jumper for the underground, it’s around 10°C down there
  • A rain jacket — Czech Canada is hilly and showers are common
  • Insect repellent — you’ll appreciate it near the ponds and forests, especially in the evening
  • Wellies for the underground are provided on site, so no need to pack those ☺️

Offline map and navigation

Slavonice is small and you’ll get your bearings in no time. But if you want to explore the surrounding area (Landštejn, Osika, the Labyrinth), I recommend having Mapy.cz on your phone — it has excellent hiking and cycling routes for the Czech Canada area. Google Maps also works well for driving directions.

How many days to plan for Slavonice

For the town itself, one full day is enough. But if you want to visit the surrounding area — Landštejn Castle, the ponds, Fairy-Tale Forest, the Labyrinth — plan at least a long weekend (3 days / 2–3 nights). Slavonice is the ideal base for exploring the whole of Czech Canada.

Slavonice is proof that you don’t need to fly to the other side of the world to experience something exceptional. Sometimes you just need to get in the car and drive to the south of Bohemia — to a little town you may have never heard of, but one that will take your breath away. It took me nearly my whole life to get there. Hopefully it won’t take you quite as long. ☺️

And if you’re looking for more inspiration for trips around the Czech Republic, check out our guide to the 20 most beautiful places in the Czech Republic.

Frequently asked questions (FAQ)

What to see in Slavonice?

Slavonice offers a Renaissance square with unique sgraffito facades, medieval underground tunnels, a town tower with panoramic views, a fortification site with bunkers from 1938, and a ceramics workshop where you can paint your own mug. Nearby, you’ll find Landštejn Castle, the U Jakuba lookout tower, and swimming at Osika Pond.

How to get to Slavonice?

By car from Prague it’s about 2.5–3 hours (180 km), from Vienna about 2 hours (170 km), and from Brno about 2 hours. By train or bus via Jindřichův Hradec or Dačice — but a car is more convenient, especially for exploring the surrounding area. You can also arrive by bike along the Greenway Prague–Vienna cycle route.

How much does entry to the Slavonice underground cost?

The long route (400 m, 45–60 min) costs about €2.80 for adults and €1.60 reduced. The short route (150 m, 20–25 min) costs about €1.60 for adults and €1.20 reduced. Wellies and a rain poncho are included in the price — the tunnels have a constant water level of about 20 cm.

Where to stay in Slavonice?

For luxury, I recommend Hotel U Růže with a wine bar in medieval cellars (from €48/person/night). For families, Vila Slavonice with a playroom and kitchen is ideal (from €80/night for the entire villa). The most affordable option is Penzion Secesní dům (from €20/person/night) or Dobrohoř Château 10 km from town (from €14/person/night).

What to do in Slavonice with kids?

With small children, head to the Fairy-Tale Forest Trail (3 difficulty levels, the Bronze trail of 1.8 km for the youngest) and the mini zoo at Bejčkův mlýn (free admission). Older kids will love the hornbeam Labyrinth near Dolní Pěna (the largest in Central Europe) and the private ZOO Na Hrádečku. For swimming, Osika Pond with its gentle slope is ideal.

Why is it called Czech Canada?

The area around Slavonice, Jindřichův Hradec, and Nová Bystřice is called Czech Canada because of its hilly, forested landscape with numerous ponds and lakes that resembles Canadian wilderness. It’s one of the least populated areas of South Bohemia with beautiful, wild nature.

How much time do I need to visit Slavonice?

To see the town itself (square, underground, tower, bunkers), one full day is enough. If you want to visit the surrounding area — Landštejn Castle, ponds, Fairy-Tale Forest, the Labyrinth — plan a long weekend (2–3 nights). Slavonice is the ideal base for exploring the whole Czech Canada region.

Tips and Tricks for Your Vacation

Don’t Overpay for Flights

Search for flights on Kayak. It’s our favorite search engine because it scans the websites of all airlines and always finds the cheapest connection.

Book Your Accommodation Smartly

The best experiences we’ve had when looking for accommodation (from Alaska to Morocco) are with Booking.com, where hotels, apartments, and entire houses are usually the cheapest and most widely available.

Don’t Forget Travel Insurance

Good travel insurance will protect you against illness, accidents, theft, or flight cancellations. We’ve had a few hospital visits abroad, so we know how important it is to have proper insurance arranged.

Where we insure ourselves: SafetyWing (best for everyone) and TrueTraveller (for extra-long trips).

Why don’t we recommend any Czech insurance company? Because they have too many restrictions. They set limits on the number of days abroad, travel insurance via a credit card often requires you to pay medical expenses only with that card, and they frequently limit the number of returns to the Czech Republic.

Find the Best Experiences

Get Your Guide is a huge online marketplace where you can book guided walks, trips, skip-the-line tickets, tours, and much more. We always find some extra fun there!

Women’s Transitional Jacket: A Must-Have in Every Wardrobe

TL;DRA women’s transitional jacket is the ultimate spring-and-autumn layer, combining lightness, warmth and moisture-wicking so it works equally well for sport and everyday city wear. Brands like Quiksilver, Billabong, Element and sporty Kappa all do this well, and you’ll find a wide range at the modivo.cz online shop. When choosing a waterproof jacket, check six things: taped seams, an adjustable peaked hood, pocket count, elasticated cuffs, zip quality and low weight. Come autumn, longer parkas in earthy tones with a warm lining are the way to go — just pick a cut that suits your shape, straight lines for an apple body type, or waist-defined styles for an hourglass.
Choosing the right outfit for unpredictable weather can be a real headache for any fashion-conscious woman. A quality women’s jacket designed for the transitional seasons is the ultimate solution — spring and autumn constantly catch us off guard with sudden temperature swings and unexpected downpours. That’s why it’s essential to have a versatile outer layer in your wardrobe that both protects you and looks fantastic. High-quality materials and well-crafted cuts ensure you’ll feel comfortable all day long. The right jacket choice can elevate your style and give you that extra boost of confidence.

Why Is a Women’s Transitional Jacket an Essential Piece for Every Season?

This type of clothing offers the perfect balance between lightweight comfort and protection from chilly weather. You’ll find quality brands like Quiksilver, Billabong, and Element producing incredibly durable pieces on the market today. A quality women’s transitional jacket works equally well for sport and everyday wear. Modern fabrics retain body heat while efficiently wicking moisture away from your skin. You’ll particularly appreciate these functional properties during extended time outdoors on damp, grey days. Here are three key reasons to add this practical garment to your wardrobe: stylish, modern looks suitable for everyday city wear.

Why Are Waterproof Jackets a Smart Choice for Changeable Days?

Rainy weather shouldn’t stand in the way of your outdoor plans and exciting adventures. A quality waterproof jacket will keep you reliably dry even during heavy downpours. Modern technology has made it possible to produce fabrics that are fully waterproof yet wonderfully lightweight. Proper care of the material will significantly extend the lifespan of your favourite piece for many years to come. When shopping, pay close attention to the water column rating and breathability of the functional fabric you choose. These figures are absolutely crucial for your future comfort in heavy rain. Here are six features you should carefully check before buying:

  • Quality of taped seams for maximum moisture protection.
  • An adjustable hood with a sturdy, practical peak.
  • Plenty of internal and external pockets for your belongings.
  • Elasticated cuffs on the sleeves to keep water and wind out.
  • Overall quality and durability of all main and side zips.
  • Low weight for easy, comfortable carrying in your backpack.

Which Autumn Jackets Will Best Protect You from Dreary Weather?

Autumn brings cooler winds and more frequent showers, calling for warmer and more resilient materials. Longer parkas with hoods are excellent for shielding your back and head from the rain. Earthy tones like olive and brown blend beautifully with the colourful autumn landscape around us. This type of garment should also feature a warm lining for those chilly autumn evenings. For lovers of an active lifestyle, breathable models with a modern functional membrane are readily available. The well-known sportswear brand Kappa offers pieces that won’t let you down, even on challenging terrain. These models combine traditional Italian design with high resistance to all adverse conditions. Functional details ensure maximum comfort with every step you take through the autumn countryside.

How to Choose a Women’s Transitional Jacket Based on Your Body Type

Every body shape looks best in a different cut, so it pays to know your strengths. Women with an hourglass figure should opt for styles that emphasise the waist. For apple-shaped body types, straight cuts that visually elongate the silhouette are ideal. A well-chosen jacket length can work wonders and create a harmonious look for any occasion. Petite women should steer clear of overly long and bulky models that can overwhelm their frame. Taller women, on the other hand, can absolutely rock bold patterns and longer, asymmetrical cuts. Always try the jacket on carefully to make sure you can move freely and naturally in it. Comfort is just as important as appearance and current fashion trends when making your choice. Don’t be afraid to experiment with contrasts between a sporty outer layer and more feminine elements in your everyday outfit. Layering adds depth and interesting texture to any look. Pastel jackets look gorgeous paired with neutral grey or soft beige tones. Fashion is ultimately about playfulness and expressing your own unique personality through what you wear.

Tips and Tricks for Your Vacation

Don’t Overpay for Flights

Search for flights on Kayak. It’s our favorite search engine because it scans the websites of all airlines and always finds the cheapest connection.

Book Your Accommodation Smartly

The best experiences we’ve had when looking for accommodation (from Alaska to Morocco) are with Booking.com, where hotels, apartments, and entire houses are usually the cheapest and most widely available.

Don’t Forget Travel Insurance

Good travel insurance will protect you against illness, accidents, theft, or flight cancellations. We’ve had a few hospital visits abroad, so we know how important it is to have proper insurance arranged.

Where we insure ourselves: SafetyWing (best for everyone) and TrueTraveller (for extra-long trips).

Why don’t we recommend any Czech insurance company? Because they have too many restrictions. They set limits on the number of days abroad, travel insurance via a credit card often requires you to pay medical expenses only with that card, and they frequently limit the number of returns to the Czech Republic.

Find the Best Experiences

Get Your Guide is a huge online marketplace where you can book guided walks, trips, skip-the-line tickets, tours, and much more. We always find some extra fun there!
Things to See in Tábor: 19 Best Places and Day Trips Nearby

TL;DRIn Tábor, don’t miss the Renaissance Žižkovo náměstí square, the medieval underground passages (60 CZK, open year-round), Kotnovská Tower with its views over the town (20 CZK), and the country’s second-oldest botanical garden, which is free to get into. There are 19 tips here covering the town and its surroundings, including Červená Lhota castle, the pottery town of Bechyně (reachable on a historic electric railway for 35 CZK), and the Chýnov Caves. Three to four hours covers the main sights in the centre, but a full day or a long weekend is a better bet. From Prague, Tábor (90 km) is an hour away by train, with fares starting at 84 CZK. May to September is the best time to go, when everything’s open and you can swim in the Jordán reservoir.

Tábor holds a special place in our hearts — it’s where Lukáš and I got engaged. And I still can’t understand why people only head to Český Krumlov when they visit South Bohemia.

Imagine a medieval town where the streets deliberately form a labyrinth — not because the medieval architects lost their blueprints, but as a clever defensive strategy devised by the Hussites. Beneath your feet lie mysterious underground tunnels, above your head Renaissance gables adorned with sgraffito, and around you surprisingly few tourists. Tábor, Czech Republic is like Český Krumlov, but without the queues for chimney cake and selfie sticks on every corner. ☺️

And I haven’t even mentioned the oldest dam in Central Europe where you can swim in summer, a gorgeous botanical garden with free admission, or a Michelin Bib Gourmand restaurant — right on the main square. Yes, in Tábor. I couldn’t believe it either.

In this article you’ll find 19 tips on the best things to see in Tábor and the surrounding area — from the Hussite underground and Žižkovo náměstí (Žižka Square) to the fairytale Červená Lhota château and the ceramics town of Bechyně, reachable by a historic electric railway. I’ll tell you where to stay, where to eat well, when the best time to visit is, and how much a whole weekend will cost.

Tábor Czech Republic

TL;DR

  • Žižkovo náměstí (Žižka Square) is one of the most beautiful Renaissance squares in Bohemia — sgraffito facades, arcaded gables, a fountain from 1567. The starting point for everything.
  • The medieval underground is a must — half a kilometre of 15th-century tunnels, up to 16 metres below ground. Admission around €2.50, open year-round.
  • Kotnov Tower (about €1) offers views over the entire town. Even better is the Dean’s Church tower — 200 steps and ducking under a 2.5-tonne bell. 😅
  • The Botanical Garden is the second oldest in Czechia, features a unique plant classification by usefulness (first in the world!), and it’s free.
  • Jordán — the oldest dam in Central Europe (1492), perfect for swimming in summer and ice skating in winter.
  • Goldie at Hotel Nautilus has held a Michelin Bib Gourmand since December 2025 — in Tábor!
  • With kids, head to the Haunted Underground, the Zoo, the LEGO Museum, or the Chocolate Museum.
  • Day trips nearby: Červená Lhota (fairytale château on water), Bechyně (via historic electric railway), Chýnov Cave (first publicly accessible cave in Czechia).
  • How long to spend: minimum 3–4 hours for the main sights, ideally a full day or a long weekend.
  • Getting there: About 90 km south of Prague — roughly 1 hour by train or car via the D3 motorway.
Žižkovo náměstí (Žižka Square) in Tábor

When to Visit Tábor and How to Get There

Tábor is a town you can enjoy practically any time — but your timing will significantly affect what you’ll see and experience. Some attractions have a limited season, and in winter you may find closed doors. Let’s go through the best time to visit, how to get there, and how long to spend in Tábor.

Best Time to Visit

May to September is hands-down the ideal period. Everything is open — Kotnov Tower, the church observation tower, Housův Mlýn, and Kozí Hrádek in the surroundings. In summer you’ll also enjoy swimming at Jordán and walks along the Lužnice River, when everything is beautifully green.

If you want to experience Tábor in full swing, make a note of the Táborská Setkání (Tábor Meetings) — in 2025, they take place on 12–14 September. It’s a three-day Hussite festival with historical processions, a medieval market, fencing tournaments, and fire shows. The entire town transforms into one great medieval celebration. Tickets for Friday and Saturday cost around €14, while Sunday is free. Just keep in mind that accommodation will be pricier and fills up fast — book well in advance.

Off-season (October–April) brings a noticeably quieter Tábor, which has its own charm — the atmosphere of medieval lanes in the mist is magical. However, many attractions are closed or have limited hours (Kotnov, the church tower, Housův Mlýn). Fortunately, the underground tunnels and the Hussite Museum operate year-round, so a weekend trip is perfectly doable even in winter. Just be prepared to spend more time indoors. 😉

Streets of Tábor, Czech Republic

How to Get to Tábor

By train from Prague is the most comfortable option. The journey takes approximately 1 hour, with around 18 connections daily. If you buy your ticket in advance through the Czech Railways app, you’ll pay from about €3.50. On the day of travel, expect to pay around €12.50.

By car, it’s about 90 km from Prague via the D3 motorway — just over an hour depending on traffic. Parking in the centre is a bit tricky (a medieval labyrinth of streets isn’t exactly car-friendly 😅). Your best bet is to park at the Ice Stadium or use the P+R lot behind the train station, from where it’s a short walk or bus ride to the centre.

One thing to keep in mind: the train station is 1.5 km from the historic centre (about a 20-minute walk). If you’d rather not walk, you can take bus 61, which goes directly to Žižka Square, or minibuses 60/61 into the old town.

If you’re visiting the Czech Republic from the UK, the easiest way is to fly into Prague and then take the train south. Several airlines operate direct flights from London, Manchester, Edinburgh, and other UK cities to Prague.

How Long to Spend in Tábor

For the main sights in the centre (the square, the underground, Kotnov, the museum), 3–4 hours will do. But honestly? It would be a shame to rush. A full day is ideal — you’ll have time for the botanical garden, a stroll around Jordán, a great meal, and maybe a café with heavenly ice cream. And if you want to explore the surroundings too (Červená Lhota, Bechyně, Chýnov Cave), then a long weekend is absolutely perfect.

Where to Stay in Tábor and How Much It Costs

Tábor is a pleasantly affordable destination where accommodation won’t blow your budget like in Český Krumlov. A room in a nice guesthouse in the centre starts at around €30 per person per night, and on the outskirts even less — from about €15. And if you want a touch of luxury? You’ll find that too, at a fraction of the prices you’d pay in bigger tourist towns. You can check availability and prices on Booking.com.

Wellness hotel in Tábor

Boutique Hotel Nautilus ⭐⭐⭐⭐

This would be my number one choice. The hotel sits right on Žižka Square in a beautifully renovated historic building. The rooms are stylish and modern, but the main reason to sleep here is Restaurant Goldie on the ground floor — which has held a Michelin Bib Gourmand since December 2025 (more on that in the dining section). Prices start at around €50 per person per night, which for a four-star hotel on the most beautiful square in town is absolutely fair.

19 Best Things to See in Tábor, Czech Republic

Tábor’s historic centre is surprisingly compact — you can comfortably walk past most of the monuments and attractions in a single day. And that’s the beauty of it: you don’t need to rush, just let yourself be carried through the medieval lanes that will naturally lead you to the next amazing spot. Let’s look at 14 tips for what to see in Tábor itself — from the iconic Žižka Square and mysterious underground to a botanical garden that’s the second oldest in Czechia. Many of these places cost just a few euros, some are completely free, and all of them are absolutely worth it.

1. Žižka Square — the Heart of the Hussite Town

Every visit to Tábor starts and ends here. Žižkovo náměstí (Žižka Square) is one of the most beautiful Renaissance squares in South Bohemia — and in my opinion, in all of Czechia. When you step onto it for the first time, you’ll just stand there looking around, because there are so many sgraffito facades, arcaded gables, and pastel-coloured houses that it’s impossible to take in all at once.

In the centre of the square stands a Renaissance fountain with a statue of the knight Roland from 1567 — one of the oldest stone fountains in Bohemia. Nearby you’ll find the Jan Žižka monument from 1884. The square is lined with cafés, restaurants, and small shops, so you can easily spend a long time here, even if you’re “just” sitting with a coffee and soaking up the atmosphere.

The square is dominated by the imposing Dean’s Church of the Transfiguration of Christ, whose observation tower I’ll tell you about later. Žižka Square is freely accessible at all times and serves as a natural starting point for all explorations of the town. If you only have time for one thing in Tábor, make it a walk here.

Renaissance houses on Žižka Square in Tábor

2. Kotnov Tower and Bechyně Gate — Panoramic Views

Kotnov Tower and Bechyně Gate are the oldest surviving monuments in the town — both from the 13th century, predating the Hussites. The tower is a remnant of the original castle around which Tábor grew, and its silhouette is one of the most photographed motifs in town.

You can climb the Kotnov Tower via 155 steps to a height of 25 metres. From up there you have the entire town at your feet — the rooftops of the old town, the surface of Jordán lake, the surrounding hills. Admission is a laughable €1, making it possibly the best investment of your day. 😁

Right next to the tower stands the Bechyně Gate, the only surviving entrance to the medieval town. Inside you’ll find an exhibition called “Tábor, Fortress of the Just” about the Hussite history of the town, and you can admire the Tábor Treasure — a hoard of approximately 4,000 silver coins that is truly impressive. Admission to the gate is about €1.60.

Note: Both monuments are open May–September only, Tuesday–Sunday, 10:00–17:00. In winter you’re out of luck, but at least you can admire them from the outside.

Hussite Christmas markets in Tábor

3. Medieval Underground — a Mysterious Labyrinth Beneath the Town

This is probably what most people come to Tábor for — and rightly so. Beneath the historic centre stretches a network of underground tunnels from the 15th century, reaching depths of up to 16 metres across three levels. They originally served as cellars, but also as escape routes and shelters during sieges.

The tour route is approximately 500–800 metres long, and the entrance is right from the Town Hall on Žižka Square, so you can’t miss it. The tunnels are narrow, in places you have to duck, and the atmosphere is — I must admit — a bit eerie. In the best possible way.

Admission is about €2.50 for adults and €1.60 reduced. Unlike most historic attractions in Tábor, the underground is open year-round (in winter with limited hours), making it an excellent choice for an off-season visit too.

💡 TIP: Bring a jacket or jumper, even when it’s 30°C outside. The underground maintains a constant temperature of around 10–12°C, and after fifteen minutes you’ll feel it. Lukáš and I went in summer wearing T-shirts and regretted it. 😅

4. Haunted Underground — for the Brave (and Kids!)

This is a completely different attraction from the “official” medieval underground, although many people confuse them. The Haunted Underground is located in a 500-year-old house behind the church and is more of a fun interactive tour than a historical exhibition.

In the underground chambers you’ll encounter figures of an alchemist, vampire families, white ladies, executioners, and mummies. It might sound cheesy, but it’s surprisingly well done — and kids absolutely love it. Admission is about €2 for adults, €1.20 for children, and €5.60 for a family ticket.

If you’re looking for an answer to the question “what to do in Tábor when it rains,” this is one of the best options — especially if you have children with you. And let’s be honest, adults have a good time here too. 😉

Hussite Museum in Tábor

5. Hussite Museum — Dive into Tábor’s History

The Hussite Museum is housed in the Gothic Town Hall on Žižka Square, completed around 1521, which boasts the second largest Gothic non-ecclesiastical hall in the Czech Republic. The building alone is worth a visit.

The exhibition takes you through the entire Hussite history — from the causes of the Hussite movement through the battles and everyday life of the Hussites to the legacy they left behind. If you’re curious about why Tábor was founded, how the Hussite “commune” functioned, and why the streets were designed as a labyrinth, you’ll find your answers here. And it’s presented in an engaging way, not like a dull history lesson.

Admission is about €3.20 for adults and €2.40 for children. During the season (April–September) it’s open daily; off-season (October–March) only Wednesday–Saturday. The museum manages several sites in the town, so if you plan to visit Kotnov and Bechyně Gate as well, ask about a combined ticket.

Historic streets of Tábor

6. Dean’s Church Tower — 200 Steps to the Best View

If you survived the 155 steps up Kotnov Tower and want an even better view, the Dean’s Church offers an observation tower 77 metres tall. It’s 200 steps to the top, and on the way up you’ll duck under a 2.5-tonne bell — an experience that makes you wonder if this was an entirely sensible decision. 😅 But the view at the top more than makes up for it.

Admission is just about €1.20 for adults and €0.40 for children. The catch? The tower is open May–August only, 10:00–17:00. And note — the entrance is through small brown doors at the back of the church, not the main entrance. We spent a good ten minutes looking for it before a local gentleman showed us the way. Now you know. 😁

7. Botanical Garden — Second Oldest in Czechia (and Free!)

I honestly got stuck here much longer than I expected. The Botanical Garden in Tábor was founded in 1866 on the banks of Jordán, covers 2.5 hectares, and looks after more than 4,000 plant species. It’s the second oldest botanical garden in Czechia — only the one in Prague is older.

What makes it truly exceptional is its unique concept of classifying plants by usefulness — introduced in 1903 as the first in the world. Plants are organised according to how they serve people: medicinal, poisonous, industrial, food… It’s a fascinating way of looking at nature, and for me it was both educational and poetic.

You’ll find an arboretum, rock gardens, greenhouses, a pond, and even a peat bog. Personally, I was completely charmed by the corner with rescued handicapped animals, home to a fox called Sisi among others — she’s adorable and children don’t want to leave her.

And now the best news: admission to the garden is free. Only the greenhouses cost a symbolic €0.80. The garden is open Monday–Friday year-round, but at weekends only in July and August. So if you’re visiting outside summer, plan your visit for a weekday.

8. Jordán — the Oldest Dam in Central Europe

Jordán is to Tábor what the Thames is to London — an inseparable part of the town’s identity. This reservoir was created in 1492 (yes, the same year Columbus “discovered” America) and with an area of over 51 hectares, it’s the oldest dam in Central Europe.

In summer, Jordán is a swimmer’s paradise. Sluneční pláž (Sun Beach) on the southern shore offers changing rooms, showers, toilets, a children’s playground, and refreshments — and admission is free. If you fancy getting on the water, you can rent pedal boats for about €5 per hour and paddle with views of the old town skyline. In winter, people ice-skate here, and year-round you’ll find anglers.

Even if you’re not planning to swim, I recommend a walk around Jordán. The path follows the waterside, is pleasantly shaded, and offers gorgeous views of the historic centre. Lukáš and I spent an evening here and it was one of the loveliest spots to unwind after a full day of exploring.

9. Tábor Zoo

Tábor Zoo is located near the Větrov district and is home to over 300 animal species. It’s not a huge zoo, but it’s a pleasant spot for a walk, especially with children. The grounds are well maintained, the animals have plenty of space, and you can comfortably see everything in an hour or two.

Admission is about €4.40 for adults, €2.40 for children, and €11 for a family ticket. The zoo is open year-round, but in winter only at weekends — keep that in mind when planning.

Chocolate Museum in Tábor

10. Chocolate and Marzipan Museum — a Sweet Paradise

If you like chocolate (and who doesn’t?), this museum will make your day. It occupies three historic houses and at over 1,000 m² is one of the largest of its kind in Czechia.

Inside you’ll find an exhibition on the history of chocolate, a chocolate fountain (yes, you can taste it), marzipan models of famous buildings, and of course a shop you won’t leave without a bag full of sweets. Lukáš and I “just went to look around” and left with three boxes of pralines. Classic. 😅

Admission starts at about €7; for evening tours with tasting you’ll pay around €20 — which is more, but if you’re a chocoholic, the tasting is apparently well worth it (we heard from other visitors; we went in the afternoon).

LEGO Museum in Tábor

11. LEGO Museum — 2 Million Bricks

On Betlémská Street in the town centre you’ll find the LEGO Museum, housing over 2 million bricks assembled into models of world landmarks and fantasy scenes. For families with children, it’s an absolute hit — young and old happily spend an hour and a half here.

It’s also one of the best tips for a rainy day in Tábor. Combine it with the Chocolate Museum and the Haunted Underground, and you’ve got a whole rainy afternoon sorted with no one complaining. And let’s be honest — even grown-up boys (Lukáš, I’m looking at you 😁) stand there with their mouths open at those models.

12. Housův Mlýn — a Film Armoury Below the Walls

This place is truly unique. Housův Mlýn stands on the foundations of a 13th-century mill beneath the town walls and inside you’ll find over 3,000 film props — weapons and armour from every historical era that were actually used in movie and TV productions.

And here’s the best part: you can try on, pick up, and photograph most of the props. Want to feel like a medieval knight? This is your chance. Admission is just about €1.60 per person or €5 for a family.

The mill is open May–September and also functions as accommodation. If you happen to stay there, the evening atmosphere is apparently absolutely magical — imagine falling asleep in a 13th-century building surrounded by film weaponry. That’s not an everyday experience.

13. Pintovka Forest Park and the Lužnice Valley Trail

If you need some nature and quiet after all that urban exploring, Pintovka Forest Park and the Lužnice Valley trail are exactly what you’re looking for. And they’re literally a stone’s throw from the centre.

The Lužnice Valley trail is designated as an LQT Best of Europe route — one of the best hiking trails on the continent. It follows the river through beautiful forests, past interesting rock formations, and offers complete tranquillity. We walked here for about an hour and encountered perhaps two people and one dog (who was, incidentally, more enthusiastic about the walk than his owner).

In Pintovka Forest Park you’ll find educational trails and pleasant paths for walking or jogging. It’s the ideal complement to the historic centre — one side of town is culture and history, the other is nature and silence.

14. Klokoty — a Pilgrimage Church Above the Town

Most tourists completely overlook this gem, and that’s a shame. The Baroque pilgrimage complex of Klokoty is about 1 km from Žižka Square and since 2018 has been a National Cultural Monument — which speaks for itself.

The centrepiece is the Church of the Assumption of the Virgin Mary, built between 1701 and 1730. Around it runs a Stations of the Cross with 14 stops, and by the chapel below you’ll find a spring that supposedly has healing properties. I’m not into esoterics, but the water was refreshingly cool and the place was incredibly peaceful.

Admission is free and from Žižka Square you can walk here in fifteen minutes. If you have a bit of extra time in Tábor, head here — especially in the late afternoon, when the sun is shining and the complex is almost deserted. It’s one of those places where you stop, take a breath, and say to yourself: “Yes, this was worth it.” ☺️

lukas a lucka
Lukáš and Lucie recommend
Where to stay in Tábor
4 accommodations — wellness hotels and other lodging options

Day Trips Near Tábor: 5 Ideas Within 30 Minutes

The Tábor region has plenty to offer beyond the town itself. In the surroundings you’ll find over 630 km of marked hiking trails, fairytale châteaux, unique caves, and small towns with surprising stories. Here are 5 day trip ideas you can easily manage from Tábor — all within half an hour by car.

15. Kozí Hrádek — Where Jan Hus Stayed

If you’re interested in Hussite history (and if you’re in Tábor, you probably are), this is a pilgrimage site. The ruins of a Gothic castle lie about 5 km from the centre of Tábor, and it was here that Jan Hus stayed in 1412–1414, before he left for the Council of Constance, from which he never returned.

Not much of the castle is still standing, but the atmosphere is powerful — especially when you realise that a man who changed the history of all of Europe once walked these grounds. Admission is about €1.20 and the castle is open May–September (closed Mondays).

A lovely option is to walk here from Sezimovo Ústí — the forest walk takes just under an hour and covers pleasant terrain. Lukáš and I treated it as a morning hike and stopped for lunch in Tábor on the way back. A perfect combination.

16. Chýnov Cave — the First Publicly Accessible in Czechia

Just 18 km from Tábor lies Chýnov Cave — the first publicly accessible cave in all of Czechia (since 1868!). And it’s not just a historical curiosity — the cave is geologically unique.

Unlike most Czech caves, here you won’t find classic stalactites and stalagmites. Instead, you’ll be amazed by the stunning colours of the marble — from white through pink to green and black. It’s a completely different experience from what you might know from the Moravian Karst or elsewhere.

The guided tour lasts 45 minutes and costs about €5.60. The cave is open April–October. But beware — I must warn you: the route includes approximately 400 steps and is more physically demanding than most Czech caves. With small children or limited mobility, it could be a challenge.

The good news is that you can get here by local bus from Tábor — you don’t need a car.

Beautiful doorways in Tábor
We’ll definitely come back to Tábor — not just for the beautiful doors and the wine 🙂

17. Červená Lhota — a Fairytale Château on Water

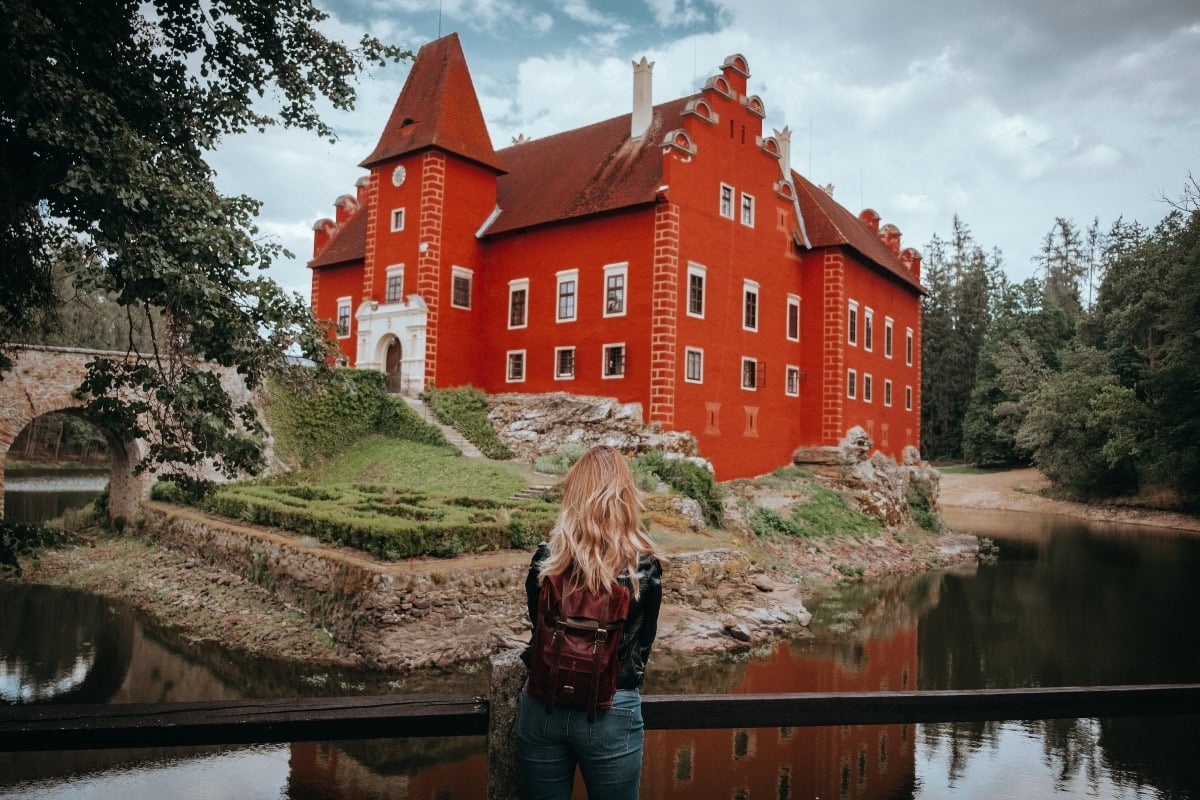
You’ve seen Červená Lhota in photos even if you’ve never been there. That Renaissance château on a rocky islet in the middle of a pond, surrounded by greenery — it looks like something out of a fairytale, and indeed several fairy tales and films have been shot here.

The interior tour costs about €8 for adults and takes around 40 minutes. But honestly? The main attraction is the exterior and the surroundings. Walk around the château along the pond, photograph it from every angle, and in summer you can rent rowing boats for about €3.20 and glide across the water with a view of the pink façade. It’s incredibly romantic — and the photos will collect hearts on Instagram. ☺️

The drive from Tábor takes about 25 minutes. Public transport connections exist, but they’re complicated and slow — if you don’t have a car, consider a taxi or a ride-share. This trip is worth it.

Červená Lhota château
Červená Lhota

18. Bechyně — a Ceramics Town with the First Electric Railway

Bechyně lies 24 km from Tábor and is one of the oldest towns in South Bohemia. But the main reason to go is the journey itself — from Tábor to Bechyně runs Křižík’s Electric Railway, inaugurated in 1903 as the first electric railway in Austria-Hungary!

A ticket costs just about €1.40, and in summer historic carriages run on the route, which is an experience in itself. We sat in a wooden carriage, gazed out the window at the South Bohemian countryside, and felt like we were at the dawn of the 20th century. Only the smartphones in other passengers’ hands spoiled the illusion. 😅

In Bechyně itself you’ll find a château, a ceramics museum (Bechyně is the traditional centre of Czech ceramics), a spa with a 300-year tradition, and the stunning Bechyně Rainbow Bridge (Bechyňská duha) — a concrete arch bridge that is a National Cultural Monument and photogenically spans the Lužnice valley.

Bechyně town
Bechyně

19. Stádlec Chain Bridge — the Last of Its Kind in Czechia

This is a tip for anyone who loves technical monuments and unusual places. The Stádlec Chain Bridge is the last Empire-style chain bridge in all of Czechia — and a National Technical Monument. It’s 157 metres long, spans the Lužnice River, and when you walk across it, it sways gently underfoot. Trust me, it’s worth it. 😉

The bridge lies on the red-marked hiking trail from Tábor to Bechyně along the Lužnice, so you can include it in a full-day trip combined with a visit to Bechyně. It’s a beautiful walk along the river — and the bridge itself is a surprisingly elegant structure that’s well worth a detour.

Tábor with Small Children: Play Areas and Kids’ Corners

Tábor is a pleasant town for families with children too — you’ll find several establishments with play areas or kids’ corners where parents can relax while the little ones have fun. Among the restaurants with children’s corners are U Dvou Koček on Svatošova Street, a stylish Hussite-themed restaurant with vaulted ceilings, Černá Perla on Šafaříkova Street with exceptional views over the town, and Housův Mlýn below Holečkovy Sady. A popular choice is also the Pintovka forest restaurant near Kotnov Castle, which has a large outdoor children’s playground with climbing frames and slides.

If you’re looking specifically for an indoor play centre or a café with a play area, Tábor has six of them. Městečko at Jump Arena on Soběslavská Street is ideal for children aged 1 to 5 — there’s a multi-level labyrinth, slides, and a ball pit ocean. Herna Safari in the Univerzita centre on Vančurova Street offers trampolines, a ball pool, and slides on 200 m² for children up to 8.

Parents of the tiniest tots will appreciate Mimi Kafe on Soběslavská Street, a café with wooden toys, climbing frames, and sensory play, suitable even for babies. At Tesco Tábor there’s Kulíškov with a large climbing structure, trampoline, and ball pool, open daily from 9am to 7pm. Dětský svět and Café Ela at OC Dvořák combines trampolines, slides, a mirror maze, and a toboggan with a nice café where you can have coffee or pizza. And for the youngest ones up to 6, there’s Herna RC Radost on Kpt. Nálepky Street, where the first visit is even free.

Where to Eat and Drink in Tábor

I must admit that Tábor’s food scene completely caught me off guard. I was expecting classic South Bohemian pubs with schnitzel and dumplings (nothing against them!) — and instead I discovered a Michelin-recognised restaurant, amazing cafés with their own roastery, and Uyghur noodle cuisine. In a town of 35,000 people. You just don’t expect this. 😁

Traditional Czech spreads in Tábor
Crackling spread and bryndza spread. Can you tell which is which?

Restaurants

Goldie (in Boutique Hotel Nautilus, right on Žižka Square) — now sit down for this: this restaurant has held a Michelin Bib Gourmand since December 2025. In Tábor! They serve modern Czech cuisine with local ingredients and a creative approach. I recommend the smoked duck breast and profiteroles for dessert. Prices are completely reasonable given the Michelin recognition. Book ahead, especially at weekends.

La Cave (in LH Hotel Dvořák) — head chef Martin Pudil cooks on the Czech national chefs’ team, so you can imagine the level. They offer a seasonal tasting menu that changes according to what’s fresh. The atmosphere is a touch more formal than Goldie, but the food is fantastic.

Výčep Tábor — this is where you’ll rub shoulders with the locals. Right on the square, with their own beer from Obora brewery (brewing since 2015 with their own hops!) and meats from butcher Liška. Prices are fair even in such a prime location, and the atmosphere is totally laid-back. Ideal for lunch or an afternoon pint.

RAFARIZ noodle house — Uyghur cuisine in a South Bohemian town? Yes, and with a 4.9/5 rating on TripAdvisor. Hand-pulled noodles, laghman, samsa… If you love Asian food, this is a must. We went on a local friend’s recommendation and didn’t regret a second of it.

Výkvět bistro — great for breakfast and daily specials. They have two branches in town, cook fresh, also serve pizza, and portions are generous. Nothing fancy, but reliably good and reasonably priced.

Cafés

Moccacafé — make sure you order the Paris-Brest ice cream. It won the Czech round of a world ice cream competition! In summer there are queues, but it’s worth the wait. The coffee is excellent too, but you simply must try the ice cream.

Putovní Pražírna — a café with its own roastery, listed in the prestigious Czech Coffee Guide 2022. For specialty coffee lovers, this is a no-brainer. The setting is pleasant, calm, and smells of coffee from the moment you walk in.

Café Mañana — in the town centre, serving coffee from Garage Coffee, a Tábor-based roastery. So here you’re drinking truly local coffee. A pleasant spot for a morning stop.

Fiori e Caffè — a café combined with a florist’s shop. You sit among bouquets, sip cappuccino, and feel like you’re in Provence. It’s a bit hipster, but in the best possible way. ☺️

Frequently Asked Questions (FAQ)

What is interesting in Tábor?

Tábor is a town with fascinating Hussite history, medieval underground tunnels you can walk through, one of the most beautiful Renaissance squares in Bohemia (Žižka Square), the oldest dam in Central Europe (Jordán, dating from 1492), and the second oldest botanical garden in Czechia. The old town streets were deliberately designed as a labyrinth — a Hussite defensive strategy. And since December 2025, there’s even a Michelin Bib Gourmand restaurant here.

How long to spend in Tábor?

For the main sights in the centre (Žižka Square, the underground, Kotnov, the Hussite Museum), 3–4 hours is enough. But if you want to truly get to know the town — explore the botanical garden, walk around Jordán, enjoy a good lunch and sit in a café — plan a full day. For Tábor plus day trips to the surrounding area (Červená Lhota, Bechyně, Chýnov Cave), a long weekend is ideal.

What to do in Tábor with kids?

With children, head to the Haunted Underground (spooky figures, about €1.20 for kids), Tábor Zoo (€2.40 for kids), the LEGO Museum (over 2 million bricks!), the Chocolate and Marzipan Museum with a chocolate fountain, or Housův Mlýn where kids can try on film props and armour. In summer, swimming at Jordán is brilliant — Sun Beach has a playground, showers, refreshments, and admission is free.

What to do in Tábor when it rains?

Tábor is surprisingly well equipped for a rainy day. Walk through the medieval underground (open year-round), visit the Hussite Museum in the Gothic town hall, pop into the Chocolate and Marzipan Museum, the LEGO Museum, or the Haunted Underground. All these attractions are in the centre within a few minutes’ walk of each other. And when you’ve had enough of culture, take shelter in one of the excellent cafés — try Moccacafé for its award-winning ice cream.

What is Tábor famous for?

Tábor is inextricably linked to the Hussite movement. The town was founded in 1420 by the Hussites as a “City of God” — they named it after the biblical Mount Tabor. Jan Žižka of Trocnov built a fortress here and deliberately designed the streets as a labyrinth for defence against attackers. The Hussite Taborites practised an egalitarian community where property was shared. This fascinating history is still alive — in the town’s architecture, in the Hussite Museum, and at the Táborská Setkání festival every September.

How far is Tábor from Prague?

Tábor lies about 90 km south of Prague. By train you can get there in approximately 1 hour, with around 18 connections daily; tickets bought in advance cost from about €3.50 (on the day of travel around €12.50). By car it’s just over an hour via the D3 motorway.

When is the Táborská Setkání festival?

Táborská Setkání traditionally takes place on the second weekend of September — in 2025 that’s 12–14 September. It’s a three-day Hussite festival with historical processions through the town, a medieval market, fencing tournaments, fire shows, and more. Admission for Friday and Saturday is around €14; Sunday is free. If you’re planning to visit during this period, book accommodation well in advance — the town fills up quickly.

Experiences & tickets
traveler-rated · GetYourGuide
Tábor: Museum of illusions Entry Ticket
★★★★★ 5.0 · 5 reviews
from €14
I want this experience →
🔗 These are affiliate links — they don't change your price and help us create content. · All experiences →

Tips and Tricks for Your Vacation

Don’t Overpay for Flights

Search for flights on Kayak. It’s our favorite search engine because it scans the websites of all airlines and always finds the cheapest connection.

Book Your Accommodation Smartly

The best experiences we’ve had when looking for accommodation (from Alaska to Morocco) are with Booking.com, where hotels, apartments, and entire houses are usually the cheapest and most widely available.

Don’t Forget Travel Insurance

Good travel insurance will protect you against illness, accidents, theft, or flight cancellations. We’ve had a few hospital visits abroad, so we know how important it is to have proper insurance arranged.

Where we insure ourselves: SafetyWing (best for everyone) and TrueTraveller (for extra-long trips).

Why don’t we recommend any Czech insurance company? Because they have too many restrictions. They set limits on the number of days abroad, travel insurance via a credit card often requires you to pay medical expenses only with that card, and they frequently limit the number of returns to the Czech Republic.

Find the Best Experiences

Get Your Guide is a huge online marketplace where you can book guided walks, trips, skip-the-line tickets, tours, and much more. We always find some extra fun there!
Turkey Packing List: What to Pack for a Holiday in Turkey

TL;DRPack a passport valid for at least 150 days from your entry date, travel insurance, light summer clothes, swimwear, SPF 30-50 sun cream, and something with covered shoulders and knees for mosque visits. British travellers don’t need a visa for stays under 90 days within a 180-day period. In July and August, coastal temperatures hit as high as 40°C, so bring a hat and a light jumper for air-conditioned spots. The currency is the Turkish lira, though it’s worth carrying some cash in euros or dollars for bazaars and small purchases. The best beaches include the Blue Lagoon at Ölüdeniz, Antalya, Bodrum, Marmaris, Alanya and Kemer.

Planning a holiday in sunny Turkey? Whether you’re heading to the Turkish Riviera, bustling Istanbul, or magical Cappadocia, having the right gear will help you enjoy your trip to the fullest. Turkey offers stunning beaches, rich history, incredible cuisine, and friendly locals — and a solid Turkey packing list is the first step to a stress-free trip.

To help your holiday go smoothly, we’ve put together a complete guide on what to pack for a holiday in Turkey.

Turkey packing list – what to pack for a holiday in Turkey
What to pack for a holiday in Turkey

Turkey Packing List: What to Pack

We’ve put together a list of everything you’ll need for your holiday in Turkey.

💡Also read: 25 Things to Do in Antalya

Essential Documents and Money

Before you start packing clothes and swimsuits, make sure you have all the important documents sorted. Without them, your trip could end before it even begins.

Passport and Visa

Your passport is the absolute essential. It must be valid for at least 150 days from the date of entry into Turkey. Good news for British travellers — if you’re visiting for tourism purposes and your stay doesn’t exceed 90 days within a 180-day period, you don’t need a visa for Turkey. Even so, check your passport’s validity before travelling and make sure you meet all requirements.

Money and Payment Cards

The currency in Turkey is the Turkish lira (TRY). We recommend bringing both a payment card and some cash. In tourist areas and larger cities, cards are accepted almost everywhere, but at traditional markets (bazaars) or smaller street stalls, you’ll need cash.

It’s handy to carry a small amount in euros or pounds, which you can exchange on the spot at official exchange offices (CHANGE OFFICE). Alternatively, you can withdraw Turkish lira directly from ATMs. Before your trip, check with your bank what fees apply for overseas withdrawals.

And if you want to pay by card with favourable exchange rates, we recommend getting a Revolut card — you can have it as a physical card or on your phone.

Travel Insurance

Never travel without travel insurance. Even though Turkey is considered a safe destination, accidents can happen anywhere. Your insurance should cover medical care, lost luggage, and potential cancellation fees. If you’re travelling with a tour operator, insurance is often included in the package price, but always double-check.

💡We recommend travel insurance from SafetyWing.

Turkey
Turkey

Clothing and Footwear for Turkey’s Climate

Turkey is a country with a diverse climate. During the summer months, temperatures can be very high, especially in July and August, when they can reach up to 40 °C (104 °F).

Summer Clothing

For a summer holiday, pack:

  • Several lightweight t-shirts and tank tops made from natural fabrics,
  • shorts and light skirts,
  • a couple of swimsuits (ideally two, so you can dry one while wearing the other),
  • a lightweight long-sleeve shirt for sun protection,
  • light summer dresses for women,
  • a hat, cap, or headscarf for sun protection.

Note that even in summer, a hoodie or light jacket can come in handy, particularly because of air conditioning in hotels and shops, or when it cools down in the evening.

Footwear for Different Occasions

For a holiday in Turkey, bring:

  • Comfortable sandals for everyday wear,
  • flip-flops or sliders for the beach,
  • trainers or walking shoes for excursions and city walks,
  • water shoes (if you plan to visit rocky or pebbly beaches).

Clothing for Visiting Mosques

If you plan to visit mosques or other religious sites, prepare appropriate clothing. Women should have their shoulders, neckline, and knees covered, and in some cases their hair as well (bring a scarf). Men should wear long trousers and have their shoulders covered.

💡TIP: If you haven’t decided where to go in Turkey yet, we recommend Side.

The town of Side
The town of Side

Toiletries and Cosmetics

Most hotels provide basic toiletries, but there are some personal items you should bring from home.

Basic Hygiene

Don’t forget:

  • Toothbrush and toothpaste,
  • shower gel and shampoo (in small travel sizes, or pack waterless cosmetics),
  • deodorant and perfume,
  • feminine hygiene products,
  • shaving supplies for men,
  • contact lenses and solution (if you wear them),
  • a small pack of wet wipes.

Sun Care Products

The sun in Turkey is very strong, so protection is essential:

  • Sunscreen with a high SPF (30–50),
  • after-sun cream with aloe vera,
  • lip balm with UV protection,
  • panthenol or another product for treating sunburn.
Side, Turkey
Side, Turkey

Personal First Aid Kit

Although you’ll find pharmacies almost everywhere in Turkey, it’s wise to bring basic medications with you.

Essential Medications

Pack in your travel first aid kit:

  • Pain relief (ibuprofen, paracetamol),
  • anti-diarrhoea medication (activated charcoal, Imodium),
  • antihistamines for allergies (cetirizine, loratadine),
  • cold and sore throat medication,
  • blister plasters,
  • antiseptic for minor cuts and scrapes,
  • any prescription medications you take regularly — bring enough for your entire trip.

Electronics and Other Gear

It’s hard to imagine a modern holiday without technology.

Electronic Devices

Don’t forget to pack:

  • Mobile phone and charger,
  • camera with enough memory card space,
  • a power bank for charging on the go,
  • an e-reader or a book for the journey.

💡TIP: If you want to stay connected without roaming charges, consider getting an eSIM from Holafly or Yesim for easy mobile data in Turkey.

Beach Equipment

If you plan to spend time at the beach, bring:

  • A beach towel (hotel towels usually can’t be taken to the beach, though beach towels are often available for hire — sometimes for a fee, sometimes included in all-inclusive packages),
  • a beach bag,
  • an inflatable lilo or swim ring (you can also buy these locally),
  • snorkel mask and snorkel.

💡You might also enjoy: Pamukkale in Turkey

Pamukkale
Pamukkale

Other Useful Items

There are a few more items that can make your stay more enjoyable:

  • A small sewing kit with needle and thread,
  • nail clippers or small scissors,
  • clothes pegs (for drying swimsuits on the balcony),
  • a small daypack or bum bag for excursions,
  • a phrasebook or translation app for basic Turkish,
  • a reusable water bottle (you can refill it),
  • a small pouch for valuables (passport, money, phone).

What to Watch Out for in Turkey

Turkey is a relatively safe country, but as with any trip abroad, it pays to be cautious and respect local customs.

Safety and Local Customs

  • Alcohol: Drinking alcohol is legal in Turkey, but remember it’s a predominantly Muslim country. Be moderate and respect local customs.
  • Photography: Don’t take photos of military buildings, and in some museums and monuments photography is prohibited.
  • Bargaining: At bazaars, haggling is a normal part of shopping. Don’t be afraid to negotiate on the price, but stay polite.
  • Tap water: While it’s technically drinkable in many areas, it’s recommended to drink bottled water to avoid potential stomach issues.
  • Respect for religion: During Ramadan, be considerate towards fasting Muslims and avoid eating, drinking, and smoking in public during the day.

Health Precautions

  • Stomach issues: To avoid digestive problems, drink bottled water, avoid ice in drinks from street vendors, and wash your hands thoroughly.
  • Sunburn: The Turkish sun is very strong. Use sunscreen, wear a hat, and avoid direct sunlight during the midday hours.
  • Mosquitoes: In some areas, mosquitoes can be a nuisance. Pack insect repellent.

💡Also read: Things to Do in Manavgat

Frequently Asked Questions

Do I Need a Passport for Turkey?

Yes, you need a valid passport to enter Turkey. It must be valid for at least 150 days from the date of entry into the country.

Do I Need a Visa for Turkey?

If you’re a British citizen travelling to Turkey for tourism for a stay not exceeding 90 days within a 180-day period, you don’t need a visa.

What Is the Weather Like in Turkey?

Turkey has a diverse climate. Along the Aegean and Mediterranean coasts, summers are hot and dry (June–September, with temperatures of 30–40 °C / 86–104 °F), while winters are mild and rainy. The interior has a continental climate with hot summers and cold winters. The best time to visit the coastal areas is from May to September.

Is Turkey a Safe Country?

Turkey is generally considered a safe destination for tourists. As in any country, however, basic safety precautions should be observed. Before travelling, we recommend checking the latest travel advice on the UK Foreign, Commonwealth & Development Office (FCDO) website.

Can I Drink Tap Water in Turkey?

In tourist areas, tap water is often chlorinated and technically safe to drink, but it may cause stomach issues due to its different mineral composition. We recommend drinking bottled water, which is very affordable in Turkey.

Where Are the Best Beaches in Turkey?

Some of the most beautiful beaches in Turkey include the Blue Lagoon in Ölüdeniz, the beaches of Antalya, Bodrum, Marmaris, Alanya, and Kemer. Many of these beaches have been awarded the Blue Flag for cleanliness and services.

Tips and Tricks for Your Vacation

Don’t Overpay for Flights

Search for flights on Kayak. It’s our favorite search engine because it scans the websites of all airlines and always finds the cheapest connection.

Book Your Accommodation Smartly

The best experiences we’ve had when looking for accommodation (from Alaska to Morocco) are with Booking.com, where hotels, apartments, and entire houses are usually the cheapest and most widely available.

Don’t Forget Travel Insurance

Good travel insurance will protect you against illness, accidents, theft, or flight cancellations. We’ve had a few hospital visits abroad, so we know how important it is to have proper insurance arranged.

Where we insure ourselves: SafetyWing (best for everyone) and TrueTraveller (for extra-long trips).

Why don’t we recommend any Czech insurance company? Because they have too many restrictions. They set limits on the number of days abroad, travel insurance via a credit card often requires you to pay medical expenses only with that card, and they frequently limit the number of returns to the Czech Republic.

Find the Best Experiences

Get Your Guide is a huge online marketplace where you can book guided walks, trips, skip-the-line tickets, tours, and much more. We always find some extra fun there!
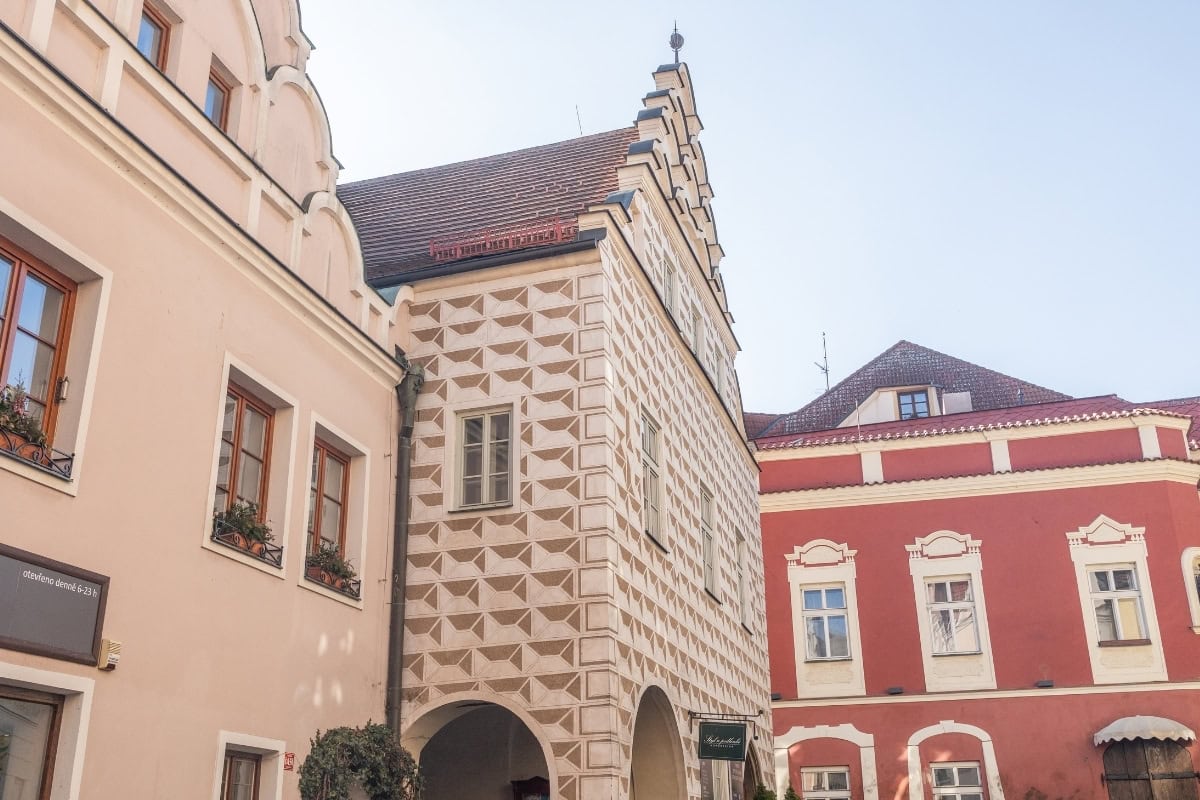
Cape Breton Highlands National Park, Nova Scotia, Canada: 16 Things to See and Do

TL;DRCape Breton Highlands National Park, on the northern tip of Cape Breton Island in Nova Scotia, comes with 16 tips for things to do, starting with the legendary 300km Cabot Trail road and the lookouts at French Mountain, MacKenzie Mountain and North Mountain. Add in hikes like Skyline Trail, Franey Trail, Middle Head Trail and Fishing Cove Trail, plus whale watching from Pleasant Bay and moose spotting. Entry costs 10.50 CAD per person per day (roughly 185 CZK), while an annual Discovery Pass runs 75.25 CAD (about 1,320 CZK). Late September and October are best for autumn colours, while summer (July–August) is when you’ll want to swim and watch whales. The authors reckon on 3–4 days in the park, ideally 5–7, with Chéticamp and Ingonish as your bases.

I’m standing on the edge of a cliff, the Atlantic crashing against the rocks below me, and the wind blowing into my face so hard I feel like it might sweep me away. Before me stretches an undulating green landscape that looks like it was torn right out of the Scottish Highlands — and honestly, that’s not far from the truth. We’re at Cape Breton Highlands National Park in Canada’s Nova Scotia, and I’ve got goosebumps. Not from the cold, but from how utterly breathtaking it is.

My mum and I arrived here at the end of September, when the entire island of Cape Breton transforms into a firework display of colours. Orange, red, yellow — the forests look as if someone spilled paint all over them. And we just stood there, mouths agape, wondering why we hadn’t come sooner. 😅

Cape Breton Highlands National Park is one of those places that barely gets mentioned in most travel circles (honestly, hardly anyone talks about it outside of Canada), but in reality, it ranks among the most beautiful national parks in all of Canada. If you’re planning a road trip through Cape Breton Canada and you love dramatic cliffs, wild ocean, moose, whales, and Celtic culture, this is the place where it all comes together at once.

In this article, you’ll find a complete guide to Cape Breton Highlands National Park — from the most beautiful trails and viewpoints to practical advice on where to stay and how much it all costs, plus tips on whale watching and the best lobster roll on the island. Let’s dive in.

Cape Breton Highlands National Park, Nova Scotia, Canada: 16 Things to See and Do

TL;DR

  • Cape Breton Highlands National Park lies on the northern tip of Cape Breton Island in the province of Nova Scotia, Canada. It’s roughly the size of the Lake District, but instead of rolling hills, you’ll find dramatic Atlantic cliffs, boreal forests, and deep river valleys.
  • The most beautiful time to visit is late September to mid-October — the fall foliage here is absolutely insane. Summer (July–August) is best for whale watching and swimming.
  • Cabot Trail — a legendary 300 km loop road that circles the entire park. One of the most beautiful drives in the world and the main way to explore the park.
  • Best trails: Skyline Trail (iconic sunset over the ocean), Franey Trail (more challenging with stunning views), and Middle Head Trail (easy but gorgeous).
  • You’ll almost certainly spot moose — especially in the early evening and early morning. Watch out on the roads!
  • Whale watching from Pleasant Bay or Chéticamp — humpback whales and more from June to October.
  • Allow at least 3–4 days for the park, ideally 5–7 if you want to hike more trails and soak in the atmosphere.
  • Camping in the park is an experience in itself — from classic campgrounds to backcountry camping at Fishing Cove.
  • Park admission: 10.50 CAD/day per person (approx. €7), or a Discovery Pass for 75.25 CAD (approx. €50) for a full year to all of Canada’s national parks.
  • Celtic culture is everywhere here — from live music to Gaelic signs. It feels like Scotland, just with moose.

When to Visit Cape Breton Highlands and How to Get There

Cape Breton Highlands National Park is one of those places where timing your trip can completely transform the experience. Each season offers something different — and each has its pros and cons. Let’s go through them so you know exactly when to set off.

Best Time to Visit

Autumn (late September – mid-October) is hands down the most beautiful time. The fall foliage on Cape Breton is legendary, drawing visitors from around the world. The entire Cabot Trail is lined with trees in every shade of orange, red, and gold. It’s simply wow. Temperatures hover around 8–15 °C, so pack layers — mornings can be chilly, but midday sun feels pleasant.

Summer (July–August) is best for hiking, camping, and whale watching. Temperatures around 18–25 °C, sometimes even warmer. Bear in mind, though, that it’s busier with tourists — Skyline Trail in particular gets quite crowded in August. Book your camping and accommodation well in advance. Seriously, not “a week before” — months ahead.

Spring (May–June) is quieter and cheaper, but some trails may be closed due to mud or wildlife migrations. The whale watching season opens in June though, which is a bonus. Just be warned — the weather can be fickle and fog is a frequent visitor.

Winter I wouldn’t recommend for hiking. Most services are closed, roads can be dangerous, and camping isn’t operational. However, if you love cross-country skiing, the park does offer winter trails.

Cape Breton Highlands National Park, Nova Scotia, Canada: 16 Things to See and Do

How to Get to Cape Breton

By air: The closest airport is J.A. Douglas McCurdy Sydney Airport (YQY) right on Cape Breton Island. There are no direct flights from the UK — you’ll need a connection through Toronto, Montréal, or Halifax. Air Canada operates flights to Sydney. Search for affordable flights on Kiwi — it’s our go-to platform for finding flights to Canada.

Another option is flying into Halifax (YHZ), which is a larger airport with better connections from Europe. From Halifax, it’s about 4–4.5 hours by car to Cape Breton — ideal if you want to do a road trip through all of Nova Scotia.

By car: A car is absolutely essential on Cape Breton. Without one, you simply can’t get around the national park — there’s no public transport. We’ve had consistently great experiences with DiscoverCars, which we use all over the world. Pick up your rental from Halifax or Sydney.

From Halifax, take the Trans-Canada Highway (Highway 104 and then 105) across the Canso Causeway — the only road bridge to Cape Breton Island. That crossing is actually quite a symbolic moment. Suddenly you’re on the island and the world slows down.

Where to Stay and How Much Cape Breton Highlands Costs

Accommodation around Cape Breton Highlands National Park is surprisingly varied — from campgrounds right in the park to cosy B&Bs and more luxurious lodges with ocean views. Keep in mind that prices during peak season (July–October) are significantly higher than off-season, and the best accommodation gets snapped up months in advance. Don’t find yourself searching for a room the day before — it doesn’t work like that here. 😅

Camping in the Park

The most authentic experience is camping right inside the national park. Parks Canada operates several campgrounds:

  • Chéticamp Campground — on the western side of the park, near the visitor centre. Large, with hot showers and toilets. Price: approx. 28–36 CAD/night (€18–24).
  • Broad Cove Campground — on the eastern side, smaller and more peaceful. Perfect for sunrises over the ocean.
  • Ingonish Campground — in the southeast of the park, close to Franey Trail and Ingonish Beach.
  • Corney Brook Campground — small and romantic, right by the ocean.
  • Fishing Cove Backcountry Campground — for adventurers. Accessible only on foot (approx. 8 km one-way). More on this below.

Reservations open on the Parks Canada website usually in January/February for the summer season. In autumn, it’s easier to find a spot, but I still recommend booking the main campgrounds in advance.

Accommodation Outside the Park

The two main bases for accommodation are Chéticamp on the west and Ingonish on the east. Both offer restaurants, shops, and lodging.

Chéticamp: An Acadian fishing village with galleries, restaurants, and a friendly atmosphere. For example, Auberge Bay Wind Suites.

Ingonish: Quieter, closer to Franey Trail and Middle Head Trail. You might check out Knotty Pine Cottages, Suites & Motel Rooms.

Pleasant Bay: A small village on the northern side of the Cabot Trail, ideal for whale watching. Accommodation is more limited but quieter — Ananda – Enchanted Forest Hideaway.

Cape Breton Highlands National Park, Nova Scotia, Canada: 16 Things to See and Do

How Much Cape Breton Highlands Costs — Weekly Budget

Approximate budget for two people for 7 days (mid-range — mix of camping + B&B):

  • Park admission: 10.50 CAD/day/person × 7 days × 2 = 147 CAD (€98). Tip: A Discovery Pass for 145.25 CAD for two is worth it if you plan to visit other parks too.
  • Camping (3 nights): ~100 CAD (€67)
  • B&B/accommodation (4 nights): ~800 CAD (€535)
  • Food and restaurants: ~500 CAD (€335)
  • Petrol (Cabot Trail + surroundings): ~150 CAD (€100)
  • Whale watching (2 people): ~120 CAD (€80)
  • Total for two for a week: approx. 1,800–2,000 CAD (€1,200–1,340) excluding flights and car rental

We didn’t particularly scrimp on the trip, but camping saved us a fair bit on accommodation and allowed us to stay longer.

Cabot Trail and the Best Viewpoints: 5 Stops You Can’t Miss

The Cabot Trail is a 300 km loop road that circles the entire Cape Breton Highlands National Park, and it’s considered one of the most beautiful drives in the world. And I have to say, for once, there’s no marketing exaggeration — it truly is. The road winds through mountains, along cliffs, through fishing villages, and past bays where you can spot whales right from the roadside. We drove it over two days, but you could easily spend a week here without getting bored.

You can drive the Cabot Trail clockwise or counter-clockwise — we went from Chéticamp north and then down through Ingonish, but both directions are beautiful. Personally, I recommend going counter-clockwise (starting from Chéticamp), because you’ll be on the outer side of the road closer to the ocean and the viewpoints will be right in front of you.

1. Cabot Trail Scenic Drive — the Road People Come Here For

The drive along the Cabot Trail is an experience in itself. You don’t have to do a single trail and you’ll still have one of the most beautiful days on the road. The road is well-maintained, but it has steep climbs, sharp bends, and in some places you’ll encounter a series of “wow” moments around every curve.

A few tips for the drive: Fill up on petrol in Chéticamp or Ingonish, because there are no petrol stations inside the park. Set aside a full day for the drive — you’ll be stopping every few minutes. And most importantly — watch out for moose on the road! They’re enormous, hard to spot at dusk, and a collision with a moose is a serious accident. Slow down especially at dawn and after dark.

The most beautiful sections of the road are between French Mountain and Pleasant Bay (western side), and then the stretch leaving the park towards Ingonish on the eastern side, where the road winds high above the ocean. Keep your camera charged — or rather your phone, because you’ll be snapping photos every minute anyway. 😁

Cabot Trail Cape Breton

2. French Mountain and MacKenzie Mountain Lookouts — Ocean Views

On the western side of the Cabot Trail, just past Chéticamp, the road climbs up French Mountain and then MacKenzie Mountain. Both mountains offer official lookouts with car parks where you simply stop and take it all in.

From French Mountain Lookout, you gaze down at Chéticamp and the entire Gulf of St. Lawrence coastline. On a clear day, it’s infinite — the water and sky merge into one. MacKenzie Mountain Lookout is a bit further along and the view is even more dramatic — the road literally cuts into the cliff face and you’re looking hundreds of metres down to the coast.

If you visit in autumn, these lookouts are particularly magical. The forests below you blaze with colour and the ocean is deep blue. It’s like looking at a painting where the artist went a bit overboard with the colour saturation — except here, it’s real.

Cabot Trail Cape Breton
You’ll spot moose even more frequently than in other parts of Canada where we lived.

3. North Mountain Lookout — Where You See Moose Below You

On the northern edge of the park, between Pleasant Bay and Neil’s Harbour, the road climbs North Mountain. The viewpoint here is one of the most dramatic on the entire Cabot Trail — you’re looking down into a deep valley with the ocean stretching beyond.

This is also one of the best spots to see moose. In the evening and early morning, moose often graze in the valleys below the road and you can observe them from a safe distance. We saw a cow with her calf here — we stood at the lookout, these enormous creatures strolling peacefully below us, and we completely lost track of time. Purely magical.

You'll spot moose even more frequently than in other parts of Canada where we lived.
You’ll spot moose even more frequently than in other parts of Canada where we lived.

4. Lakies Head Lookout — the East Coast in All Its Glory

On the eastern side of the park, near Ingonish, you’ll find Lakies Head Lookout. It’s a smaller viewpoint, but the view of the rocky coastline where the Atlantic crashes against granite rocks is absolutely stunning.

This spot is great for a snack break — there’s a bench and a peaceful atmosphere. Unlike Skyline Trail (which is packed with people), it’s quiet here even in peak season. If you’re lucky and it’s a clear day, you can see kilometres of sweeping cliffs along the coast.

5. Mica Hill and Sunrise Trail Lookout — for Early Birds

If you’re willing to get up before dawn, Mica Hill and the surrounding lookouts on the eastern side of the park offer spectacular sunrises over the Atlantic. The sky transitions from deep blue through pink to gold, and the entire ocean below you lights up.

Best Trails in Cape Breton Highlands: 6 Hiking Routes You Must Try

Cape Breton Highlands National Park offers over 25 marked trails with a total length of about 100 km. From short 20-minute walks to all-day challenging hikes — there’s something for everyone. Here are the best ones we walked (and a couple we heard about from locals who said we shouldn’t miss them, but our legs said otherwise).

Skyline Trail, Cape Breton, Nova Scotia

6. Skyline Trail — the Most Famous Trail in the Entire Park

Length: 9.2 km (return) | Elevation gain: 365 m | Difficulty: Moderate | Time: 2.5–4 hours

Skyline Trail is iconic. You’ve probably seen the photos — wooden boardwalks leading to a cliff edge, the ocean below, and a sky that never ends. And in reality, it’s even better.

The trail starts in boreal forest, climbs gradually, and the last 600 metres run along a boardwalk that ends on a cliff high above the bay. From there, you watch the sunset over the Gulf of St. Lawrence and — I’m truly not exaggerating — it’s one of the best sunsets I’ve ever seen.

Important tip: Since 2024, Parks Canada requires a reservation for sunset on Skyline Trail (Sunset Skyline). Reservations open two days in advance and sell out within minutes. If you want the sunset, be at your computer at the exact moment bookings open (usually 8:00 AM). During the day (before 16:00), the trail is accessible without a reservation.

One more thing — the trail is closed after dark for safety reasons (bears). You must be back at the car park by the designated time.

Franey Trail, Cape Breton, Nova Scotia

7. Franey Trail — for Those Who Want a Proper Climb

Length: 7.4 km (loop) | Elevation gain: 366 m | Difficulty: Challenging | Time: 2.5–4 hours

If Skyline Trail is the popular one, Franey Trail is the one for those in the know. The trail climbs fairly steeply through forest and ends at a rocky summit with 360° views over Clyburn Brook Canyon, the ocean, and the surrounding hills.

Unlike Skyline, you’ll encounter a fraction of the people. We met about six other hikers the entire way. The ascent is quite steep and rocky in places — good hiking boots are a genuine necessity here, not an optional extra. But that view from the summit… We stood there and couldn’t tear ourselves away.

The trail starts near Ingonish and you can combine it with a visit to Ingonish Beach, which is down by the car park. After a tough climb, dipping your feet in the icy Atlantic — there’s no better refreshment.

Franey Trail - what to see on Cape Breton
Franey Trail, Cape Breton, Nova Scotia

8. Middle Head Trail — Easy Yet Breathtaking

Length: 3.6 km (return) | Elevation gain: minimal | Difficulty: Easy | Time: 1–1.5 hours

Middle Head Trail is perfect for those who don’t want to spend all day climbing uphill but still want a cracking view. The trail follows a narrow peninsula that juts out into the ocean like a finger, and at the end, you’re surrounded by water on three sides.

The trail starts right at Keltic Lodge and winds through forest to a rocky headland. Along the way, you might spot seals, and during the season, even whales from dry land. We saw a group of seals basking on the rocks — Mum spent about 20 minutes photographing them and refused to move on.

I recommend coming here early in the morning, when the peninsula is wrapped in fog and the whole thing looks like something out of a Scottish novel.

Cape Breton
Franey Trail, Cape Breton, Nova Scotia

9. Fishing Cove Trail — Backcountry Adventure

Length: 16 km (return) | Elevation gain: 335 m (down and then back up!) | Difficulty: Challenging | Time: 6–8 hours or overnight

Fishing Cove is, for me, the most beautiful spot in the entire park. It’s a remote cove accessible only on foot, which most tourists never reach because few people manage the climb back up with a smile on their face.

The trail starts from the Cabot Trail road and descends steeply (335 metres) down to the ocean. And there — there is paradise. A pebbly little beach, green meadows, a stream with drinking water, and a backcountry campsite where you can sleep under the stars. Sounds idyllic? It is idyllic.

If you want to stay overnight, you’ll need a backcountry permit from Parks Canada (approx. 10 CAD/person/night, about €7). Spaces are limited and in season, booking ahead is worthwhile. Fire pits and pit toilets are available, but otherwise no amenities — and that’s exactly the point.

Warning: The way back is the same hill, but uphill. After a night in the backcountry with a pack on your back, it’s an experience bordering on a spiritual awakening. 😅 But it’s worth it.

10. Benjies Lake Trail — for Lovers of Peace and Bogs

Length: 3 km (loop) | Elevation gain: minimal | Difficulty: Easy | Time: 45 min – 1 hour

This trail is different from all the others. It doesn’t lead to a cliff or the ocean, but into the heart of the boreal forest to a quiet lake surrounded by bogs. There’s a wooden boardwalk, a few information panels, and above all — absolute silence.

If you need a break from dramatic views (yes, that can actually happen), Benjies Lake is perfect. We popped in here one afternoon when it was raining, and the atmosphere — fog hovering over the lake, droplets on the moss, not a soul around — was almost meditative.

11. Bog Trail — 20 Minutes but Worth It

Length: 0.8 km (loop) | Elevation gain: none | Difficulty: Very easy | Time: 20 minutes

The shortest trail on the list, but I’m including it because it’s absolutely unique. It runs along a boardwalk through a bog at around 400 m elevation and showcases an ecosystem that looks like it’s from another planet — carnivorous plants, mosses, miniature orchids.

Great for a quick stop when you’re driving the Cabot Trail and want to stretch your legs. It takes 20 minutes, but you’ll leave a little wiser.

Cape Breton, Nova Scotia
🏡
Lukáš and Lucie recommend
Where to Stay in Cape Breton Highlands
4 verified accommodations — from national park campgrounds to cozy cabins with ocean views

Wildlife and Nature: 3 Experiences You Won’t Find Anywhere Else

Cape Breton Highlands National Park is home to incredible wildlife. This isn’t just about pretty views — you’re living in the midst of wild nature and it makes that very clear. The island is home to moose, black bears, bald eagles, seals, whales, and dozens of other species. Let’s look at the highlights.

12. Moose Watching — Giant Animals Right by the Road

Moose are the unofficial symbol of Cape Breton Highlands and you’ll spot them with high probability — especially if you know where and when to look.

Best time: Dawn (5:00–7:00) and dusk (18:00–20:00). Moose are more active in cooler weather, so you have a better chance in autumn.

Best spots: Around North Mountain, Bog Trail, the road between Pleasant Bay and Neil’s Harbour. During our entire stay, we saw seven moose — four right from the road, two from the North Mountain lookout, and one on Skyline Trail (that one startled us a bit because it was standing in the middle of the path and we weren’t sure who should give way 😁).

Safety rules: Moose are massive animals (bulls weigh up to 700 kg) and they’re not friendly. Keep a distance of at least 30 metres. On the roads, especially at dusk, drive slowly — a collision with a moose is extremely dangerous.

13. Whale Watching — Whales Within Arm’s Reach

From June to October, humpback whales, minke whales, and occasionally pilot whales migrate along Cape Breton’s coastline. Whale watching is one of the most popular experiences in the entire area.

Tours depart from Pleasant Bay on the western side and from Bay St. Lawrence on the northern tip of the island. Prices are around 50–65 CAD per person (€33–43). It’s worth choosing a smaller boat (zodiac) — you’re closer to the water and it’s a more intense experience, though wetter. 😅

We went from Pleasant Bay with Captain Mark’s Whale & Seal Cruise and saw two humpbacks breaching about 50 metres from the boat. That moment when the entire enormous body surges out of the ocean and then crashes back down with a splash… you can’t prepare for it. You just stand there with your mouth open.

Tip: If you suffer from seasickness, take tablets BEFORE boarding. The Atlantic here can be quite rough and on a small boat, you’ll definitely feel it.

14. Bald Eagle and Bird Watching

Cape Breton is a paradise for bird watching. Bald eagles are surprisingly common here — we saw several soaring above the cliffs along the Cabot Trail. Other species you’ll encounter include osprey, blue jays, and in the harbours, cormorants and puffins (mainly on the Bird Islands off Englishtown).

If you’re into birds, the Bird Islands Boat Tour from Englishtown takes you to small islands where thousands of seabirds nest. Price is around 45 CAD per person (€30).

Cape Breton
Cape Breton, Nova Scotia

Celtic Culture and Villages on the Cabot Trail: What to Do Outside the Park

Cape Breton isn’t just a national park — it’s a culturally fascinating island where Acadian (French) and Scottish (Celtic) cultures meet. Gaelic was a common language here until the mid-20th century and Celtic tradition is still very much alive. Here are places worth visiting beyond the trails.

15. Chéticamp — an Acadian Village with Soul

Chéticamp is a picturesque fishing village on the western side of the park and the main gateway to Cape Breton Highlands. It’s an Acadian community — descendants of French settlers who have lived here since the 18th century. The village is famous for traditional hooked rugs, and you’ll find several galleries and workshops here.

Stop by Les Trois Pignons — a cultural centre with a museum of Acadian culture and an impressive collection of hooked tapestries by Élizabeth LeFort, which are absolutely stunning. Admission is nominal (around 8 CAD, €5).

Stock up on food and petrol here before entering the park — there are no shops inside the park itself.

16. Celtic Music and Red Shoe Pub in Mabou

If you’re visiting Cape Breton, you must experience live Celtic music. And the best place is the Red Shoe Pub in the village of Mabou, a bit south of the national park. The pub is owned by the Rankin sisters — of the legendary Rankin Family — and every evening features live traditional music. Fiddle, step dancing, and beer from the local brewery — you won’t have a better evening on Cape Breton.

If you can’t make it to Mabou, you’ll find Celtic pub sessions in Chéticamp and Baddeck too. Ask the locals where the music is playing — schedules change from day to day here and the best events are found through word of mouth, not on the internet.

Cape Breton, Nova Scotia

Where to Eat and Drink on Cape Breton Highlands: a Guide for Hungry Travellers

Food on Cape Breton is surprisingly good — and heavily focused on seafood. Lobster here isn’t a luxury, it’s an everyday affair. Here are our favourite spots.

Chéticamp:

  • Le Gabriel — arguably the best restaurant in Chéticamp. Fresh seafood, local specialities, and surprisingly good wine. Lobster dinner around 35–45 CAD (€23–30).
  • Aucoin Bakery — a local bakery with fantastic croissants and coffee. The perfect stop before heading into the park.
  • L’Abri — Acadian cuisine in a rustic setting. Try the fricot (Acadian chicken soup) and pâté à la viande (meat pie).

Ingonish and the east side:

  • The Purple Thistle — our absolute favourite restaurant on the entire Cabot Trail. The seafood is top-notch, but they also do a brilliant steak. The lobster roll was possibly the best we’ve ever had. That’s not an exaggeration — just a fact. ☺️
  • Main Street Restaurant & Bakery in Neil’s Harbour — an unassuming restaurant with harbour views. Fish & chips at a fair price and homemade pies.

Pleasant Bay:

  • Rusty Anchor — fish straight from the boat to your plate. A small restaurant with enormous portions. In season, there can be a queue, but the wait is worth it.

Baddeck (on the southern end of the island):

  • Baddeck Lobster Suppers — a classic experience. A full lobster dinner at a set price (around 45 CAD/person, about €30) with salad, soup, and homemade pie. Simple, but absolutely perfect.

Shopping tip: If you’re camping, stock up in Chéticamp or Ingonish. There are no shops in the park. At farmers’ markets (mainly in Baddeck and Mabou), you can pick up local cheeses, honey, and fresh seafood at great prices.

Practical Tips for Visiting Cape Breton Highlands National Park

Let’s have a look at the practical side of visiting Cape Breton.

Admission and Discovery Pass

Park admission is 10.50 CAD/day per person (approx. €7), children aged 6–17 pay 5.25 CAD and children under 5 enter free. If you plan to stay 7+ days or visit other Canadian national parks, the Discovery Pass is worth it — 75.25 CAD per person/year (€50), or 145.25 CAD (€97) for a family/group of up to 7 people in one vehicle.

You can pay admission at the park entrance or online on the Parks Canada website.

Weather and What to Pack

Weather on Cape Breton is unpredictable. It can be 20 °C and sunny and an hour later, foggy and 10 °C. Pack:

  • A waterproof jacket (essential kit, not optional)
  • Layers — merino base layer + fleece + jacket
  • Quality hiking boots — trails are wet and rocky in places
  • A hat and gloves (in autumn, it can be seriously windy at the lookouts)
  • Binoculars — for moose, whales, and birds

If you want to pack efficiently, check out our guide on how to pack into carry-on luggage.

Internet and Connectivity

On most of the Cabot Trail, there’s no mobile signal. Seriously — kilometres upon kilometres without coverage. Chéticamp, Ingonish, and Pleasant Bay have signal, but inside the park itself, forget about Google Maps and rely on offline maps.

Download the Cape Breton Highlands map to Google Maps or maps.me beforehand. And enjoy the digital detox — it’s liberating. ☺️

If you need data straight after landing, you can get an eSIM — we use Holafly and it works in Canada too.

Safety — Bears and Moose

The park is home to black bears. They’re not as aggressive as grizzlies, but you still need to follow the rules:

  • Store food in bear boxes (available at campsites) or in your car.
  • Don’t bring fragrant food on the trail.
  • Make noise — talk, clap, some trails have bear bells.
  • If you encounter a bear, stay calm, don’t run, back away slowly, and speak in a calm voice.

Regarding moose — see above. Especially on roads at dusk.

Travel Insurance

For a trip to Canada, I strongly recommend travel insurance. Healthcare in Canada is extremely expensive for foreigners — a single night in hospital can cost thousands of dollars. For longer trips, we go with SafetyWing, and for shorter ones, a comprehensive travel policy from your provider.

Cape Breton
Cape Breton, Nova Scotia

FAQ — Frequently Asked Questions About Cape Breton Highlands National Park

What are Cape Breton Highlands?

Cape Breton Highlands is a highland plateau on the northern tip of Cape Breton Island in the Canadian province of Nova Scotia. The national park, established in 1936, protects 949 km² of dramatic landscape — from Atlantic cliffs and boreal forests to deep river valleys. The park is encircled by the legendary Cabot Trail road.

What is Cape Breton known for?

Cape Breton is famous primarily for the Cabot Trail — one of the most beautiful drives in the world — and for its stunning fall foliage, which attracts thousands of photographers and travellers every year. Beyond the nature, the island is known for its vibrant Celtic culture, whale watching, and lobster.

Is Cape Breton Highlands National Park worth visiting?

Absolutely yes. If you love nature, hiking, and wild Atlantic landscapes, Cape Breton Highlands is one of the most beautiful places in all of Canada. The park offers trails for all levels, breathtaking views, abundant wildlife, and a peaceful atmosphere without crowds of tourists (with the exception of Skyline Trail in peak season). Plus, it feels like Scotland — just with moose and better lobster.

How many days do I need for Cape Breton Highlands National Park?

A minimum of 3 days if you want to drive the Cabot Trail and do 2–3 main trails. The ideal is 5–7 days — you’ll have time to hike more trails, go whale watching, visit surrounding villages, and soak in the atmosphere. If you’re planning backcountry camping at Fishing Cove, add an extra day.

How do I get to Cape Breton Highlands National Park?

The easiest way is to fly into Halifax (YHZ) and rent a car — from Halifax, it’s about 4–4.5 hours on the Trans-Canada Highway. Alternatively, you can fly directly to Sydney (YQY) on Cape Breton Island. A car is essential — there’s no public transport in the park. You reach the island via the Canso Causeway (road bridge) or by ferry from Newfoundland to North Sydney.

Is Cape Breton Highlands suitable for families with children?

Yes! The park offers several short and easy trails (Bog Trail, Benjies Lake, Middle Head Trail) that even younger children can manage. Camping in the park is a great family experience and kids love spotting moose and whales. Just bear in mind that some trails (Franey, Fishing Cove) are too challenging for small children.

Do I need a map for Cape Breton Highlands?

Definitely recommended. Mobile signal in the park is virtually non-existent, so don’t rely on online maps. At the park entrance visitor centre (Chéticamp or Ingonish), you’ll receive a free printed map of Cape Breton Highlands. Additionally, download an offline map to Google Maps or maps.me before you set off. The Parks Canada website also has detailed maps of individual trails.

Tips and Tricks for Your Vacation

Don’t Overpay for Flights

Search for flights on Kayak. It’s our favorite search engine because it scans the websites of all airlines and always finds the cheapest connection.

Book Your Accommodation Smartly

The best experiences we’ve had when looking for accommodation (from Alaska to Morocco) are with Booking.com, where hotels, apartments, and entire houses are usually the cheapest and most widely available.

Don’t Forget Travel Insurance

Good travel insurance will protect you against illness, accidents, theft, or flight cancellations. We’ve had a few hospital visits abroad, so we know how important it is to have proper insurance arranged.

Where we insure ourselves: SafetyWing (best for everyone) and TrueTraveller (for extra-long trips).

Why don’t we recommend any Czech insurance company? Because they have too many restrictions. They set limits on the number of days abroad, travel insurance via a credit card often requires you to pay medical expenses only with that card, and they frequently limit the number of returns to the Czech Republic.

Find the Best Experiences

Get Your Guide is a huge online marketplace where you can book guided walks, trips, skip-the-line tickets, tours, and much more. We always find some extra fun there!
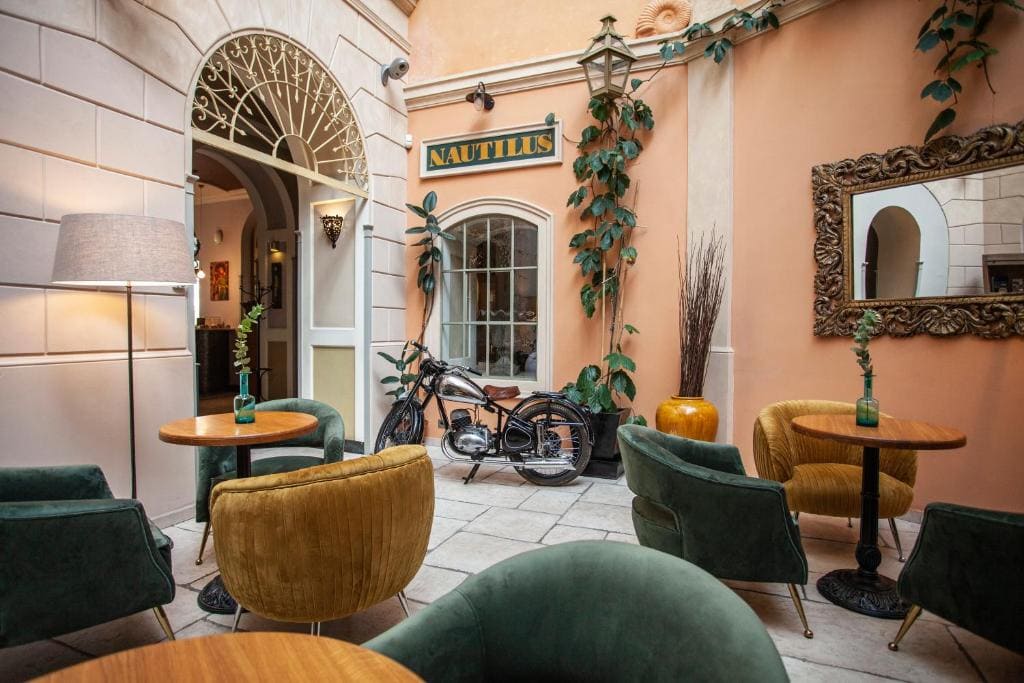
Zion National Park, Utah: 8 Tips on What to See and Do

TL;DRZion National Park in southwest Utah comes with eight essential picks, from the adrenaline-fuelled Angels Landing trail (8.7 km, $6/person permit) to wading through The Narrows, plus calmer options like Emerald Pools, Canyon Overlook Trail, Pa’rus Trail, Observation Point, Riverside Walk and Kolob Canyons. April–May and September–October are the best months, with pleasant weather and thinner crowds than summer, when temperatures top 40°C. Plan on 2–4 days; entry costs $35 per car for 7 days, or $80 for an annual America the Beautiful Pass. Springdale, right by the south entrance, makes the perfect base, with a free shuttle running the Zion Canyon Scenic Drive from March to November — and it’s compulsory, so leave the car behind. The nearest airport is Las Vegas, about 270 km away (2.5 hours’ drive).

You’re standing on a narrow rock ledge. Nothing but emptiness on both sides, hundreds of metres straight down, and the people below look like ants. Your heart is pounding so loud you’re convinced they can hear it too. This is Angels Landing in Zion National Park, Utah — and that’s exactly how I felt when I was gripping the chains so tightly that my palms were sore for three days afterwards.

But that day was even more extraordinary than usual. Just as we were high up on the trail, a solar eclipse passed over America. The light suddenly shifted, as if someone had turned the brightness down to minimum, and within a few minutes an unexpected chill set in — that eerie, “this doesn’t belong here” kind of cold that gets under your skin. Combined with that narrow ridge and the infinite depth all around, it was a moment you never forget.

Zion is a park that captivates you instantly: massive red canyons, the Virgin River, sandstone walls as tall as skyscrapers, and an atmosphere that makes you feel tiny — yet incredibly alive. Lukáš and I spent three days here, and honestly? We could easily have stayed a week. Every trail, every viewpoint, every sunset here carries a special energy. And I’ll do my best to convey it in this article.

In this article, you’ll find a complete guide to Zion National Park in Utah — from the best time to visit and how the famous shuttle system works, through 15 tips on the most beautiful places and trails, to practical advice on where to stay, how much it all costs, and where to get the best burger in Springdale. If you’re planning a road trip through the US national parks, Zion should definitely be on your list.

Zion National Park Utah, what to see and do

TL;DR

  • Zion National Park is located in southwestern Utah and is one of the most visited national parks in the USA — over 4 million people come here every year.
  • Best time to visit is April–May and September–October. Summer is hot (over 40 °C / 104 °F) and overcrowded; winter is beautiful but some trails may be closed.
  • You need a permit for Angels Landing — the lottery runs online, so apply well in advance!
  • The shuttle system is mandatory from March to November for Zion Canyon Scenic Drive — you can’t drive your own car there during the season.
  • The Narrows (wading through a river canyon) is an absolutely unforgettable experience, but you’ll need special gear.
  • Accommodation in Springdale is the most practical option — the town sits right at the park entrance.
  • Entrance fee is $35/vehicle for 7 days, or free with an annual America the Beautiful Pass ($80).
  • Kolob Canyons — a lesser-known northern section of the park where you’ll encounter very few tourists.
  • At least 2–3 days in the park is recommended, ideally 4 if you want to hike the main trails at a relaxed pace.

When to Visit Zion and How to Get There

Zion National Park is open year-round, but the timing of your visit can make a huge difference between an amazing experience and a frustrating crush of crowds. Let’s break down each season so you know what you’re getting into.

Best Time to Visit

Spring (April–May) is, in my opinion, the absolute ideal time. Temperatures range between 15–28 °C (59–82 °F), the Emerald Pools waterfalls are at their fullest thanks to snowmelt, and while there are already plenty of visitors, it’s not total madness yet. May is probably our favourite month — the days are long, evenings are pleasant, and the canyons are bathed in gorgeous warm light.

Autumn (September–October) is the second great choice. The heat subsides, the leaves along the Virgin River turn gold and orange, and the atmosphere is simply magical. October tends to be a bit quieter than September. If you can visit on a weekday, that goes double — weekends at Zion are always busier.

Summer (June–August) — I’d avoid it if possible. Temperatures regularly exceed 40 °C (104 °F) and the park is bursting at the seams. Queues for the shuttle bus are long, parking in Springdale is a nightmare, and hiking in the midday heat isn’t just unpleasant — it’s dangerous. If you must go in summer, get up before dawn. Seriously. Four in the morning. 😅

Winter (December–February) — beautiful, quiet, and underrated. Snow-dusted red rocks are stunning, there are hardly any tourists, and the shuttle doesn’t run, so you can drive through Zion Canyon in your own car. The downside? Some trails (Angels Landing, The Narrows) may be closed due to ice and snow. But if the lower trails are enough for you and you want peace, winter is fantastic.

How to Get to Zion National Park

By air: The nearest major airport is Las Vegas (LAS) — about 2.5 hours by car (170 miles / 270 km). This is the most practical option and exactly what we did. You can often find great deals on flights to Las Vegas from across Europe and the UK, especially if you’re flexible with dates.

Another option is Salt Lake City (SLC) airport — about 4.5 hours’ drive, but it can be beautifully combined with a visit to Bryce Canyon along the way.

By car: A car is essential in Zion (and on any road trip across the American West, really). Lukáš and I have had consistently good experiences with DiscoverCars, which we use all over the world — you can compare offers and usually find a better price than going directly to the rental companies. It’s worth picking up your car right at Las Vegas airport.

The drive from Vegas to Zion is absolutely spectacular — you pass through Virgin River Gorge and the red rocks welcome you dozens of kilometres before the park itself. The final stretch along Highway 9 into Springdale is an experience in its own right.

Shuttle System — How It Works

This is probably the thing that surprises most first-time visitors to Zion: from March to November, private vehicles are not allowed on Zion Canyon Scenic Drive. The only way to reach most of the main trailheads (Angels Landing, The Narrows, Emerald Pools…) is the free park shuttle.

Shuttles run from early morning (usually from 6:00 AM) until evening, every 7–10 minutes during peak season. You board at stops in Springdale (there are two stops in town) or at the Visitor Center inside the park.

Practical tip: During the season, get to the stop EARLY. We showed up at 8 AM the first time and waited 40 minutes for a bus. The next day we got up at 5:30 and were comfortably seated on a half-empty shuttle by 6:15. That morning at the trailhead, when the first rays of sunlight pierce through the canyon and everything around you is still quiet — it’s absolutely worth setting that alarm.

Zion where to stay

Where to Stay Near Zion National Park + How Much It Costs

Most Zion visitors stay in Springdale — a charming little town right at the south entrance to the park. And it’s the logical choice: you’ve got restaurants, outdoor gear shops, shuttle stops, and an atmosphere that’s pleasantly touristy without being annoyingly commercial. Think of it as a smaller Moab, just a touch cosier.

Springdale — The Best Base

Accommodation in Springdale isn’t cheap — especially in peak season. Expect a decent hotel room to cost $150–300 per night, and in summer even more. Airbnb options tend to be a bit more reasonable, particularly if you’re travelling in a group.

A few Zion Utah hotels worth considering:

  • Cable Mountain Lodge — right at the park entrance, with a pool and stunning canyon views. Pricier, but the location is unbeatable.
  • Cliffrose Springdale — a gorgeous garden right along the Virgin River, modern rooms. If you want to treat yourself to a bit of luxury after a full day of hiking, this is a great pick.
  • Bumbleberry Inn — a more affordable option, still in Springdale. Simple, clean, and they have a legendary bumbleberry pie (a mix of blueberries, raspberries, and blackberries).

Camping

If you want to stay right inside the park, there are two campgrounds:

  • Watchman Campground — open year-round, reservations required via Recreation.gov. A site costs $30/night. Book as soon as the booking window opens (6 months in advance) — it sells out within hours.
  • South Campground — seasonal, first-come-first-served. That means either arrive on a Monday morning early or you’re out of luck. Weekends aren’t worth trying.

Camping in Zion is a fantastic experience — you fall asleep under the stars with a view of the red canyon walls and it’s absolutely silent at night. Just make sure to pack a warm sleeping bag — even in summer, the canyon can get chillier at night than you’d expect.

How Much Does Zion Cost — Budget for 3 Days for Two

Here’s an approximate budget based on our trip (spring, 3 nights in Springdale):

  • Park entrance fee: $35/vehicle for 7 days — or free with an America the Beautiful Pass ($80/year — worth it if you visit at least 2 national parks)
  • Accommodation (3 nights): approx. $600–750
  • Food (3 days): approx. $150–200 — a mix of restaurants and trail snacks
  • Petrol from Las Vegas and back: approx. $60–80
  • Gear rental for The Narrows: $30–50/person
  • Angels Landing permit: $6/person — if you win the lottery

Total for two people for 3 days: approx. $900–1,150 — excluding flights and car rental. That’s roughly $450–575 per person.

Main Canyon: 8 Places and Trails You Must See

The heart of Zion National Park is Zion Canyon — a roughly 24 km (15 mile) long canyon carved by the Virgin River, home to most of the park’s famous Zion National Park trails and viewpoints. This is where the shuttle bus runs and where 90% of visitors head. And honestly — rightly so. Let’s walk through the best spots, from iconic adrenaline-pumping trails to peaceful riverside strolls.

Angels Landing Zion, Utah

1. Angels Landing — The Trail That Will Rearrange Your Life Priorities

This is THE one. The trail of all trails. The reason half the people come to Zion in the first place. And also the place where you realise your life insurance might not be quite as generous as you’d like. 😅

Angels Landing is an 8.7 km (5.4 mile) round-trip trail with 453 metres (1,488 ft) of elevation gain that takes you up to a narrow rock ridge with views that will take your breath away — in every sense. The final half-kilometre follows a narrow spine where you cling to chains with sheer drops of hundreds of metres on both sides. I won’t sugarcoat it — it was one of the most intense experiences of my life.

IMPORTANT: Since 2022, you need a permit for Angels Landing! The lottery runs in two rounds — a seasonal lottery (3 months in advance) and a day-before lottery. You register on recreation.gov and pay a fee of $6/person. Don’t just enter one round — try both. The chances of winning the day-before lottery are around 20–30% outside of peak times.

The trail starts at The Grotto shuttle stop and the first section — switchbacks known as Walter’s Wiggles (21 sharp turns carved into the rock) — is strenuous but not dangerous. Then you reach Scout Lookout, a beautiful viewpoint where you decide whether to continue along the ridge or not. If you have a fear of heights, Scout Lookout is an absolutely legitimate destination — the views from there are stunning too.

Practical tip: Go as early in the morning as possible. Ideally be at the trailhead by 6:30–7:00 AM. You’ll have the trail almost to yourself, it won’t be hot, and you won’t be meeting hundreds of people coming the other way on the ridge (which is far more dangerous than the trail itself).

Zion The Narrows

2. The Narrows — Wading Through a Canyon You’ll Never Forget

If Angels Landing is the king of Zion, The Narrows is the queen.

The Zion National Park Narrows is a trail where you literally wade through a river in a narrow canyon whose walls tower 300 metres (1,000 ft) above you and, at the tightest points, are only a few metres apart. It’s surreal, gorgeous, and utterly unique — I’ve never experienced anything like it anywhere else in the world.

There are two options:

  • Bottom-up (most popular) — you start at the Temple of Sinawava shuttle stop at the end of the Scenic Drive, walk the paved Riverside Walk (1.6 km / 1 mile), and then step into the river. You walk as far as you like and return the same way. No permit needed. Most people go 3–5 km into the canyon.
  • Top-down (full-day adventure) — a 26 km (16 mile) one-way trail that requires a permit and advance planning. For experienced adventurers only.

What you’ll need: Neoprene socks, special water shoes, and a hiking pole. You can rent everything from outfitters in Springdale — the most popular are Zion Outfitter and Zion Adventure Company. Renting a full set costs $30–50/person and absolutely don’t skip this. The riverbed is extremely slippery and without proper shoes you’ll end up on your backside within the first five minutes (confirmed by Lukáš, who tried it in sandals — don’t be like Lukáš 😅).

WATCH THE WEATHER: The Narrows must NOT be attempted when there’s a risk of storms! The canyon can fill with flash floodwater within minutes, and in a narrow canyon there’s nowhere to escape. The park closes The Narrows when rain is forecast — check the forecast and respect closures. This is not the place for heroics.

Canyon Overlook Trail Zion

3. Canyon Overlook Trail — Best Effort-to-View Ratio

If you only have time for one short trail, do this one. Canyon Overlook is a short hike (1.6 km / 1 mile round trip) with minimal elevation gain that leads you to a viewpoint with one of the most photogenic views in the entire park.

The trailhead is just beyond the eastern portal of the Zion-Mt. Carmel Tunnel (that’s the famous tunnel carved through rock that you drive through on Highway 9). Be warned — parking is limited, so arrive early or in the afternoon when people are leaving.

The trail is somewhere between easy and moderate — there are steps carved into the rock in places and one section with mild exposure, but nothing dramatic. At the end, you stand on a rocky outcrop overlooking Pine Creek Canyon with the majestic canyons of Zion stretching into the distance. Sunset from here is absolutely breathtaking.

The best thing about Canyon Overlook is that truly anyone can manage it, yet the views rival those of much more demanding trails. Perfect for people who don’t have a full day for hiking but want to see Zion in all its glory.

Emerald Pools, Zion
Emerald Pools, Zion

4. Emerald Pools — Three Pools, Three Difficulty Levels

Emerald Pools is a series of three “pools” (more like rock pools and waterfalls) on three levels — Lower, Middle, and Upper. It’s one of the most popular trails in the park, and each level offers a slightly different experience.

Lower Emerald Pool (1.9 km / 1.2 miles round trip) is a paved, wheelchair-accessible path leading to an overhang with water cascading down. It’s beautiful and absolutely anyone can do it — from small children to grandparents. In spring, when the snow melts, the waterfall is powerful and impressive. In late summer, it might be just a trickle (but the walk is still lovely).

Middle and Upper Emerald Pool require a bit more effort — the path is steeper and rockier. Upper Pool (4.8 km / 3 miles round trip total) is the quietest and least visited of the three. We sat on a rock by the upper pool, munched on sandwiches, and there wasn’t a soul around — in Zion, that’s a rarity!

The trail starts at the Zion Lodge shuttle stop. I’d recommend combining the Lower Pool (a short detour) and then continuing up to the Upper Pool — that way you get the most out of a single trip.

Pa'rus Trail
Pa’rus Trail

5. Pa’rus Trail — For Those Who Want a Relaxed Walk (and Dogs!)

I have to mention this trail because it’s genuinely unique — it’s the only trail in the main canyon where dogs and bicycles are allowed. So if you’re travelling with a four-legged companion, Pa’rus is your trail.

It’s a 5.6 km (3.5 mile) paved path along the Virgin River running from the Visitor Center to the Canyon Junction stop. It’s flat, easygoing, and offers lovely views of Watchman and other rock formations. Ideal for a warm-up or an evening stroll when you’re heading back from a more demanding trail.

6. Observation Point — Views That Outdo Even Angels Landing

This trail is, according to many experienced hikers (and I wholeheartedly agree), the most beautiful in all of Zion — and paradoxically far less visited than Angels Landing, despite offering even better views.

Note — the main trail from the canyon via Echo Canyon was closed due to a rockslide and its status changes. Currently (2025), the best way to reach Observation Point is from the east side of the park via the East Mesa Trail — 10.6 km (6.6 miles) round trip along a mostly flat path. Access is via a dirt road (you’ll need a high-clearance vehicle or at least an SUV) and the trailhead is outside the main part of the park, so you’ll encounter a fraction of the people.

The reward? You stand on the canyon rim, 640 metres (2,100 ft) above the Virgin River, looking down at Angels Landing — that famous ridge where people clamber along looks like a tiny rock from up here. It’s a perspective that will knock you sideways. Lukáš and I sat here for about an hour and just stared. Words are unnecessary.

Observation Point Zion

7. Riverside Walk — An Accessible Trail for Everyone

Riverside Walk is a paved, wheelchair-accessible path (3.2 km / 2 miles round trip) that leads from the Temple of Sinawava shuttle stop along the Virgin River. It’s actually the same path you walk at the start of The Narrows — but you don’t have to step into the water.

The trail is lined with lush greenery (Zion is surprisingly green thanks to the river), hanging gardens on the cliff walls, and it’s simply a pleasant, tranquil stroll. Ideal for an afternoon unwind after a tough morning hike, or for families with small children.

8. Weeping Rock — The Cliff Face That “Weeps”

A short (0.7 km / 0.4 miles round trip) but fascinating stop. Weeping Rock is a rock overhang from which water constantly drips — rain that fell on the plateau above the canyon seeps through the sandstone and, after about 1,200 years (!), emerges on the surface. Yes, the water you see dripping here fell as rain during medieval times. That’s just mind-blowing, isn’t it?

The trail is short and steep, but anyone can manage it in 15–20 minutes. A lovely cooling stop on a hot day — it’s always several degrees cooler beneath the overhang.

Kolob Canyons: 2 Tips for the Lesser-Known Side of Zion

Most tourists only visit the main Zion Canyon and have no idea about the northwestern section, Kolob Canyons. That’s a shame — and an advantage for you. This part of the park offers dramatic red canyons, peace, and the feeling of being completely on your own.

9. Kolob Canyons Viewpoint — The Red “Fingers” of the Canyon

Kolob Canyons Road is an 8 km (5 mile) scenic drive that takes you up to a viewpoint overlooking five massive rock “fingers” — red sandstone towers jutting out of the canyon. It’s a beautiful, easy stop — you can drive the road in half an hour and the viewpoint opens up a vista that’s completely different from anything in the main canyon.

The turnoff to Kolob Canyons is right off Interstate 15, about 40 minutes north of Springdale. If you’re driving to Zion from Salt Lake City or continuing towards Cedar City, it’s the perfect stop along the way.

10. Taylor Creek Trail — Three Historic Cabins in a Canyon

One of the prettiest trails in the Kolob section. 8 km (5 miles) round trip, an easygoing trail along a creek where you ford shallow water twice and pass three historic pioneer cabins from the 1930s. At the end of the trail, you stand before the Double Arch Alcove — a massive rock overhang.

We met exactly four people on this trail the entire day. Four. In the main canyon, multiply that by a hundred. If you’re looking for the “real” Zion without the crowds, Kolob is the answer.

Around the Park and Scenic Drives: 3 Tips for Extra Excursions

Zion isn’t just what’s inside the park boundaries. The surrounding landscape is spectacular in its own right, and a few spots nearby are well worth a detour.

11. Zion-Mt. Carmel Highway — One of the Most Beautiful Drives in the USA

Highway 9, which runs through the eastern part of the park, is an attraction in itself. You drive through a 1.1-mile-long tunnel (have $15/vehicle ready if you have an oversized vehicle), and then the landscape transforms dramatically — from a narrow canyon, you emerge into a world of white and red sandstone formations that look like they belong on another planet.

Checkerboard Mesa, with rock formations resembling a chessboard, is one of the most photogenic spots along the road. Stop and have a wander — you don’t need to be on any trail, just look around.

12. Grafton Ghost Town — An Abandoned Western Town

About 5 km (3 miles) south of Springdale lies Grafton — an abandoned pioneer town from the 19th century where the film Butch Cassidy and the Sundance Kid was filmed. A few original buildings still stand, along with an old cemetery, and the red rocks of Zion tower in the background.

It’s a short detour along a dirt road (usually passable in a regular car) and the place has a peculiar, peaceful atmosphere. Plus, it’s a great spot for photos — especially at sunset when the entire scene turns crimson.

13. Springdale — More Than Just a Base for the Park

Springdale is a town you’ll fall in love with. It’s not a tourist trap — it’s a vibrant place with galleries, boutiques, cafés, and excellent restaurants. The main street (Zion Park Blvd) is about 2 km long and easily walkable.

I’d recommend saving one afternoon purely for Springdale — after days of hiking, it’s lovely to just stroll around, grab some good food, and check out the local galleries. Deep Creek Coffee is a superb café for a morning start, and Oscar’s Café is legendary for breakfast (but expect a queue at weekends).

Lesser-Known Trails: 2 Tips for Adventurers

14. Hidden Canyon — A Secret Canyon with an Exposed Trail

Hidden Canyon is a less-visited alternative to Angels Landing — the trail starts from the same shuttle stop (Weeping Rock) and has similarly exposed sections with chains, but it’s shorter (4.8 km / 3 miles round trip) and less strenuous. At the end, you enter a narrow, shady canyon where you’ll find a natural rock arch and dripping water.

Note: Check the current trail status — it’s occasionally closed due to rockslides. Information is available at the Visitor Center or on the NPS website.

15. Watchman Trail — A Sunset You Won’t Find on Instagram

An unassuming trail (5.4 km / 3.3 miles round trip) that starts right at the Visitor Center and takes you up to a viewpoint with a panoramic vista over Springdale, Watchman Peak, and Lower Zion Canyon. Most tourists don’t know about it because everyone takes the shuttle deeper into the canyon.

And that’s precisely why Watchman Trail is ideal for sunset. When the canyon turns orange and pink, you’re sitting at the viewpoint with the first lights of Springdale twinkling below — it’s romantic, peaceful, and utterly gorgeous. One of our most beautiful evenings in Zion.

What to Eat and Drink: A Guide for Hungry Adventurers

Food in Springdale is surprisingly good — I was expecting typical American fast food and instead we found a range of genuinely great restaurants. Here are our tips:

  • Oscar’s Café — legendary breakfast spot in Springdale. Portions are enormous (classic America 😁), the huevos rancheros are fantastic, and the vibe is pleasantly laid-back. Expect a queue at weekends — arrive before 8:00 AM.
  • MeMe’s Café — a smaller, cosier breakfast alternative. Excellent pancakes and smoothie bowls.
  • Whiptail Grill — Mexican food with a local twist. The tacos and burritos are great and reasonably priced by Springdale standards.
  • Bit & Spur — probably the best dinner in town. A bit pricier, but the steaks and Mexican cuisine are top-notch. The evening atmosphere is wonderful — you sit on the porch overlooking the red rocks.
  • Deep Creek Coffee — speciality coffee, ideal for a morning start. If you’re like me and don’t function without coffee, head here.

Trail snack tip: Stock up on supplies at Sol Foods Supermarket in Springdale — they have good sandwiches, fruit, and protein bars. There are no shops inside the park (apart from a small stand at Zion Lodge) and you’ll be grateful for every bite on the trails.

Budget-wise, expect to pay about $12–20/person for breakfast, $15–25 for lunch, and $20–40 for dinner. With drinks and tips (15–20% is standard in the US!), it adds up quickly.

Practical Tips to Wrap Up

Entrance Fees and Passes

Entrance to Zion National Park is $35/vehicle for 7 days. However, if you’re planning to visit more US national parks (and if you’re reading this blog, you probably are 😉), get the America the Beautiful Pass for $80. It’s valid for a year and covers entry to ALL national parks and federal recreation areas in the US — that’s 400+ sites. It pays for itself with just two parks.

You can buy the pass right at the park entrance, on the NPS website, or at REI stores.

What to Pack for Zion

  • Plenty of water — at least 2–3 litres per person for a full-day hike. Zion is dry and hot; dehydration is a real danger.
  • A hat and sunscreen — the sun in the canyon is merciless.
  • Good hiking boots — sturdy trekking boots will do for most trails. Here are our tips on choosing the right pair.
  • Trekking poles — essential for The Narrows, unnecessary for Angels Landing (you need your hands free for the chains).
  • A torch/headlamp — if you’re planning an early start, it’s still dark at the trailheads.

Internet and Connectivity

Mobile signal in Zion is very limited — practically non-existent in the main canyon, decent in Springdale. Wi-Fi is available in hotels and cafés. If you need data on the go during your US trip, I’d recommend checking out an eSIM from Holafly — it works brilliantly and saves you the hassle of dealing with American SIM cards.

Safety

  • Flash floods — flash floods are a real danger in Zion, especially in narrow canyons (The Narrows, Hidden Canyon). Monitor the weather and respect closures.
  • Falling rocks — a recent rockslide closed the Observation Point trail for years. Pay attention to signs.
  • Heat — in summer, temperatures exceed 40 °C (104 °F). Hiking in the heat risks heatstroke and dehydration. Drink, drink, drink.
  • Exposure — Angels Landing and Hidden Canyon have exposed sections. If you’re afraid of heights, there’s no shame in turning back. Seriously.

Flights and Transport

Look for affordable flights to Las Vegas (the nearest major airport) through comparison sites — deals from Europe and the UK pop up regularly, especially if you’re flexible with dates. Return flights under £400 are achievable if you plan ahead.

For car hire, we use DiscoverCars — you can compare offers and usually find a better price than going directly to the rental companies at the airport. A car in the US is essential; public transport to the national parks is practically non-existent.

Travel Insurance

The USA is a country where you absolutely do not want to find yourself without travel insurance. A medical bill for a broken leg on the trail can easily exceed £50,000. For shorter trips, a good comprehensive policy from a UK provider is ideal, and for longer trips we recommend SafetyWing — you can find our detailed review in the linked article.

Frequently Asked Questions (FAQ)

What is Zion National Park and where is it located?

Zion National Park is one of the oldest and most visited national parks in the USA. It’s located in southwestern Utah, about 2.5 hours by car northeast of Las Vegas and 4.5 hours south of Salt Lake City. The park protects a monumental canyon carved by the Virgin River, with sandstone walls up to 600 metres (2,000 ft) high in shades of red, orange, and white.

How many days do I need for Zion National Park?

Two days is the minimum — you’ll manage Angels Landing (or another main trail) and The Narrows. Ideally plan for 3–4 days so you have time for Canyon Overlook, Emerald Pools, Kolob Canyons, and a relaxed exploration of Springdale. If you’re combining Zion with other Utah national parks (Bryce Canyon is just 1.5 hours away), allow 2–3 days purely for Zion.

Do I need a permit for Angels Landing?

Yes, since April 2022, a permit is required for anyone wanting to continue beyond Scout Lookout onto the exposed ridge section. The lottery runs in two rounds: seasonal (opens 3 months in advance) and day-before. Registration is on recreation.gov, with a fee of $6/person. You don’t need a permit just for Scout Lookout (the viewpoint before the ridge).

When is the best time to visit Zion National Park?

The best months are April, May, September, and October. Temperatures are pleasant (15–28 °C / 59–82 °F), the waterfalls have water, and there are fewer tourists than in summer. Summer (June–August) is best avoided due to extreme heat and crowds. Winter is beautiful and quiet, but some trails may be closed.

How does the shuttle system work in Zion?

From early March to late November, Zion Canyon Scenic Drive is closed to private vehicles. You get to the trailheads via a free shuttle bus that runs from early morning until evening. You board in Springdale or at the Visitor Center. Outside of the season (December–February), you can drive your own car.

Can I do The Narrows with children?

It depends on age and experience. The lower part of The Narrows (bottom-up) has no age restriction, but the river currents can be strong and the bottom slippery. With older children (10+) who can swim and are used to the outdoors, it’s manageable — but every child is different. With small children (under 6), I wouldn’t recommend it. An excellent alternative for families is Riverside Walk, which runs along the river without requiring you to enter the water.

Is the America the Beautiful Pass worth it?

If you’re visiting at least two national parks, absolutely. The pass costs $80 and covers entry to all national parks and federal recreation areas for an entire year. Zion ($35) and Bryce Canyon ($35) alone come to $70 — add just one more park and it pays for itself. If you’re planning a bigger road trip across the USA, it’s a no-brainer.

Tips and Tricks for Your Vacation

Don’t Overpay for Flights

Search for flights on Kayak. It’s our favorite search engine because it scans the websites of all airlines and always finds the cheapest connection.

Book Your Accommodation Smartly

The best experiences we’ve had when looking for accommodation (from Alaska to Morocco) are with Booking.com, where hotels, apartments, and entire houses are usually the cheapest and most widely available.

Don’t Forget Travel Insurance

Good travel insurance will protect you against illness, accidents, theft, or flight cancellations. We’ve had a few hospital visits abroad, so we know how important it is to have proper insurance arranged.

Where we insure ourselves: SafetyWing (best for everyone) and TrueTraveller (for extra-long trips).

Why don’t we recommend any Czech insurance company? Because they have too many restrictions. They set limits on the number of days abroad, travel insurance via a credit card often requires you to pay medical expenses only with that card, and they frequently limit the number of returns to the Czech Republic.

Find the Best Experiences

Get Your Guide is a huge online marketplace where you can book guided walks, trips, skip-the-line tickets, tours, and much more. We always find some extra fun there!
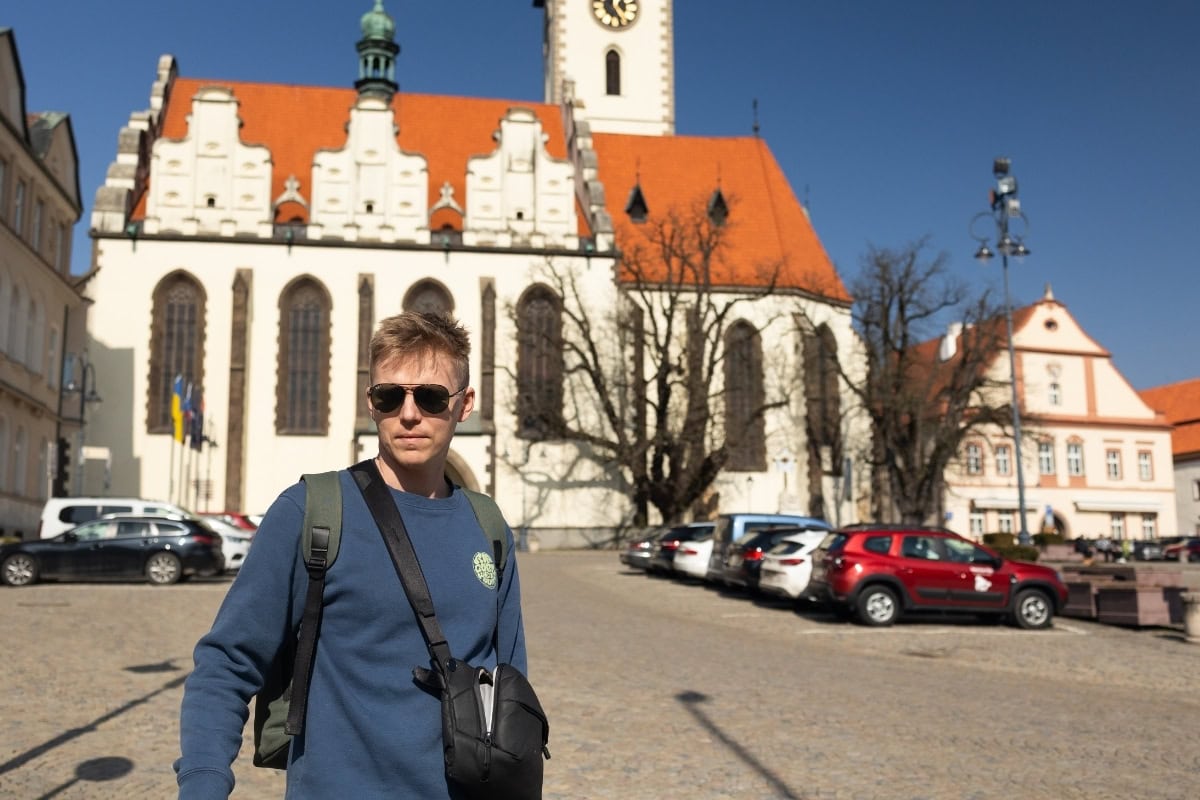
Grand Canyon, Arizona: 15 Tips on What to See and Do

TL;DRThere are 15 essential tips here for the Grand Canyon in Arizona — from South Rim viewpoints (Mather Point, Hermit Road, Desert View Watchtower) to the Bright Angel and South Kaibab trails, plus the North Rim, Havasu Falls, helicopter tours and rafting on the Colorado River. The canyon stretches 446 km, spans up to 29 km at its widest, and drops over 1,800 metres deep. Spring (March–May) and autumn (September–November) are the best times to visit, and 2–3 days is the ideal length of stay. Entry to Grand Canyon National Park costs $35 (~800 Kč) per vehicle for 7 days. The South Rim is about 4.5 hours’ drive from Las Vegas, 3.5 hours from Phoenix, and 1.5 hours from Flagstaff.

You’re standing on the edge and your brain refuses to process what it sees. It simply doesn’t make sense. No photo, no video, no National Geographic documentary can prepare you for this moment. The Grand Canyon is so enormous, so deep, and so surreally colourful that when you first look down, you forget to breathe for a split second. And then you start laughing, because what else can you do when nature creates something this absurdly beautiful? 😁

I’ve visited the Grand Canyon 4 times now — and each time was a completely different experience. The first time, we drove from Las Vegas as a day trip and thought that would be enough. It wasn’t. The second time, we spent three days here and honestly? We could have stayed a week. Grand Canyon National Park is a place you’ll want to return to. The third time, I came with my husband and finally saw what I’d missed before. But even that wasn’t enough.

In this article, you’ll find 15 Grand Canyon things to do and see — from iconic viewpoints on the South Rim to challenging hikes, helicopter flights, rafting on the Colorado River, and the legendary Havasu Falls. I’ll tell you when the best time to visit is, where to stay, how much it all costs, and what to watch out for so you can enjoy the Grand Canyon in Arizona to the fullest and stress-free.

Grand Canyon things to see and do

TL;DR

  • The Grand Canyon is arguably the most impressive natural wonder in all of America — 446 km (277 miles) long, up to 29 km (18 miles) wide, and over 1,800 metres (6,000 feet) deep. Photos don’t do it even a tenth of the justice.
  • South Rim is the most accessible and most visited section — open year-round and well connected by road. Most tourists head here.
  • North Rim is quieter and roughly 300 metres (1,000 feet) higher — open only from mid-May to mid-October. Fewer crowds, wilder atmosphere.
  • Best time to visit is spring (March–May) and autumn (September–November) — pleasant temperatures and fewer crowds.
  • Entrance fee to Grand Canyon National Park is $35 (~€32) per car for 7 days, or free with the annual America the Beautiful Pass ($80 / ~€73).
  • Accommodation right at the canyon sells out months in advance — book as early as possible, ideally 3–6 months ahead.
  • Bright Angel Trail and South Kaibab Trail are the two most famous hikes — do not hike to the bottom and back in a single day unless you’re extremely fit and experienced.
  • Havasu Falls requires a permit from the Havasupai Tribe and planning months to a year ahead. But it’s absolutely worth it.
  • A helicopter flight over the canyon is an unforgettable experience (from around $200 / €183).
  • The South Rim is easily reachable by car from Las Vegas (~4.5 hrs), Phoenix (~3.5 hrs), or Flagstaff (~1.5 hrs).

When to visit the Grand Canyon and how to get there

The Grand Canyon is open year-round — at least the South Rim. But that doesn’t mean it doesn’t matter when you arrive. Weather, tourist crowds, and the availability of attractions change dramatically by season. Here’s an overview so you know what you’re getting into.

Best time to visit the Grand Canyon

Spring (March–May) and autumn (September–November) are the ideal months. Temperatures on the canyon rim (the South Rim sits at an elevation of about 2,100 m / 7,000 ft) hover around a pleasant 15–22 °C (59–72 °F), there are significantly fewer tourists than in summer, and the light is gorgeous for photos — especially at sunrise and sunset.

Summer (June–August) is absolute chaos. Grand Canyon National Park receives over 6 million visitors per year, and the majority come in summer. On the rim it’ll be around 30 °C (86 °F), but down by the Colorado River, temperatures can easily climb to 45 °C (113 °F). If you’re planning a hike into the canyon, summer is dangerous — every year, rescue services evacuate dozens of dehydrated tourists. I’d avoid it if at all possible. 😅

Winter (December–February) has its own magic. The South Rim covered in snow looks absolutely magical, and you’ll have the place nearly to yourself. Temperatures around freezing or slightly below, occasional snow, but restaurants and accommodation on the South Rim remain open. The North Rim is closed in winter.

Grand Canyon things to see and do

How to get to the Grand Canyon

By car — the most practical option. Distances from nearby cities:

  • Las Vegas → South Rim: approx. 4.5 hours (440 km / 275 miles)
  • Phoenix → South Rim: approx. 3.5 hours (360 km / 225 miles)
  • Flagstaff → South Rim: approx. 1.5 hours (130 km / 80 miles)
  • Page (Horseshoe Bend, Antelope Canyon) → South Rim: approx. 2.5 hours (210 km / 130 miles)

My husband and I have had consistently great experiences with DiscoverCars, which we use all over the world. A car in Arizona is practically a necessity if you don’t want to rely on organised tours. And let me say right now — the Grand Canyon is just one stop on an amazing road trip through US national parks, so rent a car and enjoy the whole journey.

By air — you can fly into Phoenix (PHX) or Las Vegas (LAS), both of which have direct flights from Europe. British Airways, Virgin Atlantic, and several other carriers offer direct routes from London. For cheap flights, we recommend searching on Skyscanner or Google Flights — we regularly find great deals there.

Shuttle bus from Flagstaff to the South Rim runs in season (Groome Transportation, around $38 / €35 one way), but personally I’d always choose a car — the flexibility is priceless.

Where to stay near the Grand Canyon + how much it costs

Accommodation near the Grand Canyon is a chapter unto itself. If you want to stay right on the canyon rim (and trust me, you do — sunrise from a room overlooking the abyss is something you’ll never forget), you need to plan well ahead. The most popular lodges sell out 6–13 months in advance. That’s not an exaggeration, that’s reality.

Accommodation in Grand Canyon Village (South Rim)

You can stay right inside the park, but you’ll usually need to book a year or more in advance. Options include Highland Grand Canyon Glamping or Grand Canyon Glamping Tents Perfect for Arizona Vacations.

Accommodation outside the park

If you can’t secure accommodation inside the park (which is likely), the nearest alternatives are:

  • Tusayan (south entrance, 3 km from the gate) — Holiday Inn Resort. The advantage is proximity; the downside is higher prices and a touristy bubble.
  • Williams (95 km / 60 miles south) — significantly cheaper. We recommend Best Western Plus Inn of Williams. A charming little town on the historic Route 66. The historic Grand Canyon Railway also runs from here directly into the park.
  • Flagstaff (130 km / 80 miles south) — a university town with the best selection of restaurants and bars in the area. Check availability at Little America Hotel Flagstaff.

How much does the Grand Canyon cost overall?

A realistic budget for 3 days / 2 nights for two people (mid-range):

  • Park entrance fee: $35 (~€32) per car for 7 days
  • Accommodation (2 nights, Tusayan): ~$400 (~€366)
  • Food (3 days): ~$150–200 (~€137–183)
  • Petrol from Las Vegas and back: ~$80 (~€73)
  • Total for two: ~$665–715 (~€609–655)

If you add a helicopter flight, budget an extra $200–350 per person.

💡 TIP: If you plan to visit more US national parks (Yellowstone, Yosemite, Zion…), get the America the Beautiful Pass for $80 (~€73) — it’s valid for a year and covers entry to all national parks. It pays for itself after just two parks.

Grand Canyon things to see and do
lukas a lucka
Lukáš and Lucie recommend
Where to Stay in Grand Canyon
4 accommodations — campgrounds, hotels and other lodging options

South Rim: 8 places you must see and things to do

The South Rim is the heart of the Grand Canyon — 90% of visitors head here, and for good reason. It has the best-developed infrastructure, the easiest access, iconic viewpoints, and the two most famous hiking trails. In Grand Canyon Village you’ll find the visitor centre, restaurants, shops, and free shuttle buses that run along the rim. Let’s look at 8 places and experiences you shouldn’t miss on the South Rim.

1. Mather Point — the first view that takes your breath away

Mather Point is probably where you’ll see the Grand Canyon for the first time. It’s just a few minutes’ walk from the main visitor centre and is the most accessible viewpoint on the entire South Rim. It’s also arguably the most photogenic.

Come for sunrise. Seriously. Waking up in the dark isn’t fun, but when the first rays touch the red and orange layers of the canyon, you’ll understand why people cry with emotion here. The colours change literally every minute — from purple through pink to fiery orange. My husband and I stood here with coffee in hand and simply stayed silent, because words are unnecessary at moments like these. ☺️

If you arrive during the day, Mather Point will be full of tourists with selfie sticks. No matter — the canyon is so enormous that you’ll always find a little stretch of edge just for yourself. From Mather Point, the Rim Trail leads along the canyon’s edge, a paved path you can comfortably walk to reach all the other viewpoints.

Grand Canyon
Grand Canyon

2. Bright Angel Trail — a legendary hike into the heart of the canyon

Bright Angel Trail is the most famous trail in the Grand Canyon and one of the most iconic hikes in all of America. It starts right at Bright Angel Lodge on the South Rim and descends 1,340 metres (4,400 feet) to the Colorado River at the canyon floor.

Important warning right away: Do not hike to the bottom and back in a single day. The park service strongly advises against it, and we agree. The descent is easy, but the climb back up in the dry heat with 1,340 metres of elevation gain is brutal. Every year, rescue teams help hundreds of people who thought they could handle it. 😅

If you just want a taste, head to 1.5-Mile Resthouse (about 3 km / 2 miles round trip, 1.5–2 hours) or 3-Mile Resthouse (about 10 km / 6 miles round trip, 4–6 hours). Both stops have shade and drinking water in season. You’ll get an amazing view down into the canyon and the feeling that you’ve truly “dipped” below the rim.

For those who want the full experience — an overnight stay at Phantom Ranch or camping at the canyon floor (Indian Garden Campground / Bright Angel Campground) is unforgettable. You’ll need a backcountry permit, which must be applied for months in advance. For the hike, bring proper hiking boots, at least 3 litres of water per person, and salty snacks. Inside the canyon it’s significantly hotter than on the rim — sometimes 15–20 °C warmer.

South Kaibab Trail, Grand Canyon

3. South Kaibab Trail — a wilder, more dramatic alternative

If Bright Angel Trail is the “main street,” South Kaibab Trail is the wild, untamed version. The trail follows a ridge with no shade whatsoever and no water — but the views are a level more intense because you’re walking along an exposed spine with panoramic views on both sides of the canyon.

The most popular destination is Ooh Aah Point (about 3 km / 2 miles round trip, 1–2 hours) — and it’s named for exactly the reason you’d expect. When you reach the platform and see the canyon opening around you in every direction, you really do say “oooh” and “aaah.” Another excellent stop is Cedar Ridge (5 km / 3 miles round trip, 2–4 hours) with a small plateau where you can sit and absorb the sheer enormity around you.

Key rule: South Kaibab has no drinking water anywhere along the trail. Bring more than you think you’ll need. And start early in the morning — by 10 am in summer, the sun blazes down here so fiercely it looks like Mars.

South Kaibab is steeper than Bright Angel in one direction, which is why the popular combination for multi-day hikers is to descend via South Kaibab and climb back up via Bright Angel. If you’re only planning a single-day hike into the canyon, South Kaibab to Ooh Aah Point or Cedar Ridge is an absolute must.

Desert View
Desert View

4. Desert View and Watchtower — a view to the end of the world

Desert View sits at the eastern end of the South Rim, about 40 km (25 miles) from Grand Canyon Village. And although that means an extra half-hour’s drive, I’ll be honest — it’s one of the most beautiful spots in the entire park.

The centrepiece is the Desert View Watchtower, a stone tower built in 1932 designed by architect Mary Colter, inspired by Native American structures. You climb the stairs to the top and a 360° panorama opens up that includes the canyon, the Colorado River, the Painted Desert, and on clear days even the distant Navajo Mountain. It’s a different Grand Canyon than from Mather Point — less red, more golden, and infinitely vast.

Tip: If you’re arriving from the east (from Page or Monument Valley), enter the park through the Desert View Entrance. You’ll pay your entrance fee here and immediately be greeted by this view. On your return from Desert View back to the Village, stop at the viewpoints along Desert View Drive — Lipan Point and Grandview Point are fantastic and most tourists skip them.

Hermit Road, Grand Canyon

5. Hermit Road — 11 km of viewpoints without cars

Hermit Road (formerly West Rim Drive) is an 11 km (7-mile) road running from Grand Canyon Village westward to Hermits Rest. From March to November it’s closed to private vehicles — only free shuttle buses run here, which is actually an advantage, because you hop off at each stop, soak in the views, and ride on.

Best stops along Hermit Road:

  • Hopi Point — the best spot on the entire South Rim for sunset. Wide panoramic views with the Colorado River visible far below. Arrive at least 30 minutes before sunset to get a good spot.
  • Powell Point — a quieter viewpoint with a memorial to John Wesley Powell, the first person to run the canyon by boat.
  • The Abyss — here the canyon edge plunges 900 metres (3,000 feet) almost vertically. The name is fitting.
  • Hermits Rest — the final stop, a stone building designed by Mary Colter with a small refreshment stand. A lovely place to rest.

You can walk the entire Hermit Road along the Rim Trail — it’s about 3 hours of comfortable walking with viewpoints at every step. Walk one way and take the shuttle back. The ideal afternoon programme.

6. Helicopter flight — the Grand Canyon from a bird’s eye view

This is one of those experiences where you think “it’s expensive” — and then, as you fly over the endless labyrinth of red rocks and the Colorado River looks like a silver thread kilometres below you, you think “why didn’t I do this sooner?” ☺️ You can easily book through GetYourGuide, which is probably the most convenient platform for booking unique experiences in America.

Helicopter flights over the Grand Canyon depart from either Tusayan (near the park’s south entrance) or Las Vegas. From Tusayan, you fly directly over the canyon; flights last 25–50 minutes and prices start at around $200–350 per person (~€183–320). From Las Vegas, flights are longer and pricier (from $300), but some include a landing on the canyon floor.

Recommendation: If you’re at the South Rim, go from Tusayan — shorter transfer, more time over the canyon. Book in advance, especially in season, as flights fill up quickly.

7. Rim Trail — an easy walk with epic views

Not everyone wants to descend into the canyon and push their limits. And that’s absolutely fine, because the Rim Trail offers some of the best views on the entire South Rim and is truly accessible for everyone — including families with pushchairs and wheelchair users (most sections are paved and barrier-free).

The Rim Trail runs 21 km (13 miles) along the canyon edge from the South Kaibab Trailhead in the east to Hermits Rest in the west. You don’t have to walk the whole thing — just pick a section. Our favourite is Mather Point → Yavapai Geology Museum → Bright Angel Lodge (about 4 km / 2.5 miles, an hour’s comfortable walk). The Yavapai Museum has a glass-walled viewing area overlooking the canyon and excellent geological exhibits — you’ll learn how that billion-year history of layers actually works.

A walk along the Rim Trail is perfect for your first day to soak up the atmosphere and get your bearings.

8. Yavapai Geology Museum — understand what you’re actually seeing

This is a place most tourists skip, and that’s a shame. The Yavapai Geology Museum sits on the very edge of the canyon (literally — from the glass-walled hall you look straight down) and in 20–30 minutes will explain what you’re seeing. Those colourful layers aren’t just pretty — each has a name, an age, and a story. The oldest rocks at the bottom of the canyon are nearly 2 billion years old. Two. Billion. That number is so mind-boggling it’s worth pausing over for a moment.

Entry is free. The Grand Canyon map you pick up here shows all the trails, viewpoints, and shuttle stops at a glance.

North Rim: 3 reasons to make the journey

The North Rim is the “other side” of the Grand Canyon — and although it’s only about 16 km (10 miles) from the South Rim as the crow flies, by car it’s 350 km (215 miles) and 4–5 hours of driving. This deters most tourists, which means only about 10% of visitors make it here. And that’s precisely why the North Rim is so magical. It’s quiet, wild, and you feel like you have the canyon all to yourself. It’s open only from 15 May to 15 October — outside season, the access road is closed due to snow.

9. Bright Angel Point (North Rim) — serenity and majesty

Bright Angel Point on the North Rim is a short, easy walk (about 800 metres / half a mile) from Grand Canyon Lodge to a rocky promontory from which you gaze into the canyon from an entirely different perspective than from the South Rim. The North Rim sits roughly 300 metres (1,000 feet) higher, so the view is even deeper and more dramatic.

What surprised me most? The forest. On the North Rim grow tall pines, firs, and aspens — it’s an almost alpine atmosphere, and then suddenly the forest ends and you’re standing above an abyss. The contrast is utterly unexpected and gorgeous.

North Kaibab Trail
North Kaibab Trail

10. Cape Royal and Point Imperial — the best viewpoints on the North Rim

If you visit the North Rim, you absolutely must drive Cape Royal Drive — a 37 km (23-mile) scenic road that leads to two of the finest viewpoints.

Point Imperial (2,683 m / 8,803 ft) is the highest point in the entire Grand Canyon, and the view from here encompasses the Painted Desert, Marble Canyon, and distant Navajo Country. It’s indescribable — like looking out at the entire world.

Cape Royal is at the end of the road and offers a 360° panorama with a view of Angels Window — a natural stone arch through which you can see the Colorado River. The short trail (1.5 km / 1 mile round trip) is easy and accessible.

The whole Cape Royal Drive will take you 2–3 hours with stops. The road is paved and comfortable.

11. North Kaibab Trail — for the bold hikers

North Kaibab Trail is the only maintained trail from the North Rim to the canyon floor. It’s longer and less trafficked than the southern trails — the descent to the bottom is 22.5 km (14 miles) one way. For a single-day taster, head to Coconino Overlook (2.4 km / 1.5 miles round trip) or Supai Tunnel (6 km / 4 miles round trip).

The boldest hikers combine North Kaibab with South Kaibab or Bright Angel as the Rim-to-Rim trek — a crossing of the canyon from one side to the other. It’s 34–37 km (21–23 miles) depending on the combination, with over 3,000 metres (10,000 feet) of total elevation change, and requires at least one night at the bottom (Phantom Ranch or campground). It’s considered one of the best hikes in the world. One day, we want to do it. 😁

Beyond the park: 4 experiences worth the trip

The Grand Canyon doesn’t end at the national park boundary. In the surrounding area, you’ll find places that are equally (if not more) awe-inspiring and offer experiences you won’t find inside the park itself.

12. Havasu Falls — the most beautiful waterfall in America

Havasu Falls is every traveller’s dream — a turquoise waterfall plunging into pools surrounded by red rocks, all hidden in a side canyon. It looks like Photoshop, but it’s real. And getting there is an adventure in itself.

Havasu Falls lies on the territory of the Havasupai Tribe, and access is only possible with a permit sold online — it usually opens in February for the entire year and sells out within minutes. Literally. You’ll need to be at your computer at the exact opening time and hope for the best. The permit costs around $400 per person (~€366), which includes camping for 3 nights.

You reach the waterfalls via a 16 km (10-mile) hike from the village of Supai. The trail is beautiful but demanding — especially the return climb. Alternatively, you can arrange a mule or helicopter for baggage transport.

Is it worth it? Absolutely yes. Havasu Falls, Mooney Falls, and Beaver Falls are among the most beautiful natural wonders we’ve ever seen. But plan at least a year ahead.

Havasu Falls, Grand Canyon

13. Grand Canyon Skywalk (West Rim) — a glass bridge over the abyss

The Skywalk is a horseshoe-shaped glass viewing platform that juts 20 metres (65 feet) out over the canyon edge on the West Rim — managed by the Hualapai Tribe (not the national park). You stand on glass with 1,200 metres (4,000 feet) of void beneath your feet.

Honestly? Opinions are very divided. Admission is around $75–90 per person (~€69–82), and you need to get to the West Rim (190 km / 120 miles from Las Vegas, 400 km / 250 miles from the South Rim). You can’t bring your own camera or phone onto the Skywalk (they sell photos for extra money). And the canyon at the West Rim isn’t as deep or colourful as in the national park.

My verdict: If you’re short on time and based in Las Vegas, it’s an interesting day trip. If you’re heading to the South Rim, skip the Skywalk — you’ll see far more beautiful places in the park and without the commercial add-ons.

14. Rafting the Colorado River — the Grand Canyon from below

If you want to experience the Grand Canyon from its most intimate perspective, rafting the Colorado River is the ultimate adventure (easily bookable through GetYourGuide). You look up at the canyon walls from below and truly grasp the depth — it’s literally a different world from the rim.

Options are divided into:

  • Half-day/full-day smooth water rafting from Lee’s Ferry or the West Rim — calm water, suitable for families. From ~$100 (~€92).
  • Multi-day whitewater rafting — 3–18 days on wild rapids. A full-canyon expedition (226 miles / 364 km) takes 12–18 days and costs from $2,500 to $5,000+ (~€2,290–4,580+). Reservations are made one to two years in advance.

Even the one-day version is worth it — you’ll navigate gentle rapids, have lunch on beaches, and see the canyon as John Wesley Powell saw it in 1869.

Horseshoe Bend near Grand Canyon
Horseshoe Bend, Grand Canyon

15. Horseshoe Bend and Antelope Canyon — the perfect combination

Horseshoe Bend and Antelope Canyon are located near the town of Page, about 2.5 hours from the South Rim, and can be perfectly combined with a Grand Canyon visit on the same road trip.

Horseshoe Bend is a sweeping meander of the Colorado River, where it curves 270° around a massive rock pillar. Entry is $10 per car and the walk to the viewpoint takes about 15 minutes. You’ll recognise the photos from Instagram — but in person, it’s (as always) a completely different experience.

Antelope Canyon (Upper and Lower) are narrow slot canyons where light penetrates from above, creating incredible colour effects on the sandstone walls. Access is only possible with a Navajo Nation guide. Upper Antelope is more photogenic; Lower Antelope is less crowded. Prices from ~$40–80 per person (~€37–73).

💡 Road trip TIP: Las Vegas → Grand Canyon South Rim (2 nights) → Desert View → Page / Horseshoe Bend + Antelope Canyon → Monument Valley → back to Vegas. An ideal loop for 5–7 days.

Antelope Canyon, Grand Canyon

Where to eat and drink at the Grand Canyon

I won’t lie to you — the Grand Canyon isn’t a gastronomic paradise. You’re in the middle of Arizona’s wilderness and the dining options reflect that. But you’ll find a few places where you can eat well and with a view that would cost a fortune anywhere else.

Inside the park (South Rim)

  • El Tovar Dining Room — the best restaurant in the park. Steaks, fish, seasonal American cuisine. Mains around $25–45 (~€23–41). Book dinner well in advance — the atmosphere of the historic dining hall is beautiful.
  • Arizona Room — a more casual alternative to El Tovar, great steaks and burgers. No reservations, but expect a queue in season. Mains $15–30.
  • Bright Angel Restaurant — solid breakfasts and lunches at reasonable prices. Nothing exceptional, but reliable.
  • Maswik Food Court — fast food, pizza, burgers. When you need food quickly and without ceremony.

In Flagstaff (if you’re staying overnight)

Flagstaff has a surprisingly lively food scene. Brix Restaurant serves excellent American cuisine with local ingredients. Pizzicletta has some of the best Neapolitan pizzas in all of Arizona (and yes, I know that sounds absurd — Naples and Arizona — but it’s true 😅). Tourist Home is a lovely café with excellent cappuccino.

What to bring with you

Always pack more food and water than you think you’ll need for the canyon. There are no shops on the trails (with the exception of Phantom Ranch at the bottom). Salty snacks are better than sweet ones — your body needs electrolytes in the heat. And water volume? A minimum of 1 litre per hour of walking in summer, 0.5 litres in cooler months.

Practical tips and tricks for the Grand Canyon

Entrance fees and America the Beautiful Pass

Entrance to Grand Canyon National Park is $35 (~€32) per car (valid for 7 days, covers both South and North Rim). Motorcycles $30, pedestrians/cyclists $20 per person. If you plan to visit multiple national parks, the America the Beautiful Pass at $80 (~€73) is a no-brainer — it’s valid for a year and covers 2,000+ federal recreation areas.

Internet and eSIM

Mobile signal at the Grand Canyon is limited — you’ll get reception in Grand Canyon Village, but on the trails and at more remote viewpoints, forget about it. Before your trip to the USA, get an eSIM so you have data as soon as you land. We use Holaflyhere’s our review on whether it’s worth it.

Travel insurance

Healthcare in the USA is astronomically expensive — a rescue operation in the canyon can cost tens of thousands of dollars. Don’t go without insurance. For shorter trips, we recommend a comprehensive travel insurance policy from a reputable UK provider. For longer adventures, we’ve had great experiences with SafetyWing.

What to pack

The Grand Canyon requires layers. On the canyon rim it can be around 5 °C (41 °F) in the morning, 25 °C (77 °F) at noon, and 40 °C (104 °F) down in the canyon. Layering is key. Proper hiking boots are essential — not flip-flops, not trainers. For hiking you need boots with ankle support and good grip. And if you want to pack efficiently, check out our guide to packing carry-on only.

Safety

  • Don’t underestimate the canyon. An average of 12 people die here each year — falls from the rim, dehydration, overestimating abilities on the trails.
  • Never climb over the railings for a photo. No photo is worth your life.
  • On hikes, turn back sooner than you think — the ascent takes twice as long as the descent.
  • In summer, don’t hike into the canyon between 10:00 and 16:00. An early start (5:00–6:00 am) is essential.

Frequently Asked Questions (FAQ)

How much does it cost to enter the Grand Canyon?

The entrance fee is $35 (~€32) per private vehicle and is valid for 7 days. It includes access to both the South Rim and the North Rim. For pedestrians and cyclists, the fee is $20 per person. With the annual America the Beautiful Pass ($80), you get free entry to all national parks.

What makes the Grand Canyon so special?

The Grand Canyon is one of the largest and most impressive canyons in the world — 446 km (277 miles) long, up to 29 km (18 miles) wide, and over 1,800 metres (6,000 feet) deep. At its bottom are rocks nearly 2 billion years old. It’s not just “a big hole in the ground” — it’s a geological textbook where you can read the entire history of the planet in its colourful layers. And the feeling of standing on the edge? Unforgettable.

When is the best time to visit the Grand Canyon?

The best time is spring (March–May) and autumn (September–November) — pleasant temperatures, fewer tourists, and beautiful light. Summer is hot and crowded, while winter is cold but romantic with snow on the rim. The North Rim is open only from mid-May to mid-October.

Which is the largest canyon in the USA?

The Grand Canyon is the most famous and one of the largest — 446 km long and over 1,800 m deep. Technically, there are canyons that are “bigger” in some parameter (Hells Canyon in Idaho is deeper), but the Grand Canyon’s combination of size, beauty, and accessibility makes it unquestionably number one. It’s one of the most significant natural wonders not just in the USA, but in the entire world.

Is one day enough for the Grand Canyon?

It’s enough, but it would be a shame. In one day you can see the main viewpoints on the South Rim, walk the Rim Trail, and perhaps take a short hike to Ooh Aah Point. But if you want to experience both sunrise and sunset, venture deeper into the canyon, or visit the North Rim, plan for at least 2–3 days. We initially came for one day and then regretted not having more time. The second time we stayed three days and it was ideal.

Is the Grand Canyon safe for families with children?

Yes, but with common sense. The Rim Trail is wide, paved, and manageable even for small children and pushchairs. The main viewpoints have railings. However — and this is a big however — the canyon is deep and not all areas have barriers. Children must be supervised at all times and should never climb on rocks beyond the railings. Descending into the canyon via Bright Angel or South Kaibab Trail is only recommended for older children (10+) who can handle more demanding walks.

What is the difference between the South Rim and North Rim?

The South Rim is more accessible — open year-round, easier to reach by car, with more accommodation, restaurants, and services. It attracts 90% of visitors. The North Rim sits 300 m (1,000 ft) higher, is open only from mid-May to October, and is significantly quieter. Views from both sides are stunning, but the North Rim has a wilder atmosphere with forests and meadows. If you have time, visit both sides — but if you’re choosing just one, I recommend the South Rim for a first visit.

Experiences & tickets
traveler-rated · GetYourGuide
Grand Canyon West: Whitewater Rafting, Helicopter, & Skywalk
★★★★★ 5.0 · 2 reviews
from €592
I want this experience →
🔗 These are affiliate links — they don't change your price and help us create content. · All experiences →

Tips and Tricks for Your Vacation

Don’t Overpay for Flights

Search for flights on Kayak. It’s our favorite search engine because it scans the websites of all airlines and always finds the cheapest connection.

Book Your Accommodation Smartly

The best experiences we’ve had when looking for accommodation (from Alaska to Morocco) are with Booking.com, where hotels, apartments, and entire houses are usually the cheapest and most widely available.

Don’t Forget Travel Insurance

Good travel insurance will protect you against illness, accidents, theft, or flight cancellations. We’ve had a few hospital visits abroad, so we know how important it is to have proper insurance arranged.

Where we insure ourselves: SafetyWing (best for everyone) and TrueTraveller (for extra-long trips).

Why don’t we recommend any Czech insurance company? Because they have too many restrictions. They set limits on the number of days abroad, travel insurance via a credit card often requires you to pay medical expenses only with that card, and they frequently limit the number of returns to the Czech Republic.

Find the Best Experiences

Get Your Guide is a huge online marketplace where you can book guided walks, trips, skip-the-line tickets, tours, and much more. We always find some extra fun there!
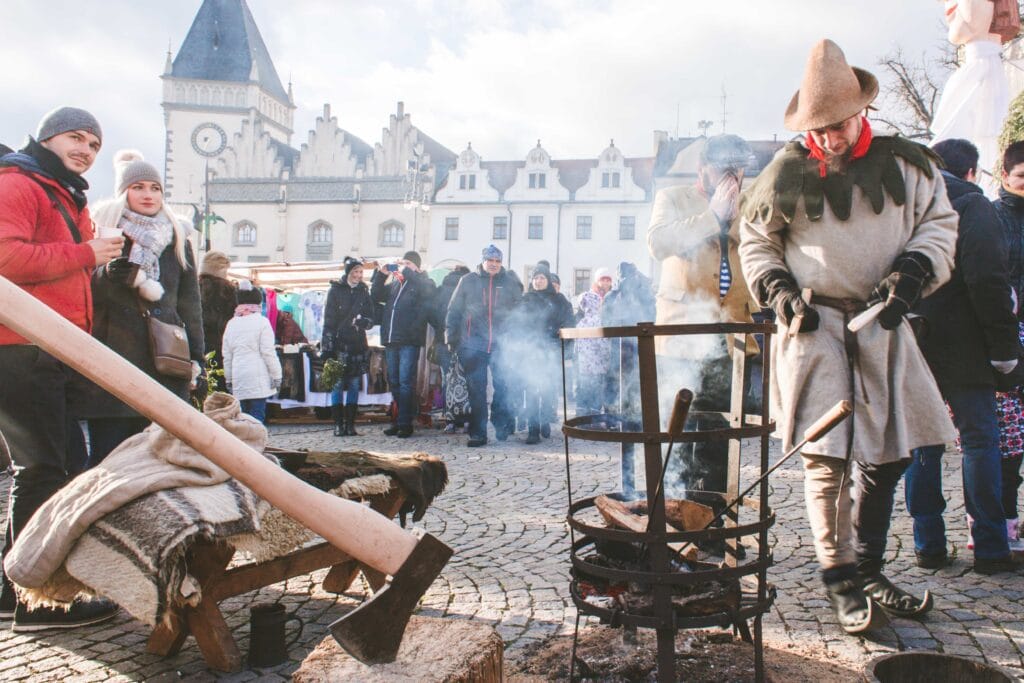
Bay of Fundy & Hopewell Rocks: 13 Tips on What to See and Do

TL;DRThe Bay of Fundy in Canada’s New Brunswick has the highest tides on the planet, with water levels shifting by up to 16 metres. The star attraction is Hopewell Rocks, where you can walk across the ocean floor at low tide, weaving between the famous “flowerpot” rock formations. Among the other 13 tips: Fundy National Park, home to Dickson Falls and Laverty Falls, the scenic Fundy Trail Parkway, sea kayaking between the cliffs at high tide, whale watching out of Alma or St Andrews, and the sea caves at St Martins. July and August are the best months to come, and 2–3 days is enough to see it all. Budget CAD 480–840 for two people over 3 days. Alma, a small fishing village, makes the best base, and the nearest airport is Moncton, 40 minutes from Hopewell Rocks.

You’re standing on the ocean floor, looking up at fifteen-metre-tall rock pillars with spruce trees growing on top. You feel tiny — as if someone shrunk you and placed you inside a giant glass aquarium that someone just drained. And that’s essentially what happened here. Except the “aquarium” is the size of an entire bay, and it was the ocean itself that drained it. Twice a day.

Bay of Fundy, a bay in the Canadian province of New Brunswick, is a place where nature puts on one of the most dramatic water shows on the planet. The tides here reach heights of up to 16 metres — that’s roughly a five-storey building, if you need a comparison. 😅 My mum and I came here as part of our road trip across Canada and honestly? This bay blew us away in a completely different way than the Rocky Mountains. No dramatic peaks, no glaciers — just a quiet, incredible spectacle of nature that follows the timetable of the Bay of Fundy tides.

In this article, you’ll find a complete guide to Bay of Fundy — from the famous Hopewell Rocks and hikes in Fundy National Park to whale watching and the best lobster roll in the little town of Alma. I’ll tell you when to go, how to plan your day around the tide tables, and where to stay. Everything you need to know before heading to the highest tides in the world.

Bay of Fundy rock formations at low tide
Bay of Fundy

TL;DR

  • Bay of Fundy is located in the province of New Brunswick on Canada’s east coast. It has the highest tides in the world — the tidal range reaches up to 16 metres.
  • The main attraction is Hopewell Rocks — flowerpot-shaped rock formations that you can walk around on the ocean floor at low tide.
  • Plan your entire day around the tide tables — this is the key to the whole experience. Ideally, visit Hopewell Rocks at low tide and then return at high tide to see the mind-blowing difference.
  • The nearest city is Moncton (about 40 minutes by car from Hopewell Rocks), but make your base in the small fishing village of Alma right by the bay.
  • Fundy National Park offers dozens of hiking trails, waterfalls, and beautiful coastline — dedicate at least one full day to it.
  • Best time to visit is from June to September. July and August are the warmest and offer the best chance of whale watching.
  • Two to three days is the ideal time to explore the area. One day for Hopewell Rocks, one day for Fundy NP, one day for kayaking or whale watching.
  • Budget for two people for 3 days is around €250–500 (excluding flights and car rental) depending on accommodation type.
  • A car is essential — public transport is virtually non-existent.

When to visit Bay of Fundy and how to get there

Bay of Fundy is a destination where timing is literally everything. And I don’t just mean the month of the year — I mean the exact hour of the day. Let’s break down both.

Best time to visit Bay of Fundy

The season at Bay of Fundy runs from June to October, with the golden period being July and August. During these months, temperatures hover around 20–25 °C, the water in the bay is bearable (though “bearable” is a relative term in Canada — it’s no Algarve 😅), and most importantly — it’s the best time for whale watching, as humpbacks and other species migrate here to feed.

June is lovely because there are fewer tourists, but the weather can still be unstable and morning fog is common. September is gorgeous thanks to the autumn colours — the Canadian “Indian summer” combined with the dramatic coastline is something that will take your breath away.

I’d avoid May and October — many attractions and accommodations are closed, the weather is unpredictable, and some trails in Fundy NP may still be waterlogged or closed. And winter? Skip it entirely, unless you enjoy arctic winds and shuttered restaurants.

How to get to Bay of Fundy

Bay of Fundy is located in the province of New Brunswick on Canada’s east coast, though part of the bay extends into Nova Scotia on the opposite shore. The main tourist attractions (Hopewell Rocks, Fundy National Park, Alma) are on the New Brunswick side.

By air: The nearest airport is Moncton (YQM) — about 40 minutes by car from Hopewell Rocks and an hour from Alma. A larger international airport is Halifax (YHZ) in Nova Scotia — it’s about 3.5 hours by car through New Brunswick, but you can easily combine it with a visit to Halifax and the Nova Scotia coast.

From the UK, there are no direct flights to Moncton. The most common route is via Toronto or Montreal, from where you can either fly to Moncton or set off on a road trip along the east coast. For the best flight deals, we recommend comparing prices on Kiwi or Skyscanner.

By car: A car is absolutely essential for Bay of Fundy. Public transport to the area is virtually non-existent, and the distances between attractions are such that you simply can’t get around without one. We’ve had consistently great experiences with DiscoverCars, which we use all over the world. From Moncton, it’s about 40 minutes to Hopewell Rocks via Route 114, an hour to Alma, and about an hour and a quarter to Fundy National Park.

One thing to watch out for: You’ll sometimes come across information about Bay of Fundy in Maine, USA — yes, the bay technically extends into the American state of Maine, but the famous tides, Hopewell Rocks, and main attractions are on the Canadian side. If you’re googling “Bay of Fundy Maine,” you’ll find a quieter, less touristy part of the bay without the iconic rock formations.

Bay of Fundy things to see and do in New Brunswick

Where to stay near Bay of Fundy and how much it costs

The area around Bay of Fundy isn’t exactly overflowing with luxury resorts — and that’s part of its charm. It’s a peaceful, slightly sleepy corner of Canada where accommodation is mostly B&Bs, small motels, cottages, and campsites. Prices are considerably more affordable than in western Canada.

Alma — the best base

The little town of Alma (population about 250, but who’s counting 😁) is the ideal base for exploring the entire area. It sits right at the entrance to Fundy National Park and is the closest settlement to Hopewell Rocks (about 30 minutes by car). Plus, you’ll find a few restaurants, shops with local products, and a harbour from which whale watching boats depart. We recommend Alma Shore Lane Suites & Cottages.

Moncton — if you want city comforts

Moncton is the nearest larger city (population 75,000) and if you prefer hotels with full amenities, restaurants, and shopping options, it can work as a base. However, expect to drive 40–80 minutes each way every day. For a luxury stay, consider Chateau Moncton Trademark Collection by Wyndham.

Sussex and St. Martins — for Fundy Trail visitors

If you’re planning to explore the Fundy Trail Parkway (and you should!), staying in St. Martins — a picturesque fishing village with covered bridges and sea caves — could be a smart choice. Accommodation options are more limited here, but all the more authentic. Check out Fundy Footprints.

Bay of Fundy: 13 tips on what to see and do

Let’s dive into the best that Bay of Fundy has to offer — from walking on the ocean floor and waterfalls in Fundy National Park to whale watching and the best lobster on the coast. I’ve ordered these tips so you can easily put together two to three days packed with unforgettable experiences.

1. Hopewell Rocks — walking on the ocean floor

This is the main reason most people come here, and I have to say: rightly so. Hopewell Rocks (officially The Hopewell Rocks Ocean Tidal Exploration Site) are rock formations shaped like giant flowerpots — they’re called “flowerpot rocks” — carved by millions of years of tidal erosion. At low tide, you walk around them on the ocean floor, touch them, and shake your head wondering how it’s possible that trees grow on top of them. At high tide, those same rocks are submerged up to their necks and you watch them from the viewpoint above.

And here’s the crucial thing: you must arrive at low tide. Ideally 1–2 hours before the lowest point of low tide, so you have plenty of time for the walk on the ocean floor. You can find the tide tables directly on the Hopewell Rocks website — download them in advance and plan your entire day around them. Seriously, there’s nothing worse than arriving to find three metres of water below you. 😅

Walk on the ocean floor at Bay of Fundy

Practical info:

  • Admission: 15 CAD/adult (about €10), children 6–16 years 12 CAD
  • Open: mid-May to mid-October
  • Parking: free, large car park
  • Time needed: 2–3 hours (ideally arrive at low tide, walk on the ocean floor, then return at high tide to compare the incredible difference)
  • Tip: The stairs down to the ocean floor have about 100 steps and can be slippery. Wear shoes you don’t mind getting dirty — the bottom is muddy and full of seaweed. Definitely no flip-flops. If you’re looking for good hiking shoes, check out our hiking boots guide.

What surprised me most wasn’t the walk on the ocean floor itself — you expect that. What amazed me was the moment you return a few hours later and the rocks you walked around are suddenly submerged up to the top. The contrast is so dramatic that you can’t help but photograph it again from the same spot. Your brain refuses to accept that it’s the same place.

2. Fundy National Park — waterfalls, trails, and coastline

Fundy National Park is one of the most beautiful, yet least visited national parks in Canada. And that’s its greatest charm — no crowds, no queues, just you, the forest, and the sound of waterfalls. The park covers 207 km² along the Bay of Fundy coast and offers over 25 hiking trails of varying difficulty.

Admission: 10 CAD/adult (about €7) — purchased at the park entrance or online. If you’re planning to visit multiple Canadian national parks, the Parks Canada Discovery Pass is worth it (145 CAD/family for a whole year).

Best trails in Fundy NP:

  • Dickson Falls Trail (1.5 km, easy) — the most popular trail in the park, leading along wooden boardwalks past cascading waterfalls. Perfect even with children.
  • Laverty Falls Trail (5 km return, moderate) — leads to gorgeous waterfalls where you can even swim in summer (if you’re hardy — the water is freezing).
  • Third Vault Falls (7.4 km return, moderate) — the tallest waterfall in New Brunswick (16 m). The route is longer but well worth it.
  • Coastal Trail — various sections along the coastline with views over the bay. Some parts are only accessible at low tide!
  • Coppermine Trail (4.4 km, easy) — leads to Point Wolfe and the ocean shore.

You can also camp in the park — Headquarters campground is right by the town of Alma and has showers, toilets, and electrical hookups. Chippewa campground is set in the forest by a lake where you can swim in summer.

What to see in New Brunswick? Bay of Fundy

3. Fundy Trail Parkway — a scenic drive that will take your breath away

If you love scenic drives, Fundy Trail Parkway will blow you away. It’s a 30 km road along the coastline with dozens of viewpoints, hiking trails, and beach access points. The road is narrow, winding, and stunning — it’s a bit like the Great Ocean Road in Australia, just without the crowds and with Canadian forest instead of eucalyptus.

Fundy Trail admission: 11 CAD/car (about €7).

Along the route, you’ll find 21 viewpoints — stop at every one, because each offers a different perspective on the bay, cliffs, and coastline. The most impressive for me was Big Salmon River at the end of the parkway — a former logging settlement where the river meets the bay and where you can descend to the beach (at low tide, naturally).

Tip: Allow at least 3–4 hours for the entire parkway if you want to stop and walk at least two trails. If you’re more active, you could easily spend a whole day here — there are plenty of trails leading to waterfalls, suspension bridges, and hidden beaches.

Fundy Trail Parkway is open from mid-May to mid-October, and in the morning hours you’ll often encounter fog that gives the coastline a mystical atmosphere. It usually clears by the afternoon, leaving crystal-clear views.

4. Kayaking among the rocks at high tide

If walking on the ocean floor at low tide is experience number one, then kayaking among the Hopewell Rocks at high tide is a close 1-A. You paddle between those massive rock pillars with trees above your head and the smooth bay surface around you at a level where just a few hours earlier you were standing on dry land. It’s a bit surreal.

Kayak tours are offered by several local companies in the Hopewell Rocks area and typically last 2–3 hours. Prices are around 65–85 CAD per person (€40–55). Your guide will explain the geology of the bay, show you sea caves, and make sure you don’t capsize (though even that’s an experience 😅).

Important: Kayaking is obviously dependent on the tide — tours run 2 hours before and after high tide. So the ideal plan is: morning at low tide for Hopewell Rocks on foot, afternoon at high tide for kayaking. A perfect day.

Book at least a day or two in advance, and in summer even a week — capacity is limited and this is one of the most popular activities in the entire area.

Bay of Fundy things to see and do

5. Whale watching in Bay of Fundy

Bay of Fundy is one of the best places in the world for whale watching. The massive tides bring tonnes of plankton and tiny crustaceans into the bay, attracting humpback whales, fin whales, minke whales, and even endangered North Atlantic right whales — some of the rarest animals on the planet.

Best time: July and August, when whale concentration is at its highest.

Whale watching trips depart from Alma and from St. Andrews (on the other side of the bay). A cruise typically lasts 2–3 hours and prices are around 70–90 CAD per person (€45–60). Most operators guarantee you’ll see whales — if not, you get a free return trip. We recommend booking your trip through GetYourGuide — it’s the easiest option.

Tip from personal experience: Bring a warm layer and a jacket, even if it’s warm on land. Out on the water it’s 5–10 degrees colder and the wind blows fiercely. And if you suffer from seasickness, take medication beforehand — the bay can get rough.

We were lucky and saw a group of humpbacks feeding about 200 metres from the boat. When a fifteen-metre whale surfaces and slaps its tail fin on the water, it’s a sound and sight you simply can’t prepare for. Lukáš says it was his top experience of the entire trip. And I’m not going to argue with that. 😊

6. St. Martins — sea caves and covered bridges

The small fishing village of St. Martins sits at the eastern end of the Fundy Trail and is one of those places you probably wouldn’t drive to without a guidebook — and that would be a shame. The village is known for two things: sea caves and covered bridges.

The sea caves are accessible at low tide (more tide table planning!) and are impressive — tall, dark, and carved into red sandstone cliffs. At high tide, they’re completely submerged. Entry is free — you just walk down to the beach.

The covered bridges are a classic feature of New Brunswick — wooden bridges with roofs that look like something out of a storybook. In St. Martins, you’ll find two right next to each other, making them a beautifully photogenic subject.

St. Martins makes a great stop on the way from Moncton to Fundy Trail Parkway. Stop for an hour, explore the caves, and grab some fish and chips at one of the local restaurants.

7. Alma — a fishing village with the best lobster

Alma isn’t just a base for exploring the area — it’s a place with its own soul. The town has a harbour where at low tide the boats lie on their sides on the bottom (because the water left — where else would it go? 😅), a handful of shops, and most importantly, fantastic food.

It’s tiny — a few hundred residents — but that intimate atmosphere is what makes it so special. In the morning you buy fresh pastries at Kelly’s Bake Shop (their sticky buns are legendary — the queue stretches down the street and is absolutely worth it), for lunch a lobster roll straight from the harbour, and in the evening you sit on the pier watching the tide slowly lift the boats back into the water.

I’ll come back to Alma in the food section — it deserves it.

Fresh lobster at Bay of Fundy

8. Bay of Fundy tide tables — your most important tool

This isn’t a typical “thing to see” tip, but it’s probably the most important piece of advice in this entire article. Bay of Fundy is a place where your entire schedule is dictated by the tide tables. If you ignore them, you’ll arrive at Hopewell Rocks at high tide and only see the tips of rocks poking out of the water. Or you’ll show up for kayaking at low tide with nowhere to paddle.

Where to find tide tables:

  • Hopewell Rocks website has the table right on the main page
  • The Tides Near Me app (free) — shows tides for any location
  • Fisheries and Oceans Canada — the official government source

How Bay of Fundy tides work: The entire cycle takes approximately 12 hours and 25 minutes. This means high tide and low tide shift by about 50 minutes each day. If low tide is at 10:00 today, tomorrow it will be around 10:50. The average difference between the lowest and highest water level is 12 metres, but during spring or autumn full moons, it can reach up to 16 metres.

Practical day planning example:

  • Low tide at 10:30 → Arrive at Hopewell Rocks at 9:00, walk on the ocean floor 9:30–11:30
  • Lunch in Alma 12:00–13:00
  • Afternoon hike in Fundy NP 13:30–16:00
  • High tide around 16:45 → Return to Hopewell Rocks, view the submerged rocks from above
Hopewell Rocks Provincial Park - Bay of Fundy
Hopewell Rocks Provincial Park – Bay of Fundy

9. Point Wolfe — a hidden gem of Fundy NP

Point Wolfe is an area in Fundy National Park that most tourists miss because they head straight for Dickson Falls. And that’s a mistake. The road to Point Wolfe passes through a beautiful covered bridge (another one!) and ends at a beach where the river meets the bay.

At low tide, an enormous stretch of ocean floor is revealed, full of rock pools where you can find starfish, sea urchins, crabs, and other marine creatures. It’s like a natural aquarium and for children (and adults who like to revisit their childhood years — guilty 😁) it’s an absolute paradise.

The Coppermine Trail leads from the Point Wolfe car park along the coast and offers beautiful views of the bay. It’s easy and about 4.4 km return.

Point Wolfe in New Brunswick
Point Wolfe – Hopewell Rocks Provincial Park – Bay of Fundy

10. Waterside Beach — walk on the Bay of Fundy floor without crowds

If Hopewell Rocks feels too touristy for you (it can indeed get quite busy in summer), Waterside Beach is a great alternative. It’s about 15 minutes’ drive from Hopewell Rocks and offers practically the same experience — a walk on the ocean floor at low tide — but without the crowds and without admission fees.

The beach is long, sandy, and at low tide reveals interesting rock formations and pools. It’s not as dramatic as Hopewell Rocks, but the atmosphere is far more intimate. We were practically alone here and could enjoy the experience — standing where just a few hours earlier there were 12 metres of water — in complete peace.

Cape Enrage, Bay of Fundy, New Brunswick

11. Cape Enrage — lighthouse and zip-line over the bay

Cape Enrage (yes, it really is called that — “Enraged Cape” 😅) is a dramatic cliff with a lighthouse perched on the edge of a 50-metre drop above the bay. The site is run by a local non-profit, and alongside stunning views, they also offer some rather adrenaline-pumping activities.

What you can do here:

  • Visit the lighthouse and museum (admission 5 CAD)
  • Ride a zip-line over the bay (quite the experience if you’re not afraid of heights)
  • Rappel down the cliffs to the beach
  • Walk along the beach below the cliffs at low tide

Cape Enrage is about 20 minutes’ drive from Alma and can be easily combined with a visit to Hopewell Rocks — it’s practically on the way.

12. Mary’s Point — a paradise for birdwatchers

Every year from mid-July to mid-August, hundreds of thousands of semipalmated sandpipers descend on Mary’s Point to fuel up before their migration to South America. It’s one of the most important gathering sites for these birds in the world, and UNESCO has listed it as an Important Bird Area.

Even if you’re not a dedicated birdwatcher, the spectacle is incredible — thousands of birds lift off the mudflats at once and fly in synchronized formations above the bay. At low tide, you can walk across the muddy floor and watch the birds probing the mud for crustaceans.

Entry is free. Mary’s Point is about 10 minutes from Hopewell Rocks.

13. Coastal road trip — connect Bay of Fundy with Halifax or PEI

Bay of Fundy makes an excellent start (or finish) to a larger road trip along Canada’s east coast. From the area, you can easily continue in several directions:

  • Halifax and Nova Scotia (3.5 hours) — a city with rich maritime history, Peggy’s Cove, and the Cabot Trail coastline
  • Prince Edward Island (3 hours) — across the iconic Confederation Bridge to an island of red beaches and Anne of Green Gables
  • Saint John (1.5 hours) — the largest city in New Brunswick with the Reversing Falls (a spot where the tide reverses the direction of the river!)

If you’re planning a bigger road trip, I recommend at least 10–14 days for a combination of Bay of Fundy, Nova Scotia, and PEI. For road trip planning tips, check out our article on road tripping in western Canada — the planning principles are the same.

Don’t forget travel insurance — Canada has very expensive healthcare and without coverage you risk astronomical bills. For longer road trips, we recommend SafetyWing, and for shorter trips, a standard travel policy. And if you want internet connectivity even in remote areas, check out our Holafly eSIM review.

lukas a lucka
Lukáš and Lucie recommend
Where to Stay near Bay of Fundy
4 accommodations — wellness hotels and other lodging options

What to eat and drink at Bay of Fundy: a foodie guide

If you’re heading to Bay of Fundy and not planning to eat lobster, you’re doing it wrong. Here’s a rundown of the food and places you shouldn’t miss.

Lobster roll — obligation number one

A lobster roll is a bun stuffed with fresh lobster meat. In Alma, you can get one practically everywhere, but our favourite was at Alma Lobster Shop — fresh, generously filled, and at a reasonable price (around 25 CAD/€16).

Sticky buns from Kelly’s Bake Shop

Kelly’s Bake Shop in Alma is an institution. Their cinnamon sticky buns are legendary and queues form every morning. They open early and sell out fast — get there before 9:00 or risk missing out. They cost about 5 CAD (€3) and are so good you’ll buy two. Maybe three. 😅

Fish and chips

You probably know the drill. Fresh fish (usually cod or plaice), crispy batter, and homemade chips. Try Tides Restaurant in Alma or Holy Whale Brewing — yes, the local microbrewery that makes great beer and solid fish and chips to boot.

Dulse — edible seaweed

This is a local speciality that will either delight you or horrify you. Dulse is dried red seaweed that’s eaten as a snack in New Brunswick. It has a salty, slightly smoky flavour and can be added to salads, soups, or eaten on its own. Pick up a bag at a local shop in Alma and give it a try — it’s an experience. If only for the expression on your face. 😁

Holy Whale Brewing

The Holy Whale microbrewery in Alma is a great spot for an evening pint after a full day of exploring. They brew local craft beers inspired by the bay and surrounding nature. Friendly atmosphere, good music, and views over the harbour.

Craft beer in Canada

FAQ — Frequently asked questions about Bay of Fundy

What is the Bay of Fundy famous for?

Bay of Fundy has the highest tides in the world. The difference between the lowest and highest water levels averages 12 metres, but under ideal conditions (full moon, spring or autumn equinox) it can reach up to 16 metres — equivalent to the height of a five-storey building. This phenomenon is caused by the bay’s unique funnel shape and the resonance of the tidal wave. In practical terms, at low tide an enormous stretch of ocean floor is exposed for you to walk on, and a few hours later the same spot is under fifteen metres of water. Beyond the tides, Bay of Fundy is home to rare whales, unique rock formations, and a rich marine ecosystem.

How high are the tides in Bay of Fundy?

The average tidal range in Bay of Fundy is around 12 metres, but at the narrowest points of the bay — particularly at Burntcoat Head in Nova Scotia and at Hopewell Rocks in New Brunswick — the range reaches up to 16 metres. With each tidal cycle, approximately 160 billion tonnes of water flow through the bay — more than the combined flow of all the world’s rivers. Yes, you read that correctly. The ocean shifts here with such force that scientists are even studying the potential for tidal energy generation.

What city is closest to Bay of Fundy?

The nearest larger city is Moncton in New Brunswick — about 40 minutes’ drive from Hopewell Rocks and an hour from Alma. If you’re looking for a smaller base right by the bay, the town of Alma (population around 250) sits directly at the entrance to Fundy National Park. Other nearby cities include Sussex (50 minutes from Fundy NP) and Saint John (1.5 hours), the largest city in New Brunswick.

Which province is Bay of Fundy in?

Bay of Fundy stretches between two Canadian provinces — New Brunswick on the northern side and Nova Scotia on the southern side. A small portion of the bay also extends into the American state of Maine. The bay as a whole doesn’t “belong” to any single province — it’s shared territory under Canada’s federal jurisdiction when it comes to maritime law and fishing. Hopewell Rocks and Fundy National Park are managed by the province of New Brunswick and Parks Canada, respectively.

Can you swim in Bay of Fundy?

Yes, but prepare for cold water. Ocean temperatures even in summer hover around 10–14 °C, so it’s more of a wading or kayaking experience than a swimming one. However, in Fundy National Park you’ll find Wolfe Lake and Bennett Lake, where the water is significantly warmer in summer (around 20 °C) and swimming is pleasant. On the coast, swimming is more symbolic — most people dip their toes and run back. 😅

How many days do I need for Bay of Fundy?

Ideally 2–3 days. Spend one day at Hopewell Rocks (at both low and high tide), a second day at Fundy National Park with hikes, and a third day kayaking, whale watching, or driving the Fundy Trail Parkway. If you only have one day, focus on Hopewell Rocks at low tide and an afternoon hike in Fundy NP. But honestly — one day isn’t enough. You’ll want more.

Do I need a car to visit Bay of Fundy?

Absolutely yes. Public transport in the area is virtually non-existent — no buses between Moncton and Hopewell Rocks, no trains to Alma. The nearest bus connection is to Moncton, from where you’d need to find your own way. Without a car, it simply doesn’t work. Car rental from Moncton starts from about 50 CAD/day (€32) and the roads are good quality and easy to drive.

Tips and Tricks for Your Vacation

Don’t Overpay for Flights

Search for flights on Kayak. It’s our favorite search engine because it scans the websites of all airlines and always finds the cheapest connection.

Book Your Accommodation Smartly

The best experiences we’ve had when looking for accommodation (from Alaska to Morocco) are with Booking.com, where hotels, apartments, and entire houses are usually the cheapest and most widely available.

Don’t Forget Travel Insurance

Good travel insurance will protect you against illness, accidents, theft, or flight cancellations. We’ve had a few hospital visits abroad, so we know how important it is to have proper insurance arranged.

Where we insure ourselves: SafetyWing (best for everyone) and TrueTraveller (for extra-long trips).

Why don’t we recommend any Czech insurance company? Because they have too many restrictions. They set limits on the number of days abroad, travel insurance via a credit card often requires you to pay medical expenses only with that card, and they frequently limit the number of returns to the Czech Republic.

Find the Best Experiences

Get Your Guide is a huge online marketplace where you can book guided walks, trips, skip-the-line tickets, tours, and much more. We always find some extra fun there!
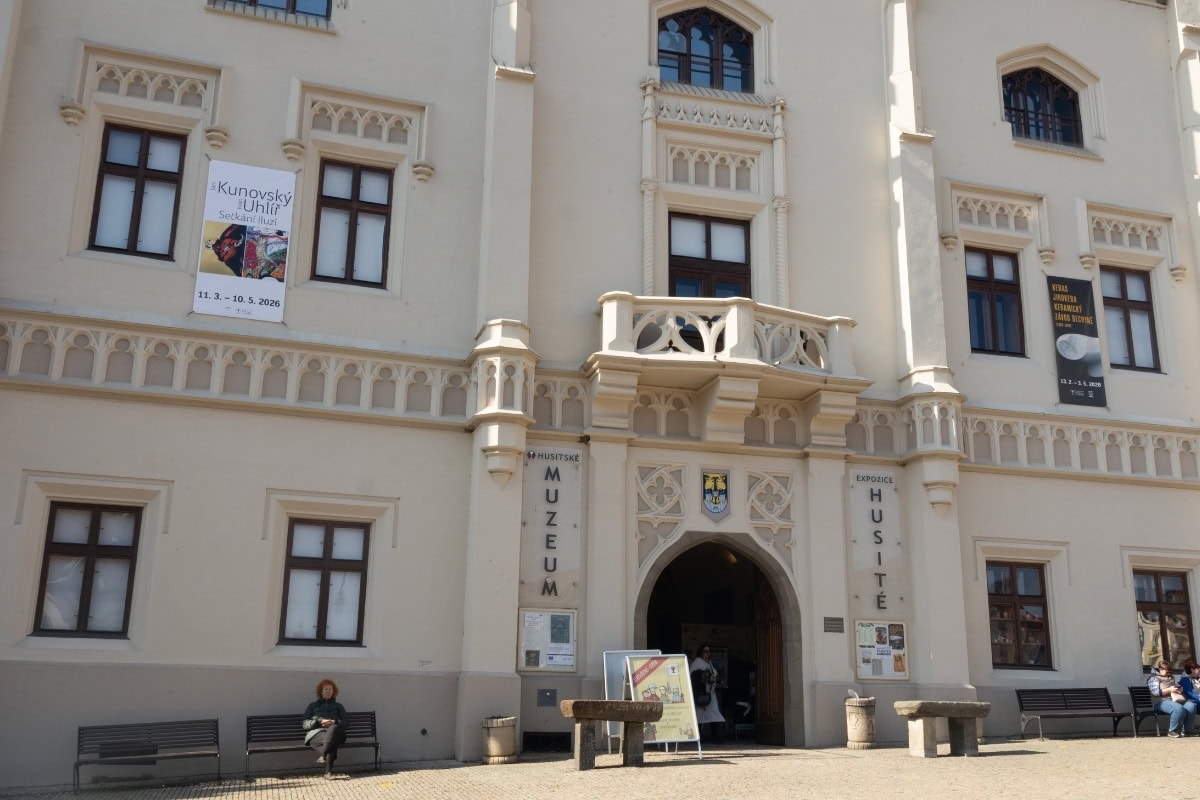
AirHelp Review: Is This Flight Compensation Service Worth It?

TL;DRAirHelp is worth it if you can’t be bothered with the paperwork yourself, since it works on a “no win, no fee” basis and takes a 35% cut of your compensation (up to 50% if the case goes to court). Under EC Regulation 261/2004, you’re entitled to between €250 and €600 depending on the flight distance — for example, €250 for London–Rome, €400 for London–Canary Islands, or €600 for London–New York. Once AirHelp’s fee comes off, you’re left with somewhere between €162.50 and €390. Processing takes 2–3 months on average, though tricky cases can drag on for 6–12 months. The downsides are the lack of support in your own language and higher fees than some rivals — alternatives elsewhere in Europe, such as ClaimCloud (from 25% plus VAT) or Refundio (35%, but with an advance payout within 48 hours and local-language support), might work out better.

Let’s be honest — who hasn’t experienced that moment when the departure board flashes the dreaded word DELAYED and you’re wondering whether you’ll make your connection or end up sleeping at the airport? Lukáš and I deal with this with clockwork regularity, and my mum missed her flight three times last year alone. That’s exactly why I started looking into whether we could get flight compensation for all those delays. That’s when I stumbled upon AirHelp. In this review, I’ll tell you everything you need to know — how much they charge, what real travellers’ experiences are like, and most importantly, whether it’s actually worth it. 😉

AirHelp review

Our Story: How We Discovered AirHelp

It all started last May. My mum was flying back from Sicily and the journey turned into a nightmare. Her flight from Palermo was nearly three hours late, she missed her connection in Zurich and had to stay overnight unexpectedly. Sure, the airline gave her a hotel and meals, but nobody gives you back that stress and wasted time… or do they?

When she got home, we tried submitting her case on AirHelp. No complicated forms, no arguing with a call centre. We just uploaded the boarding passes.

And the result?
Cha-ching! €162.50 landed in her account. 💸 And that’s not all. When Lukáš was on a quick trip to Portugal and got stranded in Lisbon, he received €200 — even though he’d already been given a free hotel and meals.

I’ll be honest — AirHelp isn’t a charity. They took their commission from the amount recovered (around 35%). But hand on heart — we would never have dealt with all that airline paperwork ourselves. We would have just let it go and that money would have been lost.

So my new maths is clear: It’s better to have “just” 65% of the compensation in your account without any effort than to proudly own 100% of nothing. If your flight is delayed, that money is waiting for you. Don’t leave it for the airlines. 😉

TL;DR

No time for the full article? Here are the key takeaways:

  • What it is: A service that handles your flight delay compensation, cancellation, or overbooking claim for you
  • How much they charge: 35% of the compensation (up to 50% if the case goes to court)
  • How much you get: From the maximum compensation of €600, you’d keep €390 without court proceedings, or €300 with court
  • You only pay on success: If they don’t win, you pay nothing
  • Trustpilot: 4.6/5 from 191,000+ reviews
  • Processing time: On average 2–3 months, but can be 6+ months
  • Alternatives: Flightright (from 20–30% + VAT), ClaimCompass (25–35%, court costs included)
  • Worth it? Yes, if you don’t want to or can’t handle it yourself. No, if you have the time and patience to deal with the airline directly
AirHelp review flight compensation

What Is EU Regulation EC 261/2004 and What Are You Entitled To

Before we dive into AirHelp itself, it’s important to understand why you can even claim flight cancellation compensation in the first place. It all comes down to one European regulation that’s absolutely brilliant for travellers — it’s just that far too many people don’t know it exists.

Who Is Entitled to Compensation

Regulation EC 261/2004 is a law passed by the European Parliament that sets out rules for compensating air passengers. It applies to:

  • All flights departing from the EU (any airline — even that obscure one you found on a comparison site)
  • Flights into the EU (but only with an EU-based airline)
  • It also covers flights from/to Iceland, Norway, and Switzerland

This is particularly relevant for the flight compensation UK situation — since Brexit, flights from UK airports are no longer covered unless you’re flying with an EU-based carrier. However, flights from the EU to the UK are still covered regardless of the airline. If you’re flying from London Heathrow with British Airways, for instance, you wouldn’t be covered under EC 261/2004 (though the UK has its own equivalent regulation, UK261, which provides similar protections for flights departing from UK airports).

When Are You Entitled to Compensation

  • Delay of 3+ hours on arrival at your final destination
  • Flight cancellation announced less than 14 days in advance
  • Denied boarding due to overbooking
  • Missed connecting flight with arrival 3+ hours after the scheduled time

Flight Delay Compensation Table

Flight DistanceCompensationExample Route
Up to 1,500 km€250London → Rome, London → Barcelona
1,500–3,500 km€400London → Canary Islands, London → Istanbul
Over 3,500 km€600London → New York, London → Bangkok

When You Are NOT Entitled

  • Extraordinary circumstances: Severe weather, volcanic ash, security threats, air traffic control strikes
  • Advance notice: The airline announced the cancellation 14+ days in advance
  • Re-routing: The airline offered an alternative flight within an acceptable time window

Important Information: Limitation Period

In the UK, you have 6 years from the date of the flight to make a claim (5 years in Scotland). That’s significantly longer than many EU countries. So if your flight was cancelled in 2021 and you haven’t done anything about it — there’s still time! In other countries, the limitation period varies (just 1 year in Belgium, up to 5 years in Spain, and 3 years in most EU countries).

What Is AirHelp and How Does It Work

AirHelp is the world’s largest flight compensation service. It’s been operating since 2013, is headquartered in Berlin, and has helped 28 million customers to date. They have offices across Europe (Berlin, Barcelona, Kraków, Gdańsk…) and legal representation in 35 countries.

Essentially, it’s a middleman between you and the airline. You tell them what happened, they check your claim, and if you have a chance of getting compensation for a late flight, they take over all communication with the airline — including any potential court proceedings.

How It Works Step by Step

The whole process is surprisingly simple. Here’s what it looks like in practice:

1. Enter your flight (2 minutes) On the AirHelp website or mobile app, enter your flight number or journey details. The system instantly checks whether your flight qualifies for compensation.

2. Claim verification An automated system cross-references data about your flight — the delay, reason for cancellation, distance — and tells you whether you have a claim and how much you could receive.

3. Sign the agreement If you want to proceed, you electronically sign a power of attorney authorising AirHelp to deal with the airline on your behalf.

4. Submit documents Heads up — this caught me slightly off guard: AirHelp requests a scan or photo of your passport after you’ve signed the agreement, not before. It’s nothing dramatic, but good to know.

5. AirHelp negotiates with the airline The team builds your case and communicates with the airline. At this stage, you don’t need to do anything — just wait.

6. Legal action (if needed) If the airline refuses to pay (and this happens — especially with Wizz Air, Ryanair, and other budget carriers 😅), AirHelp can file a lawsuit. However, they charge extra for this legal service.

7. Compensation payout When the airline pays up, AirHelp deducts their commission and sends the rest to your account.

How Long Does It Take?

This is probably the least pleasant part:

  • Simple cases: 10 days to a few weeks (mainly with Ryanair, who tend to pay relatively quickly)
  • Standard cases: 6–14 weeks (roughly 2–3 months)
  • Complex/court cases: Up to 6–12 months
  • Average: The estimated average is around 3 months

How Much Does AirHelp Cost — Real Examples

And now the crucial question — how much does AirHelp actually take? Because a “free service” it definitely isn’t. It works on a “no win, no fee” basis — if they don’t recover anything, you pay nothing. But if they succeed, the commission isn’t exactly small.

Fee Overview

Fee TypePercentageNote
Service fee35% of compensationIncluding VAT
Legal fee+15% of compensationOnly if the case goes to court
Total without court35%
Total with court50%

Real Examples — How Much You Actually Keep

Let’s look at some real numbers, because percentages are nice, but euros in your account are nicer:

Example 1: London → Rome flight (under 1,500 km), compensation €250

  • Without court: AirHelp takes €87.50 → you keep €162.50
  • With court: AirHelp takes €125 → you keep €125

Example 2: London → Canary Islands flight (1,500–3,500 km), compensation €400

  • Without court: AirHelp takes €140 → you keep €260
  • With court: AirHelp takes €200 → you keep €200

Example 3: London → New York flight (over 3,500 km), compensation €600

  • Without court: AirHelp takes €210 → you keep €390
  • With court: AirHelp takes €300 → you keep €300

It’s still not bad money, especially for not having to lift a finger. But it’s fair to say that 35–50% is above the industry average — there are services that charge less (more on that in a moment).

Real Traveller Experiences

One traveller reported that from an expected €500 from Wizz Air, they ended up with just around €280 — a combination of AirHelp’s commission and additional fees. That’s quite a cold shower when you’ve been waiting six months and then receive barely half. 😅

AirHelp+ Subscription — Is It Worth It?

AirHelp also offers a subscription called AirHelp+, which promises lower or zero fees on compensation claims plus a few added bonuses. Let’s see if it makes sense.

Plan Overview

PlanPrice/YearKey Benefits
Essential€19.99Lower service fee
Smart€39.99100% compensation with no fees, 3 trips, lounge access
Complete€49.99Same as Smart but more trips
Pro€99.999 trips, full benefits, lounge access

Note: AirHelp regularly updates and changes their plans, so the specific offering may differ.

What AirHelp+ Includes

  • Zero fees on compensation (on higher plans — you get 100%)
  • AirPayout: Up to €100 for flight disruption
  • AirLuggage: Up to €100 for delayed baggage
  • Access to 1,300+ airport lounges (when delayed 1+ hour or cancelled)
  • Priority processing of your case
What can I pack in my carry-on?

Is It Worth It?

Honestly? It depends on how often you fly.

If you fly once a year for your holiday, the subscription is probably not worth it. The chances of needing flight delay compensation are relatively small, and even if you did — the difference between a 35% fee and 0% only works out better on higher compensations.

Example: With a €400 compensation, you’d save €140 in fees. But the Smart plan costs €40, so the net saving is €100 — but only if a problem actually occurs.

However, if you fly 5 or more times a year (business trips, digital nomad lifestyle), the Pro plan at €100/year could be worth it as a kind of insurance — mainly for the lounge access during delays and automatic monitoring of all your flights.

For most leisure travellers though, I’d say: skip the subscription and just pay the one-off commission if and when you actually have a problem.

AirHelp Pros

After reviewing dozens of reviews, traveller forums, and our own experience with the process — here’s what AirHelp does well:

  • You only pay on success — no upfront costs, no risk
  • Full service — you don’t have to deal with anything yourself; they handle all airline communications
  • Professional legal representation in 35 countries including court proceedings
  • Easy process — filling out the form literally takes 2 minutes
  • Mobile app — real-time flight tracking + notifications about new claims (even retroactively!)
  • Biggest player on the market — airlines know AirHelp and often prefer to pay quickly rather than get dragged through the process
  • 13+ years of experience and 28 million customers served
  • Transparent calculations — you see the estimated compensation and fees upfront
  • High Trustpilot rating — 4.6/5 from 191,000+ reviews
  • Works retroactively — you can claim for flights up to 6 years back (in the UK)

AirHelp Cons

And now the less pleasant side. Because nothing is perfect, and there are a few things about AirHelp that bothered me:

  • High 35% commission — above the industry average (competitors offer from 25%)
  • Up to 50% with court proceedings — half the compensation goes to AirHelp
  • Long waiting times — some cases drag on for months, in extreme cases over 6 months
  • Documents required after signing — they request a scan of your passport after you’ve already signed the agreement, not before (that slightly surprised me)
  • Limited communication — no phone support, email responses can take time
  • Google rating only 2.3/5 — a stark contrast with Trustpilot (4.6/5), suggesting satisfied customers are actively encouraged to leave Trustpilot reviews
  • Impersonal approach — occasional repeated document requests, feeling like you’re just a number
  • Booking through intermediaries (Kiwi, eSky) complicates the process

Comparison with Competitors

AirHelp may be the biggest player, but it’s certainly not the only one. There are plenty of alternatives on the market — and if you’re looking for the best value on your flight compensation claim, it’s worth comparing them.

Comparison Table

ServiceBase FeeLegal FeeMax TotalMain Advantage
AirHelp35%+15%50%Biggest brand, global coverage
Flightright20–30% + VAT+14%~44% + VATPioneer, strong EU expertise
ClaimCompass25–35%0% (included)35%Transparent, no extra fees
Skycop25–35%Included35%Fast processing, good for budget airlines

Flightright

Flightright is a German pioneer in the industry — they’ve been around as long as AirHelp. Their fees start at 20–30% + VAT with an additional 14% for court, which can work out cheaper or more expensive depending on the situation. They have a strong database of court rulings and a higher success rate with complex EU cases. On the downside, similar to AirHelp, payouts can take time.

Best for: Complex legal cases within the EU.

ClaimCompass

ClaimCompass has one huge advantage: their 25–35% fee covers everything — including any court proceedings. No surprises, no extra charges. If your case goes to court, you still pay the same commission. That’s a massive difference compared to AirHelp, where court involvement pushes you to 50%.

Best for: Those who want a transparent, fixed fee with no surprises.

Flight Compensation: Ryanair and Budget Airlines

If you’re specifically looking for flight compensation Ryanair claims, it’s worth knowing that budget airlines are notoriously difficult to deal with directly. Ryanair, easyJet, and Wizz Air are all known for delaying, ignoring, or rejecting claims with questionable reasoning. This is where a service like AirHelp or its competitors really earns its commission — these airlines know that fighting a professional legal team isn’t worth their time.

What Do Review Sites Say?

Looking at independent review sites, the picture is interesting:

AirHelp consistently leads in editorial scores thanks to its brand recognition and global reach, but user reviews tell a more nuanced story. The Google rating of just 2.3/5 versus the Trustpilot score of 4.6/5 is a noticeable gap, suggesting that satisfied customers are more actively directed to Trustpilot.

When to Use AirHelp vs. DIY

This is probably the most important section of the entire article. Because the truth is, you can claim flight delay compensation completely on your own and for free. The question is whether it’s worth the effort.

How to Claim Flight Compensation Yourself (DIY Guide)

1. Write directly to the airline — most have an online form for complaints/compensation claims 2. Wait for a response — the airline should respond within 6–8 weeks 3. If they refuse: Contact the Civil Aviation Authority (CAA) in the UK — or the relevant national enforcement body in the country of departure 4. If that doesn’t work either: You can take it to the small claims court or use Alternative Dispute Resolution (ADR)

When It’s Worth Doing It Yourself

  • ✅ You have a clear-cut case (provable 3+ hour delay, no extraordinary circumstances)
  • ✅ You’re comfortable writing a formal complaint letter
  • ✅ You have time and patience
  • ✅ You’re flying with an airline known for paying compensation (e.g., Lufthansa, KLM, British Airways)
  • ✅ You don’t want to lose 35–50% of the compensation

When It’s Worth Using AirHelp (or Another Service)

  • ✅ The airline ignores you or refuses your claim (Wizz Air, easyJet — they love to drag their feet 😅)
  • ✅ You don’t have the time or energy for paperwork
  • ✅ The case is complicated (connecting flights, layovers, multiple carriers)
  • ✅ You’re flying through multiple countries and aren’t sure which jurisdiction applies
  • ✅ You simply want peace of mind and don’t care about not getting 100%

What Real Travellers Say

On traveller forums, one theme keeps coming up: with some airlines, the DIY approach is practically impossible. Wizz Air, Ryanair, easyJet — they love to ignore your requests, reject them with made-up reasons, or send you round in circles. In these cases, a service like AirHelp has genuine added value, because airlines know that fighting a professional legal team isn’t worth the hassle.

On the other hand — one traveller described how Ryanair paid the compensation directly within 10 days of submitting their own form. So it sometimes works without a middleman too.

Airplane wing view from window

Conclusion and Recommendation

After thoroughly reviewing all the available information, real traveller experiences, and testing the process ourselves — here’s my honest verdict:

AirHelp is a good service, but not necessarily the cheapest option on the market.

It’s like buying that expensive suitcase at the airport — it works great, looks professional, but there are cheaper alternatives that do essentially the same thing. 😉

Who I Recommend AirHelp For

  • Travellers who don’t have time or inclination to argue with airlines
  • Those who have older unresolved claimsAirHelp has a brilliant retroactive flight search feature
  • Frequent flyers who want the AirHelp+ subscription benefits

Who I Recommend an Alternative For

  • Anyone who wants no surprises on fees → ClaimCompass (fixed fee including court)
  • Those looking for potentially lower fees → Flightright (from 20–30% + VAT)
  • Budget airline claims → Any reputable service, as DIY can be a nightmare with these carriers

Who I Recommend the DIY Approach For

  • Anyone with a straightforward case and a bit of patience
  • You’ll save 35–50% — and with a €600 compensation, that’s real money (€210–€300)

And one more tip before you go: before your next flight, don’t forget to sort out proper travel insurance with SafetyWing, download an eSIM from Holafly, and check out our guide on how to pack carry-on only. And if something goes wrong with your flight — now you know exactly where to turn. 😁

Frequently Asked Questions (FAQ)

Is AirHelp Free?

AirHelp works on a “no win, no fee” basis — if they don’t recover your compensation, you pay nothing. But if they succeed, they take 35% of the recovered amount (up to 50% if the case goes to court). So it’s not free — but you don’t risk anything.

How Long Does Flight Compensation Through AirHelp Take?

It depends on the complexity of the case. Simple cases (where the airline cooperates) can be resolved in 10 days to a few weeks. Standard cases take 2–3 months. Complex cases that go to court can take 6–12 months. The average is around 3 months.

Does AirHelp Work in the UK?

Yes, AirHelp works for UK residents. They can help with claims under EU Regulation EC 261/2004 (for flights departing from EU airports) and under the UK’s equivalent regulation UK261 (for flights departing from UK airports). The forms are straightforward and the process is the same regardless of where you’re based.

Can I Claim Compensation for an Old Flight Through AirHelp?

Yes! In the UK, the limitation period is 6 years from the date of the flight (5 years in Scotland). AirHelp has a feature that can scan your old flights (if you give them access to the email with your booking confirmations) and check whether you have any outstanding claims. Many people discover retroactively that they were entitled to compensation and never knew.

What If the Airline Claims Extraordinary Circumstances?

This is the most common excuse airlines use. “Extraordinary circumstances” (severe weather, third-party strikes) genuinely exempt airlines from paying. But airlines often misuse this excuse — for example, a technical fault with the aircraft is usually NOT an extraordinary circumstance (the airline could have anticipated it). AirHelp has a team of lawyers who can assess this and challenge it if necessary.

Is AirHelp+ Subscription Worth It?

For most leisure travellers (1–2 flights per year), it’s probably not worth it. It can be worthwhile for frequent flyers who fly 5+ times a year — mainly thanks to lounge access during delays and zero fees on compensation claims. For the average traveller, I’d recommend one-off use of the service instead.

Is AirHelp or ClaimCompass Better?

It depends on your priorities. AirHelp has greater global coverage, a stronger brand, and more experience — airlines tend to deal with them more willingly. ClaimCompass offers a transparent fixed fee (25–35%) that includes court costs, meaning no surprises. For straightforward EU flight claims, ClaimCompass often works out cheaper. For exotic destinations or complex cases, AirHelp has the edge.

What If AirHelp Rejects My Claim?

If AirHelp determines that your claim has no chance of success, they’ll inform you and close the case. In that scenario, you pay nothing. You can try another service (each has a slightly different approach and different database of legal precedents) or try yourself directly with the airline and through the Civil Aviation Authority.

Does AirHelp Work for Flights Outside Europe?

Partially. Regulation EC 261/2004 covers flights from the EU (any airline) and flights to the EU (EU airlines only). For purely non-European flights (e.g., Bangkok → Tokyo with a Thai airline), AirHelp can’t help, because EU regulations don’t apply. However, some countries have their own compensation rules (USA, Canada, Brazil) and AirHelp may be able to assist there — but that’s more the exception than the rule.

Can I Use AirHelp If I Booked Through Kiwi.com?

Yes, you can, but bear in mind that it can be more complicated. Booking through an intermediary (Kiwi.com, eSky, etc.) means AirHelp needs to track down more information and communication between all parties is more complex. As a general rule — if you book flights directly with the airline, the compensation process tends to be simpler and faster. Last updated: February 2026. Information about AirHelp prices and plans may change — always verify current terms on the provider’s website. Lukáš and I eventually got our compensation for the delayed flight from Barcelona. It took two and a half months, but €260 per person (after the commission was deducted) landed in our account just when we were planning our next trip. A nice little contribution from the airline towards our next adventure. ☺️

Tips and Tricks for Your Vacation

Don’t Overpay for Flights

Search for flights on Kayak. It’s our favorite search engine because it scans the websites of all airlines and always finds the cheapest connection.

Book Your Accommodation Smartly

The best experiences we’ve had when looking for accommodation (from Alaska to Morocco) are with Booking.com, where hotels, apartments, and entire houses are usually the cheapest and most widely available.

Don’t Forget Travel Insurance

Good travel insurance will protect you against illness, accidents, theft, or flight cancellations. We’ve had a few hospital visits abroad, so we know how important it is to have proper insurance arranged.

Where we insure ourselves: SafetyWing (best for everyone) and TrueTraveller (for extra-long trips).

Why don’t we recommend any Czech insurance company? Because they have too many restrictions. They set limits on the number of days abroad, travel insurance via a credit card often requires you to pay medical expenses only with that card, and they frequently limit the number of returns to the Czech Republic.

Find the Best Experiences

Get Your Guide is a huge online marketplace where you can book guided walks, trips, skip-the-line tickets, tours, and much more. We always find some extra fun there!
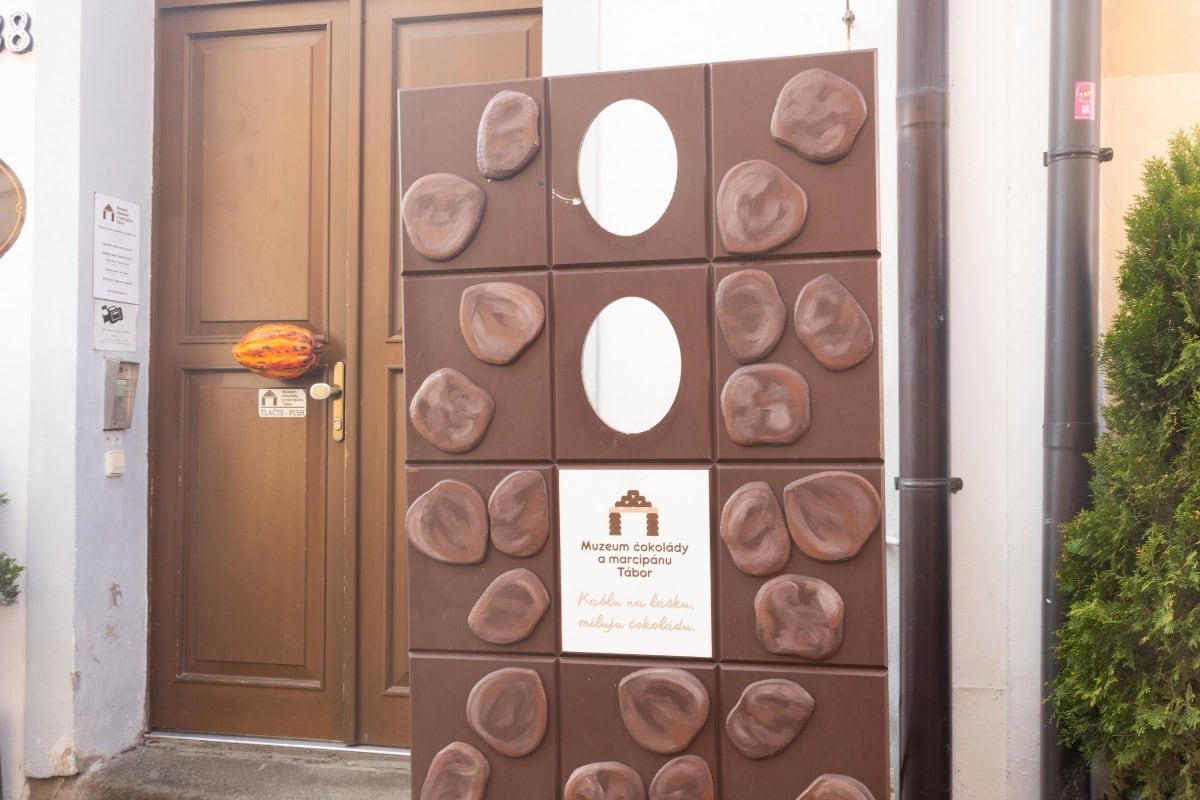
Arches National Park, Utah: 15 Tips on What to See and Do in the Park with Over 2,000 Arches

TL;DRArches National Park in south-eastern Utah, just 8 km from Moab, is packed with over 2,000 natural rock arches, including the iconic Delicate Arch, the nearly 93-metre Landscape Arch and the cinematic Double Arch. There are 15 specific tips here on what to see and do, from the 29 km Arches Scenic Drive to the maze-like Fiery Furnace. Entry costs $30 per car for 7 days, and from April to October you’ll also need a timed entry reservation, booked for $2 on recreation.gov. April–May and September–October are the best months, with temperatures of 18–28°C. Give yourself at least a full day here, ideally two.

When Lukáš and I first drove through the gate of Arches National Park, I expected a desert landscape with a few rock arches along the road. A nice little afternoon trip, I thought. Eight hours and twenty thousand steps later, I was standing beneath Delicate Arch at sunset, jaw on the floor and tears in my eyes, whispering: “This can’t be real.” 😅

But it is very real. Arches National Park is a place where nature has spent millions of years patiently carving shapes into red sandstone that not even the wildest sculptor could dream up. Over 2,000 natural stone arches in a single location — there’s nothing quite like it anywhere on Earth. From the delicate curve of Delicate Arch, which you’ll recognise from Utah’s licence plates, to the monumental Landscape Arch spanning nearly 100 metres, to Double Arch, where you feel like an ant in a cathedral.

The park lies in southeastern Utah, just minutes from the town of Moab, and can easily be combined with nearby Canyonlands and other parks of the American Southwest. In this article, I’m bringing you a complete guide to Arches National Park — 15 tips on what to see and do, practical advice on timed entry reservations, where to stay in Moab, how much it all costs, and how to make the most of the park even if you only have one day.

Arches National Park, Utah

TL;DR

  • Arches National Park is located in Utah, right next to the town of Moab — the entrance gate is just 8 km from the town centre.
  • The park contains over 2,000 natural stone arches, including the iconic Delicate Arch and the impressive Landscape Arch.
  • From April to October, you’ll need a timed entry reservation — book on recreation.gov, slots sell out fast.
  • Entrance fee is $30 per car (valid for 7 days). If you’re visiting multiple parks, get the America the Beautiful Pass for $80.
  • The best time to visit is April–May or September–October — pleasant temperatures around 20–25 °C and smaller crowds.
  • The park features a 29 km Arches Scenic Drive — you drive along it with turnoffs leading to individual trails and viewpoints.
  • Delicate Arch Trail is a must-do — 4.8 km round trip, ideally 1–2 hours before sunset.
  • For adventurers: Fiery Furnace — a labyrinth of rock formations accessible only with a permit or with a ranger.
  • Devils Garden Trail at the end of the road offers several arches including Landscape Arch.
  • Accommodation in Moab ranges from about $60/night (budget motel) to $150+/night (nicer hotel).
  • The park pairs beautifully with Canyonlands National Park, which is just 40 minutes by car.
  • Plan at least one full day for the whole park, ideally two days.

When to Visit Arches National Park and How to Get There

Arches National Park is a desert park, and the weather plays an absolutely crucial role in how much you’ll enjoy your visit. Temperatures change dramatically throughout the year, and some months are, frankly, pretty brutal. Here’s my honest overview of when to go and what to avoid.

Best Time to Visit

April and May are probably the very best months. Temperatures hover around 20–28 °C, the days are long, and nature is waking up (yes, even in the desert!). It can be windy occasionally, but nothing that would stop you.

September and October are the second great choice — summer has faded, temperatures drop back to a pleasant 18–27 °C, and the crowds thin out noticeably, especially after mid-September.

June to August — summer in Arches is brutal. Temperatures routinely exceed 38 °C and the rock trails turn into a scorching frying pan. If you visit in summer, plan all longer hikes for early morning (before 8:00) or late afternoon. Hydration is an absolute must — bring at least 2 litres of water per person for every hike. We once made the mistake of setting off for Delicate Arch at two in the afternoon in July… never again. 😅

November to March — the park is open year-round, but winter months bring temperatures around freezing (sometimes below) and occasional snow. On the other hand — red rocks with a white dusting are absolutely magical, and you’ll have the place almost to yourself. Just expect shorter days and the possibility that some trails may be snowy or icy.

Landscape with red rocks and mountains.
Arches National Park, Utah

How to Get to Arches National Park

If you’re wondering where Arches National Park is on the map — it’s in southeastern Utah, right next to the town of Moab. The park entrance gate is literally 8 km from the centre of Moab.

By car — this is by far the most practical option. You can’t get around the park without a car; there’s no public transport. The nearest larger cities are:

  • Moab — 8 km (5 minutes by car) — the base for most visitors
  • Grand Junction, Colorado — 180 km (2 hours) — the closest larger airport
  • Salt Lake City — 370 km (4 hours) — the biggest international airport in the region

We flew into Salt Lake City and drove from there across Utah, which was amazing — the landscape along the way is an experience in itself. We’ve had great long-term experience with DiscoverCars, which we use all over the world, and Utah was no exception. A car is an absolute necessity here, not just for Arches but for all the surrounding parks.

By air — the closest airport with regular flights is Canyonlands Field Airport (CNY) in Moab itself, served by United Airlines from Denver. A wider selection of connections is available at Grand Junction (GJT) or Salt Lake City (SLC). For cheap flights to the US from the UK, try comparison sites like Skyscanner or Google Flights to find the best deals with connecting flights.

Timed Entry — Reservation for Entry (Important!)

Since 2022, Arches National Park has operated a timed entry system — essentially timed entry tickets. If you’re planning a visit from 1 April to 31 October, you need to book a time slot in advance on recreation.gov.

Here’s how it works:

  • Reservations open 3 months in advance (e.g. June slots open on 1 March)
  • Slots sell out within minutes — be on the website the moment they open
  • It costs just $2 per reservation (plus the $30 per car entrance fee)
  • If you miss out, there’s a last-minute lottery — a limited number of slots are released the day before
  • Without a reservation, you can enter the park before 7:00 am or after 4:00 pm (times may vary — check nps.gov)

My tip: Get the America the Beautiful Pass for $80 (about £65) if you’re planning to visit more than two national parks. The pass is valid for a full year and covers entry to all national parks and federal recreation areas in the USA. However, you still need the timed entry reservation — the pass replaces only the entrance fee, not the timed entry.

Where to Stay in Moab and How Much Arches National Park Costs

Moab is hands down the best base for visiting Arches National Park. It’s a small desert town with surprisingly good infrastructure — hotels, restaurants, bike and jeep rental shops, outdoor stores. Everything a traveller needs in one place. From central Moab, you’re at the park entrance gate in 5 minutes.

Accommodation in Moab

Popular accommodation options include Hoodoo Moab (a stylish hotel with a pool and stunning views of the red rocks), Gonzo Inn (a boutique hotel in the centre), or the more affordable but clean Moab Valley Inn. In winter, prices sometimes drop by as much as half.

How Much a Visit to Arches Costs

Here’s an approximate budget for 3 days for two people (Arches + Canyonlands):

  • Arches entrance fee: $30 per car / 7 days (or $80 America the Beautiful Pass)
  • Timed entry reservation: $2
  • Canyonlands entrance fee: $30 per car / 7 days (included in ABP)
  • Accommodation (3 nights, mid-range): approx. $150–250/night → $450–750 total
  • Food (restaurants + occasional groceries): $40–80/day for two → $120–240 total
  • Petrol: approx. $30–50
  • Total for 3 days for two: approx. $670–1,150 (excluding flights and car hire)

Prices in Moab aren’t exactly cheap — it’s a tourist town and they know it. But compared to some other park destinations in the US (looking at you, Jackson Hole 😅), it’s still reasonable.

Arches National Park: 15 Places You Must See and Things to Do

Let’s take a look at the best things Arches National Park has to offer. The park is surprisingly compact — the main road (Arches Scenic Drive) is just 29 km long, with short turnoffs leading to individual trails and viewpoints. Yet you can easily spend two full days here, because the number of arches, rock formations, and hikes is simply staggering. I’ve listed the tips roughly in the order you’ll encounter them driving through the park from the entrance.

1. Arches Scenic Drive — An Experience in Itself

Yes, you can drive through Arches National Park by car — and the drive itself is one of the highlights. Arches Scenic Drive takes you through the entire park along a 29 km road that climbs from the desert valley past red rock walls all the way to Devils Garden at the end. Along the way, there are viewpoints, trailhead car parks, and dozens of rock formations visible directly from the car.

But honestly? If you just drive through without getting out, you’ll miss 90% of what makes Arches special. Most arches require at least a short walk. Think of the Scenic Drive as the backbone of your day — park up, walk, take photos, then move on to the next stop.

Practical tip: Car parks at popular trailheads (Delicate Arch, Devils Garden) fill up by 8–9 am during the season. Either set off early or aim for the afternoon when spaces start freeing up.

2. Park Avenue Viewpoint & Trail — A Sandstone Welcome Committee

Right after entering the park, you’ll reach the first stop — Park Avenue Viewpoint. The name isn’t a coincidence: the enormous rock towers on both sides of the valley resemble the skyscrapers of Manhattan. Except these skyscrapers are millions of years old and have a much nicer colour. 😉

If you have time, walk the Park Avenue Trail (1.6 km one way, one-directional — you’ll need either two cars or to walk back the same way). You walk along the canyon floor between the towers, and it’s a stunning introduction to what awaits you in the park. We walked it there and back (3.2 km total) and it took about 45 minutes.

Arches National Park

3. Balanced Rock — A Rock That Defies Gravity

This 39-metre rock formation looks like it should topple over any second. A massive boulder balancing on a thin “leg” of softer sandstone — it looks like a Photoshop creation, but it’s completely real. Balanced Rock is visible right from the road, and the short loop around it (500 metres) takes just 15 minutes.

It’s a great stop for stretching your legs and taking photos. At sunset, the rock literally glows orange — if you’re heading back from the park in the evening, be sure to stop here.

Balanced Rock, Arches National Park, Utah

4. The Windows Section — Three Arches in One Place

This is one of the most photogenic areas in the park and also one of the most easily accessible. A short turnoff from the main road takes you to a car park, from where two short trails lead to North Window, South Window, and Turret Arch.

The Windows Trail (1.6 km loop) takes you to both “windows” — enormous arches in the rock wall. You walk through them, and the views of the desert landscape framed by the arches are breathtaking. Don’t miss the trail behind the Windows (not just to them) — the view from the other side is even better and far fewer people venture there.

Turret Arch is across the car park and takes another 10 minutes to reach on foot. It’s smaller but beautifully shaped, with a tower beside it — this is the spot for the classic photo capturing both Windows at once.

The entire Windows Section will take you an hour to an hour and a half and is ideal for families with children or those who don’t fancy long hikes.

The Windows Section, Arches National Park

5. Double Arch — Two Arches, One Jaw Drop

Directly opposite the Windows turnoff, you’ll find the car park for Double Arch — and this is one of my absolute favourite stops in the entire park. Double Arch consists of two massive arches sharing a single “leg.” The larger one spans over 45 metres and stands 32 metres tall.

The walk to it is easy and short (800 metres round trip on flat ground), but the experience is enormous. You stand beneath it and feel absolutely tiny. Sound resonates beautifully under the arches, and the light filtering through both of them in the late afternoon is pure magic.

Fun fact: You might recognise Double Arch from the opening scene of Indiana Jones and the Last Crusade. Yes, it was filmed here.

Double Arch, Utah

6. Delicate Arch — Utah’s Icon and the Number One Must-Do

Here we go. Delicate Arch is probably the most photographed natural formation in all of Utah — you’ll find it on the Utah licence plate, on postage stamps, and on millions of Instagram photos. And believe me, it’s even better in person.

The Delicate Arch Trail is 4.8 km round trip with an elevation gain of about 146 metres. It’s no stroll — the final 800 metres cross exposed bare rock with no shade, and in summer it can be scorching. Allow 1.5–3 hours for the full hike (depending on your pace and how long you’ll stare at the arch — we stood there for an hour 😅).

Best time: Set off 1.5–2 hours before sunset. You’ll arrive at the top just in time to watch the arch gradually change colours from orange through crimson to deep purple. It’s one of those moments that makes you understand why you travel. Bring a headlamp for the way back — you’ll be returning in the dark, but the trail is well marked.

If you can’t or don’t want to hike: There are two viewpoints where Delicate Arch is visible from the road (Lower and Upper Viewpoint, 800 metres of walking combined), but honestly — it’s like looking at the Mona Lisa through frosted glass. If you’re physically able, do the trail. It’s worth every step.

Don’t forget to bring plenty of water (at least a litre per person), sunglasses, a hat, and good hiking boots — the terrain is rocky and slippery.

Delicate Arch, Utah

7. Fiery Furnace — A Labyrinth for Adventurers (Permit Required!)

Fiery Furnace is a narrow labyrinth of sandstone fins, tight passages, and hidden arches that you can only enter with a ranger-led tour or a special permit. And it’s one of the most amazing experiences in the entire park.

The ranger-led hike (about 3 hours, $10/person) is fantastic — the ranger guides you through the labyrinth, shows you hidden arches, explains the geology, and makes sure you don’t get lost (which could easily happen without a guide). Tours are booked on recreation.gov and sell out fast — book months in advance.

Self-guided entry with a permit is possible, but you first need to complete an online orientation video and demonstrate that you can navigate without marked trails. The permit costs $6 and is available on recreation.gov. This isn’t for beginners — there are no markers in the labyrinth and it’s easy to lose your way.

We went with a ranger and don’t regret it one bit. Our guide was incredibly knowledgeable, showed us miniature arches we’d never have found on our own, and the whole experience was more intimate than anything else in the park (groups have a maximum of 20 people).

8. Sand Dune Arch — A Secret Oasis Among the Rocks

This is my secret tip for families with children or for when you need an escape from the heat. Sand Dune Arch is tucked away between tall rock walls that create natural shade, and beneath the arch there’s soft sand where kids (and let’s be honest, adults too) love to play.

The trail is short — just 500 metres round trip along a sandy path between sandstone fins. It’s a bit like discovering a secret garden. Even in the fiercest summer heat, it’s several degrees cooler here.

9. Broken Arch — Surprisingly Still in One Piece

The name is misleading — Broken Arch isn’t actually broken. It does have a crack along its top, but it’s still holding together. The trail to it (2 km loop) leads through an open desert meadow with wildflowers in spring and makes for a pleasant, easy walk.

Bonus: Broken Arch is also accessible from Devils Garden Campground, so if you’re camping there, it’s literally right behind your tent.

10. Devils Garden Trail — An Arch Paradise at the End of the Road

Devils Garden Trail, at the very end of Arches Scenic Drive, is the longest and most rewarding trail in the park. Along its full length (11.6 km round trip), you’ll encounter at least seven named arches and countless other rock formations.

Most people walk only to Landscape Arch (the first mile — see tip #11) and turn back. But if you have the time and fitness, continue further — after Landscape Arch, the trail transforms from a comfortable path into an adventurous route across sandstone fins marked with cairns (stone markers), and the rewards are arches like Partition Arch, Navajo Arch, Double O Arch, and Dark Angel (a rock tower at the very end).

The full trail takes 3–5 hours and requires good fitness, plenty of water (3+ litres in summer), and proper hiking boots. The Primitive Trail on the return journey is less visited and offers a completely different perspective.

11. Landscape Arch — The Longest Arch in North America

Landscape Arch, with a span of nearly 93 metres, is the longest natural stone arch in North America (and one of the longest in the world). It’s incredibly thin and elegant — at its narrowest point, it’s only a few metres thick. It looks like it could collapse at any moment.

And that’s not far from the truth. In 1991, a chunk roughly 18 metres long broke off, and since then it’s been forbidden to walk beneath it. Geologists estimate that the arch will eventually fall — nobody knows when, but the fact that you can still see it standing is a bit like winning the lottery.

The walk to Landscape Arch is easy — 2.6 km round trip along a well-maintained path from the Devils Garden car park. Practically anyone can manage it.

12. Panorama Point and La Sal Mountains Viewpoint — Views in Every Direction

Two viewpoints along the main road that many people drive past because they’re in a rush to reach the arches. Mistake! Panorama Point offers a 360-degree view of the entire park and surrounding landscape — on a clear day, you can see all the way to the snow-capped La Sal Mountains, creating an incredible contrast with the red desert in the foreground.
The stop takes just 10 minutes, and the photos from here will be among the best you’ll take home from the park.

Courthouse Towers & Petrified Dunes — desert cathedrals

13. Courthouse Towers & Petrified Dunes — Desert Cathedrals

Just after Park Avenue, you’ll reach the Courthouse Towers area — massive rock towers named Three Gossips, Sheep Rock, and Tower of Babel. They’re not arches, but they’re imposing rock formations that deserve a stop.

A bit further on are the Petrified Dunes — petrified sand dunes that you can freely walk across. It’s a surreal landscape where you feel like you’re on Mars. A perfect spot for photographers at sunrise or sunset.

14. Fiery Furnace Viewpoint — When You Don’t Have a Permit

If you didn’t manage to get a permit or reservation for the ranger-led tour into Fiery Furnace (see tip #7), at least stop at the Fiery Furnace Viewpoint. From the overlook, you can see the labyrinth of sandstone fins from above, and at sunset, when the rocks light up in orange and crimson, you’ll understand why this area is called the “Fiery Furnace.”

Arches National Park, Utah

15. Combine with Canyonlands — Two Parks, One Trip

This isn’t a tip from within Arches itself, but it would be foolish not to mention it. Canyonlands National Park is just about 40 minutes’ drive from Moab and is an entirely different world. While Arches is all about arches and rock formations, Canyonlands is about vast canyons, mesas, and viewpoints that will make your head spin.

The Island in the Sky section is the most accessible and can easily be visited in half a day — the Grand View Point and Mesa Arch viewpoints (a small arch with an iconic canyon view at sunrise) are absolute must-dos.

Our tip: Dedicate one day to Arches and a second day to Canyonlands Island in the Sky. If you have a third day, head to Dead Horse Point State Park — the view is comparable to the Grand Canyon and there’s a fraction of the crowds.

Canyonlands
Canyonlands National Park, Utah
lukas a lucka
Lukáš and Lucie recommend
Where to stay in Moab
4 accommodations — hotels and other lodging options

Food and Drink: Where to Eat in Moab

For a desert town, Moab is surprisingly well equipped when it comes to restaurants. After a day in the park surviving on trail bars and water from your CamelBak, you’ll appreciate a proper meal more than ever.

Breakfast and Coffee

Love Muffin Café — our number one breakfast spot. Homemade muffins, excellent eggs Benedict, and solid coffee. There’s usually a queue in the morning, but it moves fast. If you love specialty coffee, Moab Coffee Roasters roasts right in town and serves great espresso.

Lunch and Dinner

Quesadilla Mobilla — a food truck serving (surprise!) quesadillas that are so good people queue up for them. Fresh, creative filling combinations at reasonable prices ($8–12).

Antica Forma — the best pizza in Moab. Neapolitan style, thin crust, quality ingredients. Surprisingly authentic Italian food for a small town in the desert.

Desert Bistro — if you fancy something upscale, this is arguably the best restaurant in town. Seasonal menu, local ingredients, beautiful setting. Prices match the quality ($25–45 for a main course), but after a day in the desert, you deserve it. Book in advance.

Moab Brewery — a local brewery with decent food and excellent craft beer. The Dead Horse Amber Ale is a classic. Ideal for a relaxed evening after a demanding day.

Shopping and Picnic

City Market (Moab) — the largest supermarket in town. Stock up here on water, fruit, trail mix, and sandwiches for your outings. There are no shops or restaurants in the park — you need to bring everything with you.

Practical Tips for Visiting Arches National Park

What to Pack

Arches is a desert park with minimal shade. Absolute essentials:

  • Water, water, water — at least 2–3 litres per person per day. In summer, probably more.
  • Sun protection — high-SPF sunscreen, a hat, sunglasses
  • Quality hiking boots — the rocky terrain is uneven and slippery. Check out our hiking boots guide.
  • Headlamp — if you’re planning sunset at Delicate Arch, you’ll be walking back in the dark
  • Layers of clothing — mornings and evenings can be chilly even in season (desert climate = huge temperature swings)
  • Want to pack into carry-on only? We have a complete guide for that.

Travel Insurance and eSIM

For trips to the USA, definitely don’t skimp on travel insurance — healthcare in America costs astronomical sums, and a rescue operation in a national park can run into thousands of dollars. Check out our SafetyWing review, which we use for longer trips.

As for internet, American eSIM cards are thankfully easy to sort out nowadays. Read our Holafly review — we had excellent signal in Moab, while coverage in the park itself is limited (which is actually quite nice — a digital detox in the desert 😊).

Safety in the Park

  • Don’t feed or approach wildlife — foxes, rabbits, and the occasional coyote live in the park
  • Stay on marked trails — the biological soil crust (cryptobiotic soil) is a fragile ecosystem that takes decades to recover
  • Watch out for lightning — monsoon season (July–September) brings afternoon storms. On rock plateaus, you’re the highest point — descend immediately if a storm hits
  • Flash floods — after rain, narrow canyons can flood rapidly. Check the forecast

FAQ — Frequently Asked Questions About Arches National Park

Can you drive through Arches National Park?

Yes, a 29 km Arches Scenic Drive runs through the park, and you can see a number of rock formations (Balanced Rock, Courthouse Towers, Petrified Dunes) right from the car. But honestly — you’d miss the best bits. Delicate Arch, Devils Garden, Fiery Furnace, and most arches in the Windows Section all require at least a short walk. At the very minimum, get out at the Windows (10-minute walk) and Double Arch (5-minute walk) to have at least some close-up contact with the rocks.

What is Arches National Park famous for?

Arches National Park is famous for its more than 2,000 natural stone arches — it’s the greatest concentration of natural stone arches in the world. The most well-known is Delicate Arch, the icon of the state of Utah, which also appears on the local licence plate. Other famous arches include Landscape Arch (the longest in North America, spanning 93 metres), Double Arch (known from the film Indiana Jones and the Last Crusade), and the Windows — a pair of arches in a rock wall.

What is the nearest town to Arches National Park?

The nearest town is Moab, Utah — the park entrance gate is just 8 km (5 minutes’ drive) from the centre of Moab. Moab is the base for most visitors and offers a wide range of accommodation, restaurants, shops, and outdoor services. The nearest larger city with an international airport is Salt Lake City (370 km, 4 hours by car).

How much does it cost to enter Arches National Park?

The entrance fee is $30 per car (approximately £24) and is valid for 7 days. A motorcycle costs $25, and entry on foot or by bicycle is $15 per person. If you’re planning to visit multiple national parks, the America the Beautiful Pass at $80 (about £65) is worth it — it covers entry to all national parks in the USA for a full year. From April to October, you also need a timed entry reservation for $2 on recreation.gov.

How much time do I need for Arches National Park?

It depends on what you want to see. A minimum of 4–5 hours will cover the Scenic Drive, Windows, Double Arch, and Balanced Rock with short stops from the car. One full day allows you to also complete the Delicate Arch Trail and Devils Garden to Landscape Arch. Two days are ideal — you’ll manage all the main trails, Fiery Furnace, and can enjoy both sunrises and sunsets without rushing. We spent two days here and wanted more.

Do I need a reservation to enter Arches?

From April to October, yes — the park operates a timed entry system. Reservations are made on recreation.gov for a $2 fee and open 3 months in advance. Slots sell out very quickly (within minutes), so be on the website exactly when they open. Alternatively, you can enter without a reservation before 7:00 am or after 4:00 pm (times may vary — check the current rules on nps.gov). During the winter months (November–March), no reservation is needed.


Can you combine Arches with Canyonlands?

Absolutely, and we highly recommend it! Canyonlands National Park (Island in the Sky section) is just about 40 minutes’ drive from Moab and offers a completely different but equally stunning experience — deep canyons, Mesa Arch viewpoint, and Grand View Point. The ideal plan is to dedicate one day to Arches and a second day to Canyonlands. If you have time, add Dead Horse Point State Park and make it a full road trip through US national parks.
Tips and Tricks for Your Vacation

Don’t Overpay for Flights

Search for flights on Kayak. It’s our favorite search engine because it scans the websites of all airlines and always finds the cheapest connection.

Book Your Accommodation Smartly

The best experiences we’ve had when looking for accommodation (from Alaska to Morocco) are with Booking.com, where hotels, apartments, and entire houses are usually the cheapest and most widely available.

Don’t Forget Travel Insurance

Good travel insurance will protect you against illness, accidents, theft, or flight cancellations. We’ve had a few hospital visits abroad, so we know how important it is to have proper insurance arranged.

Where we insure ourselves: SafetyWing (best for everyone) and TrueTraveller (for extra-long trips).

Why don’t we recommend any Czech insurance company? Because they have too many restrictions. They set limits on the number of days abroad, travel insurance via a credit card often requires you to pay medical expenses only with that card, and they frequently limit the number of returns to the Czech Republic.

Find the Best Experiences

Get Your Guide is a huge online marketplace where you can book guided walks, trips, skip-the-line tickets, tours, and much more. We always find some extra fun there!